1 inch Body Lift Installed *PICS*
 02-18-2008, 07:11 PM
#1
1 inch Body Lift Installed *PICS*
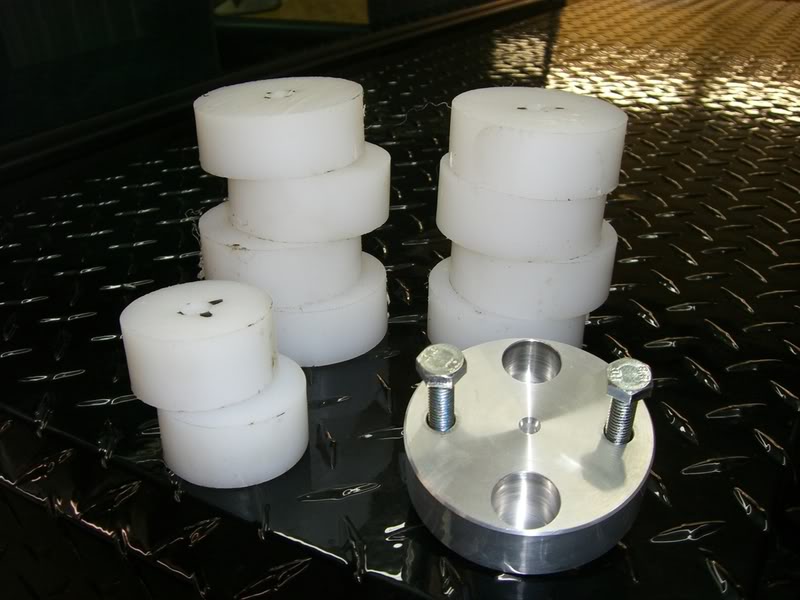
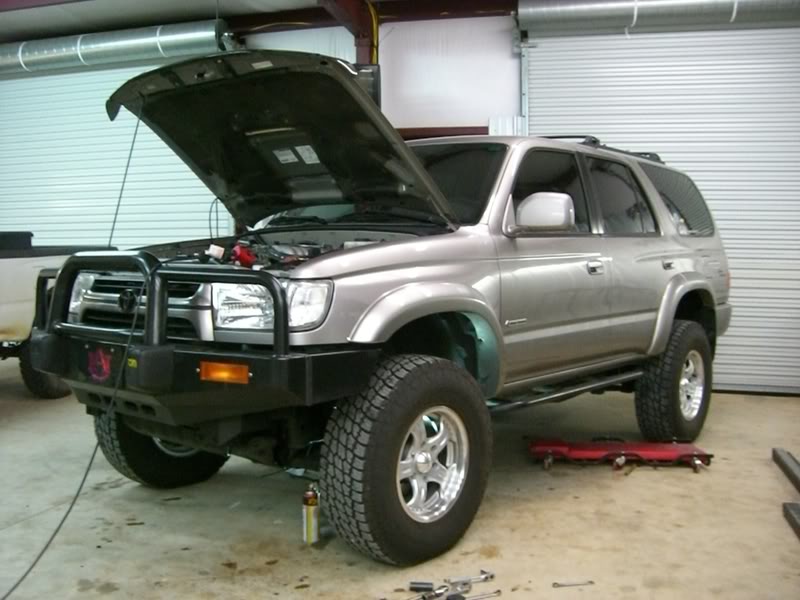
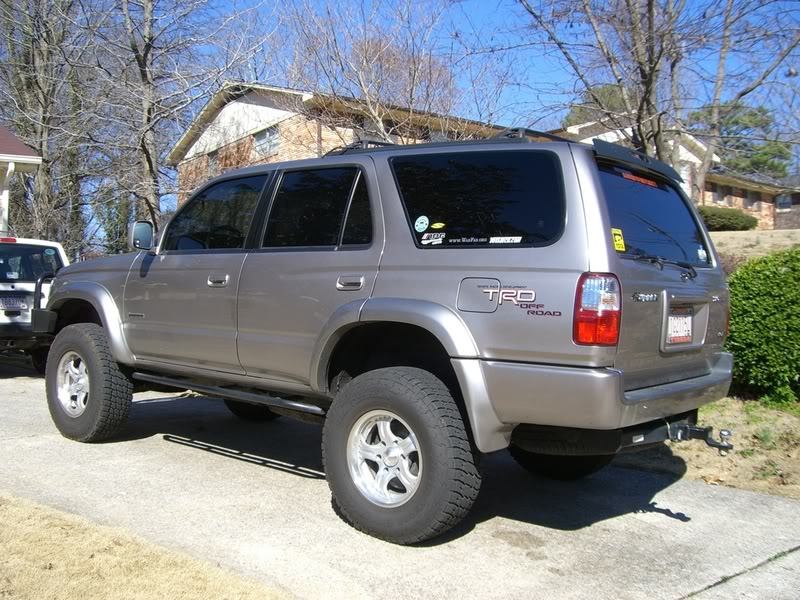
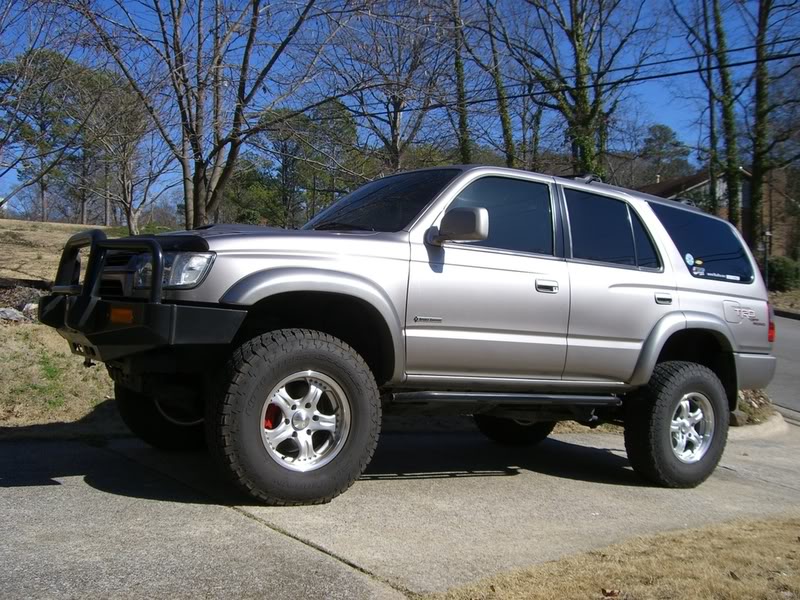
Got my 1” Body Lift installed a couple weeks ago. Purchased the steering extension from 4Crawler Off Road.
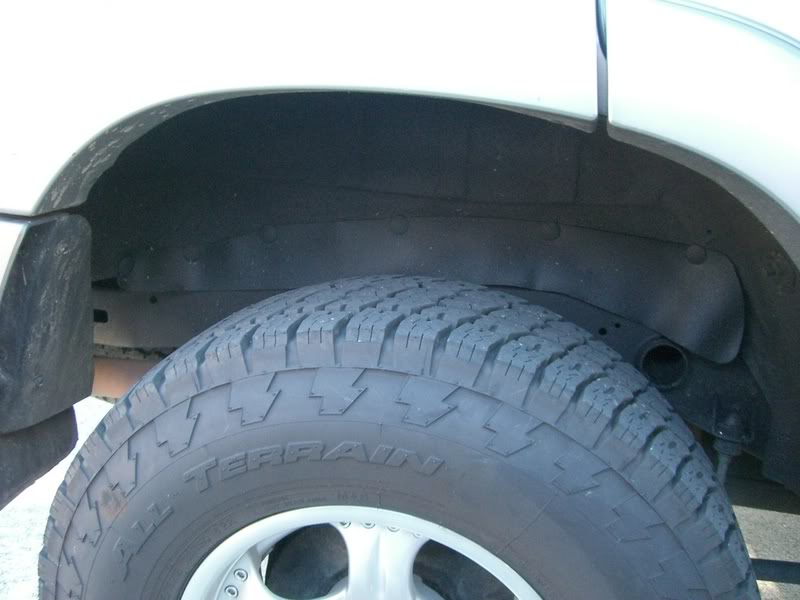
I also took a page out of Steve’s book at Sonoran Steel and installed a set of rear fender liners to cover the gap created by the BL . I then sprayed undercoating over the liners and the wheel wells to make every thing blend together. More info on what Steve did can be found here: Click Me.
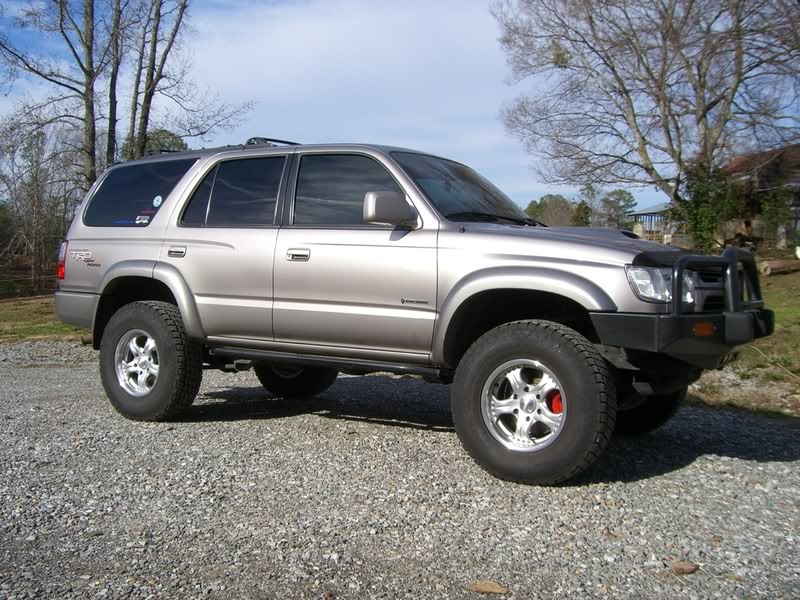
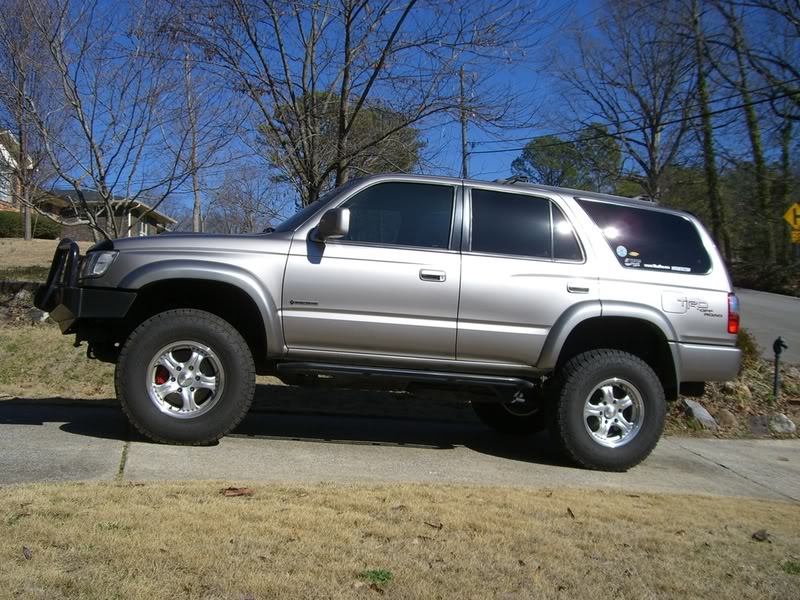
I’m very pleased with the overall results of the BL and Fender Liners . Pictures below:
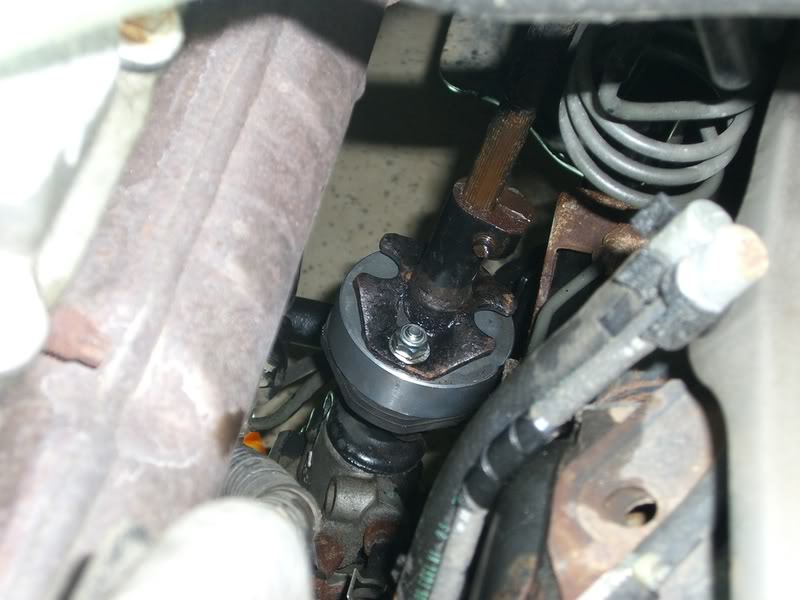
Body Lift and Steering Extension:
Before:

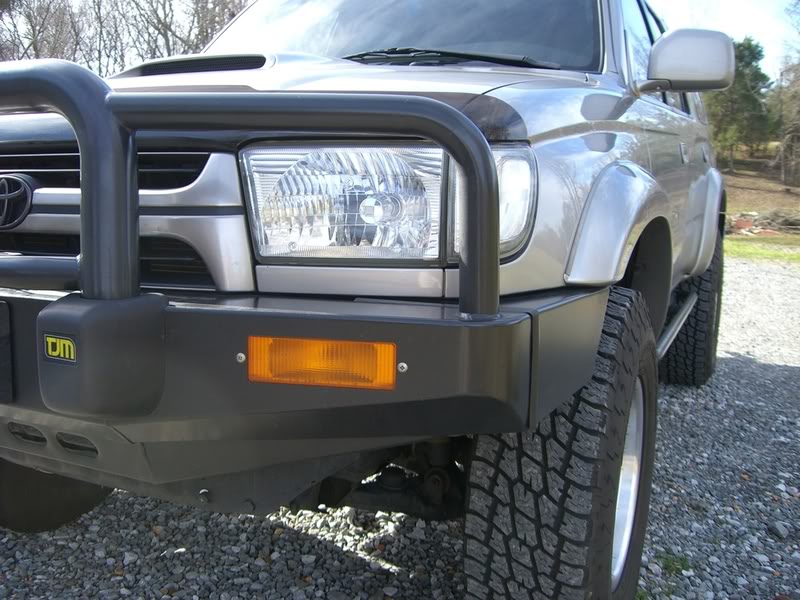

Body Lift Installed:
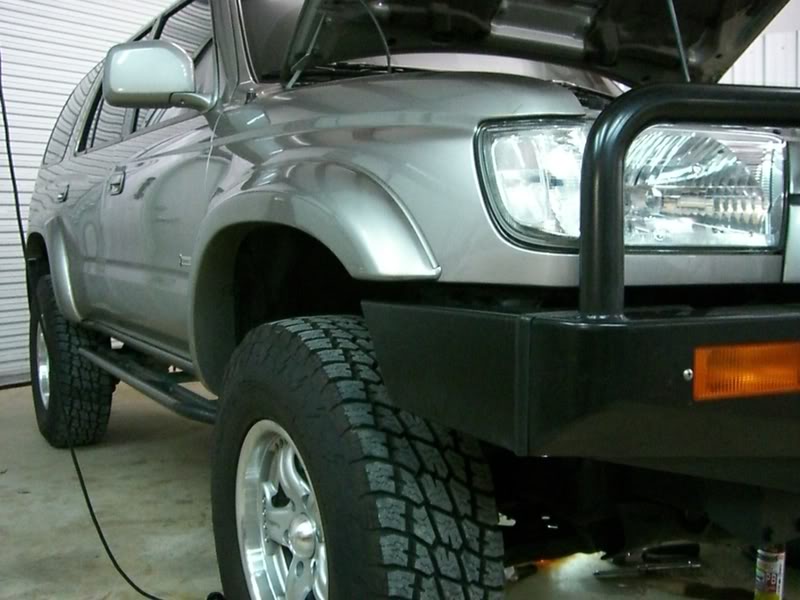
Steering Extension Installed:
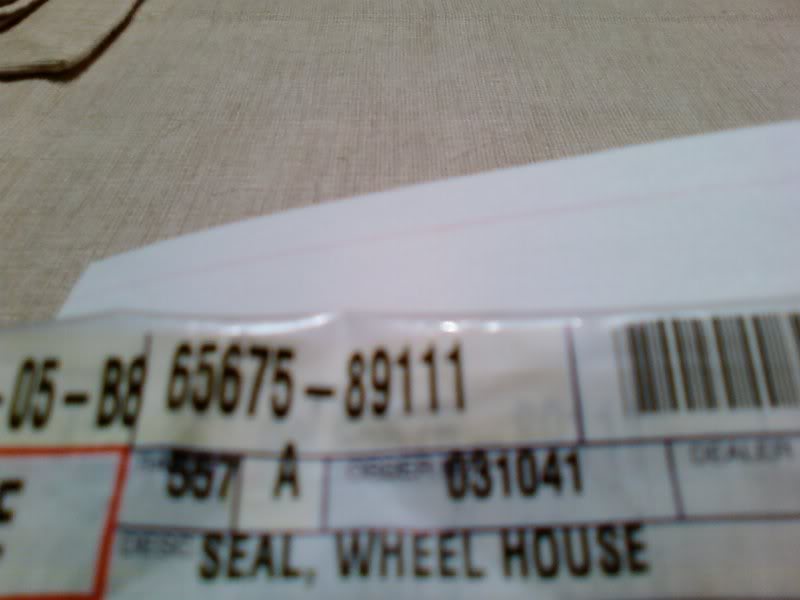
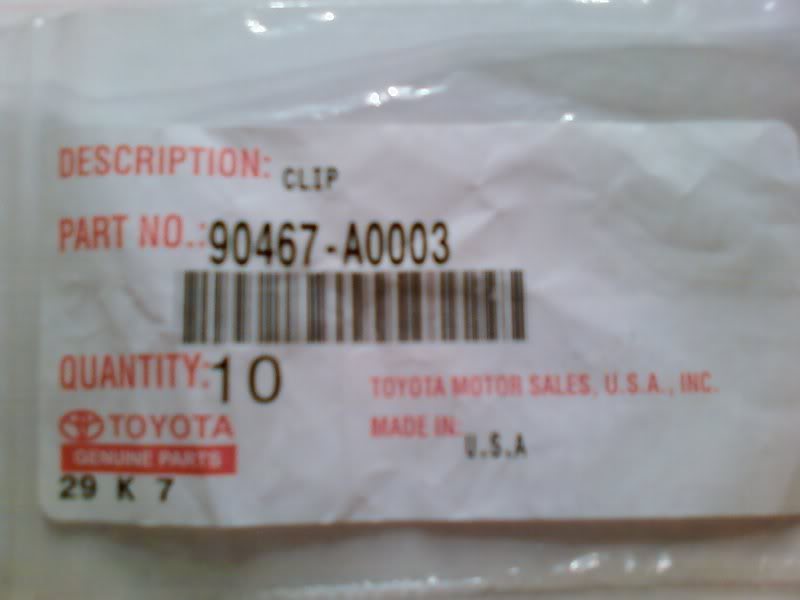
Here’s some info on the rear fender liners that I used to cover the gap created by the BL:
- Wheel House Seals (2), Part No. 65675-89111
- Clips (9), Part No. 90467-A0003
These Liners have 5 holes in each. I had to create an extra hole on the passenger side fender…so I used a total of 6 clips on that one. However, for the driver side fender, I only used 3 clips. I used 2 existing clips that hold the gas tank filler cover to the body.
Fender Liners
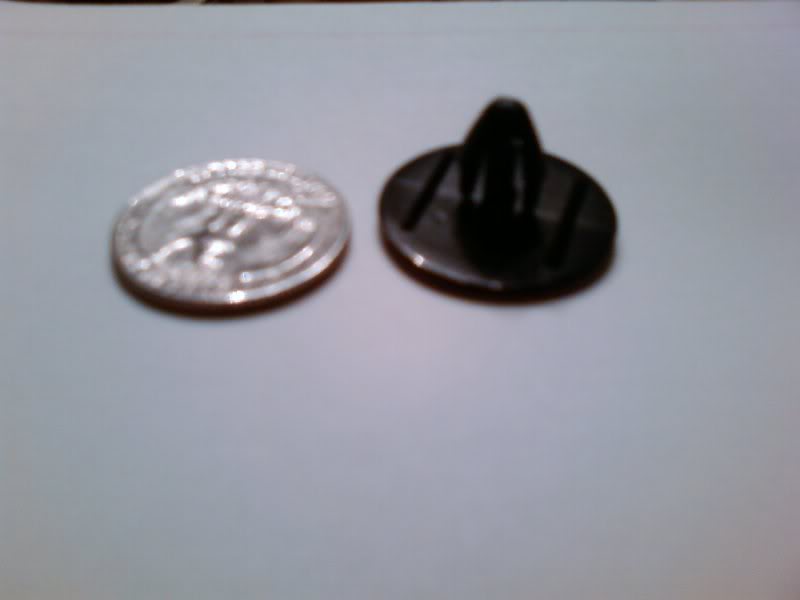
Clips:
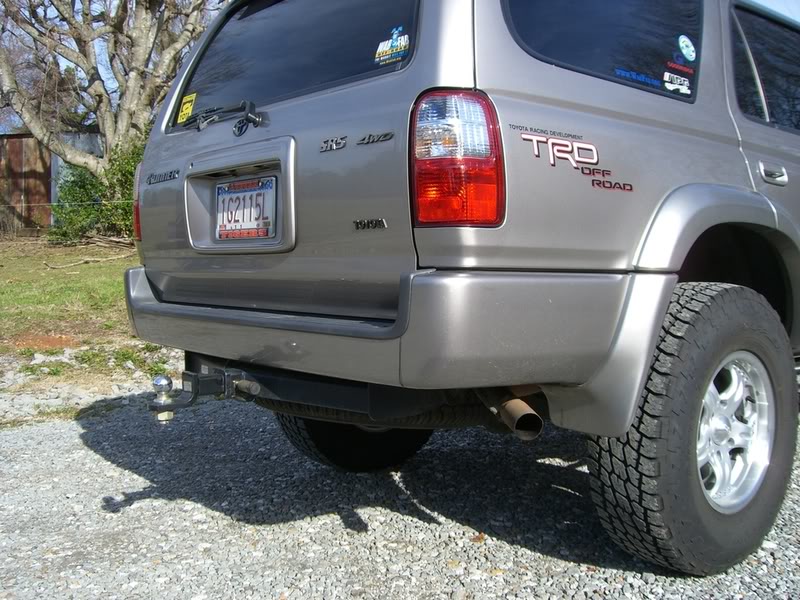
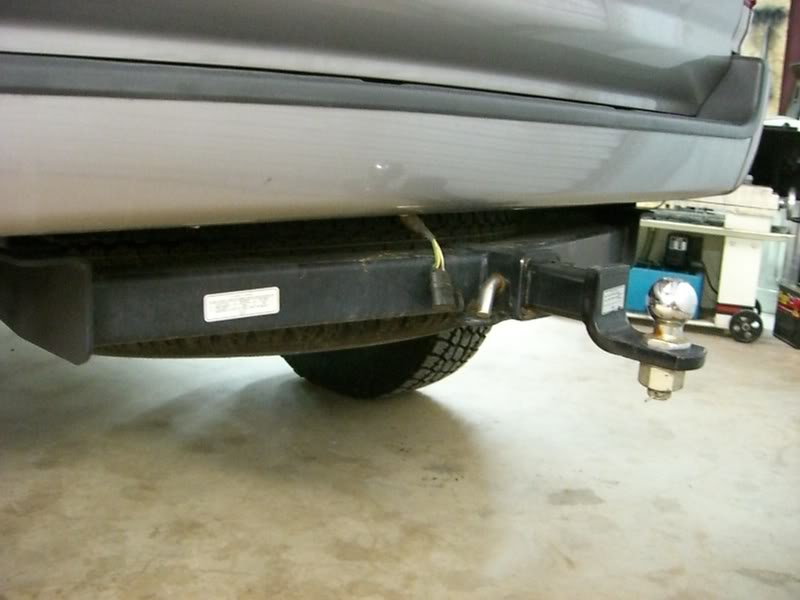
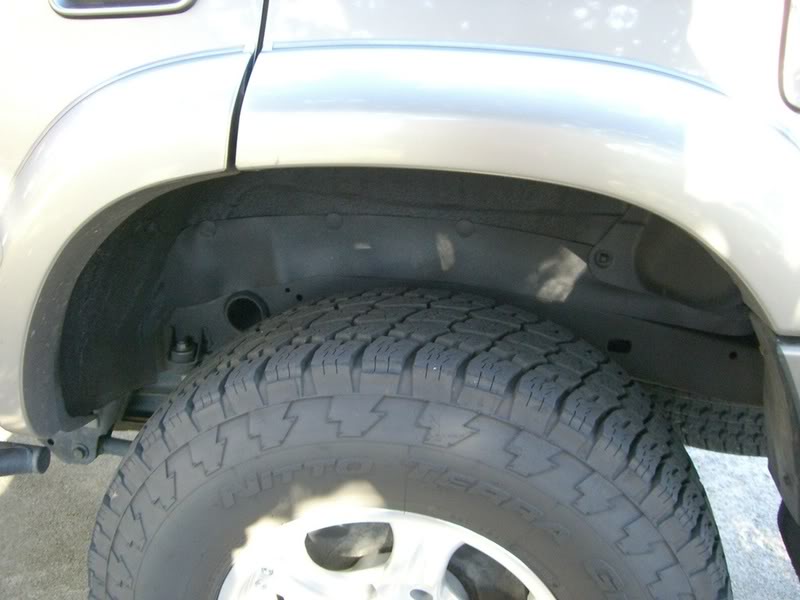
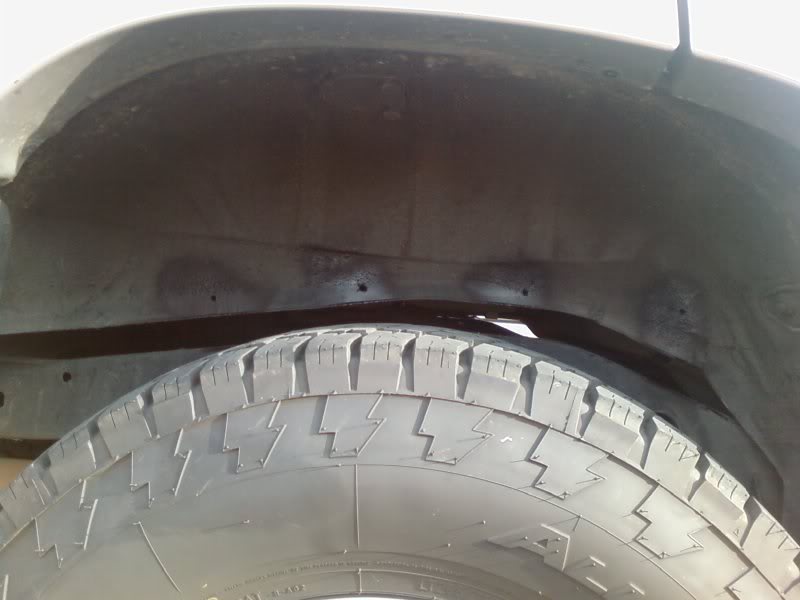
Rear Driver Side Body Gap:

Rear Driver Side After Liners Installed:
Passenger Side Body Gap with New Holes Drilled:
Passenger Side After Liners Installed:
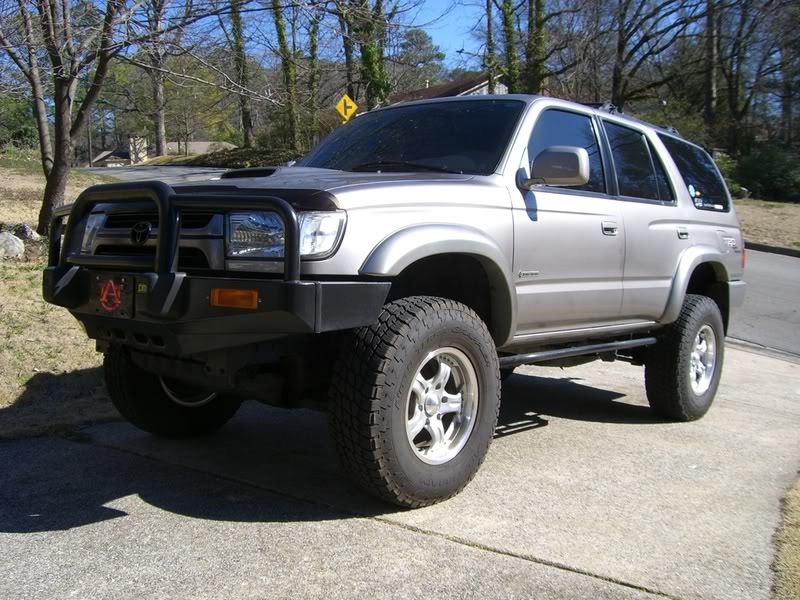
One Last Picture for Good Measure:
**
I also took a page out of Steve’s book at Sonoran Steel and installed a set of rear fender liners to cover the gap created by the BL
. I then sprayed undercoating over the liners and the wheel wells to make every thing blend together. More info on what Steve did can be found here: Click Me.I’m very pleased with the overall results of the BL and Fender Liners
. Pictures below:Body Lift and Steering Extension:
Before:
Body Lift Installed:
Steering Extension Installed:
Here’s some info on the rear fender liners that I used to cover the gap created by the BL:
- Wheel House Seals (2), Part No. 65675-89111
- Clips (9), Part No. 90467-A0003
These Liners have 5 holes in each. I had to create an extra hole on the passenger side fender…so I used a total of 6 clips on that one. However, for the driver side fender, I only used 3 clips. I used 2 existing clips that hold the gas tank filler cover to the body.
Fender Liners
Clips:
Rear Driver Side Body Gap:
Rear Driver Side After Liners Installed:
Passenger Side Body Gap with New Holes Drilled:
Passenger Side After Liners Installed:
One Last Picture for Good Measure:
**
Last edited by rworegon; 08-19-2014 at 05:38 PM.

 Just wondering cuz altough my truck is a 1st gen, I didn't use an extension for my 1" BL.
02-18-2008, 09:05 PM
Just wondering cuz altough my truck is a 1st gen, I didn't use an extension for my 1" BL.
02-18-2008, 09:05 PM
#7
Registered User
Join Date: Jul 2006
Location: Albuquerque
Posts: 288
Likes: 0
Received 0 Likes
on
0 Posts
On his website only 3rd gen's (and newer) call for an extention with a 1" BL. I got one with the kit I ordered last year from 4Crawler. Easy Install!
The Lift looks great RockSlide. Nice Rig!
Trending Topics
02-19-2008, 03:30 AM
#10
Registered User
iTrader: (1)
Join Date: Jun 2003
Location: Raleigh, NC
Posts: 923
Likes: 0
Received 0 Likes
on
0 Posts
The gap with the bumper doesn't look bad either, I was a bit worried but looks fine. I have a T15 for my 96 T4R so I wasn't sure about the 1" BL but now I am. Do you have a suspension lift as well and if so what are you running?
02-19-2008, 04:29 AM
#11
Registered User
Join Date: Feb 2007
Location: NC
Posts: 1,511
Likes: 0
Received 0 Likes
on
0 Posts
how much did the 1 inch body lift cost? how much does it usually run to have them installed too? i have been debating about a very small lift like a body lift. i wonder if they make a 1/2 inch body lift lol.. the only reason why i want one is so that my 265/75/16's wont rub at full flex and the wheel turned.
02-19-2008, 04:31 AM
#12
Registered User
Join Date: May 2007
Location: Alabama
Posts: 658
Likes: 0
Received 0 Likes
on
0 Posts
yea gap guards always make stuff with body lift look ten times better IMO, i had a friend with a tahoe with 2 inch body and the gap was terrible.
the only think you need now for your truck rock is to get rid of that ugly auburn sticker and tag on the back and you'll be good
the only think you need now for your truck rock is to get rid of that ugly auburn sticker and tag on the back and you'll be good
02-19-2008, 05:31 AM
#13
Registered User
Join Date: May 2006
Location: Lawrenceville/Statesboro, GA
Posts: 625
Likes: 0
Received 0 Likes
on
0 Posts
how much did the 1 inch body lift cost? how much does it usually run to have them installed too? i have been debating about a very small lift like a body lift. i wonder if they make a 1/2 inch body lift lol.. the only reason why i want one is so that my 265/75/16's wont rub at full flex and the wheel turned.
02-19-2008, 05:47 AM
#14
Registered User
yea gap guards always make stuff with body lift look ten times better IMO, i had a friend with a tahoe with 2 inch body and the gap was terrible.
the only think you need now for your truck rock is to get rid of that ugly auburn sticker and tag on the back and you'll be good :bigok:
the only think you need now for your truck rock is to get rid of that ugly auburn sticker and tag on the back and you'll be good :bigok:
02-19-2008, 06:12 AM
#15
Registered User
Join Date: Feb 2008
Location: Lonoke,AR
Posts: 68
Likes: 0
Received 0 Likes
on
0 Posts
looks good! are any of your harnesses stretched bad? i was wanting to try the same setup but i have an automatic and was woried about levers and brackets being to far streched.
02-19-2008, 06:24 AM
#16
Registered User
Join Date: Jul 2006
Location: Halifax, NS, Canada
Posts: 844
Likes: 0
Received 0 Likes
on
0 Posts
if you have any tools it's pretty cheap to make the lift yourself. i think i spent about $20 on UHMW, and maybe an hour on the jigs to slice and drill it.
dangit, i had a pic of all my pucks but i have no idea where it is. oh well, they look identical to all the other ones :d
dangit, i had a pic of all my pucks but i have no idea where it is. oh well, they look identical to all the other ones :d
Last edited by isaac338; 02-19-2008 at 01:06 PM.
02-19-2008, 07:03 AM
#19
Registered User
Join Date: Nov 2007
Posts: 18
Likes: 0
Received 0 Likes
on
0 Posts
i've been considering the 1" BL for a lil time now, but with my new ARB it sits so nice flush... i feel like i don't want to ruin that, how are you dealing with it? or are you just over it.. hah... i have 275/70/16 and still rubs with my SAWs... dunnno so i wanted to get a 33" mud tire, and i figured a 1"BL would give it just enough room to be happy... anywho looksgood!


