TransAmBandit's 1987 4x4 XtraCab 5MGE Swapstoration
 10-18-2015, 03:36 AM
#1
Registered User
Thread Starter
Join Date: Jun 2007
Location: Brooklyn, NYC
Posts: 452
Likes: 0
Received 0 Likes
on
0 Posts
TransAmBandit's 1987 4x4 XtraCab 5MGE Swapstoration
Because I am truly an idiot and clearly I didnt have enough projects already(I also have a 22RTE 4Runner I havent touched in a year). I bought this 87 XtraCab from New Jersey back in July. I had this idea of buying something to drive for the winter as I didnt want to drive the 87 Maxima SE I just had shipped from Georgia in the NE salt. I also knew I wasnt going to have the RTE truck done anytime soon nor would I also want to subject that to salt.
So I found this pretty solid Xtracab. Called and the guy liked me so much over the phone he took it offline until I can come look at it in person. The truck was basically a one owner truck all of its life. Belonged to his partner in the police force. It was parked for a few years until he bought it to tinker with. He installed a new fuel tank and pump and couldnt get the truck to idle well. He felt he was in over his head and listed it.
It started off as a 22RE/Auto Deluxe truck. Bench seat, no tach. Power nothing. Body is straight. Looks to have been repainted at some point. I havent found any body filler on it yet.
I bought it, it ran but misfired. I towed it back to NYC and started messing with it. I did the cap/rotor and plugs. And that made no difference. I narrowed it down to the third cylinder not firing. I did a compression test and got a 0 reading.
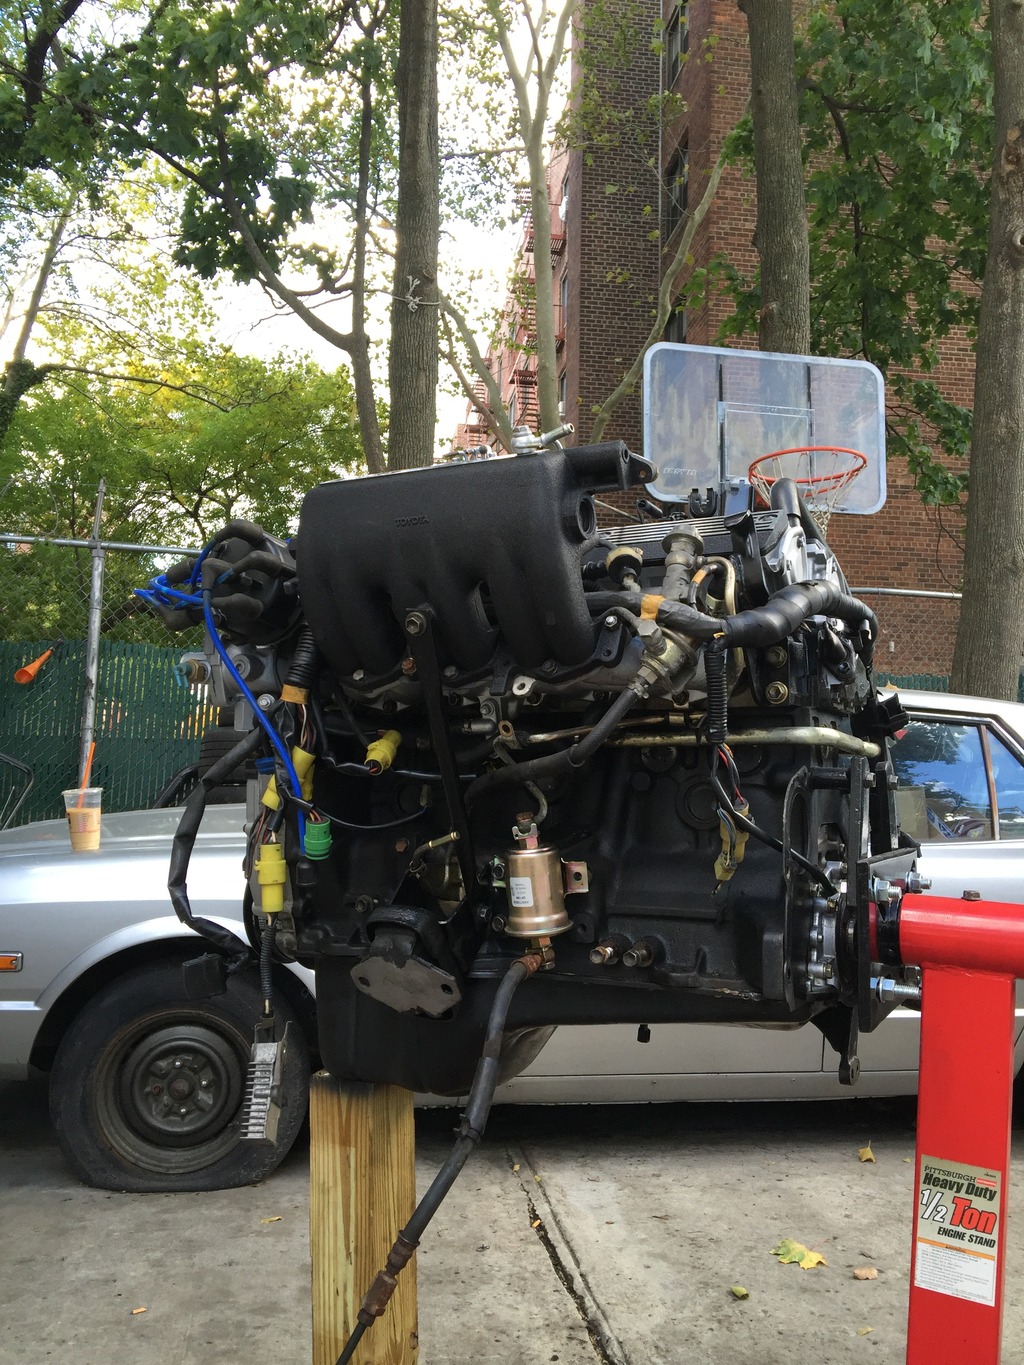
Instead of rebuilding the 22RE in the truck which only had 126k on it, I opted for a 5MGE swap. We had a complete 5MGE with Supra belhouising and all wiring. Plus my years of hoarding parts for the two Celica Supras I had made it an easier choice. And Ive worked on many of them over the years. The only issue with the 133k 5MGE was that it had more oil on it than in it. Every single seal on the engine leaked including the valve stem seals.
I pulled the 22RE out in September and offloaded it to my uncle who was going to rebuild it to use on a future project. He informed me that the number three intake valve was bent. Out assumption it was was probably stuck from sitting for so long and bent on its first start in years. :
Goals for the swap/truck:
5MGE Engine swap with 5 speed conversion
Retaining factory wiring from truck side and splice into Cressida harness
As little cutting as possible
Retaining Power Steering
A Reliable winter daily, as well as making it look clean. This will be a street truck.
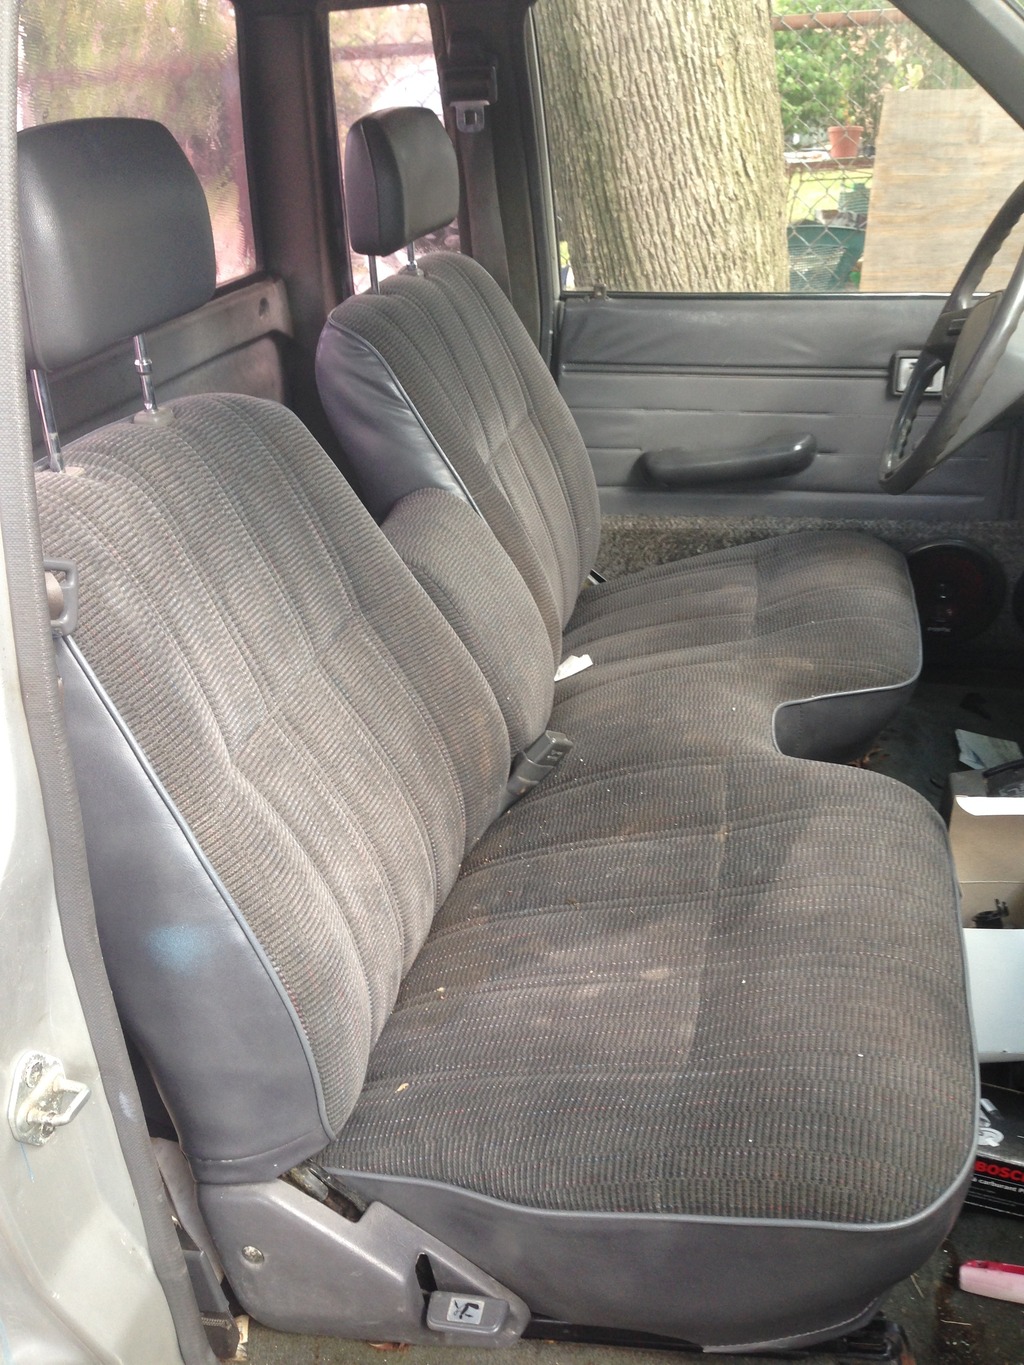
MKII Supra seat swap. I had already sold the bench out of the truck.
Clean and partial restoration of the interior. And rewiring of the old sound system in the truck.
Parts list: as of 2/6/16
87 Cressida 5MGE Motor/harness with 133k (Front Sump engine)
87 Cressida Motor Mounts combined with 22RE rubber mounts
Stock 5MGE Exhaust Manifold as the PaceSetter in the pics turned out to hit the frame with the trans installed
87 Supra W58 Bellhousing with clutch, fork, and flywheel
85-87? G54 with Forward Shift -TCase
EGR Delete
Performance Accessories 3inch Body Lift
82-86.5 Celica Supra Radiator with stock Supra lower mounting brackets welded to custom frame brackets
12inch Dual Fan kit with Fan Temp Probe and a Derale Fan relay kit
Custom Exhaust
Rubber fuel line spliced between hardline off of tank to the factory engine fuel line from 22RE moved over to D/S
ToySport Intake
Loaded up from the sellers house. July 2015
Here in NYC at my friend's house.
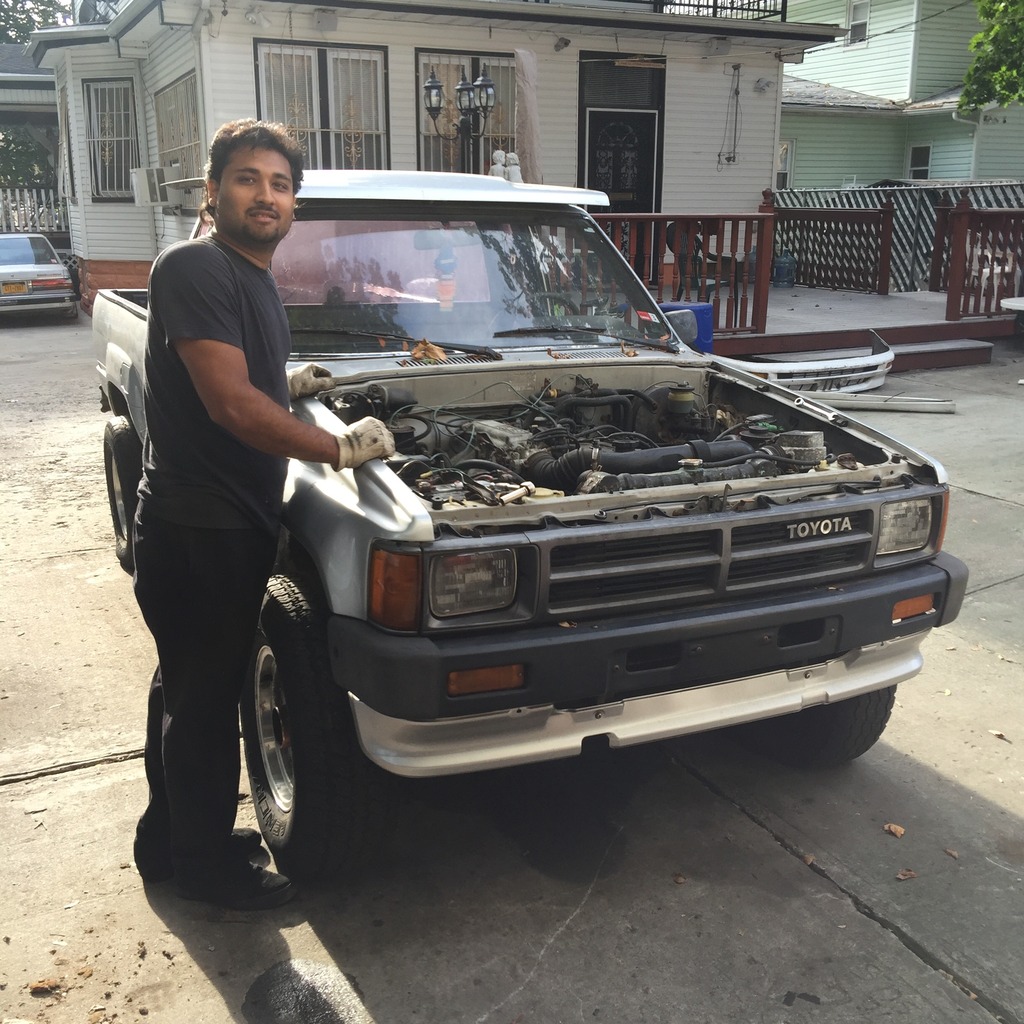
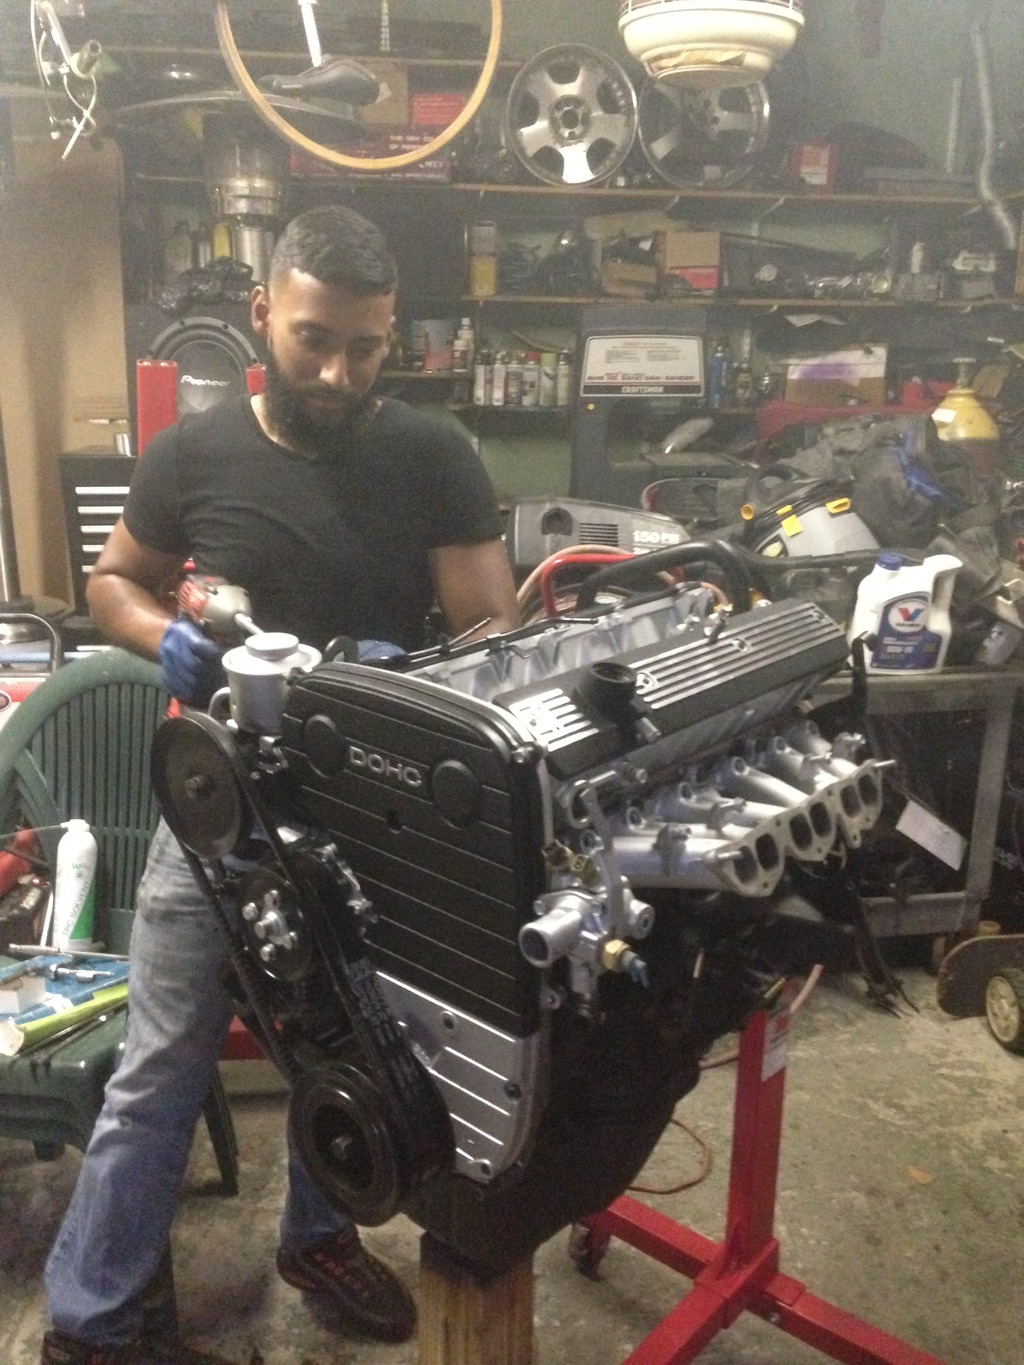
Me posing after getting ready to pull the motor September 2015
My helpers for the day. Having Ice Cream
Some more of my helpers helping clean the engine bay.
All clean. Have to take care of the battery tray rust.
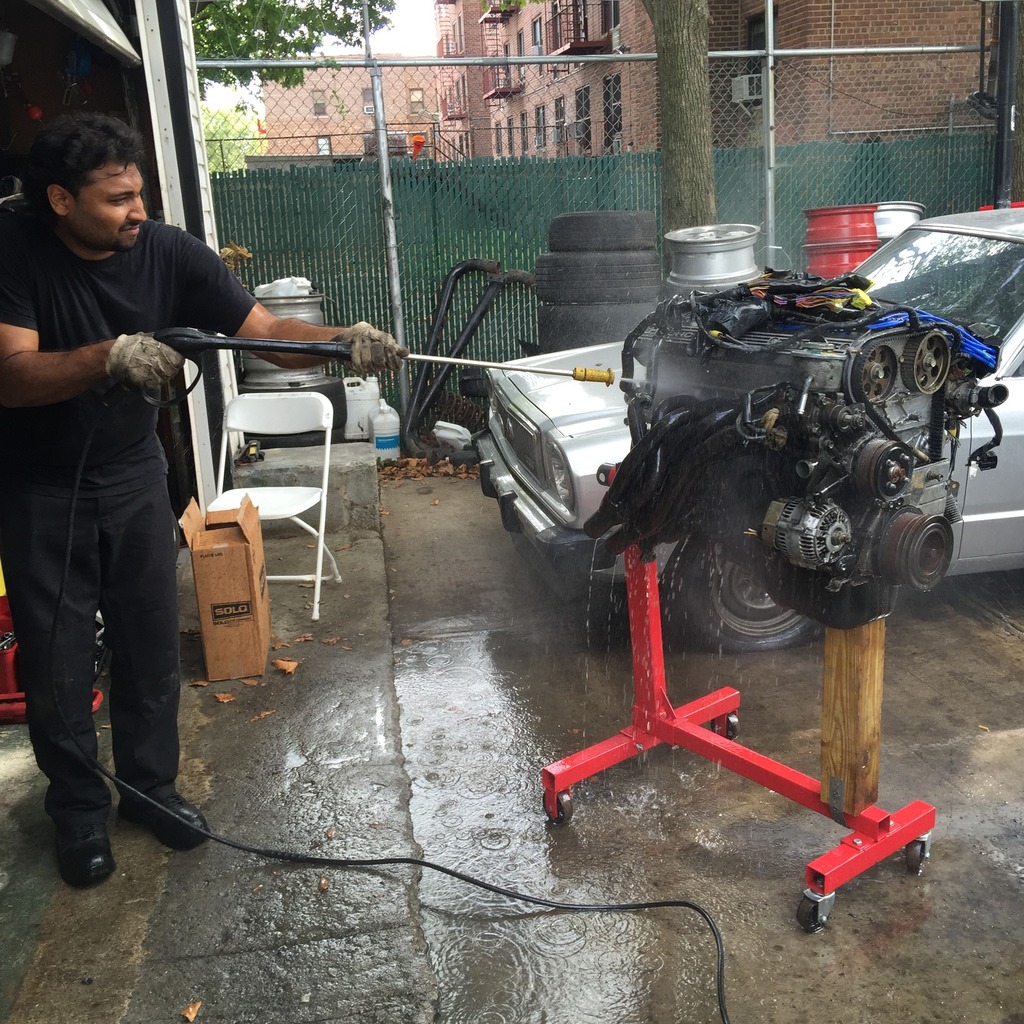
Pressure washing the years of oil off of the motor.
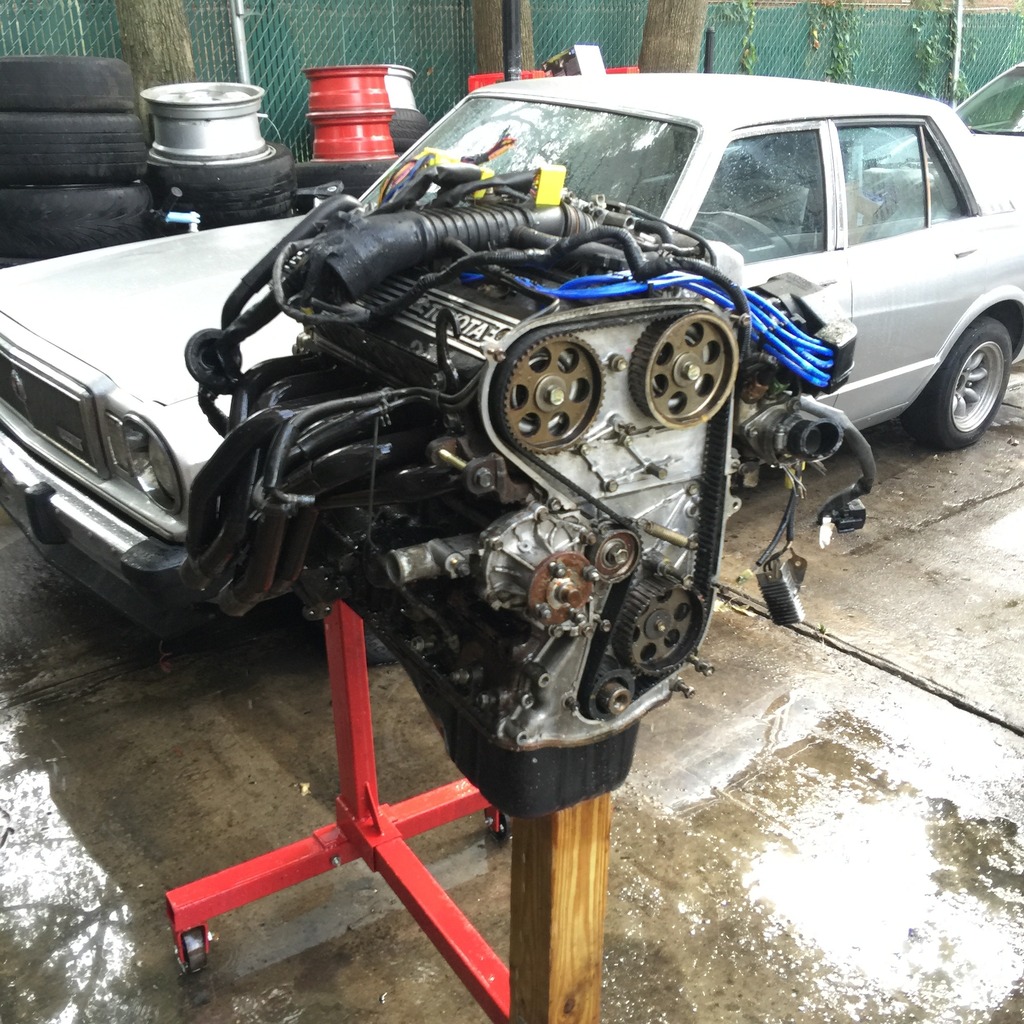
Somewhat clean. But enough to work.
Stripping the cam towers and all the timing belt covers to be cleaned and painted. And to make way for the Valve seal job.
Brought the top end and a bunch of parts to my job to be sandblasted.

Before and after the sandblaster. (Yes I taped the gasket surfaces)
Some misc brackets and covers painted by my friend.
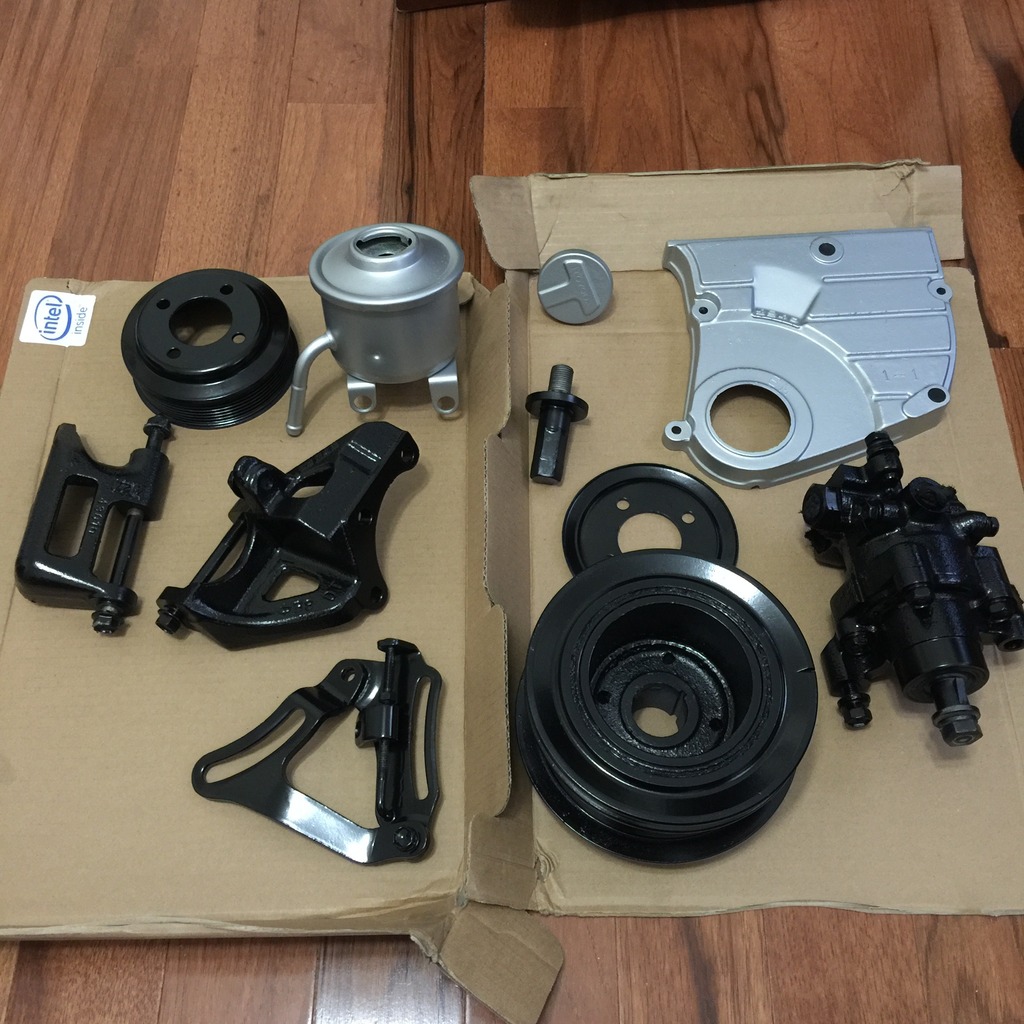
The front timing covers after being refinished by my buddy.
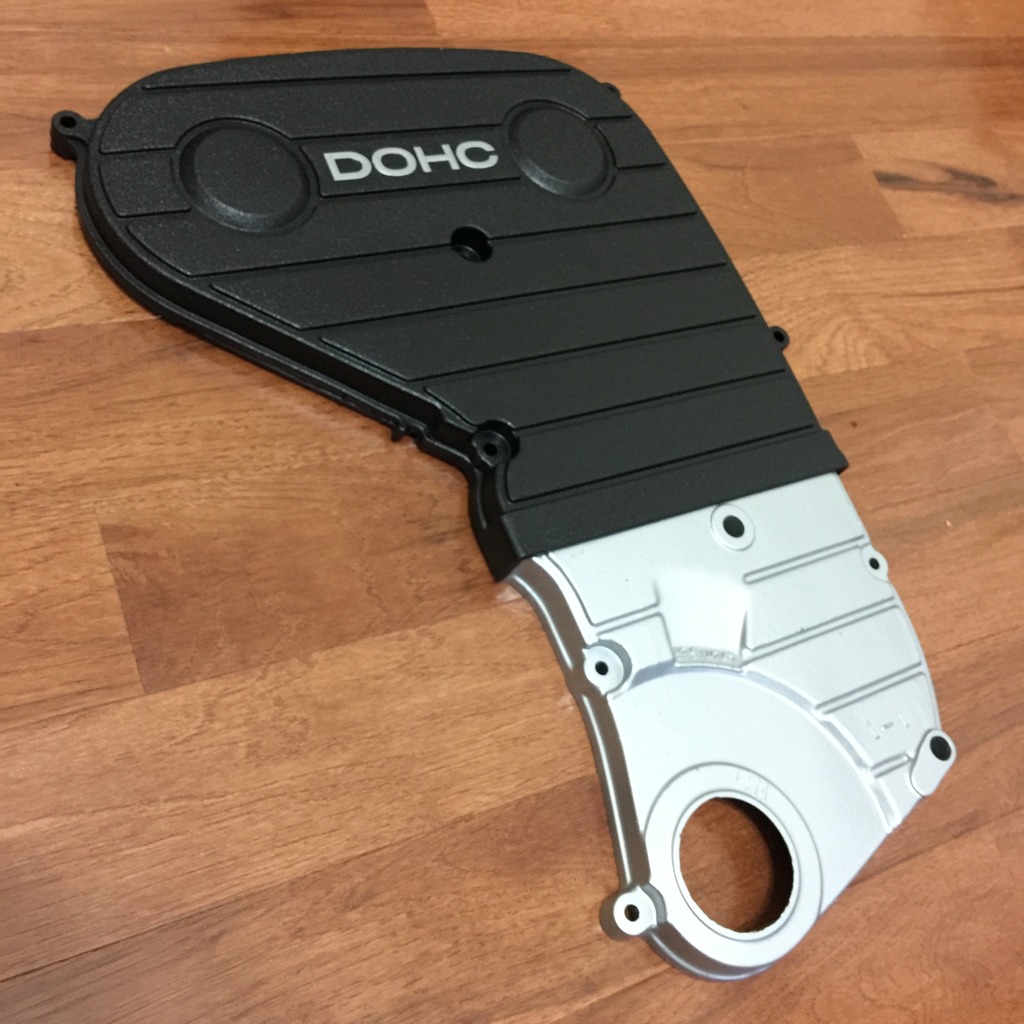
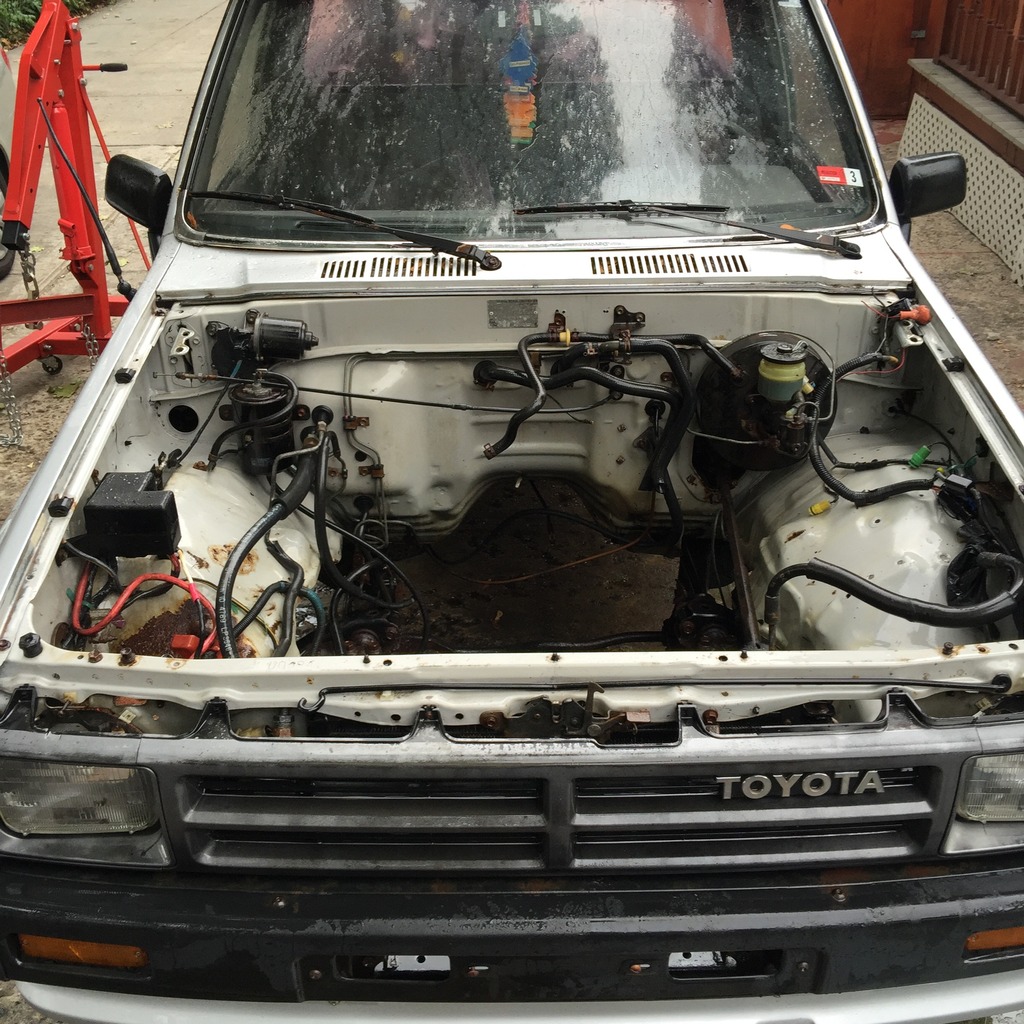
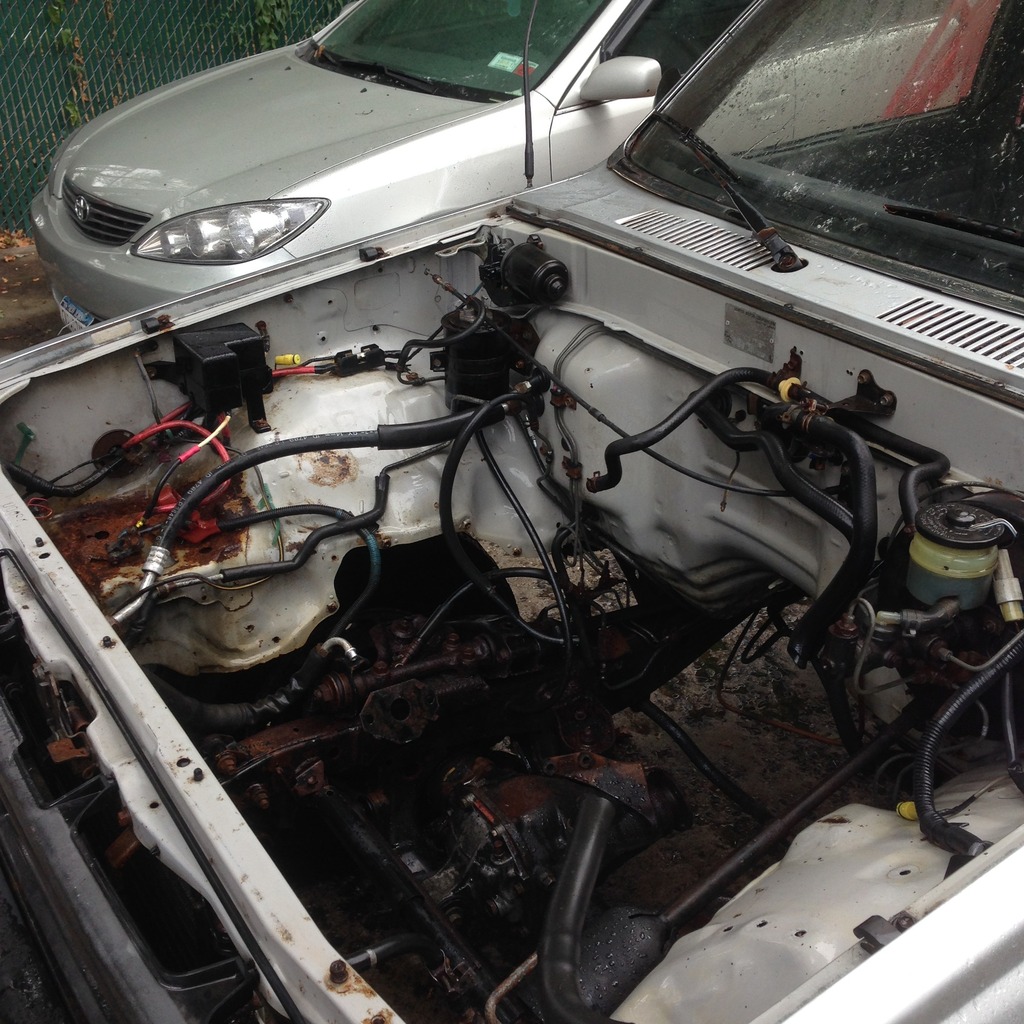
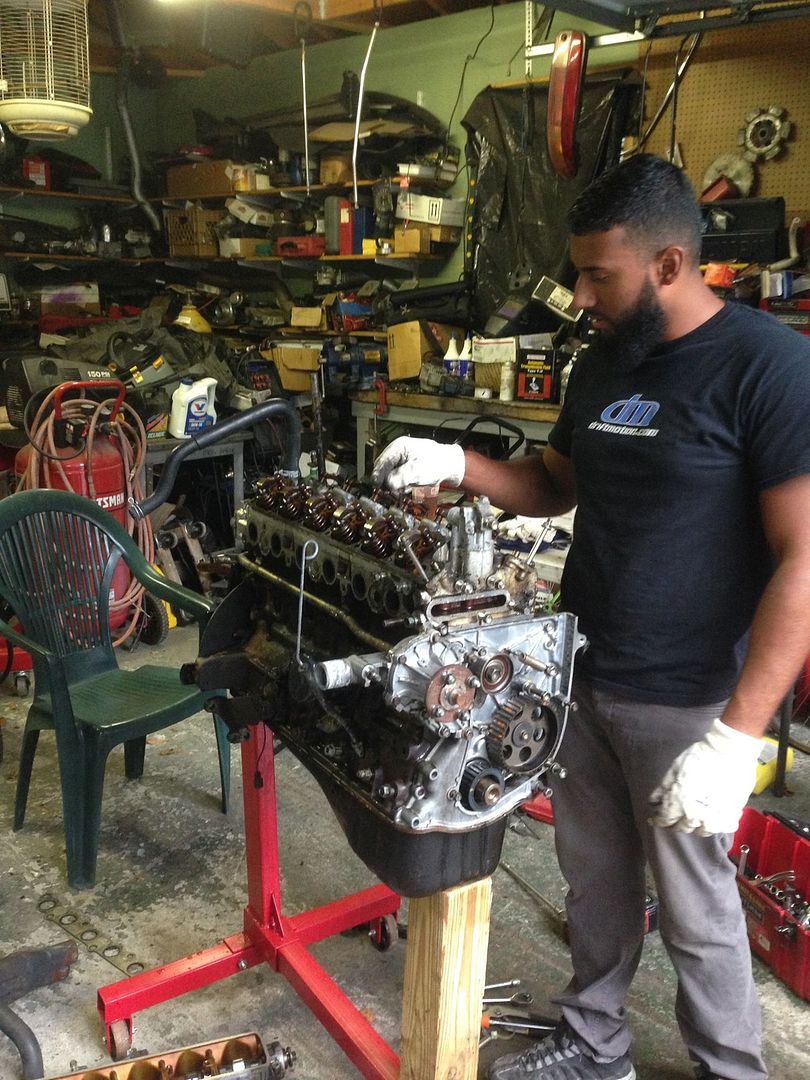
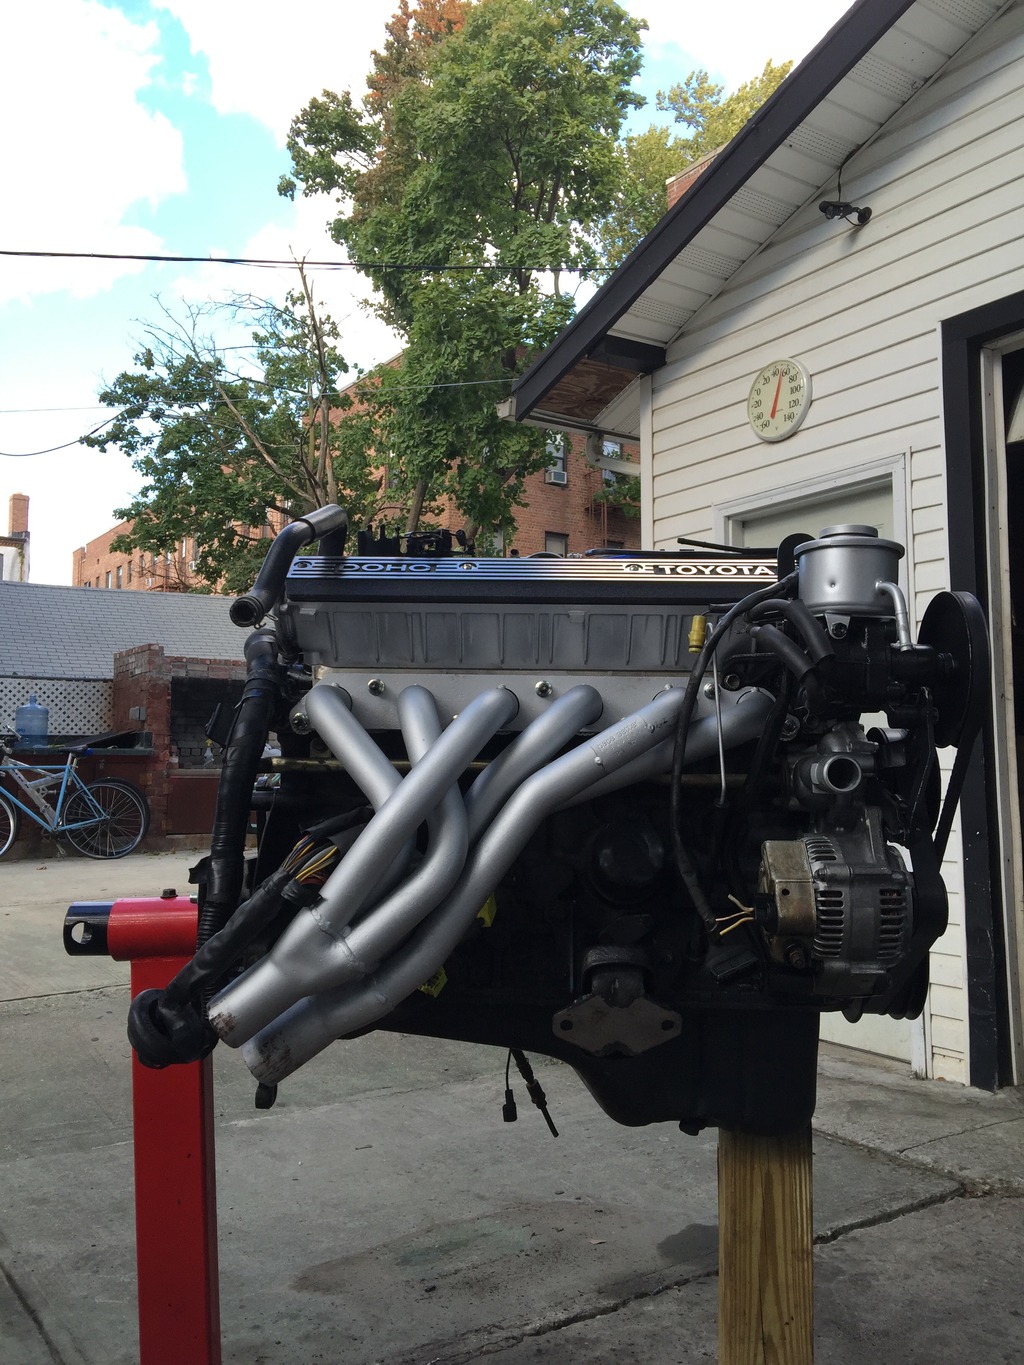
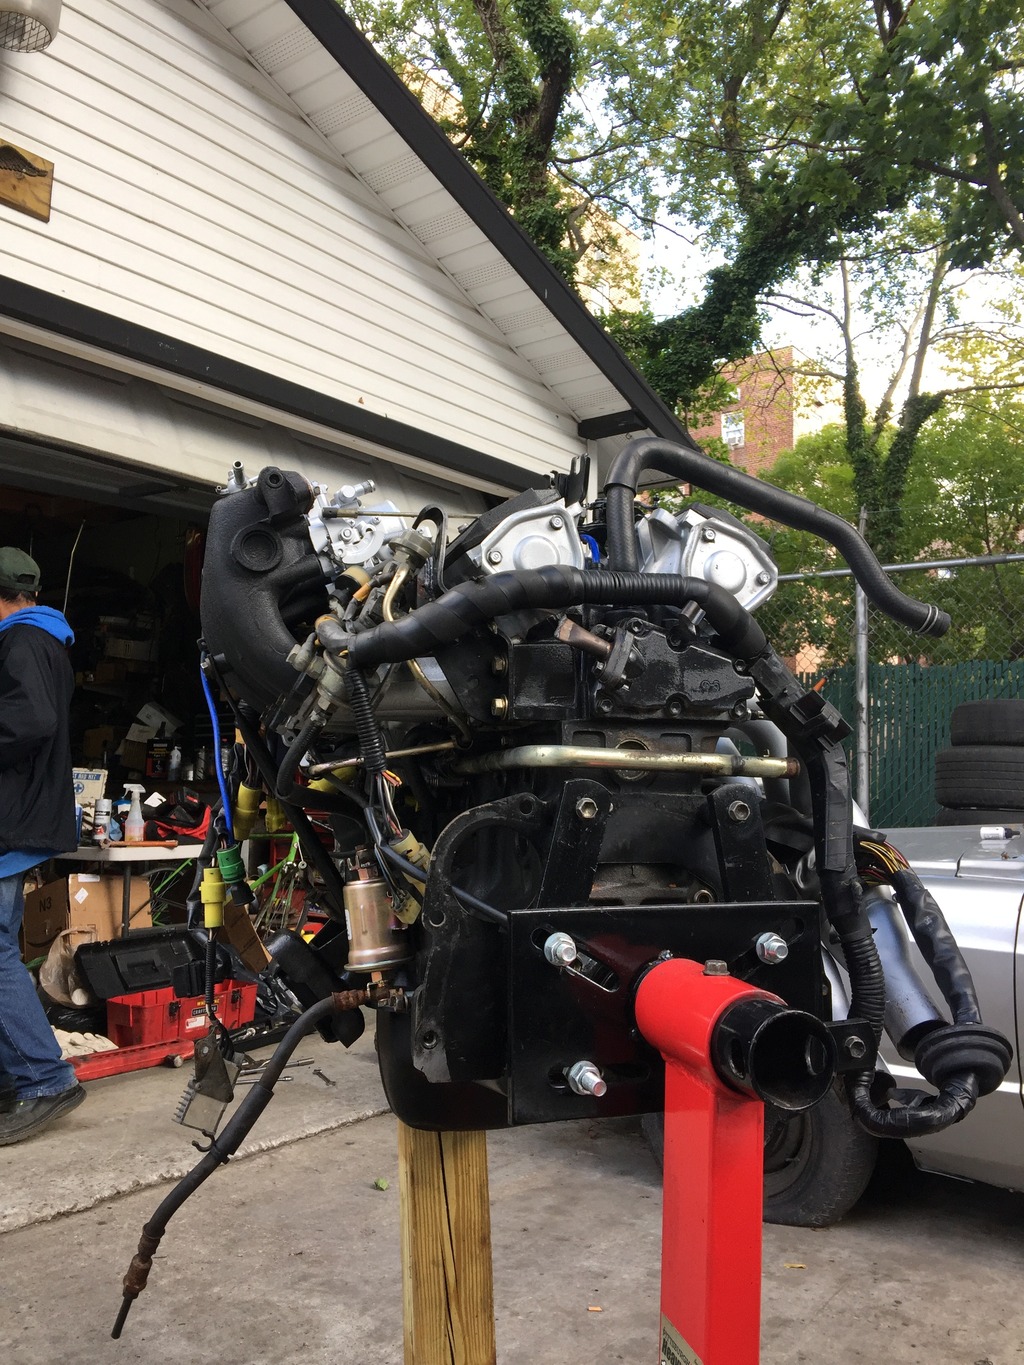
The engine taking shape again.
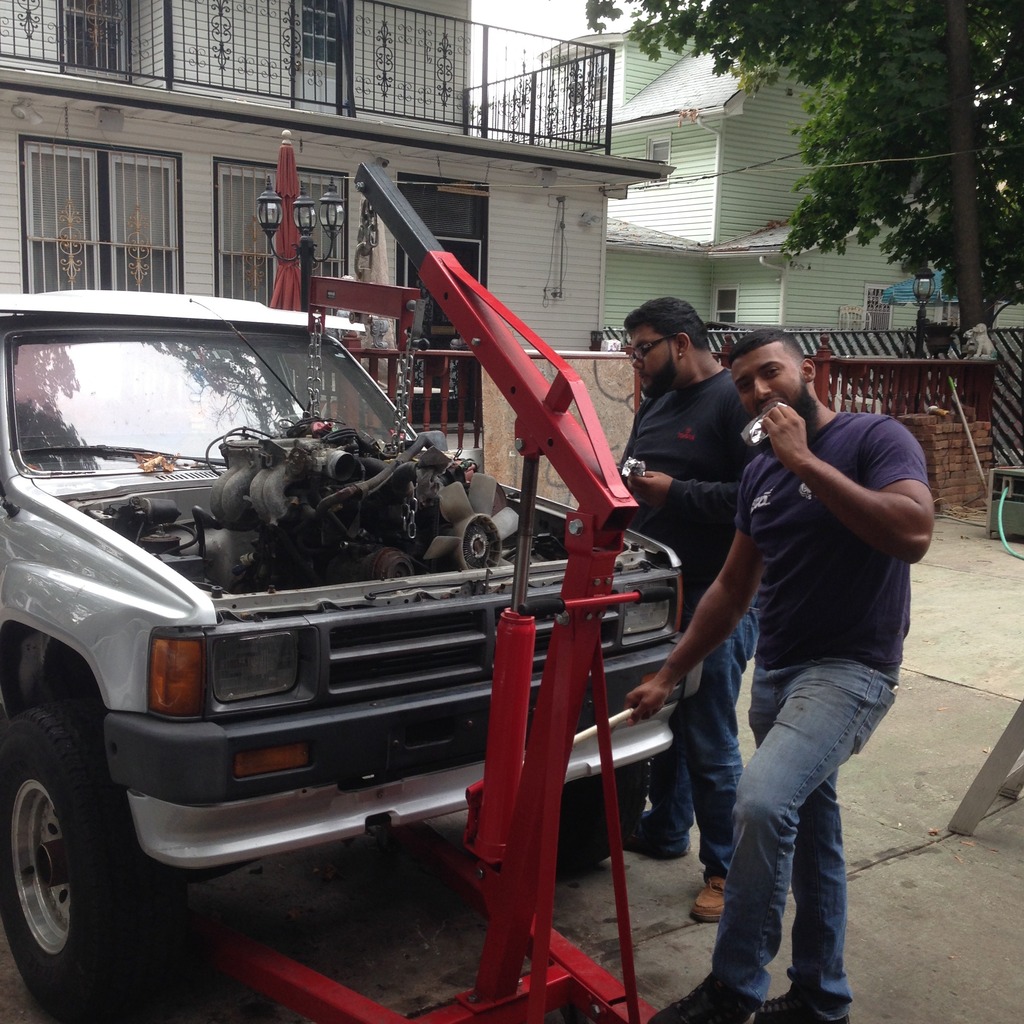
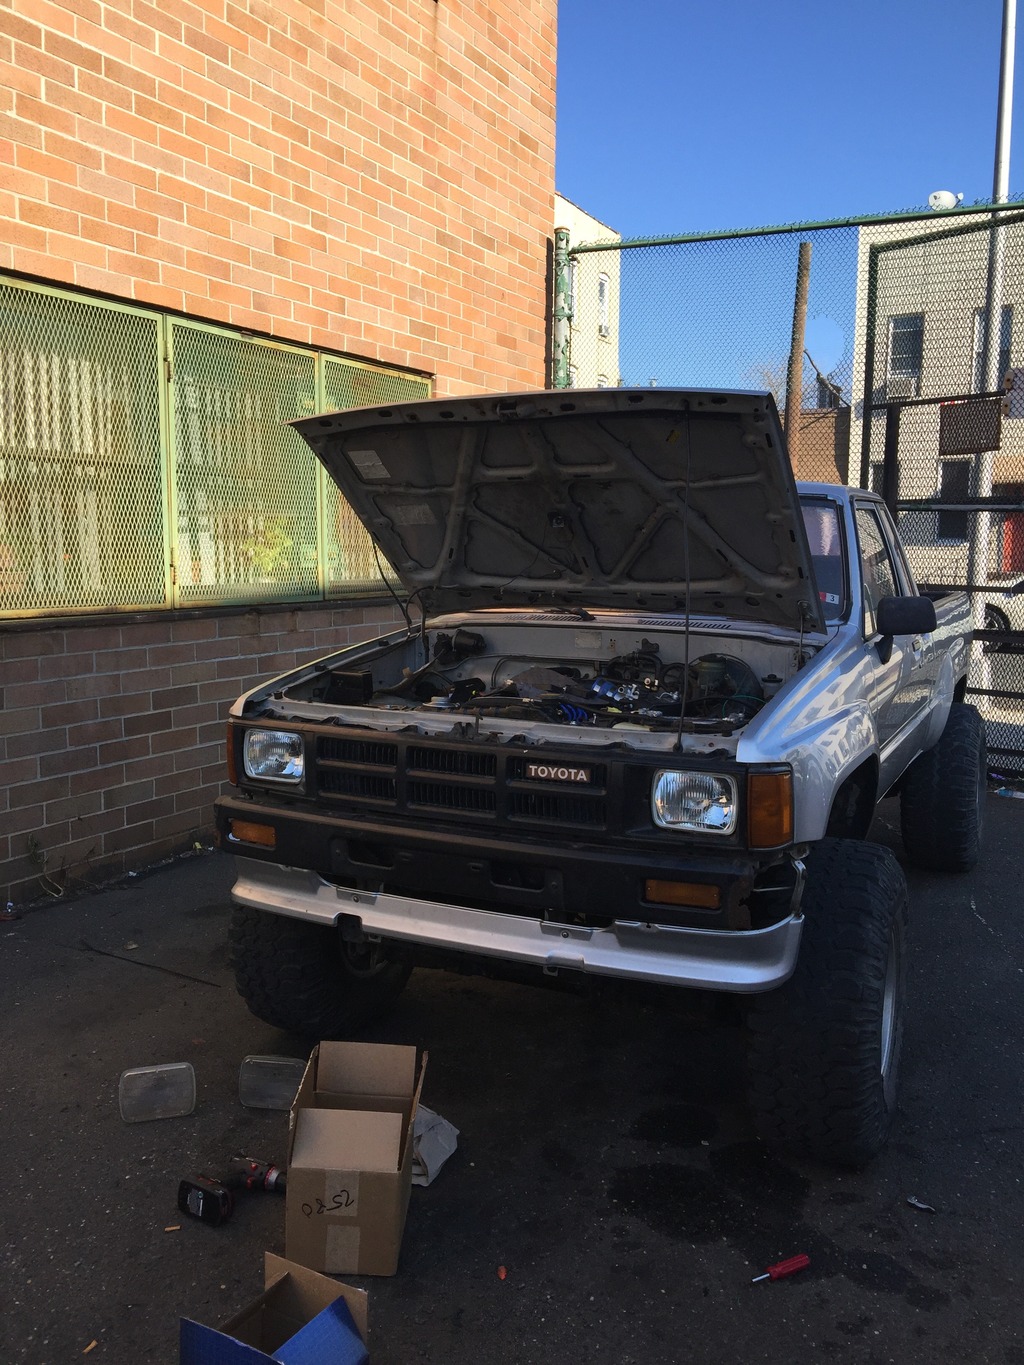
Time to see if it'll fit. 10/17/15
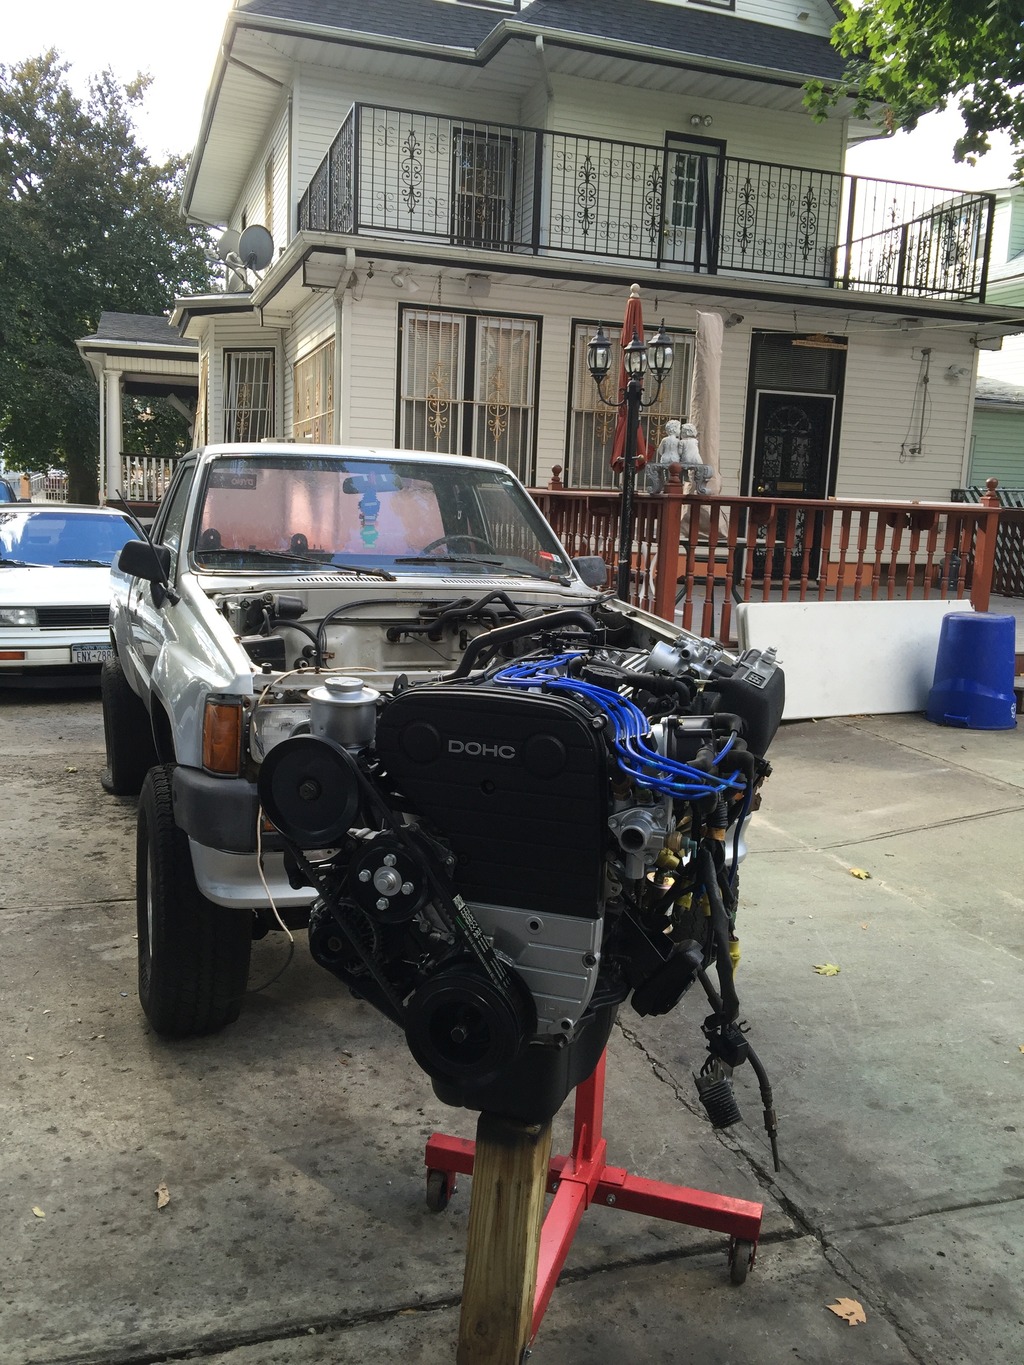
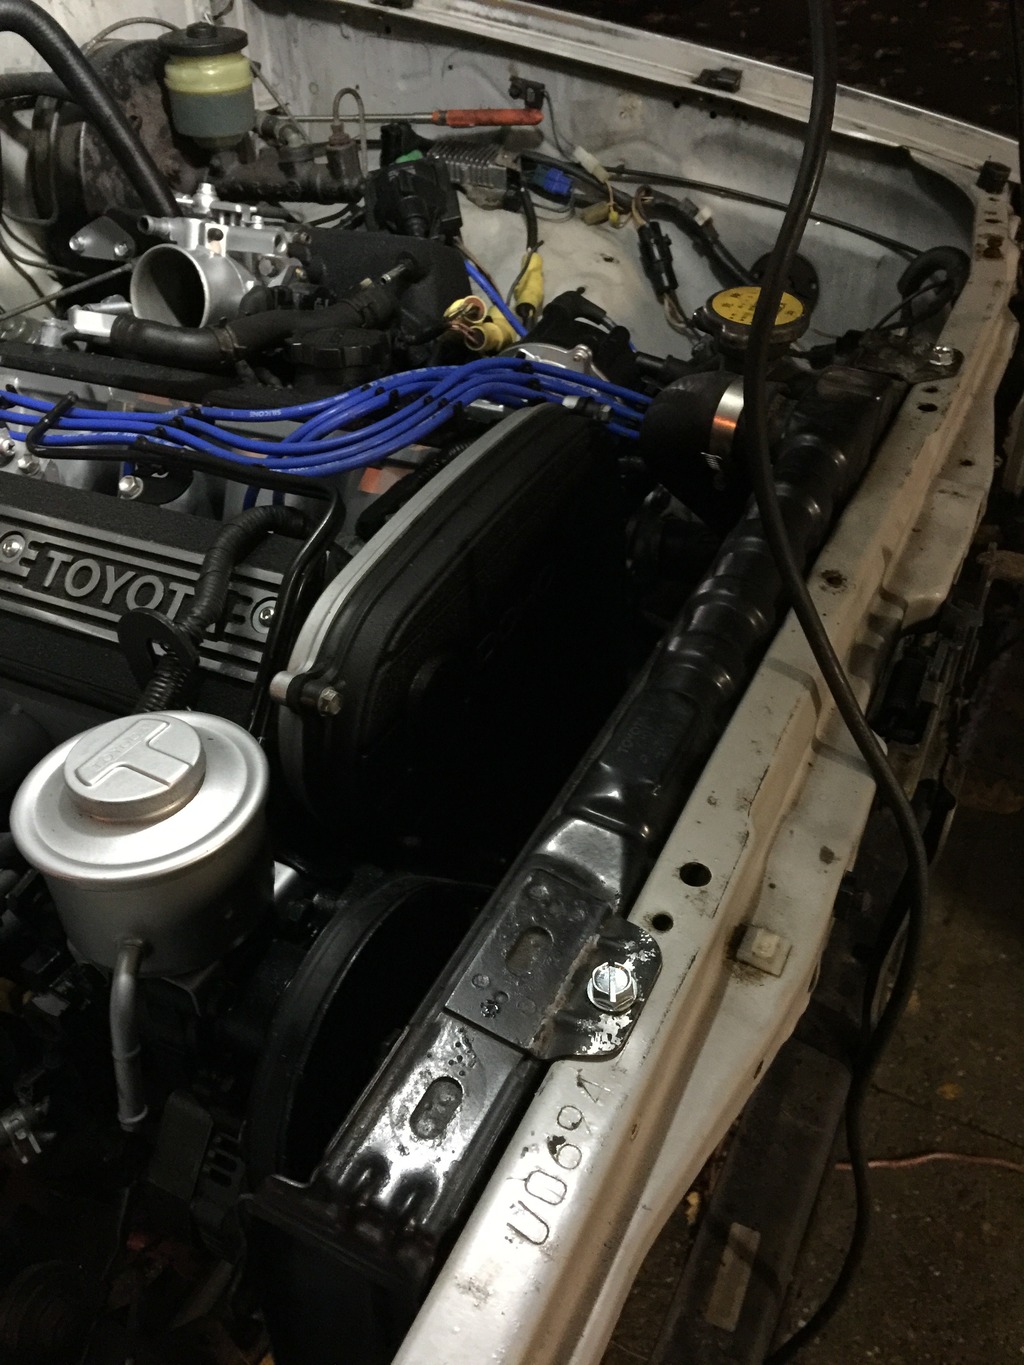
It fits! Engine seems to sit really high and it does. But I did get the hood to close. Im thinking Im going to need either a 2" or 3" body lift to relax the heater hoses. But most importantly the bellhousing. Which youll see in another photo.
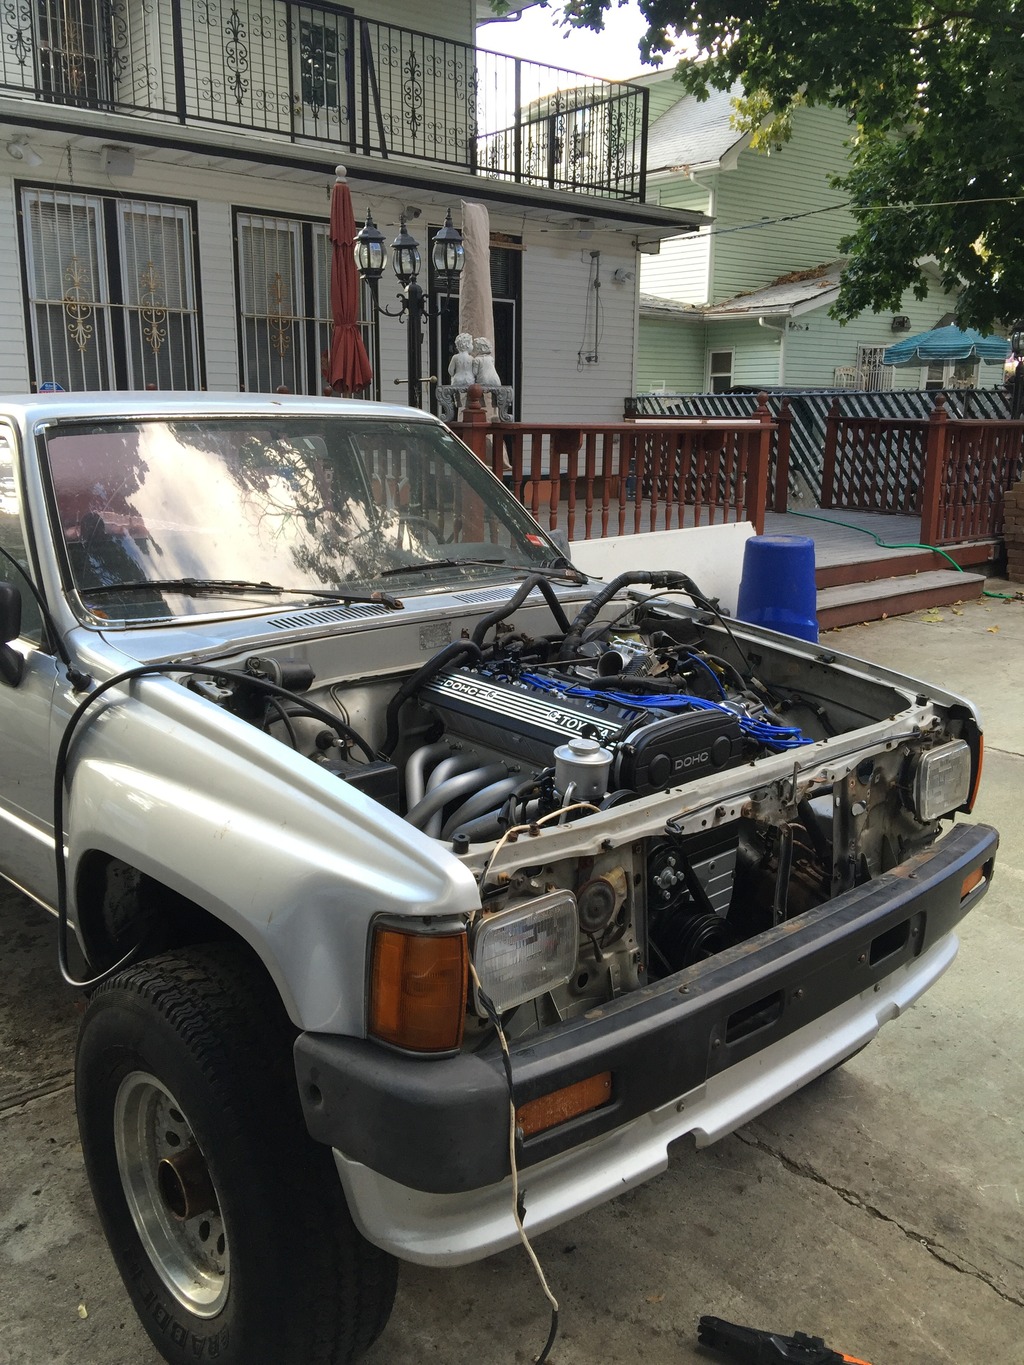
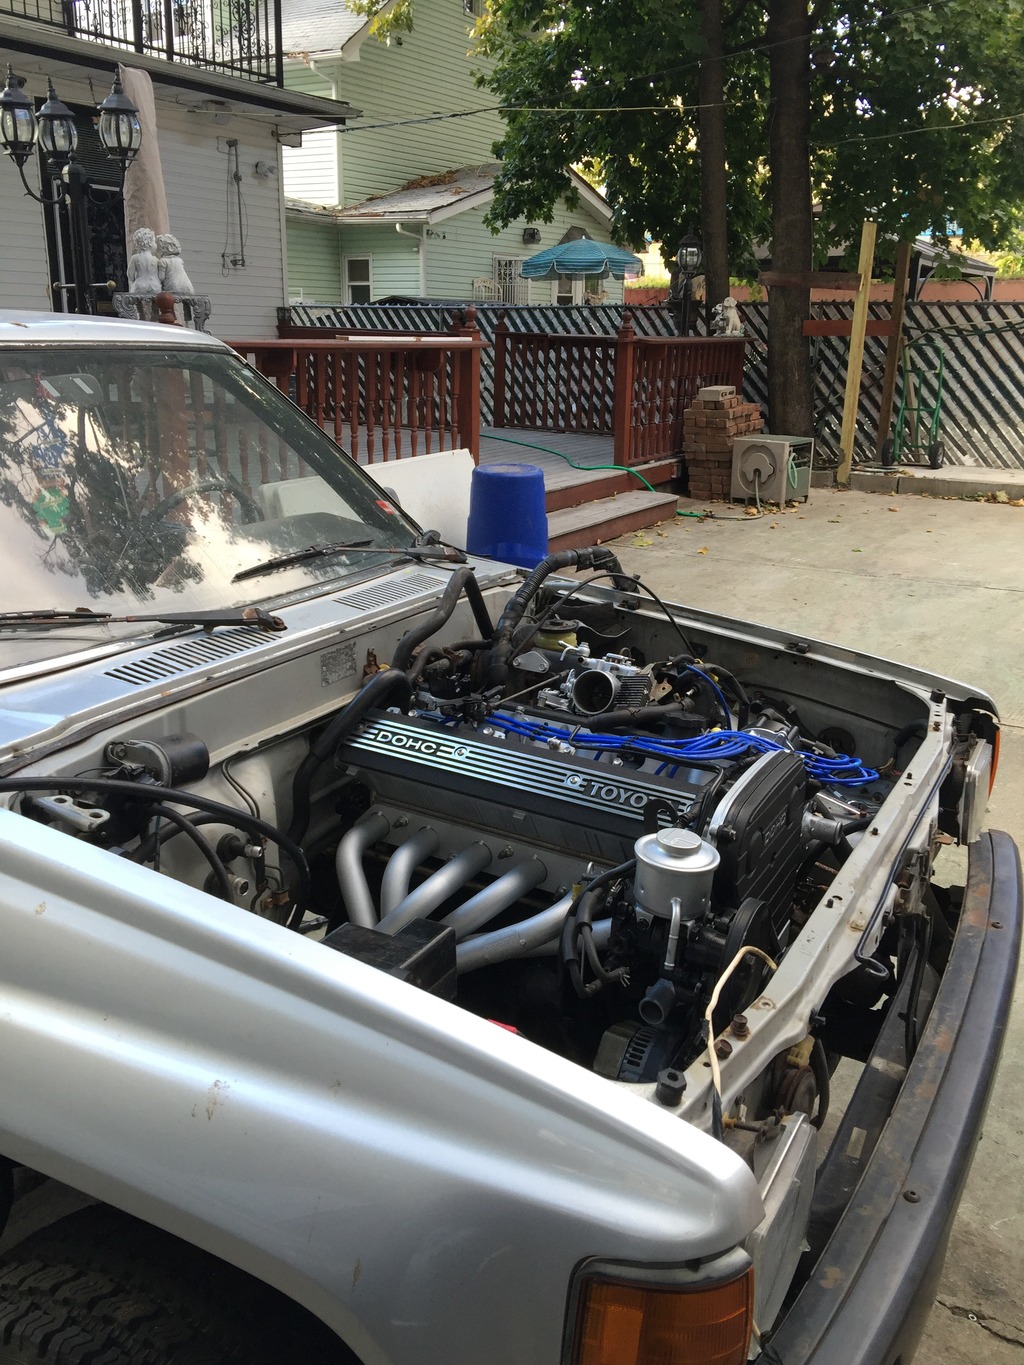
The header outlet clearance without the collector Y pipe. Ill have to fab a heat sheild and some heat wrap for the lines.
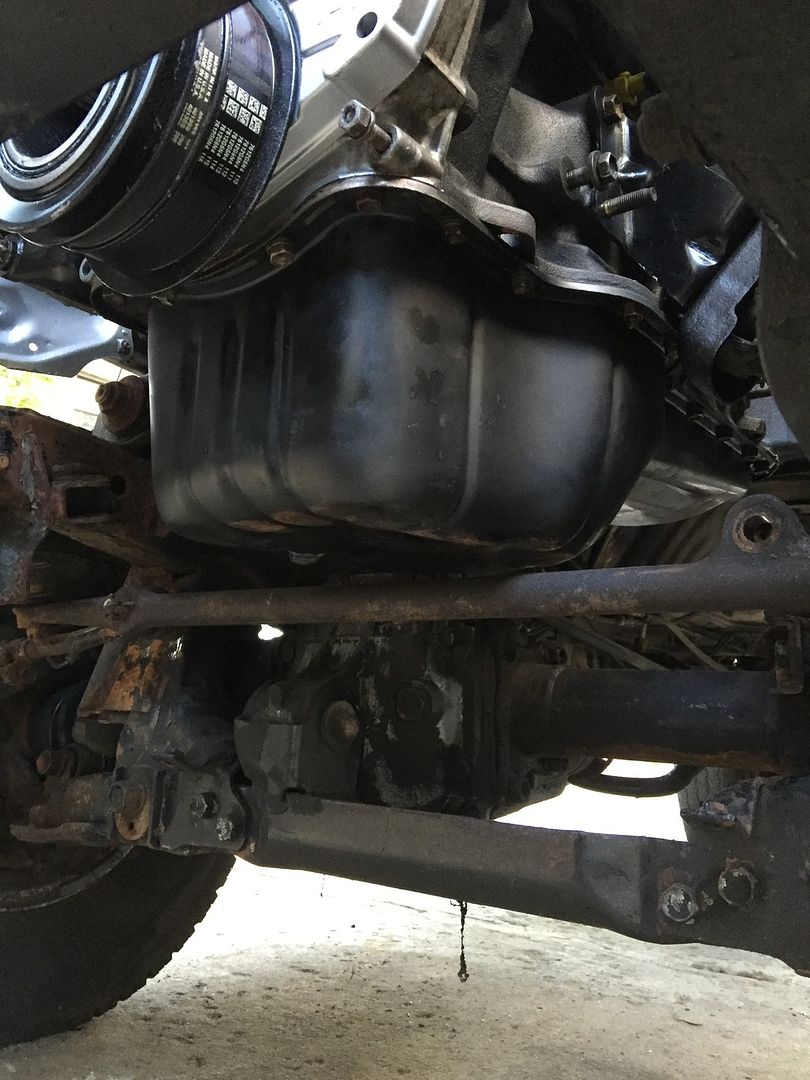
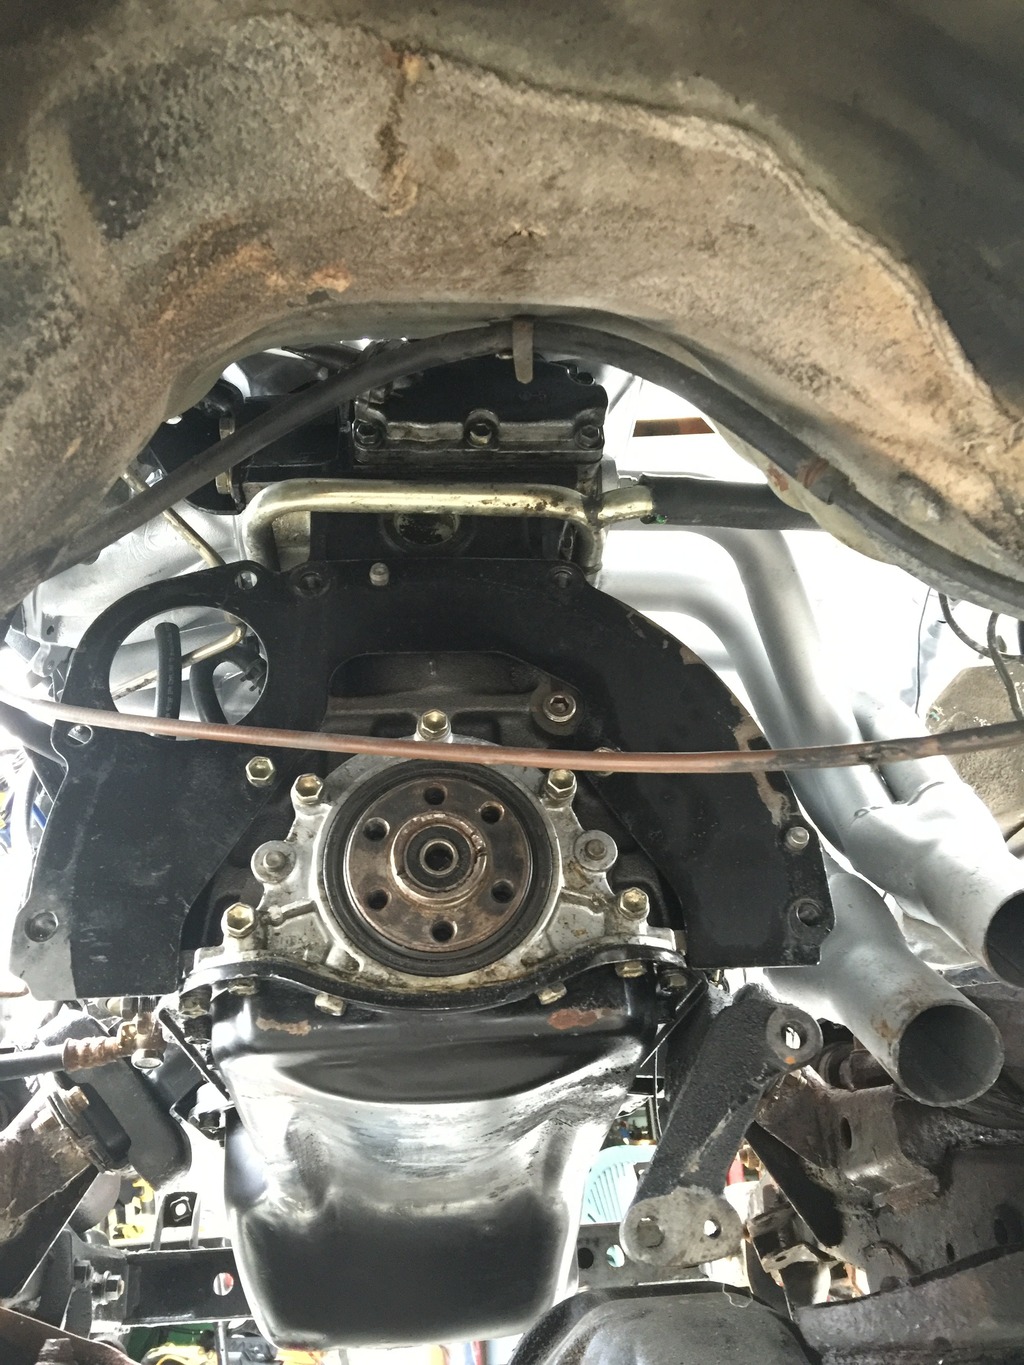
Oil pan clearance. Again this is a 5MGE front sump with Cressida Metal brackets and 22RE rubbers. The steering damper was removed and looks to be the only "mod" to fit the motor thus far.
My current issue now. It looks as if I cannot fit the transmission due to the new height. The engine sits a bit higher on the frame brackets. Upon realizing this, all of the reference photos ive saved off the internet. It looks as if all the trucks have some sort of body lift. But most of the trucks seems to have already have them before the swap so they arent always listed as a required mod for the conversion. Therefore, I completely overlooked that and now I have this issue. Im thinking to order a 3" body lift for the truck to make some more space. Which will also make my radiator mounting a bit easier.
So I found this pretty solid Xtracab. Called and the guy liked me so much over the phone he took it offline until I can come look at it in person. The truck was basically a one owner truck all of its life. Belonged to his partner in the police force. It was parked for a few years until he bought it to tinker with. He installed a new fuel tank and pump and couldnt get the truck to idle well. He felt he was in over his head and listed it.
It started off as a 22RE/Auto Deluxe truck. Bench seat, no tach. Power nothing. Body is straight. Looks to have been repainted at some point. I havent found any body filler on it yet.
I bought it, it ran but misfired. I towed it back to NYC and started messing with it. I did the cap/rotor and plugs. And that made no difference. I narrowed it down to the third cylinder not firing. I did a compression test and got a 0 reading.
Instead of rebuilding the 22RE in the truck which only had 126k on it, I opted for a 5MGE swap. We had a complete 5MGE with Supra belhouising and all wiring. Plus my years of hoarding parts for the two Celica Supras I had made it an easier choice. And Ive worked on many of them over the years. The only issue with the 133k 5MGE was that it had more oil on it than in it. Every single seal on the engine leaked including the valve stem seals.
I pulled the 22RE out in September and offloaded it to my uncle who was going to rebuild it to use on a future project. He informed me that the number three intake valve was bent. Out assumption it was was probably stuck from sitting for so long and bent on its first start in years. :
Goals for the swap/truck:
5MGE Engine swap with 5 speed conversion
Retaining factory wiring from truck side and splice into Cressida harness
As little cutting as possible
Retaining Power Steering
A Reliable winter daily, as well as making it look clean. This will be a street truck.
MKII Supra seat swap. I had already sold the bench out of the truck.
Clean and partial restoration of the interior. And rewiring of the old sound system in the truck.
Parts list: as of 2/6/16
87 Cressida 5MGE Motor/harness with 133k (Front Sump engine)
87 Cressida Motor Mounts combined with 22RE rubber mounts
Stock 5MGE Exhaust Manifold as the PaceSetter in the pics turned out to hit the frame with the trans installed
87 Supra W58 Bellhousing with clutch, fork, and flywheel
85-87? G54 with Forward Shift -TCase
EGR Delete
Performance Accessories 3inch Body Lift
82-86.5 Celica Supra Radiator with stock Supra lower mounting brackets welded to custom frame brackets
12inch Dual Fan kit with Fan Temp Probe and a Derale Fan relay kit
Custom Exhaust
Rubber fuel line spliced between hardline off of tank to the factory engine fuel line from 22RE moved over to D/S
ToySport Intake
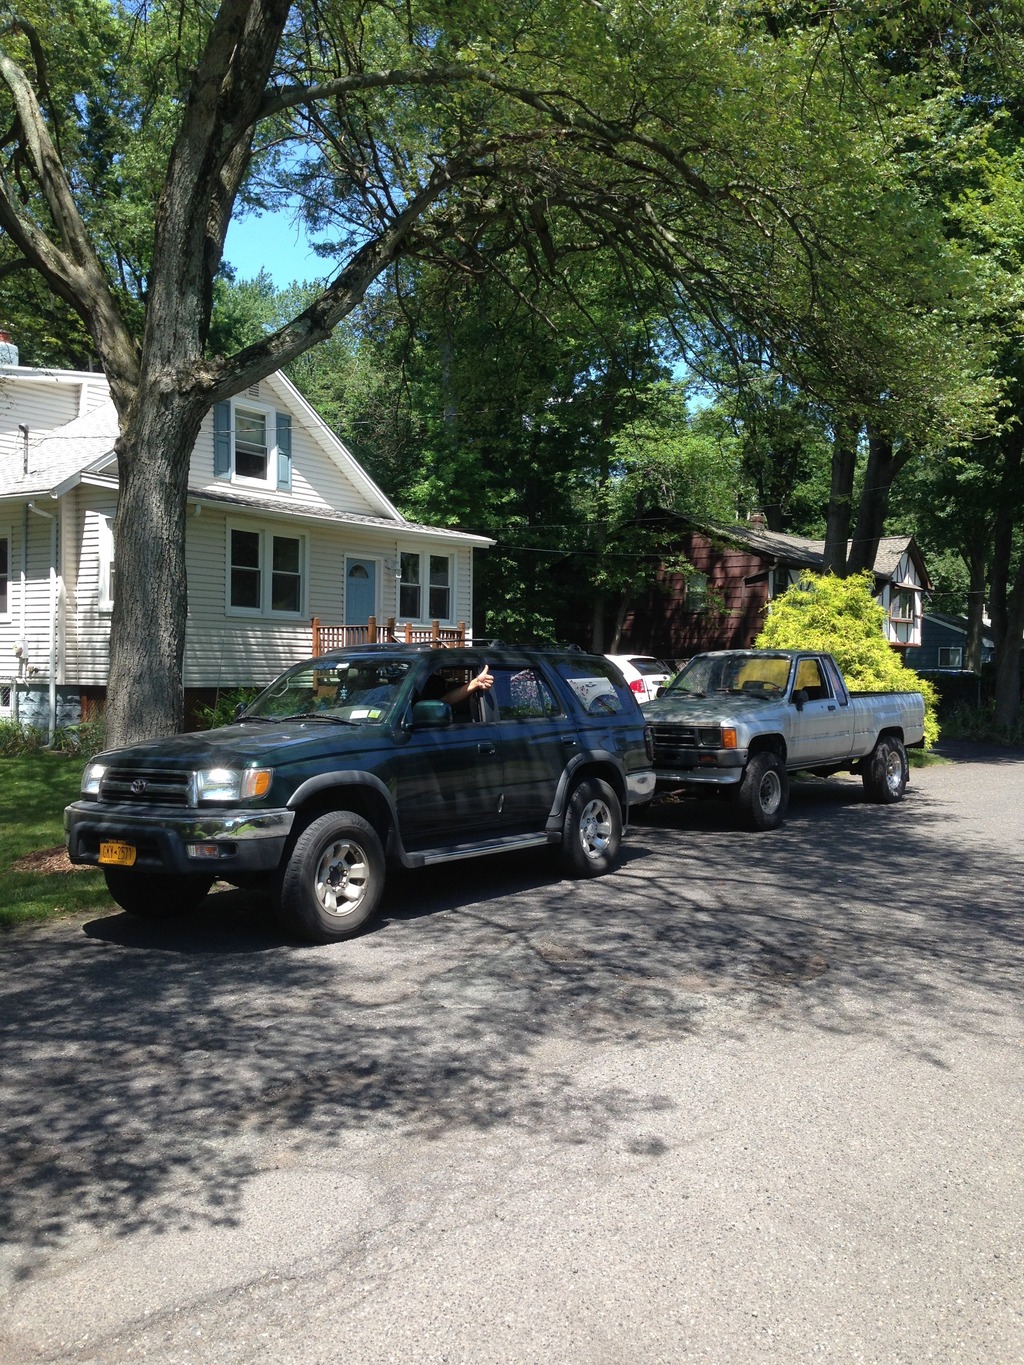
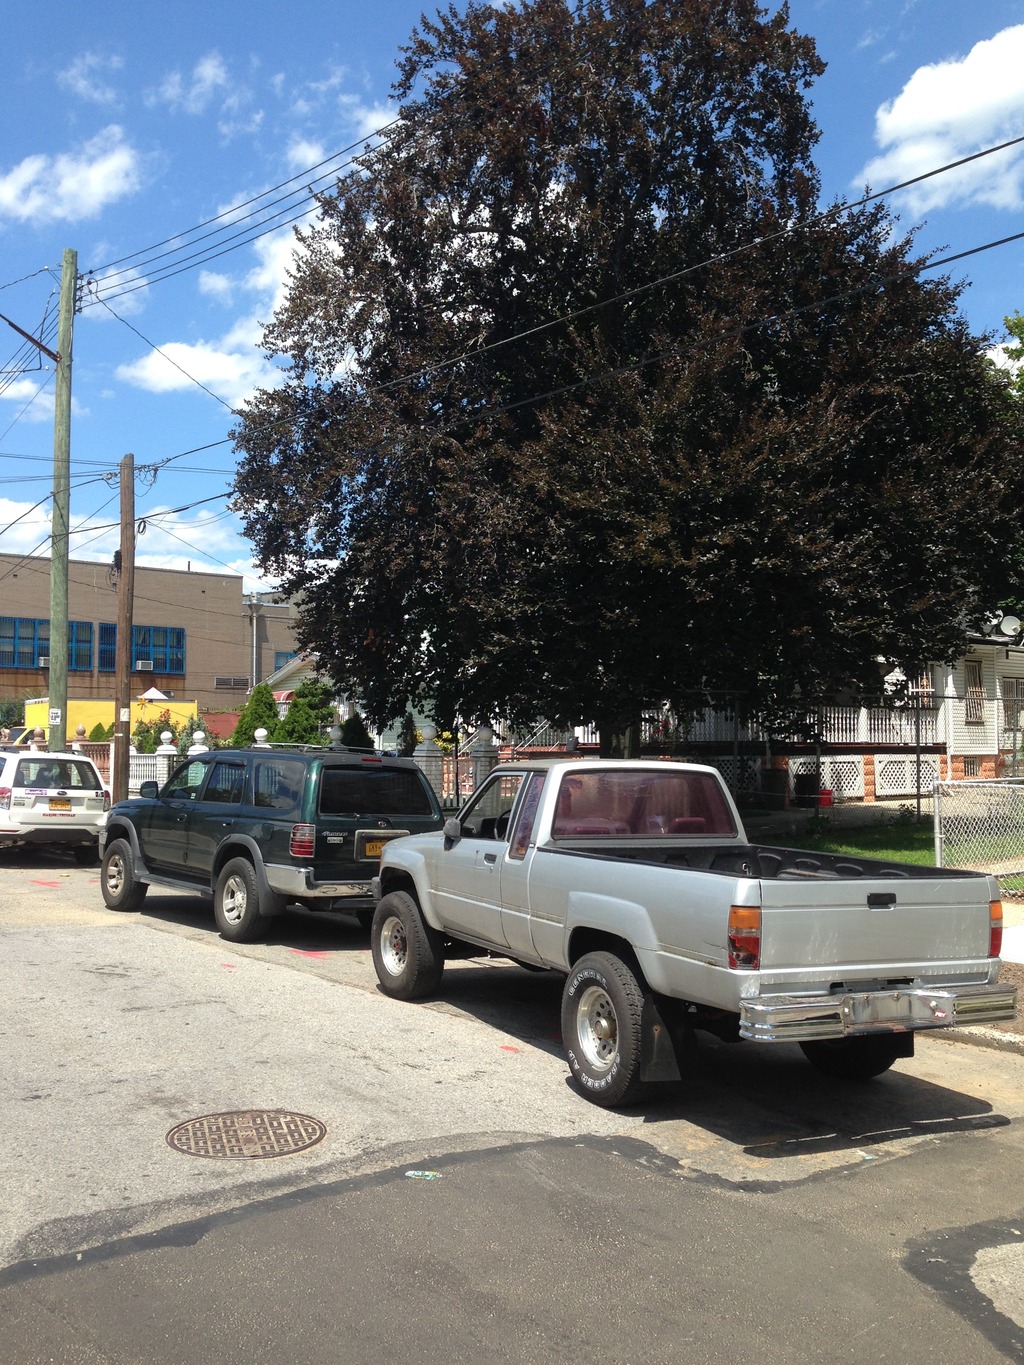
Loaded up from the sellers house. July 2015

Here in NYC at my friend's house.


Me posing after getting ready to pull the motor September 2015

My helpers for the day. Having Ice Cream

Some more of my helpers helping clean the engine bay.

All clean. Have to take care of the battery tray rust.


Pressure washing the years of oil off of the motor.

Somewhat clean. But enough to work.

Stripping the cam towers and all the timing belt covers to be cleaned and painted. And to make way for the Valve seal job.

Brought the top end and a bunch of parts to my job to be sandblasted.

Before and after the sandblaster. (Yes I taped the gasket surfaces)

Some misc brackets and covers painted by my friend.

The front timing covers after being refinished by my buddy.

The engine taking shape again.

Time to see if it'll fit. 10/17/15


It fits! Engine seems to sit really high and it does. But I did get the hood to close. Im thinking Im going to need either a 2" or 3" body lift to relax the heater hoses. But most importantly the bellhousing. Which youll see in another photo.


The header outlet clearance without the collector Y pipe. Ill have to fab a heat sheild and some heat wrap for the lines.


Oil pan clearance. Again this is a 5MGE front sump with Cressida Metal brackets and 22RE rubbers. The steering damper was removed and looks to be the only "mod" to fit the motor thus far.

My current issue now. It looks as if I cannot fit the transmission due to the new height. The engine sits a bit higher on the frame brackets. Upon realizing this, all of the reference photos ive saved off the internet. It looks as if all the trucks have some sort of body lift. But most of the trucks seems to have already have them before the swap so they arent always listed as a required mod for the conversion. Therefore, I completely overlooked that and now I have this issue. Im thinking to order a 3" body lift for the truck to make some more space. Which will also make my radiator mounting a bit easier.

Last edited by TransAmBandit; 02-05-2016 at 11:06 PM.
 10-19-2015, 04:55 AM
#2
Damn, that is a clean looking engine now. Good job on the install.
On the bellhousing issue, I only had to use a 1" body lift to get everything to clear - I remember installing the body lift during the engine install, but can't remember exactly why I did (I think my write-up says for radiator clearance). A 1" body lift isn't much and is pretty cheap - much more height than that on a body lift and I start to cringe in the same way as when someone tells me they're installing blocks on leaf springs
On the bellhousing issue, I only had to use a 1" body lift to get everything to clear - I remember installing the body lift during the engine install, but can't remember exactly why I did (I think my write-up says for radiator clearance). A 1" body lift isn't much and is pretty cheap - much more height than that on a body lift and I start to cringe in the same way as when someone tells me they're installing blocks on leaf springs
10-19-2015, 01:01 PM
#3
Registered User
Join Date: Mar 2013
Location: Chester County, PA
Posts: 48
Likes: 0
Received 0 Likes
on
0 Posts
Awesome build. Sorry you hit a small wall with the body lift issue, but as I'm looking to do this swap in the future it's really handy you mentioned it!

/subscribed
/subscribed
10-24-2015, 03:30 PM
#4
Registered User
Thread Starter
Join Date: Jun 2007
Location: Brooklyn, NYC
Posts: 452
Likes: 0
Received 0 Likes
on
0 Posts
Thanks for the kind words guys!
Corax, I ended up going with the 3" Body lift from peformance accessories through Summit Racing. I figured why not. It's a street truck and 3" is the max on a body lift people recommend.
I ordered it last Sunday and got it by Wednesday. And installed on Thursday.
The body lift turned out to be an easy install since almost everything that needed to be disconnected was already removed to begin with. The only things I had to remove were the bumper and the steering shaft. Which was coming out anyways for a Tilt column swap. The bed bolts were a bitch to remove since they were a bit on the right side and the tabbed studs ended up bending. Luckily I was able to use a vice grip on the three that gave an issue. The kit had a longer fuel vent hose but made no mention of the tank filler needing to be extended. I searched on Yota tech and found the answer. I'll be cutting it in half and extending it with a metal pipe. I forgot to take a before photo. Sorry about that.
The cab lift done.
Lots of Engine room now!
The bed lifted and aligned a little closer to the cab.
Corax, I ended up going with the 3" Body lift from peformance accessories through Summit Racing. I figured why not. It's a street truck and 3" is the max on a body lift people recommend.
I ordered it last Sunday and got it by Wednesday. And installed on Thursday.
The body lift turned out to be an easy install since almost everything that needed to be disconnected was already removed to begin with. The only things I had to remove were the bumper and the steering shaft. Which was coming out anyways for a Tilt column swap. The bed bolts were a bitch to remove since they were a bit on the right side and the tabbed studs ended up bending. Luckily I was able to use a vice grip on the three that gave an issue. The kit had a longer fuel vent hose but made no mention of the tank filler needing to be extended. I searched on Yota tech and found the answer. I'll be cutting it in half and extending it with a metal pipe. I forgot to take a before photo. Sorry about that.
The cab lift done.

Lots of Engine room now!

The bed lifted and aligned a little closer to the cab.
 12-10-2015, 09:37 PM
#5
Registered User
Thread Starter
Join Date: Jun 2007
Location: Brooklyn, NYC
Posts: 452
Likes: 0
Received 0 Likes
on
0 Posts
I haven been keeping up on the updates. Nor have I been putting in the work I should be. This swap should have taken a month and a half tops. lol
But let me catch up from October.
Improved space with the bodylift. Bellhousing bolts are easier to reach. But more importantly the transmission will be easier to attach.
Separating of the steering shaft from my tilt column swap to make longer for body lift. I painted this before installation. No pics of that.
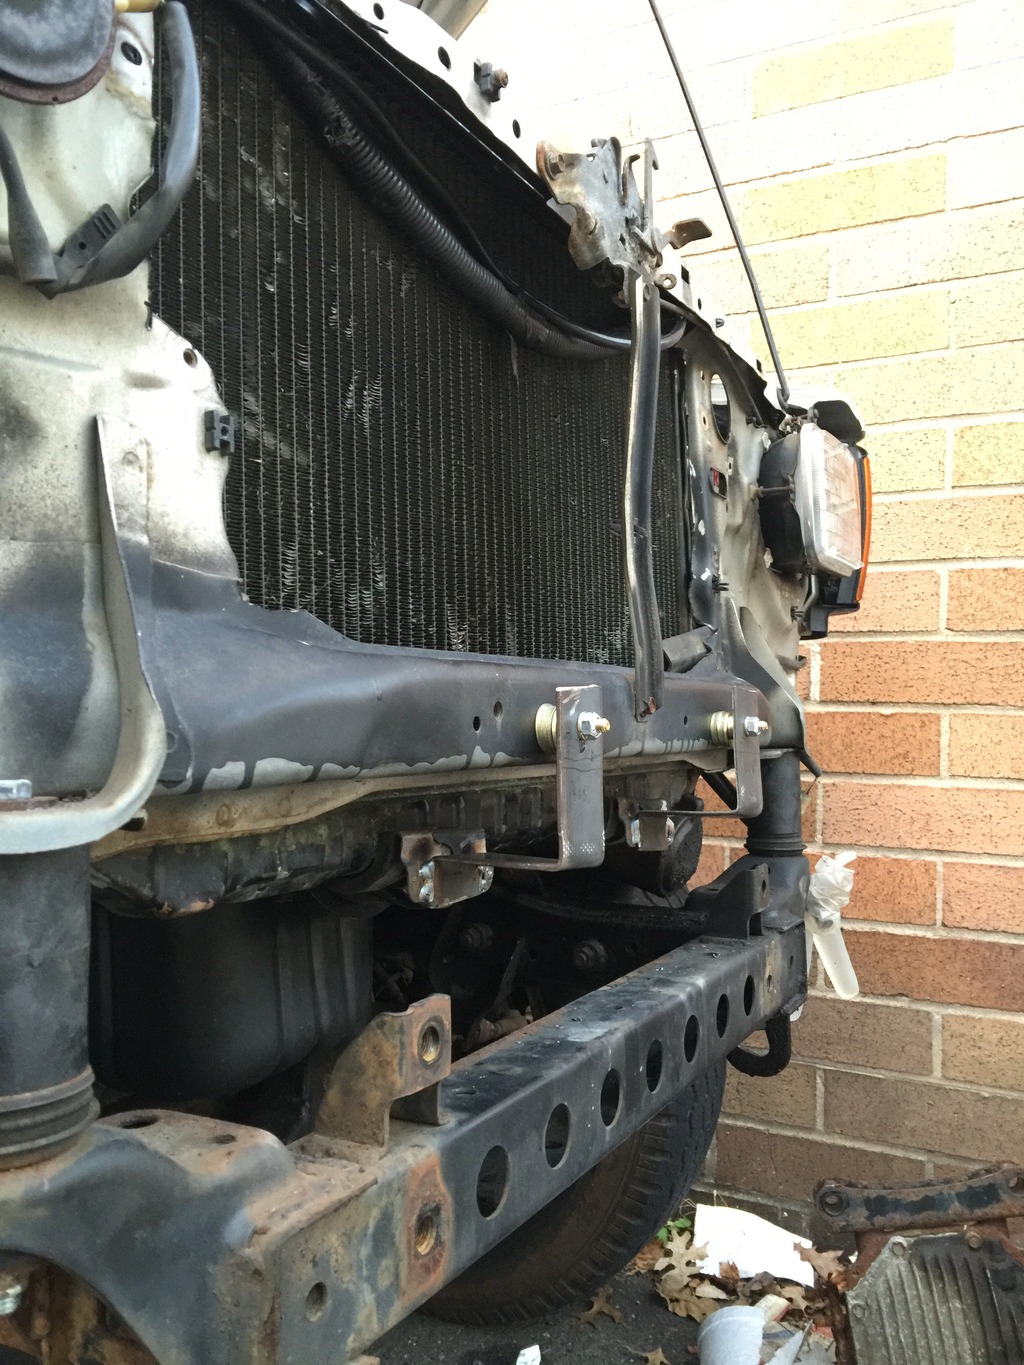
Stock 85 Supra radiator with top brackets beaten flat to the stock core support.
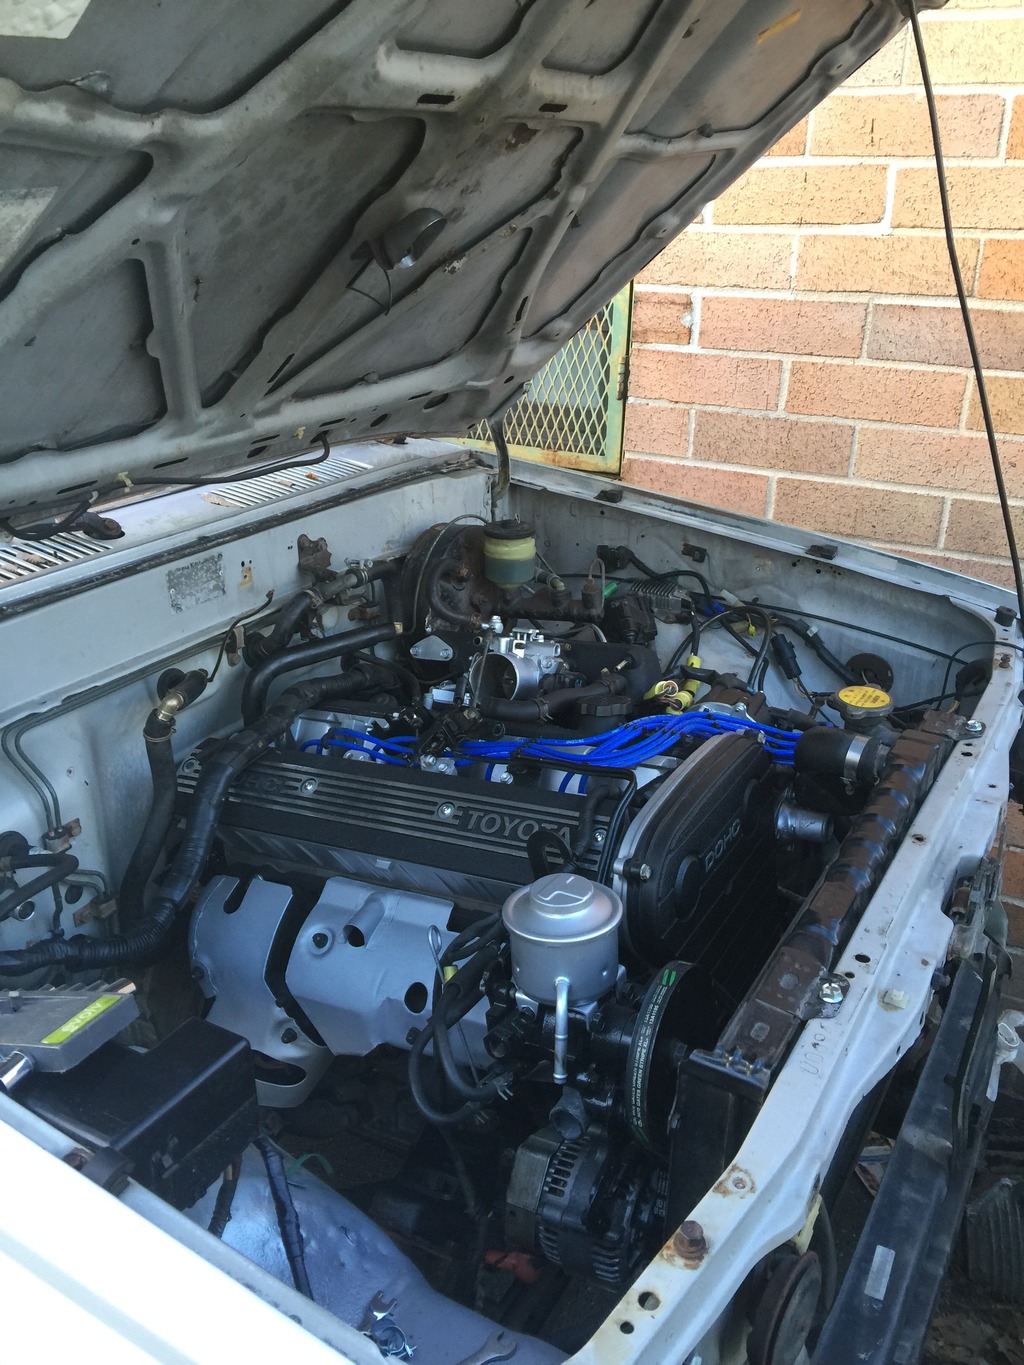
Took this photo a week after the transmission made it into the truck. This was the day I towed it home from my friend's house where his dad was grateful to let me use his yard for two months. Tan Supra is mine.
Unfortunately, after the transmission was installed the engine was now in its actual position. With the trans on the mount, the engine tilted back as I expected it to. The intake plenum came in contact with the booster which I then I had to bash the best I can with the motor in the bay. But the most frustrating was the Supra header collector came in contact with the control arm/frame. If I shorten the runners it should work. But I wasnt looking to add more time to the project. So I went with a stock manifold from a Cressida. Which I painted to make up for the loss of the header. =(

Last week I sold the ugly diamond plate/Chrome bumper to a friend with an 82 4x4. I hope to replace it with a smittybilt if I can find one that isnt rotted.

And for black friday, I took advantage of LCE's sale and ordered a short shifter kit to negate some of the body lift. Also I was missing all of the shifter bushings so everything was sloppier than normal. Everything is nice and tight. I can even use the stock Automatic shifter bezel if I want to. lol
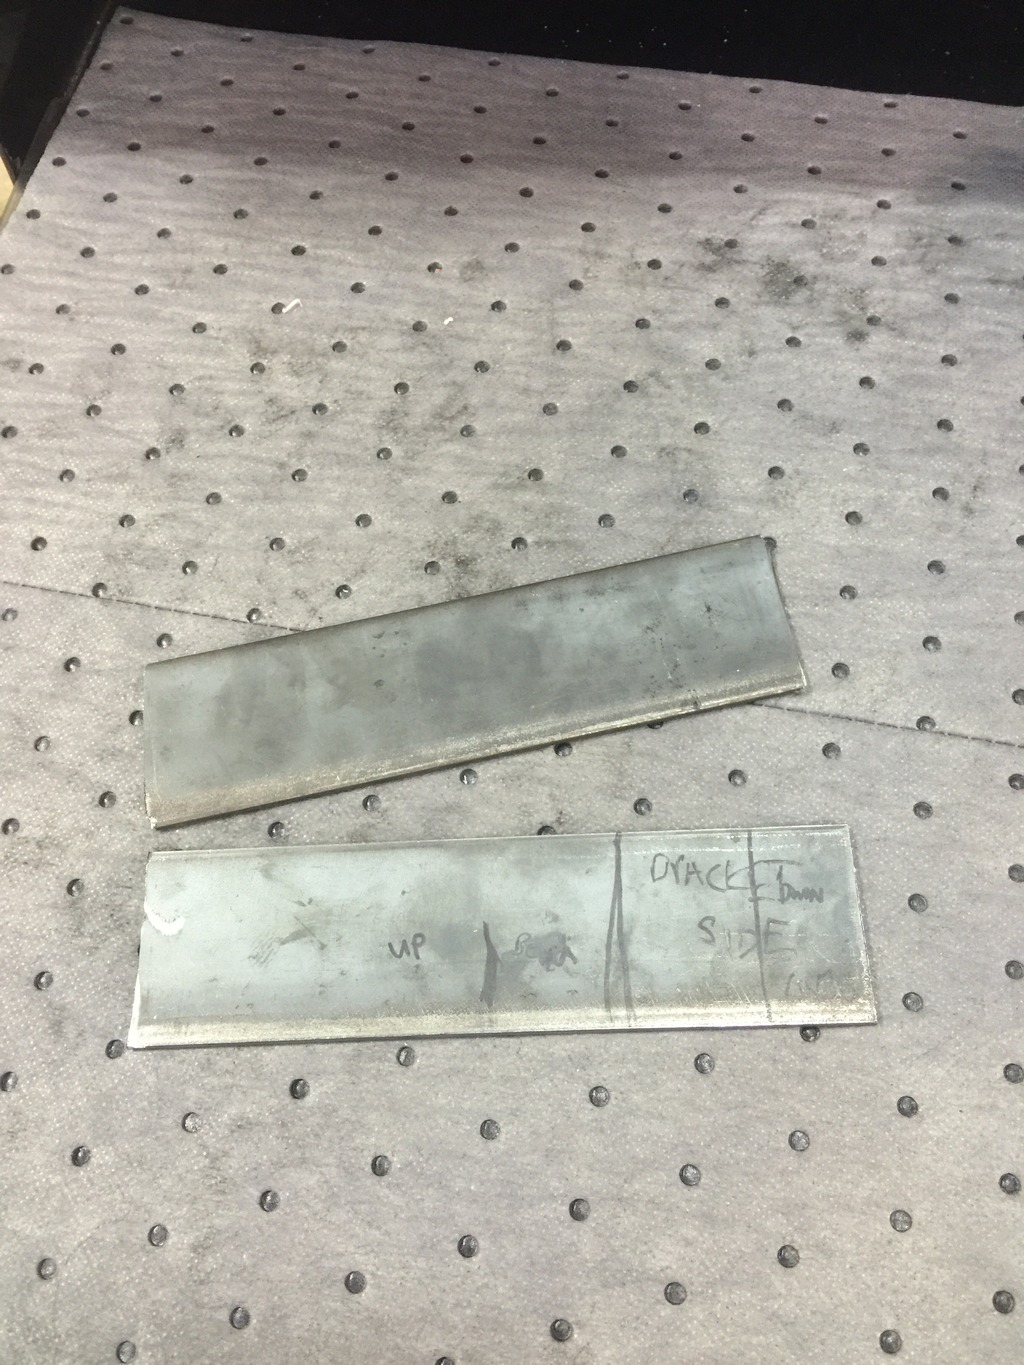
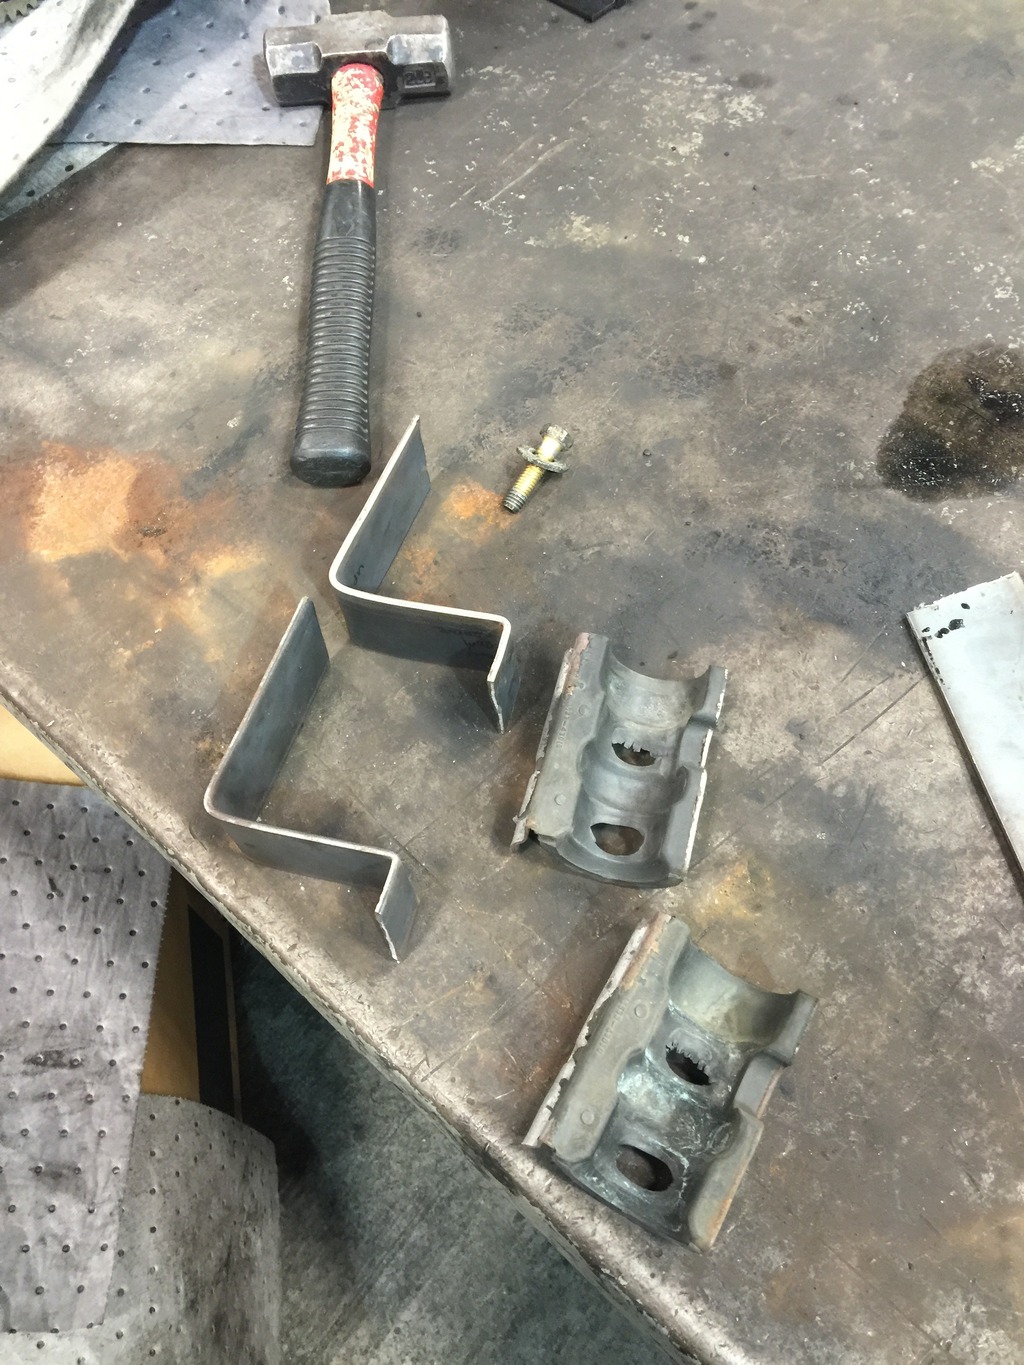
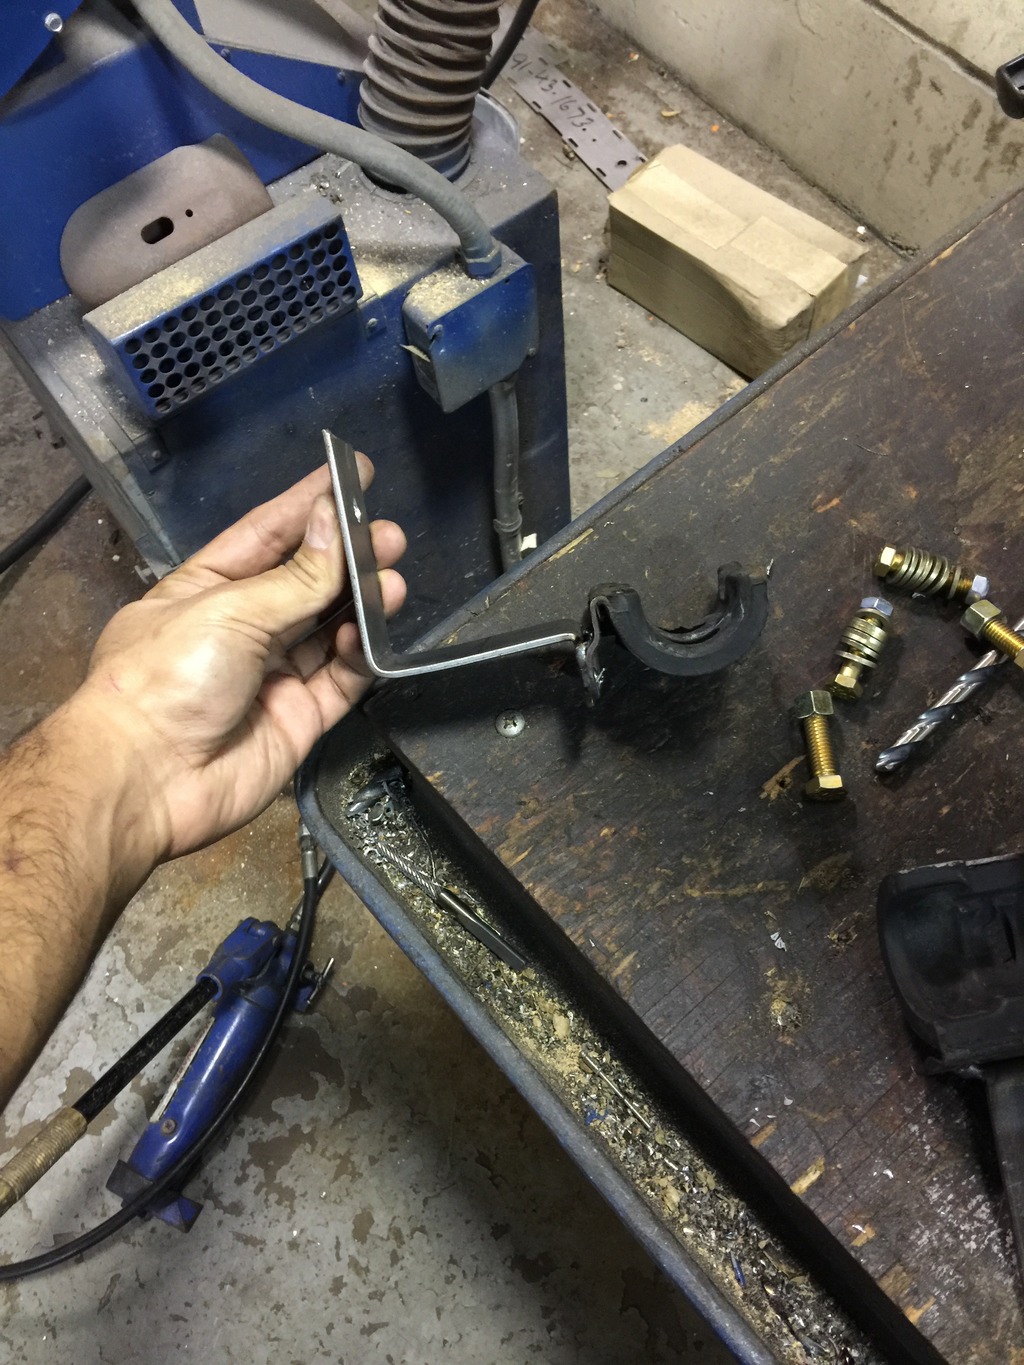
The next thing I needed to sort out was the lower radiator brackets. My original plan was to weld a piece of angle iron to the truck frame and then weld the Supra lower brackets to that. But being where I have the truck now I couldnt use a welder as easily. My neighbor gave me an idea that I should try to use the core support. Which to be honest, my dumbass didnt think of it. So I took a rough guesstimate and took some pieces to work and used a sledge and vise to shape them. Had someone at work weld the brackets to the angle iron. Came home drilled a hole in the core and used a bunch of washers to take the slack and help keep things tight. Im suprised I got it to work honestly. lol
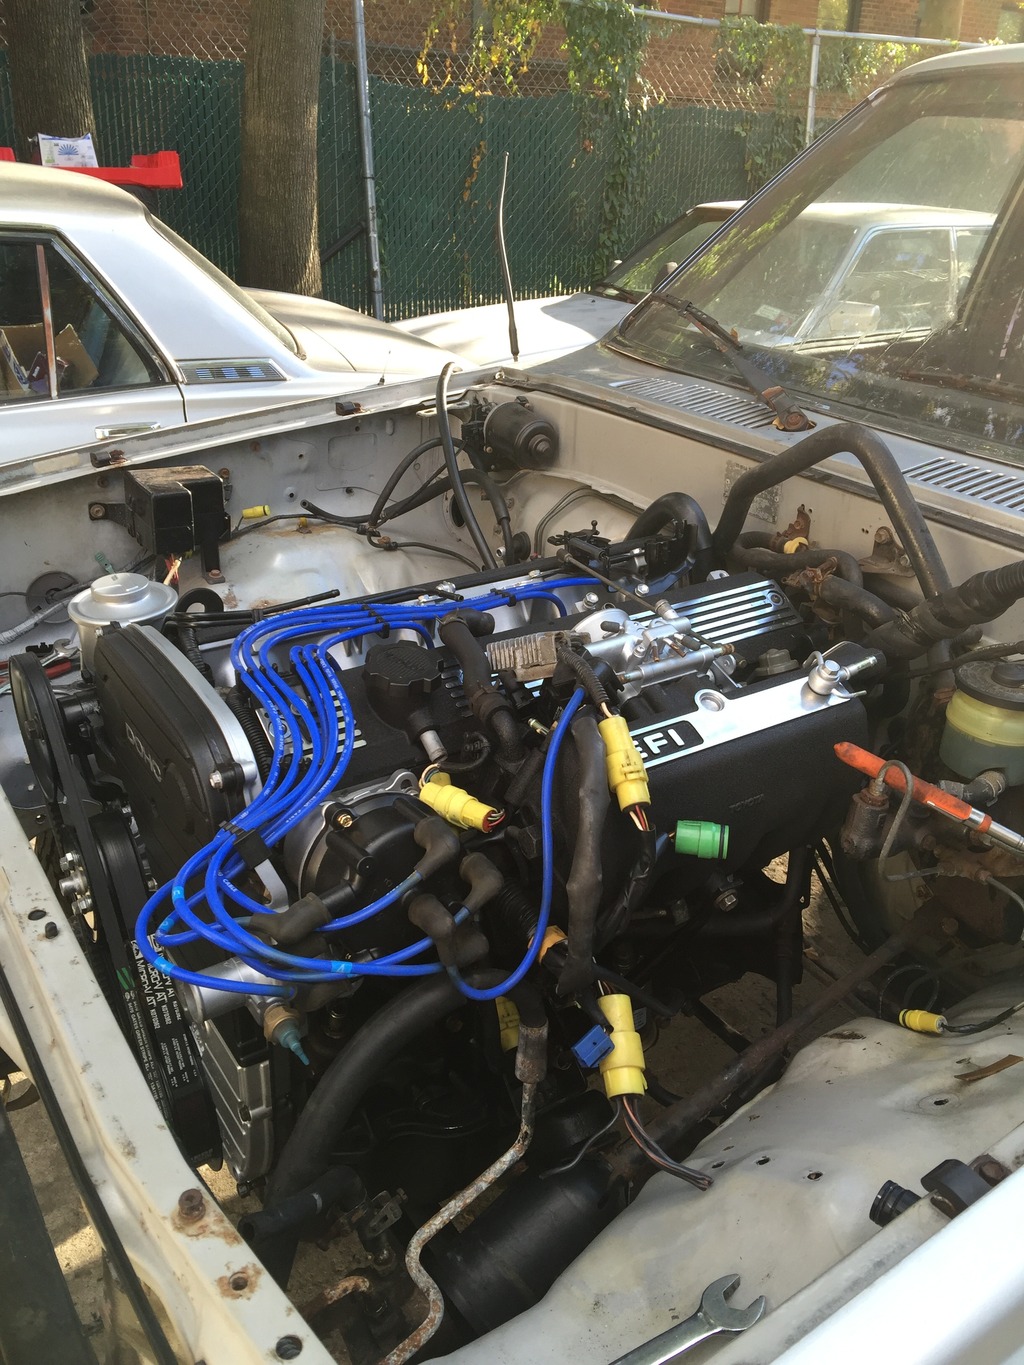
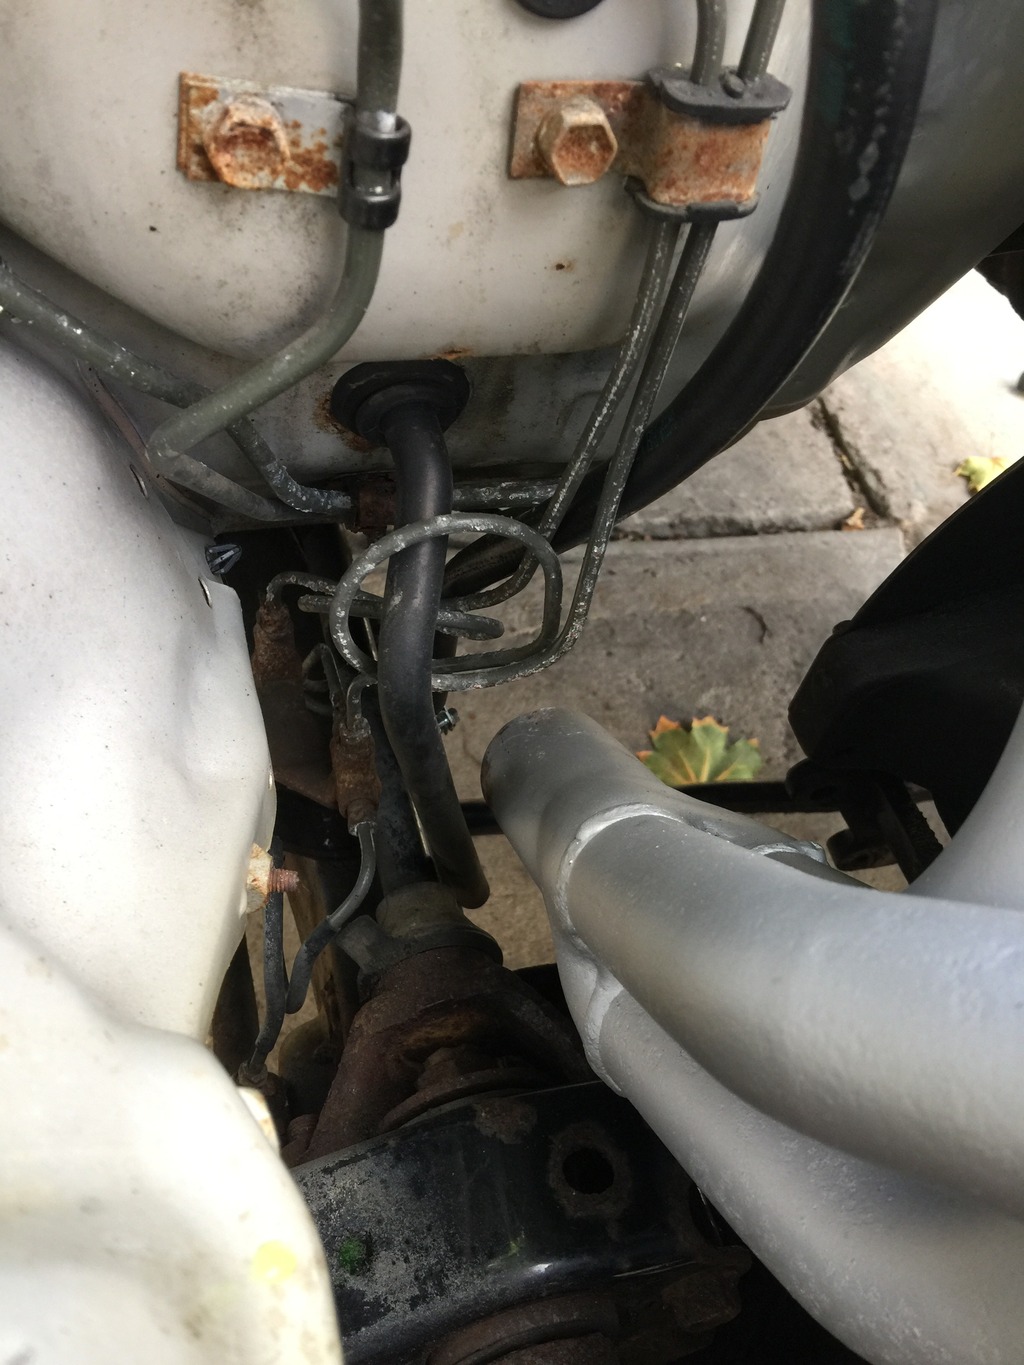
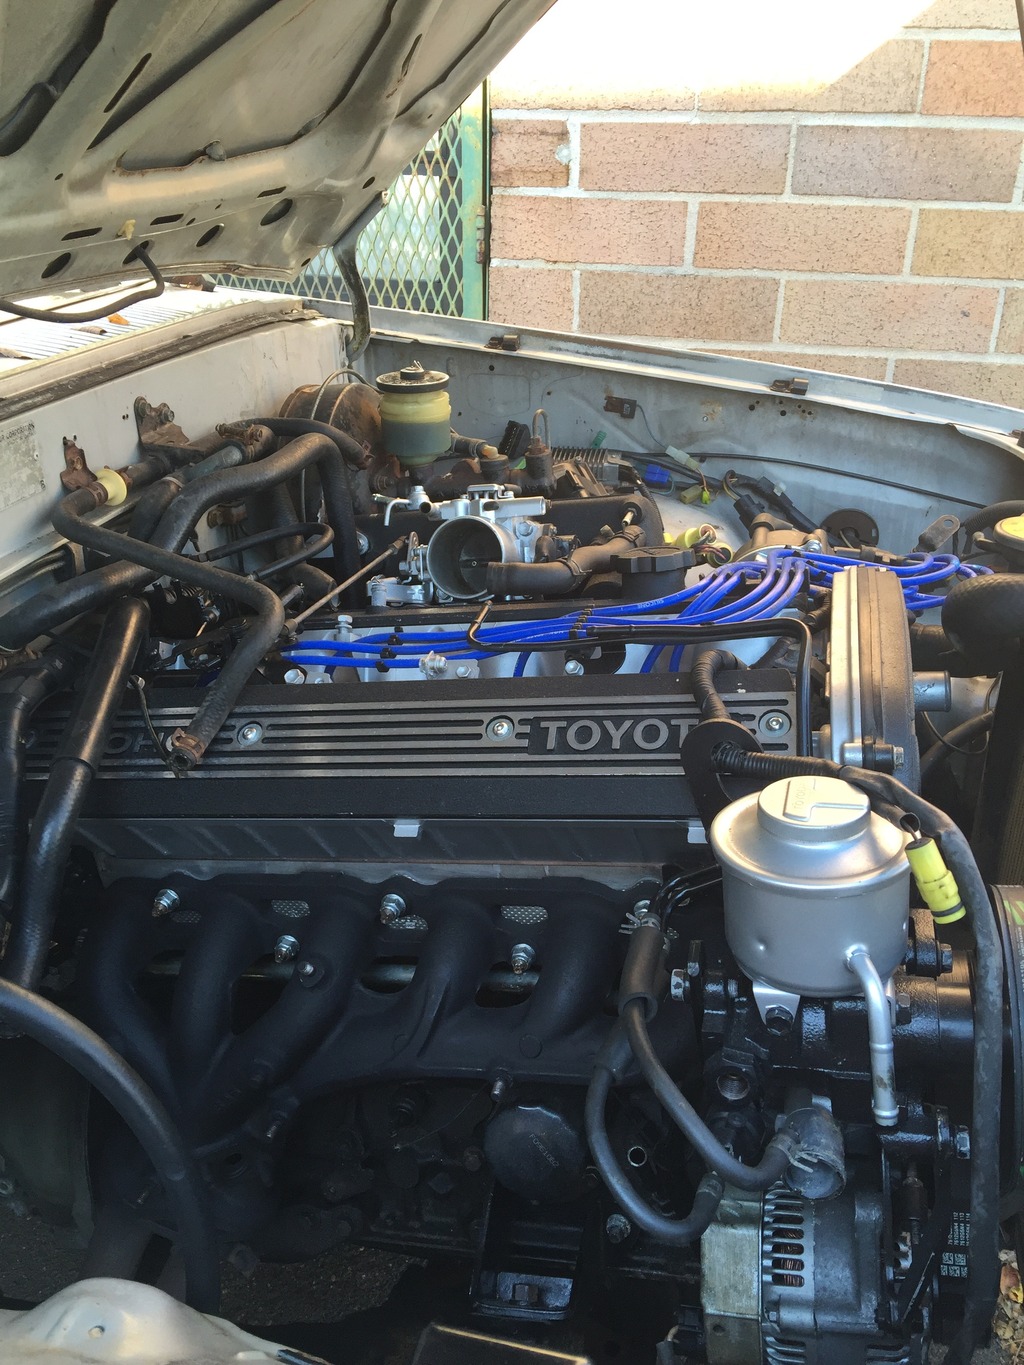
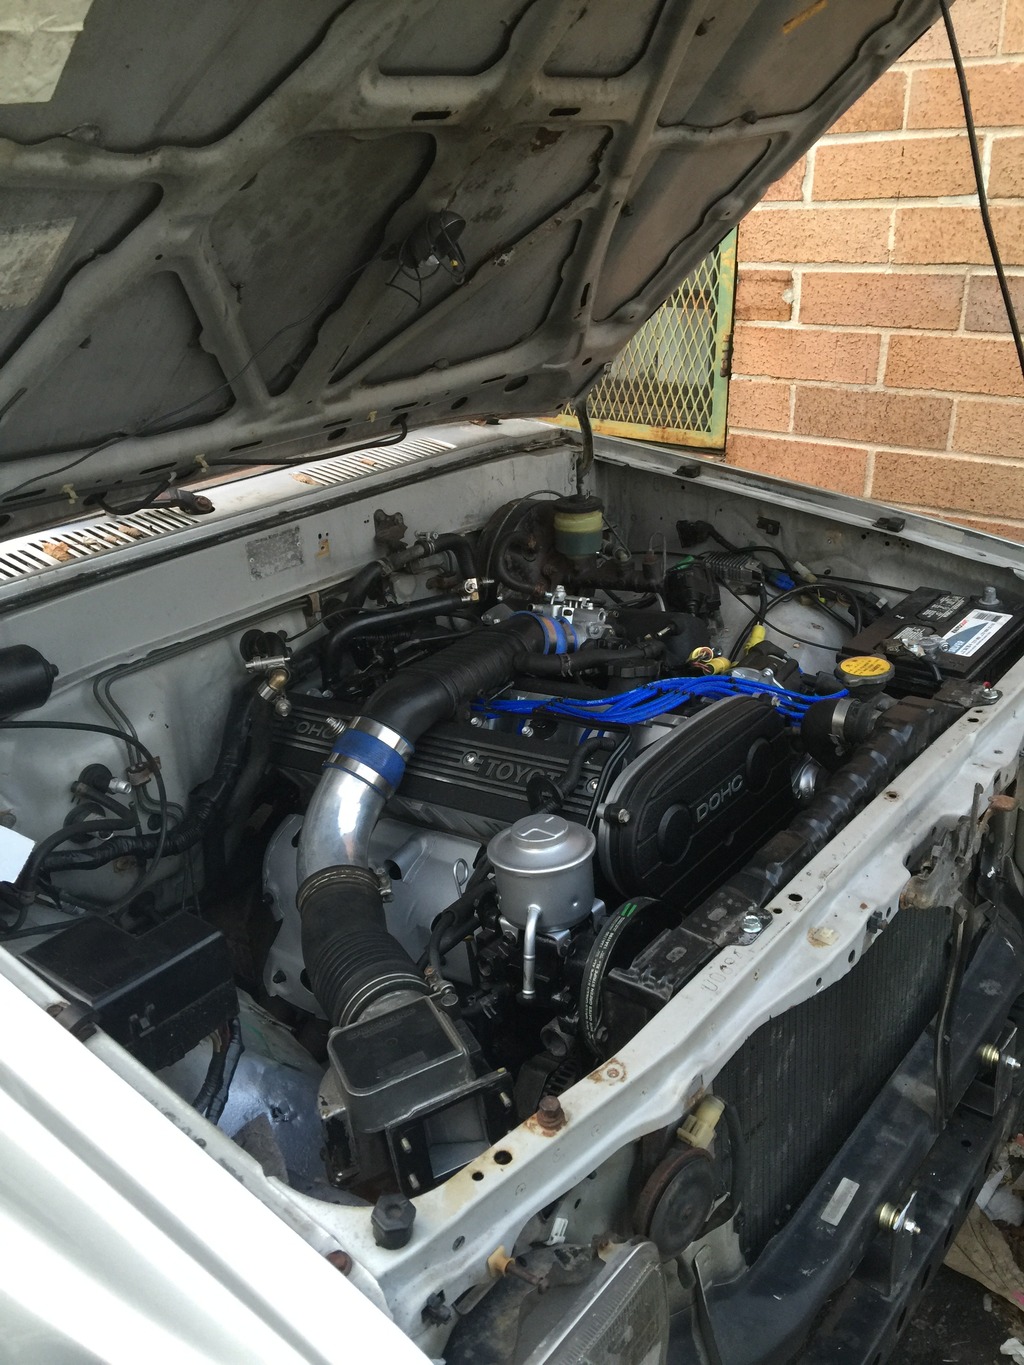
And im going to leave this off at this pic. Things are starting to take shape. The only things really left on the engine part of the project is to wire the cooling fans, wire the engine harness, get a power steering line made, and connect the fuel lines. I ran rubber fuel injection hose from the motor and im going to splice them into the hard lines near to the tank.
But let me catch up from October.
Improved space with the bodylift. Bellhousing bolts are easier to reach. But more importantly the transmission will be easier to attach.

Separating of the steering shaft from my tilt column swap to make longer for body lift. I painted this before installation. No pics of that.

Stock 85 Supra radiator with top brackets beaten flat to the stock core support.

Took this photo a week after the transmission made it into the truck. This was the day I towed it home from my friend's house where his dad was grateful to let me use his yard for two months. Tan Supra is mine.

Unfortunately, after the transmission was installed the engine was now in its actual position. With the trans on the mount, the engine tilted back as I expected it to. The intake plenum came in contact with the booster which I then I had to bash the best I can with the motor in the bay. But the most frustrating was the Supra header collector came in contact with the control arm/frame. If I shorten the runners it should work. But I wasnt looking to add more time to the project. So I went with a stock manifold from a Cressida. Which I painted to make up for the loss of the header. =(


Last week I sold the ugly diamond plate/Chrome bumper to a friend with an 82 4x4. I hope to replace it with a smittybilt if I can find one that isnt rotted.

And for black friday, I took advantage of LCE's sale and ordered a short shifter kit to negate some of the body lift. Also I was missing all of the shifter bushings so everything was sloppier than normal. Everything is nice and tight. I can even use the stock Automatic shifter bezel if I want to. lol

The next thing I needed to sort out was the lower radiator brackets. My original plan was to weld a piece of angle iron to the truck frame and then weld the Supra lower brackets to that. But being where I have the truck now I couldnt use a welder as easily. My neighbor gave me an idea that I should try to use the core support. Which to be honest, my dumbass didnt think of it. So I took a rough guesstimate and took some pieces to work and used a sledge and vise to shape them. Had someone at work weld the brackets to the angle iron. Came home drilled a hole in the core and used a bunch of washers to take the slack and help keep things tight. Im suprised I got it to work honestly. lol


And im going to leave this off at this pic. Things are starting to take shape. The only things really left on the engine part of the project is to wire the cooling fans, wire the engine harness, get a power steering line made, and connect the fuel lines. I ran rubber fuel injection hose from the motor and im going to splice them into the hard lines near to the tank.

Last edited by TransAmBandit; 12-10-2015 at 10:12 PM.
12-11-2015, 06:25 PM
#6

This is a badass build! Nice work man!

Trending Topics
12-13-2015, 10:27 PM
#8
Registered User
Thread Starter
Join Date: Jun 2007
Location: Brooklyn, NYC
Posts: 452
Likes: 0
Received 0 Likes
on
0 Posts
Thank you for the kind words!
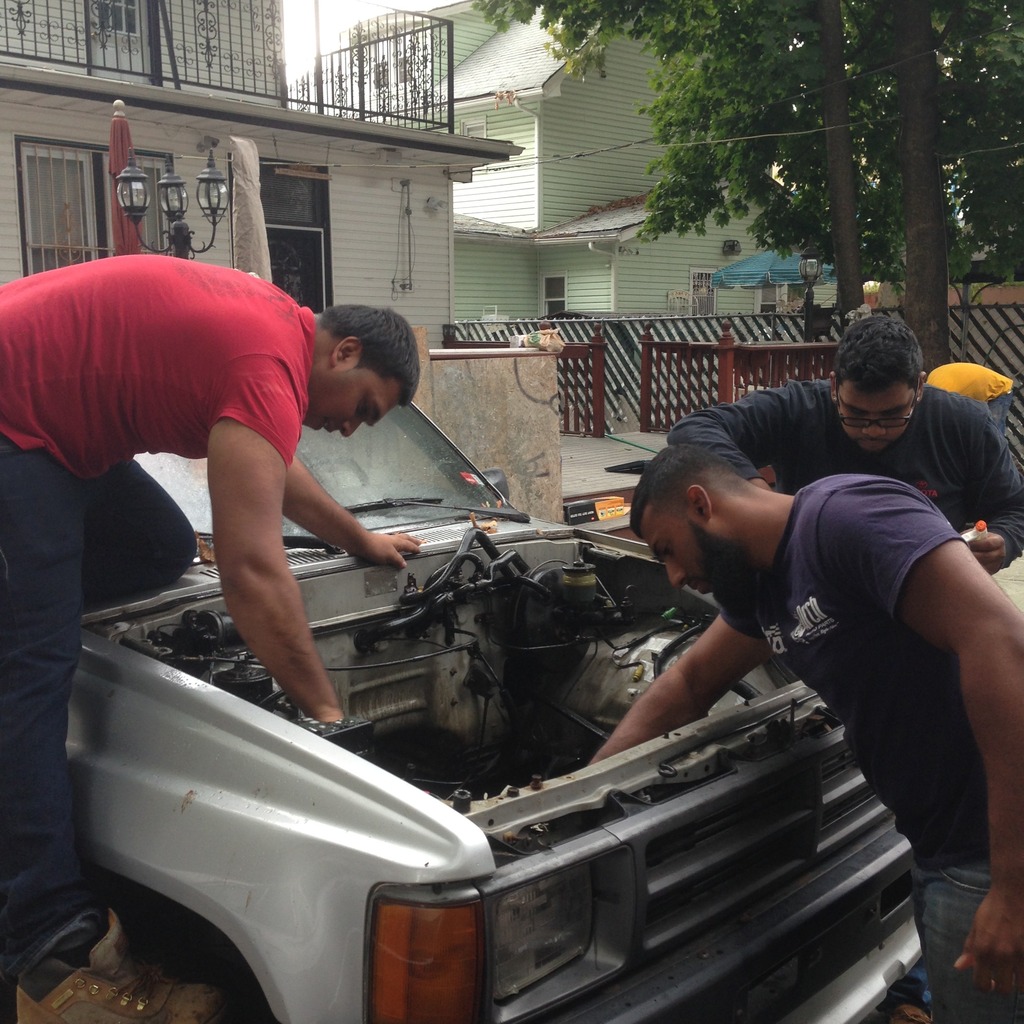
Yesterday, 12/12/15 I tackled the wiring. Started a little later in the day than I wanted to. But I had taken the night off of work so I could work through the night if I wanted to.
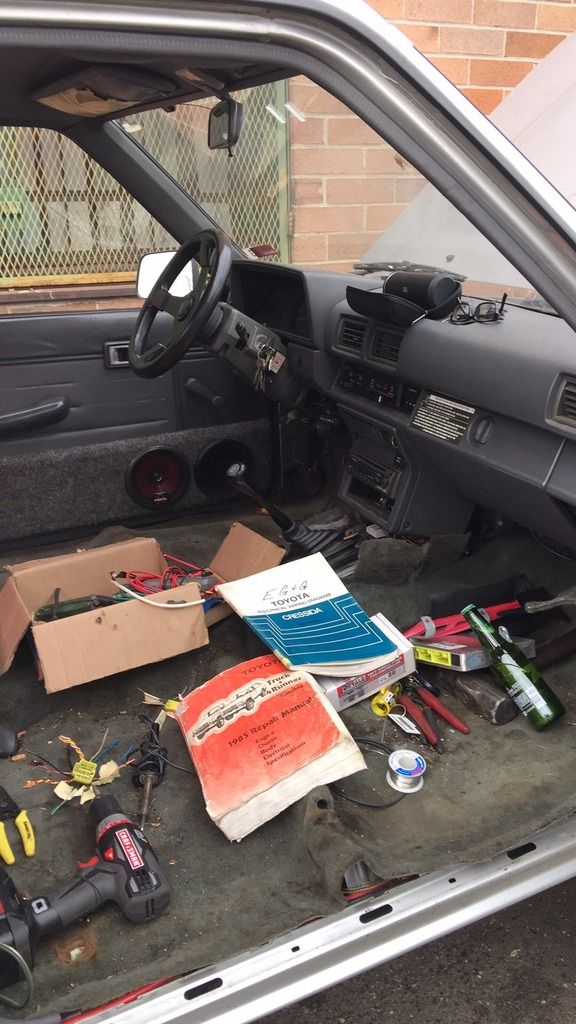
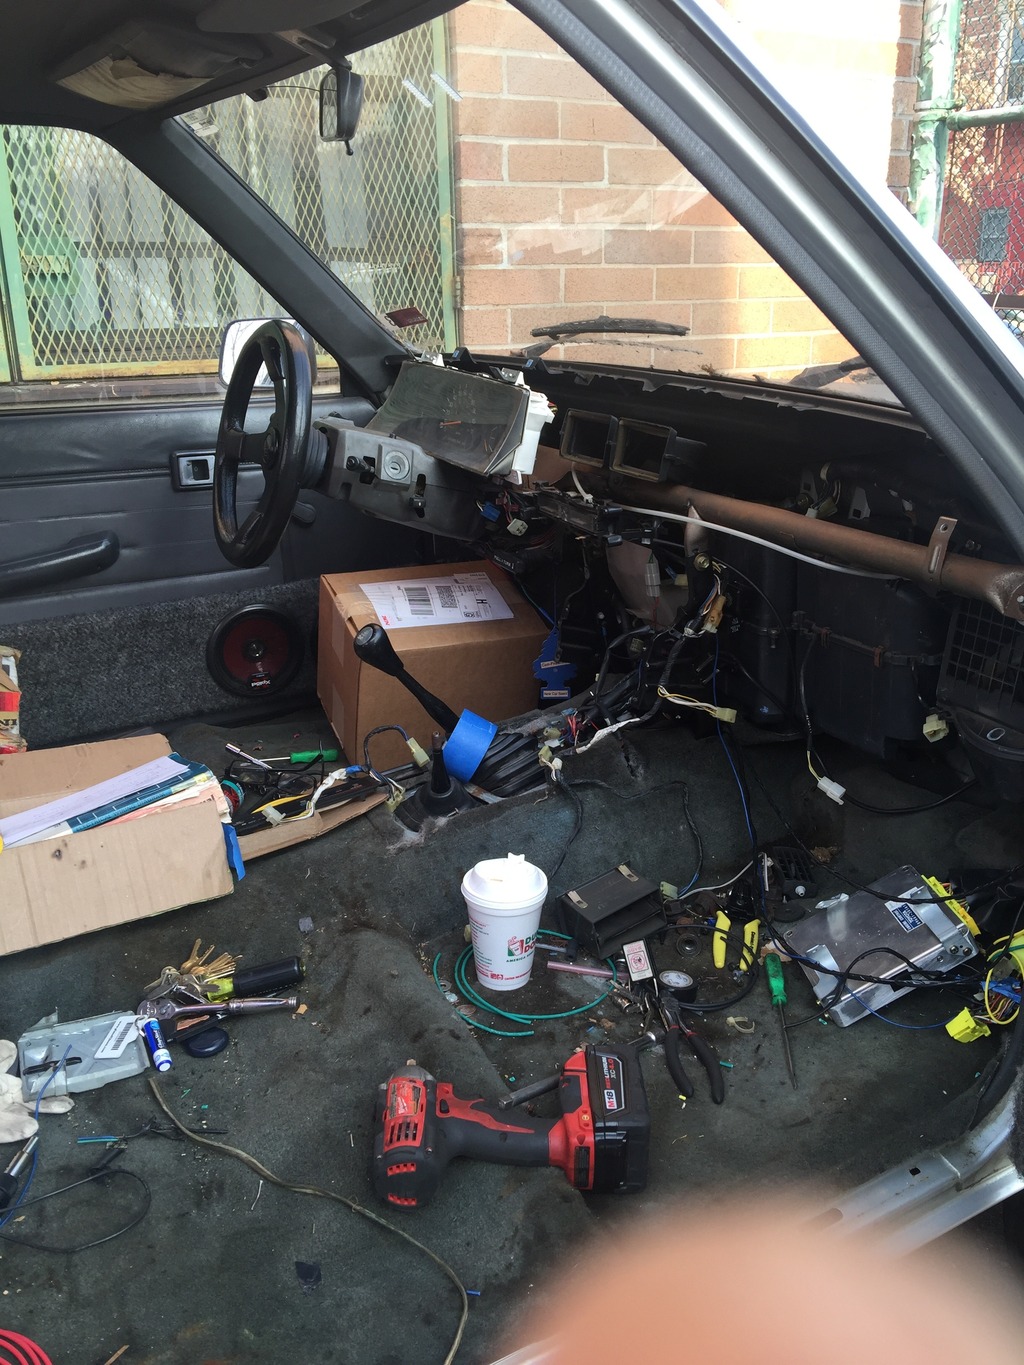
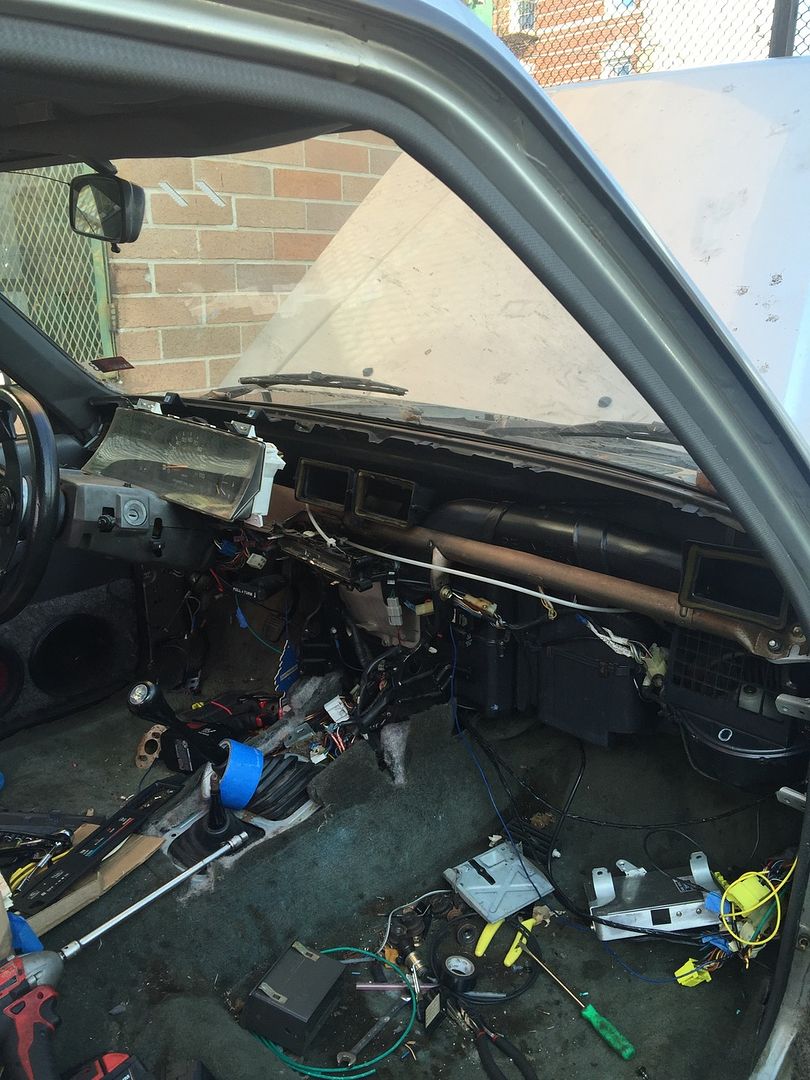
This is where I started off. I thought I was gonna be able to get by with just the lower right side panels out of the way. But then I quickly learned that wasnt gonna happen like that. I also learned that the giant dash is basically one whole piece lol. I first removed the dashpad, then gave in and removed the whole dash.
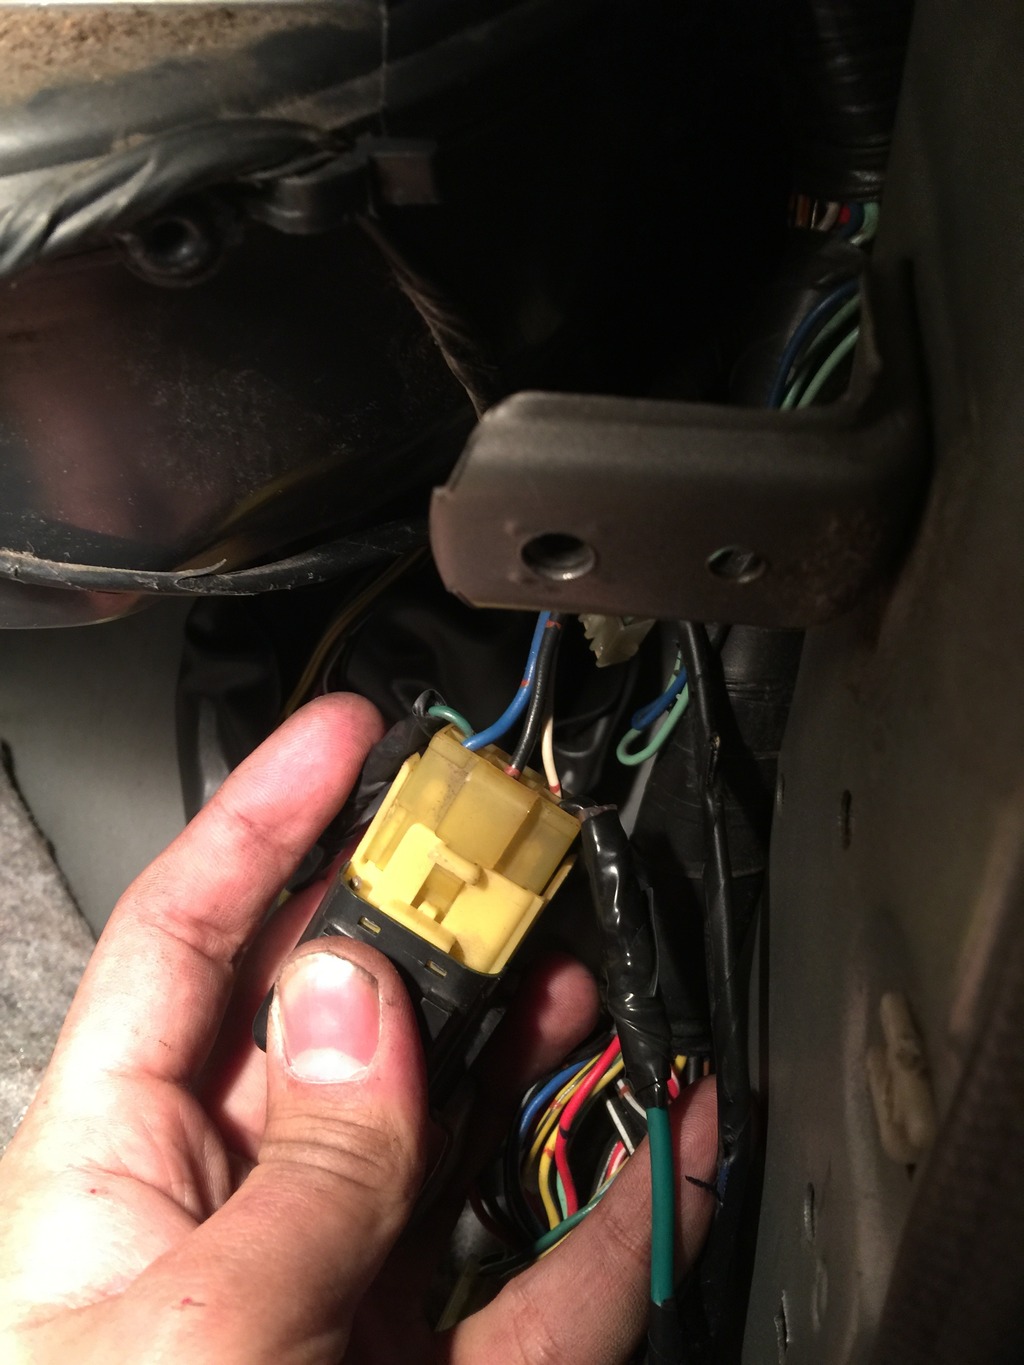
All to get to this one relay since there wasnt much slack to pull it through.

I needed to tap the AFM FC wire from the Cressida C1 connector to the green wire on the COR. And splice a start signal to the black wire to the far right. (the one on my pinky finger) I thought maybe the truck wouldve already been wired like that but I tested i with a test light and that was a negatory. No big deal.
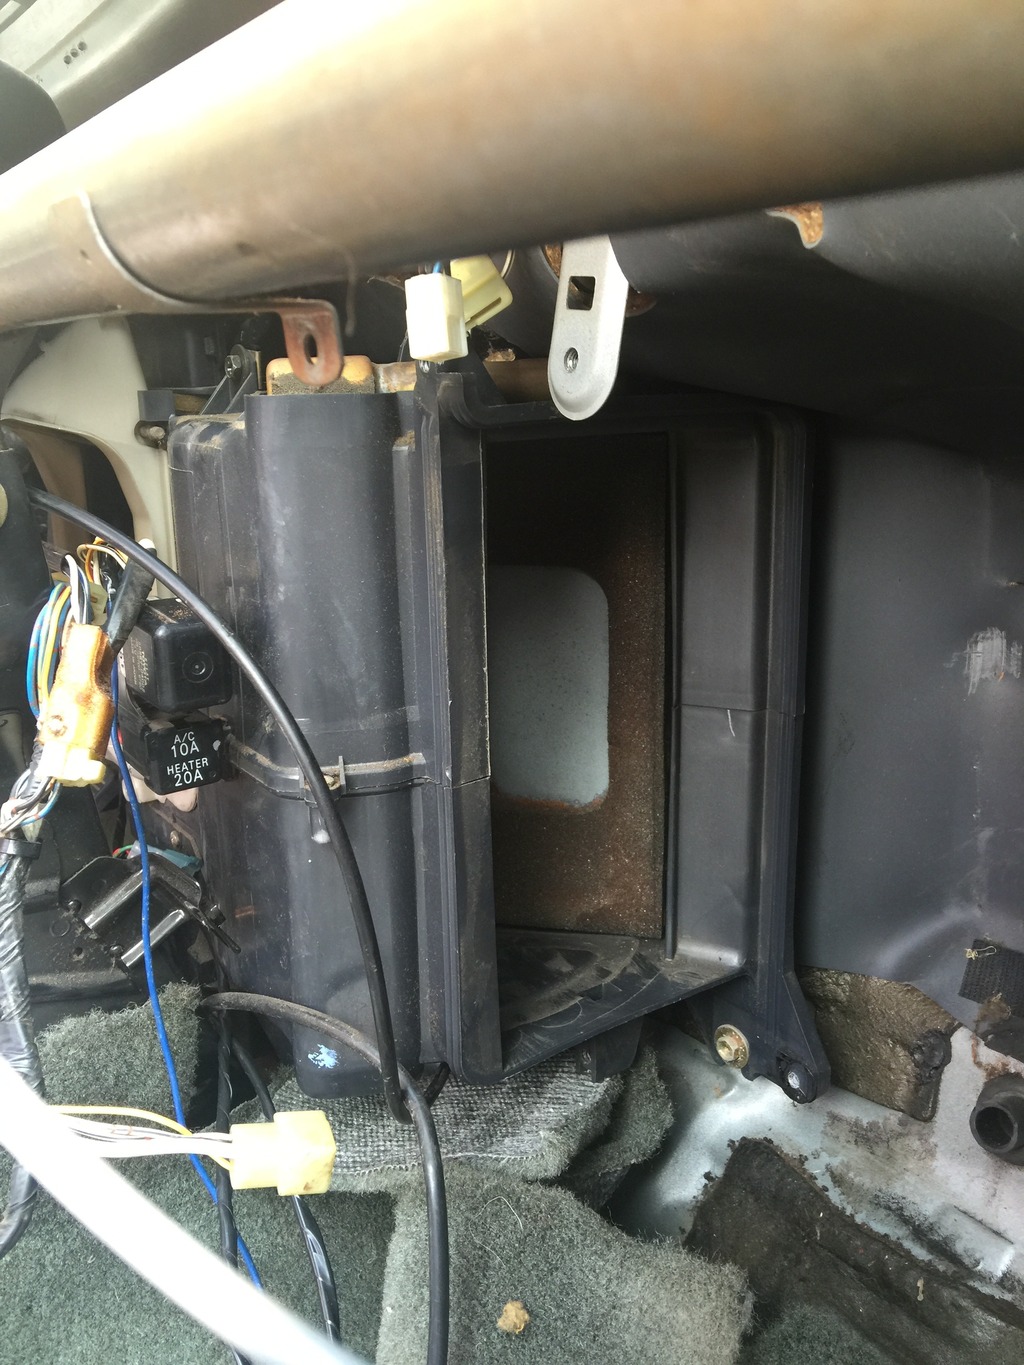
I didnt take much pictures while I was working through the wiring. But I did take a video explaining most of the wiring I did. Which I will be uploading soon. One thing I did notice was an abundance of pieces of insulation on top of the heater core when I removed the PE center vent to access some wires. Which I quickly guessed was a mouse nest. It had three dead mice in it. Ewww. So I was convinced they had to have made a nest in the rest of the heating circuit. Being that I was already balls deep into the dash it was a good time to pull the vents and HVAC units to clean them. I had read a thread by Terry87 a few months back on cleaning a 84-88 HVAC system. Which I read out off curiosity. Read it again last night and tackled the system this morning 12/13/15.
Terry's write up if anyone is interested. Special thanks to Terry for making this write up and all the other ones ive randomly read out of boredom. Ive learned a lot from him and his experiences!
https://www.yotatech.com/forums/f116...trucks-286766/
How I started the morning off.
And some reference photos to remember how things were connected.
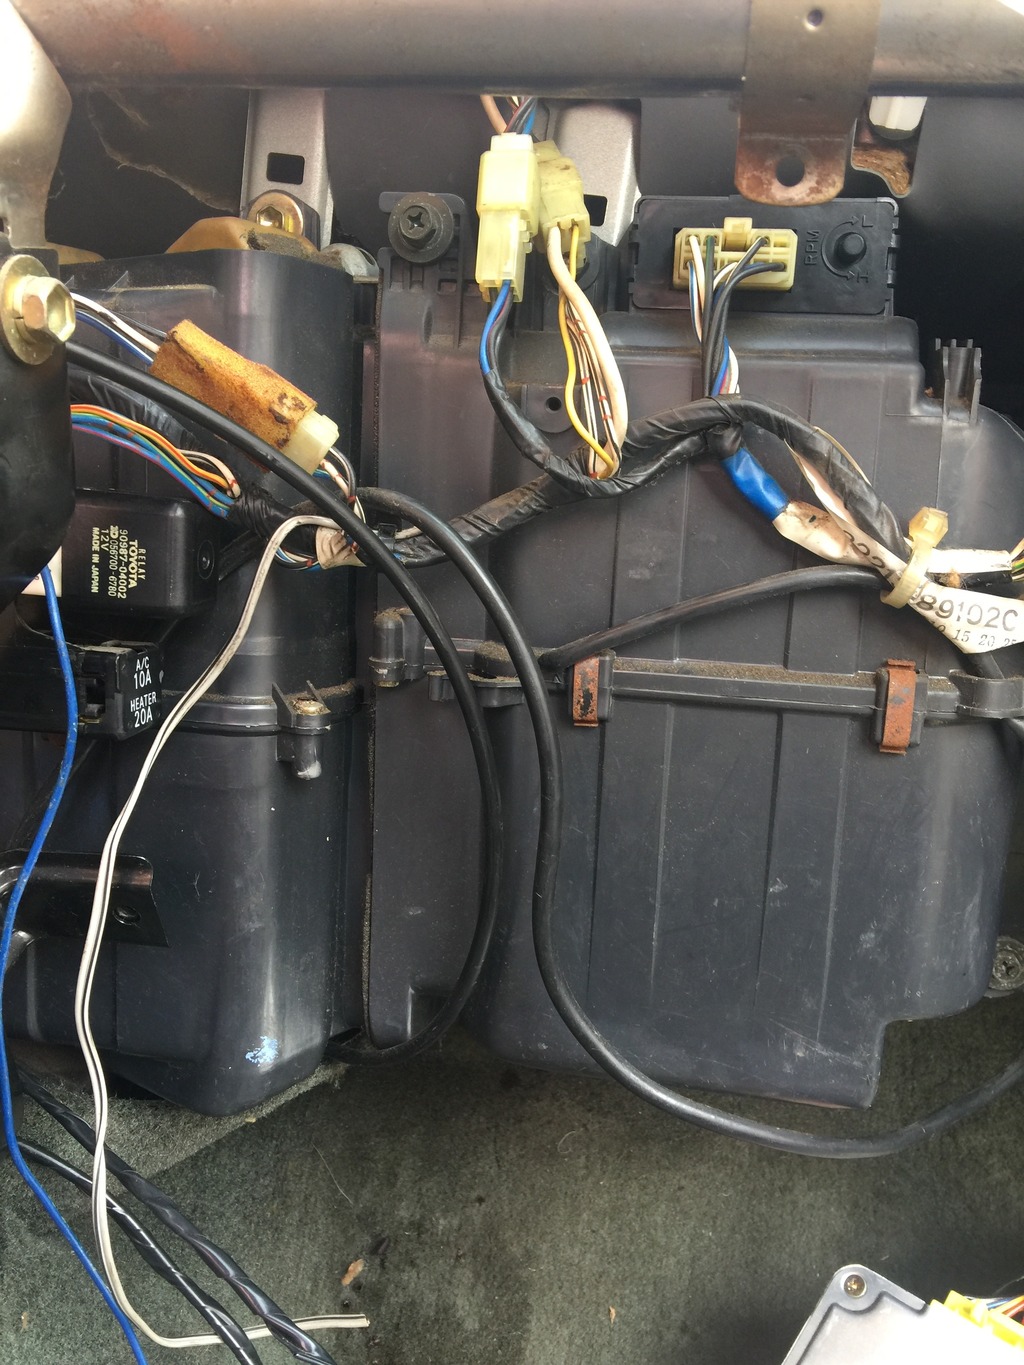
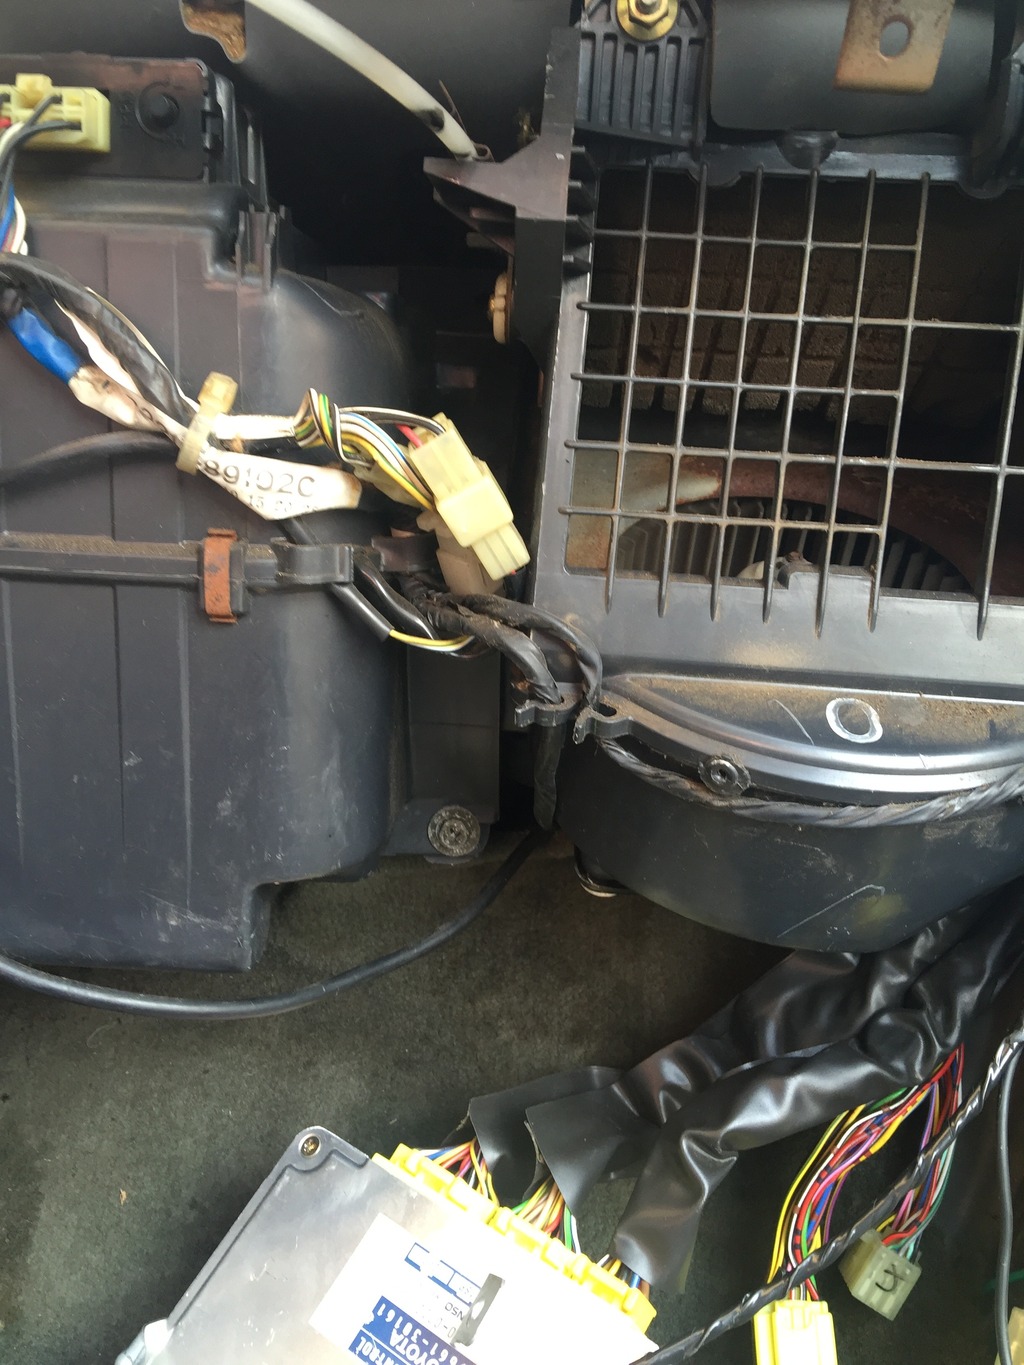
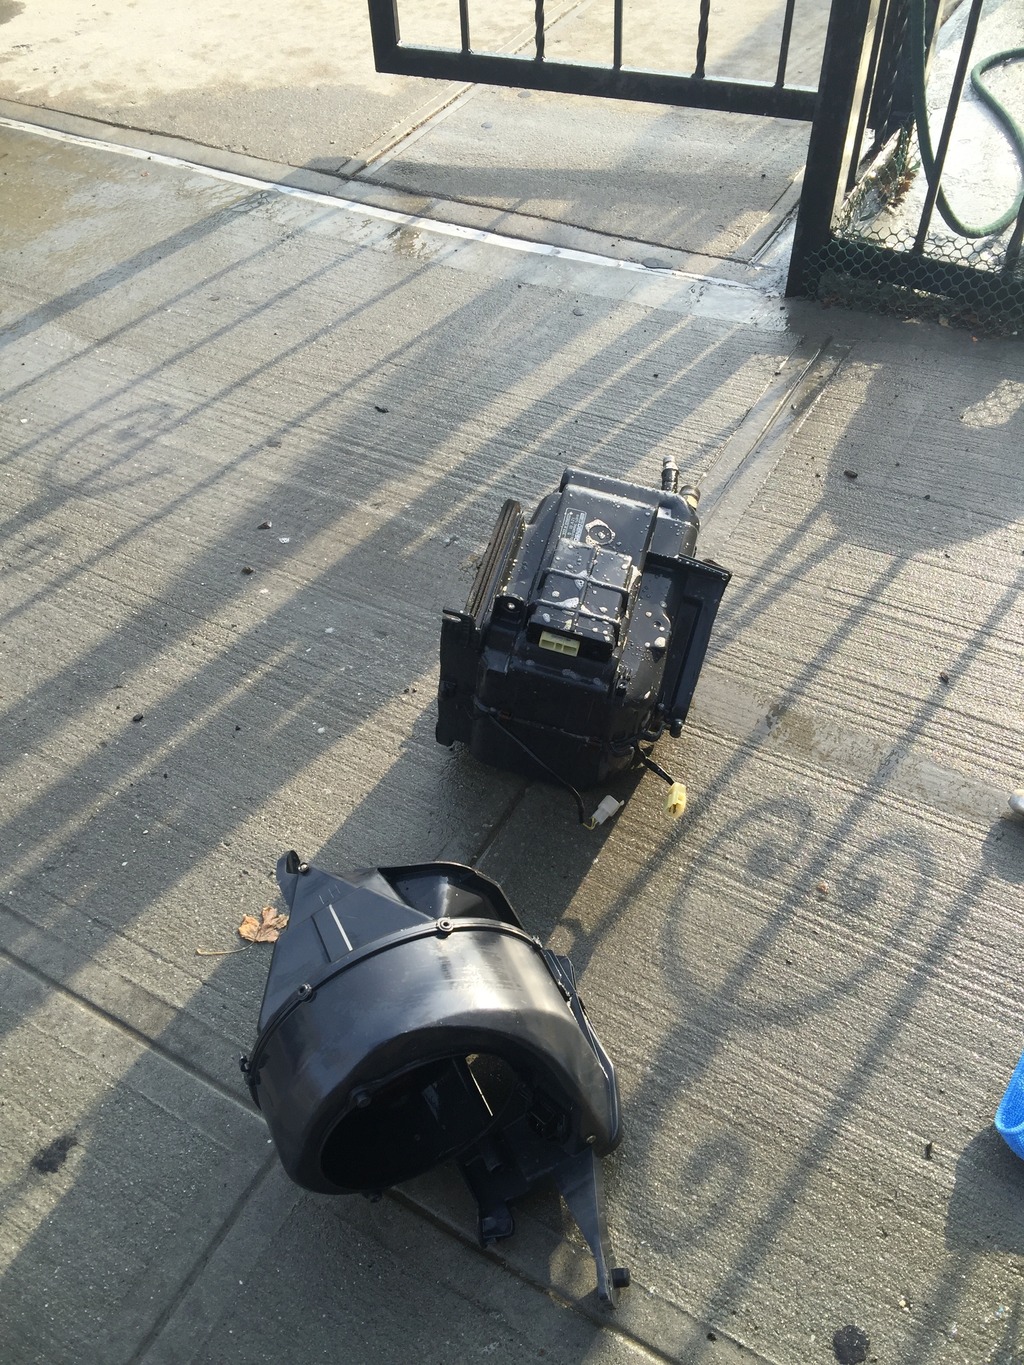
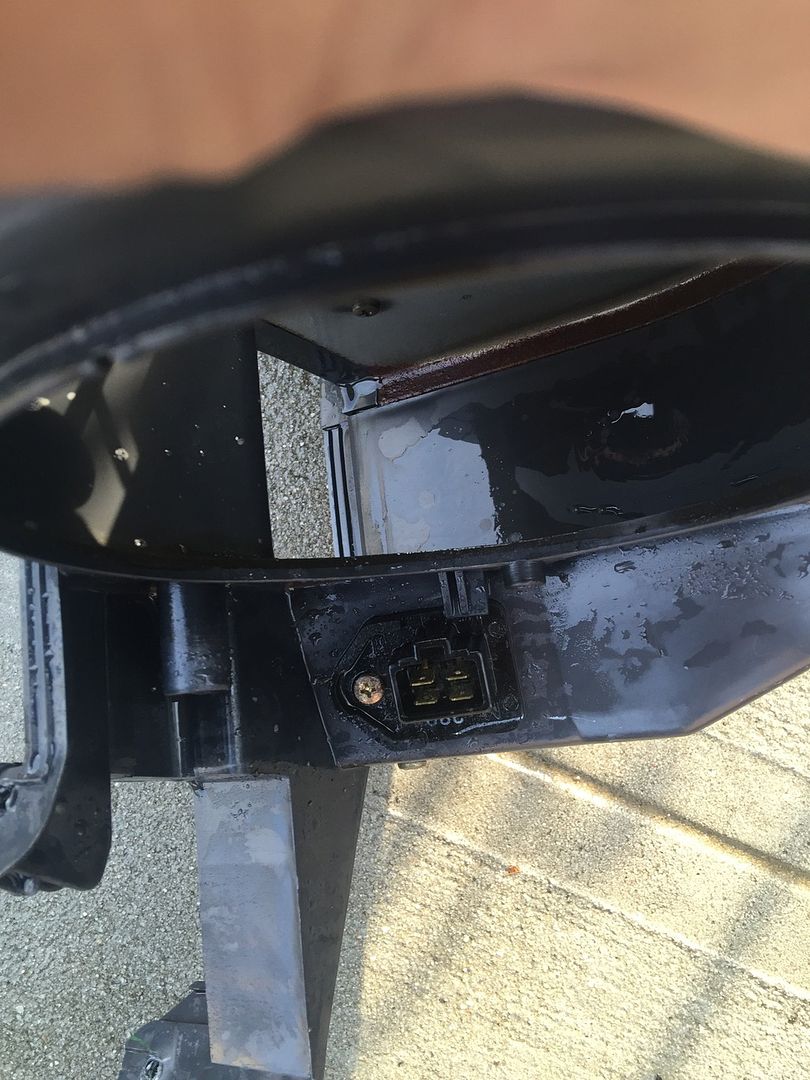
First off I started with the AC unit. I already had all the lines under the hood removed. So it was just the matter of removing the bolts and sliding it out. Followed by the blower unit. After verifying which blower resistor I have. (4 Pin) I looked into the heater core housing and there was nothing in there so that was a good thing. A/C unit was also clean as was the blower housing. I took the blower motor out and washed the whole housing as well as the AC unit. I also used this opportunity to take all the vent shrouds, dash, and all paneling and wash all the dust and dirt out on them and in them.

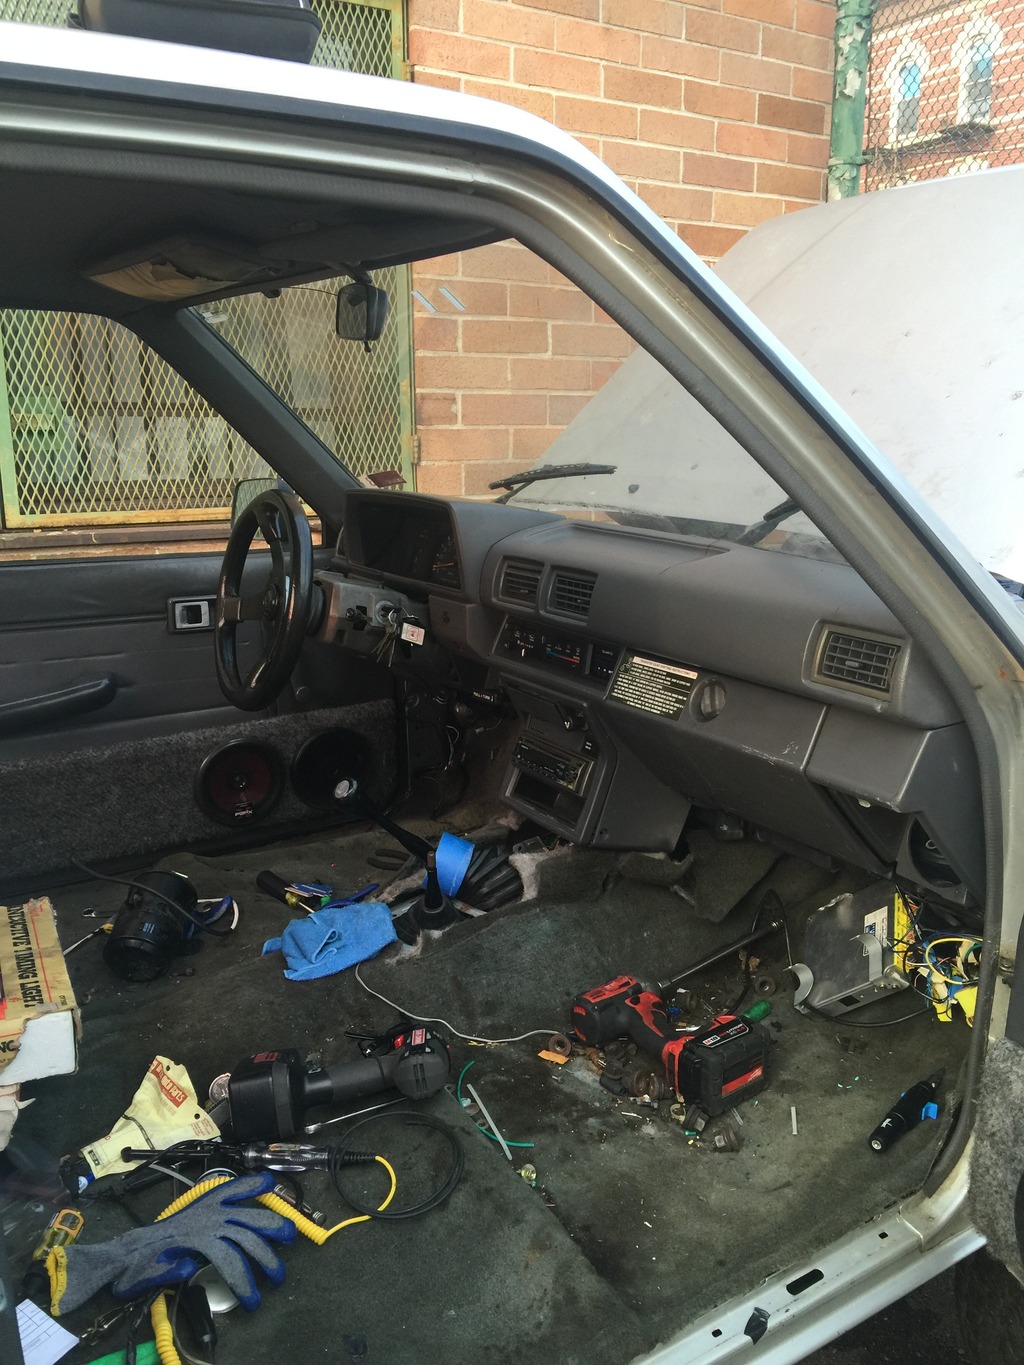
At this point a few of my friends came by and I wanted to try to start it when they came by. It fired on the first crank and quickly shut off. I tried it again and it ran steady. I didnt run it for too long as I didnt wire the fans or put coolant in. Nor was the coolant gauge wired. So I started to assemble the dash.
And ending with this for the day. My friend wired the fan relay for me and the fan while I was assembling the main interior bits. Tomorrow if I can get up early enough I will be taking a look at a small fuel leak I have at the pressure line where I spliced the rubber hose. Adding coolant, maybe wire the temp gauge if I wanna take a guess. I have a EWD manual coming later in the week. I just wish I found it on ebay a few weeks ago.
Yesterday, 12/12/15 I tackled the wiring. Started a little later in the day than I wanted to. But I had taken the night off of work so I could work through the night if I wanted to.
This is where I started off. I thought I was gonna be able to get by with just the lower right side panels out of the way. But then I quickly learned that wasnt gonna happen like that. I also learned that the giant dash is basically one whole piece lol. I first removed the dashpad, then gave in and removed the whole dash.

All to get to this one relay since there wasnt much slack to pull it through.

I needed to tap the AFM FC wire from the Cressida C1 connector to the green wire on the COR. And splice a start signal to the black wire to the far right. (the one on my pinky finger) I thought maybe the truck wouldve already been wired like that but I tested i with a test light and that was a negatory. No big deal.

I didnt take much pictures while I was working through the wiring. But I did take a video explaining most of the wiring I did. Which I will be uploading soon. One thing I did notice was an abundance of pieces of insulation on top of the heater core when I removed the PE center vent to access some wires. Which I quickly guessed was a mouse nest. It had three dead mice in it. Ewww. So I was convinced they had to have made a nest in the rest of the heating circuit. Being that I was already balls deep into the dash it was a good time to pull the vents and HVAC units to clean them. I had read a thread by Terry87 a few months back on cleaning a 84-88 HVAC system. Which I read out off curiosity. Read it again last night and tackled the system this morning 12/13/15.
Terry's write up if anyone is interested. Special thanks to Terry for making this write up and all the other ones ive randomly read out of boredom. Ive learned a lot from him and his experiences!
https://www.yotatech.com/forums/f116...trucks-286766/
How I started the morning off.

And some reference photos to remember how things were connected.


First off I started with the AC unit. I already had all the lines under the hood removed. So it was just the matter of removing the bolts and sliding it out. Followed by the blower unit. After verifying which blower resistor I have. (4 Pin) I looked into the heater core housing and there was nothing in there so that was a good thing. A/C unit was also clean as was the blower housing. I took the blower motor out and washed the whole housing as well as the AC unit. I also used this opportunity to take all the vent shrouds, dash, and all paneling and wash all the dust and dirt out on them and in them.


At this point a few of my friends came by and I wanted to try to start it when they came by. It fired on the first crank and quickly shut off. I tried it again and it ran steady. I didnt run it for too long as I didnt wire the fans or put coolant in. Nor was the coolant gauge wired. So I started to assemble the dash.

And ending with this for the day. My friend wired the fan relay for me and the fan while I was assembling the main interior bits. Tomorrow if I can get up early enough I will be taking a look at a small fuel leak I have at the pressure line where I spliced the rubber hose. Adding coolant, maybe wire the temp gauge if I wanna take a guess. I have a EWD manual coming later in the week. I just wish I found it on ebay a few weeks ago.

Last edited by TransAmBandit; 12-13-2015 at 10:49 PM.
02-02-2016, 03:23 PM
#9
Registered User

Join Date: Sep 2009
Posts: 79
Likes: 0
Received 0 Likes
on
0 Posts
Hey man I could really use your help to insure Im gathering correct parts to do this swap in my 87 runner biggest thing that has me worried is wiring. First the engine is being pulled from a 1985 supra I have a complete uncut harness from the car and ecu. Body lift how low can I go with the body lift to clear the trans. and you used a stock supra radiator with just the custom lower brackets correct. Sorry for all the questions but supra excited to do this swap since my truck sucks in the dunes. If you can give me any info it would be so appreciated!!
02-02-2016, 05:43 PM
#11
Registered User
Thread Starter
Join Date: Jun 2007
Location: Brooklyn, NYC
Posts: 452
Likes: 0
Received 0 Likes
on
0 Posts
Hey man I could really use your help to insure Im gathering correct parts to do this swap in my 87 runner biggest thing that has me worried is wiring. First the engine is being pulled from a 1985 supra I have a complete uncut harness from the car and ecu. Body lift how low can I go with the body lift to clear the trans. and you used a stock supra radiator with just the custom lower brackets correct. Sorry for all the questions but supra excited to do this swap since my truck sucks in the dunes. If you can give me any info it would be so appreciated!!
Some people say you can get by with a inch body lift. Corax did his to make his radiator clearance better. Since I mated the Trans to the engine with the engine already in I needed a bit more clearance. I could've prob did a 2 inch body lift but I went three inch since I had mostly everything disconnected anyway and was already doing a tilt column swap.
The top mounts of the supra rad were beat flat and screwed into the top support and the bottom was the supra mounts with flat stock bent and welded then bolted to the lower core support of the body. I could've did tabs from the frame. But with the body lift I didn't like how long I would've had to make them to work.
02-05-2016, 10:39 PM
#12
Registered User
Thread Starter
Join Date: Jun 2007
Location: Brooklyn, NYC
Posts: 452
Likes: 0
Received 0 Likes
on
0 Posts
Time to catch up on updates from the last few months.
As for the wiring. I didnt take any pics of the diagrams pinouts I made since they were crudely drawn. Some of the plugs on the truck side will slightly differ as my truck was originally an automatic 22re. Also the engine harness for the 5M will differ depending on the car it came out of. 83-84 Cressidas would have different plugs. And somewhere between 85-86 some plugs were slightly different on the Cressidas. So far ive seen the 87-88 Cressida engine harnesses are wired the same. 82-86.5 Celica Supras will have a different harness. The 82 being the most different one. But once you find the functions you'll be fine. All I did basically was match the Engine harness wire functions from the 22RE to the ones on the 5MGE utilizing all the trucks original fuses. I didnt want to do any additions. I took a video originally for my own documentation but I decided to upload it if theres anyone that could find use for it. A lot of the older writeups on these swaps say its the same as the 7MGE. It is to an extent. Basically the SupraCharged 7MGE/GTE diagrams are correct for the 5MGE. The functions are the same, But the wire colors are different. Once you connect those basic functions the engine will start minus the gauges. My video will give you a good idea on what to do. The only thing I wired after the video was the speed sensor wire from the truck's chassis harness to the engine computer.
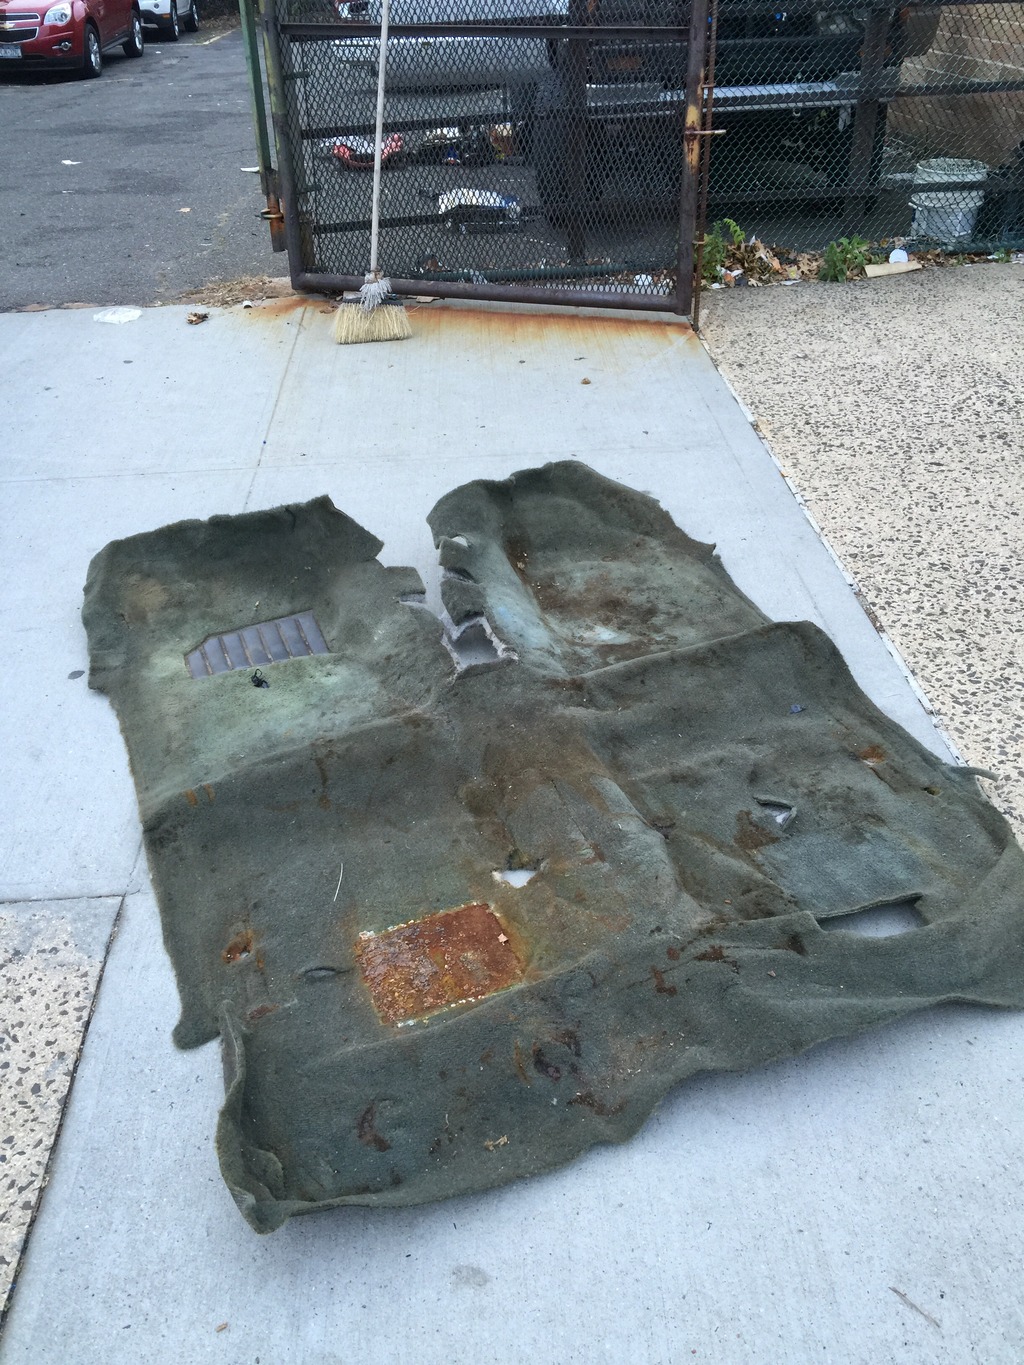
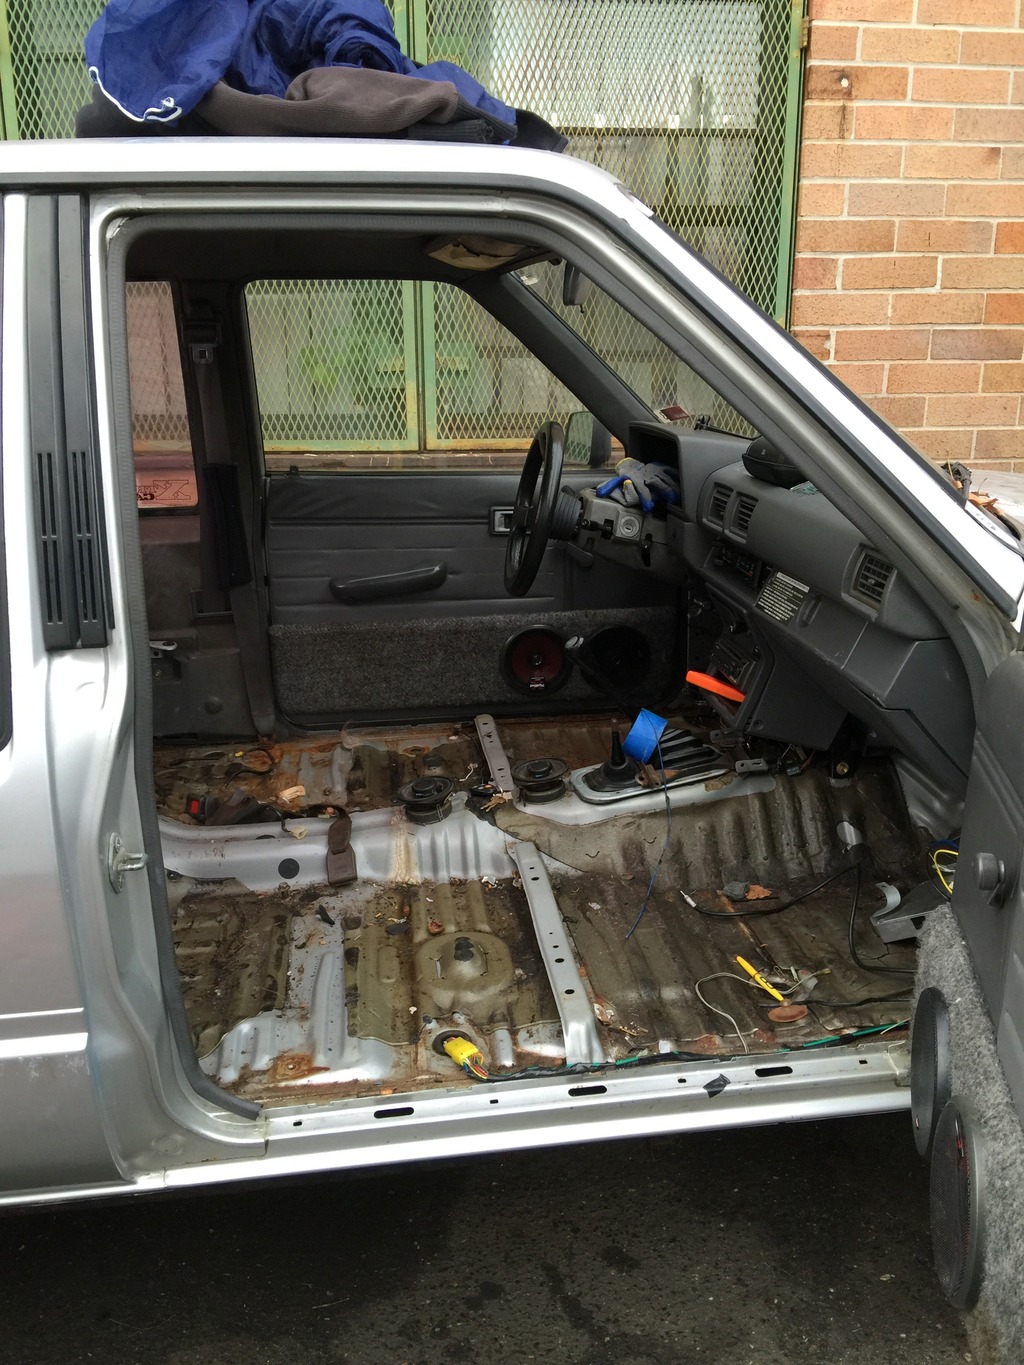
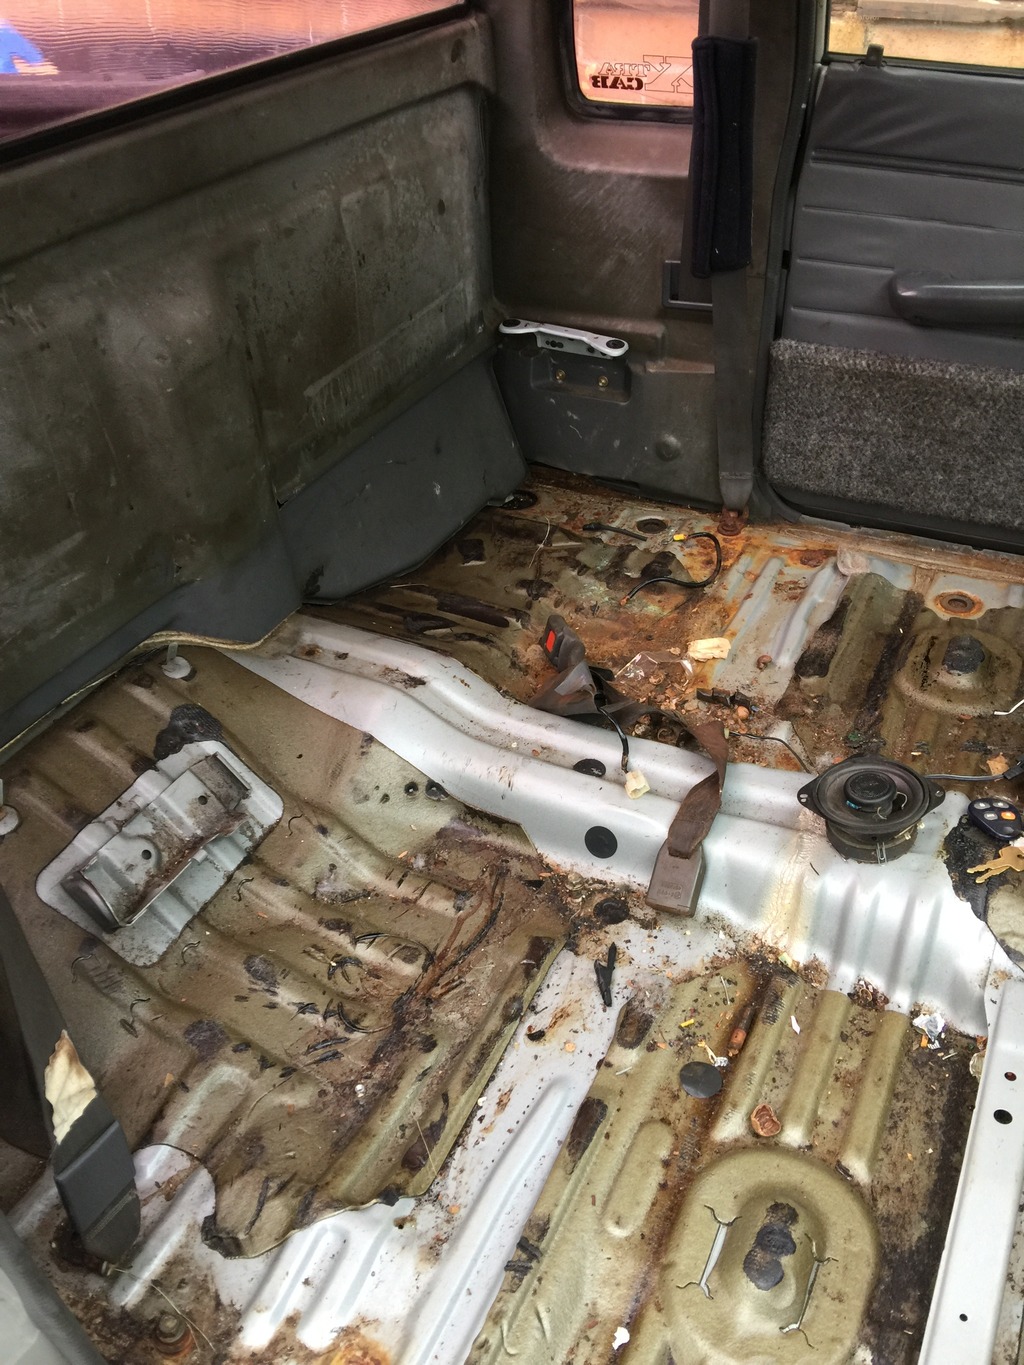
After I got the truck running, I tackled the carpet. Being that I found a mouse nest in the truck that meant the carpet and floor had to be cleaned. I removed the carpet and took it to work and powerwashed the life out of it. When it warms up in the spring, I will be removing the carpet to be redyed and the interior plastics repainted.
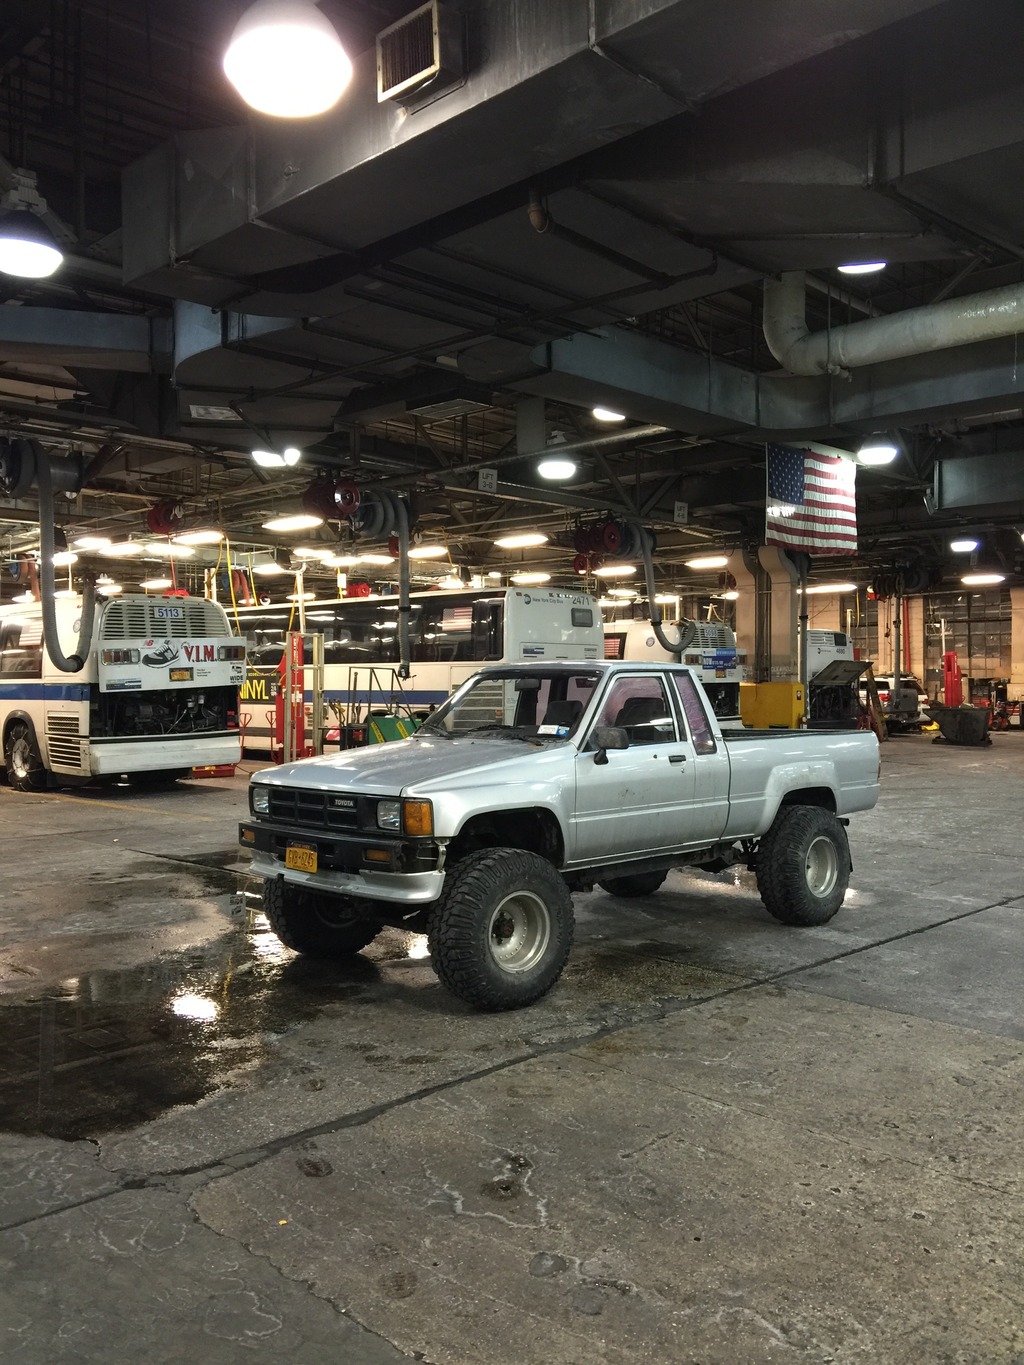
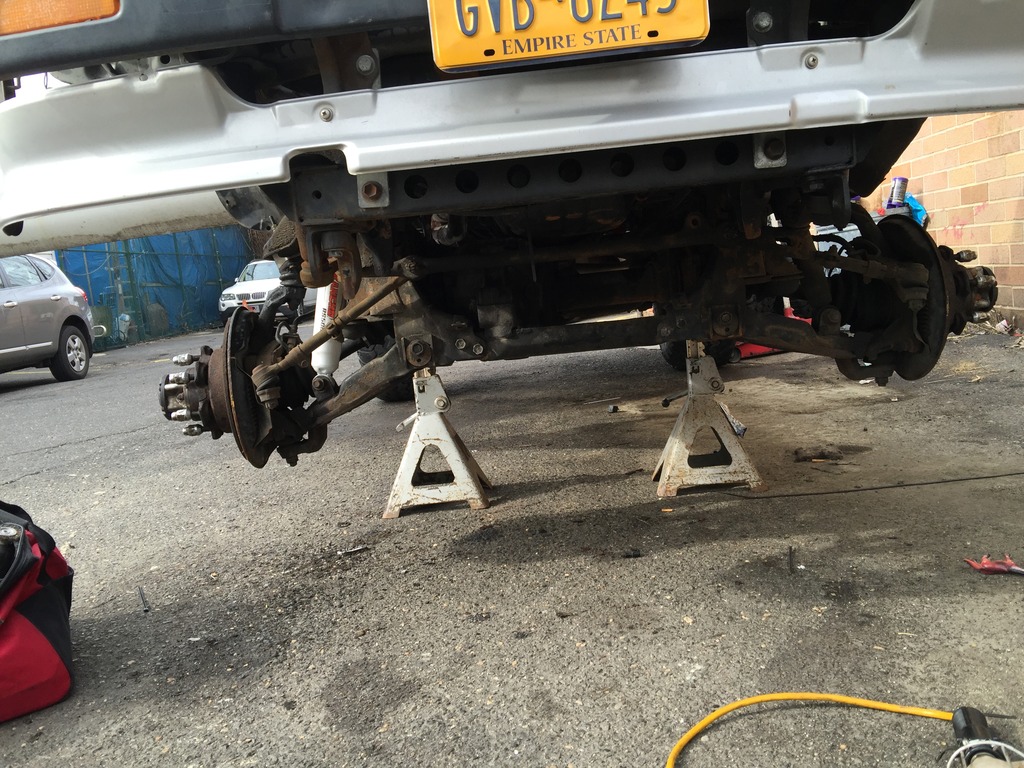
After that was taken care of, I found out that the W56-C I had put into the truck turned out to be bad. It popped out of first gear, and third gear would engage at all. So I ended up finding a tranny on craigslist a few days later. The guy said it came out of a early 90's truck 13 years ago with about 100k on it. I assumed it was another W56-C which was what I wanted so I can use my LCE short shifter. Turns out the tranny came out of a mid 80's 22R truck so it was a G54. No biggy, went from $450 to $60 and I took it home. Since the guy was gonna toss it if I didnt buy it and he just wanted it out of his way. I then brought it around the block and borrowed a friends lift and did the tranny swap with a buddy. Took about two hours with us taking our time. I didnt take a pic during the install since I was busy. But I did take the time to install the 15x10s on 33x12.5 I bought last year for $100. That I did take a picture of.
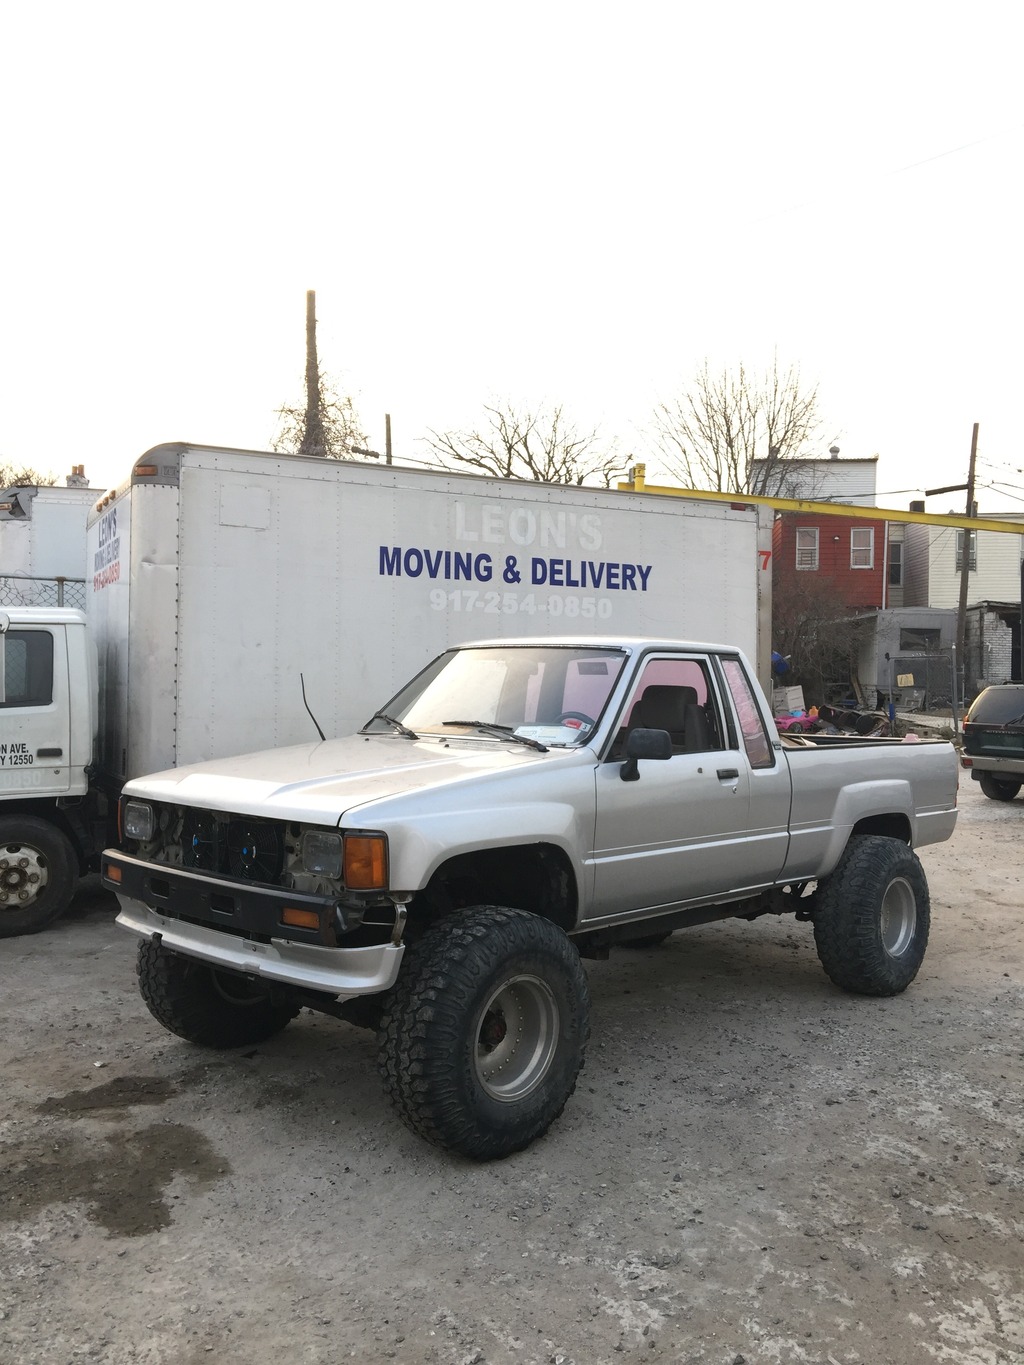
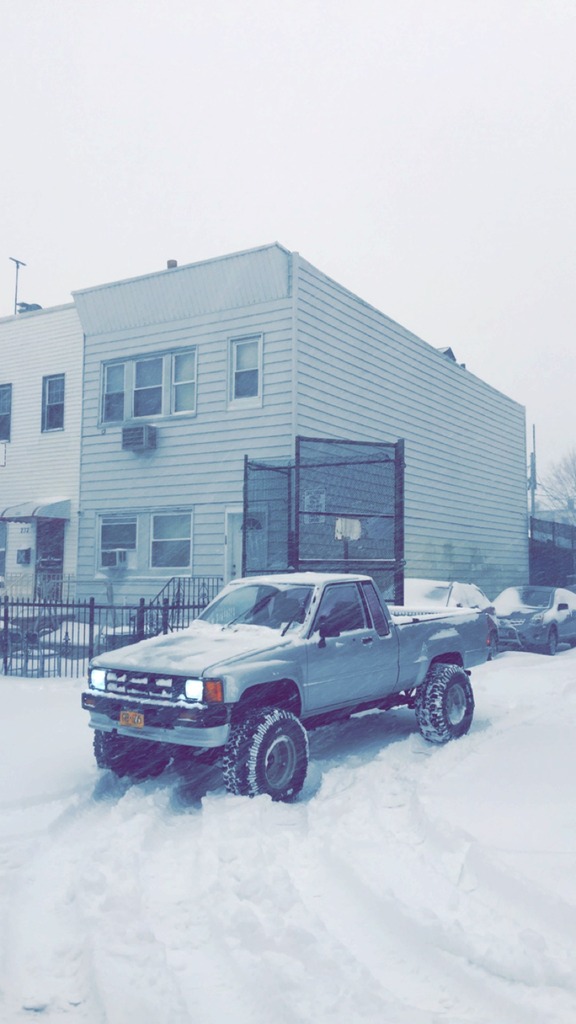
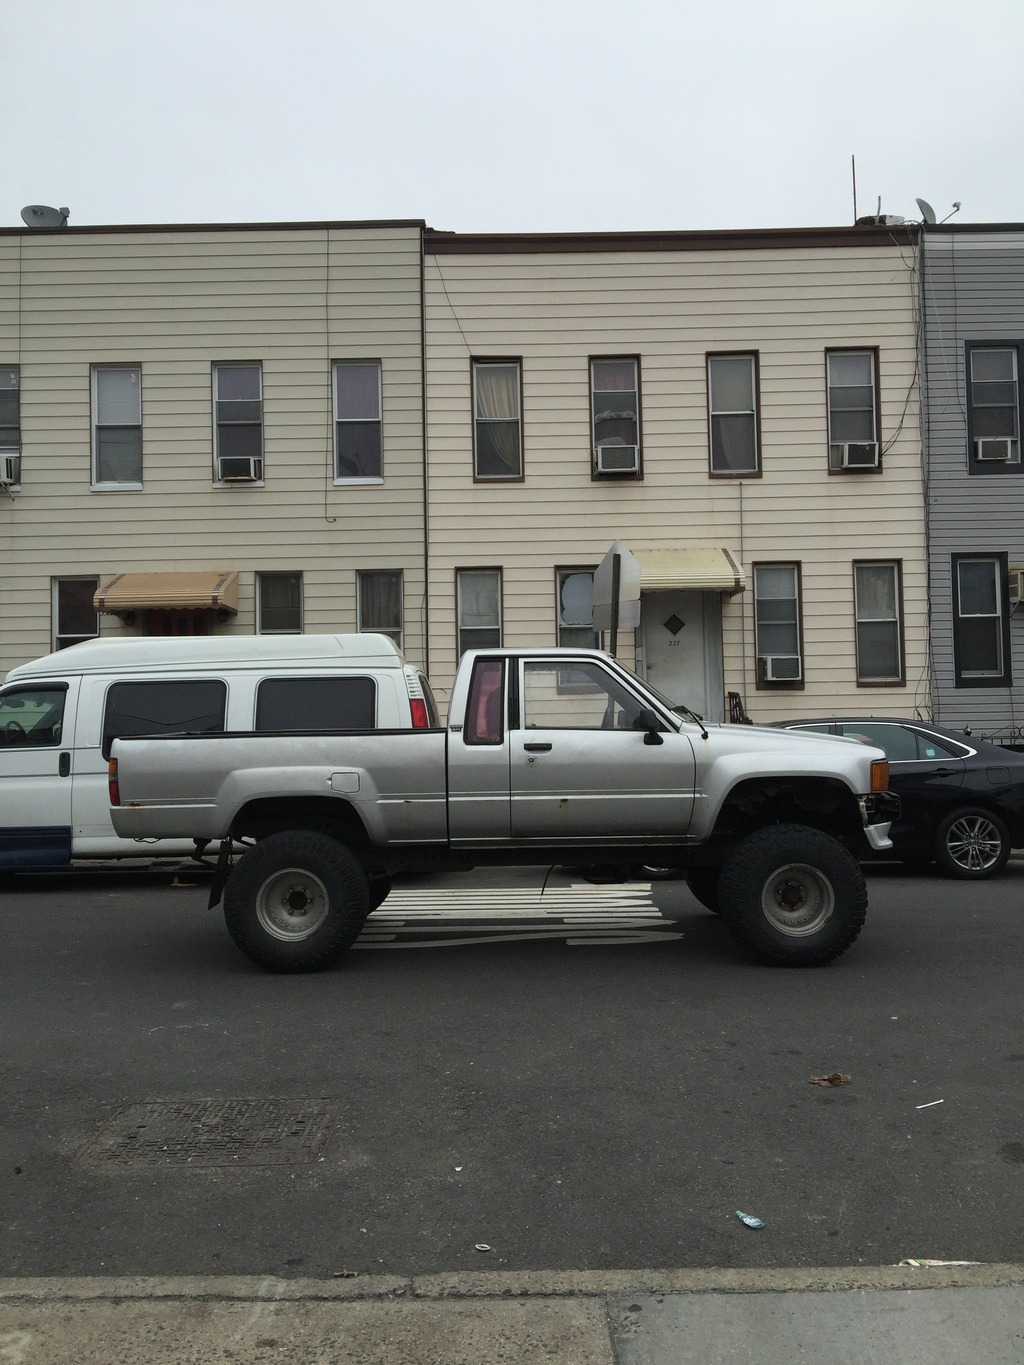
With the driveline sorted out, it was time to attack some other minor things to get it roadworthy. At this point, we were expecting a hard blizzard to hit NYC that saturday and the same week, the Wednesday I got into an accident with my '87 Maxima I adored. So now I needed to not only drive this during the blizzard, I needed it to be a daily driver. So I installed my Hella E Code housings with 6000k HIDs as well as the grill.
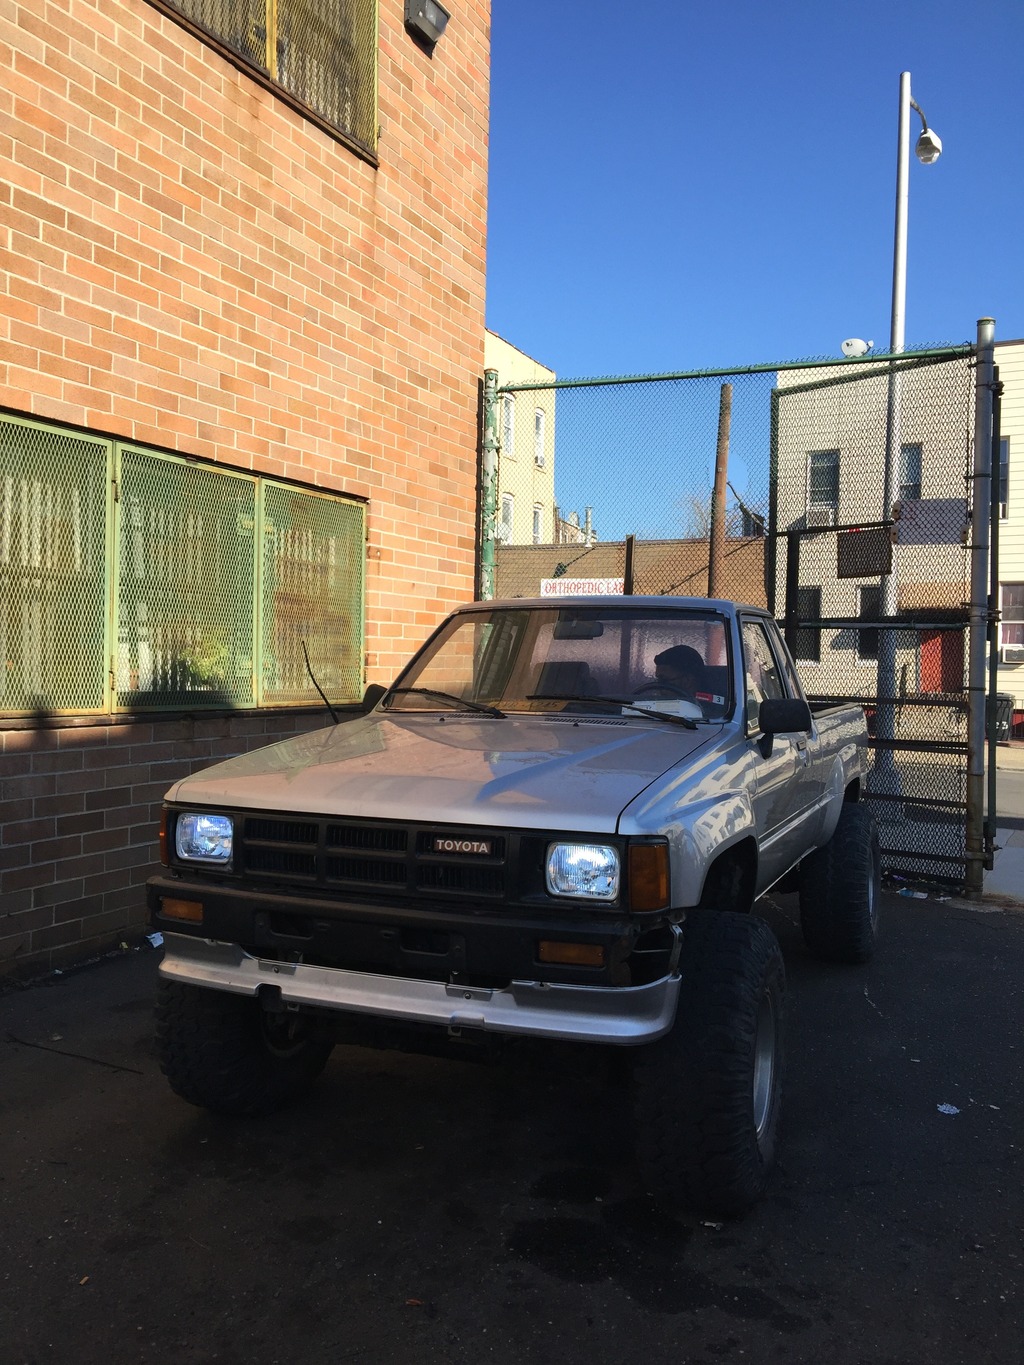
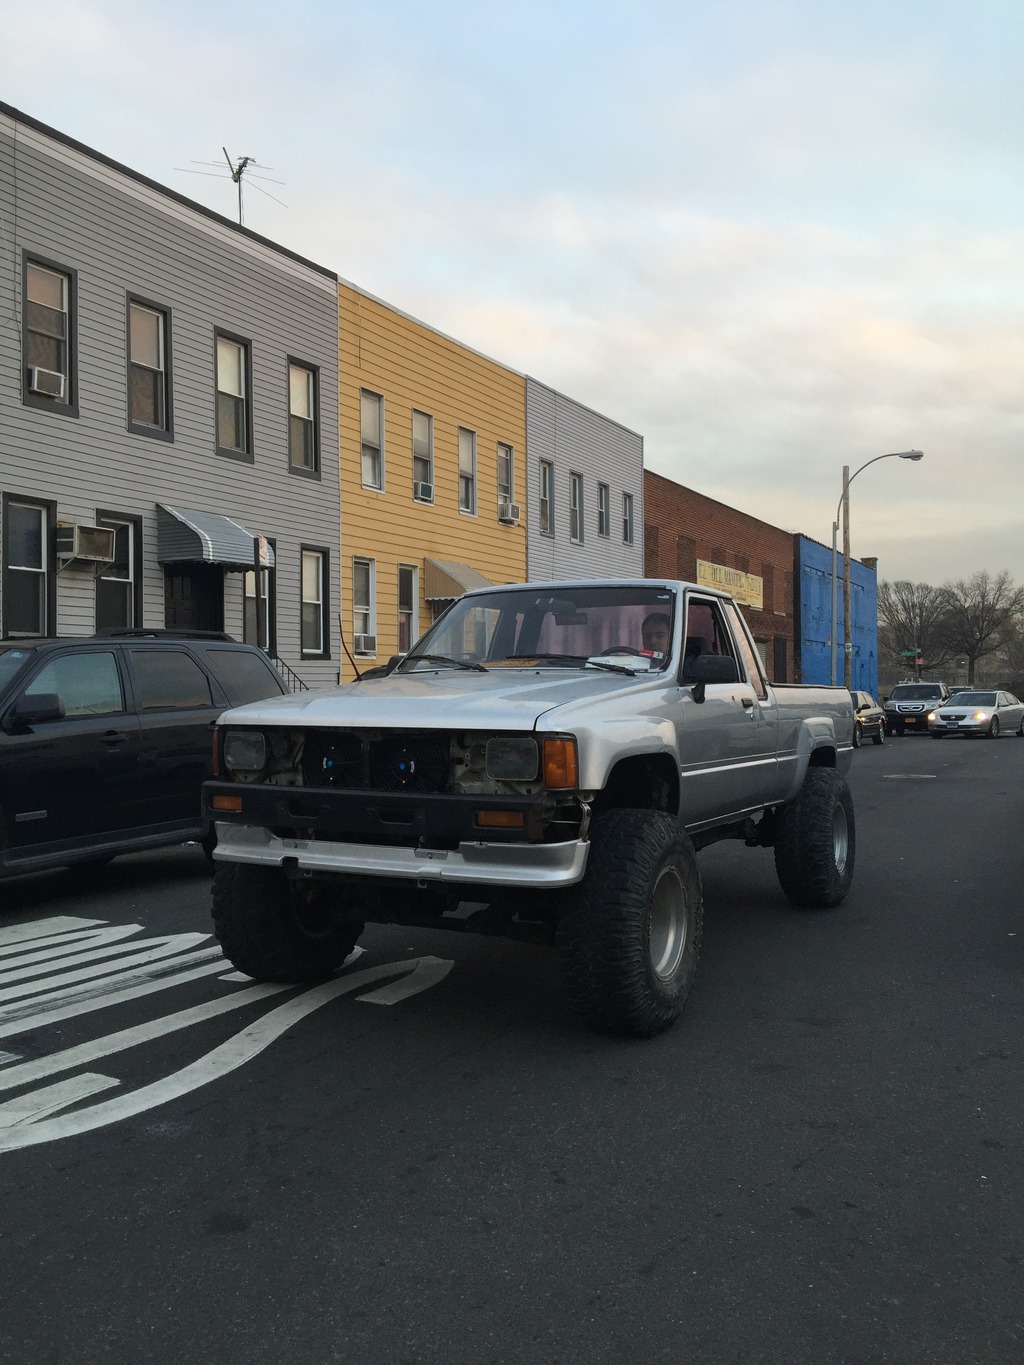
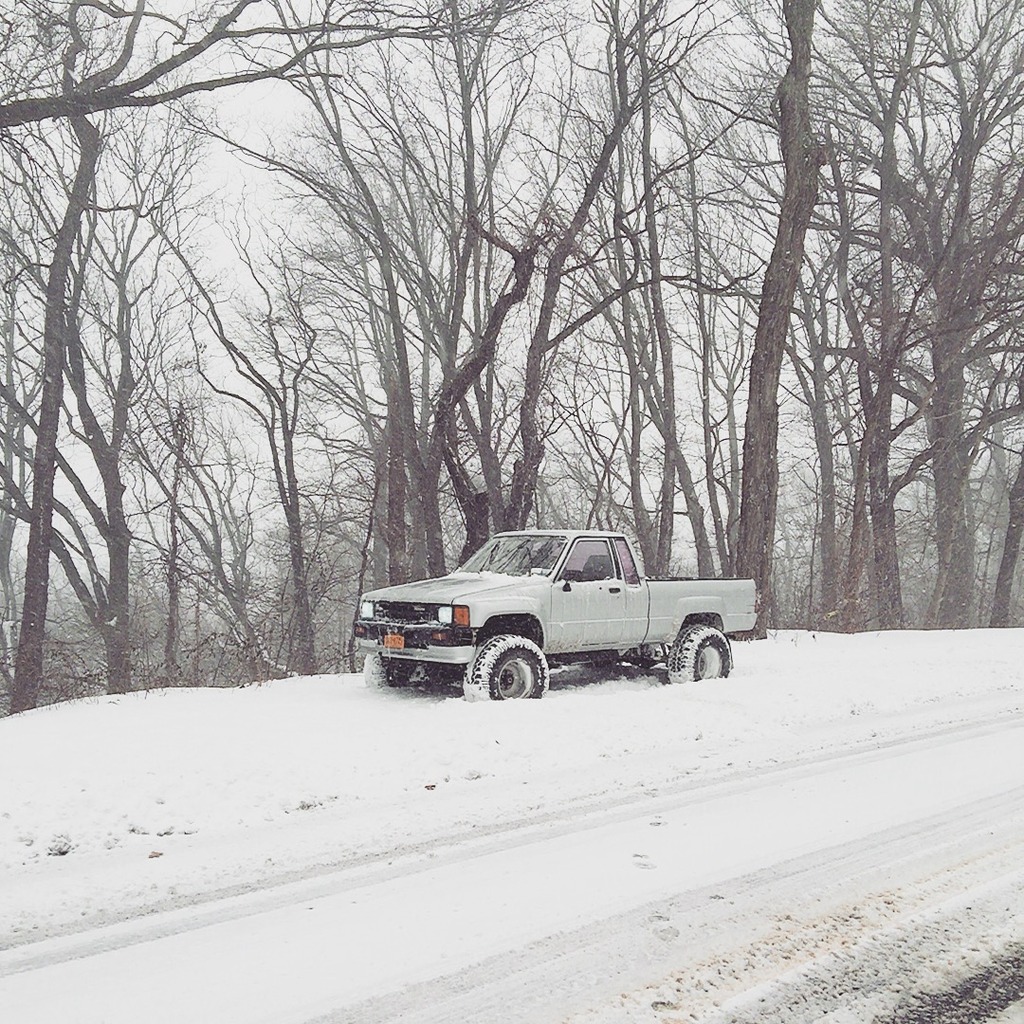
Then the next day the blizzard finally came. And I couldn't wait to test out the truck. Despite the tires being on their last legs the truck performed excellent in the snow. Made it to work the night of for the overtime spot. I spent the early day driving the truck around to make sure I wouldn't have any hiccups.
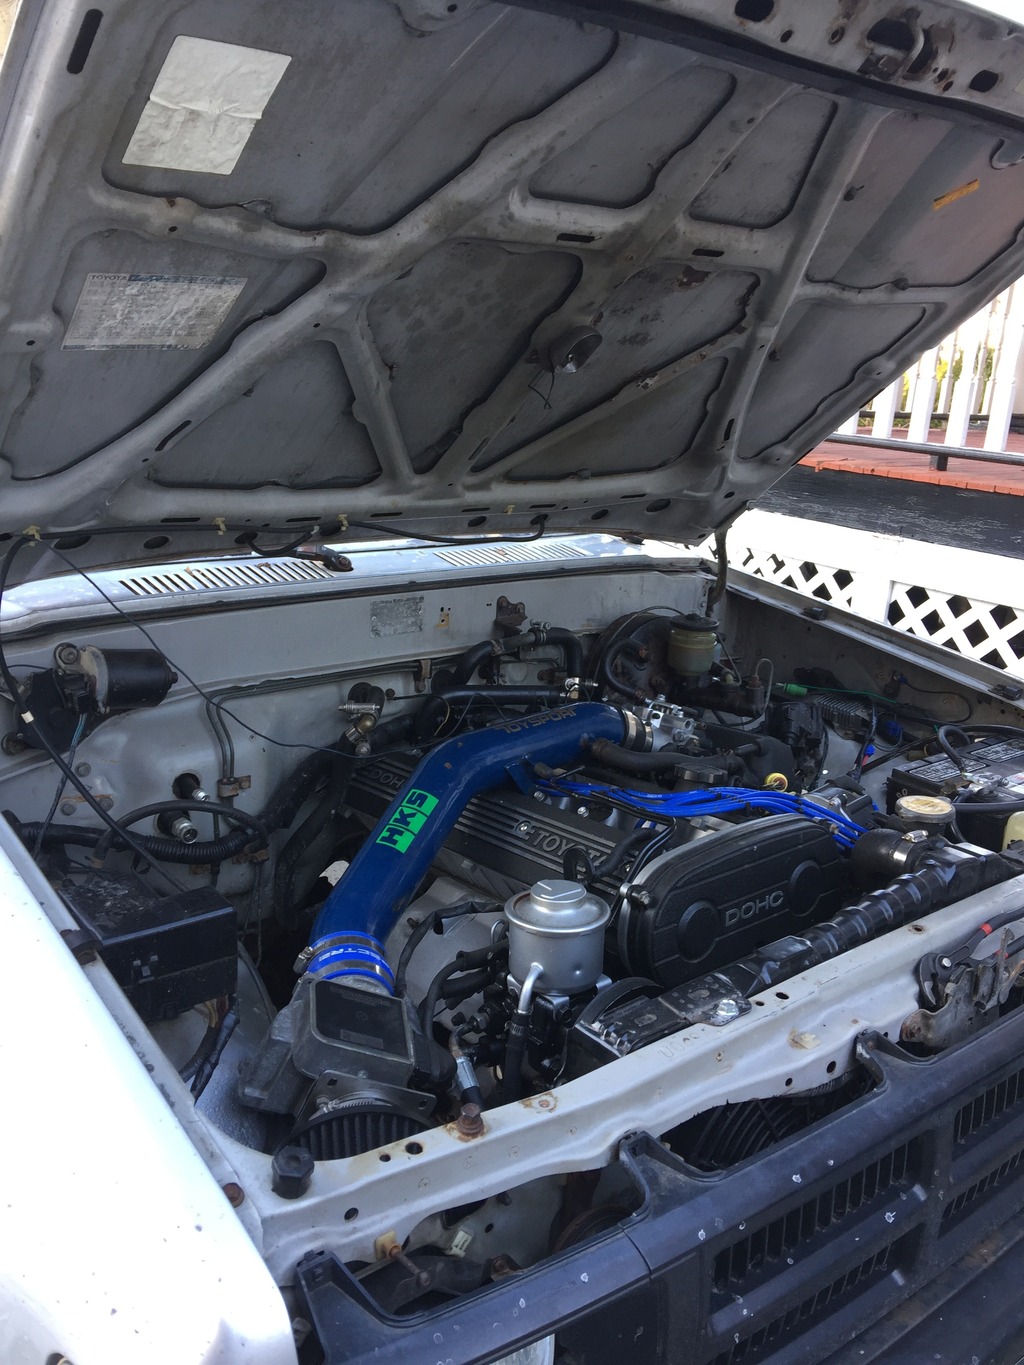
After running around with no air cleaner for two weeks. My other buddy gave me his old school ToySport intake with open element filter off of his 87 Cressida since he's going to 1JZ swap his car soon. He took my intake piping for the time being to move his car around. I will be pulling the intake off at a later date to blast and repaint either black or silver.
As for the wiring. I didnt take any pics of the diagrams pinouts I made since they were crudely drawn. Some of the plugs on the truck side will slightly differ as my truck was originally an automatic 22re. Also the engine harness for the 5M will differ depending on the car it came out of. 83-84 Cressidas would have different plugs. And somewhere between 85-86 some plugs were slightly different on the Cressidas. So far ive seen the 87-88 Cressida engine harnesses are wired the same. 82-86.5 Celica Supras will have a different harness. The 82 being the most different one. But once you find the functions you'll be fine. All I did basically was match the Engine harness wire functions from the 22RE to the ones on the 5MGE utilizing all the trucks original fuses. I didnt want to do any additions. I took a video originally for my own documentation but I decided to upload it if theres anyone that could find use for it. A lot of the older writeups on these swaps say its the same as the 7MGE. It is to an extent. Basically the SupraCharged 7MGE/GTE diagrams are correct for the 5MGE. The functions are the same, But the wire colors are different. Once you connect those basic functions the engine will start minus the gauges. My video will give you a good idea on what to do. The only thing I wired after the video was the speed sensor wire from the truck's chassis harness to the engine computer.
After I got the truck running, I tackled the carpet. Being that I found a mouse nest in the truck that meant the carpet and floor had to be cleaned. I removed the carpet and took it to work and powerwashed the life out of it. When it warms up in the spring, I will be removing the carpet to be redyed and the interior plastics repainted.


After that was taken care of, I found out that the W56-C I had put into the truck turned out to be bad. It popped out of first gear, and third gear would engage at all. So I ended up finding a tranny on craigslist a few days later. The guy said it came out of a early 90's truck 13 years ago with about 100k on it. I assumed it was another W56-C which was what I wanted so I can use my LCE short shifter. Turns out the tranny came out of a mid 80's 22R truck so it was a G54. No biggy, went from $450 to $60 and I took it home. Since the guy was gonna toss it if I didnt buy it and he just wanted it out of his way. I then brought it around the block and borrowed a friends lift and did the tranny swap with a buddy. Took about two hours with us taking our time. I didnt take a pic during the install since I was busy. But I did take the time to install the 15x10s on 33x12.5 I bought last year for $100. That I did take a picture of.


With the driveline sorted out, it was time to attack some other minor things to get it roadworthy. At this point, we were expecting a hard blizzard to hit NYC that saturday and the same week, the Wednesday I got into an accident with my '87 Maxima I adored. So now I needed to not only drive this during the blizzard, I needed it to be a daily driver. So I installed my Hella E Code housings with 6000k HIDs as well as the grill.


Then the next day the blizzard finally came. And I couldn't wait to test out the truck. Despite the tires being on their last legs the truck performed excellent in the snow. Made it to work the night of for the overtime spot. I spent the early day driving the truck around to make sure I wouldn't have any hiccups.


After running around with no air cleaner for two weeks. My other buddy gave me his old school ToySport intake with open element filter off of his 87 Cressida since he's going to 1JZ swap his car soon. He took my intake piping for the time being to move his car around. I will be pulling the intake off at a later date to blast and repaint either black or silver.

Last edited by TransAmBandit; 02-05-2016 at 11:00 PM.
02-06-2016, 10:42 PM
#13
Nice update! How's the difference in power?
02-08-2016, 12:53 AM
#14
Registered User
Thread Starter
Join Date: Jun 2007
Location: Brooklyn, NYC
Posts: 452
Likes: 0
Received 0 Likes
on
0 Posts
Well being that the truck ran on three cylinders when I bought it, it's wayyy better than the 22RE. Going off of memory from driving my buddy's 85 4Runner SR5 five speed, I don't see myself downshifting as I would with his truck. Torque is way better. I've also owned a 85 Celica GTS 'Vert with a 22RE and 5 speed. So I know how those motors run out of umph on the higher gears. Even with the 33s I have on the truck I don't have any complaints with the power. I haven't decoded the diffs on the truck yet. But I don't feel like I have to regear for daily driving.
02-08-2016, 08:44 PM
#15
Haha I can imagine! Seems easier to do this swap on the east coast with all those donors. Great work man
03-05-2016, 04:10 PM
#16
Registered User
Thread Starter
Join Date: Jun 2007
Location: Brooklyn, NYC
Posts: 452
Likes: 0
Received 0 Likes
on
0 Posts
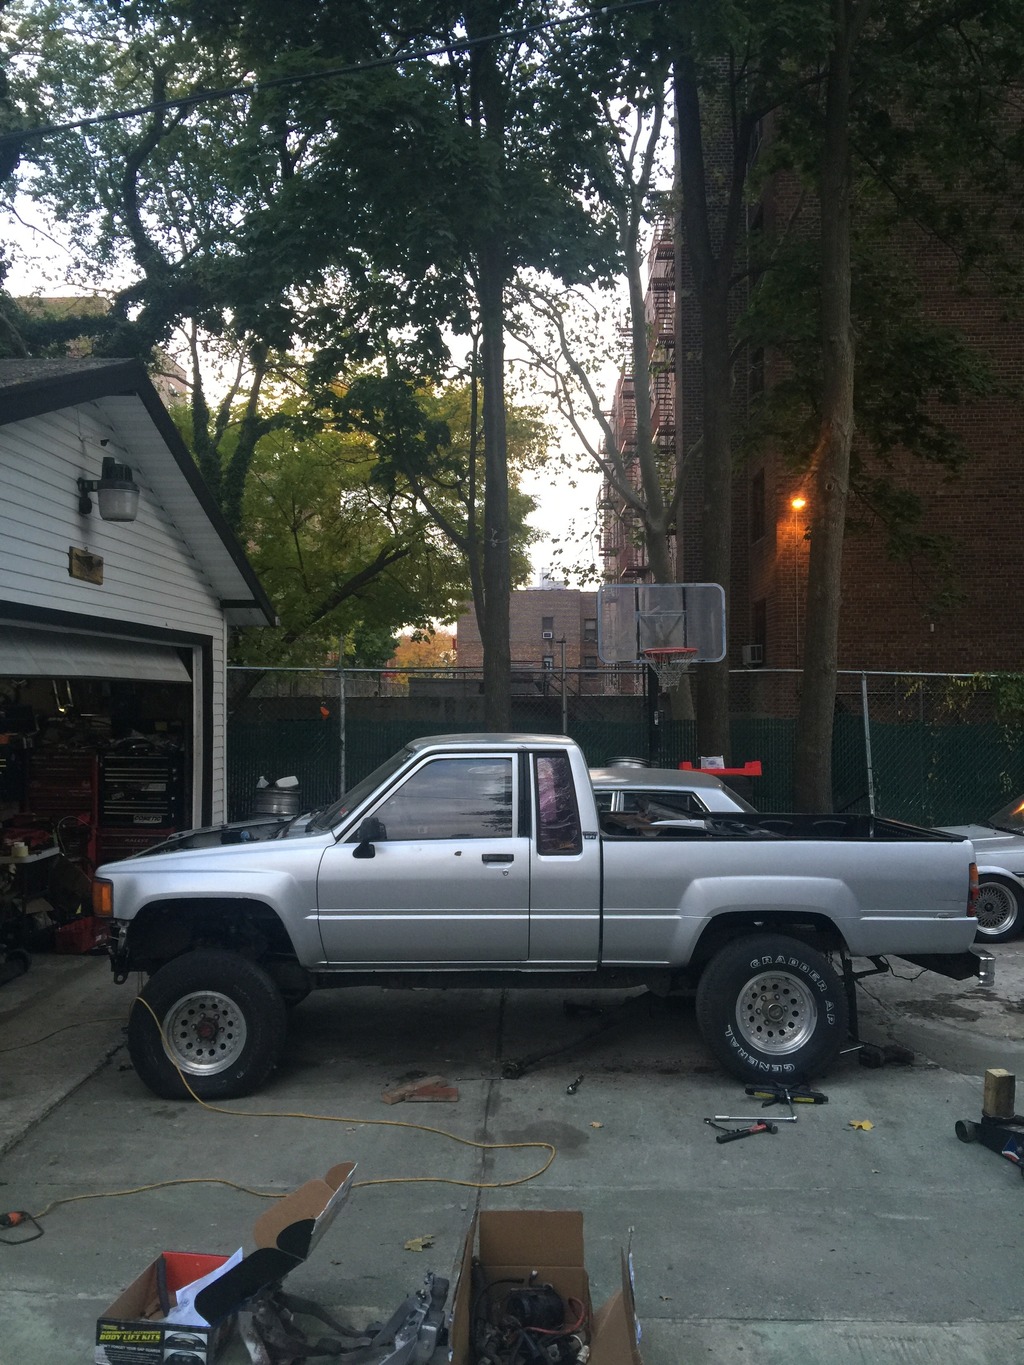
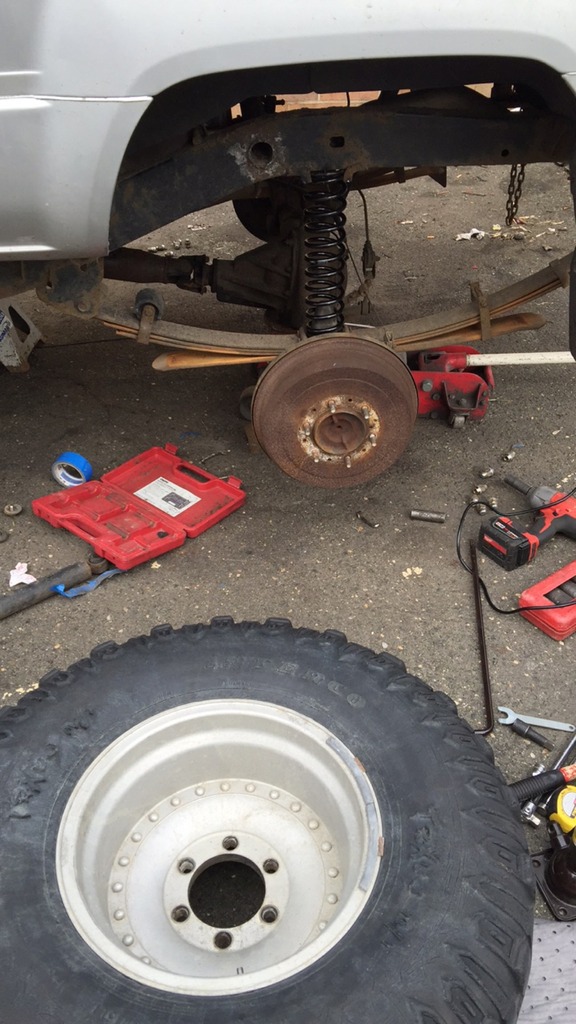
So two weekends ago the weather was in the low 60's so I decided to finally toss in the "lift kit" I had collecting dust for awhile. I ordered 14 inch 100lb Black Magic springs with a set of Rancho lift shocks and a 1.75 inch BJ Spacer kit with diff drop I bought off a guy on Craiglist.
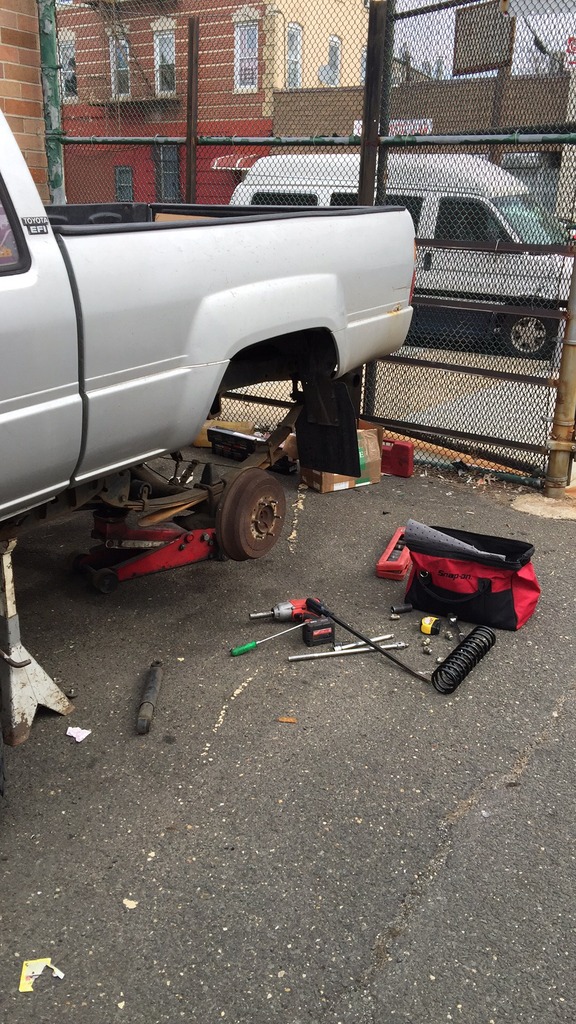
Cutting the steel stopper short to slip the springs in. Was able to slip them in with a long flathead and a big prybar my friend held for me.
 [/URL]
With just the rear done.
Pass side with 1.75 BJ spacer and left side untouched.
With the front and rear done. No torsion adjustment.
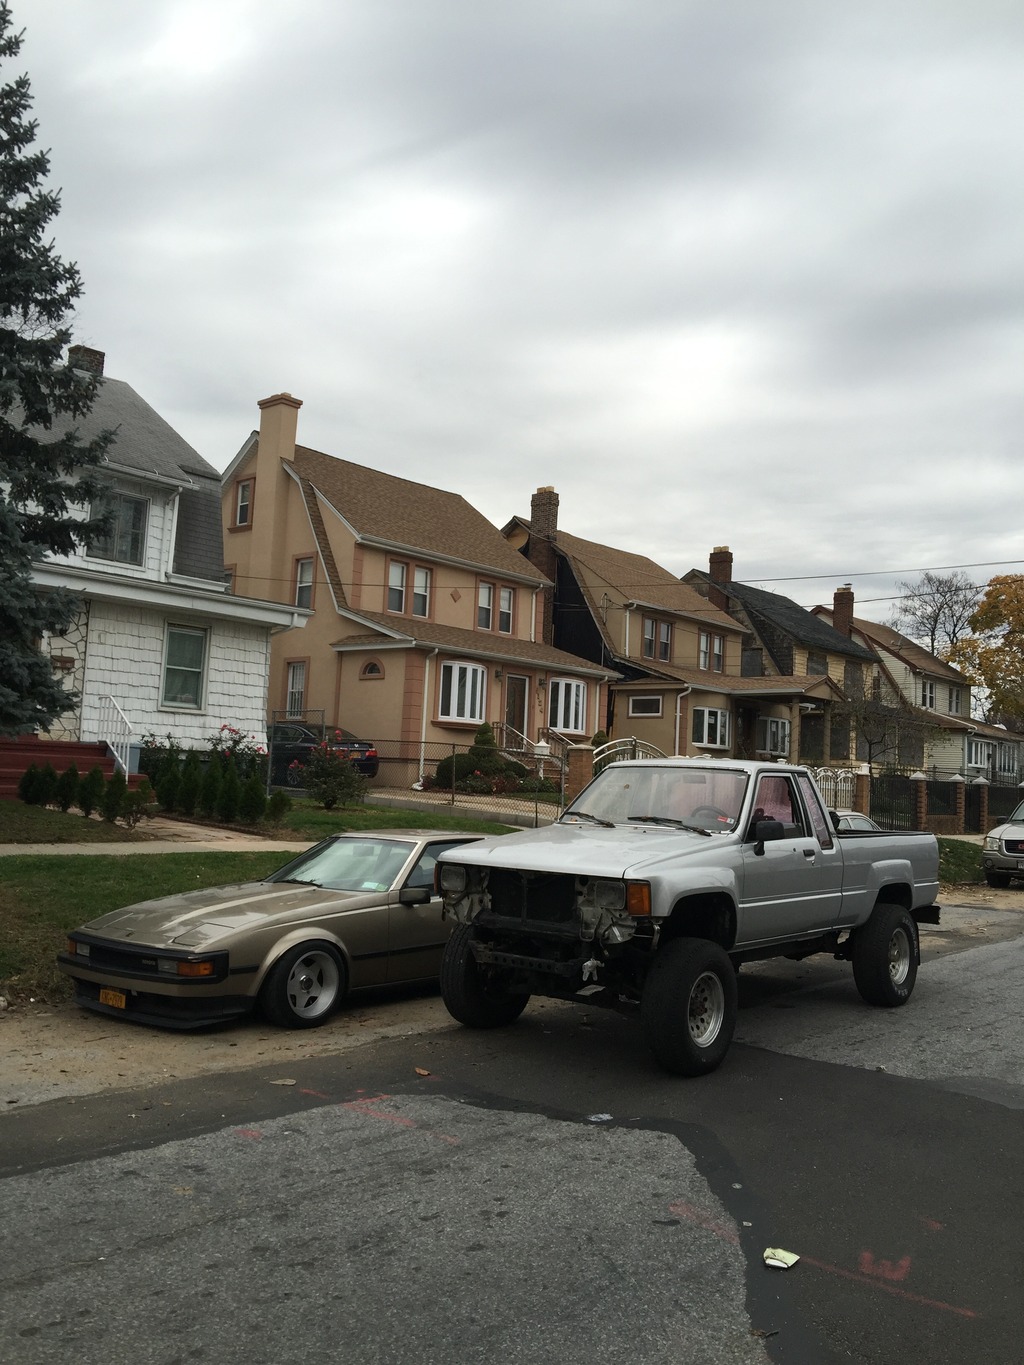
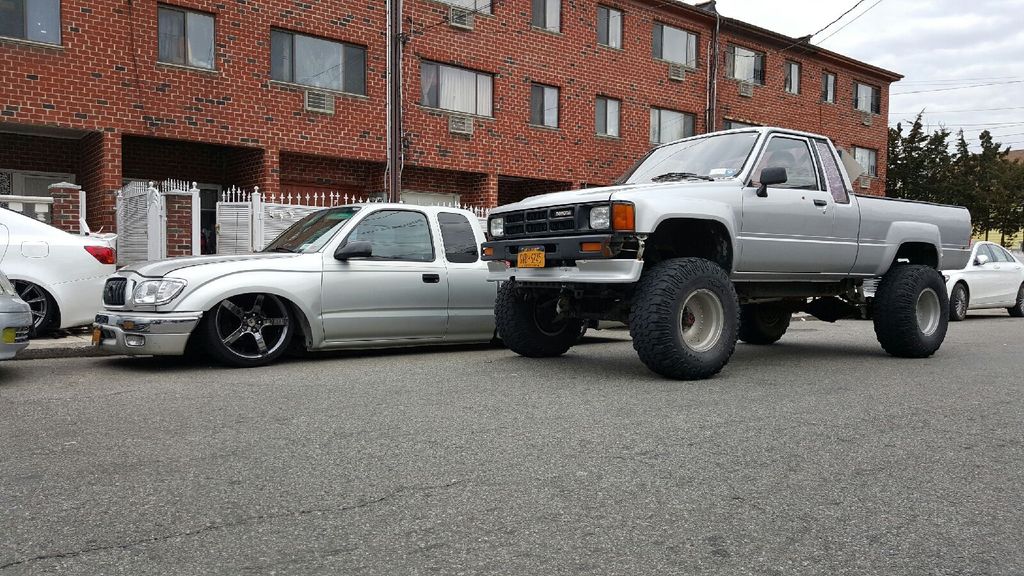
And later on the Sunday I stopped by my buddy's to take a pic with his Turbo Taco on air ride.

Cutting the steel stopper short to slip the springs in. Was able to slip them in with a long flathead and a big prybar my friend held for me.
[/URL]With just the rear done.

Pass side with 1.75 BJ spacer and left side untouched.

With the front and rear done. No torsion adjustment.

And later on the Sunday I stopped by my buddy's to take a pic with his Turbo Taco on air ride.

Last edited by TransAmBandit; 03-05-2016 at 04:15 PM.

Thread
Thread Starter
Forum
Replies
Last Post
FS[PacNorWest]: Parting 2000 4Runner Limited 4WD Marysville, WA
DeathCougar
Vehicles - Parting Out
54
04-01-2018 11:29 PM
mr_manny
86-95 Trucks & 4Runners
4
07-31-2015 10:39 AM


