ToyoToler's 1986 Pickup Build Thread
 12-29-2015, 05:16 PM
#61
Registered User
Thread Starter
Join Date: Nov 2014
Location: Jackson, MS
Posts: 119
Likes: 0
Received 0 Likes
on
0 Posts
Thanks for all the kind words, I really appreciate it!
Lately I've just been in the process of working out some kinks.
When I began driving the truck after rebuilding the engine, I noticed that the rear tires seemed to be wearing quickly, but as I was planning on replacing them soon, I didn't pay much attention to it. But when I installed the new BFGs and saw that they were already starting to wear in the back I knew that I had to solve the problem.
I bought an new rear end from a salvage yard earlier in the build since the one on the truck was from an 85 or earlier. I just did some measuring and found out that the axle was slightly bent... The tires were about 2" closer together at the front compared to the back.
I found an axle housing from a '91 close to me and picked it up. I installed the axle shafts from the existing axle and my ARB air locker diff.
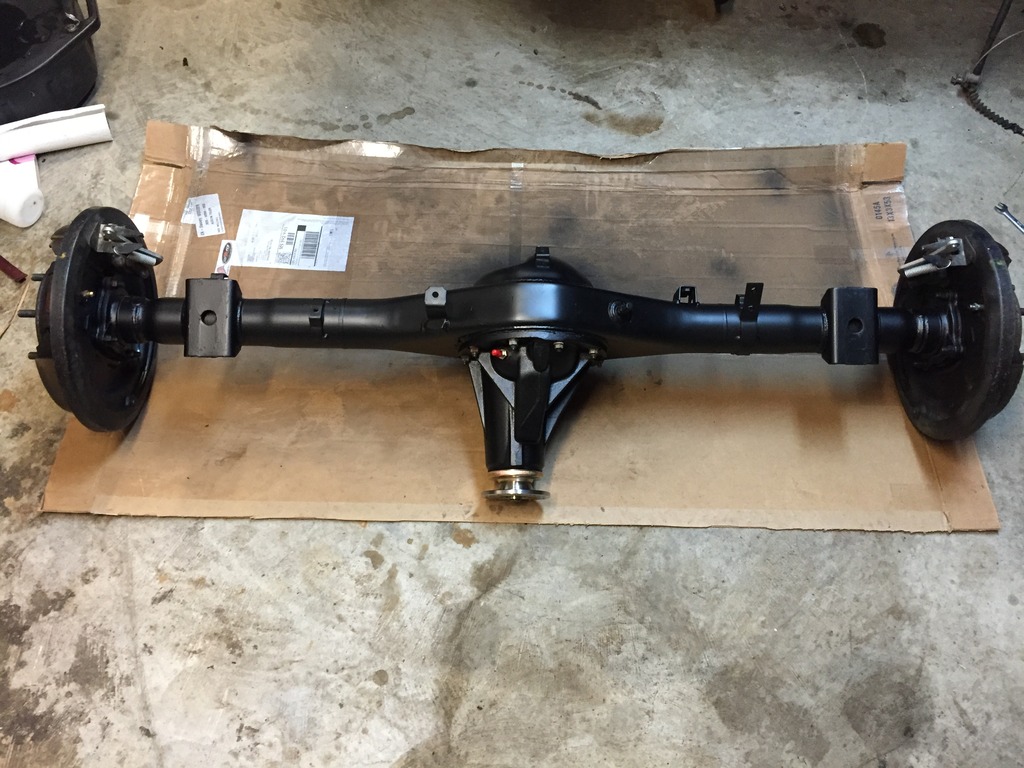
I assumed it would fit fine, but upon assemble found that the spring perches were wider than the springs and my U bolts wouldn't fit. To solve that problem I bought a U bolt flip kit and some weld on shock mounts. I taught myself how to weld and haven't done a ton of welding, but the welds on the shock mounts turned out alright I think.

Unfortunately, in my haste I welded both shock mounts on the same side of the axle, instead of on opposite sides like they should be...
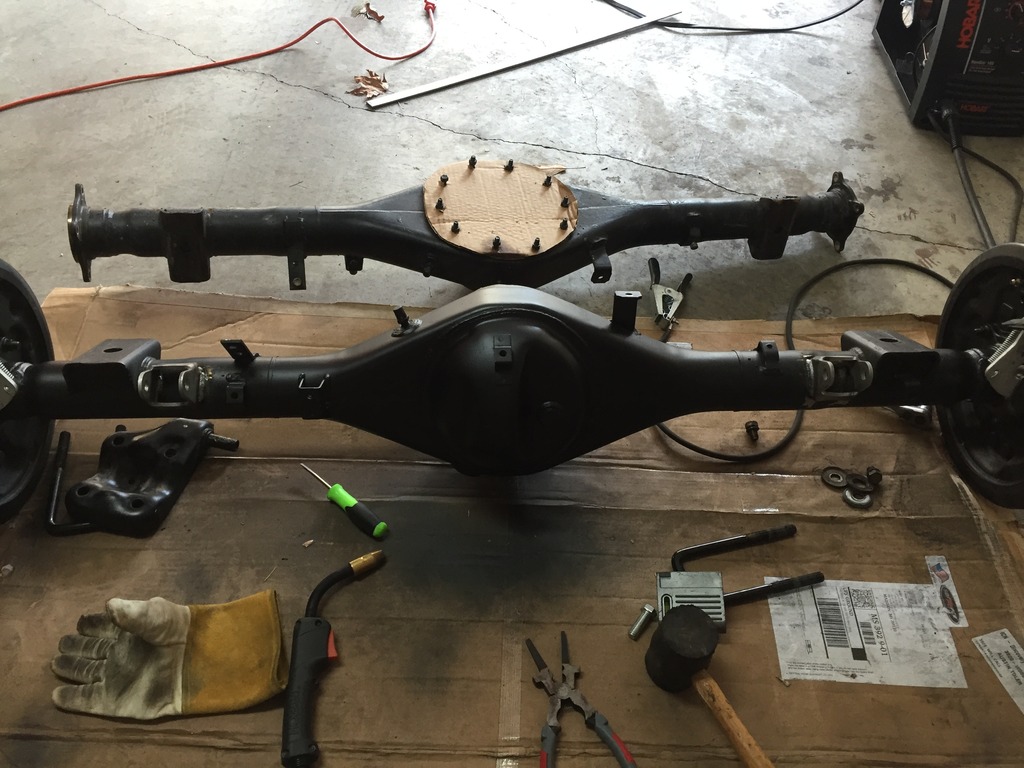
So right now the truck is sitting while I wait to get in another set of shock mounts since I had to destroy the wrong one cutting it off. Oh well, lesson learned...
I ordered an ARB air compressor that will hopefully be in soon so I can get the locker all plumbed and wired and ready to go!
Lately I've just been in the process of working out some kinks.
When I began driving the truck after rebuilding the engine, I noticed that the rear tires seemed to be wearing quickly, but as I was planning on replacing them soon, I didn't pay much attention to it. But when I installed the new BFGs and saw that they were already starting to wear in the back I knew that I had to solve the problem.
I bought an new rear end from a salvage yard earlier in the build since the one on the truck was from an 85 or earlier. I just did some measuring and found out that the axle was slightly bent... The tires were about 2" closer together at the front compared to the back.
I found an axle housing from a '91 close to me and picked it up. I installed the axle shafts from the existing axle and my ARB air locker diff.
I assumed it would fit fine, but upon assemble found that the spring perches were wider than the springs and my U bolts wouldn't fit. To solve that problem I bought a U bolt flip kit and some weld on shock mounts. I taught myself how to weld and haven't done a ton of welding, but the welds on the shock mounts turned out alright I think.
Unfortunately, in my haste I welded both shock mounts on the same side of the axle, instead of on opposite sides like they should be...
So right now the truck is sitting while I wait to get in another set of shock mounts since I had to destroy the wrong one cutting it off. Oh well, lesson learned...
I ordered an ARB air compressor that will hopefully be in soon so I can get the locker all plumbed and wired and ready to go!
 12-29-2015, 05:30 PM
#62
Registered User
Thread Starter
Join Date: Nov 2014
Location: Jackson, MS
Posts: 119
Likes: 0
Received 0 Likes
on
0 Posts
I also have a quick question about the interchangeability of those two axles. The holes in the spring perches of the later axles are a good bit bigger than the earlier axles. That means that the axle has a bit more play with the pins of the leaf springs in the larger holes on the axle. Will this be ok as long as I make sure to get the axle straight, or is there a chance the axle will be able to move around because the pins on the leaf springs have a good bit of space inside the spring perches?
12-29-2015, 06:03 PM
#63
Registered User
Join Date: Mar 2011
Location: Lindley New York
Posts: 19
Likes: 0
Received 0 Likes
on
0 Posts
The truck looks great. Sorry to hear about the rear axle housing issues. The weld looks a season pro did it.
I have a few questions on your build. Are you happy with the front bumper I was thinking about the same one?
I noticed you deleted the factory windshield moldings, I can't tell from the pictures very well but it appears you went with a generic rubber style seal? I would like to do the same thing on mine. Like you I have been a long time member and follower of several builds. I never took many pics on my build. I am building the very same truck you are less the a/c and blue in color. I wish I had started a build thread but I'm not to big on postings as this is only my third post. I love the final look on your truck. Keep up the great work!
12-29-2015, 06:40 PM
#64
Registered User
Thread Starter
Join Date: Nov 2014
Location: Jackson, MS
Posts: 119
Likes: 0
Received 0 Likes
on
0 Posts
Thanks! It's alright, with used parts there's always a chance that something may be wrong.
So far I've been very happy with the bumper, it's well made and the fit and finish is good. The only thing I'm not crazy about is how far it sticks out from the front. But that's a necessity for mounting a winch. I'm sure it would look a lot better with a winch, but I'm planning on waiting to see how much I think I'll need or use one, instead of getting one to look pretty on the front of the rig.
Ah, I new I had forgotten to cover something... Yeah, the seal on there is just a generic rubber seal that goes around the windshield before you glue it in place. I'll get a close up of it to post on here. It doesn't look awesome but it doesn't necessarily attract attention, so I'm ok with it. The guy who installed the glass did a really messy job and the windshield actually leaks a little bit, so I'm going to try to get my money back on the install and take it to a place that can do a better job.
There's a good thread located here that gives a lot of options for replacing the factory trim. One of the best options in my opinion is using a factory windshield gasket that was used on some of these trucks in other countries. I may go that route if I can find one for a fair price. I'll post an update on the windshield issue as I get that resolved.
That's cool that you have a similar truck, I'd love to see some pictures! It's hard to get in the habit of posting- I've always been a consumer of media and not really a producer. I've gotten behind on this thread plenty of times! Thanks again!
01-13-2016, 06:32 PM
#65
Registered User
Thread Starter
Join Date: Nov 2014
Location: Jackson, MS
Posts: 119
Likes: 0
Received 0 Likes
on
0 Posts
A late update and conclusion to the whole axle housing nightmare.
The '91 axle housing that I purchased had wider leaf spring perches which I just assumed was some sort of change due to the different generation. I bought a U bolt flip kit in order to fix the problem since it's supposed to work for something like 80-95 trucks. So after installing everything in the axle, painting it, and welding on the shock mounts twice (because I welded one in the wrong spot in my haste the first time around) I attempted to install it and realized that the wide spring perches would not, in fact, work with the flip kit. The conclusion I came to was that the salvage yard sold me a 2wd 1-ton axle housing instead of a 4wd one.
So I had to find another axle housing.... I ended up having to go 4 hours away to Birmingham, AL since no one local wanted to sell me just a housing.
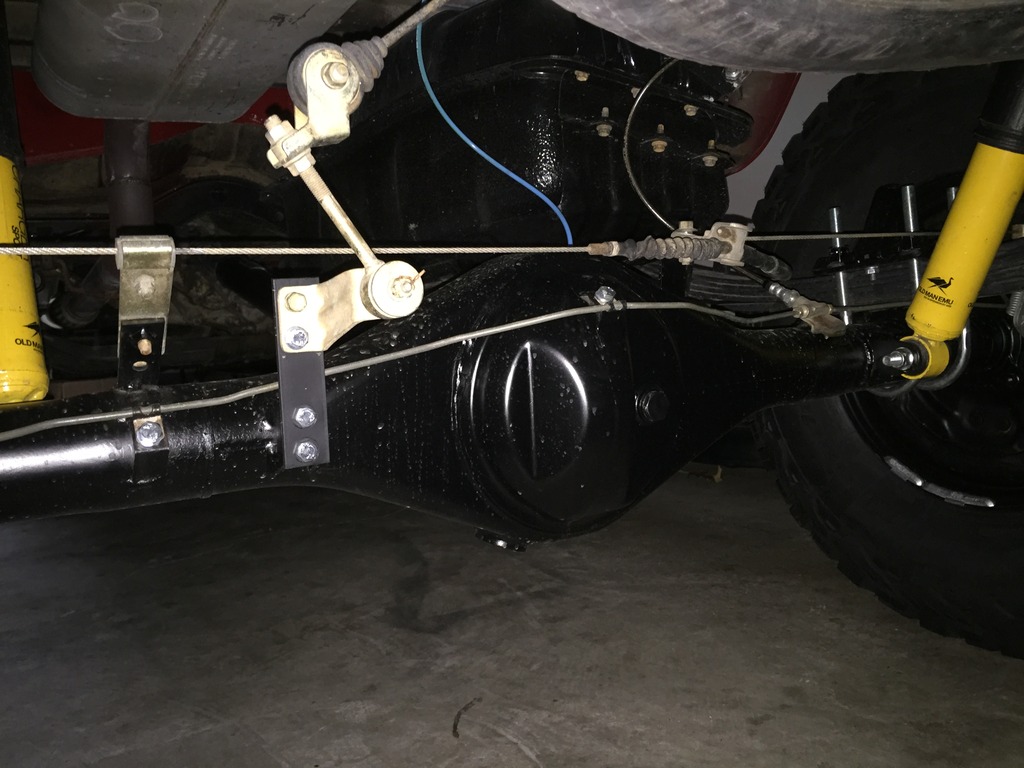
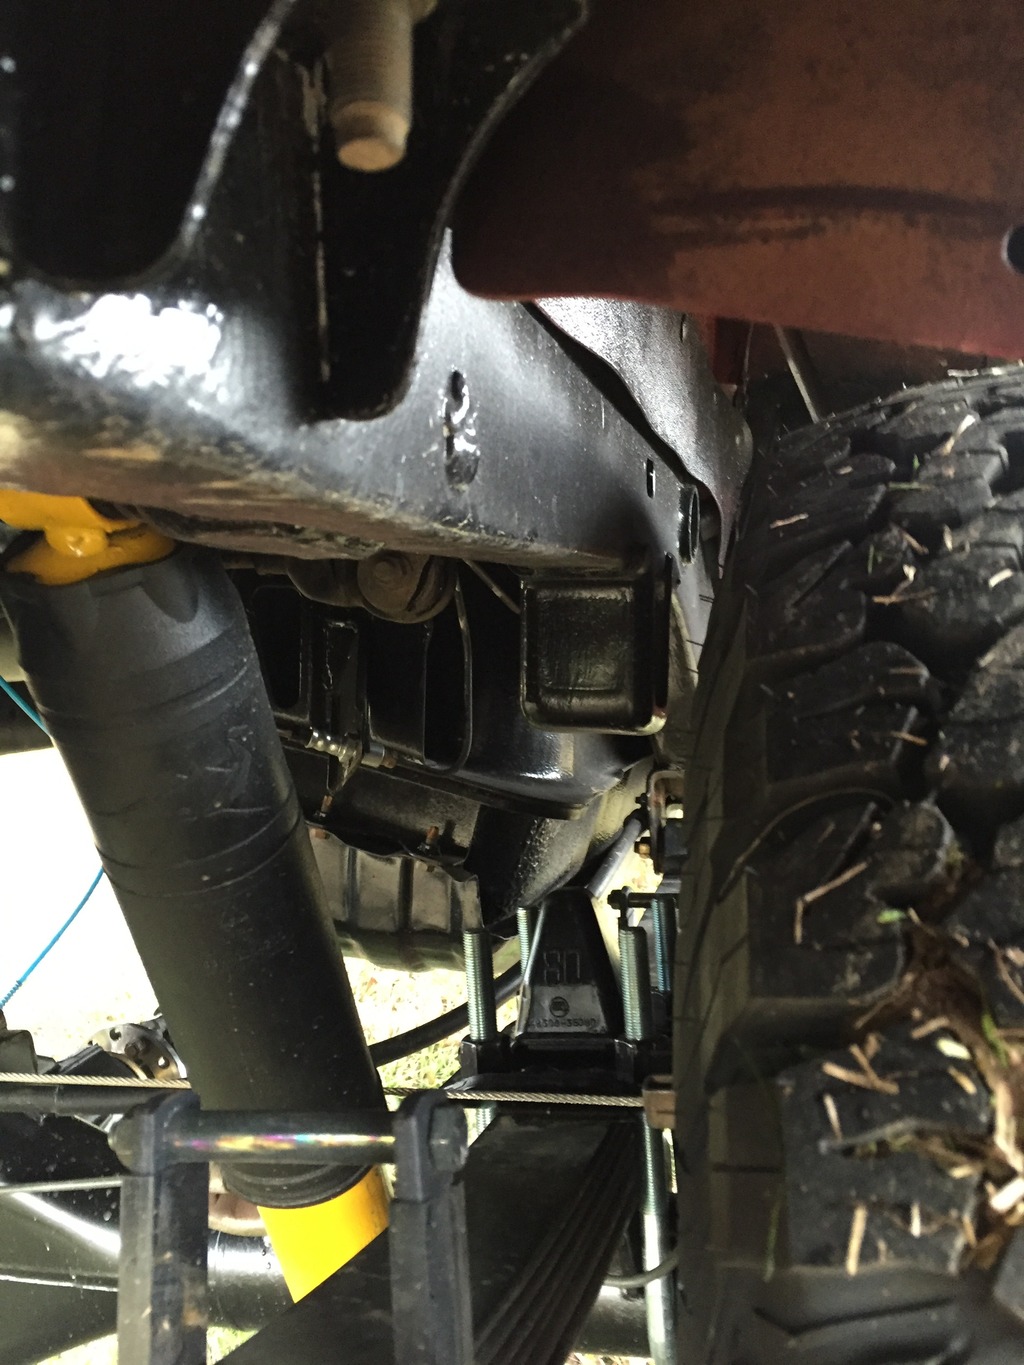
But anyway, I got everything installed, painted, etc. and it finally works and tracks right!
Here are some pictures of the install.
The new axle housing with the U-bolt flip kit
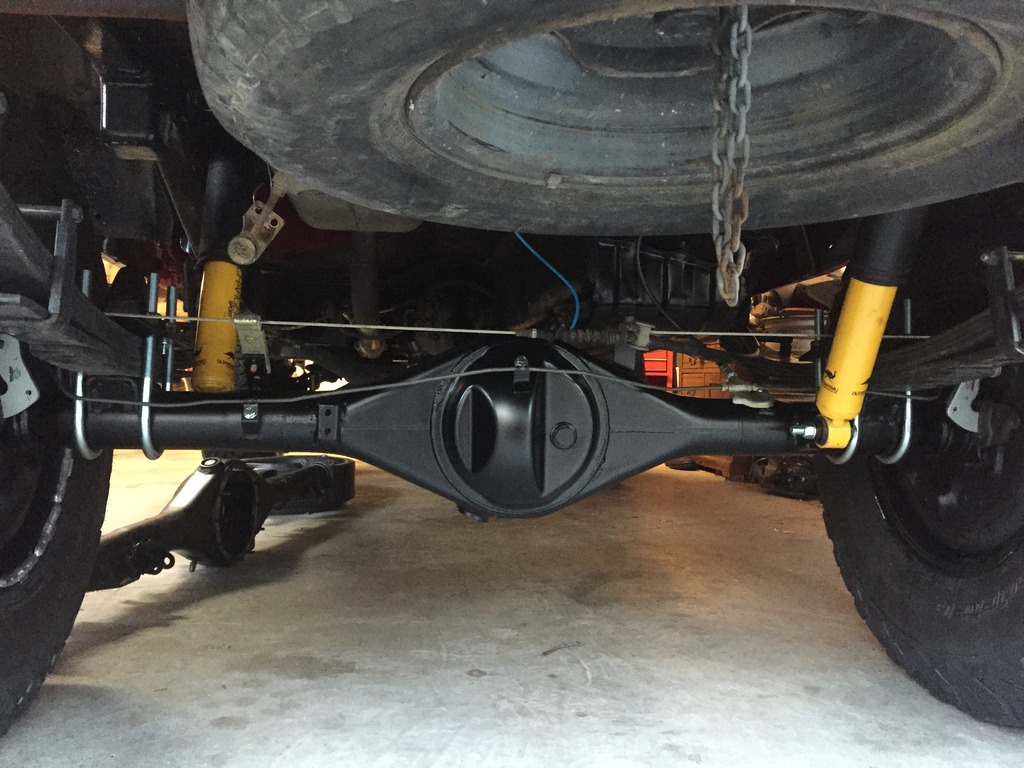
I also finally got around to making a LSPV lift bracket. Who knows if it even did anything, but it's there.
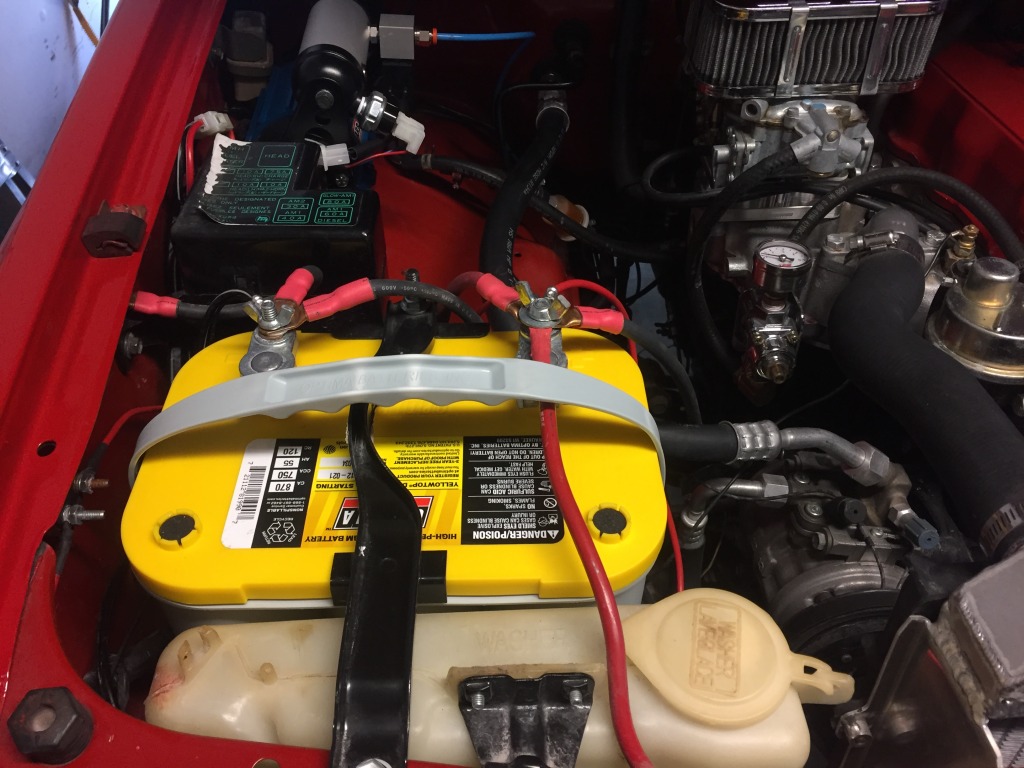
I also installed an ARB air compressor and hooked up the air locker! Super stoked about it, when locking and unlocking the diff, it just sounds bad ass!
I was able to find a nice spot in the engine bay to mount the compressor. With the pre-made wiring harness it was one of the easiest installs I've done.
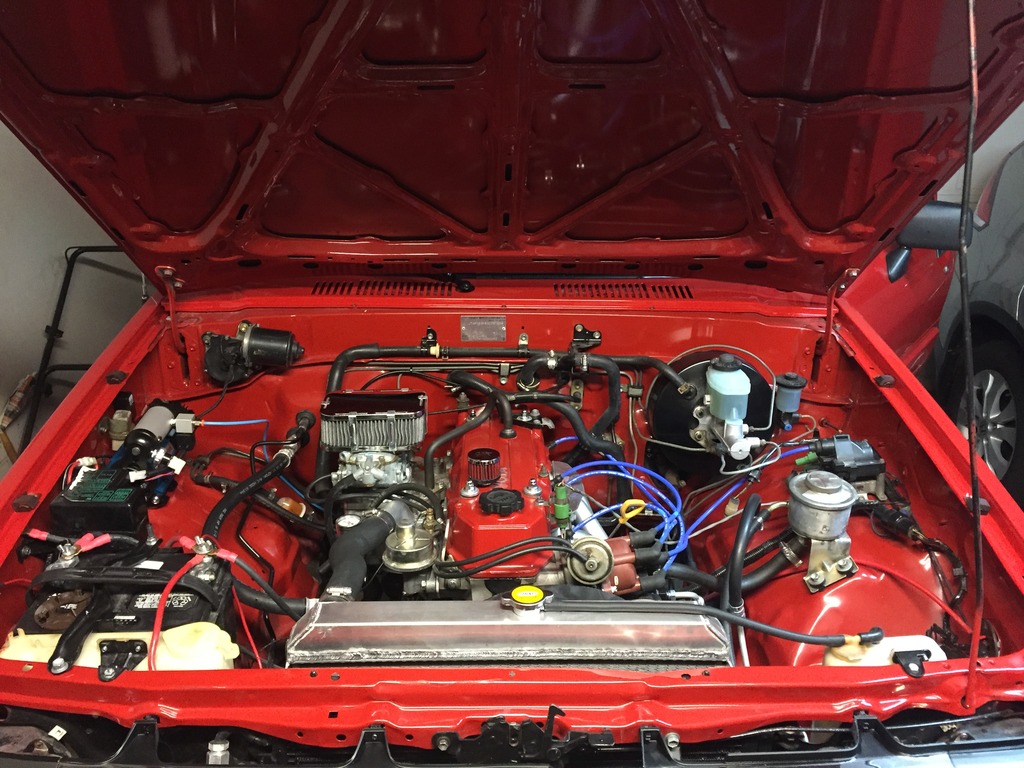
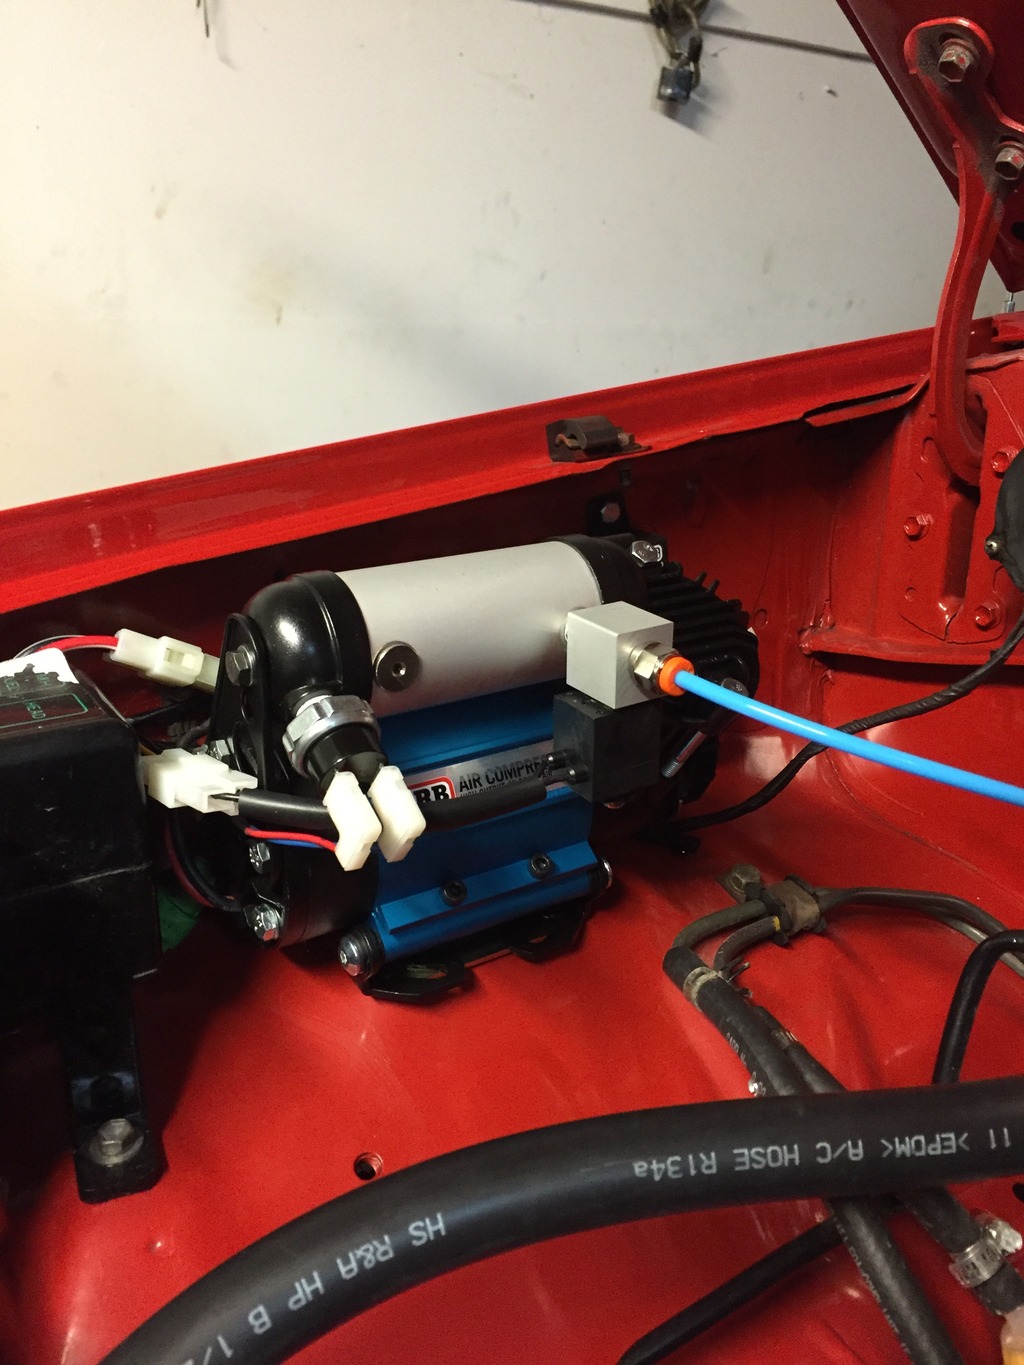
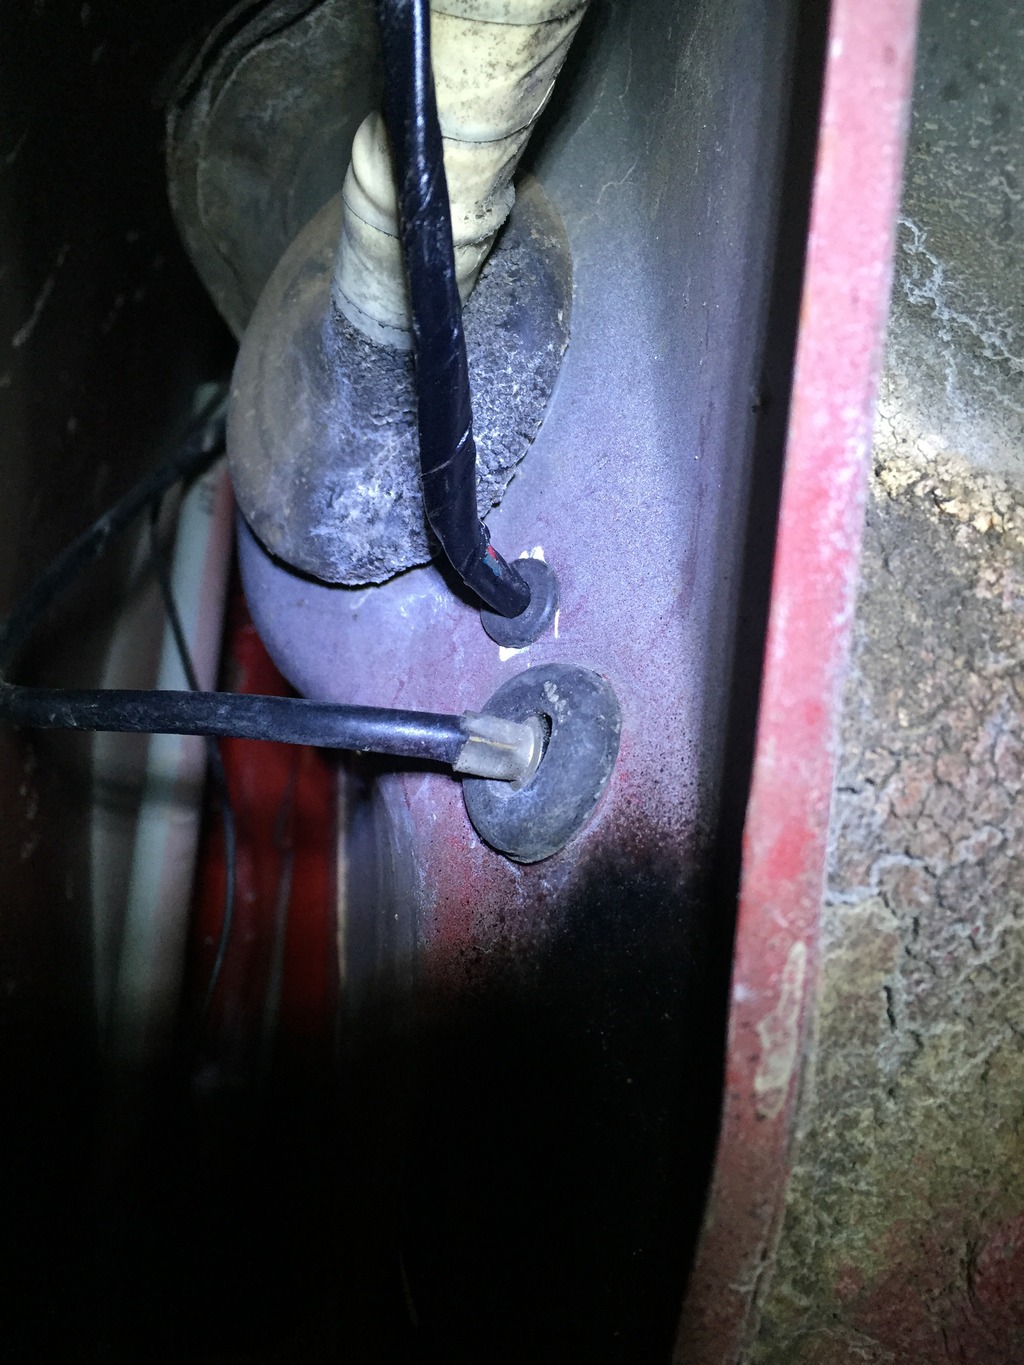
I'm also super picky about wiring. I almost made my own harness for the compressor just so it would fit better... But I was able to hide it and organize it pretty well. In order to route the wires into the cab I just drilled a new hole under the fender by the stock harness.
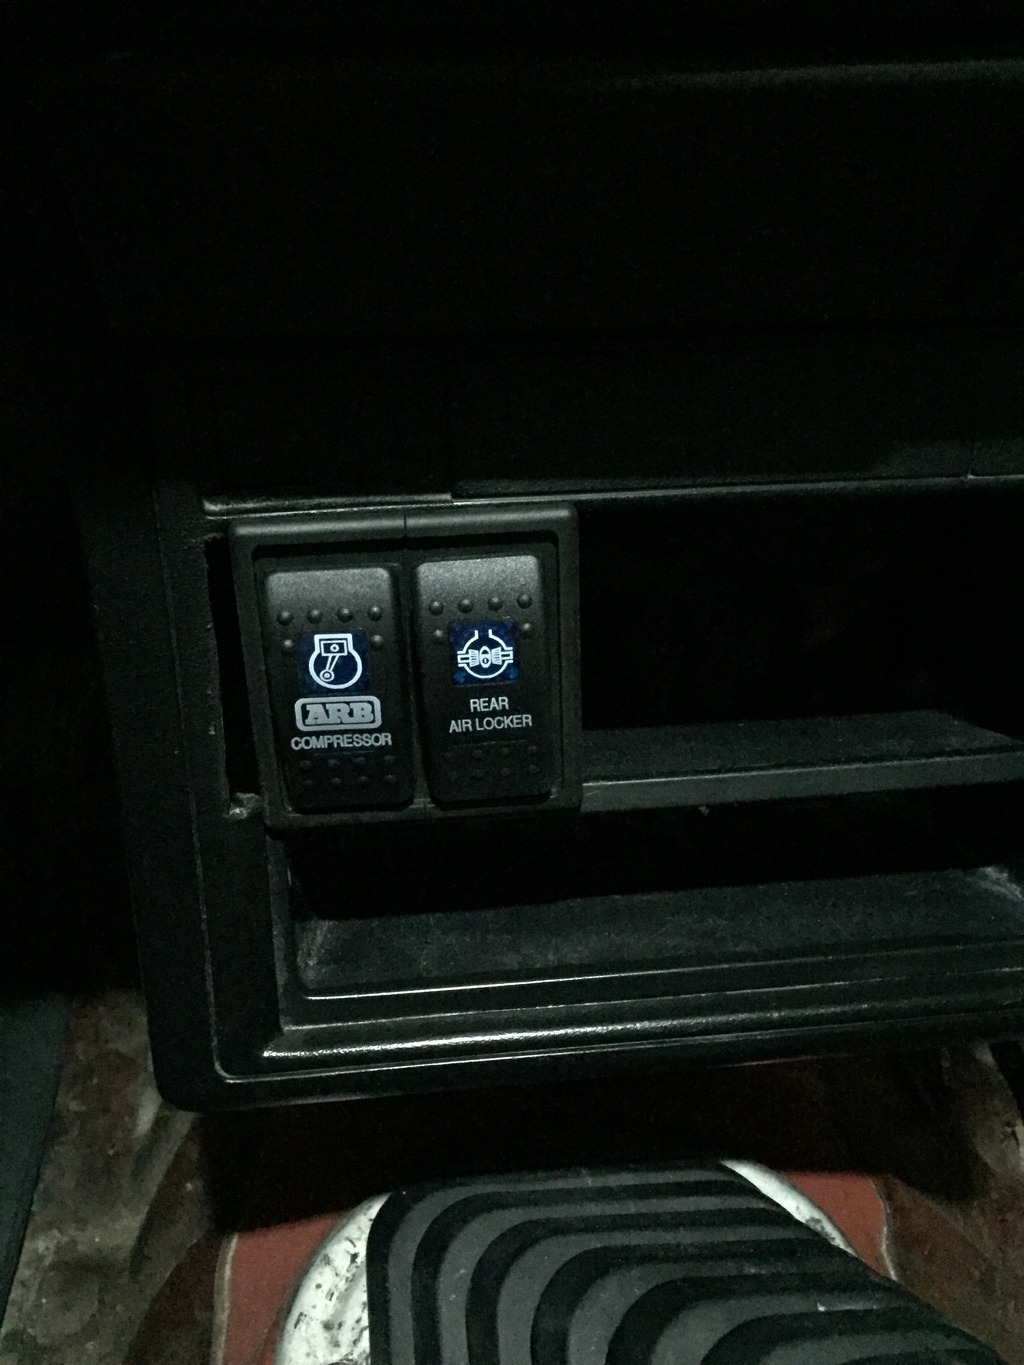
Here is the somewhat temporary location for the switches. I don't have a radio in the cab right now so I just popped them in where that normally goes.
The '91 axle housing that I purchased had wider leaf spring perches which I just assumed was some sort of change due to the different generation. I bought a U bolt flip kit in order to fix the problem since it's supposed to work for something like 80-95 trucks. So after installing everything in the axle, painting it, and welding on the shock mounts twice (because I welded one in the wrong spot in my haste the first time around) I attempted to install it and realized that the wide spring perches would not, in fact, work with the flip kit. The conclusion I came to was that the salvage yard sold me a 2wd 1-ton axle housing instead of a 4wd one.
So I had to find another axle housing.... I ended up having to go 4 hours away to Birmingham, AL since no one local wanted to sell me just a housing.
But anyway, I got everything installed, painted, etc. and it finally works and tracks right!
Here are some pictures of the install.
The new axle housing with the U-bolt flip kit
I also finally got around to making a LSPV lift bracket. Who knows if it even did anything, but it's there.
I also installed an ARB air compressor and hooked up the air locker! Super stoked about it, when locking and unlocking the diff, it just sounds bad ass!
I was able to find a nice spot in the engine bay to mount the compressor. With the pre-made wiring harness it was one of the easiest installs I've done.
I'm also super picky about wiring. I almost made my own harness for the compressor just so it would fit better... But I was able to hide it and organize it pretty well. In order to route the wires into the cab I just drilled a new hole under the fender by the stock harness.
Here is the somewhat temporary location for the switches. I don't have a radio in the cab right now so I just popped them in where that normally goes.
 01-13-2016, 07:12 PM
#67
Registered User
I seem to recal, however, that you really oughta give that kind of paint job another thirty days before using public parking.
01-14-2016, 08:06 AM
#68
Registered User
Thread Starter
Join Date: Nov 2014
Location: Jackson, MS
Posts: 119
Likes: 0
Received 0 Likes
on
0 Posts
01-17-2016, 08:03 PM
#70
Registered User
Thread Starter
Join Date: Nov 2014
Location: Jackson, MS
Posts: 119
Likes: 0
Received 0 Likes
on
0 Posts
Thanks man!
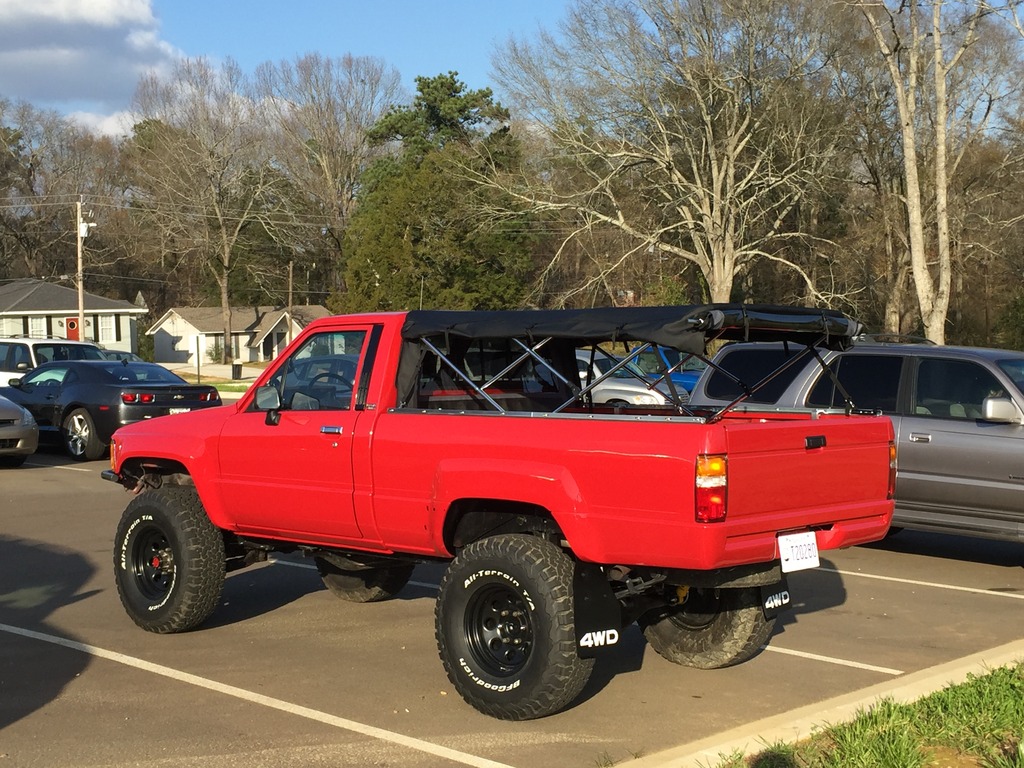
So I did a little messing around in some ditches testing out the air locker. Here's a picture of the truck flexing (sort of...) as well as a little video of the locker in action.
http://vid284.photobucket.com/albums...psxk9j9ahk.mp4
One thing I've found is that these OME leaf springs don't really like to flex all that much. I'm sure a lot has to do with the having an empty bed and the rear end of these trucks being so light, but I've got probably about 4-6" from the bump stop at full flex at this point. Is this normal for these springs?
01-20-2016, 07:49 AM
#71
Registered User
Thread Starter
Join Date: Nov 2014
Location: Jackson, MS
Posts: 119
Likes: 0
Received 0 Likes
on
0 Posts
The cold weather we've had down south lately has put the final nail in the coffin for this old battery I've been running. Decided to go ahead and upgrade to a nice yellowtop Optima! I got it for a pretty good price on Amazon with free shipping. So far it works great!
I've also been exploring the idea of switching carbs from a Weber 32/36 to a 38. The 32/36 has been working alright for me, but with headers, a larger cam, and increased displacement, it just can't quite keep up at full throttle or higher rpm's. The engine has a slight stumble when I begin to open up the second barrel and you can tell it's just not getting enough fuel or air after that.
Since my truck is a daily driver gas mileage is somewhat important to me, so I'll be doing some more research to find some comparative mileage results between the 32/36 and the 38. If you have any information on that I'd be glad to hear it.
Either way, the problems I'm having with the 32/36 are nothing major; I really only ever open up the secondaries when passing on a two-lane road that I commute down. But even though it's only a small issue, the knowledge that it could be better still eats away at me a bit. We'll see....
01-20-2016, 01:00 PM
#72
Registered User
as for the OMU springs they are stiff read that all the time on posts great springs though
for the carb perhaps check to see if the 32/36 has replaceable jets for the secondary's first would be a lot cheaper than another carb if so then go up one size sounds like shes nearly on the right jet but not quite enough you want the econ of the 32/36 lower areas the 38 might be bit biger thn you need
for the carb perhaps check to see if the 32/36 has replaceable jets for the secondary's first would be a lot cheaper than another carb if so then go up one size sounds like shes nearly on the right jet but not quite enough you want the econ of the 32/36 lower areas the 38 might be bit biger thn you need
01-20-2016, 05:25 PM
#73
Registered User
Thread Starter
Join Date: Nov 2014
Location: Jackson, MS
Posts: 119
Likes: 0
Received 0 Likes
on
0 Posts
That's what I figured about the springs. But this truck obviously isn't going to be a hardcore rock-crawler, so it isn't too big of a deal. I'm sure they would flex better with some added weight in the back.
Rejetting the secondaries was my initial step. I have a wideband afr installed in the truck so I can see how the carb is running, and after the rejetting, the secondary was actually a bit rich, but I'm still getting slight stumbling when transitioning into the secondaries. So I'm definitely getting enough fuel for the air that's coming in, but I just don't think I'm getting enough air in general.
Another YT member, kawazx636, had a similar problem if I recall correctly, and he switched to a Weber 38 and said it suited his engine much better. Our engines have very similar modifications, so that just got me thinking. And that's never a good thing hahaha. But in all seriousness if I do decide to switch carbs, I can sell my carb with about 2000 miles on it and probably only be out a hundred bucks or so.
Last edited by ToyoToler; 01-20-2016 at 05:28 PM.
02-01-2016, 10:20 PM
#74
Registered User
Thread Starter
Join Date: Nov 2014
Location: Jackson, MS
Posts: 119
Likes: 0
Received 0 Likes
on
0 Posts
It's been a little while since an update. Lately I've just been driving the truck and haven't had time to do anything to it since I've been busy with school.
The first order of business will be getting my (brand new) windshield resealed. Stupid SOB that installed it did a horrible job and it leaks like a sieve...
After that I'll begin to work on the interior. I plan to install a good bit of soundproofing- fatmat, mass loaded vinyl, the works- in order to make the truck more comfortable day to day. I hope to get that done soon but obviously need to fix the leak in the windshield before I'm putting anything down on the floor.
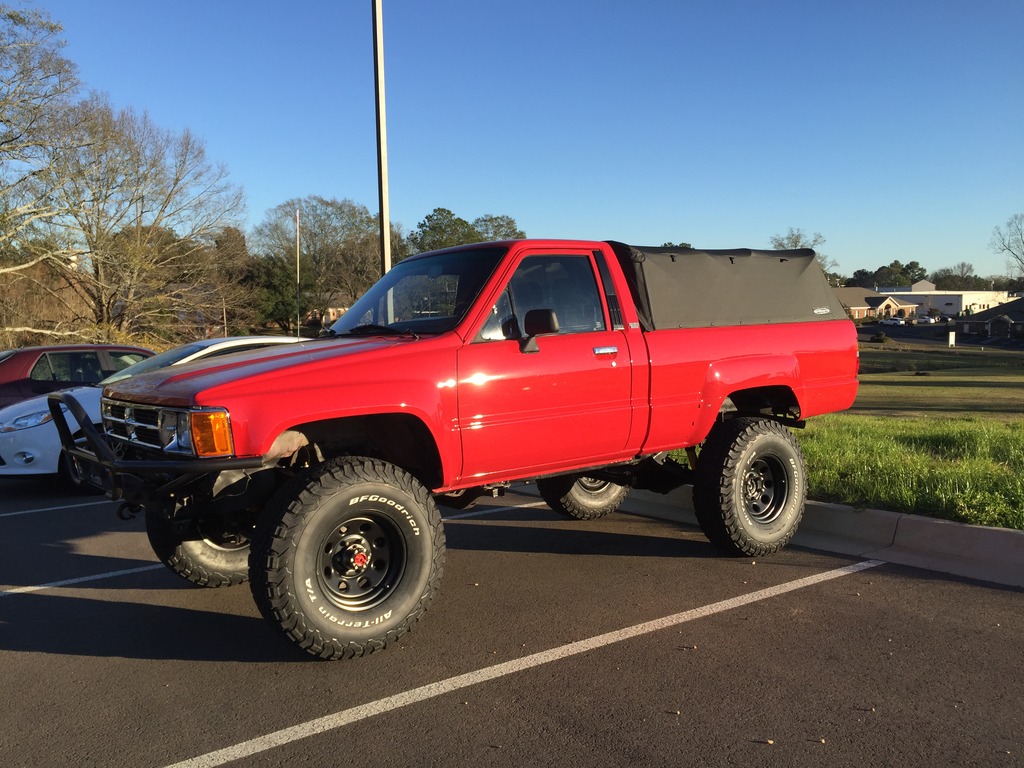
Lately I had a chance to get the truck a little muddy, and after cleaned it up nice and finally got a chance to wax the new paint. I think it came out pretty good!
The aftermath. Note that the mud was actually "accidental" That trail didn't look nearly as wet as it actually was... But it was fun anywho.
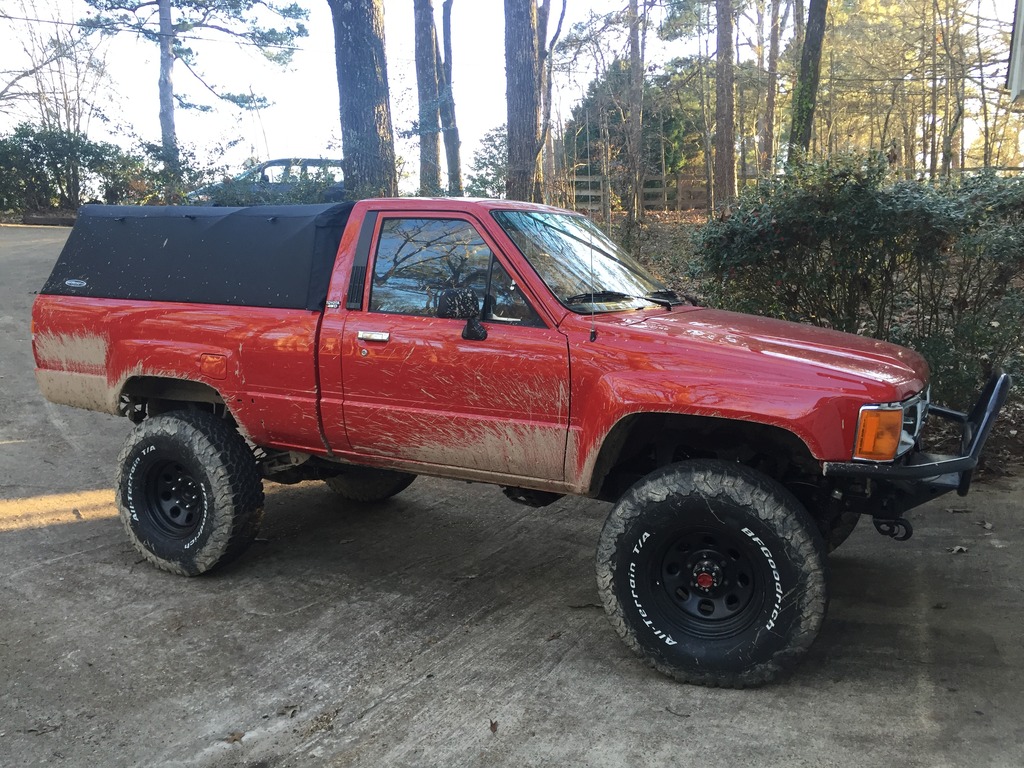
But you have to clean up your toys after you finish play
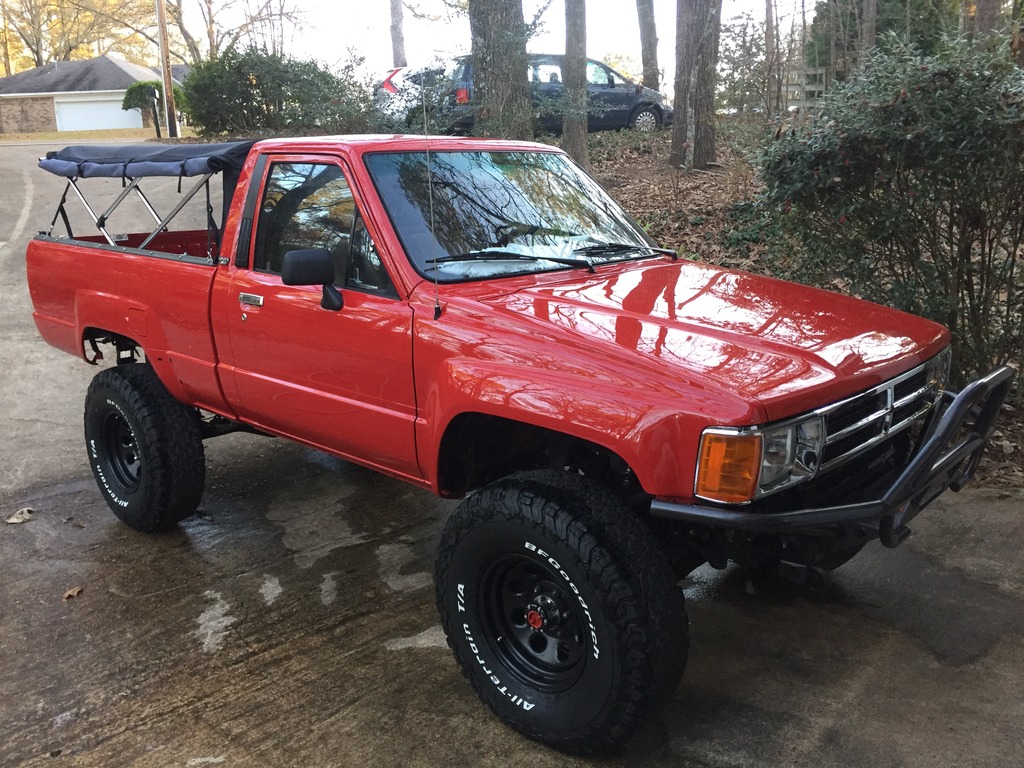
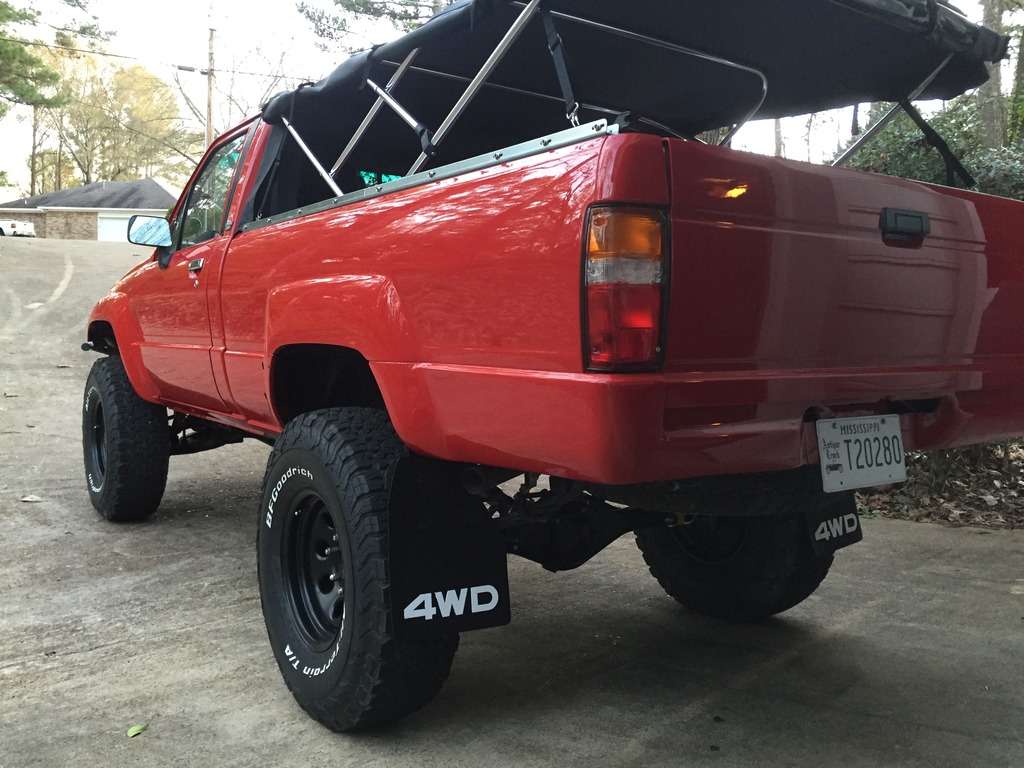
I also painted and installed the rear mud flaps. I definitely like the added touch.
The first order of business will be getting my (brand new) windshield resealed. Stupid SOB that installed it did a horrible job and it leaks like a sieve...
After that I'll begin to work on the interior. I plan to install a good bit of soundproofing- fatmat, mass loaded vinyl, the works- in order to make the truck more comfortable day to day. I hope to get that done soon but obviously need to fix the leak in the windshield before I'm putting anything down on the floor.
Lately I had a chance to get the truck a little muddy, and after cleaned it up nice and finally got a chance to wax the new paint. I think it came out pretty good!
The aftermath. Note that the mud was actually "accidental" That trail didn't look nearly as wet as it actually was... But it was fun anywho.
But you have to clean up your toys after you finish play
I also painted and installed the rear mud flaps. I definitely like the added touch.
02-02-2016, 10:02 AM
#75

Looking killer man! Now all you need is a rear bumper!
02-02-2016, 10:16 AM
#77
Good idea, or addicted offroad seems to have some good ones too. Also was trying to look through this thread but couldn't find the post where this guy painted replica rear plastic trim pieces in front of the rear fenders. Don't know what your plan is but I thought it was a cool idea.
https://www.yotatech.com/forums/f199...thread-155840/
https://www.yotatech.com/forums/f199...thread-155840/
02-05-2016, 05:47 PM
#78
Registered User

Join Date: Jun 2015
Location: WI
Posts: 147
Likes: 0
Received 0 Likes
on
0 Posts
Great build!
Do you know the model number for both front and back on those OME shocks that came in that kit? I might be switching to yellow... Trying to figure out some compatible model numbers
Do you know the model number for both front and back on those OME shocks that came in that kit? I might be switching to yellow... Trying to figure out some compatible model numbers
02-07-2016, 09:30 PM
#79
Registered User
Thread Starter
Join Date: Nov 2014
Location: Jackson, MS
Posts: 119
Likes: 0
Received 0 Likes
on
0 Posts
Yeah, the rear bumpers that addicted offroad sells for our trucks are trailgear ones that they're just distributing. I found that 4wheelparts.com will ship the bumper for free so that's where I'll be getting mine.
And thanks, I really appreciate you looking out for me with that. I'll have to take some time to look through that thread and find what you're talking about. I found the part number for those, they're called quarter wheel house covers. The cheapest I've found them is $40 a piece and I just haven't been able to stomach paying $80 for two pieces of plastic yet, so it would be great if I could find an alternative!
Thanks for checking out my build duckhead, I appreciate the compliments.
The part number for the front shock is 60072 and for the back (medium load) is 60062. The link to the ARB part compatibility chart is http://arbusa.com/uploads/PDF/access...oyotaHiLux.pdf
Or you can go to arbusa.com and enter in your vehicle information in the provided menu and it will take you to the parts that fit your vehicle.
02-07-2016, 10:22 PM
#80
Found it!! haha finally #865
https://www.yotatech.com/forums/f199...0/index44.html
And no prob man. Also good plan with the bumper.
https://www.yotatech.com/forums/f199...0/index44.html
And no prob man. Also good plan with the bumper.


