Terrys87 88 4Runner Restoration/Build thread
#1
Super Moderator
Staff
Thread Starter
iTrader: (1)
Join Date: Aug 2008
Location: Anderson Missouri
Posts: 11,788
Likes: 0
Received 21 Likes
on
19 Posts
Terrys87 88 4Runner Restoration/Build thread
GO BY THE POST NUMBER...THE PAGE NUMBERS HAVE CHANGED. I AM SLOWLY FIXING IT.
Edited 5/8/13...I am currently working on my 86 4Runner, I add information to this build so as to combine it. The 88 is running great and have very few fixes left on it and now am doing upgrades as time and funds allow. I can be found on my 86 build located at the bottom of my signature. The 88 build isnt dead, just not much left to do to it until I get my 86 done.
I just want to introduce myself and my next project. Its an 88 4Runner with the 22re 5 speed. This is my first 4Runner that is a first gen. Been wanting one for awhile.
My plans are to restore it to how I might have ordered in 1988. I want to paint the exterior to match the interior.The interior is Red. So far Red, Tan, Grey, Silver and Black should work. I would like Black, but body work has to be perfect or it will show. Im not that good. Im thinking of a two tone. Any suggestions would be greatly appreciated.
I bought it from the original owner. His youngest son got ahold of it for 6 months and it went downhill from there. It didnt have a gas tank or fuel pump, so I really dont know if it runs. I have had worse.I have replaced frames, motors, paint on my other projects.
One regret I have had is doing a project and not having before, during and after pictures. I am going to keep track on this one. This is a hobby I enjoy and will probably take me from bumper to bumper on this one.
That is my 3rd gen lurking in the background. Its been a great truck.

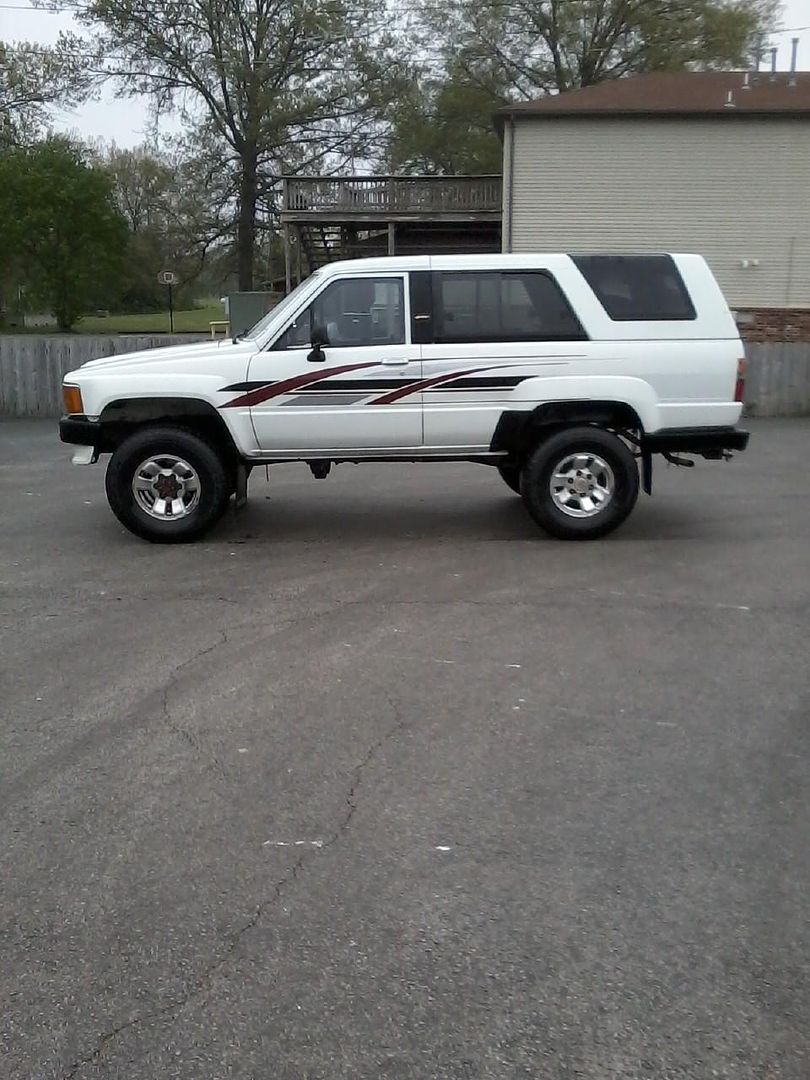
What it looks like now.
------------------------------------------------------------------------------------------------------------------------------------------------
I am going to put my Post # to help people locate how I went and fixed problems. Alot of the fixes below, I have updated since I actually did the repair. If you find something I may have missed or would help someone else out, send me a PM. If any questions come up feel free to ask.
FSM's here. Use Wayback to find FSM's.
Page 1.#2 Rusted up Fuel tank. Cheap and has been working for over 30,000 miles.( As of 1/3/12)
..........#14 Acces to a fuel tank on 4Runner.
Page 2.#31-#33 How to check and fix horn..https://www.yotatech.com/forums/f199...l#post51644565
..........#39 How to break the 22re Crankshaft bolt loose.
Page 3.#43 Cleaning Intake, Code 71 EGR Information..https://www.yotatech.com/forums/f199...l#post51647988
............#46 How to change Power Steering Pulley with Part Number.
Page 3.#51 My Cheap parts page. (If you know of some, let me know, thanks)
Page 5.#82 Track in rear window that will need lubed and temp fix for getting rear window working.
..........#88 Body/Frame Swap how to Steps.
..........#91 Silicon Spray to use on hard to operate windows. Use in tracks. Works GREAT!!!
Page 8.#152 How I got my Guage Lense clear. SR5 Guage Swap Info, Replacing cracked faceplate.....https://www.yotatech.com/forums/f199...l#post51712377
..........#169 How I got the Spare Tire Lift working.
Page 10. #185-#186 All the steps I did finally to get the Tailgate working.
...........#191 Got Door Light working/Door Buzzer from not chiming. (Not all trucks use the same box )...https://www.yotatech.com/forums/f199...l#post51724051
...........#199 Headlight Switch/Wiper delay repair.........https://www.yotatech.com/forums/f199...l#post51724567
Page 11. #207 How to replace Shifter Bushing. Video provided. Well worth cost and benefit. Have done this in the past.
Page 11.#210 How I fixed my Washer Pump motor.
Page 13.#245 Installing Sound Deading Material.
Page 13.#251 How I upgraded my Extended Cab Dome Light and will do 4Runner....https://www.yotatech.com/forums/f199...l#post51731187
Page 15.#296 How I fixed my broken antenna....https://www.yotatech.com/forums/f199...l#post51740271
Page 18.#341 Battery Light Lit, No Guages working, No Blinkers..Fixed. #346 has more recent fixes for ENG fuse.
.............#341 Alternator Rebuild Link and Starter Rebuild Video. How to Clean Starter Relay....https://www.yotatech.com/forums/f199...l#post51746363
............#343 Ground Wires Location link. ENG Fuse FIXED!!! Back up light switch wires rubbed bare at end of protective sleeve. 3.0 Grounds location from NCTTORA.... https://www.yotatech.com/forums/f199...l#post51746688
.............#348 MY Personal Reminders Page.
Page 18. #352 Picture and location of Fusible Link....https://www.yotatech.com/forums/f199...l#post51747852
.............#353 How I fixed my erratic water temp guage. Gates hose PN# 20801....https://www.yotatech.com/forums/f199...l#post51747857
page 20. #382 Broken Mirror Mount Replacement.
..............#384 Interior Paint Code for Cranberry Red Interior ( 3P1 ). Also a link for Gray Interiors by DeathCougar.
..............#396 How to Jump TE1 and E1 to get Check Engine Light Codes. Codes are in Haynes starting on Page 6-36. Diagnostic port for 87 and newer is top picture. 86 and older is the bottom picture. 85/86 Fuel Pump Bypass..https://www.yotatech.com/forums/f199...l#post51760299
Page 22. #424 Zuk Mod info.
Page 22. #439 Drivers side kick panel fuses. How to remove Fusebox...https://www.yotatech.com/forums/f199...l#post51774770
page 23.#451 How to Replace Dash Pad....https://www.yotatech.com/forums/f199...l#post51778558
Page 26. #502 How to add Front Door Pockets....https://www.yotatech.com/forums/f199...l#post51788905
Page 27. #530 Adding Rear Passenger Pockets....https://www.yotatech.com/forums/f199...l#post51793495
Page 28. #551 Tail Light Conversion PN# 43315 and Part Numbers for Door Seals. Right Door PN# 6786189105 and Left Door PN# 6786289104 with wing glass.
Page 26. #636 MY TUNE UP PAGE.
Page 33. #660 Installing a distributor. Great Video provided....https://www.yotatech.com/forums/f199...l#post51893036
.............#661 Installing a Maplight...https://www.yotatech.com/forums/f199...l#post51893038
............#664 Location of Circuit Open Relay, Operates fuel pump.
............#664 Wiper Delay box and Cable needed to install Wiper Delay. Will need Multifunction Combo switch with delay.
...........#664 Troubleshooting steps for non firing fuel injectors. Most likely bad connections in the wiring harness. Remove factory clips and solder the wires together. https://www.yotatech.com/forums/f199...l#post51897320
Page #42. #831 Diff Breather Extention...https://www.yotatech.com/forums/f199...l#post51955864
Page #45 #882 Old and New Style Block Differences...https://www.yotatech.com/forums/f199...l#post51960488
............. #889 Front axle info page. Vacuum Line Link, Steering Gearbox linkage link. Rear Seal Replacement.
Page #57 #1122 "L" Trim Removal Steps....https://www.yotatech.com/forums/f199...l#post52139859
Chefyotas V6 Brake upgrade write up. https://www.yotatech.com/forums/f199...l#post52043992
Pirate Toyota Bible http://www.pirate4x4.com/forum/toyot...faq-2-0-a.html
93 FSM... http://api.viglink.com/api/click?format=go&jsonp=vglnk_142606483339013&key=a5 e11b5075b509bfc2570af7b6e5b404&libId=i74i4q1z01000 b2q000DAf7z6mj3i&loc=http%3A%2F%2Fwww.yotatech.com %2Ff117%2F05-06-tacoma-service-manual-online-287470%2F&v=1&out=http%3A%2F%2Fwww.ether3al.com%2F 93fsm-mobile&ref=http%3A%2F%2Fwww.yotatech.com%2Fsearch. php%3Fsearchid%3D10545453&title=05-06%20Tacoma%20Service%20Manual%20Online%20-%20YotaTech%20Forums&txt=http%3A%2F%2Fwww.ether3al .com%2F93fsm-mobile
Cleaning Ventilation System.... https://www.yotatech.com/forums/f116...trucks-286766/
Wayback FSMs... https://www.yotatech.com/forums/f116.../#post52341431
Edited 5/8/13...I am currently working on my 86 4Runner, I add information to this build so as to combine it. The 88 is running great and have very few fixes left on it and now am doing upgrades as time and funds allow. I can be found on my 86 build located at the bottom of my signature. The 88 build isnt dead, just not much left to do to it until I get my 86 done.
I just want to introduce myself and my next project. Its an 88 4Runner with the 22re 5 speed. This is my first 4Runner that is a first gen. Been wanting one for awhile.
My plans are to restore it to how I might have ordered in 1988. I want to paint the exterior to match the interior.The interior is Red. So far Red, Tan, Grey, Silver and Black should work. I would like Black, but body work has to be perfect or it will show. Im not that good. Im thinking of a two tone. Any suggestions would be greatly appreciated.
I bought it from the original owner. His youngest son got ahold of it for 6 months and it went downhill from there. It didnt have a gas tank or fuel pump, so I really dont know if it runs. I have had worse.I have replaced frames, motors, paint on my other projects.
One regret I have had is doing a project and not having before, during and after pictures. I am going to keep track on this one. This is a hobby I enjoy and will probably take me from bumper to bumper on this one.
That is my 3rd gen lurking in the background. Its been a great truck.

What it looks like now.

------------------------------------------------------------------------------------------------------------------------------------------------
I am going to put my Post # to help people locate how I went and fixed problems. Alot of the fixes below, I have updated since I actually did the repair. If you find something I may have missed or would help someone else out, send me a PM. If any questions come up feel free to ask.
FSM's here. Use Wayback to find FSM's.
Page 1.#2 Rusted up Fuel tank. Cheap and has been working for over 30,000 miles.( As of 1/3/12)
..........#14 Acces to a fuel tank on 4Runner.
Page 2.#31-#33 How to check and fix horn..https://www.yotatech.com/forums/f199...l#post51644565
..........#39 How to break the 22re Crankshaft bolt loose.
Page 3.#43 Cleaning Intake, Code 71 EGR Information..https://www.yotatech.com/forums/f199...l#post51647988
............#46 How to change Power Steering Pulley with Part Number.
Page 3.#51 My Cheap parts page. (If you know of some, let me know, thanks)
Page 5.#82 Track in rear window that will need lubed and temp fix for getting rear window working.
..........#88 Body/Frame Swap how to Steps.
..........#91 Silicon Spray to use on hard to operate windows. Use in tracks. Works GREAT!!!
Page 8.#152 How I got my Guage Lense clear. SR5 Guage Swap Info, Replacing cracked faceplate.....https://www.yotatech.com/forums/f199...l#post51712377
..........#169 How I got the Spare Tire Lift working.
Page 10. #185-#186 All the steps I did finally to get the Tailgate working.
...........#191 Got Door Light working/Door Buzzer from not chiming. (Not all trucks use the same box )...https://www.yotatech.com/forums/f199...l#post51724051
...........#199 Headlight Switch/Wiper delay repair.........https://www.yotatech.com/forums/f199...l#post51724567
Page 11. #207 How to replace Shifter Bushing. Video provided. Well worth cost and benefit. Have done this in the past.
Page 11.#210 How I fixed my Washer Pump motor.
Page 13.#245 Installing Sound Deading Material.
Page 13.#251 How I upgraded my Extended Cab Dome Light and will do 4Runner....https://www.yotatech.com/forums/f199...l#post51731187
Page 15.#296 How I fixed my broken antenna....https://www.yotatech.com/forums/f199...l#post51740271
Page 18.#341 Battery Light Lit, No Guages working, No Blinkers..Fixed. #346 has more recent fixes for ENG fuse.
.............#341 Alternator Rebuild Link and Starter Rebuild Video. How to Clean Starter Relay....https://www.yotatech.com/forums/f199...l#post51746363
............#343 Ground Wires Location link. ENG Fuse FIXED!!! Back up light switch wires rubbed bare at end of protective sleeve. 3.0 Grounds location from NCTTORA.... https://www.yotatech.com/forums/f199...l#post51746688
.............#348 MY Personal Reminders Page.
Page 18. #352 Picture and location of Fusible Link....https://www.yotatech.com/forums/f199...l#post51747852
.............#353 How I fixed my erratic water temp guage. Gates hose PN# 20801....https://www.yotatech.com/forums/f199...l#post51747857
page 20. #382 Broken Mirror Mount Replacement.
..............#384 Interior Paint Code for Cranberry Red Interior ( 3P1 ). Also a link for Gray Interiors by DeathCougar.
..............#396 How to Jump TE1 and E1 to get Check Engine Light Codes. Codes are in Haynes starting on Page 6-36. Diagnostic port for 87 and newer is top picture. 86 and older is the bottom picture. 85/86 Fuel Pump Bypass..https://www.yotatech.com/forums/f199...l#post51760299
Page 22. #424 Zuk Mod info.
Page 22. #439 Drivers side kick panel fuses. How to remove Fusebox...https://www.yotatech.com/forums/f199...l#post51774770
page 23.#451 How to Replace Dash Pad....https://www.yotatech.com/forums/f199...l#post51778558
Page 26. #502 How to add Front Door Pockets....https://www.yotatech.com/forums/f199...l#post51788905
Page 27. #530 Adding Rear Passenger Pockets....https://www.yotatech.com/forums/f199...l#post51793495
Page 28. #551 Tail Light Conversion PN# 43315 and Part Numbers for Door Seals. Right Door PN# 6786189105 and Left Door PN# 6786289104 with wing glass.
Page 26. #636 MY TUNE UP PAGE.
Page 33. #660 Installing a distributor. Great Video provided....https://www.yotatech.com/forums/f199...l#post51893036
.............#661 Installing a Maplight...https://www.yotatech.com/forums/f199...l#post51893038
............#664 Location of Circuit Open Relay, Operates fuel pump.
............#664 Wiper Delay box and Cable needed to install Wiper Delay. Will need Multifunction Combo switch with delay.
...........#664 Troubleshooting steps for non firing fuel injectors. Most likely bad connections in the wiring harness. Remove factory clips and solder the wires together. https://www.yotatech.com/forums/f199...l#post51897320
Page #42. #831 Diff Breather Extention...https://www.yotatech.com/forums/f199...l#post51955864
Page #45 #882 Old and New Style Block Differences...https://www.yotatech.com/forums/f199...l#post51960488
............. #889 Front axle info page. Vacuum Line Link, Steering Gearbox linkage link. Rear Seal Replacement.
Page #57 #1122 "L" Trim Removal Steps....https://www.yotatech.com/forums/f199...l#post52139859
Chefyotas V6 Brake upgrade write up. https://www.yotatech.com/forums/f199...l#post52043992
Pirate Toyota Bible http://www.pirate4x4.com/forum/toyot...faq-2-0-a.html
93 FSM... http://api.viglink.com/api/click?format=go&jsonp=vglnk_142606483339013&key=a5 e11b5075b509bfc2570af7b6e5b404&libId=i74i4q1z01000 b2q000DAf7z6mj3i&loc=http%3A%2F%2Fwww.yotatech.com %2Ff117%2F05-06-tacoma-service-manual-online-287470%2F&v=1&out=http%3A%2F%2Fwww.ether3al.com%2F 93fsm-mobile&ref=http%3A%2F%2Fwww.yotatech.com%2Fsearch. php%3Fsearchid%3D10545453&title=05-06%20Tacoma%20Service%20Manual%20Online%20-%20YotaTech%20Forums&txt=http%3A%2F%2Fwww.ether3al .com%2F93fsm-mobile
Cleaning Ventilation System.... https://www.yotatech.com/forums/f116...trucks-286766/
Wayback FSMs... https://www.yotatech.com/forums/f116.../#post52341431
Last edited by Terrys87; 11-15-2016 at 06:59 PM.
The following users liked this post:
Yoogy (09-07-2019)
#2
Super Moderator
Staff
Thread Starter
iTrader: (1)
Join Date: Aug 2008
Location: Anderson Missouri
Posts: 11,788
Likes: 0
Received 21 Likes
on
19 Posts
I got a tank out of my parts truck and it was loaded with rust and so was the pump. I surprised the truck even ran. Filter was all plugged up. I spent quite a bit of time cleaning the tank out. First I drained it and tapped the outside with a rubber hammer to break the thick rust loose. Put a little water in to avoid sparks and put some chain and rocked it back and forth to get more loose and then I let it soak with some vinegar in it. I found this on the web. It actually came pretty clean. Have heard of using The Works toilet bowl cleaner from K Mart.
http://www.mopedarmy.com/wiki/Removi...rom_a_gas_tank Several products you can use.
http://www.ehow.com/how_4540637_remo...-gas-tank.html
http://www.vjmog.com/ftopict-3687.html
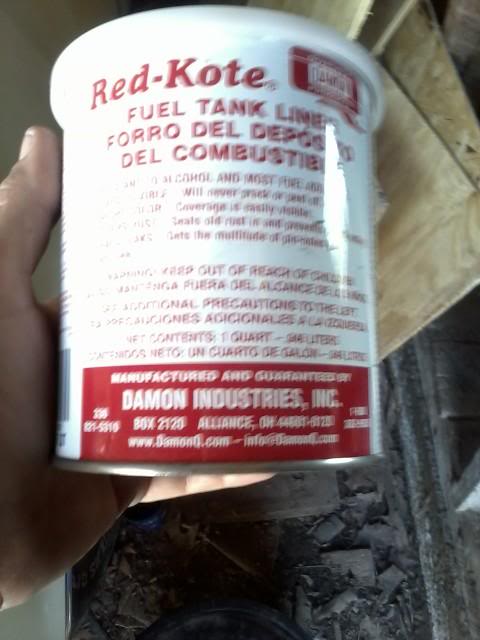
I have a friend that works in a parts store and he suggested Red Kote to coat the tank. I have coated it and am waiting for my new fuel pump to come in. I ready to get the tank in and see if this thing fires up.
I dont mess with tanks in the summer. The fumes are what are dangerous.
I bought the fuel pump off of ebay from "carpartswholesale" for $27.85 plus cheap shipping. Parts store wanted $150
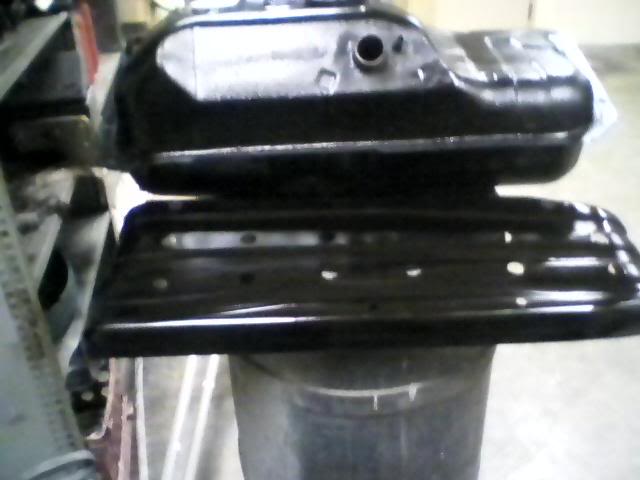
This "J" line likes to get clogged. Check all of them, but most likely this one will be clogged.
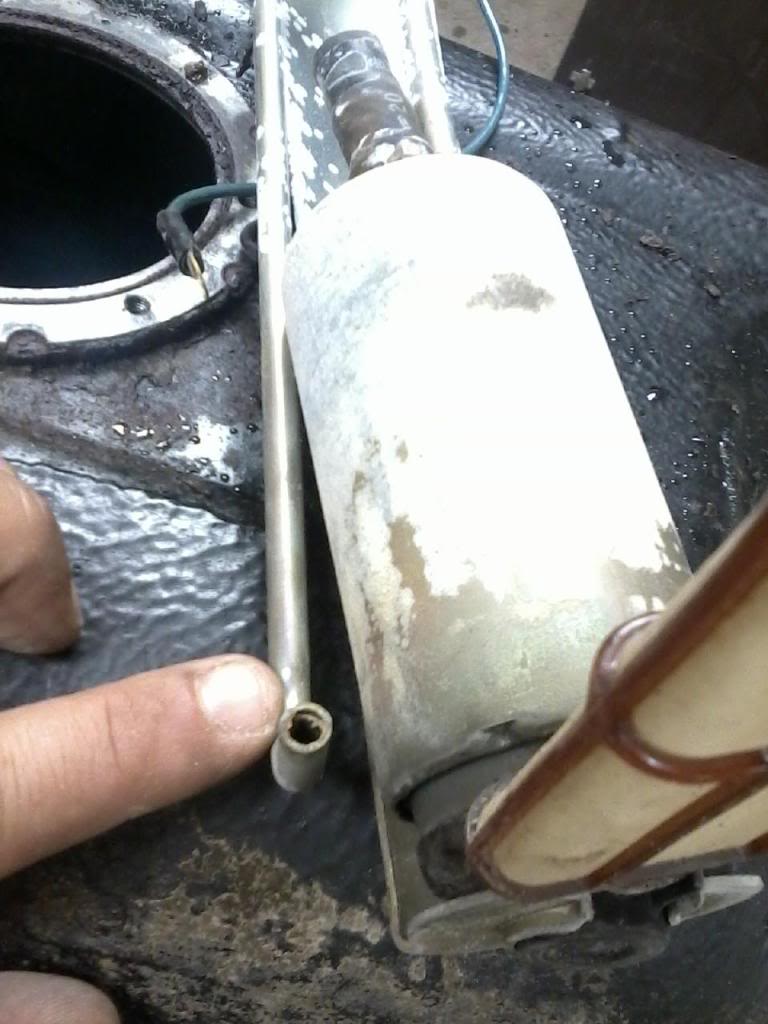
New $25 dollar fuel pump. New Fuel Pump Gas Truck 4 Runner Toyota Celica 89 88 87 86 Camry 91 90 85 MR2 | eBay
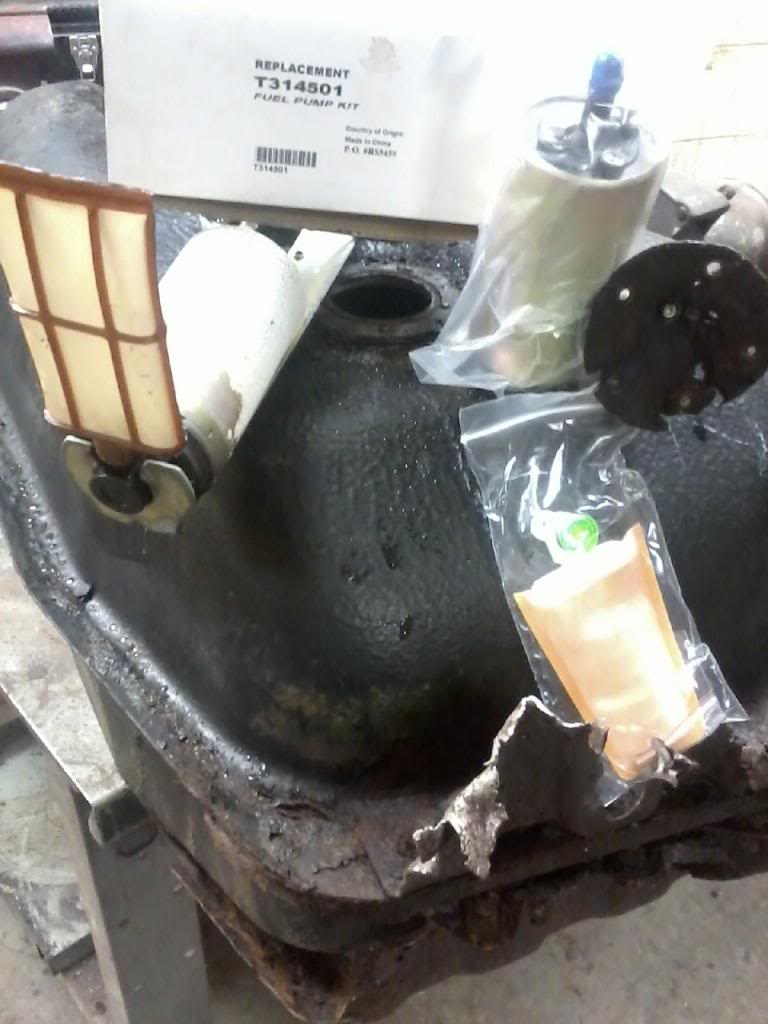
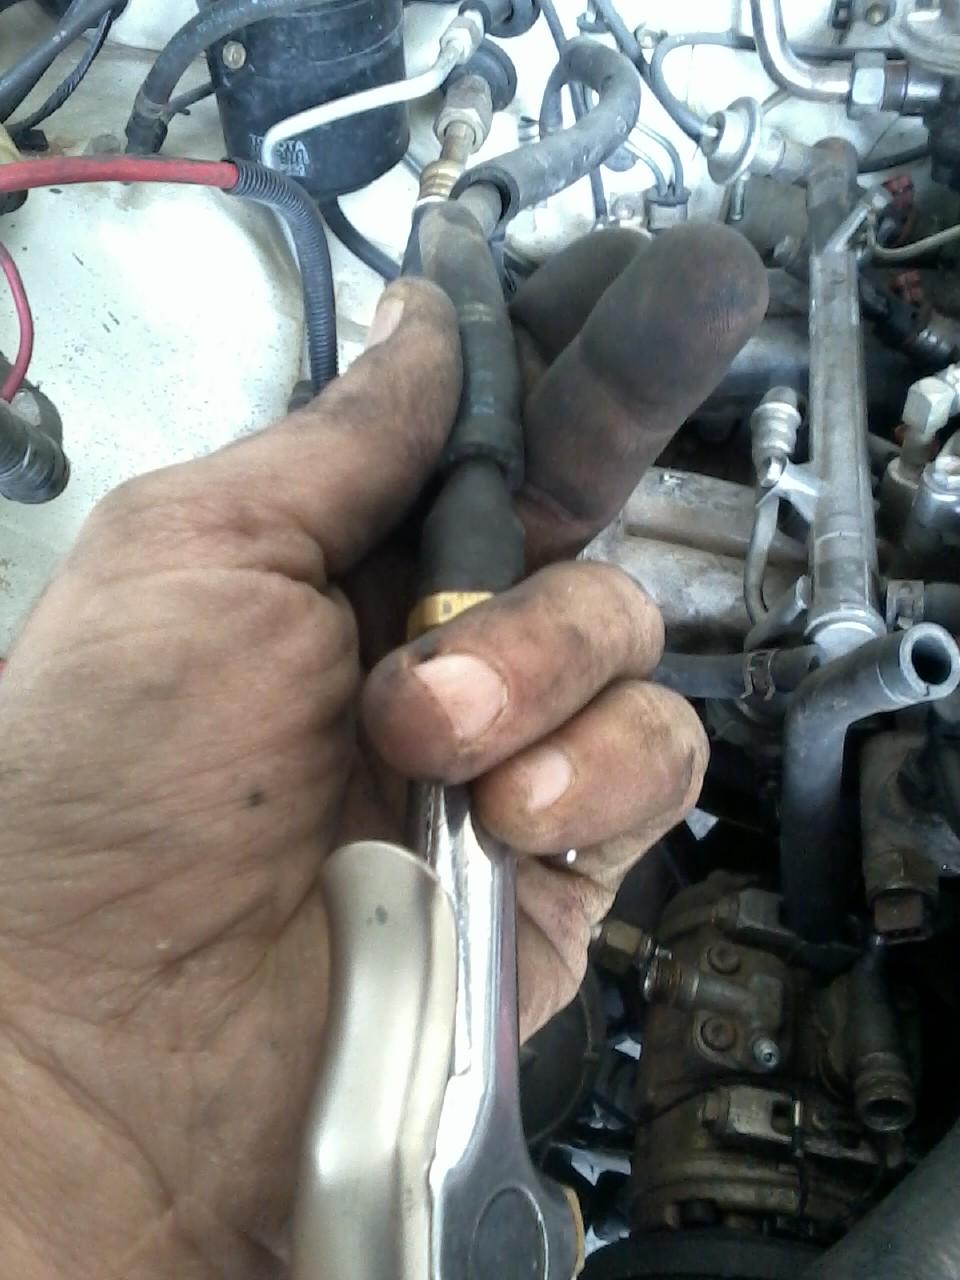
Here I am checking to see if one of the fuel return lines is clear. I pop the gas cap off and you will hear air or bubbles in the tank. I have seen these return lines clogged.
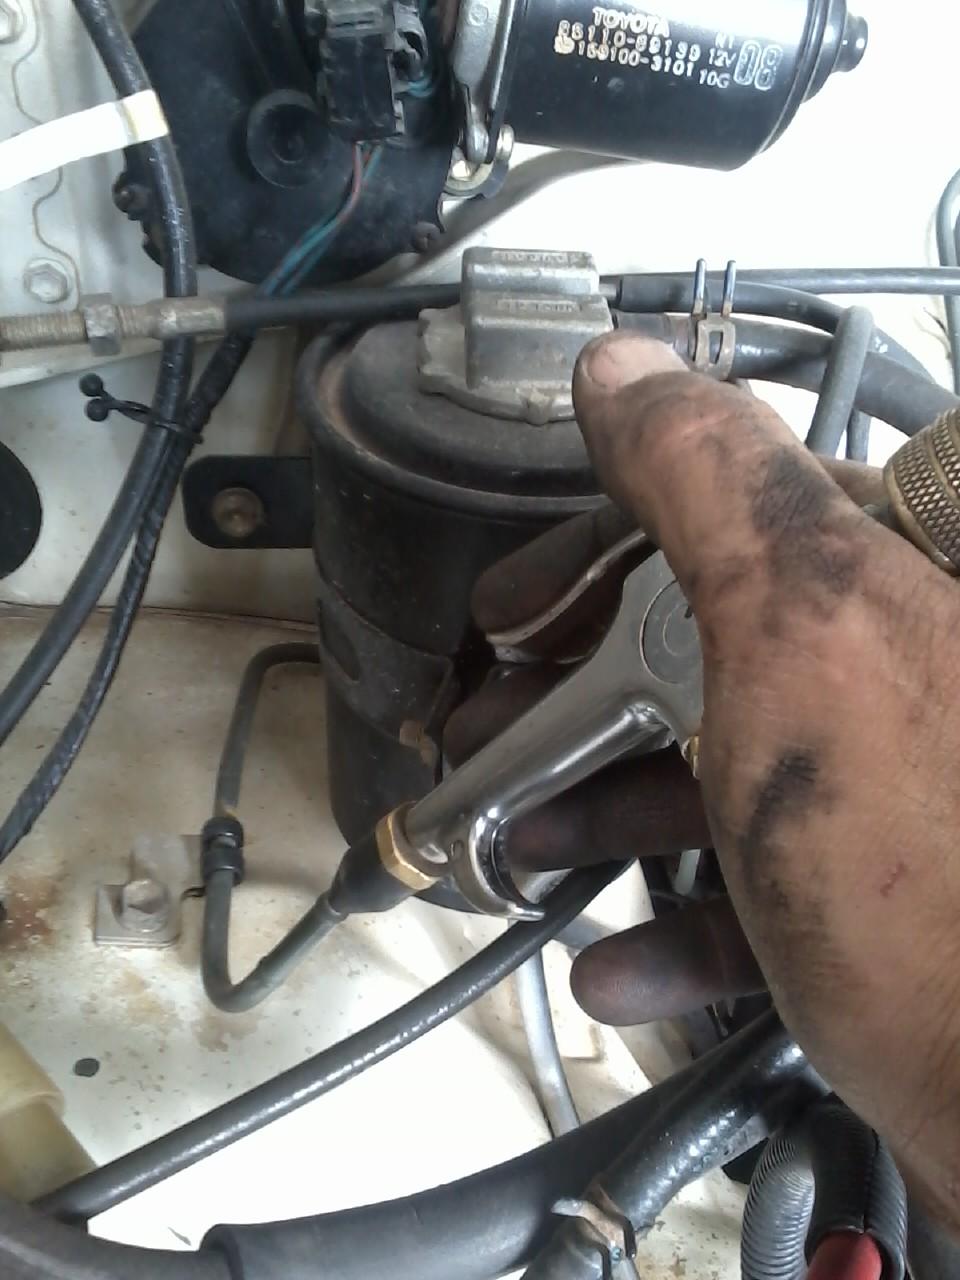
Checking the other line.
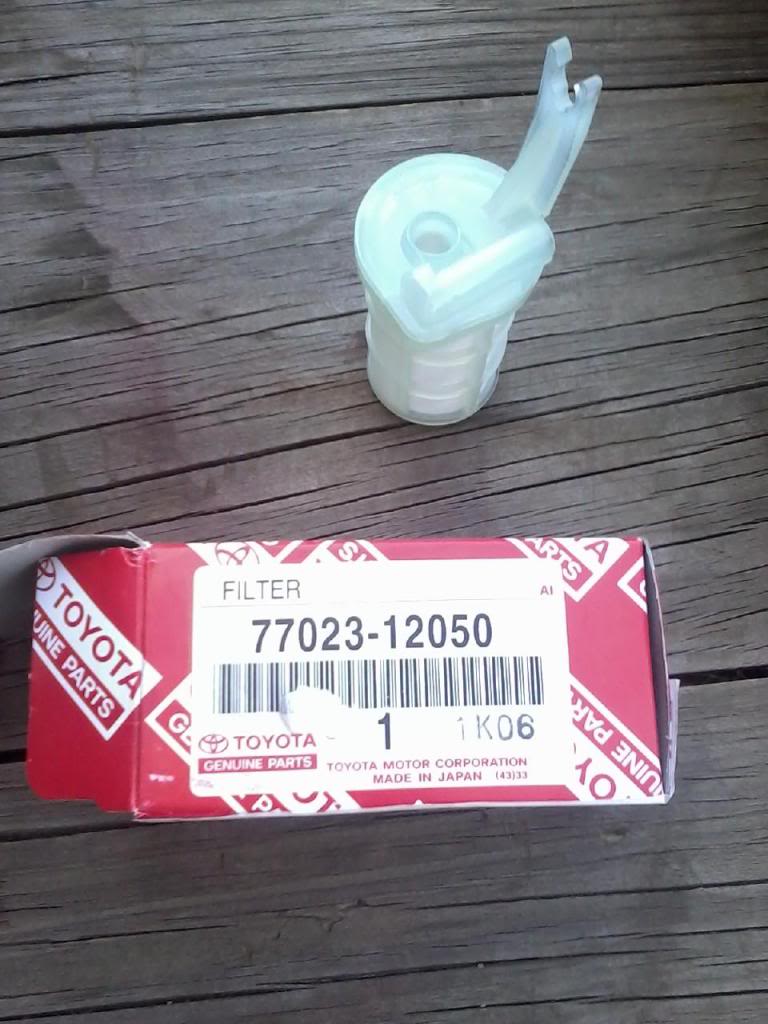
Part number for a new intank filter is #77023-12050. On ebay it is called a TOYOTA FACTORY NIB FUEL FILTER SUCTION TUBE DIESEL. It was selling for $4.50 when I finally found it. I paid $15 at Toyota. (83 pg 8) This filter is for carburated trucks.
External 22r Filter.
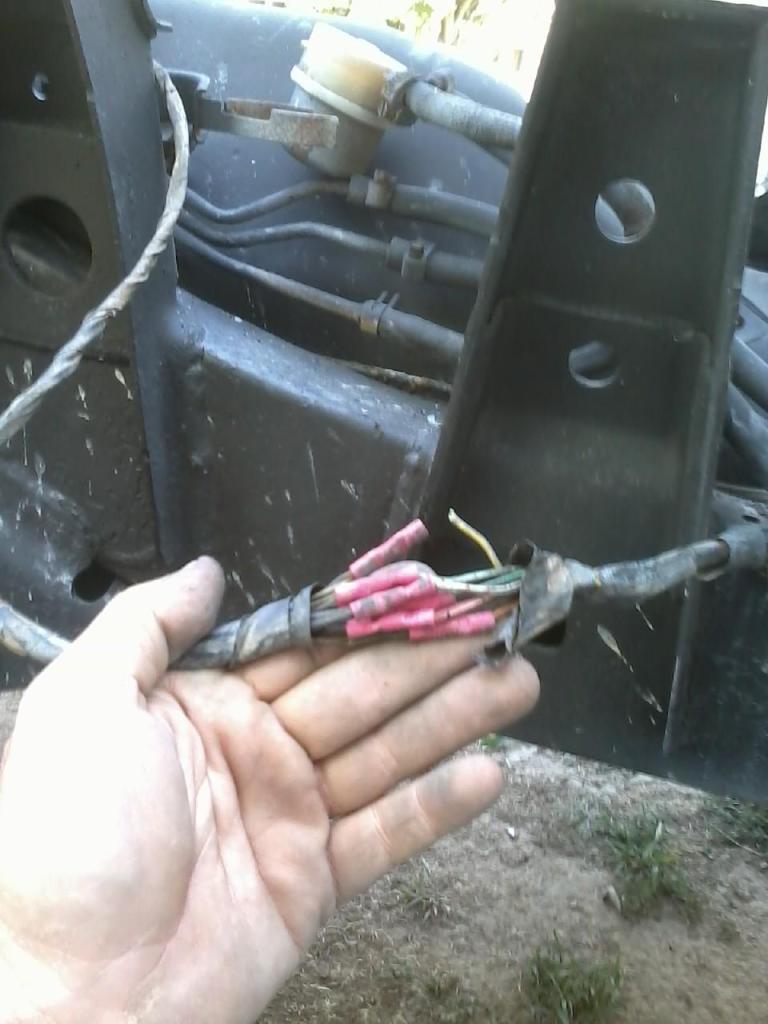
I knew I had a picture of the factory filter somewhere. Ignore the wonderful wiring hack job.
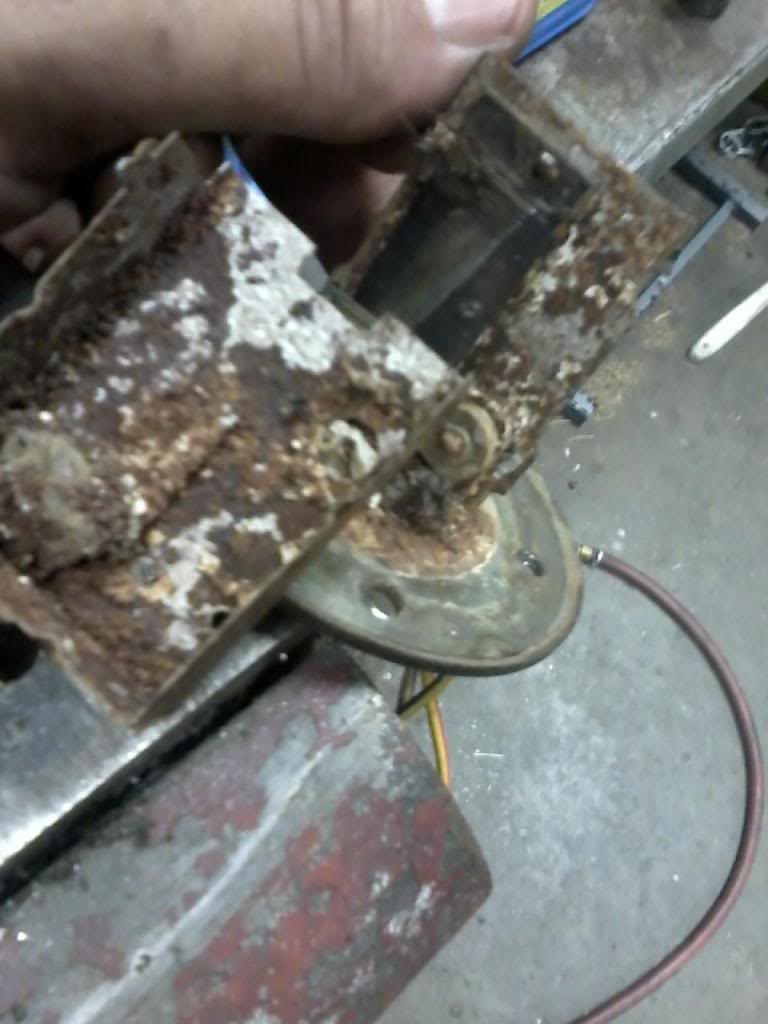
I took the assembly apart and cleaned the wiper that connects to the coil. The black coil by thumb just needed the corrosion cleaned off of the little wiper.
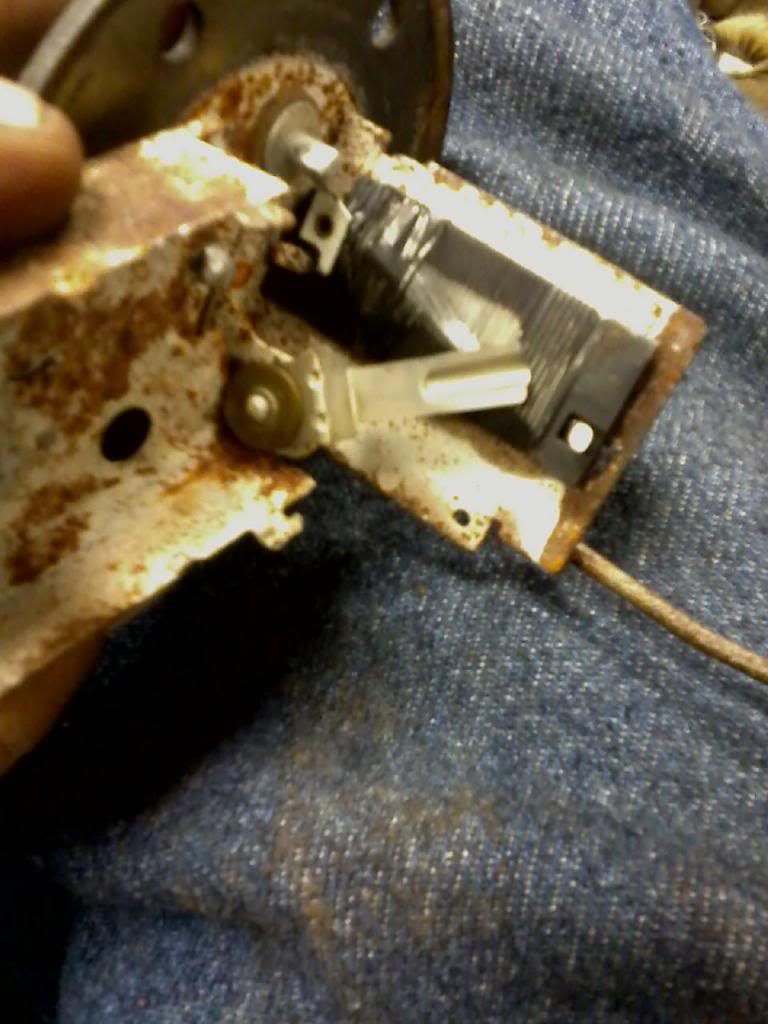
Here is a better view of the wiper that slides on the coil. It had some broken strands so is no good now. A spare that I had.
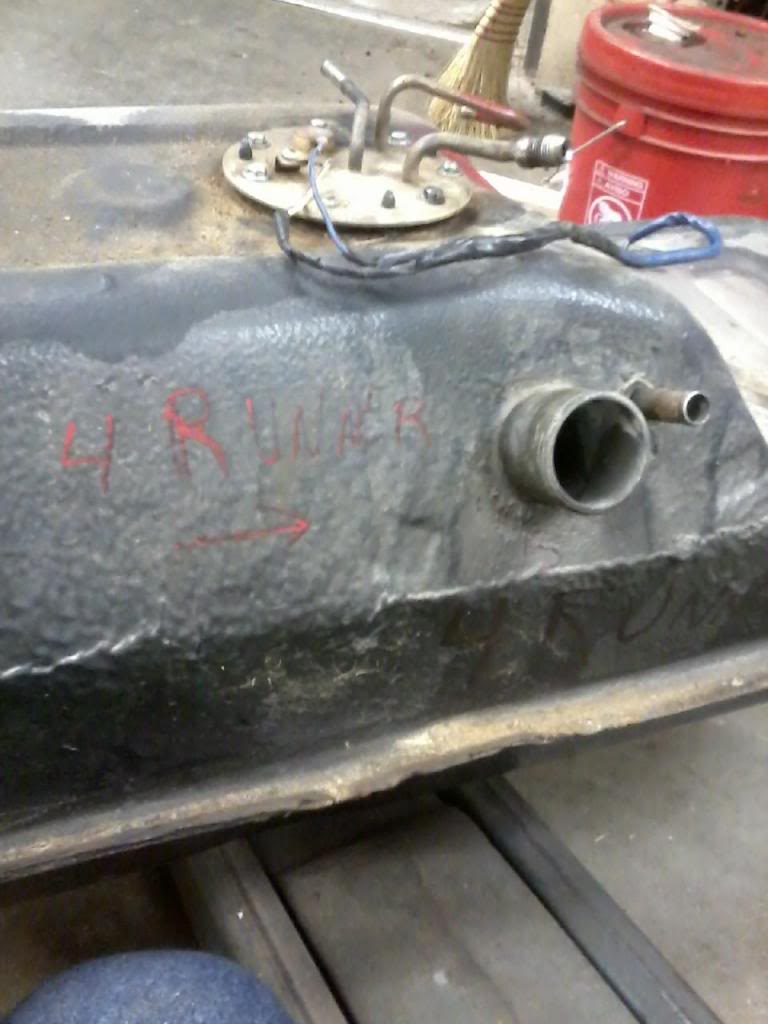
Here is a 4Runner tank. Mostly a reference for me. The big and small pipes are oppisite of each other on trucks and 4Runners.
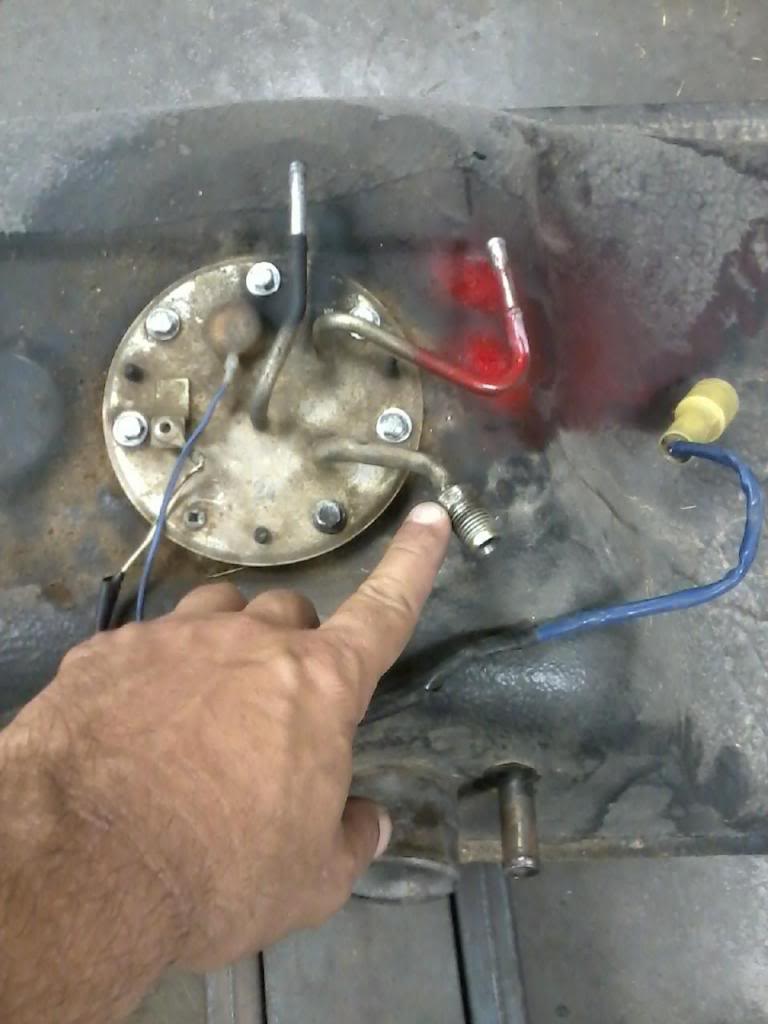
Another reference for me. The 14mm nut is stationary and the 19mm is the one that gets turned. Will add this to my fuel tank page for future reference for me.
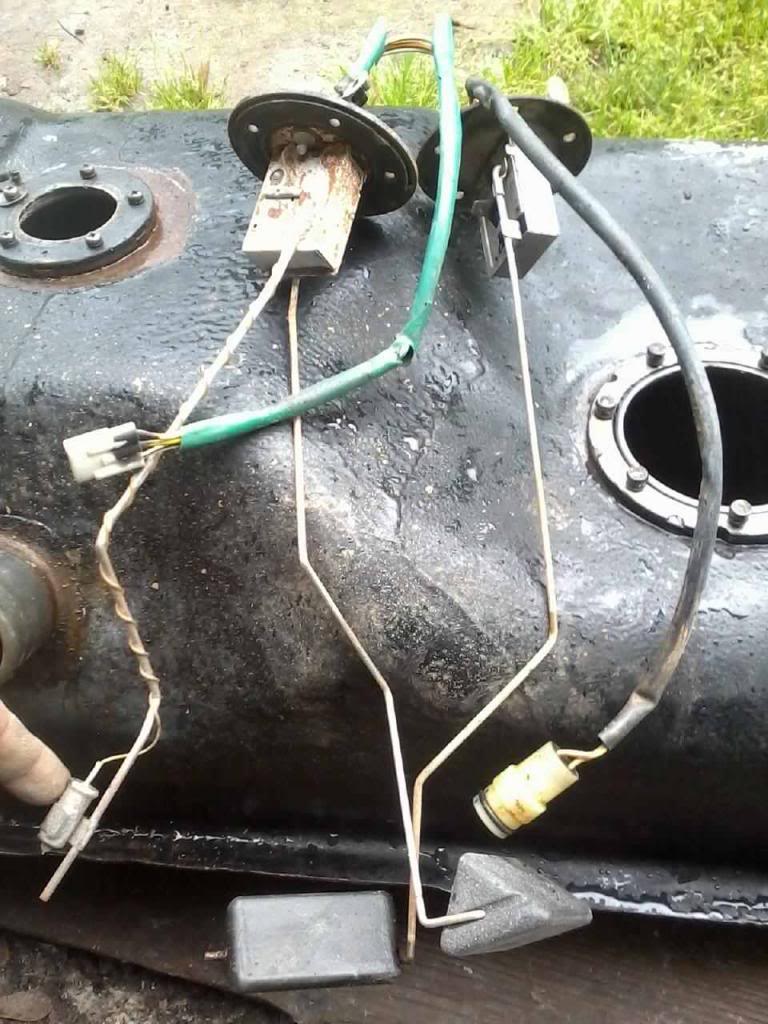
Low Level Light Option and plug differences.
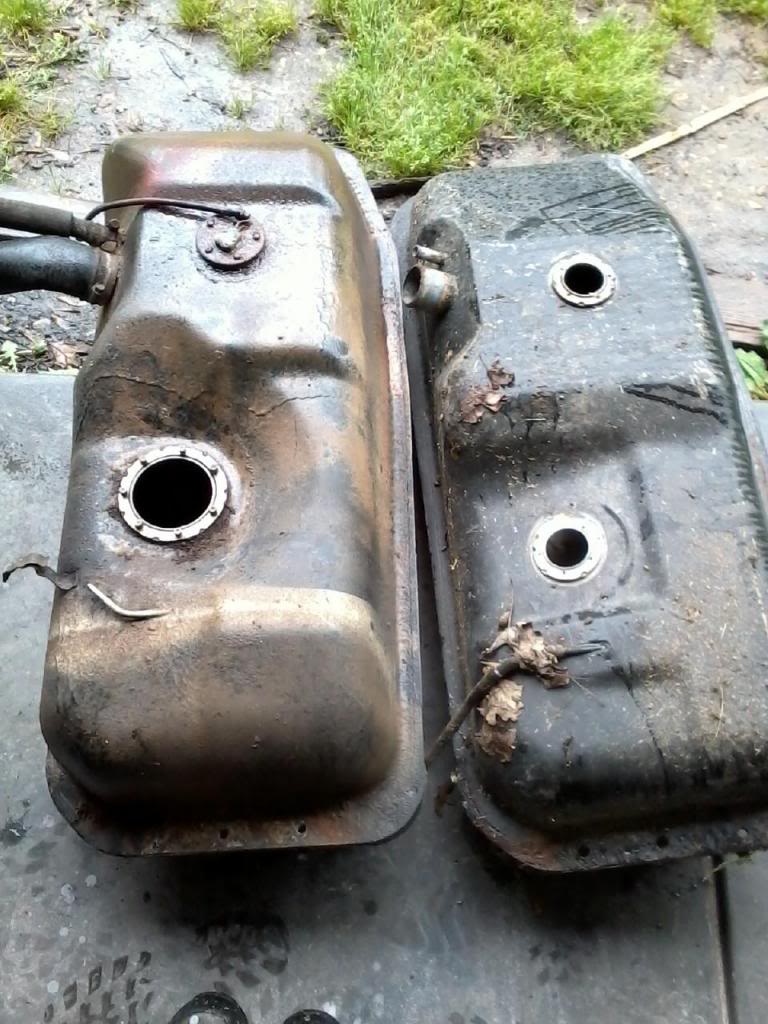
Also the tank on the left is for a fuel injected truck. Bigger opening to allow for the fuel pump to fit in. The tank on the right is carbed and it may not show in picture is but is smaller. This tank came off of a 2wd truck.
http://www.mopedarmy.com/wiki/Removi...rom_a_gas_tank Several products you can use.
http://www.ehow.com/how_4540637_remo...-gas-tank.html
http://www.vjmog.com/ftopict-3687.html
I have a friend that works in a parts store and he suggested Red Kote to coat the tank. I have coated it and am waiting for my new fuel pump to come in. I ready to get the tank in and see if this thing fires up.
I dont mess with tanks in the summer. The fumes are what are dangerous.
I bought the fuel pump off of ebay from "carpartswholesale" for $27.85 plus cheap shipping. Parts store wanted $150

This "J" line likes to get clogged. Check all of them, but most likely this one will be clogged.

New $25 dollar fuel pump. New Fuel Pump Gas Truck 4 Runner Toyota Celica 89 88 87 86 Camry 91 90 85 MR2 | eBay


Here I am checking to see if one of the fuel return lines is clear. I pop the gas cap off and you will hear air or bubbles in the tank. I have seen these return lines clogged.

Checking the other line.

Part number for a new intank filter is #77023-12050. On ebay it is called a TOYOTA FACTORY NIB FUEL FILTER SUCTION TUBE DIESEL. It was selling for $4.50 when I finally found it. I paid $15 at Toyota. (83 pg 8) This filter is for carburated trucks.

External 22r Filter.
I knew I had a picture of the factory filter somewhere. Ignore the wonderful wiring hack job.

I took the assembly apart and cleaned the wiper that connects to the coil. The black coil by thumb just needed the corrosion cleaned off of the little wiper.

Here is a better view of the wiper that slides on the coil. It had some broken strands so is no good now. A spare that I had.

Here is a 4Runner tank. Mostly a reference for me. The big and small pipes are oppisite of each other on trucks and 4Runners.

Another reference for me. The 14mm nut is stationary and the 19mm is the one that gets turned. Will add this to my fuel tank page for future reference for me.

Low Level Light Option and plug differences.

Also the tank on the left is for a fuel injected truck. Bigger opening to allow for the fuel pump to fit in. The tank on the right is carbed and it may not show in picture is but is smaller. This tank came off of a 2wd truck.

Last edited by Terrys87; 09-04-2016 at 10:25 PM.
#3
Super Moderator
Staff
Thread Starter
iTrader: (1)
Join Date: Aug 2008
Location: Anderson Missouri
Posts: 11,788
Likes: 0
Received 21 Likes
on
19 Posts
I want to get something done at least once a week, no matter how small it is. The PO had put holes in the lenses and used U-Haul lights. So I had the little guies to help on that.
Here are the common codes for Toyota vehicles 1988-95:
Code 11 Momentary interruption in power supply to ECU (electronic control unit or computer) up to 1991
Code 12 Engine revolution signal missing
Code 13 Rpm signal to ecu missing above 1000 rpm
Code 14 Igniter signal to ecu missing
Code 16 A/T control signal missing from ecu
Code 21 Main oxygen sensor signal fault
Code 22 Water temperature sensor circuit fault
Code 23 and 24 Intake air temperature signal fault
Code 25 Air/fuel ratio LEAN
Code 26 Air/fuel ratio RICH
Code 27 Sub-oxygen sensor signal or heater circuit fault
Code 28 No.2 oxygen sensor/heater signal fault
Code 31 and 32 Air flow meter circuit or Vacuum sensor signal fault
Code 34 and 36 Turbo-charging pressure signal fault
Code 35 Altitude compensation sensor signal fault
Code 41 Throttle position circuit fault
Code 42 Vehicle speed sensor circuit
Code 43 No starter signal to the ecu
Code 51 AC signal on; DL contact off (in trany shifter with diagnostic connector jumped)
Code 52, 53 and 55 Knock sensor fault
Code 71 EGR system malfunction
Code 72 Fuel cut solenoid signal fault
Code 78 Fuel pump control signal fault
Code 81, 83, 84 and 85 TCM communication fault
85-87 Codes
Code 1 System Normal
Code 2 Airflow Meter Signal
Code 3 Ignition Signal
Code 4 Water Thermo Sensor
Code 5 Oxygen Sensor Signal
Code 6 RPM Signal
Code 7 Throttle Positon Sensor Signal
Code 8 Intake Air Thermos Sensor Signal
Code 10 Starter Signal
Code 11 Switch Sigal
Code 12 Knock Control Sensor
Code 13 Knock Control CPU
Code 14 Turbocharger Pressure
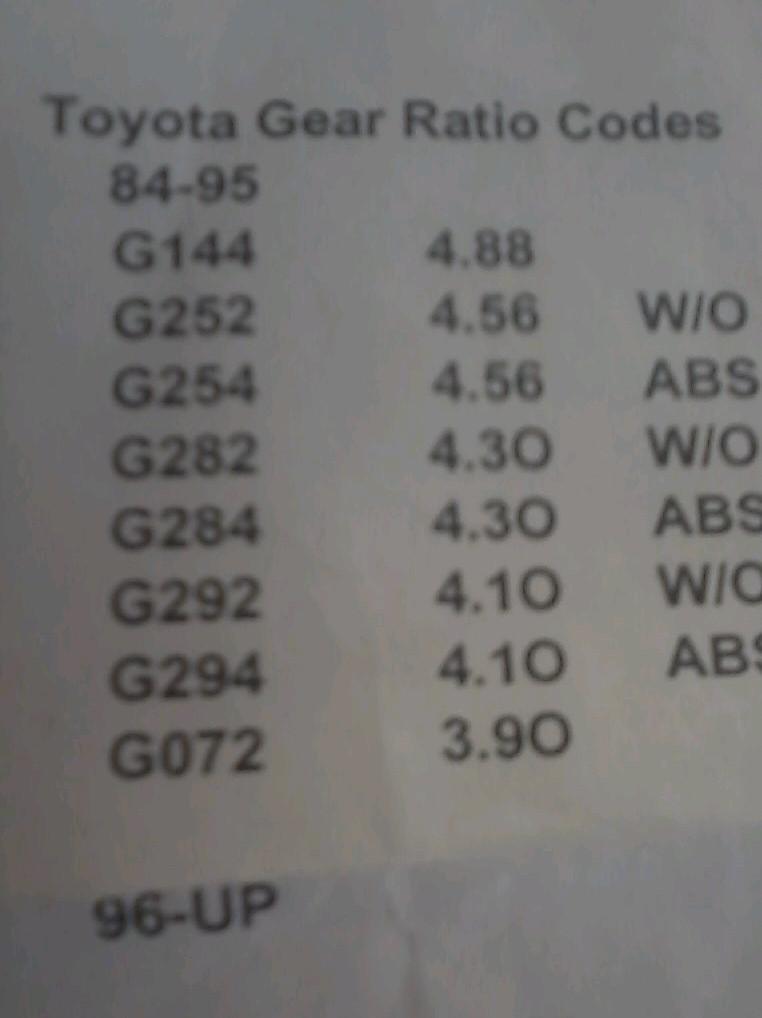
Gear codes

Last edited by Terrys87; 09-22-2016 at 11:36 AM.
#4
Super Moderator
Staff
Thread Starter
iTrader: (1)
Join Date: Aug 2008
Location: Anderson Missouri
Posts: 11,788
Likes: 0
Received 21 Likes
on
19 Posts
Here it is completed. Started to working on the gas tank. The pump holder has a plugged line so that is holding me up on getting it back in. The Red Kote has dried and sealed in the rust. If I need to I will replace the tank with a new one, but it looks good as it is now. Just cant get a good picture of it. Did get get the float back in, so it is a start.
Last edited by Terrys87; 01-13-2011 at 12:10 PM.
#6
Registered User
Search for the Interlux Brightside paint....it's a yacht paint and you can either roll it on or spray it on, comes out looking VERY VERY nice for how cheap it is. should be roughly $100-$130 to paint that entire 4runner.
#7
Super Moderator
Staff
Thread Starter
iTrader: (1)
Join Date: Aug 2008
Location: Anderson Missouri
Posts: 11,788
Likes: 0
Received 21 Likes
on
19 Posts
fl8r22..I would like for you to follow along. I like your 81. Good luck finding one of those in this area. A 79-83 is my next truck on the list. A friend of mine is trying to buy an 83 that he is trying to get the owner to sell. It has sat several years. If he gets it, I am going to help him restore it. He wants to restore one for his wife. Looks like you have done alot to yours an I will be following along. Did you restore your 84-88 on your profile? That looks sharp.
camo31..I will look into that Interlux. I have quite a bit of body work to do on the passenger side. Once it warms up I plan on hitting it hard and would like to get it painted. Im sure my neighbors would like to see it looking better. They seen me with other projects and probably no telling what went through their minds. But have had a few that like to see how they turn out when finished.
camo31..I will look into that Interlux. I have quite a bit of body work to do on the passenger side. Once it warms up I plan on hitting it hard and would like to get it painted. Im sure my neighbors would like to see it looking better. They seen me with other projects and probably no telling what went through their minds. But have had a few that like to see how they turn out when finished.
Trending Topics
#8
Registered User
iTrader: (1)
Join Date: Oct 2010
Location: N of Okechobee Florida
Posts: 1,002
Likes: 0
Received 4 Likes
on
4 Posts
fl8r22..I would like for you to follow along. I like your 81. Good luck finding one of those in this area. A 79-83 is my next truck on the list. A friend of mine is trying to buy an 83 that he is trying to get the owner to sell. It has sat several years. If he gets it, I am going to help him restore it. He wants to restore one for his wife. Looks like you have done alot to yours an I will be following along. Did you restore your 84-88 on your profile? That looks sharp.
my neighbors freak out too, but they're kind of used to me tearing something apart.
 take care
#9
Registered User
I'll subscribe also. I love first gen 4runner builds, been working on one myself for almost a year now and haven't made as much progress as I would have liked too. Good luck to you.
#11
Super Moderator
Staff
Thread Starter
iTrader: (1)
Join Date: Aug 2008
Location: Anderson Missouri
Posts: 11,788
Likes: 0
Received 21 Likes
on
19 Posts
I would be glad to have you along. Both of you have some nice runners. I'll be glad to get to aleast drive mine. Im always looking for ideas. We dont have many 1st gens around here, and I really like seeing them on the road.
#12
Super Moderator
Staff
Thread Starter
iTrader: (1)
Join Date: Aug 2008
Location: Anderson Missouri
Posts: 11,788
Likes: 0
Received 21 Likes
on
19 Posts
Here is the tank all cleaned up and put back togther. If the weather holds up, I would like to get it in and see if it runs and what I have got. I am looking forward to that first drive. First trip will be to the carwash. It looks to have a bad oil leak somewhere.
http://
I guess when I removed the picture from my album, it removed it from my post. I will get them back in.
http://

I guess when I removed the picture from my album, it removed it from my post. I will get them back in.
Last edited by Terrys87; 02-10-2011 at 03:33 PM.
#13
Super Moderator
Staff
Thread Starter
iTrader: (1)
Join Date: Aug 2008
Location: Anderson Missouri
Posts: 11,788
Likes: 0
Received 21 Likes
on
19 Posts
I got the fuel tank in and was thinking it wouldnt be long til I get to try and start it up. NOT!! The PO cut the vent line to the tank so I will put that off for the next few days til I get it replaced. But I do want to do some updates as to what going on.
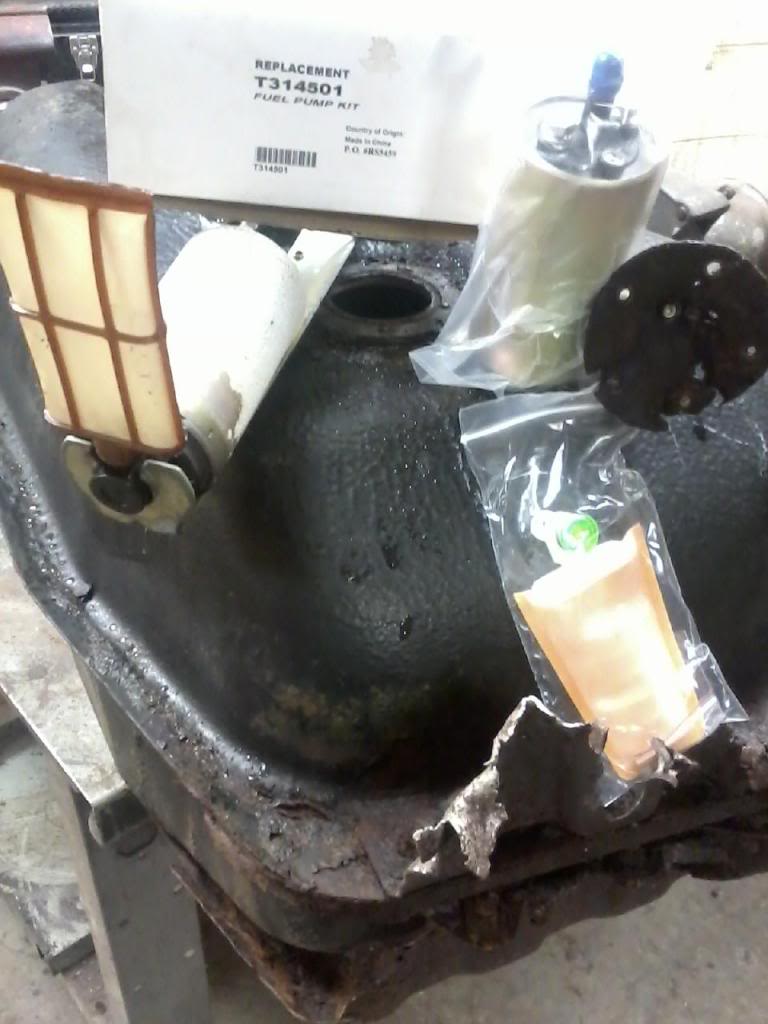
I have replaced 2 fuel pumps in the past and at about $150ish from the parts store for a new one, I thought I would look on the net for a cheaper one. I found some new ones on ebay for $25 and thougt I would try one. It looks like the orginal one. Anyone tried one of these and how have they worked for you?
UPDATE: I have over 20,000 miles and not a problem, also have used on another truck and no problems with these $25 fuel pumps.

Last edited by Terrys87; 09-14-2011 at 11:38 AM.
#14
Super Moderator
Staff
Thread Starter
iTrader: (1)
Join Date: Aug 2008
Location: Anderson Missouri
Posts: 11,788
Likes: 0
Received 21 Likes
on
19 Posts
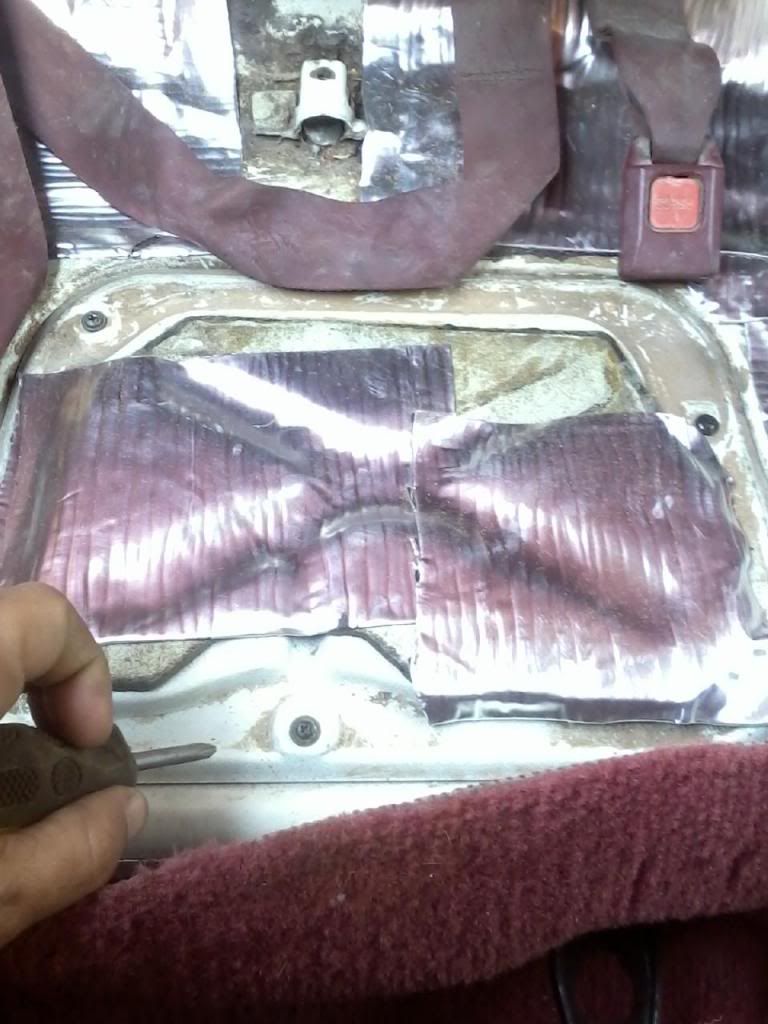
Recently I seen a post about someone asking questions on fuel pumps. On a 4Runner you have an acess panel under the passenger rear seat, remove the 3 black screws and lift the cover. On a truck you get to pull the bed or drop the tank. I like to pull the bed myself. The lines on a truck are short and dont give you much room for dropping the tank, is the reason I pull the bed.
Switching out pumps is pretty straight forward. Just make sure you get your Positive and Negative wires correct and on the Sock/Filter there is a Silver Clip that helps hold the Sock/Filter on and the rubber piece goes in between the bracket and pump.
Also the bracket assembly you have 3 metal lines. I have always seen the return line plugged. It is the long metal line that is in a "J" style. So check it out before putting it back in the tank. Usually you get everything in the Pump but no Filter/Sock as has been my experience.

The rubber O ring on this one, I dont remember ever changing. It has been awhile since I have done one. Any body know where this goes that I am holding by the silver clip? It will be a couple of days til I put it in. Thanks
Located under passenger seat. 3 screws. You can get the fuel pump. To get the fuel guage you have to drop the tank.
Switching out pumps is pretty straight forward. Just make sure you get your Positive and Negative wires correct and on the Sock/Filter there is a Silver Clip that helps hold the Sock/Filter on and the rubber piece goes in between the bracket and pump.
Also the bracket assembly you have 3 metal lines. I have always seen the return line plugged. It is the long metal line that is in a "J" style. So check it out before putting it back in the tank. Usually you get everything in the Pump but no Filter/Sock as has been my experience.

The rubber O ring on this one, I dont remember ever changing. It has been awhile since I have done one. Any body know where this goes that I am holding by the silver clip? It will be a couple of days til I put it in. Thanks
Located under passenger seat. 3 screws. You can get the fuel pump. To get the fuel guage you have to drop the tank.

Last edited by Terrys87; 12-09-2012 at 09:48 AM.
#15
Super Moderator
Staff
Thread Starter
iTrader: (1)
Join Date: Aug 2008
Location: Anderson Missouri
Posts: 11,788
Likes: 0
Received 21 Likes
on
19 Posts
The Rubber Piece is in the lower right corner that I was talking about that goes in between the bracket and pump. In the previous post.
This is just my belief so I not trying to start any arguments. The fuel is what keeps the pump cool so this is one reason I dont go below a quarter of a tank of fuel to keep from replacing a pump.
Also on the other end of the scale is over filling a tank on a newer model of car. With emissions. Manufactures have the overflow/ vent run down to your charcoal filter and will give you a Check Engine Light. If I remember right on my 01 4Runner it is code P0440. You just saturated your filter. When the pump kicks off you can go a few cents over to round up to the nearest dollar. Im not saying everything is right that I am saying, it has been my experience. But for some one new or a beginner I hope this points you in the right direction.
#16
Registered User
iTrader: (1)
Join Date: Oct 2010
Location: N of Okechobee Florida
Posts: 1,002
Likes: 0
Received 4 Likes
on
4 Posts
i've got to do my tank too. its BAD. hopefully i can pick another one up instead of messing with this one. there's a guy parting out and rv near me and i've heard the rv tanks are the cleanest. if not i'll be asking for some tips from you sir 

#17
Registered User
Join Date: Mar 2009
Location: Port Arthur, Tx
Posts: 80
Likes: 0
Received 0 Likes
on
0 Posts
Terry good luck and have fun. I've been working on my 89 for a couple of years. If you need some spare red interior parts I may be able to help, just PM me.
#18
Super Moderator
Staff
Thread Starter
iTrader: (1)
Join Date: Aug 2008
Location: Anderson Missouri
Posts: 11,788
Likes: 0
Received 21 Likes
on
19 Posts
I got the fuel tank in and when I went to put in the pump and bracket in, I somehow broke a wire on top of the assembly. Just got it fixed so will see how it goes. It was a set back as I was looking forward to getting to possibly hear it run.
I put a battery in it and was determined to get someting accomplished. Checked the clock, wipers, but when I turned on the heater blower I could tell it had something in it throwing it out of balance. Figured a mouse made him a new home. I took the blower out and it was just full of leaves. Cleaned it out and works like a charm. Even have all of the different blower speeds. A small accomplishment. But you need to be a bendable to get the back screw on the blower.
I did notice that my Power Steering Pulley is dry and noisey. I have replaced one in the past. I checked with Toyota and they want around $100 and was unable to find one in a salvage. Some may know this but I did the bearing at Oriellys for about $20. I think it is Part number 204-FF. If that isnt it, they can find it for you. It is easily replaced.

Last edited by Terrys87; 01-31-2011 at 12:44 AM.
#19
Super Moderator
Staff
Thread Starter
iTrader: (1)
Join Date: Aug 2008
Location: Anderson Missouri
Posts: 11,788
Likes: 0
Received 21 Likes
on
19 Posts
Other accomplishment was on the 01 4Runner. Replaced the rear bumper. For you 3rd Gens, once you get the rear plastic cover off by releasing some plastic clips from the under side (about 8 clips) all of the bolts are easy to get to. There a few bolts on the bottom side of the bumper too. I was surprised at much rust was starting on the back side of the bumper. I tried to get one from a salvage and Toyota wanted alot for one. I got mine from an aftermarket. It went on good with a little effort. Would of like a original replacement.


#20
YotaTech Milestone-Two Millionth Post
Hey Terry.
Love the 1st gen 4runners. Very much you will like working on the 22re versus the 3vze.....parts seem to be more readily available for the 22re.
don't know anything about the gas tank or that stuff....sorry.
paint-wise......ahhhh..black is sweet but yes, indeed, you have to be flawless, and even when you are it's pretty bad......but it depends where and what you are doing bodywork-wise as to what you can do to cover.......for example....my son's black 1st gen 4runner (his build is in my sig) needed bodywork at and around all the wheel-wells....got it perfect.....could not "feel" any imperfections, but when i painted it, you could see them, so we just used undercoating around them and enameled the hell out of them....came out great.
I have limited experience.....I "rebuilt" my 22re with the exception of the pistons and crank....basically a top and front end build (and I had no experience doing this and I drive it every day now!!!) and as far as bodywork goes...same thing.....I figure stuff out as I go along.
good luck. will be watching your work. Love seeing your helpers.


