RBx 1988 4Runner Build-Up Thread
#22
Registered User
Thread Starter
this weekend i fixed some rust
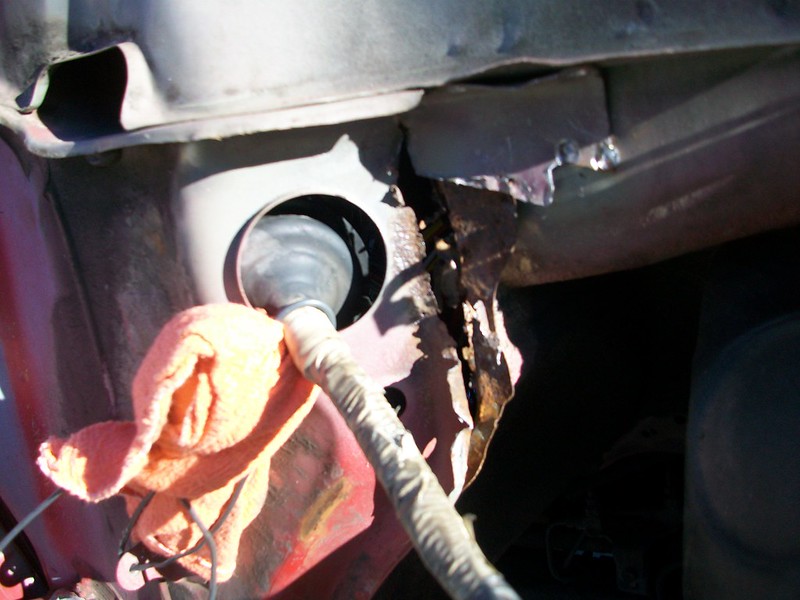 4runner firewall rust by unholyburns, on Flickr
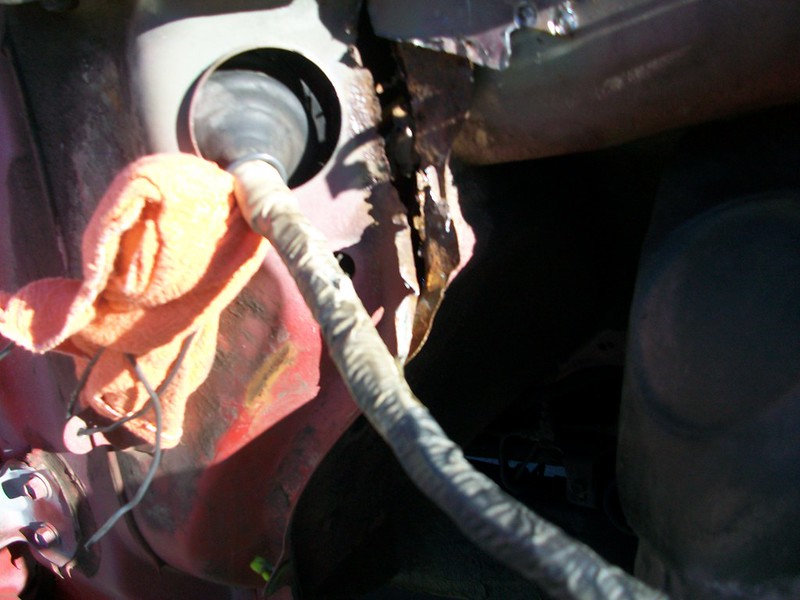 4runner firewall rust by unholyburns, on Flickr
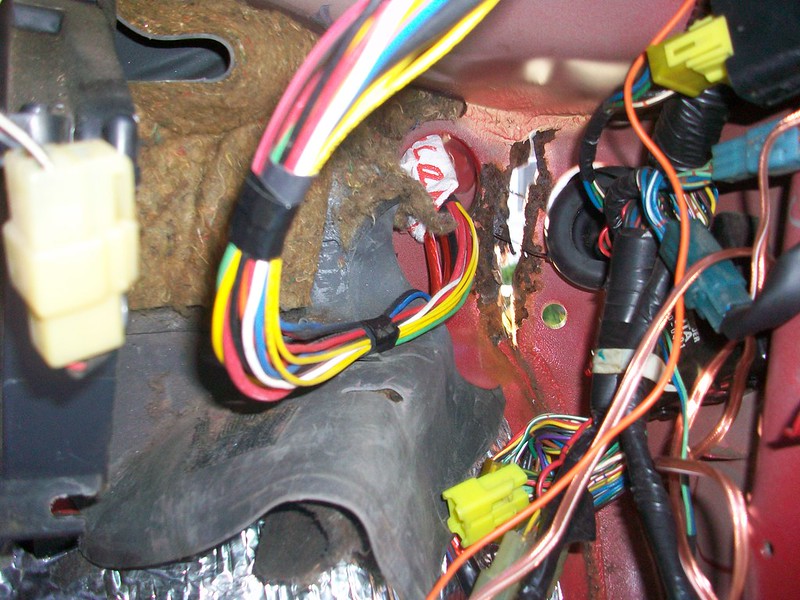 4runner firewall rust by unholyburns, on Flickr
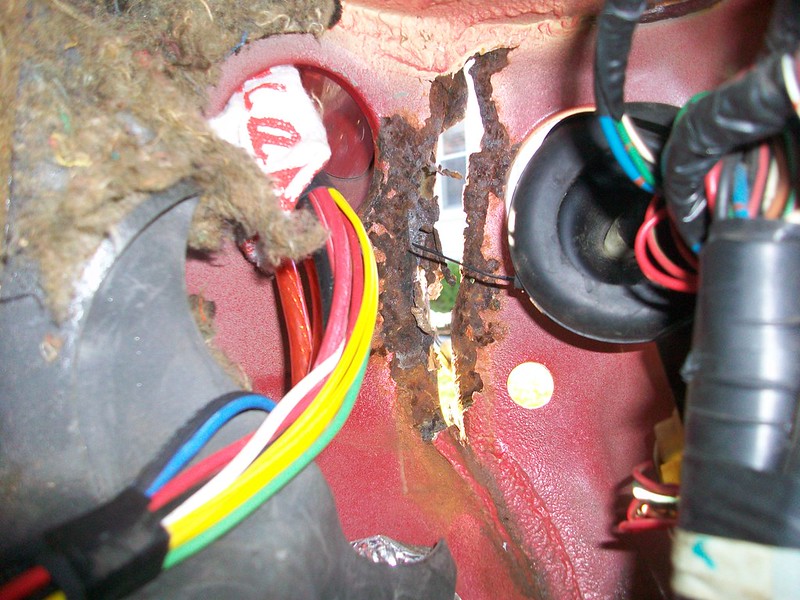 4runner firewall rust by unholyburns, on Flickr
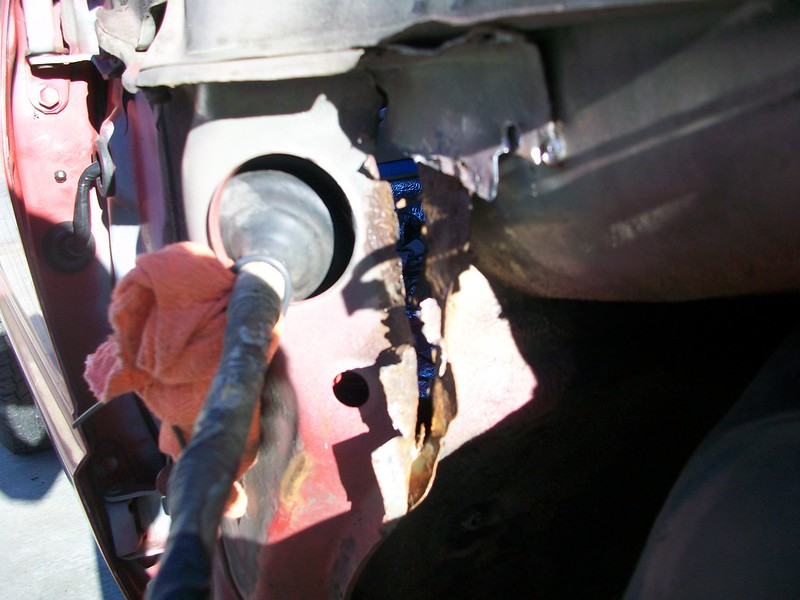 4runner firewall rust by unholyburns, on Flickr
I swear i took pics when i finished, must have been distracted by my scratched cornea!!! How could a scratch so small cause so mush trauma?
Anyhow, I Por15'ed the bare metal, and some metal that was still pitted, then seam sealer and finally some undercoating...I'll get pics when it stops raining here.
 4runner firewall rust by unholyburns, on Flickr
 4runner firewall rust by unholyburns, on Flickr
 4runner firewall rust by unholyburns, on Flickr
 4runner firewall rust by unholyburns, on Flickr
 4runner firewall rust by unholyburns, on Flickr
I swear i took pics when i finished, must have been distracted by my scratched cornea!!! How could a scratch so small cause so mush trauma?
Anyhow, I Por15'ed the bare metal, and some metal that was still pitted, then seam sealer and finally some undercoating...I'll get pics when it stops raining here.
Last edited by RBX; 11-15-2014 at 06:22 AM.
#23
Registered User
Thread Starter
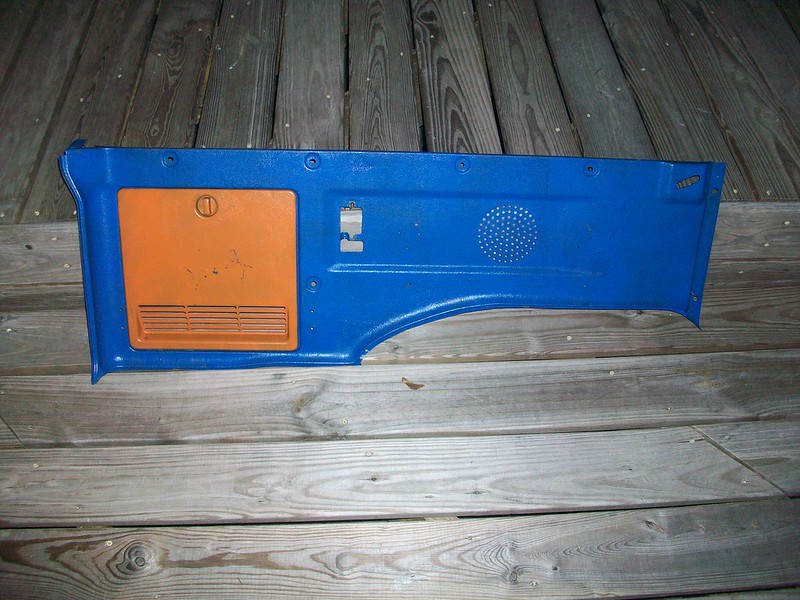
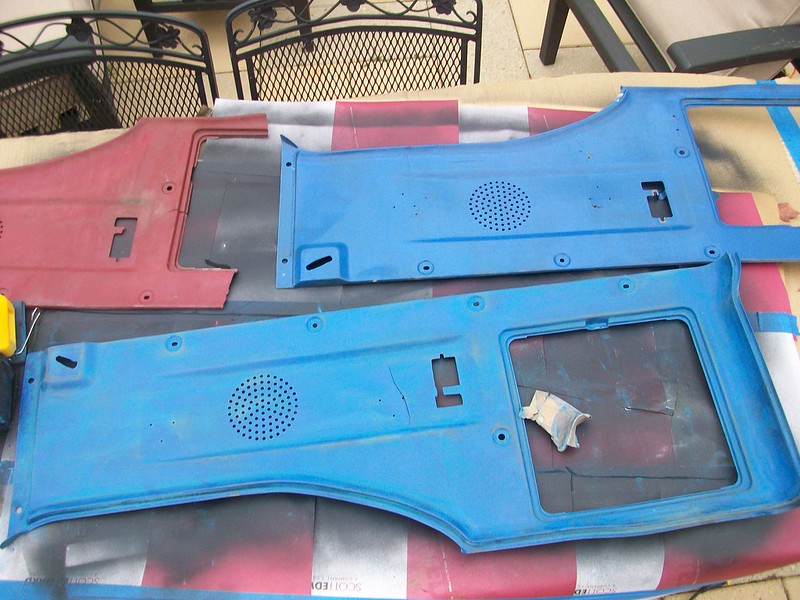
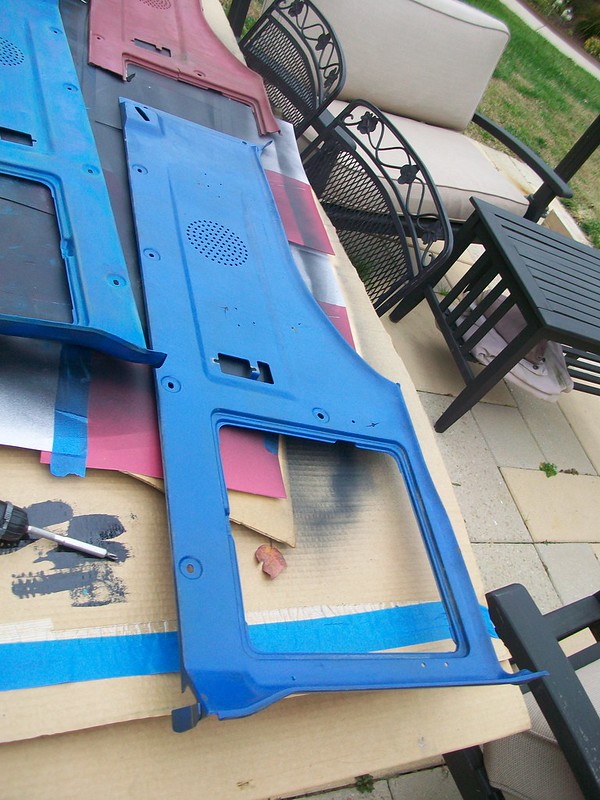
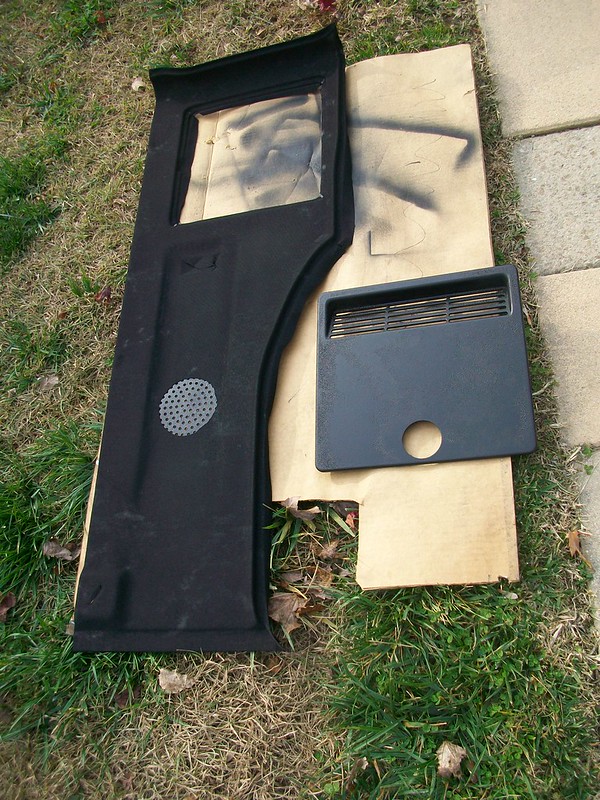
And for those of you playing along at home...some trim shots
before(PO was going for the obnoxious color schema)
 INTERIOR INSUL 4RUNNER by unholyburns, on Flickr
 INTERIOR INSUL 4RUNNER by unholyburns, on Flickr
 INTERIOR INSUL 4RUNNER by unholyburns, on Flickr
after (sunbrella fabric, and perforated aluminium):
 INTERIOR INSUL 4RUNNER by unholyburns, on Flickr
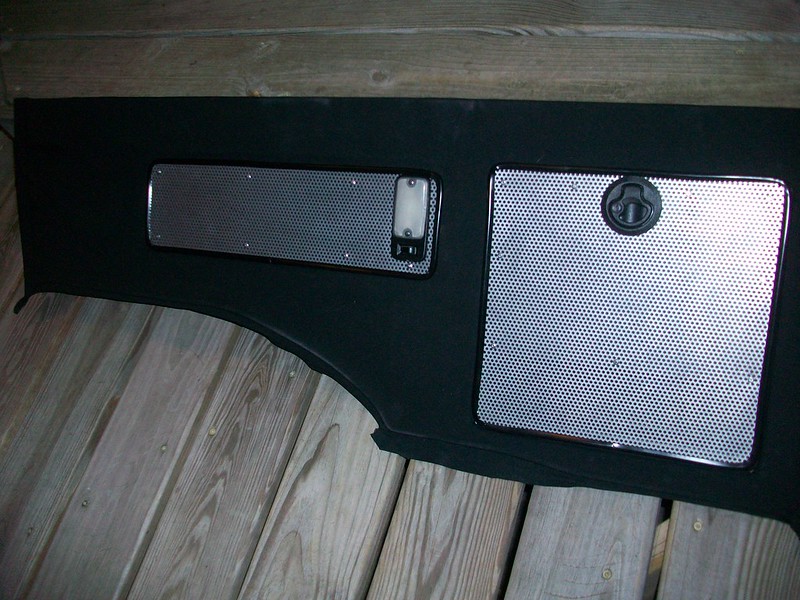 INTERIOR INSUL 4RUNNER by unholyburns, on Flickr
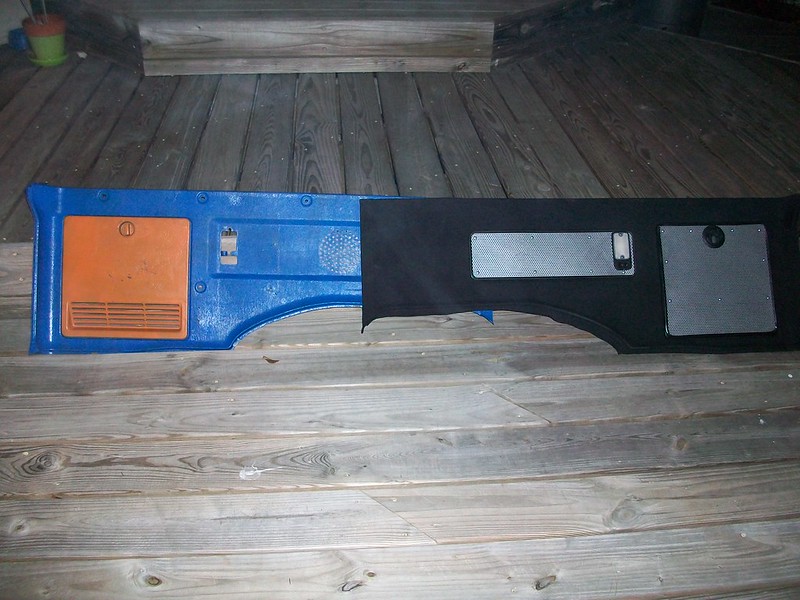 INTERIOR INSUL 4RUNNER by unholyburns, on Flickr
I had a few cracks and random screw marks in my panels from the PO that i wanted to take care of. Not to mention the color scheme. The perforated aluminum is hiding the speaker grill, and stiffening the panel along with the access door.
I will be adding 1/8" foil backed duct wrap to the other side for added insulation and sound absorption.
stay tuned...
before(PO was going for the obnoxious color schema)
 INTERIOR INSUL 4RUNNER by unholyburns, on Flickr
 INTERIOR INSUL 4RUNNER by unholyburns, on Flickr
 INTERIOR INSUL 4RUNNER by unholyburns, on Flickr
after (sunbrella fabric, and perforated aluminium):
 INTERIOR INSUL 4RUNNER by unholyburns, on Flickr
 INTERIOR INSUL 4RUNNER by unholyburns, on Flickr
 INTERIOR INSUL 4RUNNER by unholyburns, on Flickr
I had a few cracks and random screw marks in my panels from the PO that i wanted to take care of. Not to mention the color scheme. The perforated aluminum is hiding the speaker grill, and stiffening the panel along with the access door.
I will be adding 1/8" foil backed duct wrap to the other side for added insulation and sound absorption.
stay tuned...
Last edited by RBX; 11-15-2014 at 06:41 AM.
#29
Registered User
The red interior looked nice apart from the colour. Our 4 Runners don't seem to have the nicer looking interiors, our seem rather bland by comparison. but you are making some nice progress there anyway.
Clive.
Clive.
#30
Registered User
Thread Starter
UPDATE:
The holiday weekend proved to be both filling and frustrating.
Got her running after two days of wrenching, the weather is getting colder and i want to be able to use the truck if we get snow. So here is the short list:
Fixed:
O2 Sensor code 21
Water Temp sensor code 22 (connector was also busted)
TPS code 41
Knock Sensor code 52
Engine grounds were either super brittle/corroded, nonexistent or ghetto-fied.(some people should have there hands broken)
Broken TVV, found a good one at the JunkYard
Fan shroud missing, another JunkYard find
Running to the J/K ate up some time, and was not in the plan for the weekend.
Another setback...two actually...
Once everything was together, i cranked her up...sputter, no start...and FUEL gushing from the rail. Fuel supply line was leaking, and on a 3VZ its under the intake plenum....SUCK!!
So, tore the plenum back off, and destroyed the paper gasket(new) i had just put on a few hours ago....not to the parts store....SUCK!
Fix the fuel line, install new gasket, hook up the vacuum lines and fuel return...and crank her up...sputter, bad idle..fuel pouring from the exhaust!!! OOPs, i guess i should have paid a little more attention to the fuel return line i put on a vacuum nipple.
She still idles a little rough, but i have NO CODES!!!! YIPPEEE
Didn't take any picks because there really wasn't much to see other then me being frustrated, and spilt fuel.
#31
Registered User
It seems to me that fixing easy things on my rig is 75% frustration at someone else's poor job (it's never my fault), 10% running around getting parts, 10% fixing what I should have done the first time, and 5% actually fixing the whatever I'm working on. Good work this weekend. Glad to hear it's up and running.
#32
Registered User
Thread Starter
Yeah, and I get to the point where I tell myself.... I'll do the valve cover gaskets later, I just want to get it started and I need to do the timing belt. Then ten minutes later I have to pull the intake again... So I do the valve gaskets when I should have done them in the first place..... Murphey's law!
Last edited by RBX; 12-02-2010 at 03:14 AM.
#34
Registered User
Thread Starter
Well, its sorta running.
tried to start her yesterday and sputtered a very low idle, around 400-500rpm. Seems there is no cold/warm idle. Today i will try to clean the throttle body, and see if i can replace some vacuum lines, or at least look for leaks.
This part is pretty frustrating since the truck is ready for a shake down run, but i have this little stuff to sort out.
#35
Registered User
Two questions. What kind of sound deadener is that, and how much did it cost? Also, what is your plan for the door panels and headliner? I have the same cranberry red interior and I've wanted to swap it for a long time, but those two things have always concerned me. Are the door panels pretty straightforward to swap? They look like a pill. Would the headliner have to be done by a professional interior shop?
#36
Registered User
Thread Starter
The deadner is AutoBody sound pads I got from a local shop for cheap. I also used roofing butyl tape you can get from Home Depot. Then the silver stuff is duct wrap also from HD took almost 4 rolls at 16$ a roll. I only did that step because I wanted to insulate wasn't to worried about deadening. I know it isn't going to be luxury car quiet but I plan to to some long trips, so every little bit helps.
The panels for the rear passenger area is just going to be recovered with some diamond pleated sunbrella and perf'd aluminum.
Door panels, for the purpose of simplicity I moved my window switches to the center console, that way I can make simple door trim panels from the dlx model( flat). The SR5 panels are contoured and would be difficult(read- I'm not a pro) to make look nice. So to spruce up the simple interior door panels I will again use some perforated aluminum(kick panel of door) and use Maglite flashlight bodies as door pulls/arm rests retaining the SR5 door courtesy light(where the bulb in the flashlite would be. Hopefully I get to that this winter.
#37
Registered User
Thanks that's just what I was looking for. My rig is already a DLX, so no window switches or contours to worry about. One more question: how are you mounting everything? Are you using nuts and bolts, or the plastic snap-stud-thingies that it came with?
BTW your rig looks sweet. Nice and clean, and your custom interior parts are sick. Not a big fan of the 3VZE, but I know we play the hand that's dealt us when it comes to these trucks.
BTW your rig looks sweet. Nice and clean, and your custom interior parts are sick. Not a big fan of the 3VZE, but I know we play the hand that's dealt us when it comes to these trucks.
#38
Registered User
Thread Starter
Yeah I actually would rather have the 22re, I know that engine much better but I could pass up an sr5 with such little rust.
I am trying to use stainless steel corse thead screws with j-nuts/clips I ordered from bolt depot. In some spots I may need to use some type of plastic insert and screw into that. I will post a pic up of the I stalled panel this weekend.
Thanks for the kind words.
I am trying to use stainless steel corse thead screws with j-nuts/clips I ordered from bolt depot. In some spots I may need to use some type of plastic insert and screw into that. I will post a pic up of the I stalled panel this weekend.
Thanks for the kind words.
#40
Registered User
Thread Starter
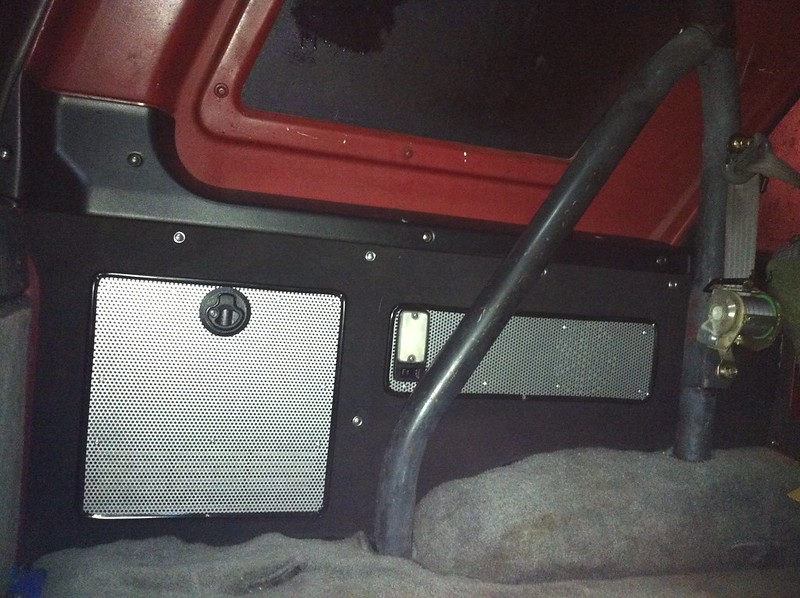
this weekend i started to put the interior back in. Some stuff i want to do will need to wait for warmer weather, but the bulk of the interior wiring is finished, just need to terminate some switches for stuff like the inverter, courtesy light overide(switches the lights on from dash).
camera pics of the rear panel installed with volt meter.
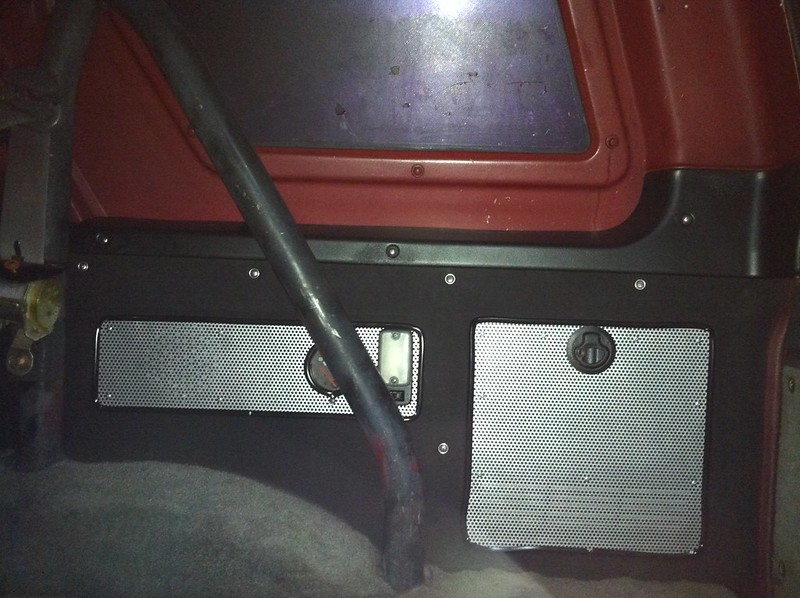
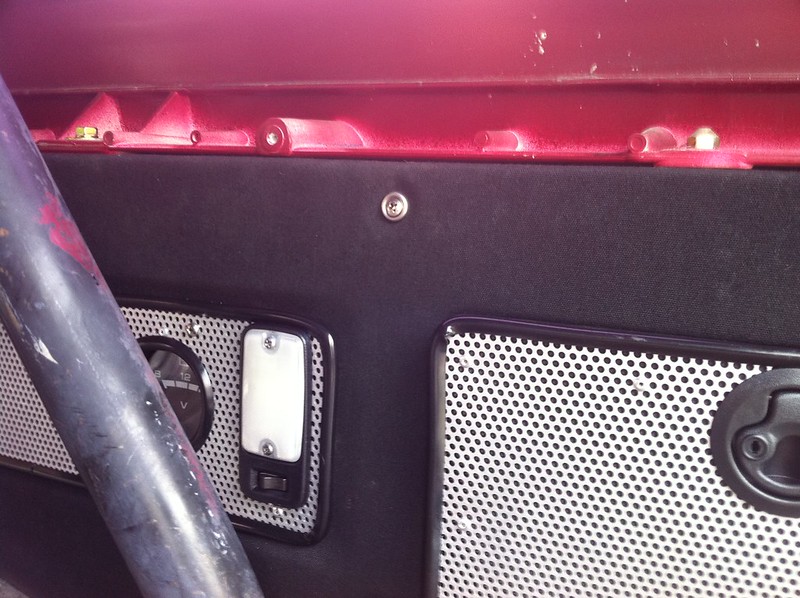
close-up of ss fasterners....i used dry-wall inserts from Home Depot with a dab of seam-sealer to screw into. The j-nuts i have are too small, and the inserts fit nice and snug, the seam-sealer is just to keep them from spinning when removing, ill try to get a pic later.
camera pics of the rear panel installed with volt meter.


close-up of ss fasterners....i used dry-wall inserts from Home Depot with a dab of seam-sealer to screw into. The j-nuts i have are too small, and the inserts fit nice and snug, the seam-sealer is just to keep them from spinning when removing, ill try to get a pic later.

Last edited by RBX; 12-30-2014 at 03:46 AM.


