Quest for a more bulletproof 22RE - 89 4runner engine build

 10-10-2014, 06:24 AM
#22
Registered User
Thread Starter
Join Date: Apr 2014
Location: Dallas, Tx
Posts: 415
Likes: 0
Received 0 Likes
on
0 Posts
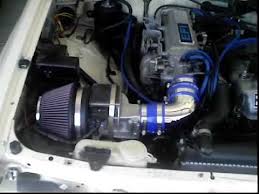
This weekend I'm going to get the head bolted up, along with any remaining brackets, the exhaust manifold, intake, and start piecing back together the vacuum lines. With removing the center vacuum line metal tube thing (sorry I don't know the technical term for it), along with the EGR, PCV, and other emissions crap, I'm sure I will have some of the lines capped. I also plan on making some easy metal brackets and using some spark plug separators to keep the vacuum lines clean and organized like the image of a fellow YOTATECH member's engine shown below.
Every hose I'm replacing is upgraded to Silicone, including all of the vacuum lines, as well as the upper and lower radiator hose. I'm not 100% sure on what belts I'll be getting, but I will definitely be purchasing whatever turns out to be the best, and will also be buying extras to keep in the truck, JIC.
Every hose I'm replacing is upgraded to Silicone, including all of the vacuum lines, as well as the upper and lower radiator hose. I'm not 100% sure on what belts I'll be getting, but I will definitely be purchasing whatever turns out to be the best, and will also be buying extras to keep in the truck, JIC.
 10-13-2014, 06:44 AM
#24
Registered User
Thread Starter
Join Date: Apr 2014
Location: Dallas, Tx
Posts: 415
Likes: 0
Received 0 Likes
on
0 Posts
HA! I wish I had a garage or even a paved driveway to work on as well. I'm doing this in a gravel drive and my living room....Even a carport would be a huge help, but sometimes you've just got to work with what you've got.
Also, the above images aren't of my engine...they're ones I found on here and liked. I just got the head finished up at the end of last week, and will be bolting it to the block tonight, and then getting the intake, exhaust, other brackets and components, and the vacuum lines installed / assembled each night after work this week. I'm hoping to have everything ready to install this weekend, and may even take off Friday or Monday to make sure everything gets finished up.
Overall, I'm getting more and more excited about finally having the 4Runner back up and running. There's a ton of stuff I'm wanting to do to it later, but right now, I just want to get this motor in and running.
10-15-2014, 08:41 AM
#25
Registered User
Thread Starter
Join Date: Apr 2014
Location: Dallas, Tx
Posts: 415
Likes: 0
Received 0 Likes
on
0 Posts
I got the head bolted up last night. Before I did so, I finally installed the front "seal saver or sleeve" which is a very thin bearing metal to help protect your crankshaft / pulley from wear by the seal. I know it sounds ridiculous that a rubber or plastic part could wear into the metal surface, but I've seen several instances where the wear was a good 1/16" - 1/8", and this bearing metal is much more resistant to wear, which means it makes it a much tighter fit with less oil leaks and less issues in the future...aka more bulletproof.
I know a lot of people have their opinions on whether or not to use any type of gasket sealer or coating, but I have used Permatex copper coat on every paper gasket so far, and decided to go ahead and use it on the head gasket as well. I used a Nippon made in Japan Very high quality head gasket, and coated it completely with copper coat. I installed 6 of the 10 ARP head studs to keep the gasket in place, and help properly guide the head into position, and keep it from sliding around. I used Ultra Grey RTV silicone on the entire front timing cover (and evenly spread it with a razor blade to prevent excess "bulging"), and had previously shaved the excess gasket material from the Timing cover gasket off with a straight edged razor. It is very important to get rid of that little bit of excess gasket to keep leaks from happening there.
Here is some pictures of the copper coated Nippon gasket, as well as an up close shot of the Ultra grey around the front lip. There are a lot of "Tips and Tricks" out there about how to get the Camshaft timing sprocket onto the camshaft, and my solution was to use a wrench handle to give the right amount of leverage and lift (with a rag on the soft aluminum surface so the wrench doesn't scar the head), and a non-marking hammer to gently tap it onto the dowel pin. Remember, you don't have to get the sprocket the entire way on at first, you just need it in place enough to get the distributor drive gear, spacer (important!), and bolt in, and then let the bolt drive the sprocket back until it is completely seated.
Last edited by joelsmithdesigns; 10-15-2014 at 10:12 AM.
10-15-2014, 08:55 AM
#26
Registered User
Thread Starter
Join Date: Apr 2014
Location: Dallas, Tx
Posts: 415
Likes: 0
Received 0 Likes
on
0 Posts
Getting the Timing Right....the first time
making sure everything is in the right position as it is installed is essential to getting the timing right. You may have to "wiggle" the crankshaft to get the timing chain tensioner to release and allow enough slack for the camshaft sprocket to go on. If you do this, make sure that the pulley lines back up with the zero when finished, and that the camshaft dowel pin is at 12:00.
As you can see from the picture and the location of the magic "silver link" in the chain, I had to jump the chain a row to get both the camshaft dowel pin at 12:00 and the mark on the pulley at zero, but both are dead even, and in reality, the silver link on the chain could be anywhere along the chain as it's more of a guide / reminder than affecting the actual timing.
Once you've got the camshaft and crankshaft aligned together at TDC on cylinder #1, the next biggest step in getting the timing right is the installation of the distributor. If you'll notice the grooves in the drive gear on the distributor and how they line up with the distributor drive gear bolted to the camshaft, you will realize that as it slides into the grooves, it will go counter-clockwise a little bit....usually a full groove. Therefore, my suggestion is to start one gear tooth further clockwise than you think you'll need, so as it slides on and rotates counter-clockwise to mesh up, it will be positioned properly. All of this takes place of course with the distributor rotor pointing directly at the #1 spark point (same position of the screw that mounts the silver clip). You also want to make sure that when bolting the back adjusting screw on the distributor, that you're not maxxed out to one side or the other. This will allow you to slightly rotate the distributor to retard or advance your timing later.
10-15-2014, 09:22 AM
#27
Registered User
Thread Starter
Join Date: Apr 2014
Location: Dallas, Tx
Posts: 415
Likes: 0
Received 0 Likes
on
0 Posts
I got so excited to have the head finally on, I threw up the intake and exhaust, and bolted on the valve cover to give me an idea of what the finished product would look like (and to let the valve cover sit overnight so that the ultra grey I put on the hemispherical rubber grommets would cure and hold them in place - one more bulletproof step. Here are a few shots.
As you can see, I've replaced all of the hardware with grade 8 SS bolts and washers / lock washers, most of which have a larger 17mm head than the original. I also put blue locktite on every nut and bolt just an over-precaution to make sure everything stays as tight as possible.
I'm going to strip the powdercoat from the "TOYOTA" on the valve cover to reveal the bright aluminum underneath, and then paint the galley with black so it matches the intake (yeah, I'm one of those guys that likes his stuff to match).
Once that's finished, I'll try to get all of the vacuum lines dialed in and re-routed with spark plug separators. Then I'll get the 35LB billet flywheel and LCE pro Clutch bolted up and will be ready to hopefully put her in this weekend.
I'm going to make sure that before the installation, I get back inside the engine bay and clean everything with Purple Power degreaser. I'm not a clean freak, but I am overly cautious and want to know the instant there is any type of leak, and be able to easily spot the source.
10-20-2014, 05:39 AM
#29
Registered User
Thread Starter
Join Date: Apr 2014
Location: Dallas, Tx
Posts: 415
Likes: 0
Received 0 Likes
on
0 Posts
Well Darn....I was hoping to get this motor put in this weekend, but the weekend had other plans. Saturday Morning I got up and rented an engine hoist from Sunbelt. It took me a good portion of the rest of the morning to get the engine out of my living room and onto the front porch. I had to use ratcheting straps to cradle the motor and swing it off of the porch with the hoist. Because of clearance issues I couldn't run the legs of the hoist all of the way out, although I had to run the boom out as far as it would go. This created a huge off balance problem, and immediately buried the front two wheels into the dirt by my front steps. It fought with it for a good while, and had to stand on the back of the hoist as I tugged, cursed, sweated, until I finally got the hoist swung around in my yard / gravel driveway. I then lowered the boom and motor back on to the stand and extended the legs of the hoist. At this point, I was pretty exhausted, and managed to lift the engine as high as it would go, and backed my truck up and got it back on the stand...in the back of my truck.
My next step was to take the motor down to my local Toyota mechanic so he could adjust the valves, and give the engine a "once over" look to make sure I had set the timing and everything else right. This is the first time I've built a motor, so I just wanted someone else (more qualified) to double-check my work and adjust the valves.
However, by the time I got down to their shop, it was already 11:45, and they close at noon. I had just enough time to get the motor unloaded (another scenario involving the priceless ratcheting straps and a forklift). One major confident booster was when the main mechanic asked me if that was an LCE crate motor. I told him it wasn't, but had been rebuilt with most of their parts. They also showed me one of their clients cars...an '87 4Runner Turbo that the owner had spent about $25K on so far. Needless to say it was the cleanest rig I've seen thus far, and I was jealous, but the mechanics told me not to be....that guy hadn't done so much as change a light bulb on his own rig, much less put the engine together in his living room and the mechanics were much more impressed with my non-turbo home-build.
Soooo....I'm having to take a half day at work today, leaving at lunch to go pick up the engine from the mechanics, load it back up into the truck, unload it in my gravel drive, bolt up the flywheel and clutch and drop that puppy in the 4Runner.
10-21-2014, 09:21 AM
#30
Registered User
Thread Starter
Join Date: Apr 2014
Location: Dallas, Tx
Posts: 415
Likes: 0
Received 0 Likes
on
0 Posts
Dropping the 22RE back into the 4Runner
After work, I picked up the engine from the mechanic's, got it loaded back into the truck, unloaded it at the house, and installed the rear seal saver, the LCE 35LB flywheel, and LCE pro clutch. Then, along with the help of a few Shiner Bock beers, got the thing lowered into the engine bay and bolted up.
because most people end up putting the wrong bolts behind the flywheel to hold on the cover, I went ahead and just left those off, and let the pins align the cover, finally sealing up after I bolted the trans up. Almost every engine I've torn down has the two bolts that hold the cover on completely marred and ground down by the flywheel because the people installing it didn't use the super thin head bolts that you're supposed to. I don't think it'll hurt a thing if they're not used, as long as your cover stays ligned up during the install until you can get the motor mounted to the tranny. In fact, I think there's less of a chance to screw up your flywheel and have a horrible grinding sound if the bolts that normally cause this aren't there.
Normally, I would have wanted to have the intake, exhaust, and everything else already bolted up to the block before installing it, but because I had rented the hoist from sunbelt, I was under a $40 a day timeline to get it in, and return the hoist...and decided just to install the longblock without everything bolted up.
In doing this myself, I didn't install the alternator bracket, the radiator return tube, or the motor mounts, because I needed the "wiggle" room to align the tranny and motor up so I could get them to mate.
I must also say, I beat the heck out of the old throw out bearing trying to get it off the cast iron fork clip....mainly because I didn't have a gear or steering wheel puller....but we all know who won that fight.
Here are some shots of the empty engine bay with all of the accessories (ac, power-steering, wiring harness, etc) pulled out of the way and ready for the install. The motor hanging from some ratcheting straps (best thing ever if you don't have a "leveler" or chain for the engine), and a picture of the LCE 35LB flywheel and Pro clutch bolted up.
Last edited by joelsmithdesigns; 10-21-2014 at 09:41 AM.
10-21-2014, 09:36 AM
#31
Registered User
Thread Starter
Join Date: Apr 2014
Location: Dallas, Tx
Posts: 415
Likes: 0
Received 0 Likes
on
0 Posts
Here's a picture of the motor when I finally got it in and bolted all the way up - yeah..it was already dark, and I had resorted to the infamous clamp light.
The ratcheting straps look a bit gangster in the previous pictures, but were priceless when trying to tilt the motor at the right angle to get the splines to match up, because once all of the straps were on, I could ratchet one or two up and tilt or rotate the motor accordingly....almost like I had the right tool for the job (an engine leveler).
I'm pretty busy with work this week, so I will try to clean up all of the accessories and try to get them and the intake / exhaust bolted on after work this week (probably in the dark with the clip-light). I plan on having it up and running by the end of the month.
I also sanded off the powder coat on the "TOYOTA" and polished it, then painted the entire top recess black so it would match my intake.
10-21-2014, 10:02 AM
#32
Registered User
Join Date: Apr 2013
Posts: 49
Likes: 0
Received 0 Likes
on
0 Posts
Some day I want to go through a experience like that, looks good. Unfortunately with motors time will tell. I also used copper coat on my gasket, the local dealership part guy told about a time they had trouble with the gaskets and that solved the problem. You got to take a video of the startup and let us hear that motor purr.
Thanks for documenting this it has been fun to watch so far.
Thanks for documenting this it has been fun to watch so far.
10-21-2014, 10:39 AM
#33
Registered User
Thread Starter
Join Date: Apr 2014
Location: Dallas, Tx
Posts: 415
Likes: 0
Received 0 Likes
on
0 Posts
Thanks Skoob....I think I value reliability and ease of maintenance above all else, including things like luxuries, performance, and comfort. When the motor blew in this ride after only two months of owning it, and being told the motor had just been rebuilt, needless to say.....I was a little upset. I could have gone to city motor here in Dallas and picked up an assembly-line rebuilt motor for about $900, but because I want this to be my daily driver for the next 10 years, I decided to do it my self.....and do it right. With the way I've built this up, I'm planning on getting at least 500,000 miles out of her. I understand the transmission might go out, there will be some other things that need to be replaced or will break, but I will know without a doubt, that it's got just about the most bulletproof motor I could build at the time with the budget I had.
I've still got to get everything else bolted on, and then get the exhaust figured out from the header back. I'm planning on skipping the cat (already took all the other emissions crap off) and going a straight 2 1/4" SS pipe back to a borla turbo XL muffler, and either a dump pipe, or route it back over the axle like it was originally. I'm hoping it sounds pretty good, but I know it will be a strong motor.
I've still got to get everything else bolted on, and then get the exhaust figured out from the header back. I'm planning on skipping the cat (already took all the other emissions crap off) and going a straight 2 1/4" SS pipe back to a borla turbo XL muffler, and either a dump pipe, or route it back over the axle like it was originally. I'm hoping it sounds pretty good, but I know it will be a strong motor.
10-27-2014, 07:10 AM
#34
Registered User
Thread Starter
Join Date: Apr 2014
Location: Dallas, Tx
Posts: 415
Likes: 0
Received 0 Likes
on
0 Posts
Bolting the accessories on
Well I had a lot of interruptions this weekend, but I managed to get a few things done on the motor.
I got the Starter, alternator, and Power steering pump and reservoir painted. I didn't want to drain the PS pump and lines, so I sort of painted it in the vehicle as you can see from the pictures.
I plan on getting the GM alternator bracket and much higher Amp output alternator later on when I switch over to a dual battery setup for extra lights, winch, air compressor, etc. But for now, I'm low on funds and really need my car back up and running, so I just painted the one that was on there and threw it in.
Lesson Learned:
Never under-estimate the ignorance of the PO. The motor blew because the Previous Owner mixed and matched parts from the early 22R and the later 22RE. Apparently he also had the wrong flywheel on (which is why I purchased the LCE 35LB billet one). To make the starter work, he had jammed 3/8" worth of washers to "space" it away from the trans enough to keep the wrong flywheel from rubbing it. There's a lot of shortcuts in life, IMHO I listen to my grandfather's advice from the "greatest generation"....If anything is worth doing, it's worth doing right. He used to talk about how if you take shortcuts in smaller things in life, you were much more prone to cheat or half ass some of the larger more important things like Marriage, Parenting, Finances, Business, etc. Yes, there's always an easier way to do something, but that doesn't mean that's the right way to do it. Don't get me wrong, I'm all about working smarter and not harder, but for many things in life, you've got to put in the wrench time to get the results you want. I've also found that in the process, you'll gain more knowledge than you ever thought, and have a much deeper appreciation for whatever it is you're working on than if you take the easy road. Do it right the first time.
Anyway, sorry for the Monday Morning Sunday School lesson.....I got the rest of the accessories bolted on and started running the wiring. The challenge this week is going to be chasing all of the vacuum lines back to their proper places. I deleted most of the EPA Emissions junk and took out the center metal vacuum extension, as well as moved several of the sensors around to help "clean up" the engine bay. Most of the parts have been labeled, cleaned, sandblasted, and re-labeled, but in the process, a few of the blue tape labels have come off, so I'll be relying on pictures taken during the tear down, schematics, and images of fellow Yotatech members' engines.
When labeling everything, I used letters for any hoses (A, B, C, etc) and numbers for electrical. I made sure to put a dot next to the letter or number, because it's been 5 months since I took the thing apart, and "H's" can easily be mistaken for "I's", "6's" can easily be mistaken for "9's" and "3's" can easily be mistaken for "E's" if you don't have any frame of reference to orient the alpha-numeric label.
I plan on taking my time with the vacuum hoses to really try and clean up the engine bay and run everything the most efficient way possible. I'm also low on funds and it will be a week or two until I can get a new battery, break-in oil, exhaust, and the other "finishing touches" I need to actually get her running.
10-27-2014, 07:20 AM
#35
Registered User
Thread Starter
Join Date: Apr 2014
Location: Dallas, Tx
Posts: 415
Likes: 0
Received 0 Likes
on
0 Posts
More shots of the accessories going on
Here's a couple of shots of the alternator, the starter, and the header.
I was really impressed with the quality of the LCE header, and looking back, I should have bought the larger "non-street legal" version instead of the street header, as I'm registered in a county with one stop light, and my baby just turned 25 years old this year and is exempt from any type of emissions in my state. Sorry to those of you who have to deal with any of the PITA that the EPA demands. Honestly, it's a 4 cylinder...the fact that it's 25 years old and still on the road and not in some junkyard probably outweighs the carbon footprint of you running out every couple of years and buying a F350 double cab dually to drive back and forth to work.....which is pretty common here in Texas.
During the 1980's California was the largest market for Toyota, and during that time had some of the strictest regulations on emissions and EPA gear due to the smog in the SF bay area and LA. Therefore, these little motors were way overprotected and over scrutinized by even today's standards for how much emissions they produce versus the usable output of the engine. I don't feel bad taking most of the emissions junk off of the motor and am not required to have any of it in the state and county I live in.
10-30-2014, 07:11 AM
#37
Registered User
Thread Starter
Join Date: Apr 2014
Location: Dallas, Tx
Posts: 415
Likes: 0
Received 0 Likes
on
0 Posts
Well crap.....
I'm sorting through some of the vacuum lines and trying to get the rest of the hoses and things connected and ready to go, and I realized that I didn't fully tighten down the heater hose outlet completely to the intake. This wouldn't be a big deal, except for the fact that I can't swing it a full 360 degrees without hitting the very first intake stud and nut. Soooooo, I've got to pull the intake back off, or at least loosen it up enough that I can get the heater hose return tightened down.
I'm also planning on cutting and extending the wiring to the three sensors that were originally on the top of the valve cover so that I can relocate them to the firewall, or somewhere else out of the way.
11-05-2014, 08:45 AM
#38
Registered User
Thread Starter
Join Date: Apr 2014
Location: Dallas, Tx
Posts: 415
Likes: 0
Received 0 Likes
on
0 Posts
So Close....
So I was able to get the lower intake loose enough (without taking it totally off) to tighten the heater return line. I broke a little VSV sensor when removing it in the teardown and thought I could drop by the dealership to pick up a new one. $165? I think not....planning a trip to the junkyard to fix that problem, but in the meantime I got the guy to print off the entire vacuum diagram, which will help the reassembly a ton. The manual I have only goes from 81-88, and although the body style didn't change in 89 for the 4runners, the engine and layout did slightly (because the truck did change). The printed vacuum line diagram has all of the associated toyota part numbers and is pretty clear to read, so that should take care of any confusion.
I then saw what I thought was a gas leak, but couldn't figure out where it was coming from. I thought I didn't tighten down the fuel lines tight enough, so I removed them and inspected them for cracks or leaks but that wasn't it. Slapped a new Purolator fuel filter on JIC and hooked it all back up. what I eventually realized after chasing the lines from the gas tank forward, was that I had tucked the hose to the fuel pressure regulator (on the fuel rail) back out of the way. It wasn't leaking normally, but the simple temperature rise from the day heating up caused enough pressure to force gas out of that hose. I simply went back and popped the gas cap and the leak stopped.
With the upper plenum off, I decided to splice in some extensions for the VSV Vacuum Valve electrical lines so I could mount them on the firewall in the back of the engine bay and try to keep everything cleaned up a bit.
It's been raining for 3 days now, so I haven't been able to get much done. Here's the list of things left to do before I can get it cranked up for the break in, and a separate list for getting her back road worthy.
Mount VSV Vacuum Valves to the firewall
re-install the upper plenum of the intake
finish routing the vacuum lines (thanks to the help of the printout from the dealership)
Install the Radiator (may also sneak a oil cooler in to hook up after the break in)
hook up / replace all hoses (I've gone with silicone for everything else and got some really nice Vibrant reinforced silicone heater hoses off Summit that I'm going to swap out all of them with)
Fill with fluids
install battery (hopefully an Optima Yellow Top)
To get road worthy:
muffler / exhaust
inspection
registration (lapsed over the build)
replace mirrors (broken before the build in an icestorm)
I'll try to get some good pictures up this weekend.
11-05-2014, 10:04 AM
#39
Elegant work, Sir!
Agree 200%
Agree! Also, a long weak (plastic) duct between the AFM and intake manifold presents more opportunity for leak and hence, INaccurate readings.
Re this setup...
Do you have details on how filter is isolated from hot engine compartment air?
Re this setup...
Do you have details on how filter is isolated from hot engine compartment air?
Last edited by RAD4Runner; 11-05-2014 at 10:06 AM.
11-05-2014, 11:00 AM
#40
Registered User
Thread Starter
Join Date: Apr 2014
Location: Dallas, Tx
Posts: 415
Likes: 0
Received 0 Likes
on
0 Posts
If you didn't want to go with a fully sealed box and ductwork, you could quickly and easily fab up a piece of sheetmetal that collars around the AFM and seals off the area from the engine. I would start with a piece of cardboard as a template and cut it or add to it until you get the shape that seals off the engine bay from the filter. Then you'd have to shroud the collar in some type of foam or rubber to get a good seal, but it would be similar to what you see a lot of the "high performance" custom cold-air-intake kits.


