Numbchux' 1987 4Runner Build-Up Thread
 06-12-2011, 12:50 PM
#21
Registered User
Thread Starter

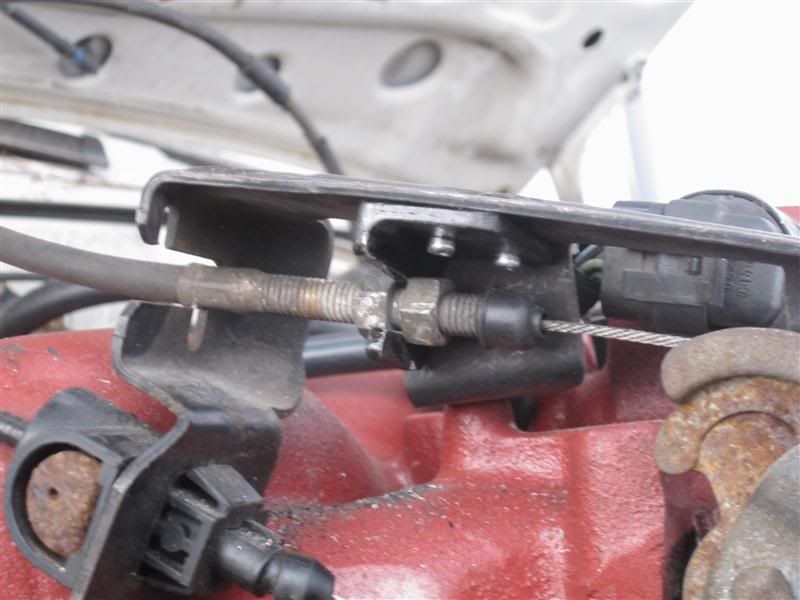
nifty little add-on harness installed. Trans-temp gauge wired. Deck-light re-wired to the hazad/horn power source.
Shifter has to come out for another adjustment....this thing is really pissing me off. But it'll be worth it to still have the stock shifter.
Shifter has to come out for another adjustment....this thing is really pissing me off. But it'll be worth it to still have the stock shifter.
 06-14-2011, 09:07 PM
#22
Registered User
Thread Starter
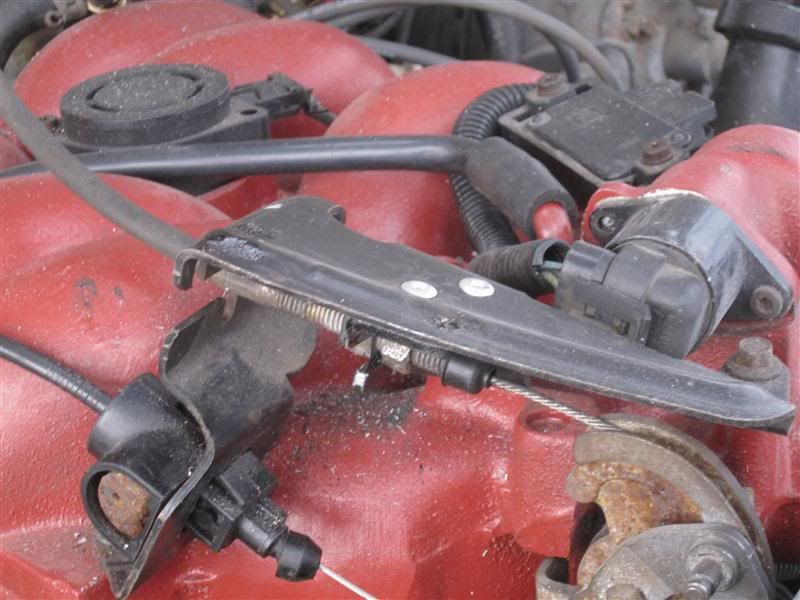
I was un-successful in clamping down the flat piece of plastic that the switches go through to the curved contour of the trim long enough for some glue to set up....
so.....pop rivets!

so.....pop rivets!
09-06-2011, 05:15 PM
#24
Registered User
Thread Starter
Turned the key today. Fuel pump primed (ran it a few times to get the whole system primed). Lights came on. Turned it to Start, and the starter engaged and the engine turned over.....but made a pretty terrible noise. Sounds like the starter gear grinding (You know the noise, like when you forget the engine's already running).
Everything seems normal when turning it over by hand, and the starter is engaging properly. So I'm starting to think the noise is internal in the starter. I've never heard a starter make a noise like that while properly engaging.....but I'm kind of at a loss.
Everything seems normal when turning it over by hand, and the starter is engaging properly. So I'm starting to think the noise is internal in the starter. I've never heard a starter make a noise like that while properly engaging.....but I'm kind of at a loss.
11-03-2011, 08:14 PM
#25
Registered User
Thread Starter
Long time without a major update. Lots of tinkering, lots of frustration.
For the record, new starter fixed the grinding noise.
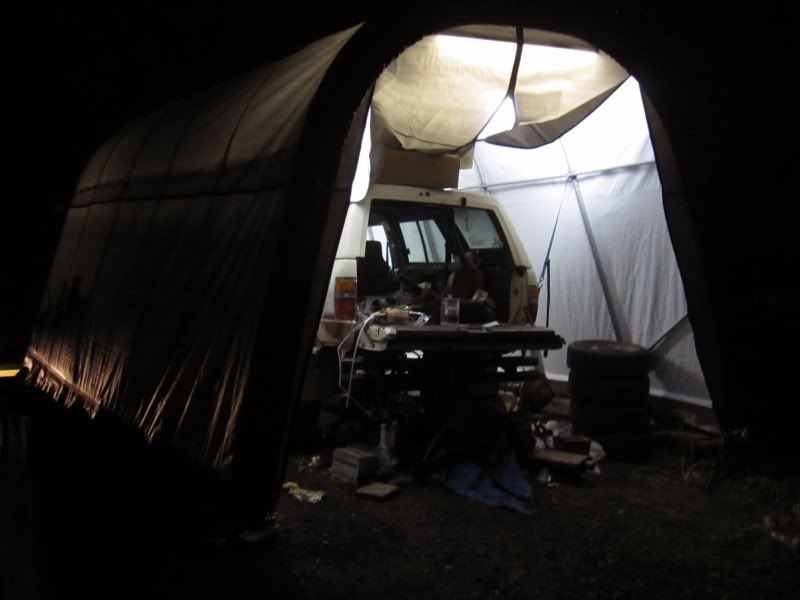
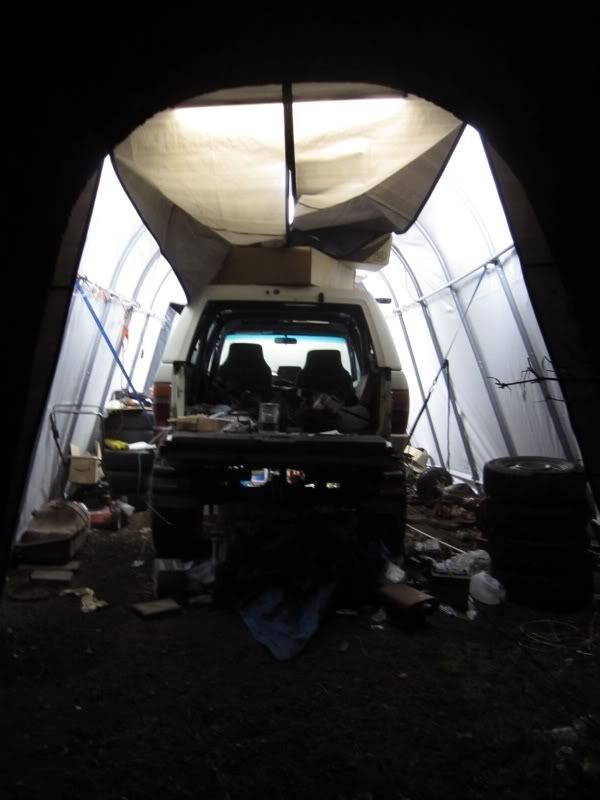
But, with winter coming, I needed an upgrade for the shelter over the truck. So...I got a nice roundtop shelter on sale at Menards. It's got a much beefier frame, thicker tarp, and the tarp is only 3 pieces instead of the 5 of the last one.
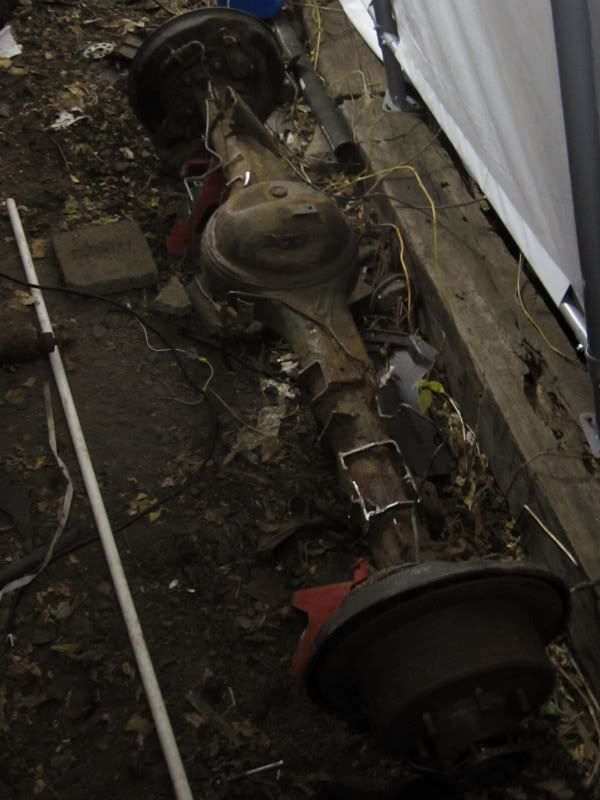
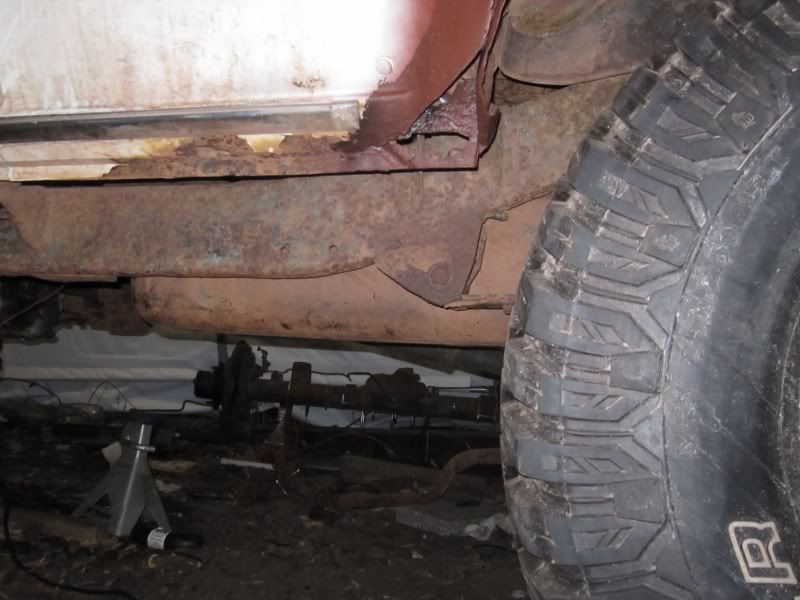
Earlier this week, I started cutting the stock 4-link bracketry off the FJ axle:
I was pretty sure that the distributor was not set right. So when I couldn't sleep last night, I started searching for good information on how to get it set. Suddenly I realized that every diagram I found online showing the firing order and spark plug wires was a mirror image of the one in my Chevy FSM, which I used when I installed the plug wires long ago.
So, this morning, I went out and pulled the plug wires off, and re-did them.
Turned the key, and the fuel pump didn't kick on. After some messing around with it, I realized that the fuel in the tank had definitely gone bad. Just a reminder of how long I've been working on this, I've already put fresh gas in the tank once since I started this swap......
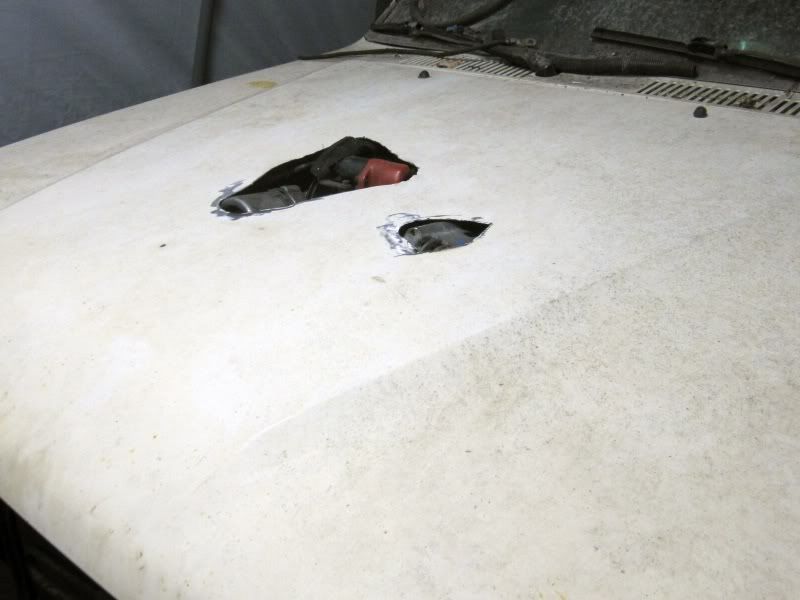
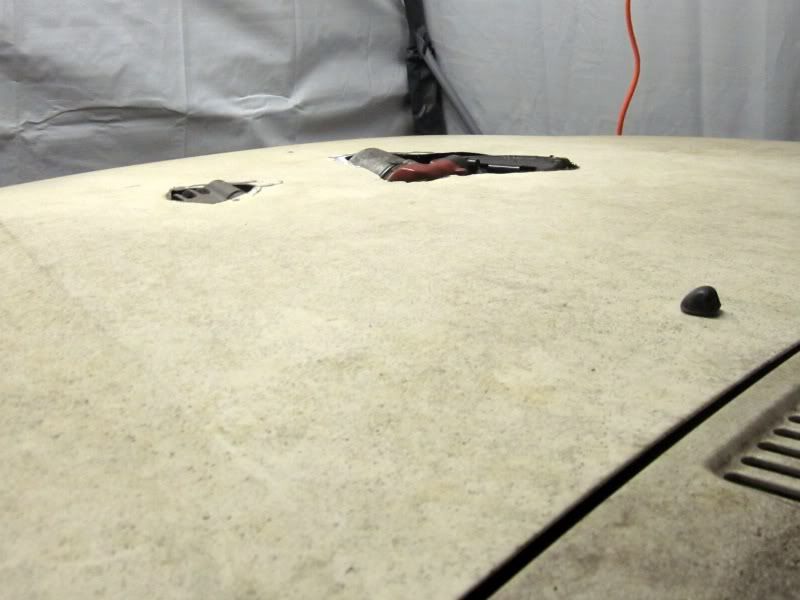
So, while it was draining out, I got out the cutting tools, and went to town on the hood:
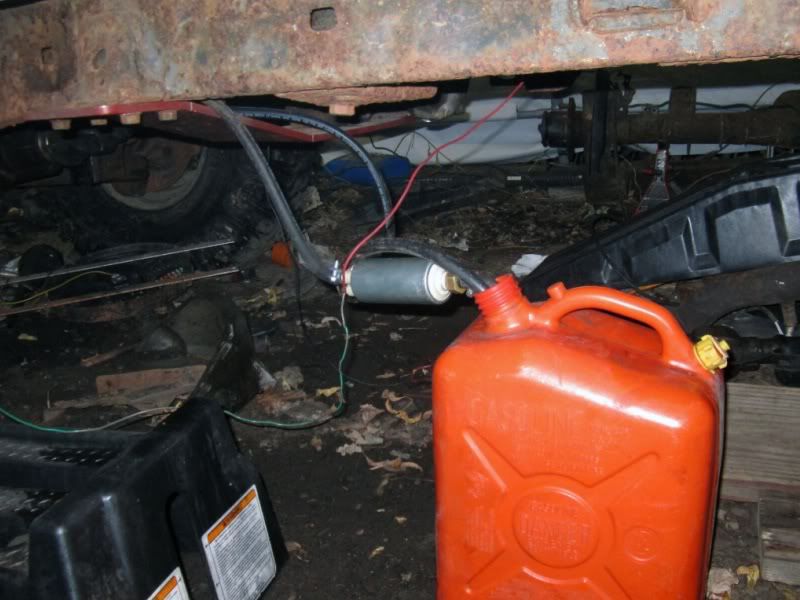
Then I got a temporary fuel system setup so I could get some fresh gas to the motor:
And......
http://www.youtube.com/watch?v=6yDaNtyJ0bE
Just open headers, no radiator hoses, ignition coil power wire just wedged in the positive battery terminal, etc. etc.
But, there's a light at the end of the tunnel.
For the record, new starter fixed the grinding noise.
But, with winter coming, I needed an upgrade for the shelter over the truck. So...I got a nice roundtop shelter on sale at Menards. It's got a much beefier frame, thicker tarp, and the tarp is only 3 pieces instead of the 5 of the last one.
Earlier this week, I started cutting the stock 4-link bracketry off the FJ axle:
I was pretty sure that the distributor was not set right. So when I couldn't sleep last night, I started searching for good information on how to get it set. Suddenly I realized that every diagram I found online showing the firing order and spark plug wires was a mirror image of the one in my Chevy FSM, which I used when I installed the plug wires long ago.
So, this morning, I went out and pulled the plug wires off, and re-did them.
Turned the key, and the fuel pump didn't kick on. After some messing around with it, I realized that the fuel in the tank had definitely gone bad. Just a reminder of how long I've been working on this, I've already put fresh gas in the tank once since I started this swap......
So, while it was draining out, I got out the cutting tools, and went to town on the hood:
Then I got a temporary fuel system setup so I could get some fresh gas to the motor:
And......
http://www.youtube.com/watch?v=6yDaNtyJ0bE
Just open headers, no radiator hoses, ignition coil power wire just wedged in the positive battery terminal, etc. etc.
But, there's a light at the end of the tunnel.
 11-08-2011, 10:14 PM
#27
Registered User
Thread Starter
I don't care if nobody's watching this thread.....I'm on a roll, so I'm going to keep updating!! 
More progress today.
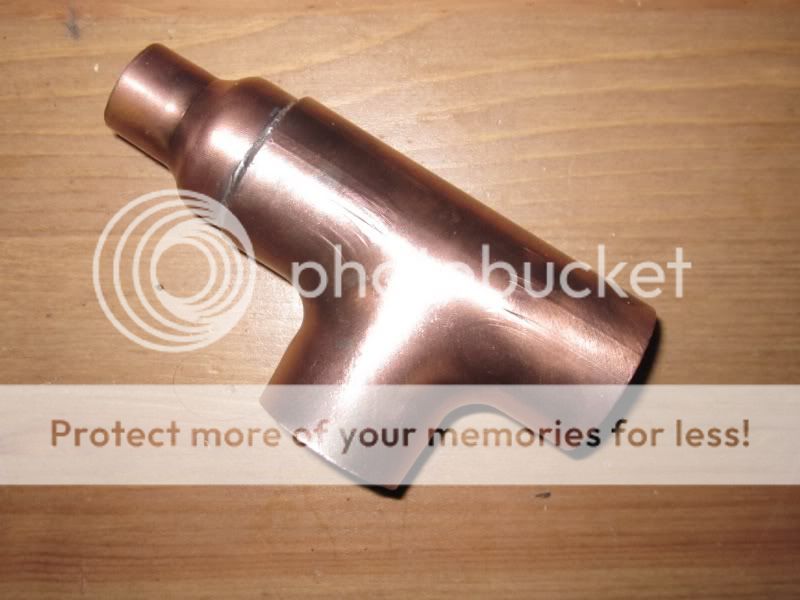
Made a run to home-depot and bought some copper fittings. A tee and a reducer so I can attach one of the heater hoses to the upper radiator hose. Tomorrow I'll solder them together.
Also ordered the rest of the parts I need for the intake.
And, found the hood cowl I want to use. It's just the right width, and 2" tall. Should be perfect to get a little more air circulation both on the road and the trail, and give me the extra clearance I need.

Gas tank is hanging from the truck. All mounts need beefing up, but it's there.
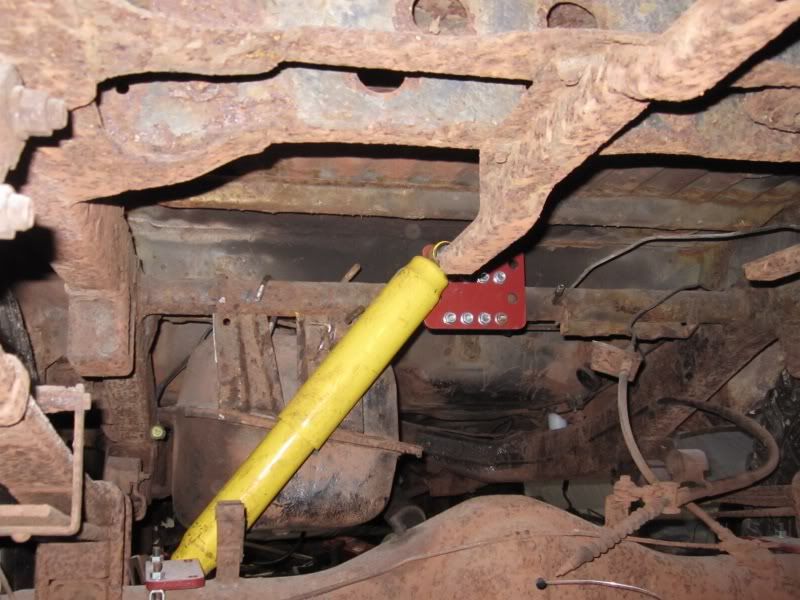
And, since the tank was there, I test-fitted a rear shock. Still needs some hardware to finalize the mount, but it shouldn't be too hard:
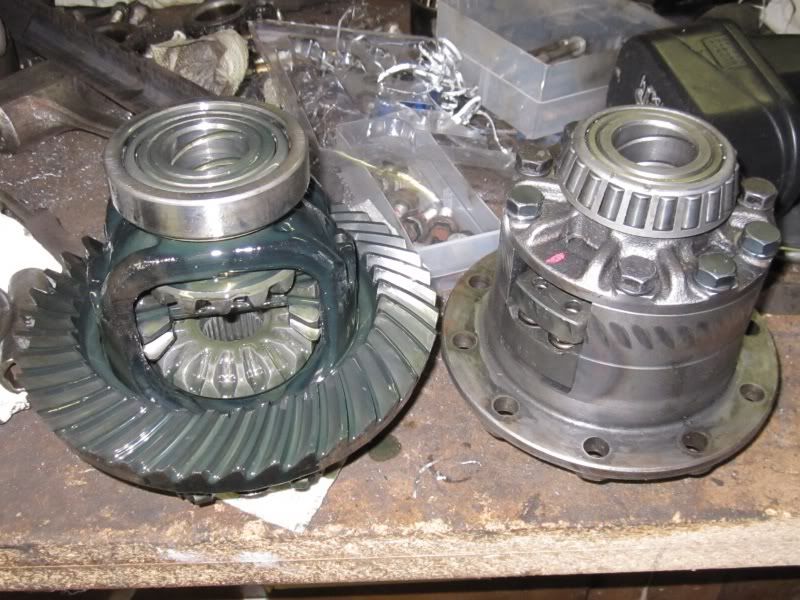
Then, started on the front LSD conversion:
More progress today.
Made a run to home-depot and bought some copper fittings. A tee and a reducer so I can attach one of the heater hoses to the upper radiator hose. Tomorrow I'll solder them together.
Also ordered the rest of the parts I need for the intake.
And, found the hood cowl I want to use. It's just the right width, and 2" tall. Should be perfect to get a little more air circulation both on the road and the trail, and give me the extra clearance I need.
Gas tank is hanging from the truck. All mounts need beefing up, but it's there.
And, since the tank was there, I test-fitted a rear shock. Still needs some hardware to finalize the mount, but it shouldn't be too hard:
Then, started on the front LSD conversion:
11-09-2011, 07:49 PM
#28
Registered User
Thread Starter
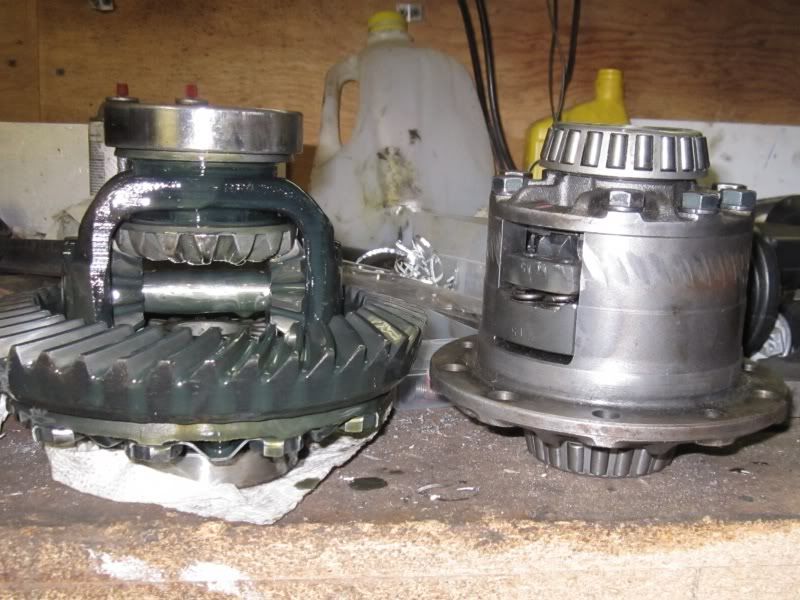
and in the housing. With a little modification, the 4runner stubs clipped right into the supra carrier. And while I had it apart, I knocked the studs out of the axle flanges, still have to grind out the splines so I can re-install the studs as bolts.
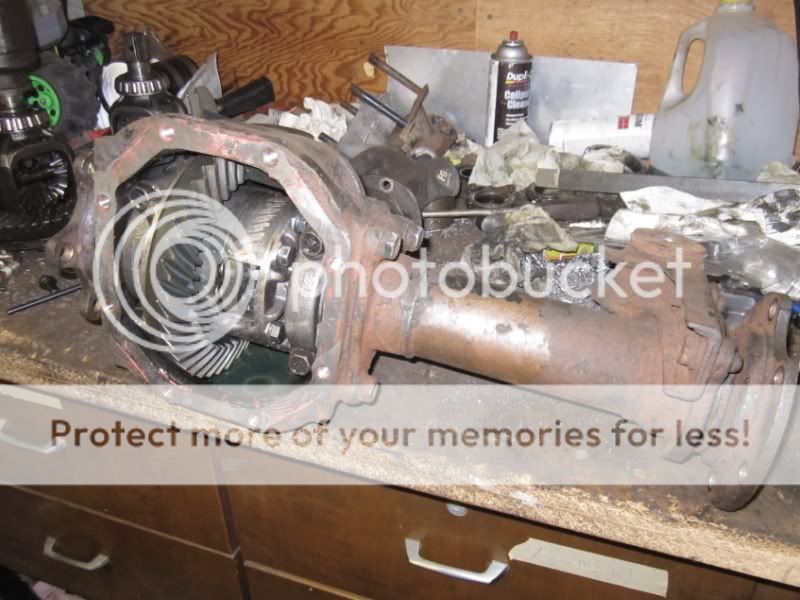
Just need some fluid (and LSD additive), and some RTV, and I'll get it back in the truck.
And, soldered a tee fitting with a reducer so I can attach one of the heater hoses to the upper radiator hose.
Just need some fluid (and LSD additive), and some RTV, and I'll get it back in the truck.
And, soldered a tee fitting with a reducer so I can attach one of the heater hoses to the upper radiator hose.
11-09-2011, 11:27 PM
#29
Registered User
Join Date: Apr 2011
Location: Southern Ontario
Posts: 428
Likes: 0
Received 0 Likes
on
0 Posts
Just ran across your thread, you seem like a man who enjoys a challenge. I hope you're as stubborn as I think you are, I'm looking forward to seeing you progress on this project.
11-10-2011, 03:55 AM
#30
Super Moderator
Staff
iTrader: (1)
Join Date: Aug 2008
Location: Anderson Missouri
Posts: 11,788
Likes: 0
Received 21 Likes
on
19 Posts
I just came across your thread myself. Got some catching up to do. Cant help you with te gearing part. I just swap them. One of these days I need to learn that part. Great job. Will be watching to see how it goes.
11-10-2011, 05:43 PM
#32
Registered User
Thread Starter
Thanks guys! I'm extremely anxious to get this thing done, and now that it runs, I'm very motivated to finish it out!
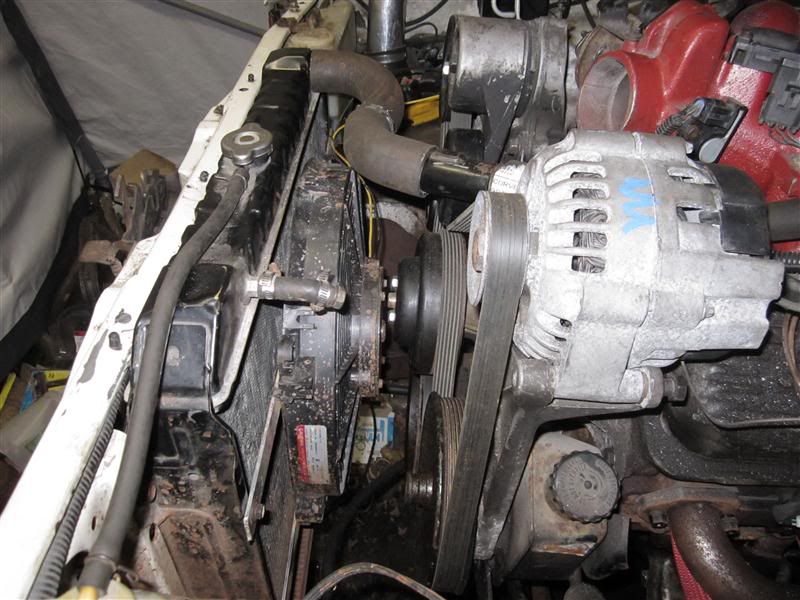
Upper radiator hose is complete....well, will be once I get some hose clamps.
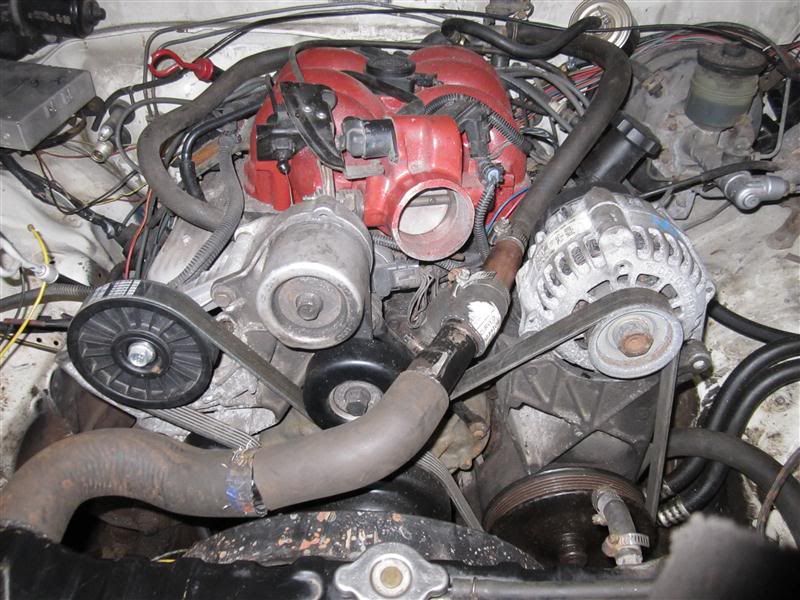
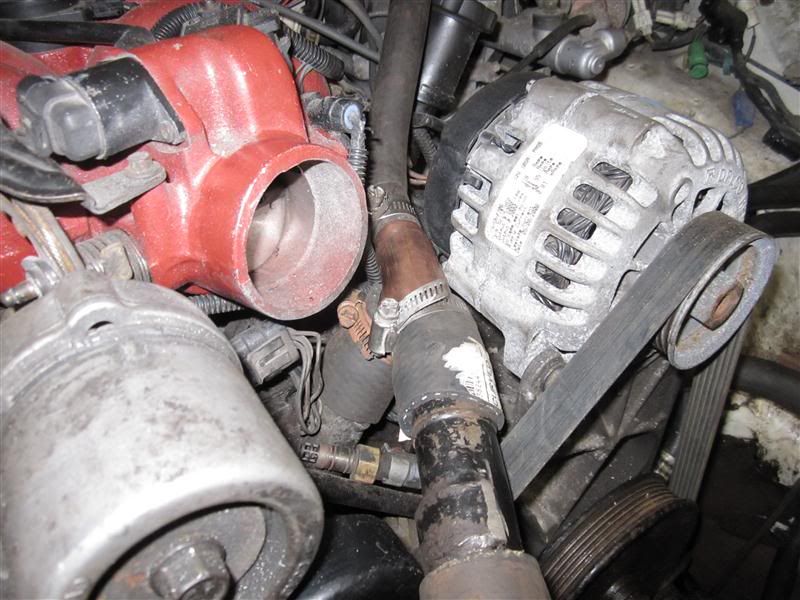
I had very little room to work, so I opted to have each turn of the hose a separate, molded piece. There's a lot more room at the bottom, so I'll just get a piece of flexible rad hose.
Also, got the electric radiator fan mounted. Not sure if it's enough clearance with the water pump pulley/bolts....I'll have to keep an eye on it.
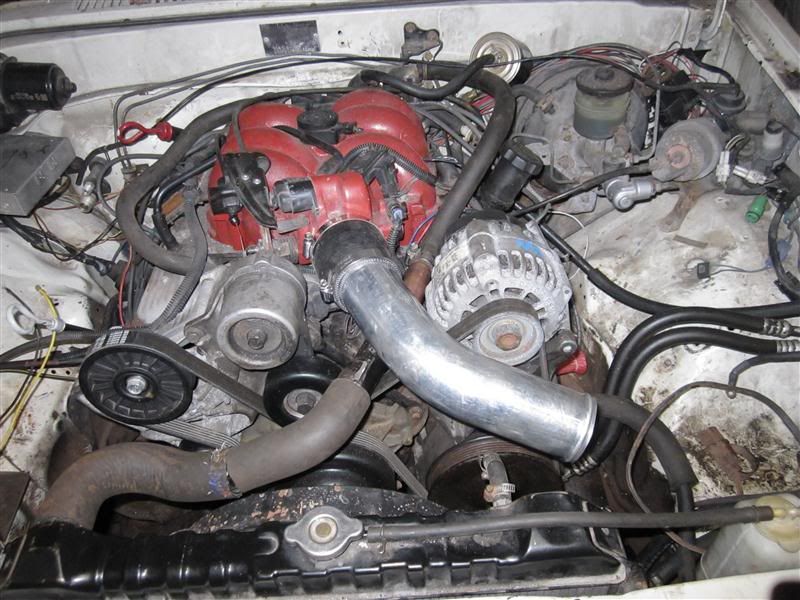
First part of the intake:
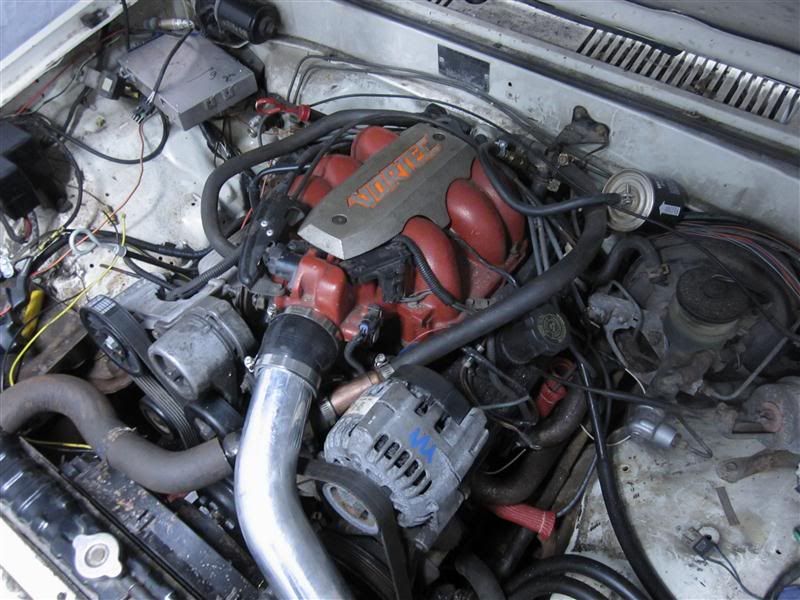
And the plastic "Vortec" cover on the intake runners.....just for the awesome factor:
Also got the front diff cover on, fluid in it, and installed....no pics of that, but whatever. SOOOO much easier with those axle flange studs removed.
Upper radiator hose is complete....well, will be once I get some hose clamps.
I had very little room to work, so I opted to have each turn of the hose a separate, molded piece. There's a lot more room at the bottom, so I'll just get a piece of flexible rad hose.
Also, got the electric radiator fan mounted. Not sure if it's enough clearance with the water pump pulley/bolts....I'll have to keep an eye on it.
First part of the intake:
And the plastic "Vortec" cover on the intake runners.....just for the awesome factor:
Also got the front diff cover on, fluid in it, and installed....no pics of that, but whatever. SOOOO much easier with those axle flange studs removed.
11-11-2011, 12:41 AM
#33
Super Moderator
Staff
iTrader: (1)
Join Date: Aug 2008
Location: Anderson Missouri
Posts: 11,788
Likes: 0
Received 21 Likes
on
19 Posts
You are on a roll. Seems like that how it goes. You will hit a slow spot and then everything takes off fast. Getting parts and getting everything prepped is what takes time. Great job. Looking good.
01-30-2012, 12:47 PM
#34
Registered User
Thread Starter
It got cold. And progress has been slow again. I built some gas tank mounts, and a few other small things.
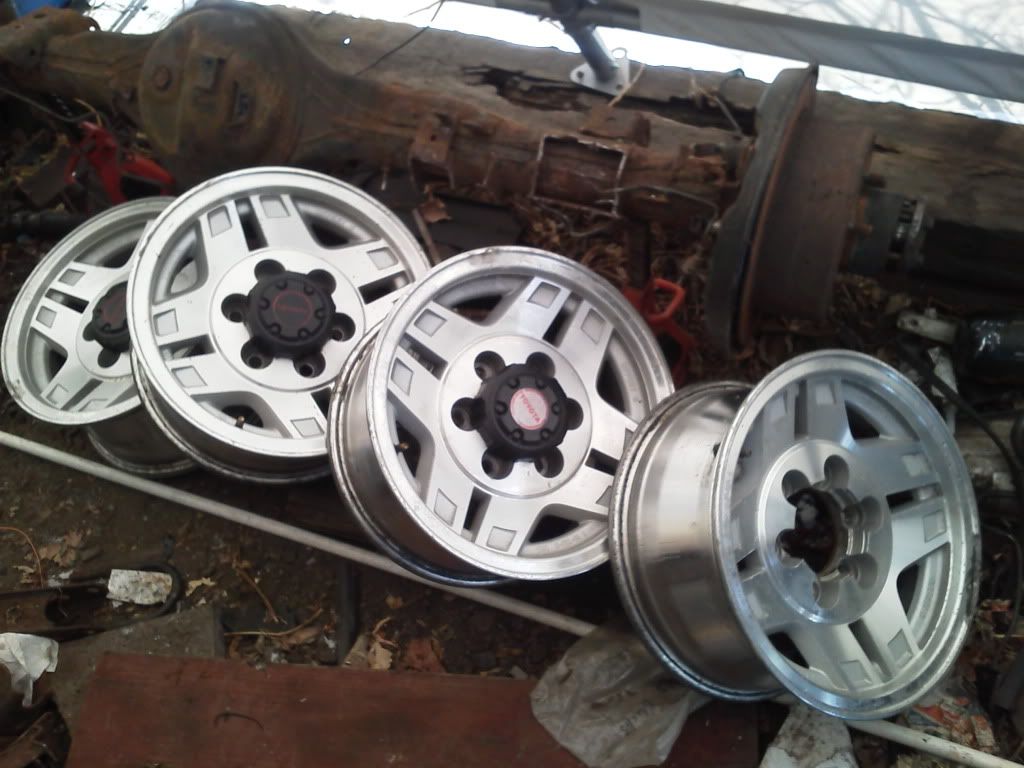
But, I also got these for $100 on CL:
Test-fitting a manual hub:
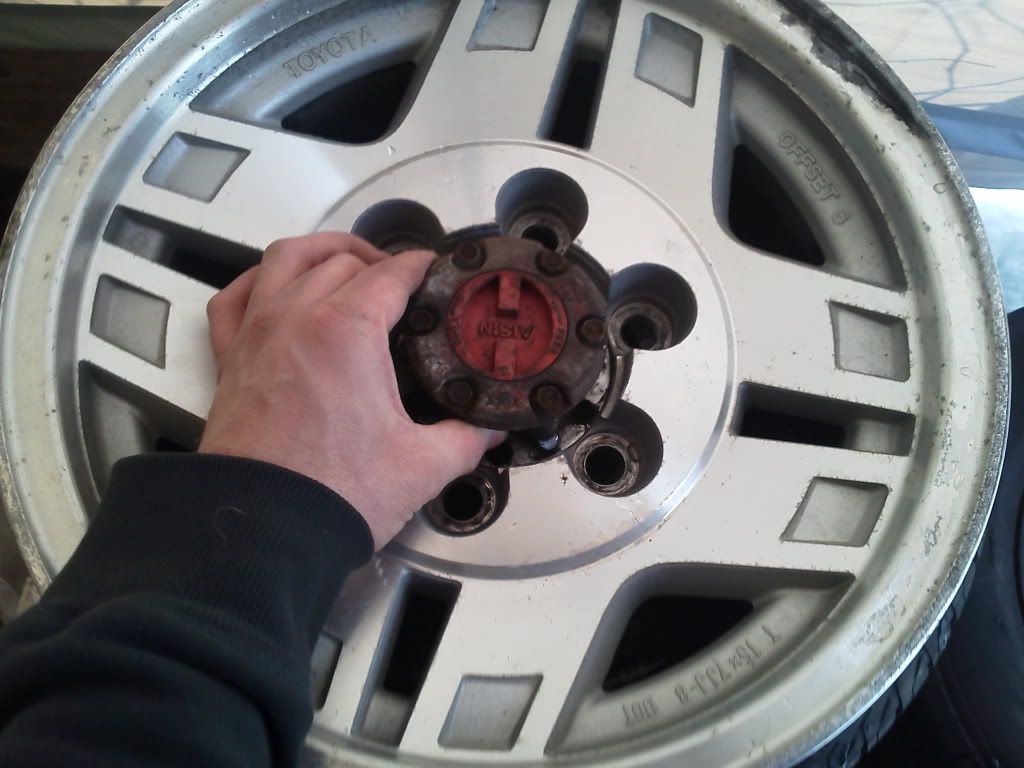
Narrower, and with more backspacing. Should help keep the big meats under the bodywork with the wider suspension. Also, narrower wheels will help keep the beads seated when aired down.
Did a test-fit on the FJ-80 rear axle.....going to be interesting. I need to have a closer look at the caliper to see if I can remove enough material to safely sneak on 15s.
Also, arranging to meet up with another YT member from WI to drop of a set of Sway-a-Way torsion bars on his way up this direction in a couple weeks. That much closer to Blazeland!
But, I also got these for $100 on CL:
Test-fitting a manual hub:
Narrower, and with more backspacing. Should help keep the big meats under the bodywork with the wider suspension. Also, narrower wheels will help keep the beads seated when aired down.
Did a test-fit on the FJ-80 rear axle.....going to be interesting. I need to have a closer look at the caliper to see if I can remove enough material to safely sneak on 15s.
Also, arranging to meet up with another YT member from WI to drop of a set of Sway-a-Way torsion bars on his way up this direction in a couple weeks. That much closer to Blazeland!
04-18-2012, 11:50 AM
#35
Registered User
Join Date: Apr 2012
Posts: 94
Likes: 0
Received 0 Likes
on
0 Posts
Any progress? From what I've read you have put a lot of work into your rig. Lookin good. I'm building a 90 runner with long travel and the 4.3 CPI swap. Will start a build thread soon. New to yt.
04-18-2012, 04:13 PM
#36
Registered User
Thread Starter
Very little. Work has been nuts.
I cut the fittings off the power steering at the steering box. I had planned to reflare the toyota fitting onto the GM line. But the thicker steel line broke my flaring tool, and I got a bit no at everywhere I went to locally.
They all said they can re-crimp the line where the rubber part meets it. But I didn't save anything but the fitting from the toyota line. So I have to hit up a junkyard to find another one.
Once that is done, I can run the engine, and troubleshoot the couple issues that I know of. And finalize the wiring.
04-19-2012, 06:25 AM
#37
Registered User
Join Date: Apr 2012
Posts: 94
Likes: 0
Received 0 Likes
on
0 Posts
That's sucks man it's always the simple things that hold us up. Did you go with a painless kit or did you rework the stock Chevy toy harness? Run into any snags? As far as the timing cover being a pita it should be looked at as a good time for preventative maintenance. Pull oil pan and make sure oil pump is in good order, have a chance to take a look at some of the internals and be able to spot any potential problems, clean oil pan etc. these motors are not hard to work on just takes a little imagination and patience lol
04-20-2012, 08:12 PM
#38
Registered User
Thread Starter
not to try to change your mind but that motor is a pain in a ass to worck on i gust got done doing my friends timeing chain no the s10 my god its possible to change without droping the pan but real pita book says u have to drop frount chrosmember and pull pan probley would have been easyer but got it done imo i would never worck on that stile of engine agin every things a real pita to worck on and people think toyotas are hard to worck on lol
That's sucks man it's always the simple things that hold us up. Did you go with a painless kit or did you rework the stock Chevy toy harness? Run into any snags? As far as the timing cover being a pita it should be looked at as a good time for preventative maintenance. Pull oil pan and make sure oil pump is in good order, have a chance to take a look at some of the internals and be able to spot any potential problems, clean oil pan etc. these motors are not hard to work on just takes a little imagination and patience lol
04-21-2012, 09:53 AM
#39
Registered User
Join Date: Apr 2012
Posts: 94
Likes: 0
Received 0 Likes
on
0 Posts
I agree those kits are nice but not worth if you have the patience. I will be re working my harness. Gonna make a test stand to fire the motor and should be. Good opportunity to be certain I have the wiring sorted out. Numbchux maybe I can pick your brain a little bit in regards to the wiring here soon if that's cool?
04-25-2012, 05:21 PM
#40
Registered User
Thread Starter
4xinnovations recently added a 2" body-lift option for their tube rear bumper with class 2 rated receiver hitch....I just ordered one:

Got the steering box end of a power steering line off a Lexus FJ80 (LX470?). Threads right into the 4runner box. It's got a 16mm hex on it, instead of the stock 17mm hex, which is annoying, but it'll do. Going to take it to have it crimped onto the chevy line tomorrow.
Got the steering box end of a power steering line off a Lexus FJ80 (LX470?). Threads right into the 4runner box. It's got a 16mm hex on it, instead of the stock 17mm hex, which is annoying, but it'll do. Going to take it to have it crimped onto the chevy line tomorrow.


