Grego92's Retroactive and Current Build Up

 06-07-2012, 05:17 PM
#42
Registered User
Thread Starter
iTrader: (4)
Join Date: May 2010
Location: People's Republic of California
Posts: 720
Likes: 0
Received 15 Likes
on
12 Posts
Yeah..luv my lab, he's the best.
Below problem solved...
NOW, for some help! I just posted this on the open forum board. But for anyone following my build if you got any ideas don't be shy....
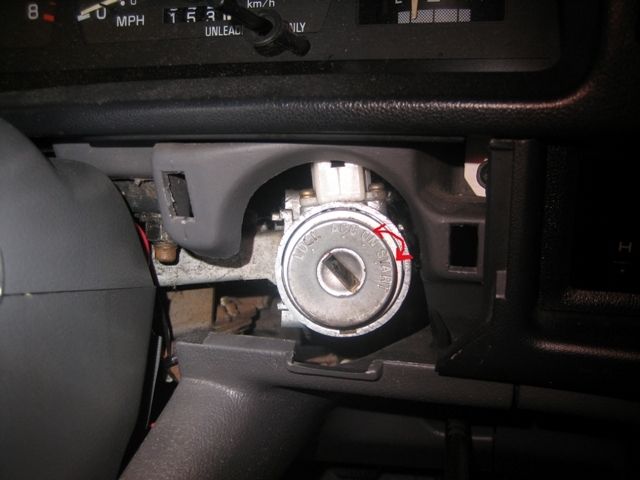
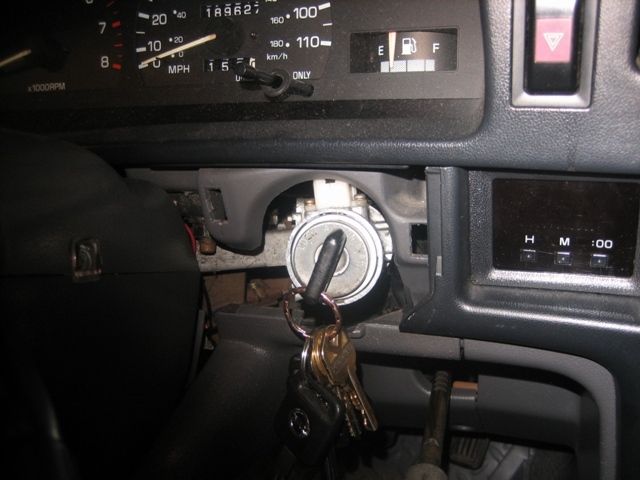
Pulled into a 7eleven and couldn't restart the truck. The key goes in, it turns from lock/acc/on/start, the steering wheel locks when in the lock position, unlocks when I turn it to the ACC position, but from ON to START there is no physical resistance (very loose). And of course I can't start, no crank or anything. It's as if I'm not pushing in the clutch or not hitting the clutch cancel switch. Again, there isn't the slightest physical resistance that I remember having when turning from the ON position to the START position when starting up. It's very loosey goosey.
Also, I now have constant power on as if I'm in the ON position no matter what position I turn the key to. For example, even though I can turn to the LOCK position and the steering wheel locks and I remove the key....there is still power (radio playing, clock on, etc...). I had to disconnect the battery cable to prevent eventually draining my battery.
I'm thinking the cylinder portion of the ignition switch is broken inside. It's too loose when turning. Anyone have this problem before? Can the cylinder portion be replaced or do I need to replace the whole switch? Will one from a 90-95 4runner work from the junk yard? Aaaargggg....
Very loose and a lot of play when turning back and forth from ON to START
Problem was solved....see below
THANK YOU iselloil ! That was the problem. A clip of some sort that keeps it in place must've broken off. I'll have to play around at the junkyard one day and see what is suppose to keep it secure.
Would have never guessed that the loose electrical connection thing would have caused the loose turning. I was totally assuming a spring inside had broke. That connection must also have some kind of switch inside of it or something that gives the key turning physical resistance.
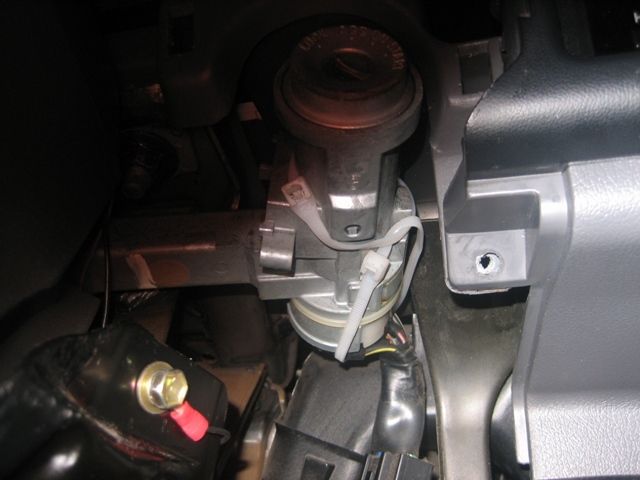
For anyone else in the future, Iselloil was talking about the white connector behind the switch as shown below. I had to put the key in and turn the key from LOCKED to ACC to ON and so forth while pushing the connector in in order for the connector to sit in there right, then used some zip ties to keep it connected.

Below problem solved...
NOW, for some help! I just posted this on the open forum board. But for anyone following my build if you got any ideas don't be shy....
Pulled into a 7eleven and couldn't restart the truck. The key goes in, it turns from lock/acc/on/start, the steering wheel locks when in the lock position, unlocks when I turn it to the ACC position, but from ON to START there is no physical resistance (very loose). And of course I can't start, no crank or anything. It's as if I'm not pushing in the clutch or not hitting the clutch cancel switch. Again, there isn't the slightest physical resistance that I remember having when turning from the ON position to the START position when starting up. It's very loosey goosey.
Also, I now have constant power on as if I'm in the ON position no matter what position I turn the key to. For example, even though I can turn to the LOCK position and the steering wheel locks and I remove the key....there is still power (radio playing, clock on, etc...). I had to disconnect the battery cable to prevent eventually draining my battery.
I'm thinking the cylinder portion of the ignition switch is broken inside. It's too loose when turning. Anyone have this problem before? Can the cylinder portion be replaced or do I need to replace the whole switch? Will one from a 90-95 4runner work from the junk yard? Aaaargggg....
Very loose and a lot of play when turning back and forth from ON to START
Problem was solved....see below
Would have never guessed that the loose electrical connection thing would have caused the loose turning. I was totally assuming a spring inside had broke. That connection must also have some kind of switch inside of it or something that gives the key turning physical resistance.
For anyone else in the future, Iselloil was talking about the white connector behind the switch as shown below. I had to put the key in and turn the key from LOCKED to ACC to ON and so forth while pushing the connector in in order for the connector to sit in there right, then used some zip ties to keep it connected.
Last edited by Grego92; 06-07-2012 at 07:34 PM.
06-07-2012, 10:03 PM
#43
OMGOSH I HATE stuff like that, it FREAKS ME OUT! hahaha.... No, really, know why it freaks me out? Cuz when it happens, .... I'M ALWAYS IN THE MIDDLE OF FREAKIN NOWHERE! lol. Like when My spare tire assembly key/tool insert portion snapped RIGHT OFF! .... yes, I had a flat, hahaha.
GREAT of Iselloil! WOOT!
GREAT of Iselloil! WOOT!
06-22-2012, 05:10 PM
#45
Registered User
Thread Starter
iTrader: (4)
Join Date: May 2010
Location: People's Republic of California
Posts: 720
Likes: 0
Received 15 Likes
on
12 Posts
Mark, good suggestion! I did do that, thanks! I used 2 part epoxy, then gorilla tape strip and then put back new zip ties! 
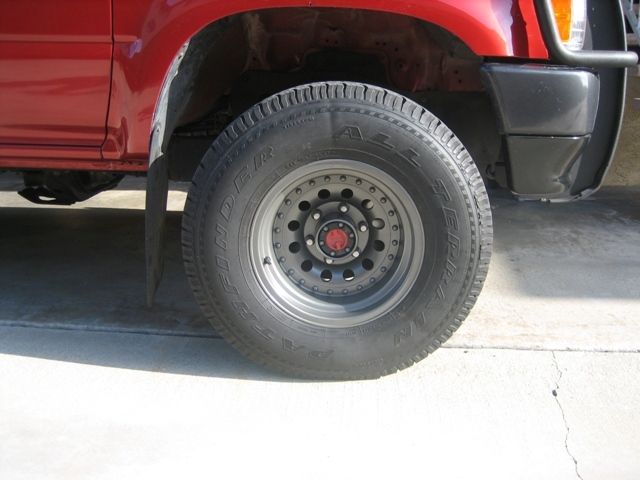
Got half the wheels done. It's a lot of work! take off all the clear coat from the aluminum with paint remover, then do it again to get what you missed, wash it all off, sand it all down and rough the aluminum up, wire wheel the crevices, wash it all off again, air compressor to blow everything out, air dry, deflate the tires, put index card between wheel and tire, etching primer, and finally coats of rustoleum wheel paint (granite color).

Got half the wheels done. It's a lot of work! take off all the clear coat from the aluminum with paint remover, then do it again to get what you missed, wash it all off, sand it all down and rough the aluminum up, wire wheel the crevices, wash it all off again, air compressor to blow everything out, air dry, deflate the tires, put index card between wheel and tire, etching primer, and finally coats of rustoleum wheel paint (granite color).
06-22-2012, 05:20 PM
#46
wheels looks good. i see a trend going on. more gray type color wheels instead of your typical black wheels everyones been doing. not that theres anything wrong with it, i just like to stand out just that much more haha
07-01-2012, 03:17 PM
#47
Registered User
Thread Starter
iTrader: (4)
Join Date: May 2010
Location: People's Republic of California
Posts: 720
Likes: 0
Received 15 Likes
on
12 Posts
The fish have been biting, so nothing much to report on the truck.
I did finish up all the wheels and am really happy with them. The wheels are nearly as old as the truck and the cracking/peeling clear coat just needed to go. Toyotech....I know what you mean about the black wheels being "over" done already...when I saw the granite grey wheel paint I was thinking almost the same thing as you "Perfect! won't look exactly like what everyone else is doing" By the way what's your first name? getting tired of calling you Toyo....hahahha
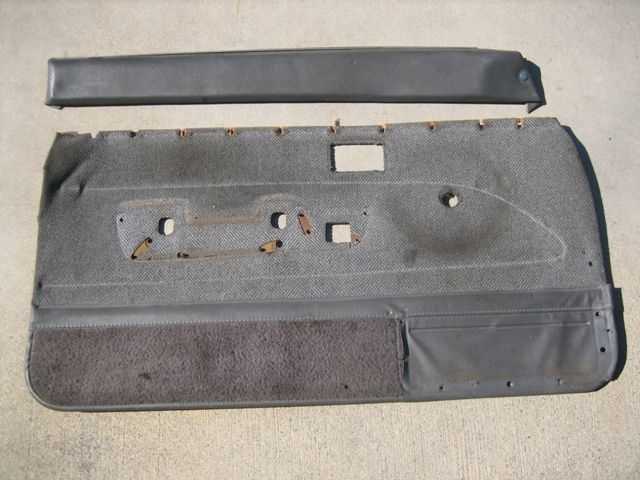
I was really happy to have scored an sr5 cloth door panel from a truck at the yard. 89-95 trucks are really hard to find in the yards here. The only problem is only the passenger panel was there, someone took the driver side door. So who knows how long it will be before I actually get to install and upgrade my panels. I recently did a makeover of my vinyl ones so I can wait it out until I can score the other side.
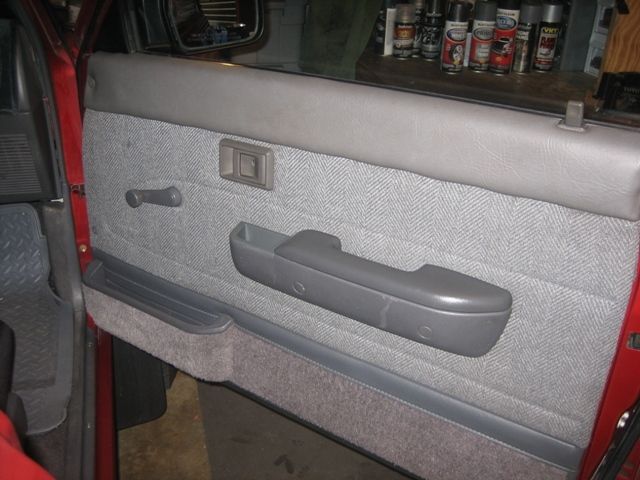
What I have now:
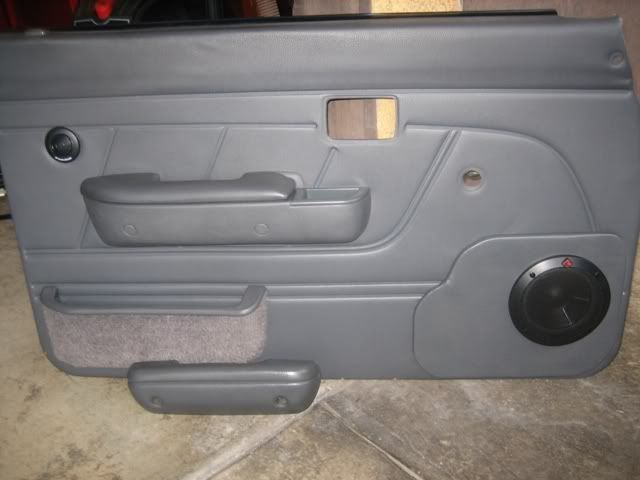
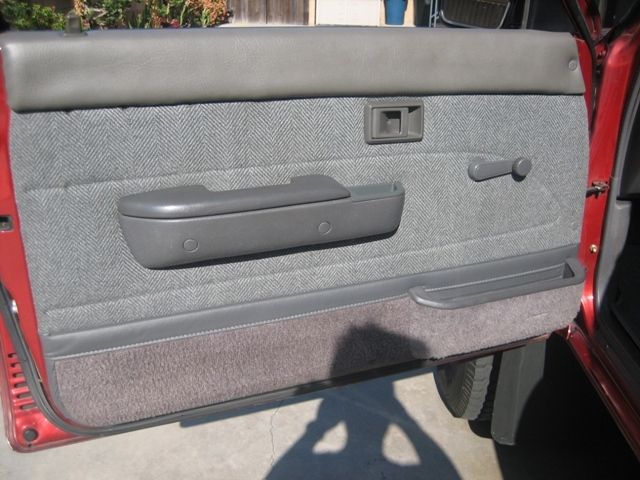
And what I will have sometime in the future....I just need to transfer the existing cloth map pocket to upgrade the plastic one and transfer the sr5 door handles I got from a 4runner. I'll also have to figure out a new speaker arrangement as i don't want to cut into the cloth panels.

Oh yeah, figured out how that ignition thing stays clipped in, it's just a screw from behind mine must have rattled out over the years so have that to do also.
I did finish up all the wheels and am really happy with them. The wheels are nearly as old as the truck and the cracking/peeling clear coat just needed to go. Toyotech....I know what you mean about the black wheels being "over" done already...when I saw the granite grey wheel paint I was thinking almost the same thing as you "Perfect! won't look exactly like what everyone else is doing" By the way what's your first name? getting tired of calling you Toyo....hahahha
I was really happy to have scored an sr5 cloth door panel from a truck at the yard. 89-95 trucks are really hard to find in the yards here. The only problem is only the passenger panel was there, someone took the driver side door. So who knows how long it will be before I actually get to install and upgrade my panels. I recently did a makeover of my vinyl ones so I can wait it out until I can score the other side.
What I have now:
And what I will have sometime in the future....I just need to transfer the existing cloth map pocket to upgrade the plastic one and transfer the sr5 door handles I got from a 4runner. I'll also have to figure out a new speaker arrangement as i don't want to cut into the cloth panels.
Oh yeah, figured out how that ignition thing stays clipped in, it's just a screw from behind mine must have rattled out over the years so have that to do also.
07-01-2012, 08:49 PM
#50
Registered User
Thread Starter
iTrader: (4)
Join Date: May 2010
Location: People's Republic of California
Posts: 720
Likes: 0
Received 15 Likes
on
12 Posts
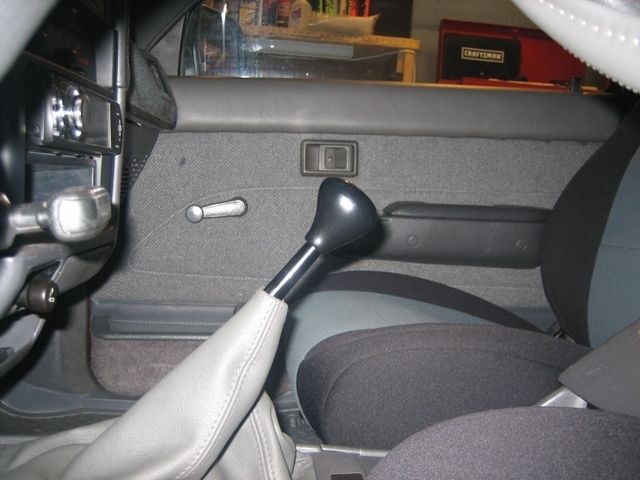
Hey Mark! the 6.5" sits at the foot and the pocket is against the bottom of the seat. I had to install the pocket at the opposite end because the speaker hole was already cut back in 1992 when I first got it. You can see the factory setup has the pocket at the foot.
I know the yard sale is this coming Wednesday...I debated on leaving it for then but didn't want to chance it. So $17 was the cost. This panel came from the Stanton one. That's the only yard I ever see pickups on a regular basis. I wish the 4runner's panels fit, but they're too short, only the 2 door 2nd Gen's 4runner's panels will fit and you know how rare those are. If you plan on going on the 4th early morning, I'll meet you there if you like!
I know the yard sale is this coming Wednesday...I debated on leaving it for then but didn't want to chance it. So $17 was the cost. This panel came from the Stanton one. That's the only yard I ever see pickups on a regular basis. I wish the 4runner's panels fit, but they're too short, only the 2 door 2nd Gen's 4runner's panels will fit and you know how rare those are. If you plan on going on the 4th early morning, I'll meet you there if you like!
Last edited by Grego92; 07-01-2012 at 08:52 PM.
07-01-2012, 10:46 PM
#51
Hey Grego... Not sure if I'm going or not.......... Didn't see much there, even yesterday.... So it'd have to be fluke luck to find a 1st Gen Runner there... But hey, never know! haha... I would go either way, but not sure I can get it off just yet. Usually wont know until the day before or so. I'm not cooking this big block party this year... So it's more likely that I can...but I'm just not sure, as I said.
If I go, I'll letcha know the day before.
Hope things are going really well for ya, Grego
If I go, I'll letcha know the day before.
Hope things are going really well for ya, Grego
07-06-2012, 08:17 PM
#52
Registered User
Thread Starter
iTrader: (4)
Join Date: May 2010
Location: People's Republic of California
Posts: 720
Likes: 0
Received 15 Likes
on
12 Posts
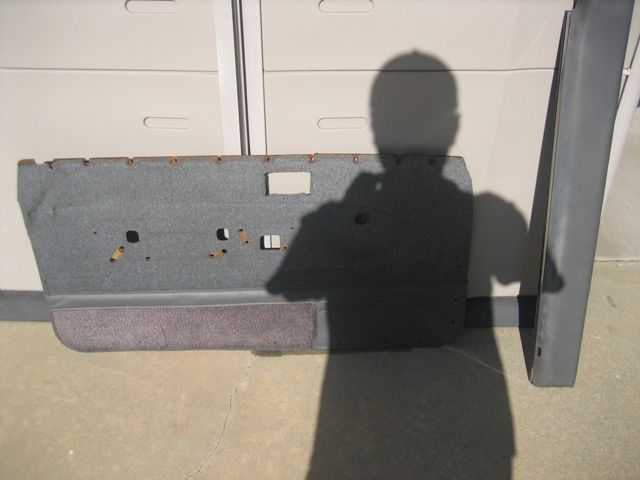
Scored!!!  Never thought I would find one so quickly! Found a pretty beat up driver side SR5 cloth door panel from a pickup at smaller Wilmington yard for $9. It was a mess and laying on the ground but it cleaned up well and no tears. The back particle wood board is messed up though but fixable. I have to research how to best mend it back together, thinking fiberglass?
Now I really need to think of how I'm going to do the speakers. Probably some 4" in the dash (never came with any). I think I need to grab the speaker holders out of the 4runner? do they sound mount better with those? I'm not a stereo/music fanatic, just need it loud enough to cover up the road noise.
Cleaned up and drying
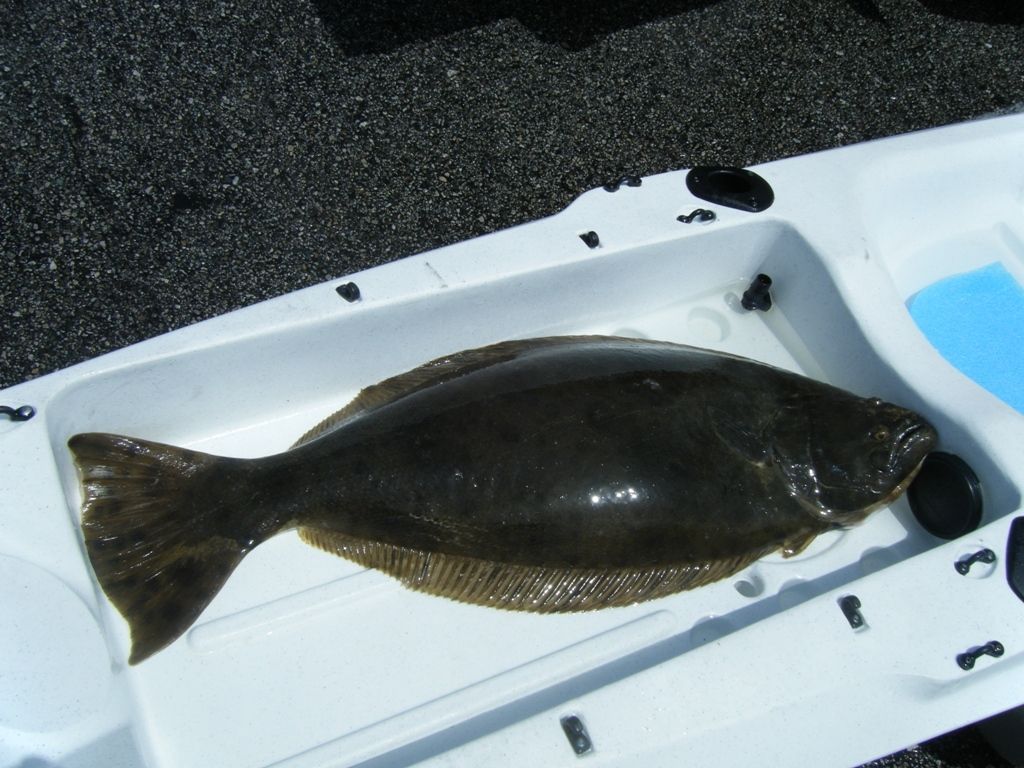
Double score today...in the morning before the yard trip I landed a 19lb halibut off Torrance Beach on the yak.
Never thought I would find one so quickly! Found a pretty beat up driver side SR5 cloth door panel from a pickup at smaller Wilmington yard for $9. It was a mess and laying on the ground but it cleaned up well and no tears. The back particle wood board is messed up though but fixable. I have to research how to best mend it back together, thinking fiberglass?Now I really need to think of how I'm going to do the speakers. Probably some 4" in the dash (never came with any). I think I need to grab the speaker holders out of the 4runner? do they sound mount better with those? I'm not a stereo/music fanatic, just need it loud enough to cover up the road noise.
Cleaned up and drying
Double score today...in the morning before the yard trip I landed a 19lb halibut off Torrance Beach on the yak.
07-06-2012, 08:46 PM
#53
The fish have been biting, so nothing much to report on the truck.
I did finish up all the wheels and am really happy with them. The wheels are nearly as old as the truck and the cracking/peeling clear coat just needed to go. Toyotech....I know what you mean about the black wheels being "over" done already...when I saw the granite grey wheel paint I was thinking almost the same thing as you "Perfect! won't look exactly like what everyone else is doing" By the way what's your first name? getting tired of calling you Toyo....hahahha
I did finish up all the wheels and am really happy with them. The wheels are nearly as old as the truck and the cracking/peeling clear coat just needed to go. Toyotech....I know what you mean about the black wheels being "over" done already...when I saw the granite grey wheel paint I was thinking almost the same thing as you "Perfect! won't look exactly like what everyone else is doing" By the way what's your first name? getting tired of calling you Toyo....hahahha
nice score on the panels
07-07-2012, 12:11 AM
#54
Looks great! I was thinking of hitting the yard on the last day, tomorrow... But I'm pretty sure it's picked pretty clean by then, haha... Still, I MUST TRY! hahaha... Both yards, usually... And really, what I WOULD LOVE to find is another 31x10.50x15 for my spare. See any? hehehe.
Take care, Grego... GREAT FIND! Great catch, too When we eatin him? hehe.
Take care, Grego... GREAT FIND! Great catch, too
When we eatin him? hehe.
07-08-2012, 08:03 PM
#55
Registered User
Thread Starter
iTrader: (4)
Join Date: May 2010
Location: People's Republic of California
Posts: 720
Likes: 0
Received 15 Likes
on
12 Posts
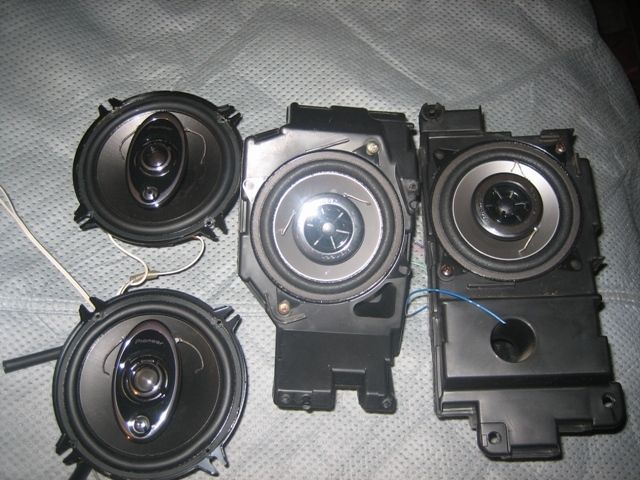
I went to the Anaheim yard today. The cool thing about Anaheim and Stanton is on the website they actually somewhat update what vehicles have been delivered and are available, sometimes they are a day off or so. So anyhow they said they had a 93' 4runner as of yesterday so that's why I went there. Sure as heck it was there and hardly gone through, AND I got EXACTLY what I was looking for - some decent aftermarket 4" speakers for the dash w/factory boxes and bonus matching 5 1/2". They're Pioneer's and looked pretty new for $4 each! So now I just need to make some speaker boxes for behind the seat and then I can swap the panels.
Also, there was a 88' or 87' SR5 pickup that I noticed had a cab wall liner. Had no idea they made such a thing. I took it off and put it inside a stripped down 91' pickup cab and nearly perfect fit! Sweet! So I took out my homemade carpet and swapped this in. Just had to do some minor cutting for my bottle jack and there are two pre-cut rectangular holes that I'll need to cover. Pretty stoked!
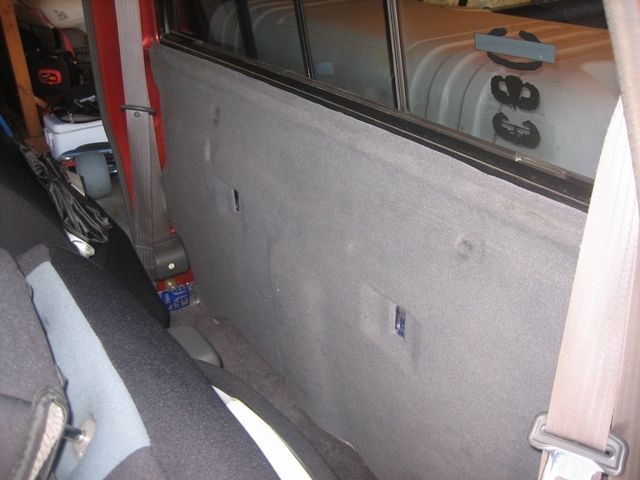
They're Pioneer's and looked pretty new for $4 each! So now I just need to make some speaker boxes for behind the seat and then I can swap the panels.Also, there was a 88' or 87' SR5 pickup that I noticed had a cab wall liner. Had no idea they made such a thing. I took it off and put it inside a stripped down 91' pickup cab and nearly perfect fit! Sweet! So I took out my homemade carpet and swapped this in. Just had to do some minor cutting for my bottle jack and there are two pre-cut rectangular holes that I'll need to cover. Pretty stoked!
Last edited by Grego92; 07-08-2012 at 08:04 PM.
07-08-2012, 08:46 PM
#56
Wow, I'm a lil bummed I didn't go.. But something about Wilmington and the RAVENOUS SCAVENGERS that visit there so often.... and the lack of much new very often any more... It TICKS me off! hahaha... PLUS, ...in all fairness to them, I can't get there very often... So I'm sure I'm missing out on a few things.  UNREAL-COOL, Grego! Congratz! They have listings, eh? Hmmmm.... I never bothered to check that before. Does Wilmington do listings? I'ma go look! hahhaa.
WOW, seriously... NICE FINDS! CONGRATZ!
UNREAL-COOL, Grego! Congratz! They have listings, eh? Hmmmm.... I never bothered to check that before. Does Wilmington do listings? I'ma go look! hahhaa. WOW, seriously... NICE FINDS! CONGRATZ!
07-18-2012, 08:17 PM
#57
Registered User
Thread Starter
iTrader: (4)
Join Date: May 2010
Location: People's Republic of California
Posts: 720
Likes: 0
Received 15 Likes
on
12 Posts
I've been down with the Flu the last few days and not going to work. BUT, that doesn't keep me away from playing in the garage while meds are keeping my stuffy head and body aches at bay. 
I decided to work on my new/used door panels and put together a How To in case someone else wants to repair or upgrade their door panels in the future.
First step for me was to find two SR5 door panels with manual windows from a 3rd Gen pick-up or a 2nd Gen 2 door 4runner. Mine were found from two separate pickups (one was a flat bed of all types) at different yards on different days. I've been on the lookout for these for a very long time, so long as the fabric wasn't beaten to death I wanted them! Pickups just aren't junked around here or the rumor that some guy from Egypt is buying them up and shipping them overseas is true, nonetheless it makes it extremely hard to find them in the South Bay junk yards of Southern California.
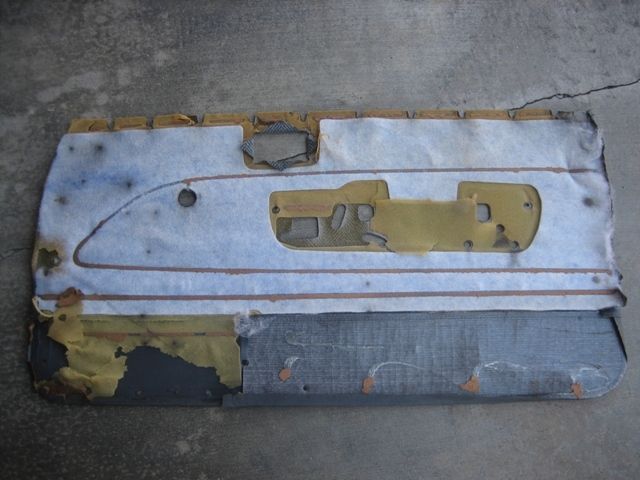
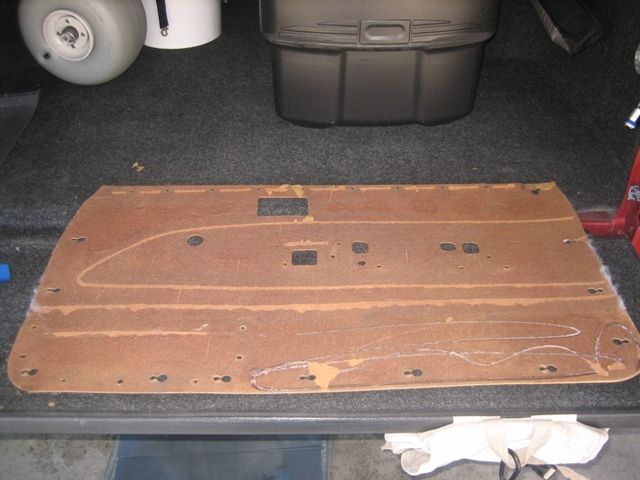
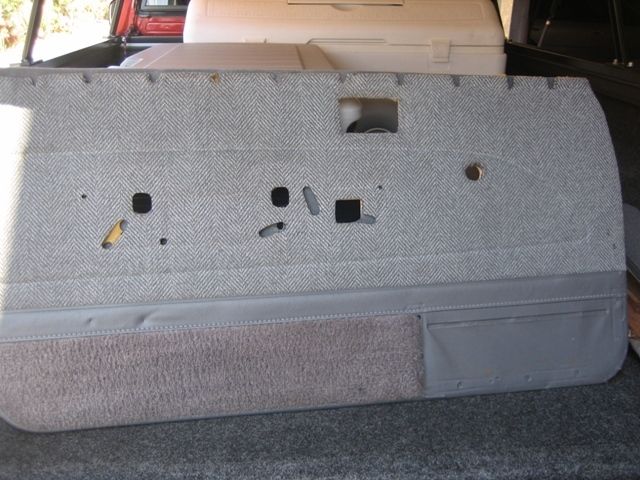
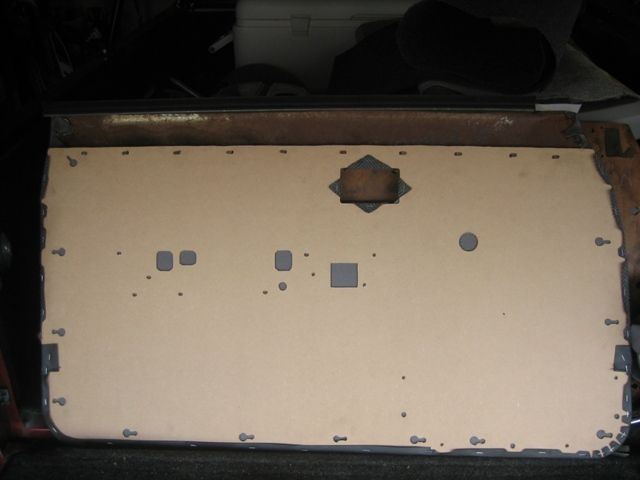
Here is the better of the two panels after I scrubbed it down with laundry detergent and dried, and taped up the cracks on the backside of the board.
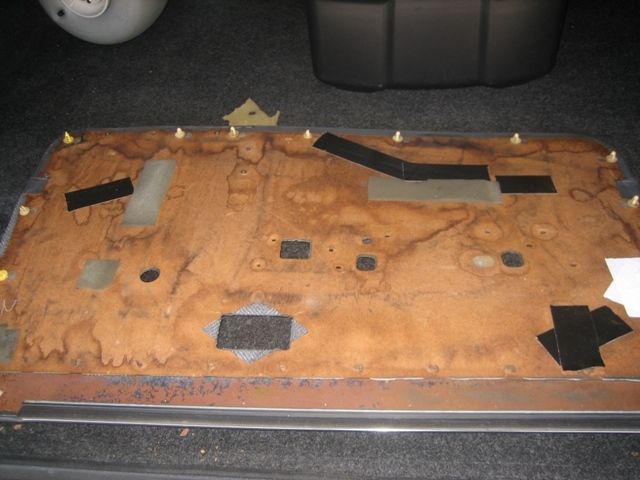
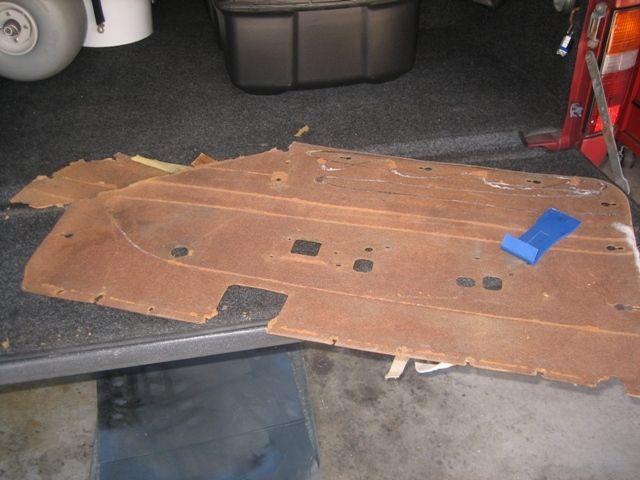
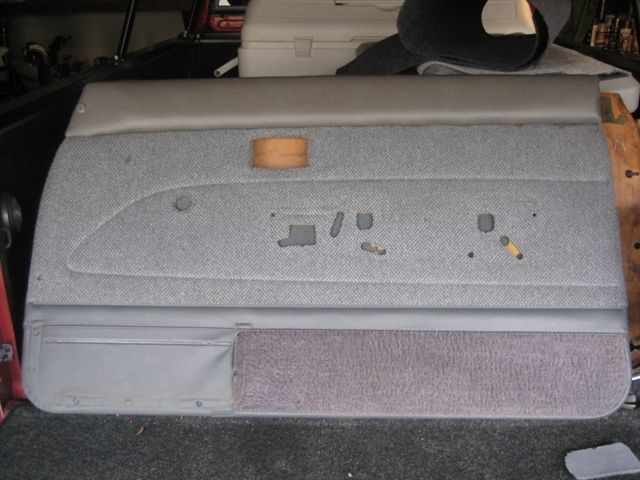
Here is the worse of the two AFTER brushing all the caked on dirt (found it laying in the ground), then after I washed it and drying it out, and the beat up board on the backside. You'll notice the armrest pad is separated, it was ripped from the board and laying on the ground underneath the adjacent vehicle
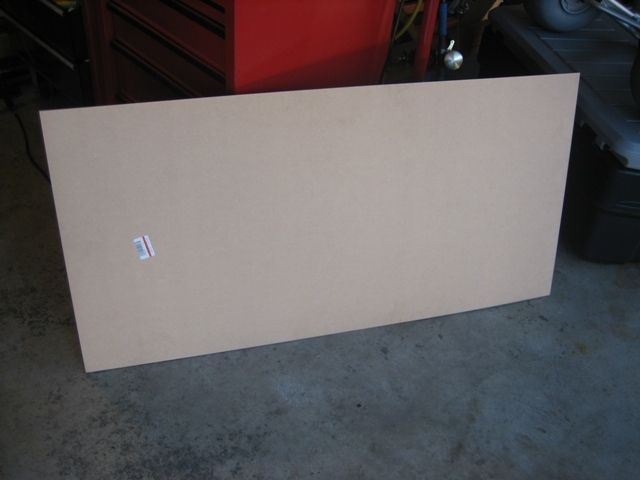
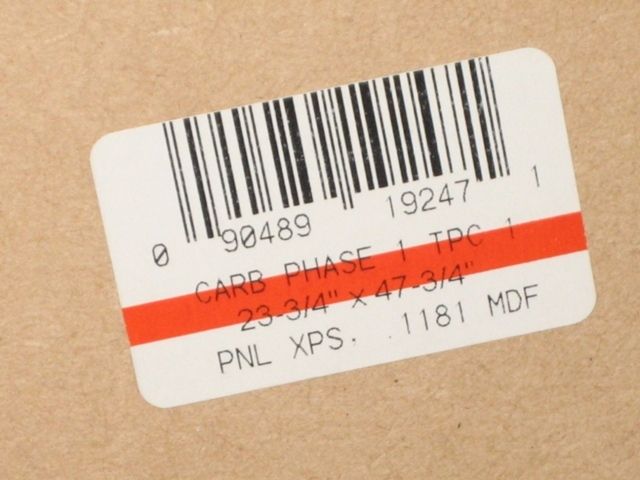
Knowing I needed to replace the particle board I went to Home Depot and purchased two approximately 2' x 4' sheets of 1/8" MDF particle board. This was nice stuff and was smooth on both sides. Cost about $4 each.
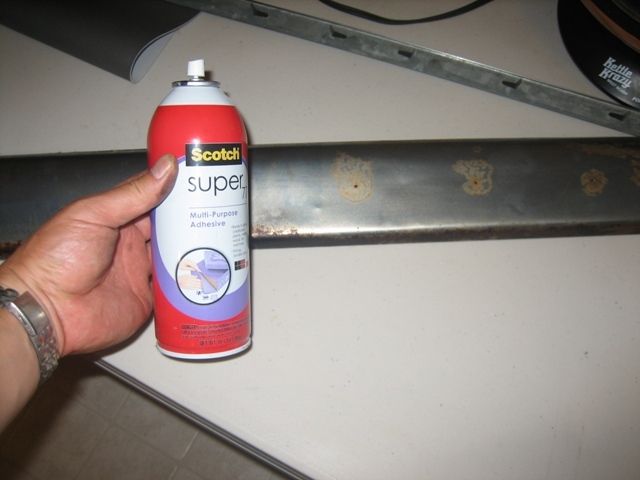
Went to a craft store called Michael's and bought headliner foam padding and grey vinyl material. the foam had felt like material covering one side of it and was about 1/8" thick. Don't remember the dimensions but enough that I could cover two door panels w/arm rests with foam, and enough vinyl to cover the two arm rests. Cost about $20 using a 50% off coupon that the register lady gave me. Also, picked up a can of spray adhesive.

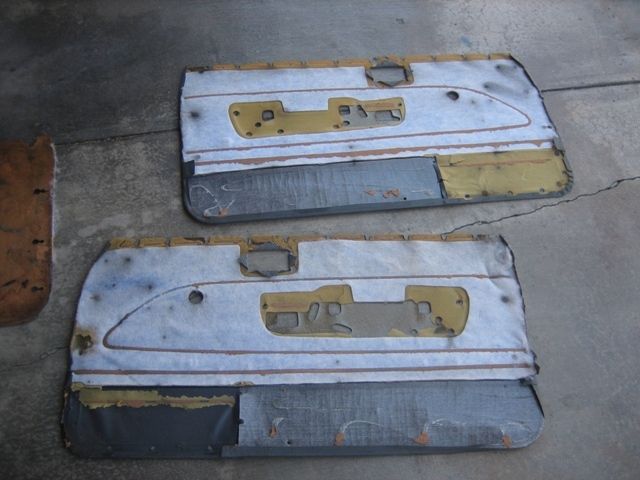
Step 1 - Remove material
Since I was re-using the material I carefully removed all the staples (front and back sides) and peeled and separated all the vinyl and material from the boards. Some of that stuff is real sticky!
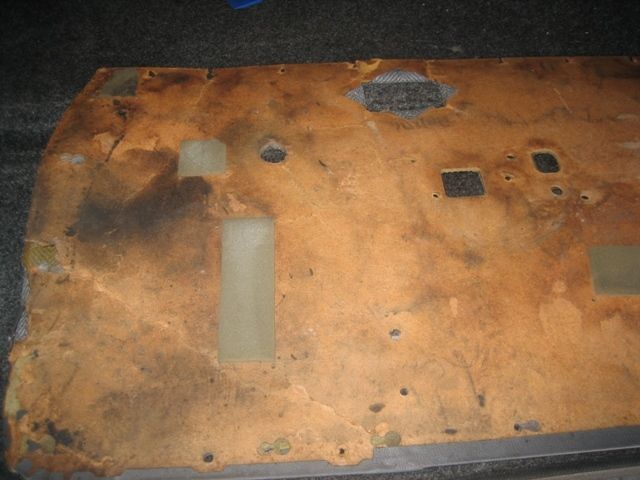
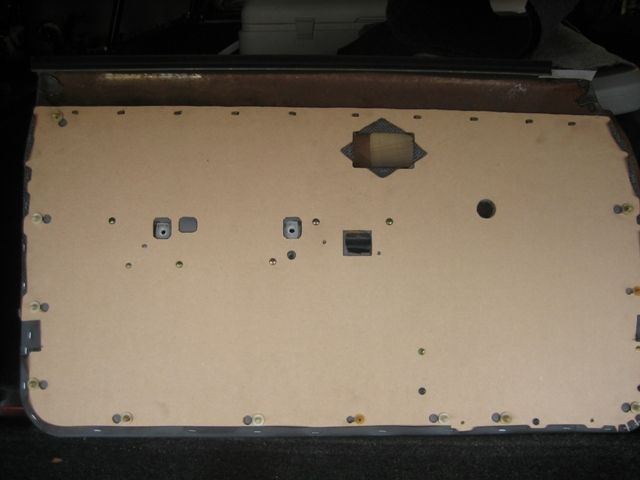
You can see how damaged the board was and why it needed to be replaced
I needed one good board in order to make my template, so I did the same thing to the better of the two boards. Much better!
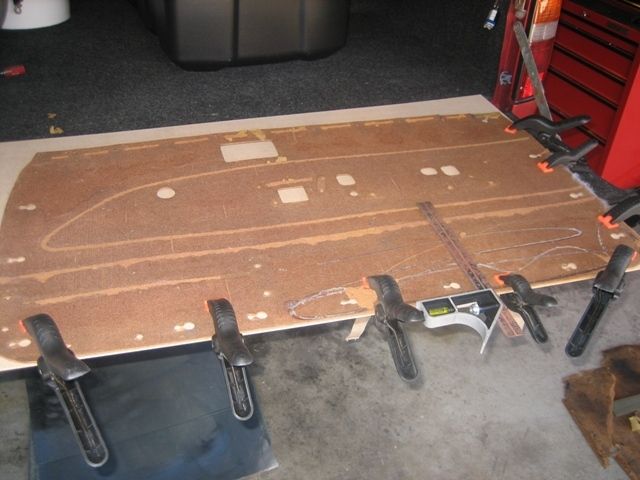
Step 2 - Make the template
Using clamps and a marker I traced the panel. I also had to use a block of wood to push down on the warped panel to get the cleanest and most accurate trace.
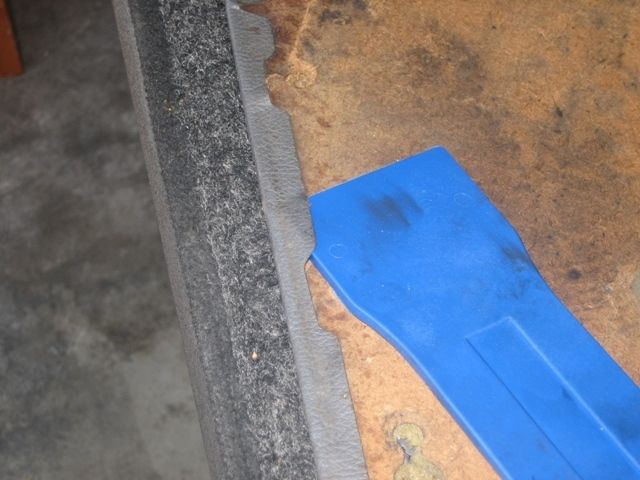
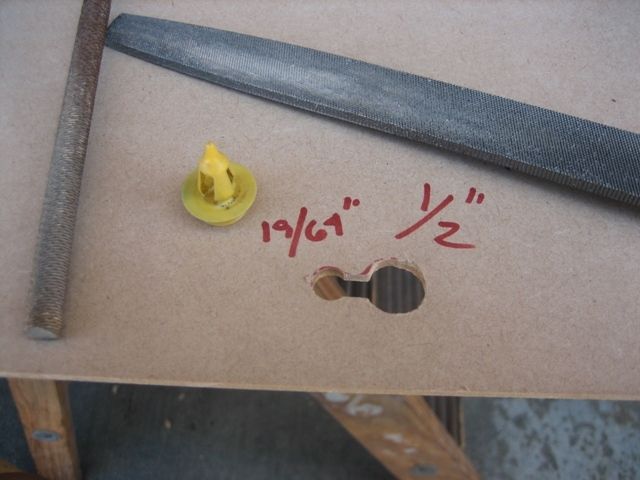
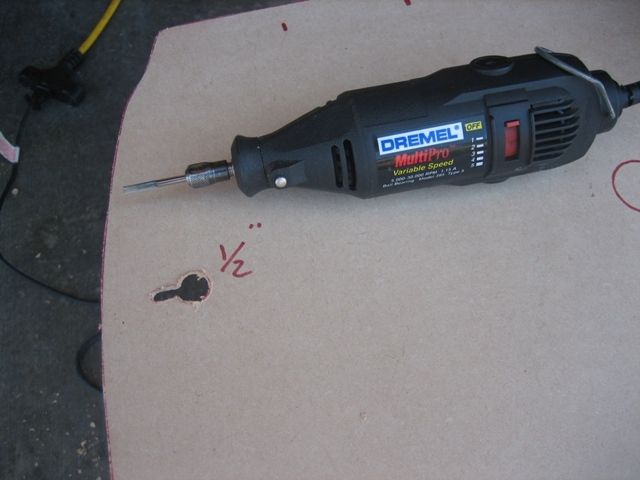
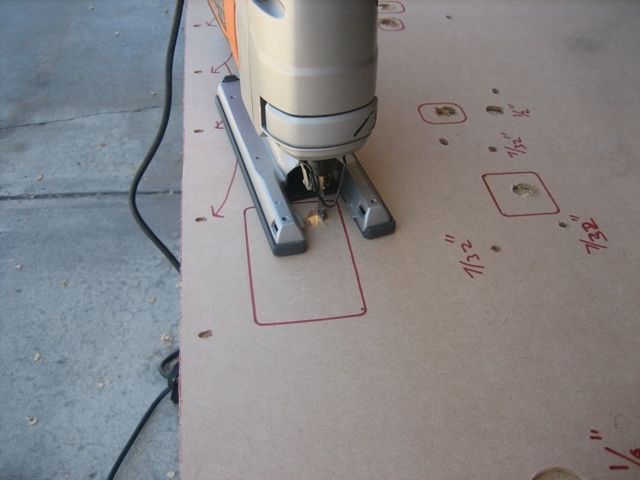
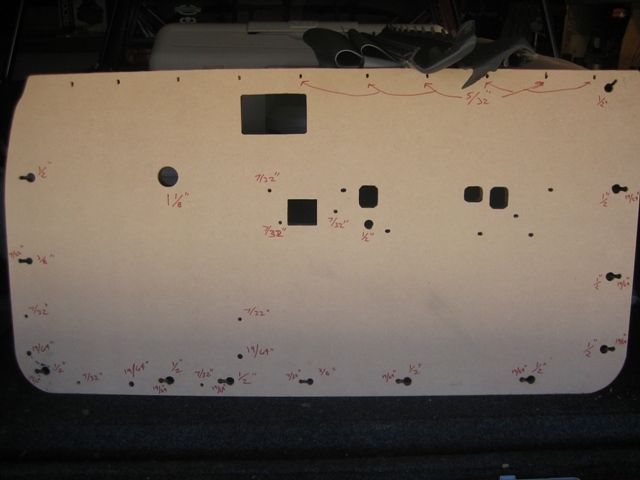
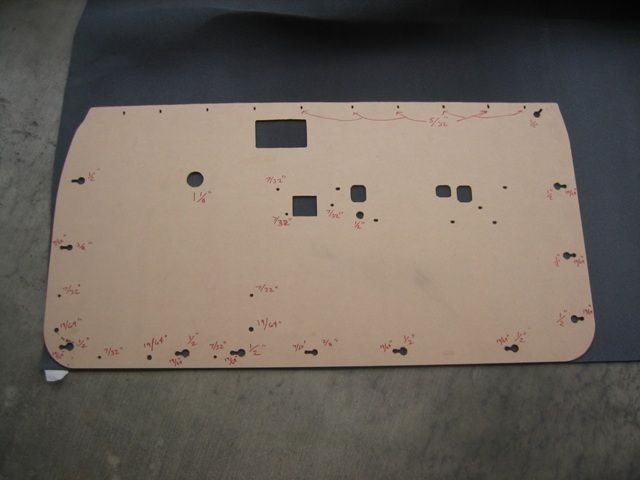
Step 3 - Making the cuts
Using a variety of different tools (Jig Saw, Drill and different bits, Small Hand Saw, Dremel Tool, and Files) I cut out the patterns to resemble the original door card panel. You'll notice I labeled the different size bits I used to make most of the holes. Afterward I had to use a cylinder and straight file to make sure the plastic pieces that hold the card to the door fit correctly.

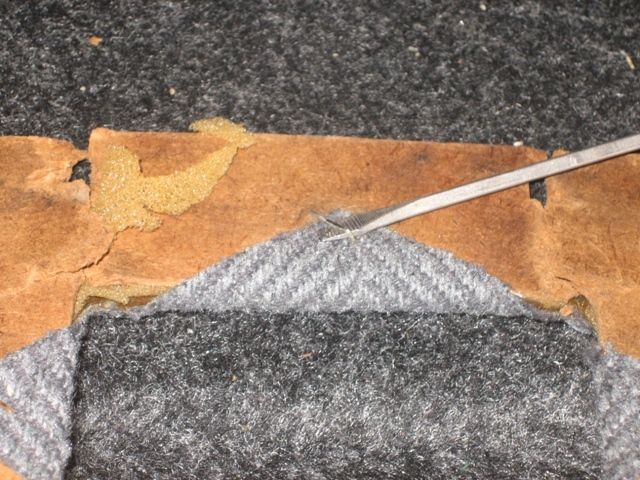
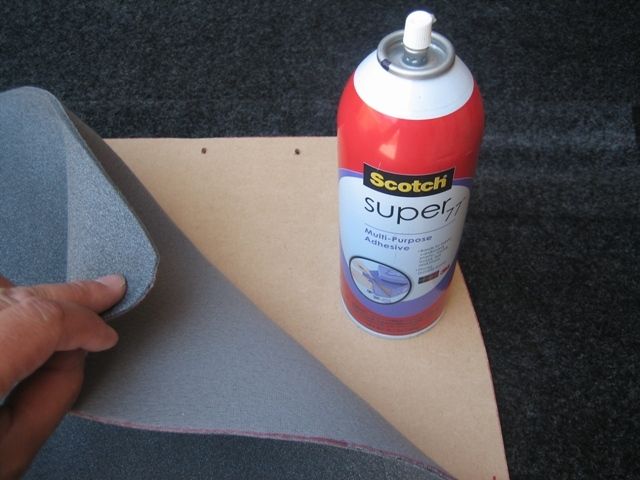
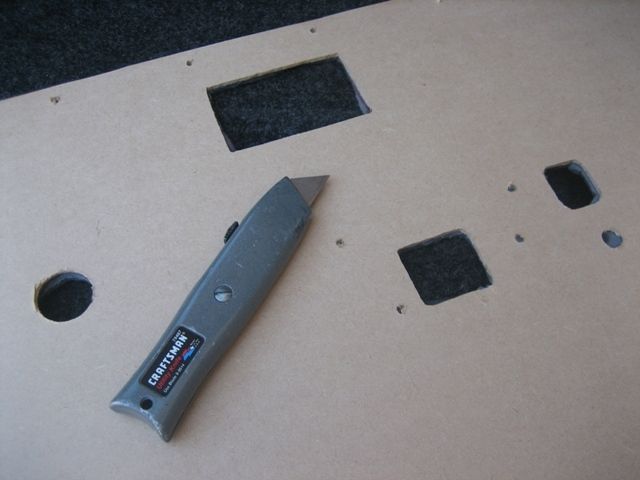
Step 4 - Foam Padding
I then laid down the foam headliner material, traced/cut the door panel, used the spray adhesive to glue it to the new door card (felt side down), and then used a box cutter to cut out the necessary openings. Then I put everything aside and worked on the arm rests.
Step 5 - PITA Arm Rests
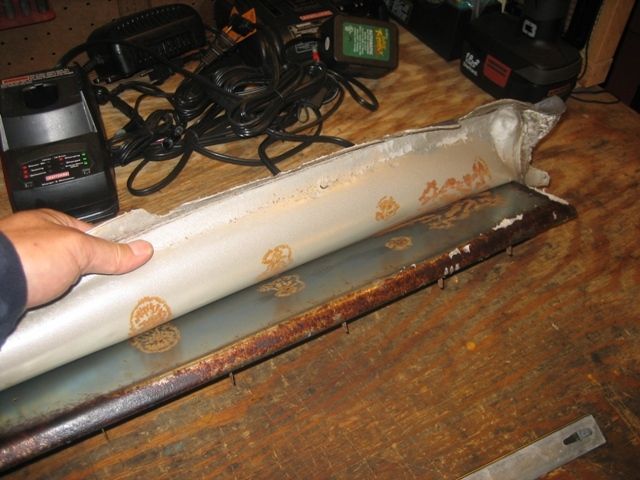
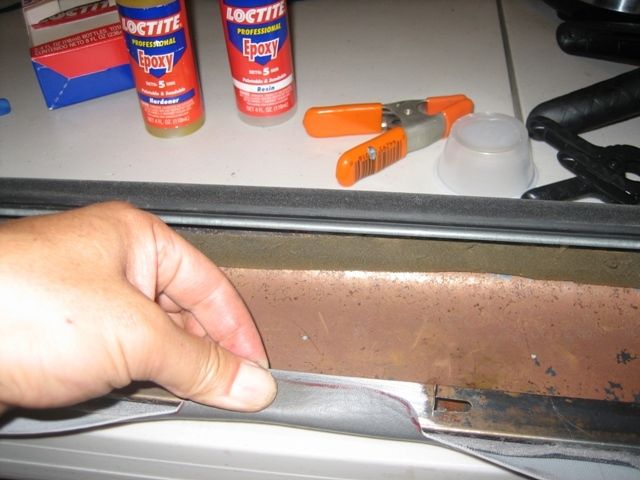
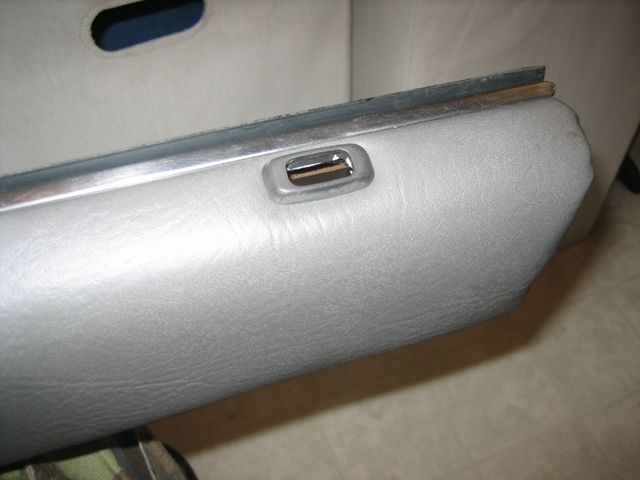
I like to ride with my window down and arm resting on the door. If you're familiar with our non-SR5 door panels you've noticed the arm pad is not very thick and has no padding, which means not very comfortable. I decided to address that with extra foam padding since I was putting new vinyl on. This part takes some patience as the ends are hard to tuck the vinyl in. It goes something like this:
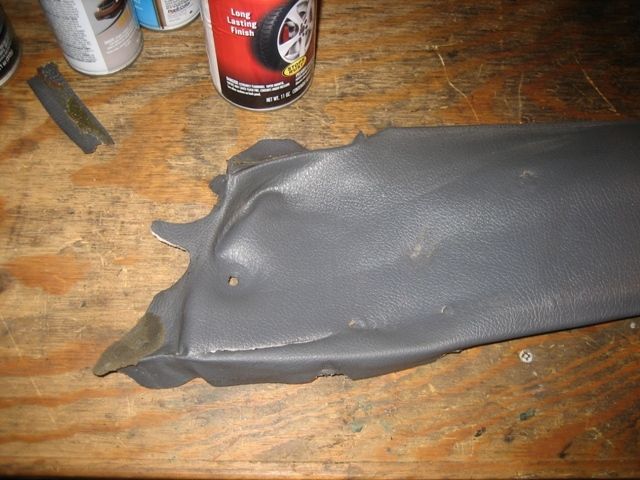
Bad vinyl
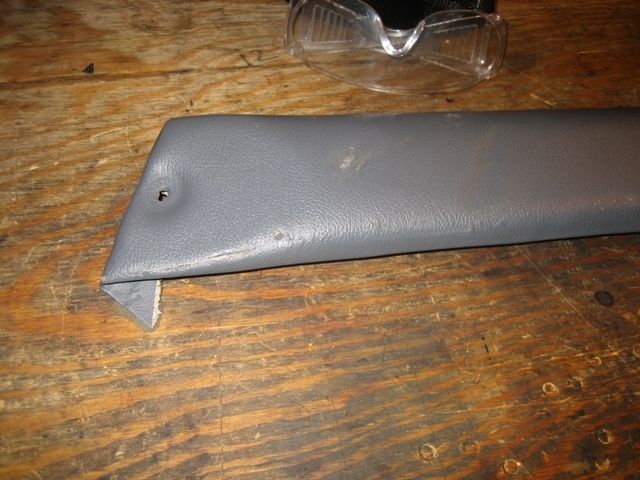
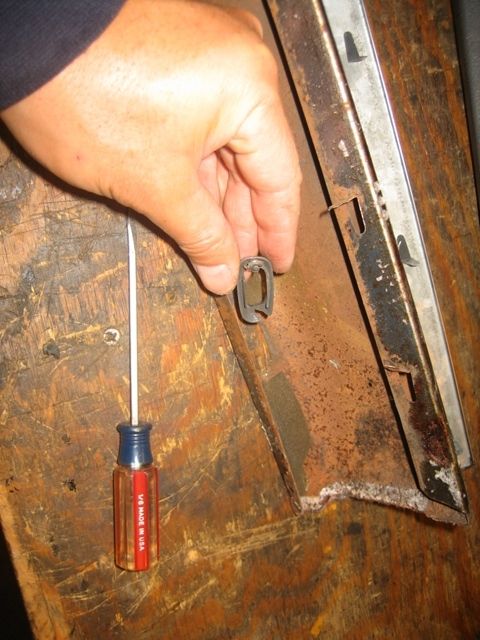
Straighten out metal clips to pull window piece off
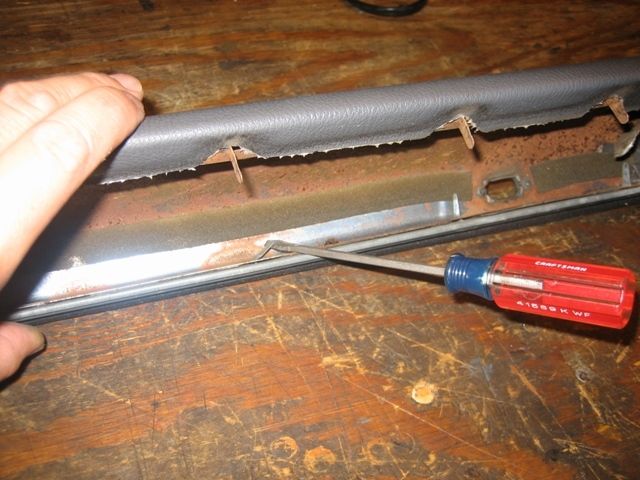
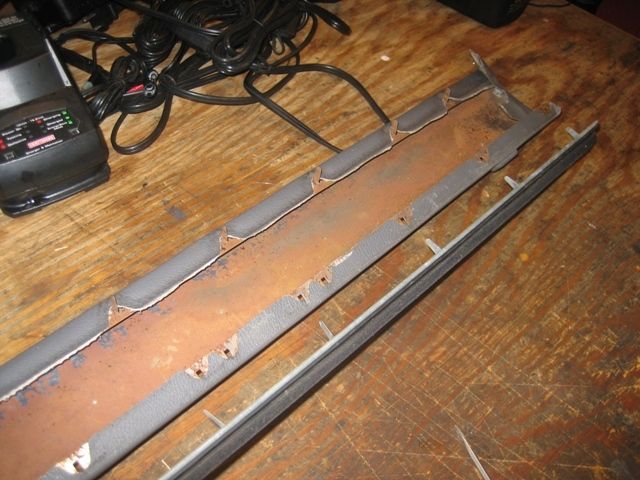
Start peeling off the old vinyl
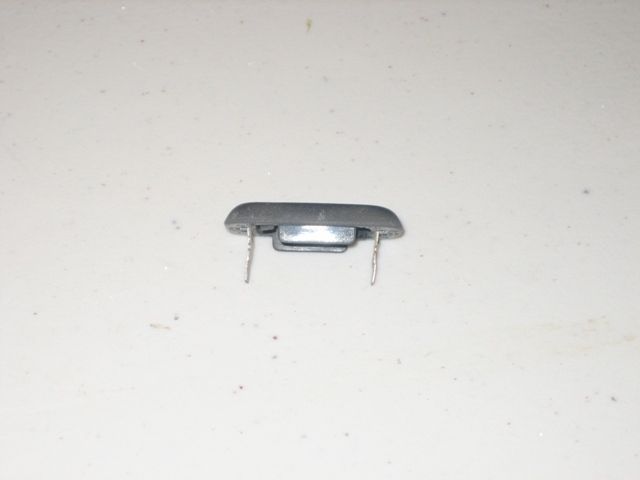
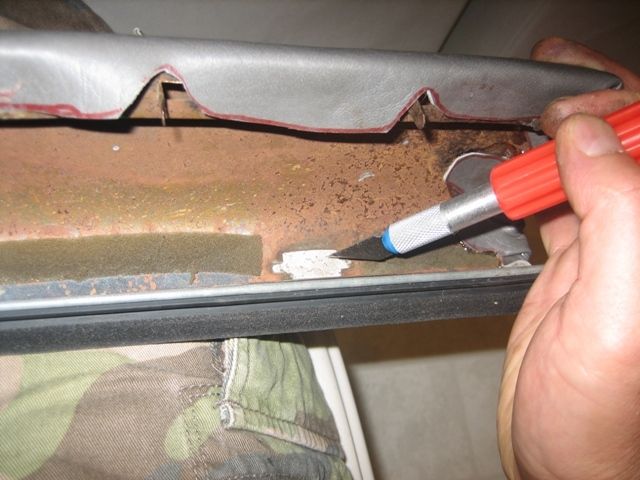
You'll have to remove the door lock plastic piece. For some reason they melt the plastic on the ends to keep it in place so you'll either have to melt them off or just do what I did and break them off. I have a 2nd Gen Camry (89-91) so I already knew there were better replacements that I could use. The camry's have metal tabs so you can easily re-use them. I had a few extra from the junk yard for my camry so I used them on these arm pads. Problem solved
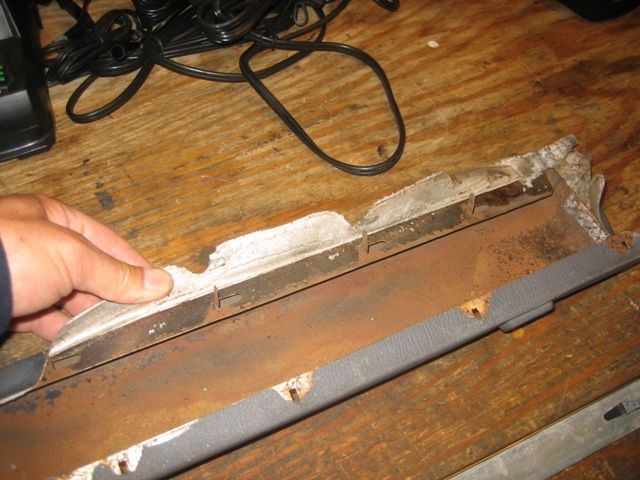
Sand off the rust and sticky residue so the new glue will adhere better
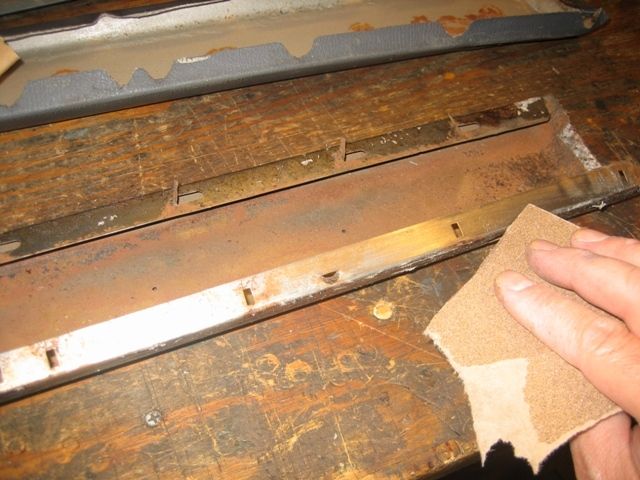
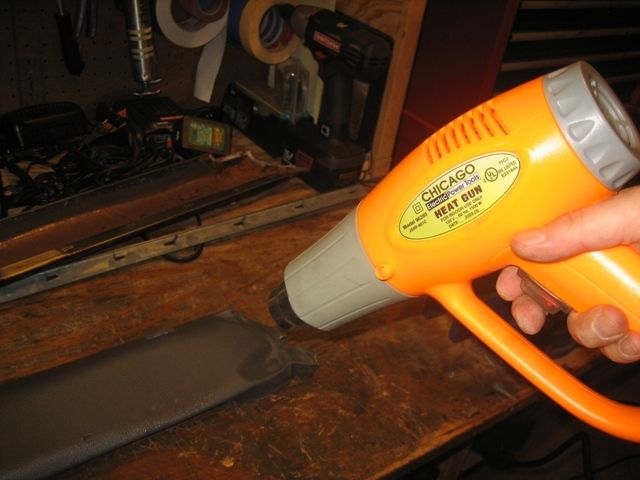
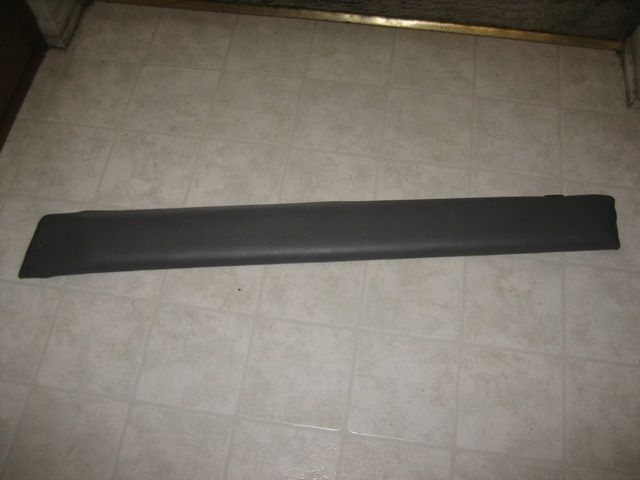
Flatten out the vinyl so you can use it as a template. A heat gun and board makes quick work of flattening it out so you can trace it easier.

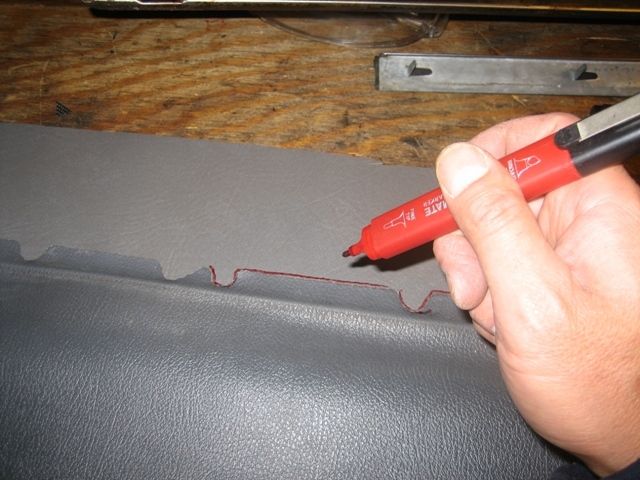
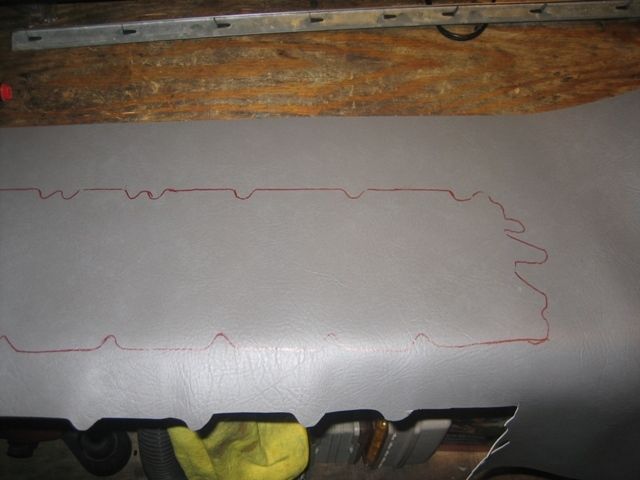
Trace and cut your vinyl skin template
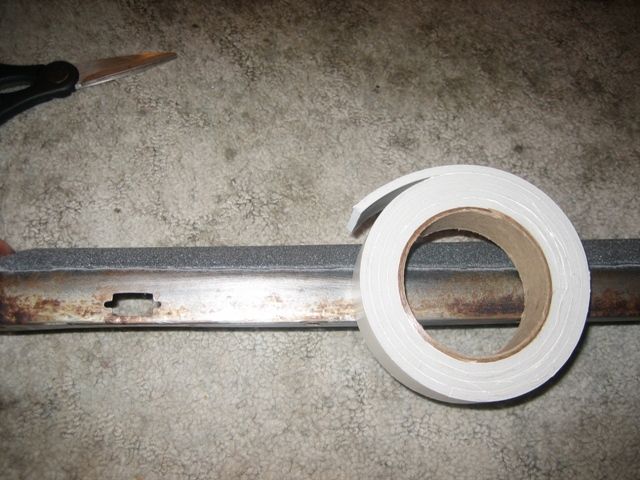
Trace, cut and glue the head liner foam for extra padding. I opted to use a thicker and denser foam padding on the top portion of the arm rest. I had this extra stuff I had used for my can-back rack and it worked perfectly.

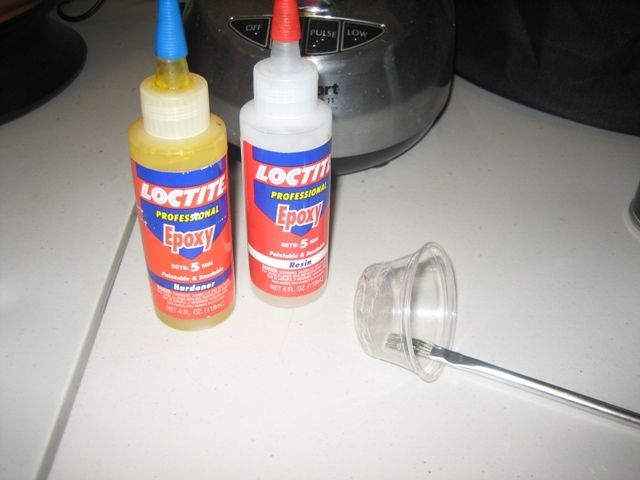
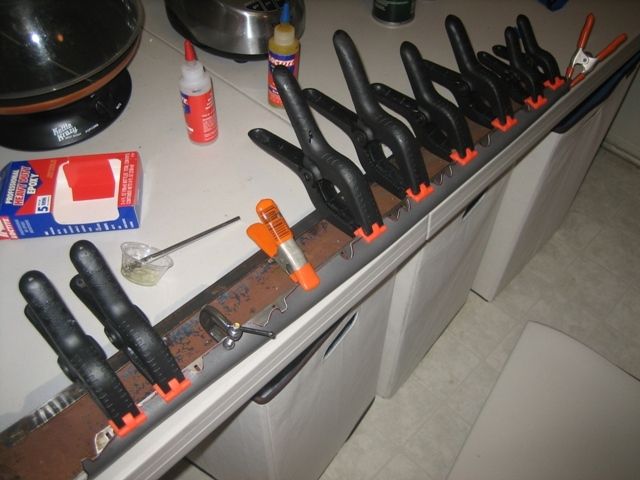
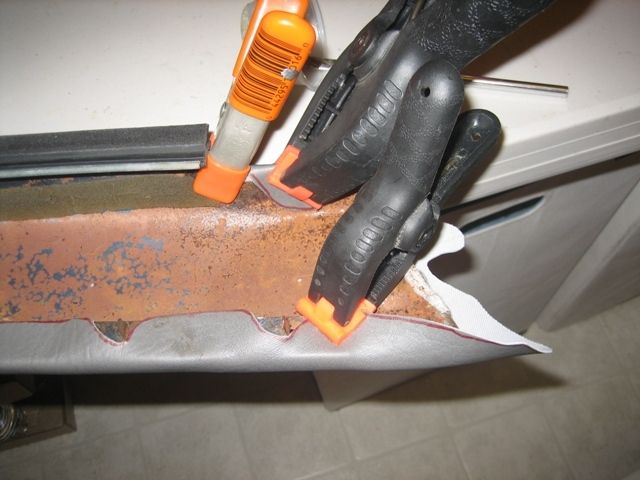
Now is the PITA part, I used two part epoxy to get the vinyl stretched and stuck over the arm pad. You'll need a BUNCH of clamps! The ends are hardest part.

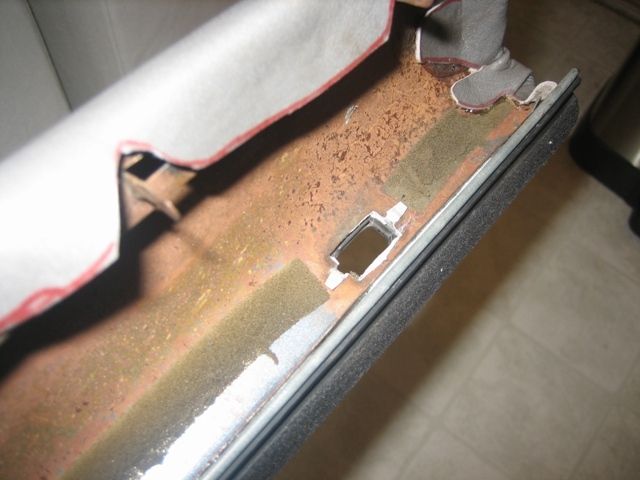
Then after it dries you can cut out the door lock hole and put the plastic camry piece in. The metal tabs just fold over to hold it in place.
Step 6 Put it all together!
Place the old clean material back on the door card and either staple or glue or both in place.
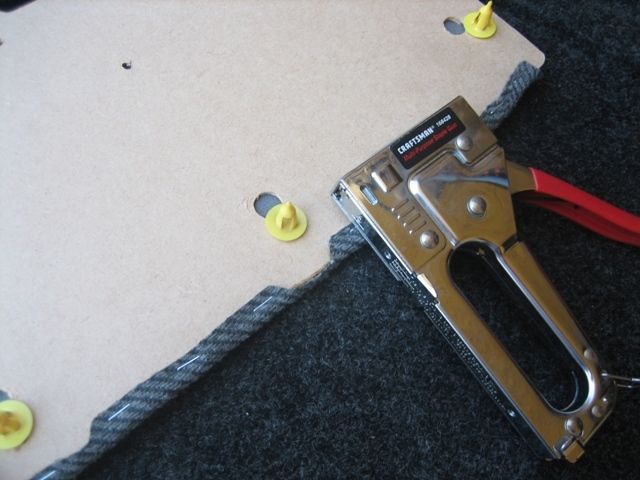
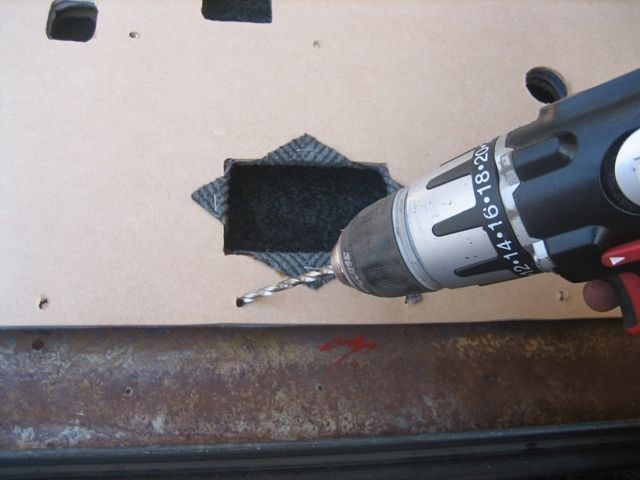
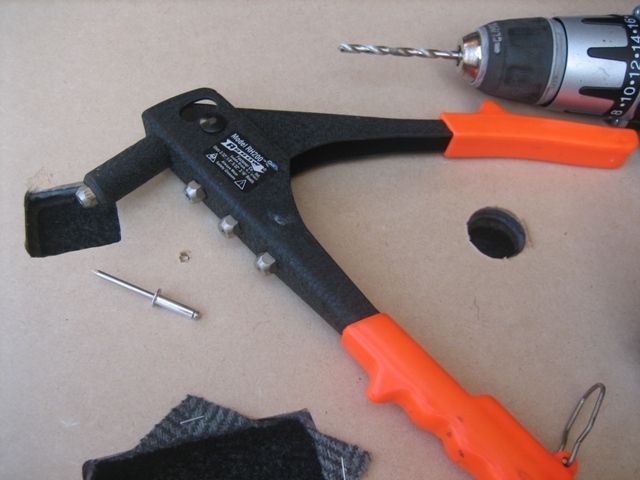
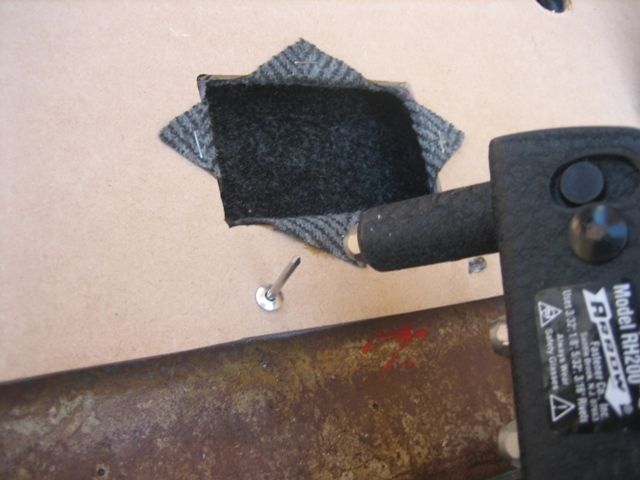
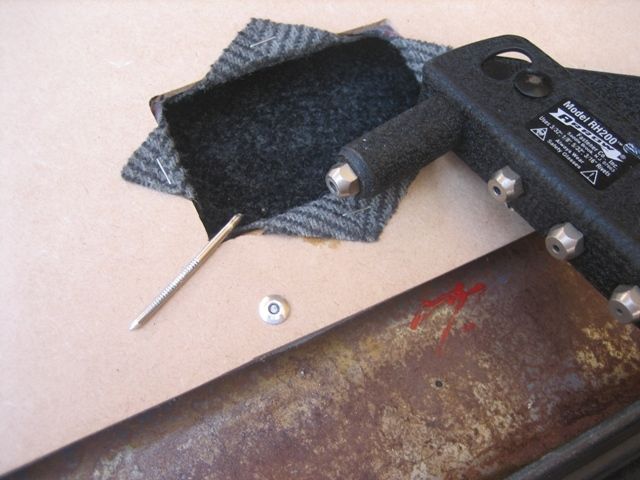
Put your arm rest on by inserting the tabs through the top holes on the board and bend them down to hold in place. If some of the tabs have broken off, you can substitute rivets to hold it in place. I drilled the appropriate hole size for the rivet and used a cheap hand powered pop rivet gun.
Lastly, grab grab your door handles and map pocket and screw them in.
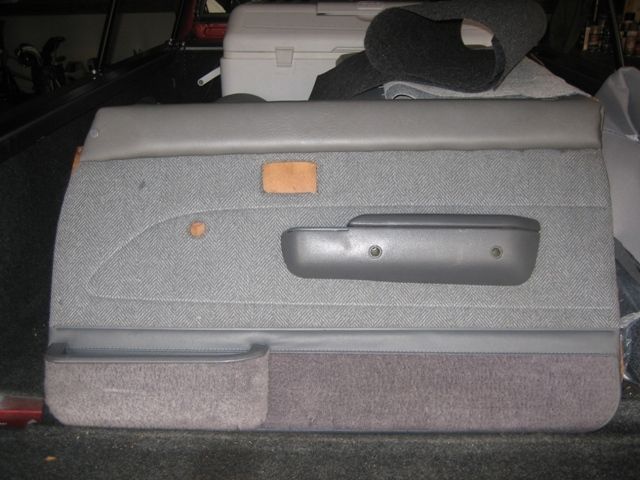
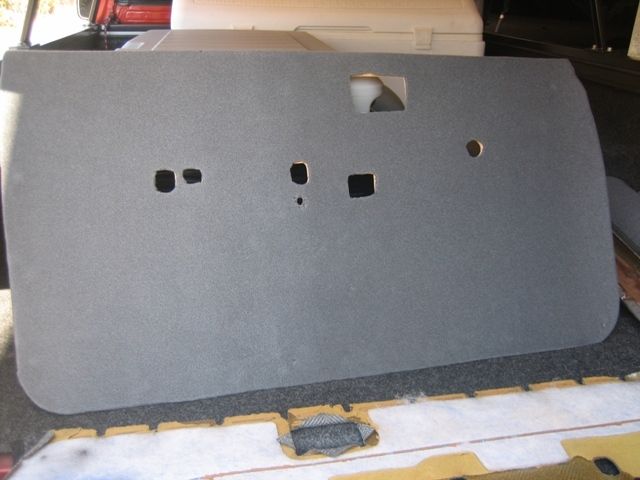
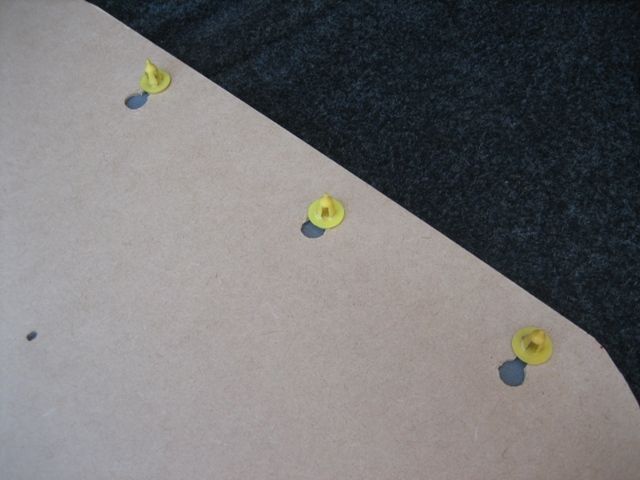
Now mount it up and see how it looks! You'll notice when placing the plastic retaining pieces in why you don't need to cut through the foam for those holes. Enjoy having some nicer looking panels, more comfortable arm rests, and additional sound proofing!
Passenger side.
Driver side.
I decided to work on my new/used door panels and put together a How To in case someone else wants to repair or upgrade their door panels in the future.
First step for me was to find two SR5 door panels with manual windows from a 3rd Gen pick-up or a 2nd Gen 2 door 4runner. Mine were found from two separate pickups (one was a flat bed of all types) at different yards on different days. I've been on the lookout for these for a very long time, so long as the fabric wasn't beaten to death I wanted them! Pickups just aren't junked around here or the rumor that some guy from Egypt is buying them up and shipping them overseas is true, nonetheless it makes it extremely hard to find them in the South Bay junk yards of Southern California.
Here is the better of the two panels after I scrubbed it down with laundry detergent and dried, and taped up the cracks on the backside of the board.
Here is the worse of the two AFTER brushing all the caked on dirt (found it laying in the ground), then after I washed it and drying it out, and the beat up board on the backside. You'll notice the armrest pad is separated, it was ripped from the board and laying on the ground underneath the adjacent vehicle
Knowing I needed to replace the particle board I went to Home Depot and purchased two approximately 2' x 4' sheets of 1/8" MDF particle board. This was nice stuff and was smooth on both sides. Cost about $4 each.
Went to a craft store called Michael's and bought headliner foam padding and grey vinyl material. the foam had felt like material covering one side of it and was about 1/8" thick. Don't remember the dimensions but enough that I could cover two door panels w/arm rests with foam, and enough vinyl to cover the two arm rests. Cost about $20 using a 50% off coupon that the register lady gave me. Also, picked up a can of spray adhesive.
Step 1 - Remove material
Since I was re-using the material I carefully removed all the staples (front and back sides) and peeled and separated all the vinyl and material from the boards. Some of that stuff is real sticky!
You can see how damaged the board was and why it needed to be replaced
I needed one good board in order to make my template, so I did the same thing to the better of the two boards. Much better!
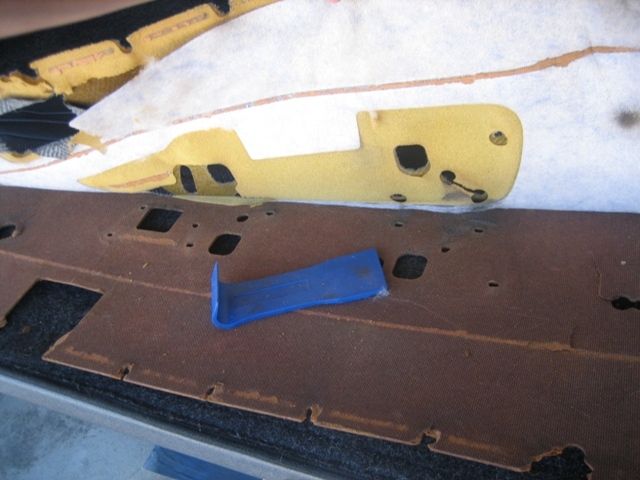
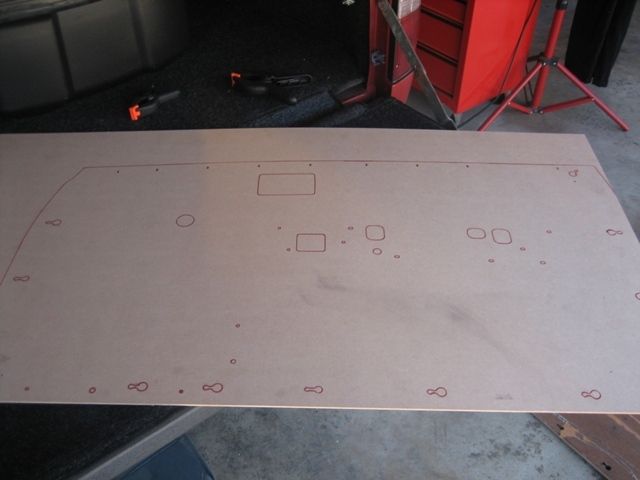
Step 2 - Make the template
Using clamps and a marker I traced the panel. I also had to use a block of wood to push down on the warped panel to get the cleanest and most accurate trace.
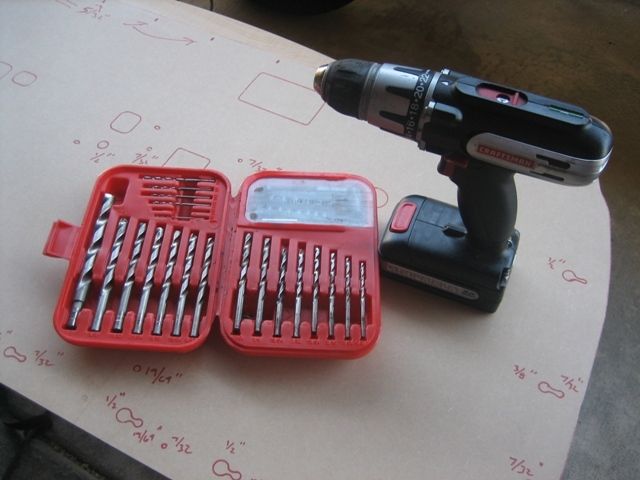
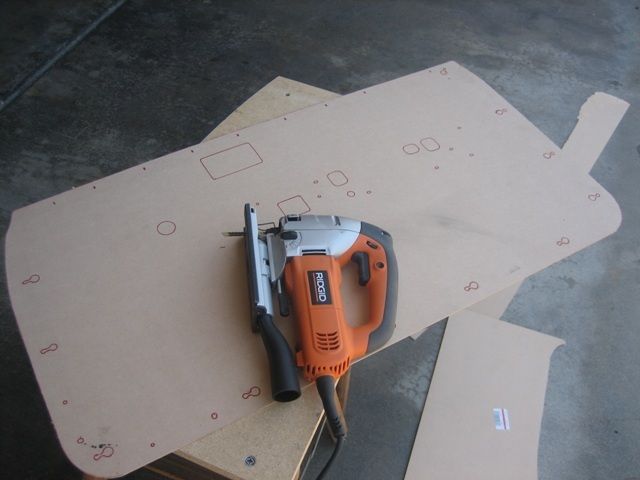
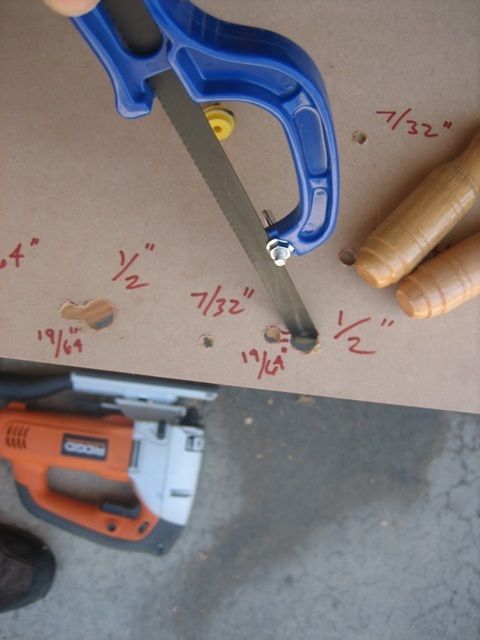
Step 3 - Making the cuts
Using a variety of different tools (Jig Saw, Drill and different bits, Small Hand Saw, Dremel Tool, and Files) I cut out the patterns to resemble the original door card panel. You'll notice I labeled the different size bits I used to make most of the holes. Afterward I had to use a cylinder and straight file to make sure the plastic pieces that hold the card to the door fit correctly.
Step 4 - Foam Padding
I then laid down the foam headliner material, traced/cut the door panel, used the spray adhesive to glue it to the new door card (felt side down), and then used a box cutter to cut out the necessary openings. Then I put everything aside and worked on the arm rests.
Step 5 - PITA Arm Rests
I like to ride with my window down and arm resting on the door. If you're familiar with our non-SR5 door panels you've noticed the arm pad is not very thick and has no padding, which means not very comfortable. I decided to address that with extra foam padding since I was putting new vinyl on. This part takes some patience as the ends are hard to tuck the vinyl in. It goes something like this:
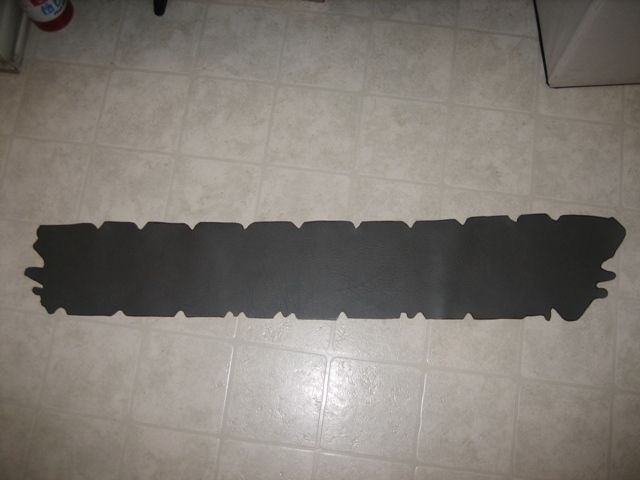
Bad vinyl
Straighten out metal clips to pull window piece off
Start peeling off the old vinyl
You'll have to remove the door lock plastic piece. For some reason they melt the plastic on the ends to keep it in place so you'll either have to melt them off or just do what I did and break them off. I have a 2nd Gen Camry (89-91) so I already knew there were better replacements that I could use. The camry's have metal tabs so you can easily re-use them. I had a few extra from the junk yard for my camry so I used them on these arm pads. Problem solved
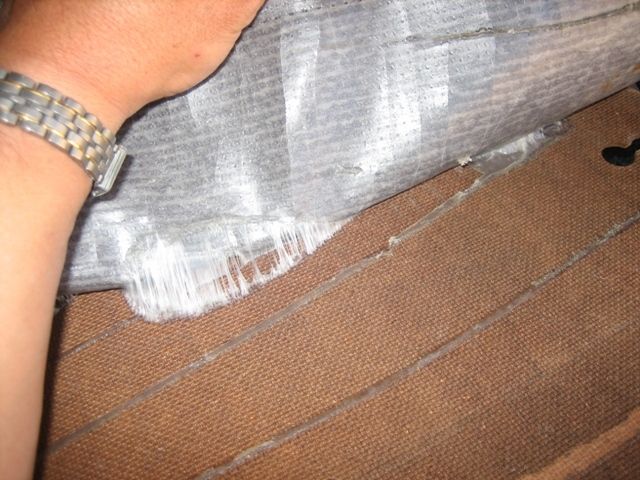
Sand off the rust and sticky residue so the new glue will adhere better
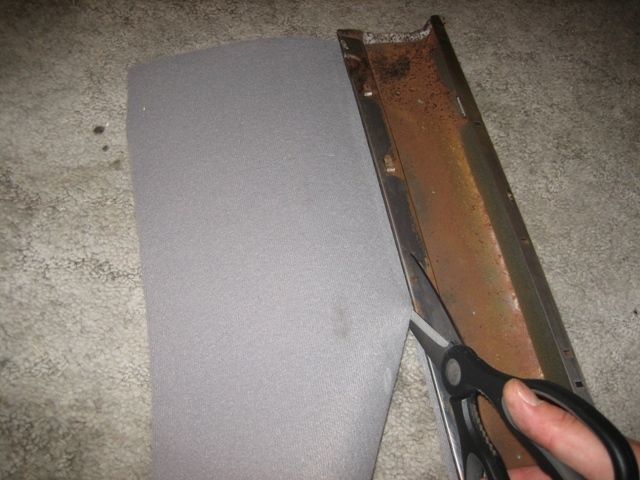
Flatten out the vinyl so you can use it as a template. A heat gun and board makes quick work of flattening it out so you can trace it easier.
Trace and cut your vinyl skin template
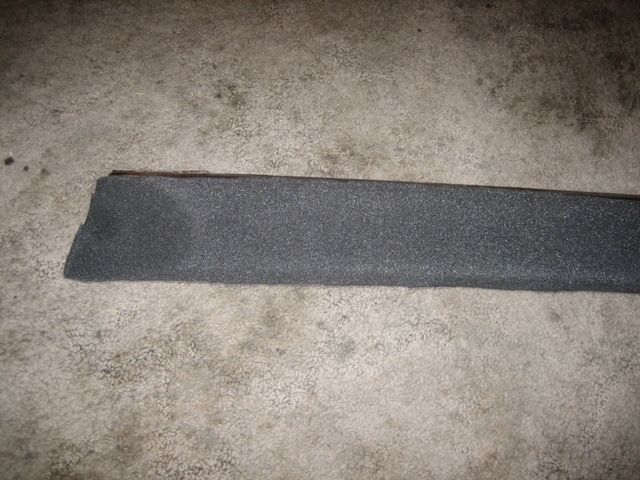
Trace, cut and glue the head liner foam for extra padding. I opted to use a thicker and denser foam padding on the top portion of the arm rest. I had this extra stuff I had used for my can-back rack and it worked perfectly.
Now is the PITA part, I used two part epoxy to get the vinyl stretched and stuck over the arm pad. You'll need a BUNCH of clamps! The ends are hardest part.
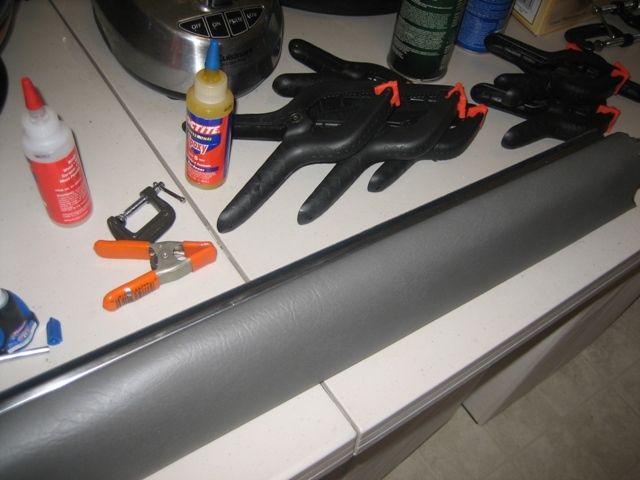
Then after it dries you can cut out the door lock hole and put the plastic camry piece in. The metal tabs just fold over to hold it in place.
Step 6 Put it all together!
Place the old clean material back on the door card and either staple or glue or both in place.
Put your arm rest on by inserting the tabs through the top holes on the board and bend them down to hold in place. If some of the tabs have broken off, you can substitute rivets to hold it in place. I drilled the appropriate hole size for the rivet and used a cheap hand powered pop rivet gun.
Lastly, grab grab your door handles and map pocket and screw them in.
Now mount it up and see how it looks! You'll notice when placing the plastic retaining pieces in why you don't need to cut through the foam for those holes. Enjoy having some nicer looking panels, more comfortable arm rests, and additional sound proofing!
Passenger side.
Driver side.
Last edited by Grego92; 07-22-2012 at 03:41 PM.


