When you click on links to various merchants on this site and make a purchase, this can result in this site earning a commission. Affiliate programs and affiliations include, but are not limited to, the eBay Partner Network.
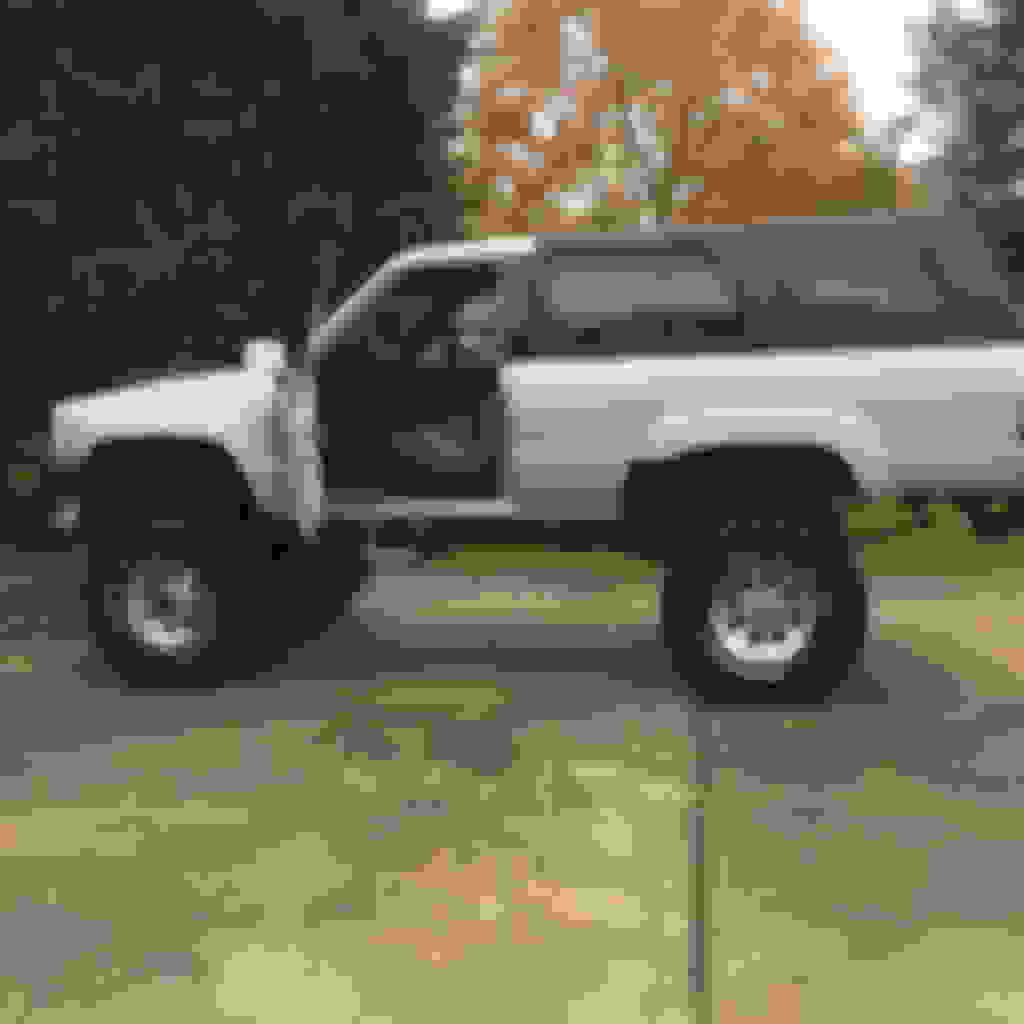
This is a teaser post for my 1991 4runner SR5 V6 build up. I bought this truck three years ago with a blown motor for $600 to be my first vehicle. I swapped in a new motor and drove it awhile before I decided to regear and SAS it. I didnt have a budget for the normal 35" tires let alone the huge MEGA lift SAS kits nor did I want that much lift. The main reason for the swap was to improve durability for light trail use and regear it for the 30 inch tires and the under powered 3.slow I had stupidly not replaced with a 3.4 less than 2 years ago. I wanted to keep it extremely low and continue using my 265/70/15 tires. Luckily my dad has been collecting toyotas since before they were cool, so I had 5 of everything just laying around waiting to be used by me... it certainly helps in the budget department. As of now I've spent about $700 on my swap. The result so far is very unique. I've got less than 2 inches of lift over my IFS and WAY more flex
The front end is a 1985 toyota Front solid axle with a custom spring hanger and stock shackles. The rear is a 1994 pickup axle running 4runner brakes. It's held in place by 55" tacoma springs and allpro spring hangers, again using stock shackles.
Ill be posting lots of pictures and text showing how it got to this point in the next couple days.....but for now here is the before and after pictures. Its not the final product as I am doing some body work, ect.
The first picture is IFS and the second picture is SAS'd same tires and wheels in both pictures to show the minimal change in ride height.
Here is a picture from the front...and yes it is spring under axle. This is a "mock up" because I recently discovered the front axle I had been slaving over was actually bent... I'm working on cleaning up and moding another to go in its place for final assembly. The passenger side body mount was heavily damaged in a wreck before I got it as was the hood and passenger fender. I opted to cut both of the mounts off and make new ones. I'll be making a flip kit for my marlin crawler flip kit so I can get back some of my lost ground clearance from going the spring under route. The steering arm is a stock driver side one with the push-pull part cut off. The passenger side will be a custom made piece with two mounting holes for the cross over steering. The steering links themselves are standard lengths from an Allpro high steer kit.
Here is one of the oldest pictures I have of my 4runner... this was after I added a brush gaurd from a 86 pickup, did a 5 speed swap, and put on the fender flares, mud flaps, and incorrect rear smitty built bumper. When I got it it had very dry rotted 31x10.50x15 BFG allterrains I ran them untill they wouldnt hold air and got some half tread 28" cooper snow tires
Eventually I got a new set of the same tires only in a 30" size.
I had bent the driver side running board wheeling with some friends so I drove it to the shop to work on it. I was sick of the rear end sagging, the radio not working and the rust that was starting to apear. I started removing rusted parts, fixed the radio, and threw in some coil springs from a rolled 2002 SR5 we had.....I could have finished the bodywork and stopped, but what kind of build thread would that make ? I thought to myself "I already have a pile of parts how long could an SAS take ?"..... and so it began a low budget, LOW LOW ride height SAS
Thanks. If you have any more pictures of the frame and steering I would appreciate it. Especially clearance of the tie rod and drag link on the frame and oil pan.
I'll get up a bunch of pictures of the front end when I get my custom steering arm back from my buddies machine shop. Hopefully it will be this week. The steering links have TONS of clearance everywhere. But I've notched the inside of the frame on the passenge side about 3/8" to clear the pumpkin at full stuff (yes my little 30" tires rub when flexed). I may notch it a bit more and possibly the other side to get another inch or two of up travel. The oil pan will be a 3.0 2wd pickup pan with the flange reversed to make it a deep front sump, Or a completely custom pan made very similar to that so I dont have to chop up my rear sump pan. Axle to oil pan clearance at full compression on both sides is also good. Build thread is going a little bit slower than Id like because I'm fighting my old original Galaxy Note to get my pictures. Things will speed up once I get to my Iphone
So I got my steering arm from the machine shop the other day. It wasn't even close to what I needed so I'm still waiting on that. He is working on another one.
So in the mean time I've been doing some wiring for my 7MGTE swap and made a set of rocksliders. Pictures are coming.
Very interested to see how this comes out.
Just bought a 94 and am thinking about what way I go suspension wise.
Did you cycle the suspension?
Almost looks like you would need to push you steering box forward a little bit, thinking the tie rod will hit the steering arm
I did "cycle" the suspension in my own way... to make sure I never had any clearance issues I took the leaf spring packs apart and only mounted the single main leaf on each side. I then bolted up the axle and put the trucks weight on it so that the axle was at full compression on both sides at the same time. A condition that would only occur if it was jumped (as far as I know). This will never happen as long as I own it. Correct me if I'm wrong but I had thought if there would be any clearance issues it would be when both sides are fully compressed rather than just a "Hard Flex"
As far as the steering box I did move it forward and up on the frame I can get some pictures if you would like. Right now it is further forward than I would assume it will ultimately be located, but I figured while I was hacking out some radiator support I might as well have some extra room to play with. Once I get my passenger side steering arm from the machine shop I'll have a better idea of exactly where it will be.
I lowered the front a little bit more today, rather than raising the rear to get rid of sag. I think I'm within in inch of factory IFS height now. I played around softening the front leaf packs to get some more flex and I'm pretty happy with the front. I'll definitely be adding a leaf to the rears to firm it up a little bit for stability on the road and when I pull my 4wheelers. I'll get some pictures up soon.
Here is what I drew up for the machine shop to make me
This is what it looked like after I lowered the front a little more today. I didn't change the rear at all and it looks less "saggy" now. Does the rear need raised a little more ? What do you guys think. It's pretty dang close to factory height.
Here are some flex picks. This is as high as my jack will go (about 22")
Here is a couple of my rock sliders. I haven't got my new welder dialed in yet (only had it a week) so welds don't look so good but they should hold. They are made from 3/16" wall 2x4 rectangular tube
Here is a picture of the 7MGTE. I forgot to post a picture of it earlier. It doesn't look like much, it has been sitting in an old 1987 4runner with a 4" IFS lift for more than two decades. I'll clean it all up and give it a good check up (maybe a metal head-gasket like my 3.0 V6) before I swap it in. It only has 49,909 original miles though. Under all the dirt rust and grime it really doesn't look like its in too bad of shape. I've been working on wiring it up to start it on the floor. I didn't want to do all the mechanical part of the swap and then not be able to get it running. It is out of a 1989 (has coil packs not a distributor) Toyota Supra Turbo with a 5 speed. I'll be bolting it up to a 1999 R150 4X4 transmission with the supra turbo bellhousing.
Here is a picture of the 7MGTE. I forgot to post a picture of it earlier. It doesn't look like much, it has been sitting in an old 1987 4runner with a 4" IFS lift for more than two decades. I'll clean it all up and give it a good check up (maybe a metal head-gasket like my 3.0 V6) before I swap it in. It only has 49,909 original miles though. Under all the dirt rust and grime it really doesn't look like its in too bad of shape. I've been working on wiring it up to start it on the floor. I didn't want to do all the mechanical part of the swap and then not be able to get it running. It is out of a 1989 (has coil packs not a distributor) Toyota Supra Turbo with a 5 speed. I'll be bolting it up to a 1999 R150 4X4 transmission with the supra turbo bellhousing.
This is turning out really good. I like how it sits and am impressed by the work. How much are they charging for the steering arms?
Still waiting on a steering arm, hopefully the wait time makes it cheaper. (I honestly don't know how much it will cost me. He's just working on it when he has down time from his normal business) This isn't a big deal because I have tons of other projects. I'll check in and see what progress he has made. The design turned out to be a little bit more complicated than he was anticapating.
Not to much to report on the SAS except for me cleaning my new work space. It was a complete disaster when I started using it and I couldn't stand it.
I did put in the rear most crossmember that will hold my fuel tank (where the spare tire was). I'm going to fab up a fuel tank that runs from the shackles to just below the rear seats. I'm aiming to make it about 25 gallons and as tucked up between the frame rails as possible.
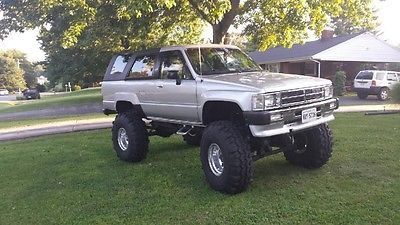
And it gives me great pleasure to announce a new addition to the yota family
A very very nice 1987 5-speed. It was on 38" superswampers but that just wouldn't do (wouldn't even fit in the garage) so on goes a set of 33x10.50 BFG's. I'll be taking off the 3" body lift and decranking the front some. Oh and its got 5.29's so lots of go power. Eventually my 1991 will be built up to this condition or better.
The custom steering arm proved to be too complicated... so on to Plan B
FJ60 parts. I ordered a full steering rod end kit from cruisercorps.com I shorted the tierod about an inch (half an inch off of each side) and threaded in the new FJ60 rod ends. For the tie rod I'm either going to have to make a new one of order a custom one. Based on the price of the taps I'm probably way better off to order one.
And just a picture of the new 4runner with the body lift gone and the torsion bars loosened up
Love the "new" 4runner too! Saw it on ebay and glad someone from here picked it up. If fact even more glad you removed the body lift and those huge tires...would have done the exact same thing!
The custom steering arm proved to be too complicated... so on to Plan B
FJ60 parts. I ordered a full steering rod end kit from cruisercorps.com I shorted the tierod about an inch (half an inch off of each side) and threaded in the new FJ60 rod ends. For the tie rod I'm either going to have to make a new one of order a custom one. Based on the price of the taps I'm probably way better off to order one.
And just a picture of the new 4runner with the body lift gone and the torsion bars loosened up
Any updates? Those FJ60 Tie rod ends look like a good solution for the steering, I wouldn't have thought of that. Do you forsee any issues with the tie rod hitting the oil pan or are your bumpstops already set up to limit the up travel before that occurs?
Also what leaf springs did you use up front, and did you end up moving your steering box forward?
Very cool build, you got me thinking in a different direction if I decide to ever do a sas again!
 07-13-2015, 01:00 PM