Dutchbelly's 1988 4runner Build-up
 04-28-2011, 08:48 AM
#1
Registered User
Thread Starter
Join Date: Apr 2011
Location: Southern Ontario
Posts: 428
Likes: 0
Received 0 Likes
on
0 Posts
Dutchbelly's 1988 4runner Build-up
The Backstory
I tend to hang out with a lot of guys much older than myself, hunting buddies, guys in my ball league, guys who can hear a beer crack in the shop from 4 sideroads over and "just thought they'd stop in to see if anything was happening". I can't count the amount of times I've heard one of them talk about that vehicle they drove 30 years ago and how much they wish they'd kept it. I made a promise to myself years ago that when I found a vehicle I loved, I'd keep that thing around and alive long enough to be the old guy that could snicker at the rest of the old buggers making that same complaint. It just so happens I've found that vehicle, and it happens to be a 4runner.
I can't put my finger on when or why I first decided the 4runner is "that one", but I can assure you that by now my wife is sick to death of hearing about them. I bought my first 4runner years ago and knew very little about them at the time. I think I paid 1200 bucks for it. It was a black '91 that came with a manual transmission, a 6cyl 3vze engine, and a set of well used 31/10.5/r15 BFG Mudterrains. What it didn't come with were rocker panels or wheel wells. My distaste for body work comes from the following weeks I spent in the shop butchering a fiberglass patch job to avoid buying the weld in steel pieces it desperately needed. The fact that it passed safety had nothing to do with the fact that my buddy was the mechanic on duty that day. Honest. I drove that truck for years, always saying "next spring will be when I fix it up and make it right". That spring never came, and one morning after leaving it parked for a long weekend I opened the door to see parts across the front seats, and big gaps where my stereo and speakers used to be. Someone had butchered the dash trying to rip out the ignition so they could take it for a spin, and helped themselves to a couple speakers and amps when their attempt failed. The insurance company decided it wasn't worth fixing, and offered me 1500 bucks and let me keep the truck unbranded, saying do what you want with it, it's not worth fixing. I sold the truck to a guy just under 2hrs away for 750 bucks as is, and undercut his towing company and delivered it for another 150 bucks.
I then bought this:
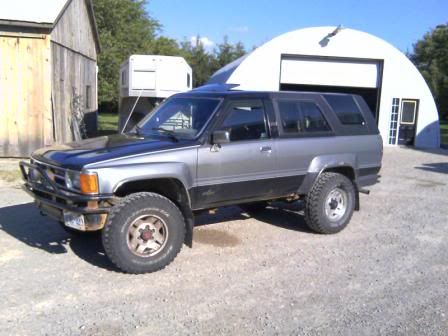
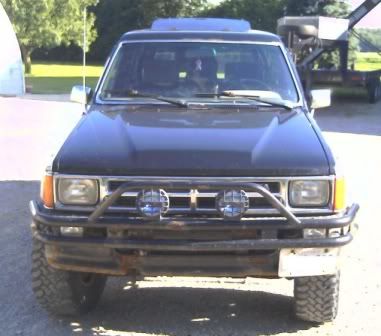
This truck was in pretty good shape when I bought it, 1989, 4cyl 22re, manual, came with the custom bumpers and lights you can probably see from the pic, minimal rust, custom speaker boxes in the doors, and a set of crap tires on boring steel rims. The sale of my old truck overlapped the purchase of this new one, so I swapped out the tires and rims before I sold the '91. The catch was this truck didn't run, and he wanted 1900 bucks for it. His story: He bought the truck from a friend for $2500 bucks a little over a year previous, and was told that would pass safety with no issues. He brought the truck in early for his safety check, and the mechanic asked him to come back in an hour when they had an open bay. He left the truck parked, went across the street to do some window shopping and when he returned an hour later the truck wouldn't start. Instead of asking the mechanic to look at it he got it towed to a buddy's house, who was apparently also working as a mechanic. His buddy looked it over, ran some tests, and told him that the engine was shot, that it didn't pass a compression test. This set off warning bells in my head, even with horrible compression the engine should still run, but I kept my mouth shut as he continued. So his buddy convinced him to buy a used engine and do an engine swap, installing a new clutch at the same time. After the swap the truck still wouldn't start. At this point he got pissed at his buddy, and towed the truck to where he worked, and asked one of the maintenance guy's there to look it over. This new guy looks it over, says the starter's fine, there's spark at the plugs, and the fuel pump's fine. It's gotta be the ecu. So the guy calls up a few wreckers and prices a used ecu at I think 150 bucks. At this point though, he's had enough and throws it up for sale, thinking he'll cut his losses and buy a cheap jeep or something that runs. I bought the thing despite his story when he told me it came with a soft top. I still consider it a steal even without running for all the toys that came with it. So I towed the thing to my father-in-law's shop, and called in the experts. My father-in-law and father stood together and exchanged wise theory's on what the problem could be while I made myself busy ruling out the stupid little things. Gas in the tank. Check. Battery is charged. Check. Spark at the plugs. Check. Fuses. There was one blown fuse. I wasn't sure what it was all for withoug a flashlight but I swapped it out anyway and tried the ignition. The truck backfired. This was more action than we'd ever heard from the truck so the experts put a hold on their wise talking and actually got their hands dirty. I sat in the driver's seat for the next 10mins or so of "try it now" until finally the truck started up for real, and stayed running, albeit horribly rough. Turns out the distributor was installed way off, probably during the engine swap of the previous owner. I'm about 90% sure the only thing that was wrong with the truck when it quit before it's safety was a blown fuse. One quick timing job and it was dream come true. Story over, right? Wrong. During the next year or so the "minimal" rust I had mentioned earlier stopped being so minimal. It evolved drastically along the rockers on both sides, the wheel wells, and along the top of the tailgate. Looks like the truck had been given a horribly done body job, and it was rapidly melting. My perfect truck wasn't so perfect anymore. I wasn't about to repeat my experience with fiberglass patching, so I started researching steel panels. The only company I found that made the panels I needed was in quebec, and they could sell me pieces I needed for I think 500 bucks for everything. I still wasn't liking the idea of welding in all those panels because I dreaded finishing the whole thing only to find out I hadn't controlled my heat properly, resulting in heat distortion and a warped body. A couple years went by of me promising myself "next spring will be when I fix it up and make it right". I then came across this:
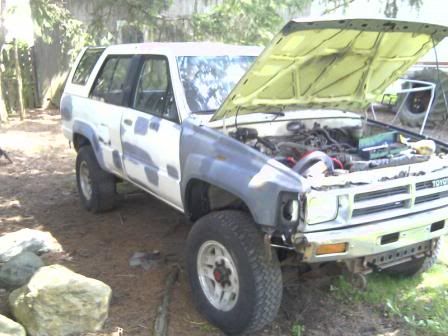
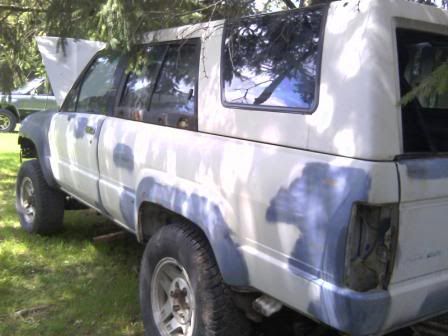
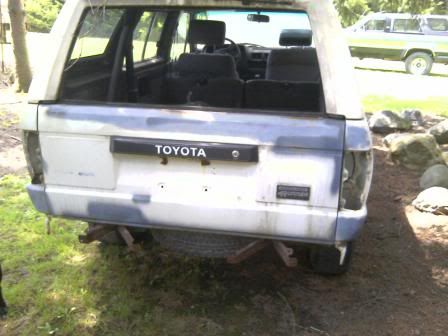
It's a 1988 4runner, 22re manual. It had been sitting since the late 90's, and had been halfway through a body/paint job for most of that time, one of those projects a guy plans on finishing but never does, only to put it up for sale. The engine was toast, having fallen victim to the ol stretched single timing chain/plastic guides issue, but he had a spare 22re that would go with the sale, along with random new body parts like front fenders which he had already put on without priming first, which didn't make much sense to me. I figured I could swap this good body onto my existing frame so bought the darn thing for I think 1400 bucks. I justified the extra cost above the steel panels I'd researched to my wife by saying this purchase came with a spare engine and a lot of spare parts for down the road, but we both knew I just plain didn't want to do body work. So now I have two trucks, neither of which is finished, and I'm sick and tired of saying "next spring will be when I fix it up and make it right".
It just so happens to be spring.
I started pulling a couple things off the front end last fall before I parked it
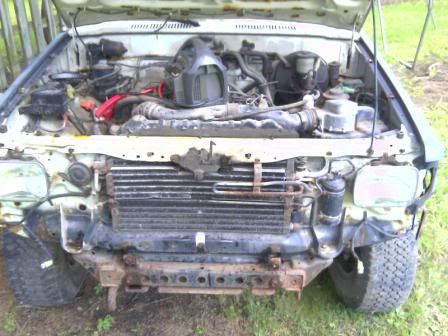
Took off the front grill, bumper, etc.
Fenders off
This is pretty much the way I left it before I stored it for the winter.
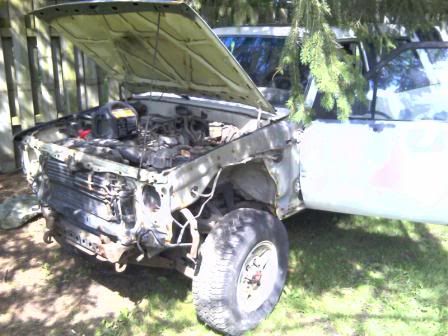
So this year I finally got off my butt, and pulled it inside.
Here it is before I started working on it:
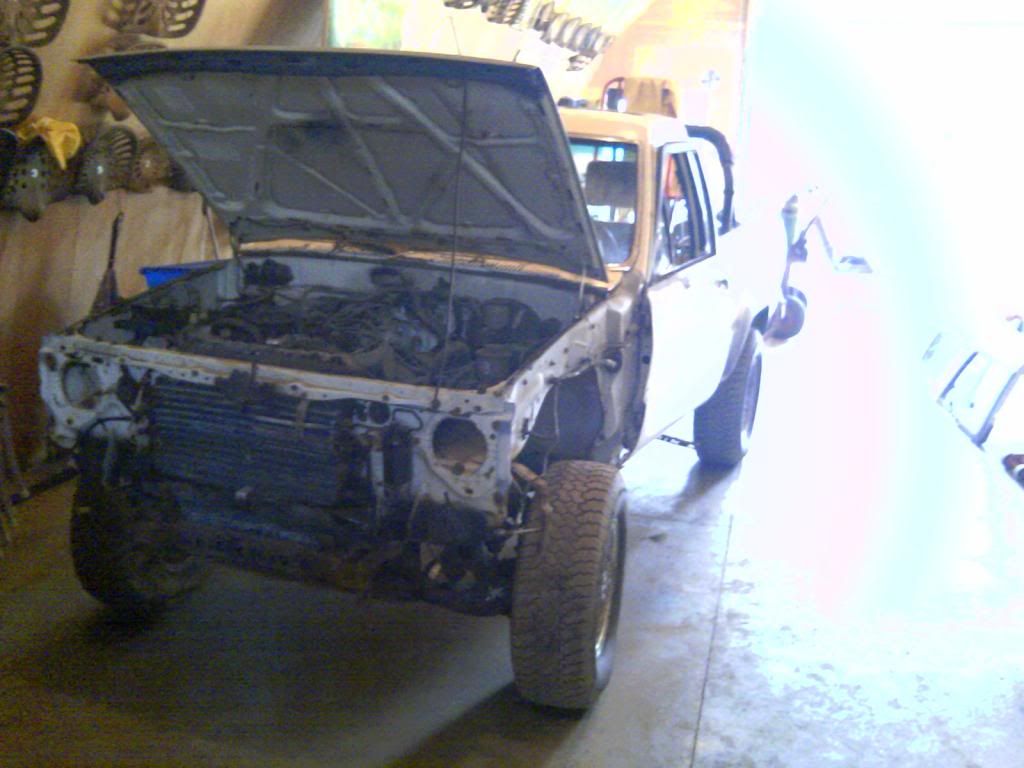
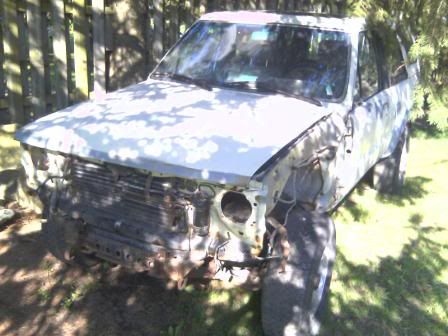
All I've done is take off the top since last fall.
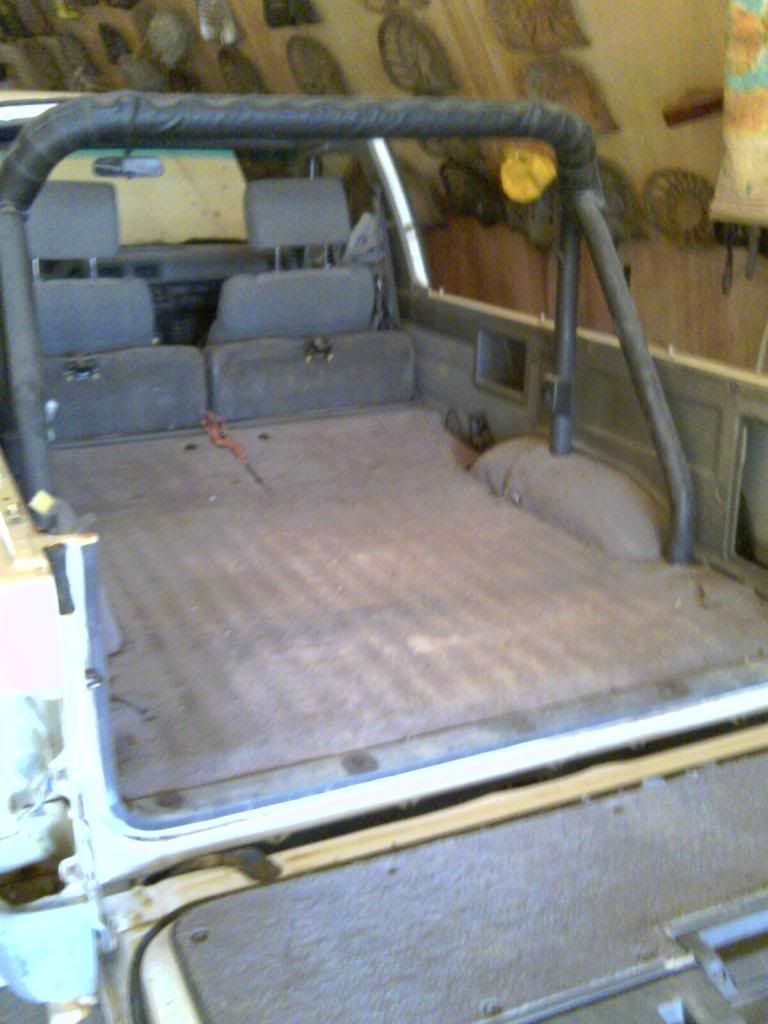
Before
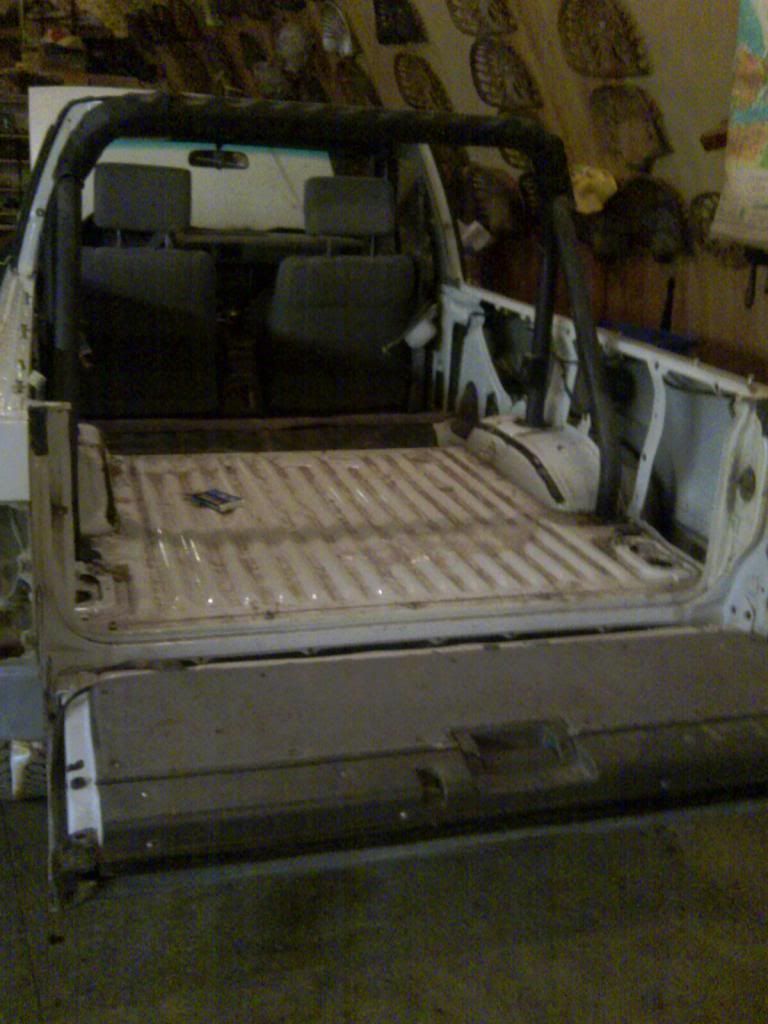
After
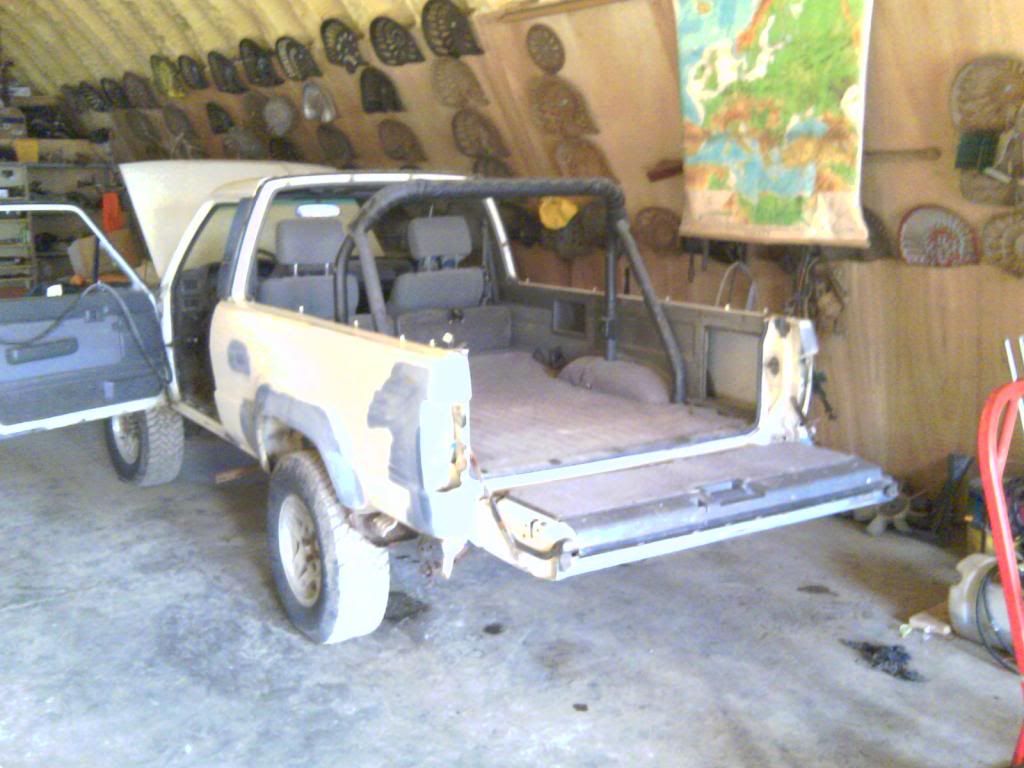
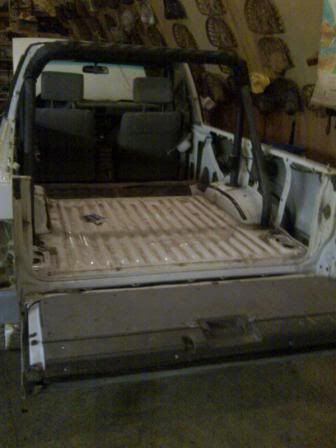
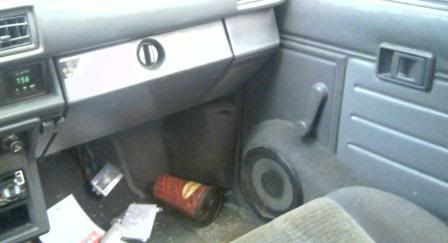
Removed the trim, side panels, carpet, and back seats. This was the 24th of April. All in all a pretty good day.
I continued pulling things apart a couple days ago, I'll try to update this thread as often as time permits.
I tend to hang out with a lot of guys much older than myself, hunting buddies, guys in my ball league, guys who can hear a beer crack in the shop from 4 sideroads over and "just thought they'd stop in to see if anything was happening". I can't count the amount of times I've heard one of them talk about that vehicle they drove 30 years ago and how much they wish they'd kept it. I made a promise to myself years ago that when I found a vehicle I loved, I'd keep that thing around and alive long enough to be the old guy that could snicker at the rest of the old buggers making that same complaint. It just so happens I've found that vehicle, and it happens to be a 4runner.
I can't put my finger on when or why I first decided the 4runner is "that one", but I can assure you that by now my wife is sick to death of hearing about them. I bought my first 4runner years ago and knew very little about them at the time. I think I paid 1200 bucks for it. It was a black '91 that came with a manual transmission, a 6cyl 3vze engine, and a set of well used 31/10.5/r15 BFG Mudterrains. What it didn't come with were rocker panels or wheel wells. My distaste for body work comes from the following weeks I spent in the shop butchering a fiberglass patch job to avoid buying the weld in steel pieces it desperately needed. The fact that it passed safety had nothing to do with the fact that my buddy was the mechanic on duty that day. Honest. I drove that truck for years, always saying "next spring will be when I fix it up and make it right". That spring never came, and one morning after leaving it parked for a long weekend I opened the door to see parts across the front seats, and big gaps where my stereo and speakers used to be. Someone had butchered the dash trying to rip out the ignition so they could take it for a spin, and helped themselves to a couple speakers and amps when their attempt failed. The insurance company decided it wasn't worth fixing, and offered me 1500 bucks and let me keep the truck unbranded, saying do what you want with it, it's not worth fixing. I sold the truck to a guy just under 2hrs away for 750 bucks as is, and undercut his towing company and delivered it for another 150 bucks.
I then bought this:
This truck was in pretty good shape when I bought it, 1989, 4cyl 22re, manual, came with the custom bumpers and lights you can probably see from the pic, minimal rust, custom speaker boxes in the doors, and a set of crap tires on boring steel rims. The sale of my old truck overlapped the purchase of this new one, so I swapped out the tires and rims before I sold the '91. The catch was this truck didn't run, and he wanted 1900 bucks for it. His story: He bought the truck from a friend for $2500 bucks a little over a year previous, and was told that would pass safety with no issues. He brought the truck in early for his safety check, and the mechanic asked him to come back in an hour when they had an open bay. He left the truck parked, went across the street to do some window shopping and when he returned an hour later the truck wouldn't start. Instead of asking the mechanic to look at it he got it towed to a buddy's house, who was apparently also working as a mechanic. His buddy looked it over, ran some tests, and told him that the engine was shot, that it didn't pass a compression test. This set off warning bells in my head, even with horrible compression the engine should still run, but I kept my mouth shut as he continued. So his buddy convinced him to buy a used engine and do an engine swap, installing a new clutch at the same time. After the swap the truck still wouldn't start. At this point he got pissed at his buddy, and towed the truck to where he worked, and asked one of the maintenance guy's there to look it over. This new guy looks it over, says the starter's fine, there's spark at the plugs, and the fuel pump's fine. It's gotta be the ecu. So the guy calls up a few wreckers and prices a used ecu at I think 150 bucks. At this point though, he's had enough and throws it up for sale, thinking he'll cut his losses and buy a cheap jeep or something that runs. I bought the thing despite his story when he told me it came with a soft top. I still consider it a steal even without running for all the toys that came with it. So I towed the thing to my father-in-law's shop, and called in the experts. My father-in-law and father stood together and exchanged wise theory's on what the problem could be while I made myself busy ruling out the stupid little things. Gas in the tank. Check. Battery is charged. Check. Spark at the plugs. Check. Fuses. There was one blown fuse. I wasn't sure what it was all for withoug a flashlight but I swapped it out anyway and tried the ignition. The truck backfired. This was more action than we'd ever heard from the truck so the experts put a hold on their wise talking and actually got their hands dirty. I sat in the driver's seat for the next 10mins or so of "try it now" until finally the truck started up for real, and stayed running, albeit horribly rough. Turns out the distributor was installed way off, probably during the engine swap of the previous owner. I'm about 90% sure the only thing that was wrong with the truck when it quit before it's safety was a blown fuse. One quick timing job and it was dream come true. Story over, right? Wrong. During the next year or so the "minimal" rust I had mentioned earlier stopped being so minimal. It evolved drastically along the rockers on both sides, the wheel wells, and along the top of the tailgate. Looks like the truck had been given a horribly done body job, and it was rapidly melting. My perfect truck wasn't so perfect anymore. I wasn't about to repeat my experience with fiberglass patching, so I started researching steel panels. The only company I found that made the panels I needed was in quebec, and they could sell me pieces I needed for I think 500 bucks for everything. I still wasn't liking the idea of welding in all those panels because I dreaded finishing the whole thing only to find out I hadn't controlled my heat properly, resulting in heat distortion and a warped body. A couple years went by of me promising myself "next spring will be when I fix it up and make it right". I then came across this:
It's a 1988 4runner, 22re manual. It had been sitting since the late 90's, and had been halfway through a body/paint job for most of that time, one of those projects a guy plans on finishing but never does, only to put it up for sale. The engine was toast, having fallen victim to the ol stretched single timing chain/plastic guides issue, but he had a spare 22re that would go with the sale, along with random new body parts like front fenders which he had already put on without priming first, which didn't make much sense to me. I figured I could swap this good body onto my existing frame so bought the darn thing for I think 1400 bucks. I justified the extra cost above the steel panels I'd researched to my wife by saying this purchase came with a spare engine and a lot of spare parts for down the road, but we both knew I just plain didn't want to do body work. So now I have two trucks, neither of which is finished, and I'm sick and tired of saying "next spring will be when I fix it up and make it right".
It just so happens to be spring.
I started pulling a couple things off the front end last fall before I parked it
Took off the front grill, bumper, etc.
Fenders off
This is pretty much the way I left it before I stored it for the winter.
So this year I finally got off my butt, and pulled it inside.
Here it is before I started working on it:
All I've done is take off the top since last fall.
Before
After
Removed the trim, side panels, carpet, and back seats. This was the 24th of April. All in all a pretty good day.
I continued pulling things apart a couple days ago, I'll try to update this thread as often as time permits.
Last edited by Dutchbelly; 04-30-2011 at 07:07 PM. Reason: fixed bad pics
 04-30-2011, 06:57 PM
#2
Registered User
Thread Starter
Join Date: Apr 2011
Location: Southern Ontario
Posts: 428
Likes: 0
Received 0 Likes
on
0 Posts
Week of April 24-30
I've been pretty busy at work all week, but I found a couple hours most nights to continue working on the truck. I'm not sure if I'll be making one good truck out of my two, or if I can just restore this one, either way I'll be taking off the body so I can get at everything that needs to be replaced easier. There are a few mods I'd like to make in the process, I think I'd like to lift the body and drivetrain and gas tank a couple inches to improve clearance and allow me to put on 33 inch tires without having to worry about rub. Sorry my pics aren't very good, I've been using the camera in my phone, and It's not the best. Anyway, lets get to it.
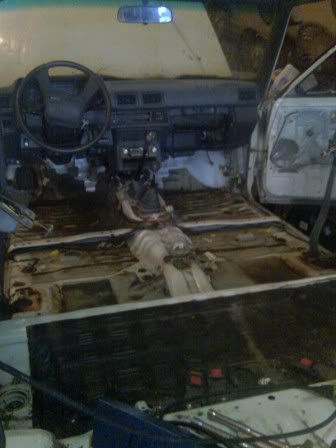
When I started working on the truck again it still had the front seats and the carpet, and I needed it all out so I can touch up any rusty areas. I'm thinking about getting the whole floor sprayed with rhino bed liner and leaving out the carpet, but I still haven't looked into prices. So here I was when I left off:
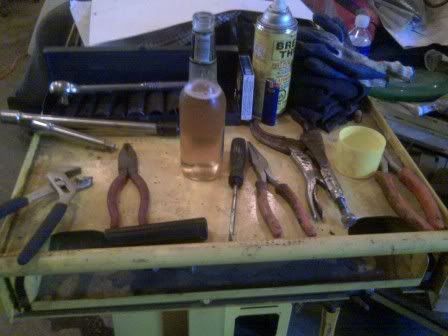
I gathered the tools I'd be using most often:
I set to work pulling out the front seats, and quickly realized I'd be drilling out a few of the bolts. I didn't get pics of them, unfortunately, but 2 bolts closest to the doors on each of the seats had rusted and seized to the floor. I got very little done that night, not having a suitable drill bit on hand, but I went through a can of penetrating oil on every bolt/screw I could find before I quit for the night. The next night I bought a bit after work and drilled out the seized bolt heads. After the seats are out I'll soak the bolts periodically and see if I can remove them with a bolt extractor kit. Pulling the seats and carpet wasn't a lot of progress, but It was a lot more than I'd gotten done the night before.
I took the door liners off as well, which wasn't difficult, but the retaining pins holding the window cranks were a royal pain to pop off.
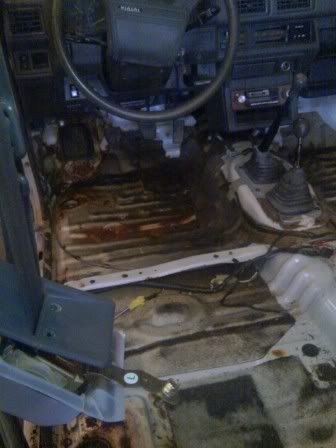
The floor is actually in pretty good condition, little worse on the driver side:
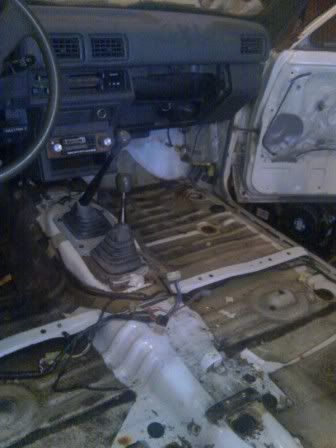
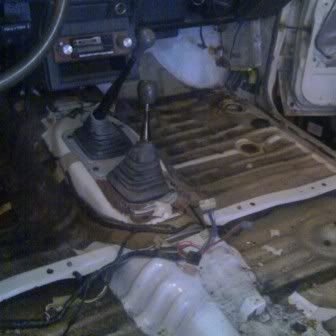
I took off the shifter nobs and the cover plate next
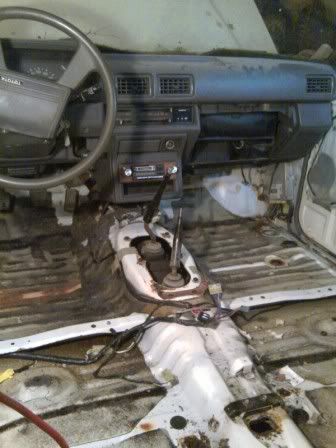
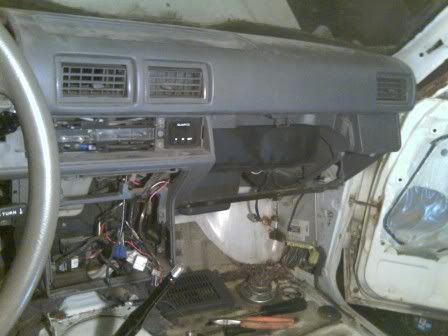
The worst rust on the floor is actually where the driver's left foot rests, so I started pulling the lower half of the dash off to give room to work later when I start to clean up the rust:

I did the same for the passenger side. I like to use old speakers to collect the screws/bolts I'm working with.
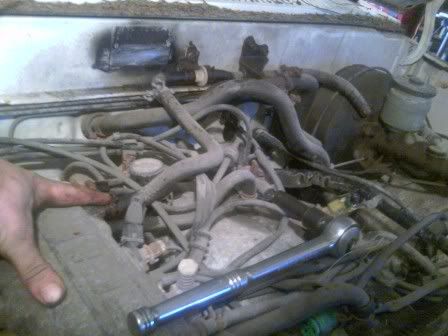
That's about as far as I got that evening. Small progress each night, but it all adds up. Today's Saturday, and I put in a couple more hours today, started unhooking a bunch of the wires/lines under the hood for when I lift the body but I have to get the pics off my phone still.
Any comments are welcome!
When I started working on the truck again it still had the front seats and the carpet, and I needed it all out so I can touch up any rusty areas. I'm thinking about getting the whole floor sprayed with rhino bed liner and leaving out the carpet, but I still haven't looked into prices. So here I was when I left off:
I gathered the tools I'd be using most often:
I set to work pulling out the front seats, and quickly realized I'd be drilling out a few of the bolts. I didn't get pics of them, unfortunately, but 2 bolts closest to the doors on each of the seats had rusted and seized to the floor. I got very little done that night, not having a suitable drill bit on hand, but I went through a can of penetrating oil on every bolt/screw I could find before I quit for the night. The next night I bought a bit after work and drilled out the seized bolt heads. After the seats are out I'll soak the bolts periodically and see if I can remove them with a bolt extractor kit. Pulling the seats and carpet wasn't a lot of progress, but It was a lot more than I'd gotten done the night before.
I took the door liners off as well, which wasn't difficult, but the retaining pins holding the window cranks were a royal pain to pop off.
The floor is actually in pretty good condition, little worse on the driver side:
I took off the shifter nobs and the cover plate next
The worst rust on the floor is actually where the driver's left foot rests, so I started pulling the lower half of the dash off to give room to work later when I start to clean up the rust:
I did the same for the passenger side. I like to use old speakers to collect the screws/bolts I'm working with.
That's about as far as I got that evening. Small progress each night, but it all adds up. Today's Saturday, and I put in a couple more hours today, started unhooking a bunch of the wires/lines under the hood for when I lift the body but I have to get the pics off my phone still.
Any comments are welcome!
05-01-2011, 04:27 PM
#3
Registered User
Thread Starter
Join Date: Apr 2011
Location: Southern Ontario
Posts: 428
Likes: 0
Received 0 Likes
on
0 Posts
Saturday, April 30
So I got tired of working on the interior, and figured that could be continued when I finally get the body off the frame, so I focused on disconnecting all the lines and wires that stop me from doing that.
Taking the rad out was my first task, because it would give me the most elbow room during the actual lift, and it's and easy enough task to start on.
I needed to get the skid plate off to more easily access the lower rad hose.
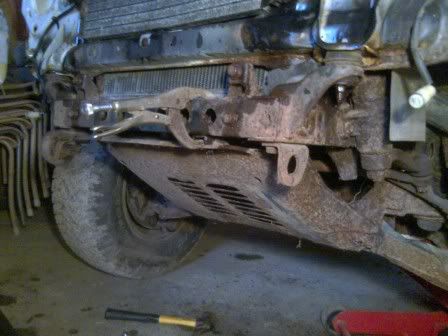
The top two bolts came out easier than expected but the lower two were seized from years of rust. I clamped the top so I could avoid wearing a fancy metal hat and used a grinder to cut off the two offending lower bolts.
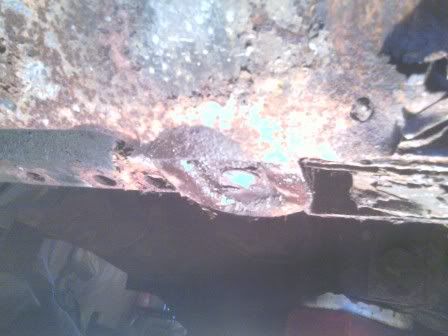
I ground them off flush with the washers, took off the clamp and pulled the skid plate off. I'll probably fab up a custom guard later, maybe out of stainless. Depends on how lazy I feel, so I'll save the factory plate just in case.
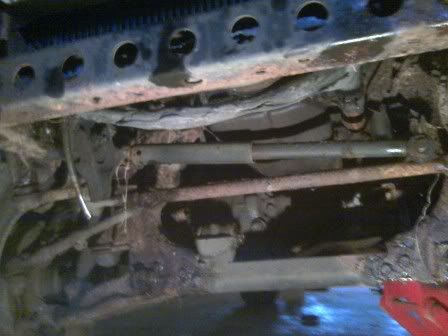
Skid plate off. I drained what was left in the rad and had easy access to the lower rad hose.
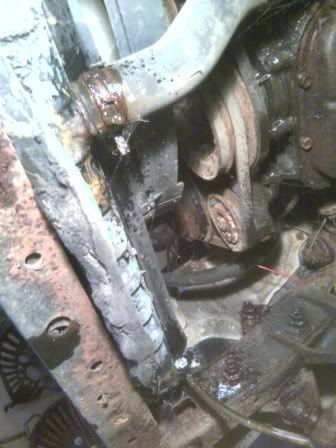
And then back on my feet
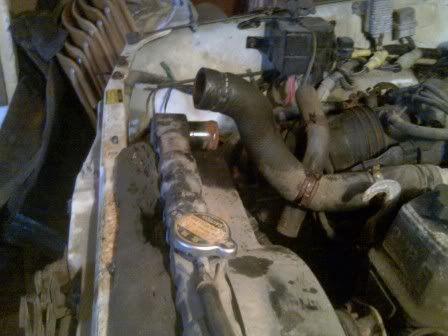
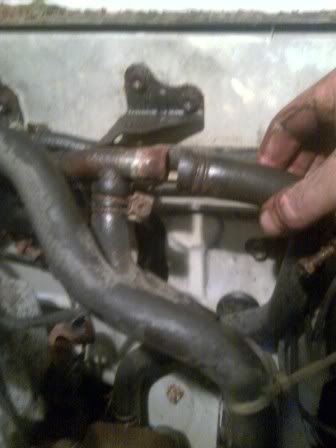
Upper rad hose off. There were a pair of power steering lines that went through to in front of the air conditioning, so I figured I'd deal with them at the same time.
I probably only needed to take apart the one that goes down to the gearbox, but I took them both off for elbow space.
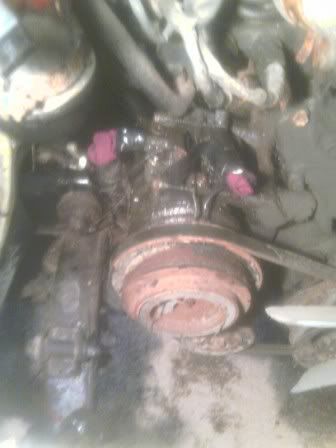
I snapped two lower bolts holding on the plastic fan shroud to the rad, but the four mounting bolts for the rad came out after liberal penetrating fluid, and some patient back and forth turning. Looks like I need a new rad anyway:
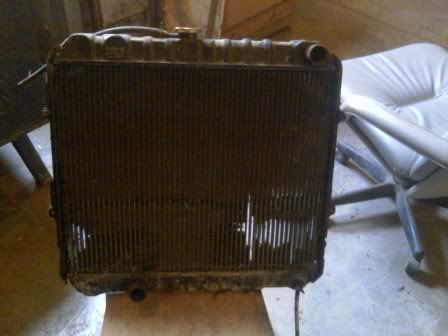
Maybe it's one of those modern high air flow rads.

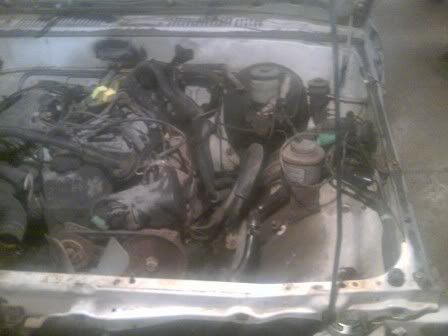
Taking the rad out gives me a lot more room to play.
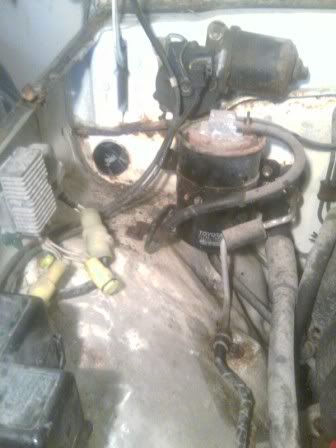
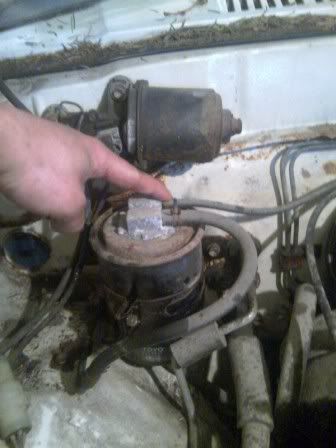
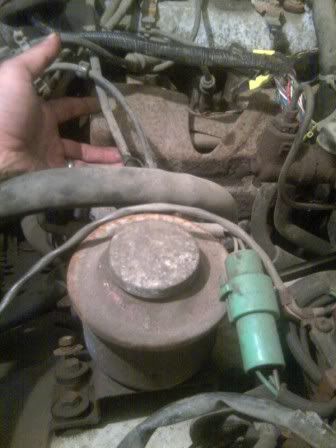
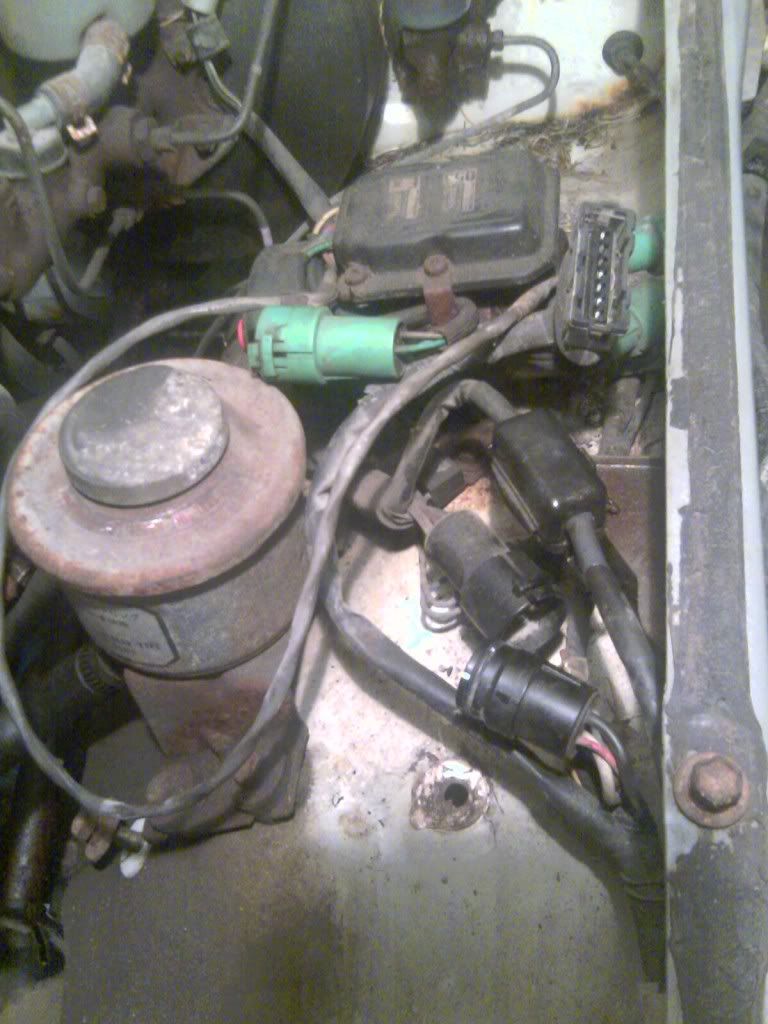
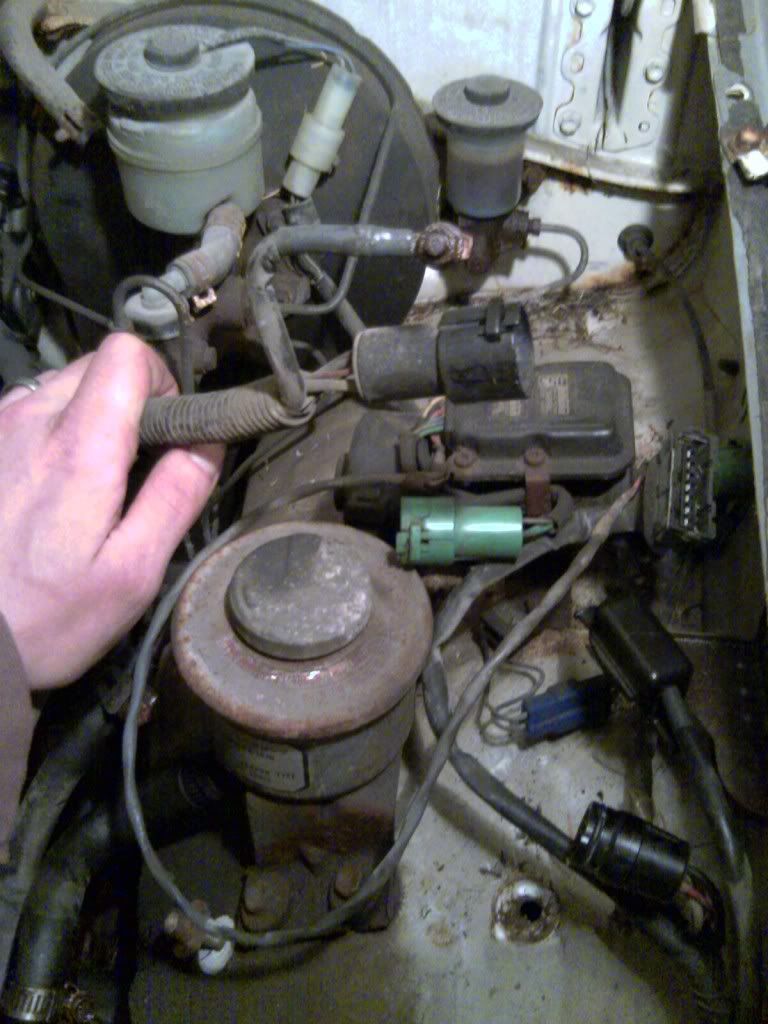
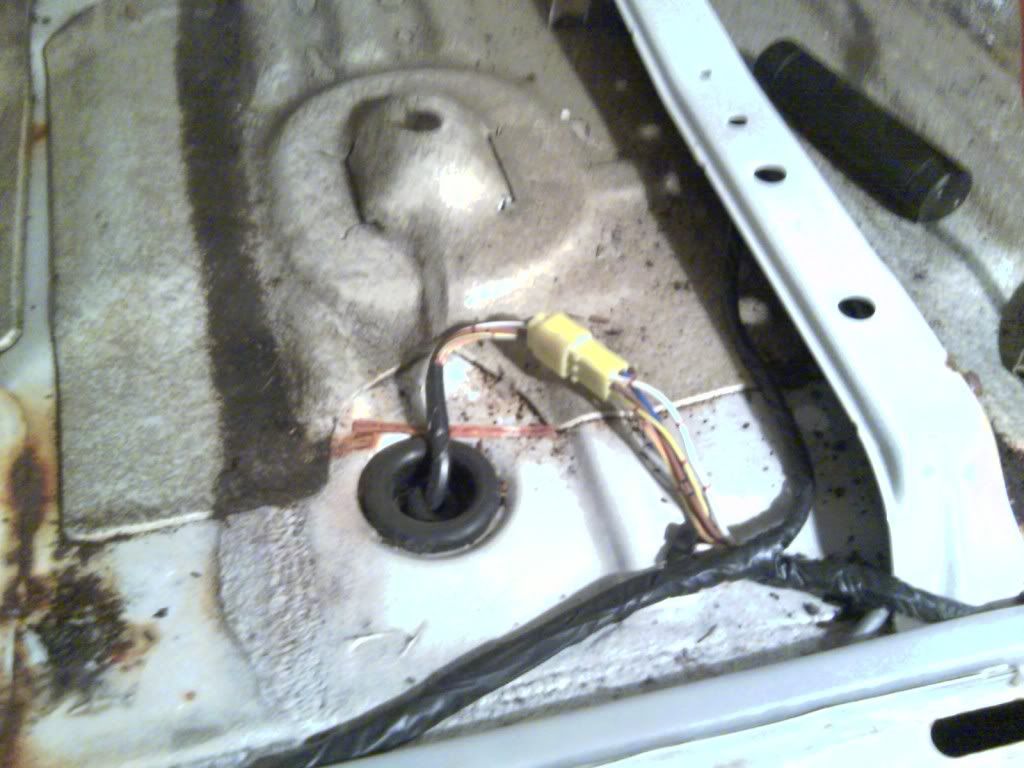
This is the ground wire that connects the body, negative terminal, and the engine, just above the oil pan. I was surprised how easily this one came out, but I'm not complaining.
This is kinda a crap photo, but it shows the wiring clip that goes from the air conditioning pump over to the main electrical harness. I don't know what the actual term for it is. I want to call it the trunk, where all the different wiring stems off. Probably not actually called a trunk, but whatever. The main mass of wiring that comes from the ecu etc. Through the firewall and then all over the engine. I can probably leave this one connected because I'll be pulling out the trunk shortly. It's definitely much easier just to say trunk.
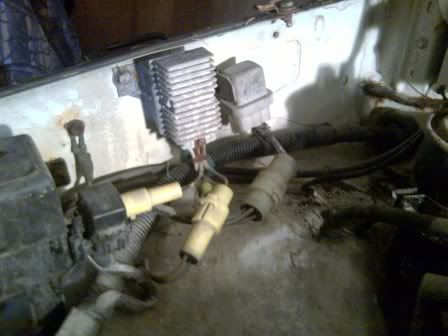
I have to disconnect one of these three clips and the diagnostic terminal from the fuse box to free the trunk from the body.
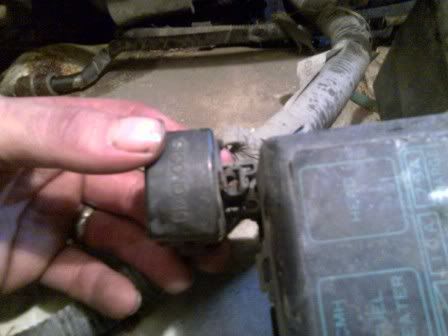
This just slides up and off.
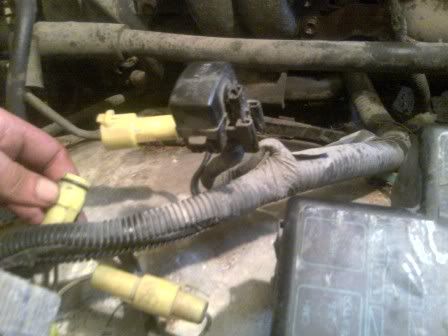
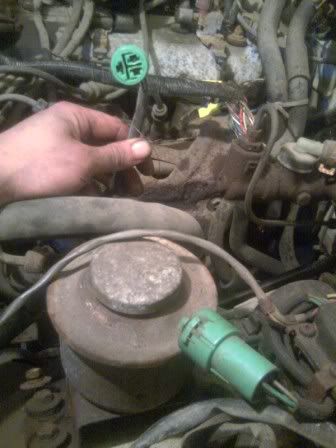
and one clip. Now back inside the truck to the ecu
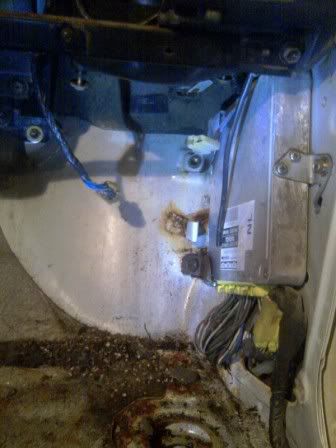
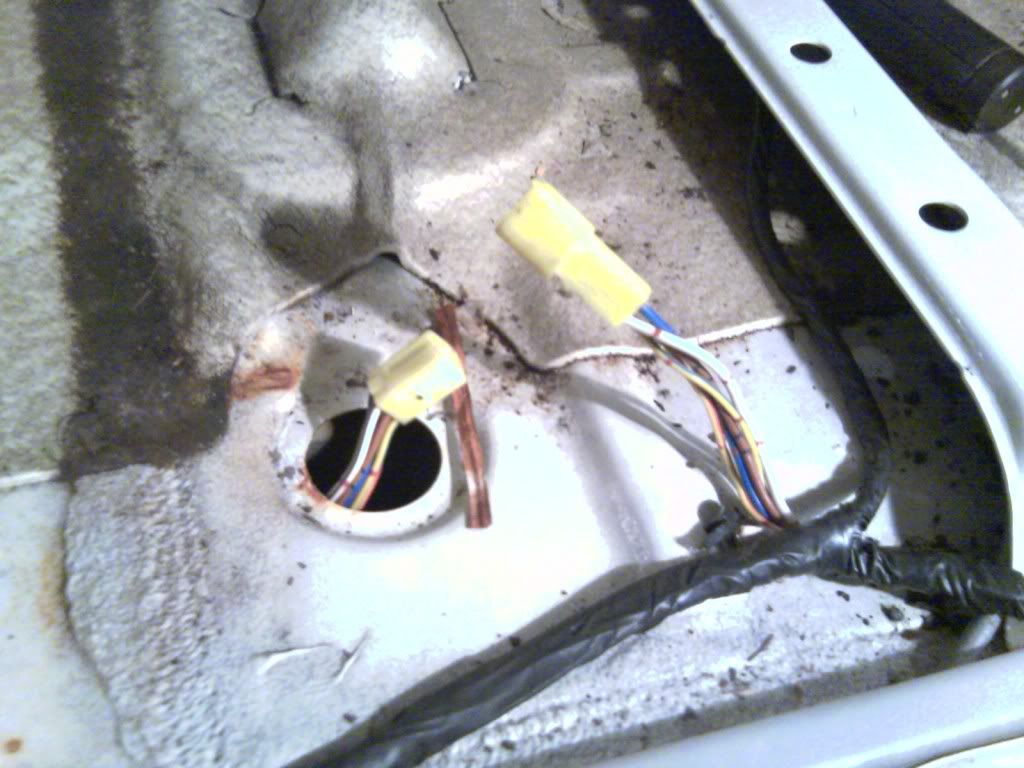
There are three bolts holding the brackets to the ecu. The ecu is held to the brackets with small screws, but it's much easier to pull the bolts and leave them connected to the ecu. The wiring clips you see hanging from the dash were for the fan for the heating system. The fan quit on my daily driver so I stole this one to make it through the winter. One of the three bolts was pretty rusty, but I could get to the tip of it in the fender. I cleaned it off best I could with a wire brush, and soaked it with penetrating fluid, and then the three bolts came out easily.
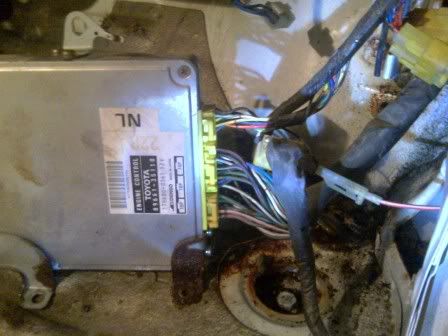
There are three clips on the ecu, and a couple others that run elsewhere. I'll disconnect them all, pull the trunk, and reconnect the ones left behind just to be safe.
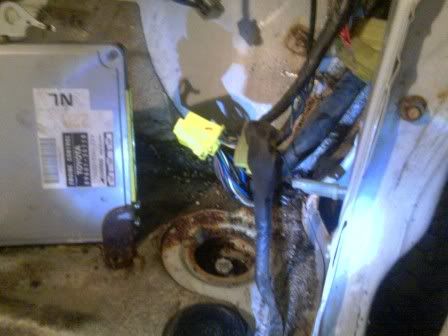
With all the clips off It was simply a matter of pulling out the gasket around the hole in the firewall, and pulling the main electrical trunk through.
The handy part about a job of this scale is the farther along I get the more room I have to work with. I then turned my attention to the lines coming off the air conditioning pump.
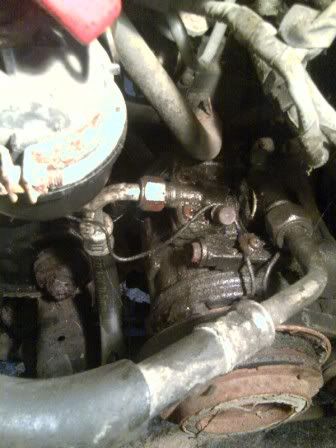
If there was still fluid in the lines I would have had to stop here until I could get a buddy who does heating/cooling systems over to evacuate the lines.
I popped the filler cap and gave the nozzle a quick tap taking care to stand well away from it, but it didn't even hiss. These lines have been empty for some time.
The one connection used a 22mil wrench, and I didn't have anything bigger than a 24mil for the other one, but a 1 1/16" fit on perfectly. The lines came apart easily. At this point I'm patting myself on the bat for dousing so many connections with penetrating fluid every time I could this past week.
I'm not sure If I'll bother trying to salvage the air con, but I plugged the holes with rags and taped them off just in case.
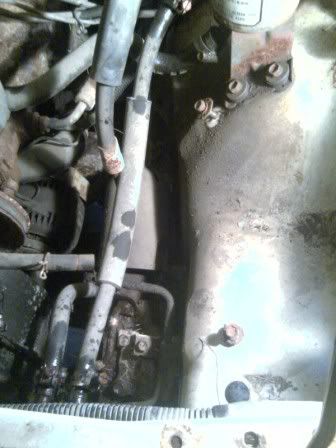
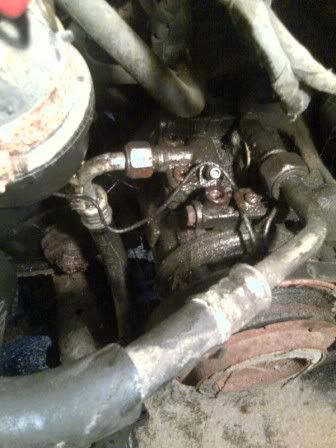
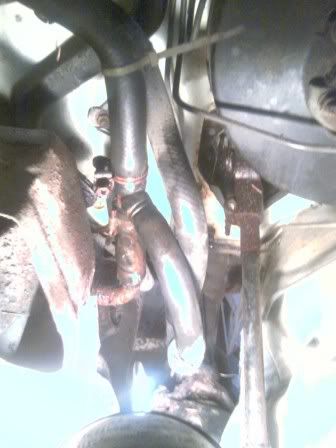
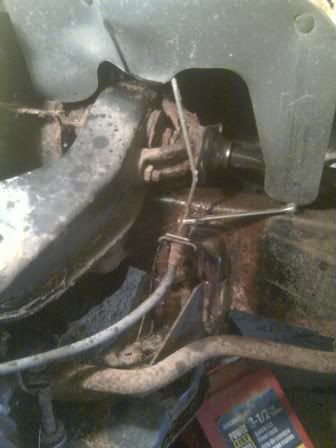
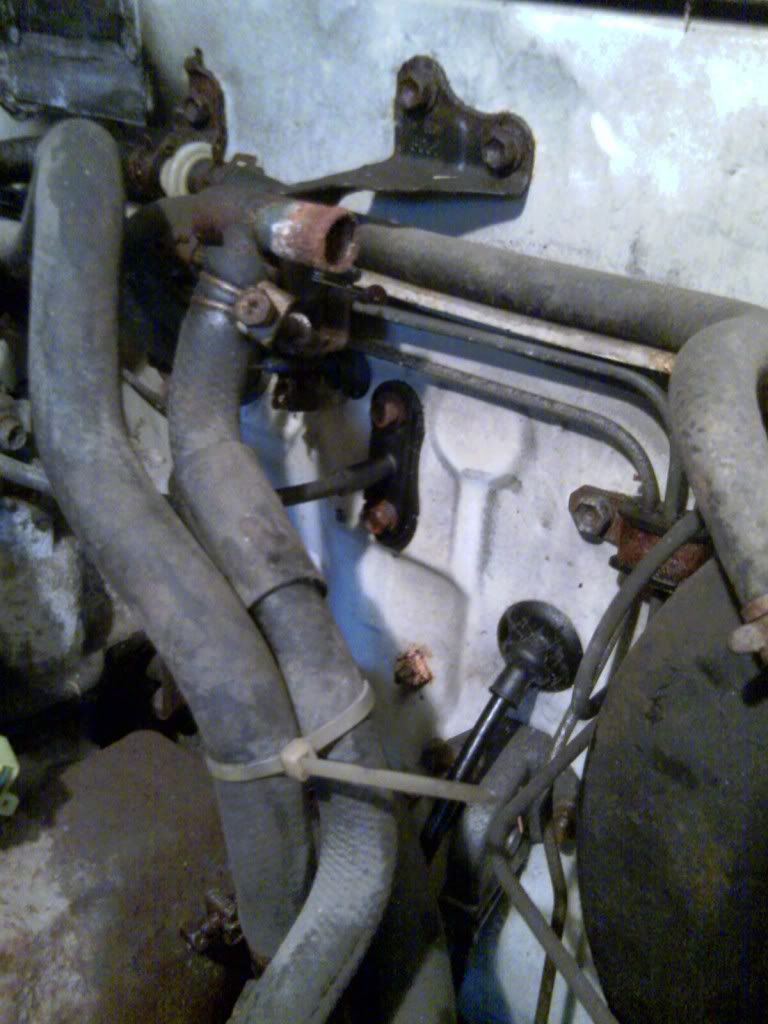
I need to take this line off, too. It connects to the intake side of the engine. I originally mistook this for a vacuum line, but I'm pretty sure now its the return line for the gas tank.
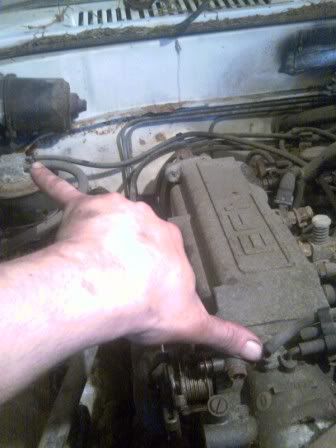
This is the best way I could find to remind myself later where it connects.
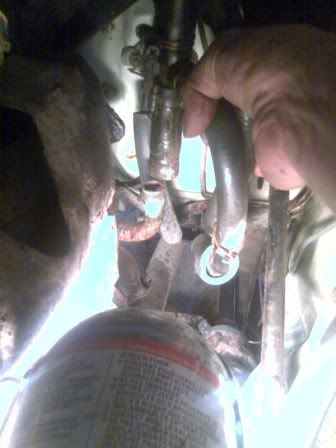
I did the same for the power steering line from the reservoir to the pump.
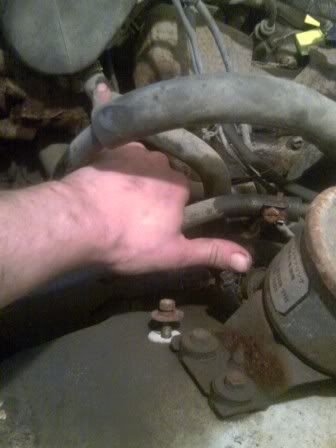
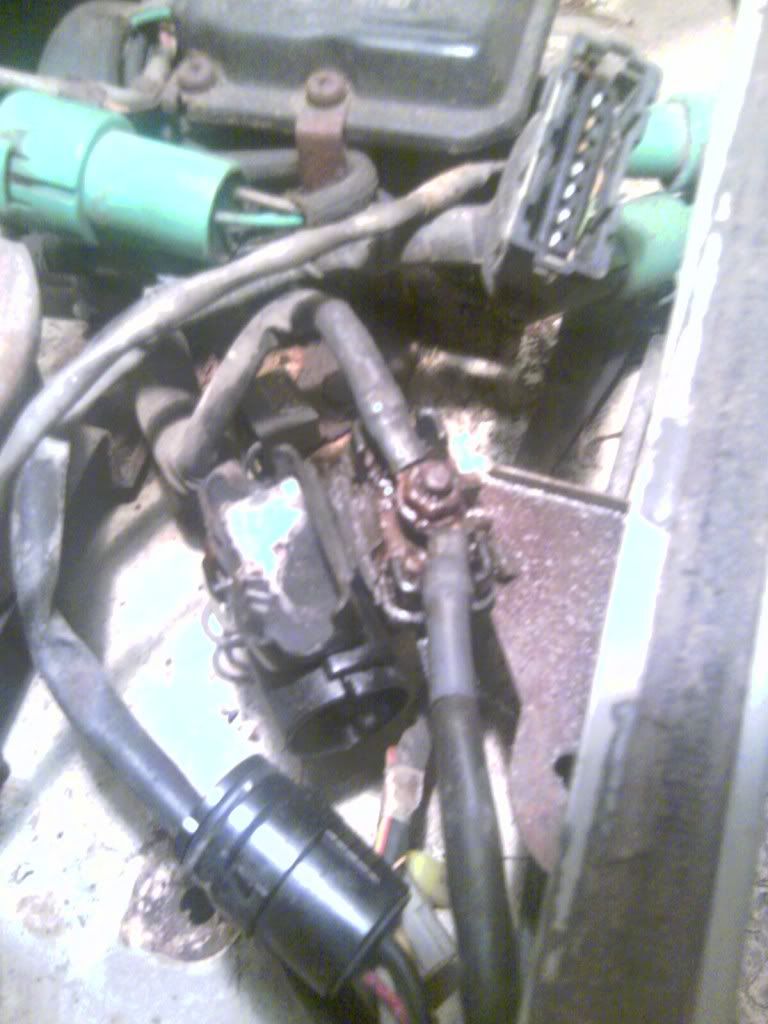
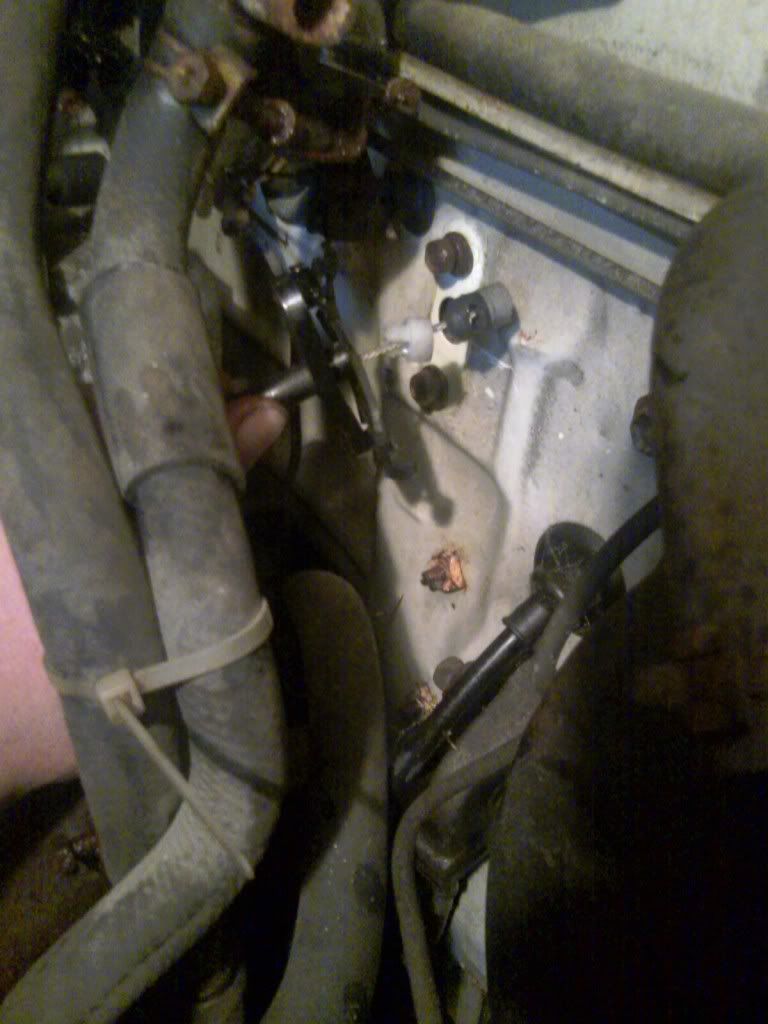
Another line to disconnect. This one runs from the distributor over to near the coil.
And disconnected.
There's another powersteering line from the gearbox to the pump, but I'll see if I can leave this one connected during the body lift.
I then disconnected the cable from the coil.
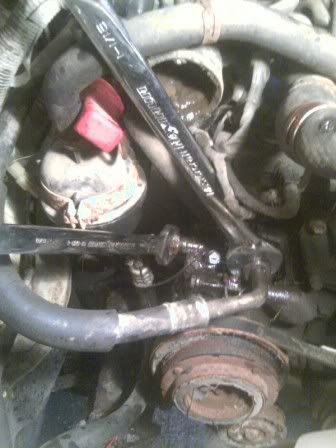
This one's harder to see, but I'm pointing to the vacuum line that goes across the the brakes. I then moved across to the hoses for the rear heater.
I'm not sure if I'll be salvaging the rear heater or not, I'd like to, but I kinda liked the look of the truck after I'd taken out the console and the plastic shifter surround.
I'm thinking If I can get the whole floor done in rhino liner I might fab up a new cover plate out of stainless, and leave the rubber shifter boot's exposed. If I can reroute the wiring easily enough, I'll salvage the rear heater, otherwise I might see about making a custom console that incorporates the switches, and also some cupholders. Seriously why doesn't this truck come with cupholders. Ok back to the rear heater lines.
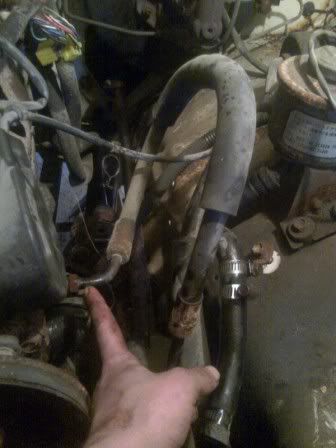
Another crap photo, but here's one of the rear heater lines disconnected. I really like the design of the hose clamps toyota uses for these. Solid spring with a bolt, so it works despite temperature changes unlike gear clamps, and also lasts a really long time.
This pics a bit blurry, I had to keep cleaning the camera lens on my phone because I kept using it with my greasy hands. Guess I should have cleaned it again before this pic, but you can still see whats goin on. The two connections I separated means I leave most of the lines on the body without having to take off brackets later. I then hopped over to work on some brake lines.
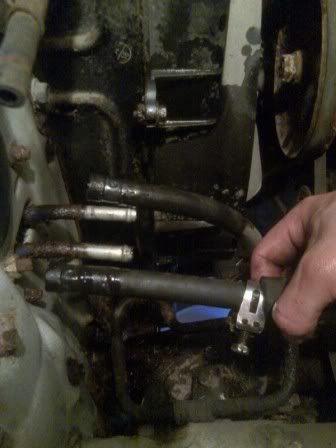
Here's the line for the front driver side. I didn't have a metric line wrench of the appropriate size, so I just tried a regular box wrench figuring I could just replace the line after I butchered it.

And because I was expecting the opposite, It came off without even rounding the corners.
The passenger side still has the cover on it. I wrecked one plastic plug before I remembered I could get to them from under the hood.
This side looked about the same as the other, clean looking line into a rusty looking head. The first one came out fine, I thought the second was coming clean, but I had twisted the line to shreds. It'll be replaced later.
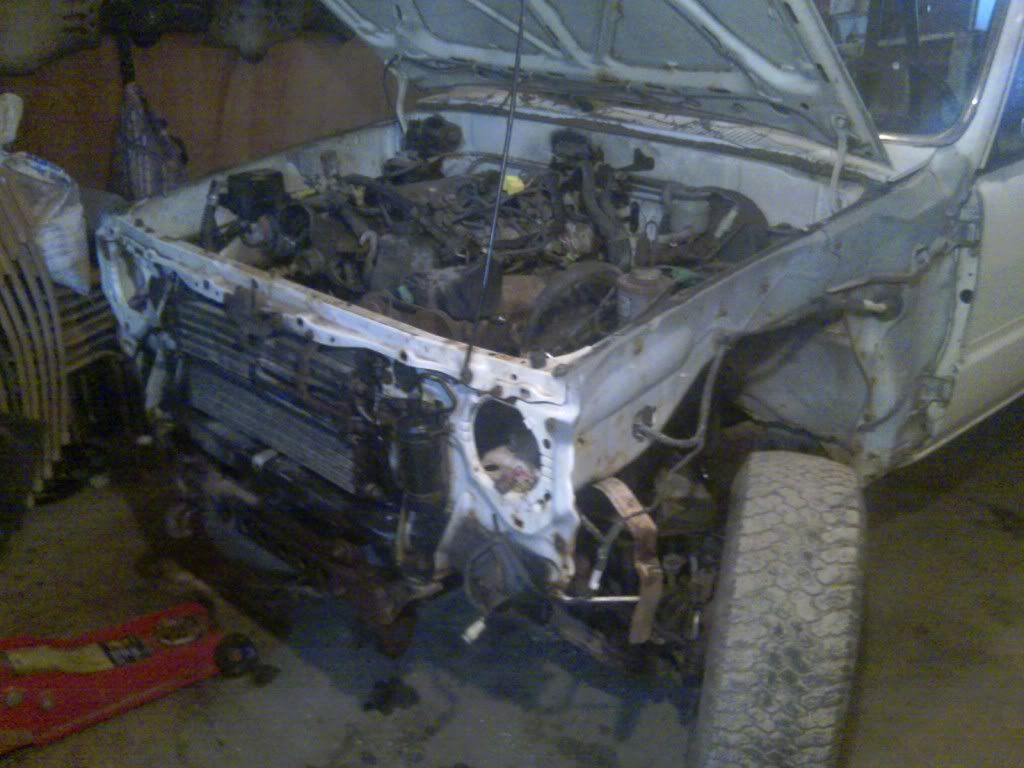
At this point I was out of time, but I felt pretty good about my progress. I'm hoping I'll have the body off next week. I'm not sure what's still connected anymore, and I'm sure I'll miss something for the lift, but such is life.
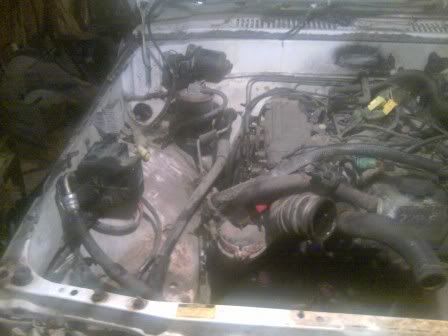
Lookin pretty roomy around the engine under the hood now.
Hoping I'll get some comments soon, kinda worried noone's interested. Either way I'll update next week, I'm hoping to use this thread as a guide when I start forgetting the steps I've taken, lol.
Taking the rad out was my first task, because it would give me the most elbow room during the actual lift, and it's and easy enough task to start on.
I needed to get the skid plate off to more easily access the lower rad hose.
The top two bolts came out easier than expected but the lower two were seized from years of rust. I clamped the top so I could avoid wearing a fancy metal hat and used a grinder to cut off the two offending lower bolts.
I ground them off flush with the washers, took off the clamp and pulled the skid plate off. I'll probably fab up a custom guard later, maybe out of stainless. Depends on how lazy I feel, so I'll save the factory plate just in case.
Skid plate off. I drained what was left in the rad and had easy access to the lower rad hose.
And then back on my feet
Upper rad hose off. There were a pair of power steering lines that went through to in front of the air conditioning, so I figured I'd deal with them at the same time.
I probably only needed to take apart the one that goes down to the gearbox, but I took them both off for elbow space.
I snapped two lower bolts holding on the plastic fan shroud to the rad, but the four mounting bolts for the rad came out after liberal penetrating fluid, and some patient back and forth turning. Looks like I need a new rad anyway:
Maybe it's one of those modern high air flow rads.
Taking the rad out gives me a lot more room to play.
This is the ground wire that connects the body, negative terminal, and the engine, just above the oil pan. I was surprised how easily this one came out, but I'm not complaining.
This is kinda a crap photo, but it shows the wiring clip that goes from the air conditioning pump over to the main electrical harness. I don't know what the actual term for it is. I want to call it the trunk, where all the different wiring stems off. Probably not actually called a trunk, but whatever. The main mass of wiring that comes from the ecu etc. Through the firewall and then all over the engine. I can probably leave this one connected because I'll be pulling out the trunk shortly. It's definitely much easier just to say trunk.
I have to disconnect one of these three clips and the diagnostic terminal from the fuse box to free the trunk from the body.
This just slides up and off.
and one clip. Now back inside the truck to the ecu
There are three bolts holding the brackets to the ecu. The ecu is held to the brackets with small screws, but it's much easier to pull the bolts and leave them connected to the ecu. The wiring clips you see hanging from the dash were for the fan for the heating system. The fan quit on my daily driver so I stole this one to make it through the winter. One of the three bolts was pretty rusty, but I could get to the tip of it in the fender. I cleaned it off best I could with a wire brush, and soaked it with penetrating fluid, and then the three bolts came out easily.
There are three clips on the ecu, and a couple others that run elsewhere. I'll disconnect them all, pull the trunk, and reconnect the ones left behind just to be safe.
With all the clips off It was simply a matter of pulling out the gasket around the hole in the firewall, and pulling the main electrical trunk through.
The handy part about a job of this scale is the farther along I get the more room I have to work with. I then turned my attention to the lines coming off the air conditioning pump.
If there was still fluid in the lines I would have had to stop here until I could get a buddy who does heating/cooling systems over to evacuate the lines.
I popped the filler cap and gave the nozzle a quick tap taking care to stand well away from it, but it didn't even hiss. These lines have been empty for some time.
The one connection used a 22mil wrench, and I didn't have anything bigger than a 24mil for the other one, but a 1 1/16" fit on perfectly. The lines came apart easily. At this point I'm patting myself on the bat for dousing so many connections with penetrating fluid every time I could this past week.
I'm not sure If I'll bother trying to salvage the air con, but I plugged the holes with rags and taped them off just in case.
I need to take this line off, too. It connects to the intake side of the engine. I originally mistook this for a vacuum line, but I'm pretty sure now its the return line for the gas tank.
This is the best way I could find to remind myself later where it connects.
I did the same for the power steering line from the reservoir to the pump.
Another line to disconnect. This one runs from the distributor over to near the coil.
And disconnected.
There's another powersteering line from the gearbox to the pump, but I'll see if I can leave this one connected during the body lift.
I then disconnected the cable from the coil.
This one's harder to see, but I'm pointing to the vacuum line that goes across the the brakes. I then moved across to the hoses for the rear heater.
I'm not sure if I'll be salvaging the rear heater or not, I'd like to, but I kinda liked the look of the truck after I'd taken out the console and the plastic shifter surround.
I'm thinking If I can get the whole floor done in rhino liner I might fab up a new cover plate out of stainless, and leave the rubber shifter boot's exposed. If I can reroute the wiring easily enough, I'll salvage the rear heater, otherwise I might see about making a custom console that incorporates the switches, and also some cupholders. Seriously why doesn't this truck come with cupholders. Ok back to the rear heater lines.
Another crap photo, but here's one of the rear heater lines disconnected. I really like the design of the hose clamps toyota uses for these. Solid spring with a bolt, so it works despite temperature changes unlike gear clamps, and also lasts a really long time.
This pics a bit blurry, I had to keep cleaning the camera lens on my phone because I kept using it with my greasy hands. Guess I should have cleaned it again before this pic, but you can still see whats goin on. The two connections I separated means I leave most of the lines on the body without having to take off brackets later. I then hopped over to work on some brake lines.
Here's the line for the front driver side. I didn't have a metric line wrench of the appropriate size, so I just tried a regular box wrench figuring I could just replace the line after I butchered it.
And because I was expecting the opposite, It came off without even rounding the corners.
The passenger side still has the cover on it. I wrecked one plastic plug before I remembered I could get to them from under the hood.
This side looked about the same as the other, clean looking line into a rusty looking head. The first one came out fine, I thought the second was coming clean, but I had twisted the line to shreds. It'll be replaced later.
At this point I was out of time, but I felt pretty good about my progress. I'm hoping I'll have the body off next week. I'm not sure what's still connected anymore, and I'm sure I'll miss something for the lift, but such is life.
Lookin pretty roomy around the engine under the hood now.
Hoping I'll get some comments soon, kinda worried noone's interested. Either way I'll update next week, I'm hoping to use this thread as a guide when I start forgetting the steps I've taken, lol.
Last edited by Dutchbelly; 05-04-2011 at 09:01 PM.
05-01-2011, 04:44 PM
#5
Registered User
Thread Starter
Join Date: Apr 2011
Location: Southern Ontario
Posts: 428
Likes: 0
Received 0 Likes
on
0 Posts
Good to know someone's reading. It's half for you guys, and also half because this means I don't have to take notes I'll just lose later on.
05-01-2011, 05:54 PM
#6
Registered User
Thread Starter
Join Date: Apr 2011
Location: Southern Ontario
Posts: 428
Likes: 0
Received 0 Likes
on
0 Posts
Plans
So I already mentioned a few plans. I want to get the body off, and paint it. Or get it painted. Not really sure which yet. I'd like to do it myself for the experience, but I'd like someone else to do it so it doesn't get screwed up. So there we are.
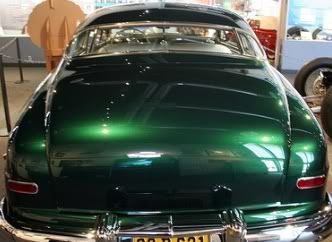
If money was no object I'd go with a colour like this one:
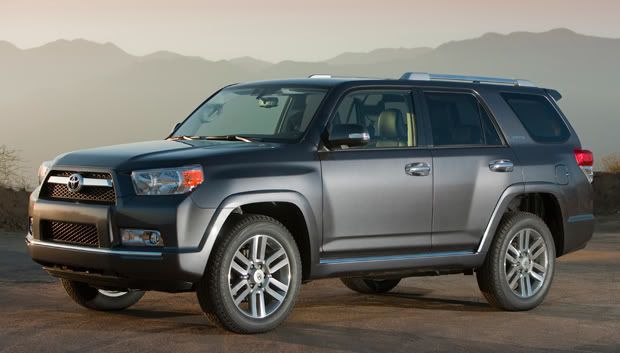
Odds are though I'll end up painting it something close to the grey on the new 4runners like this:
As far as bumpers I've always liked the ones on my daily driver:

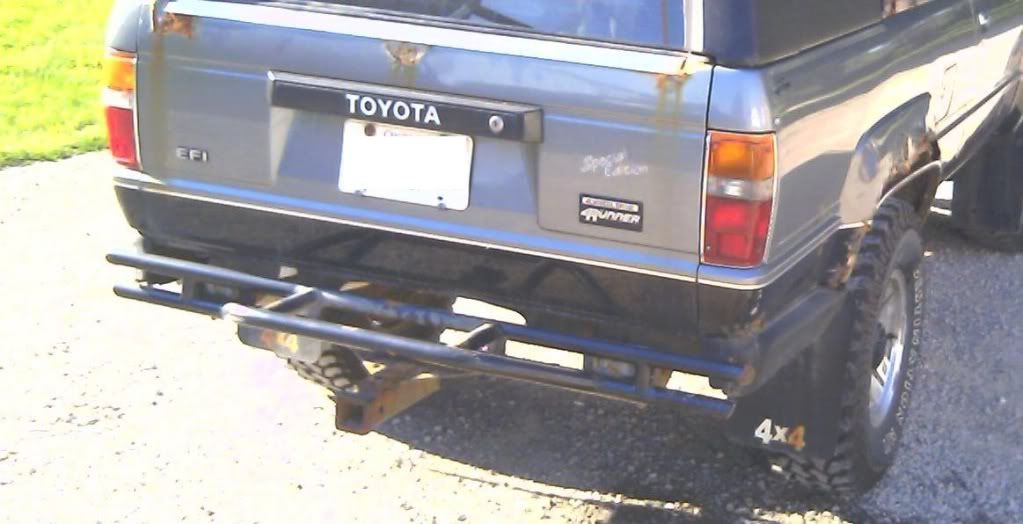
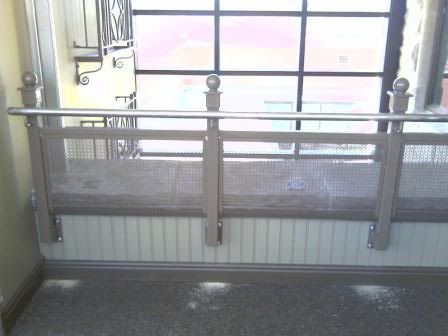
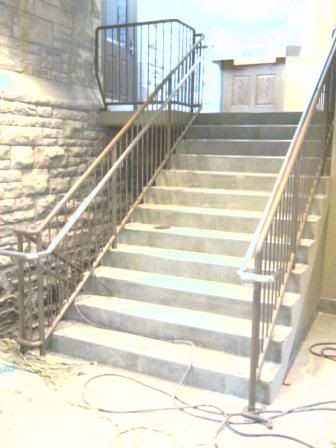
This rear bumper has a plate that goes above the reciever, so there's a step there, but the rivets were rotting out so the step came off. I think I'll make similar ones out of stainless. I'm sick of having things that rust, and I've always liked working with stainless. Here are a couple of handrails I made that I'm proud of:
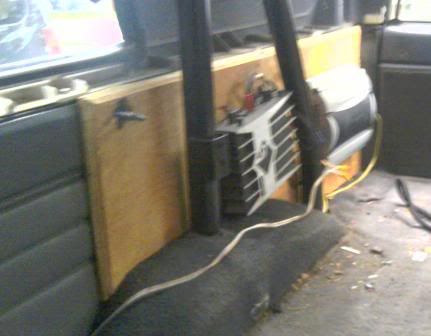
Also I've been thinking about the interior. I've always kinda hated the cheap plasticy interior panels so I might replace them over time. The first ones to go will be the ones in the very back. You can see in this pic I swapped one out for crap plywood on my daily driver:
I think I'll do the same thing with painted plate steel maybe 1/16 plate or something similar. I'm not really sure where I'll be mounting speakers and amps yet either, that'll be the project after I get this truck on the road.
I might steal the door panels here:
They came with the '89 I'm driving, and I've always really liked them. I'll probably go with component speakers and mount the tweeters inside the factory speaker holes so they can't get bumped, and I won't have to mount them on the dash. And then I'll have to buy seat covers, because I tend to be filthy after a day's work. Too many ideas, too little time.
If anyone has experience in such things, are there brands for body mounts I should avoid/brands you'd recommend? I'm still not sure If I'll be lifting the thing 3 inches, or only 2. I'd like to lift the drivetrain up as high as possible, but a 3 inch body lift might be more than I need to run nerf bars straight out the sides from the frame. I'd like the bottom of the nerf bars to be flush with the bottom of the frame, just for the visual. I'd like to start ordering parts now so I don't have a huge bill all at once.
If money was no object I'd go with a colour like this one:
Odds are though I'll end up painting it something close to the grey on the new 4runners like this:
As far as bumpers I've always liked the ones on my daily driver:
This rear bumper has a plate that goes above the reciever, so there's a step there, but the rivets were rotting out so the step came off. I think I'll make similar ones out of stainless. I'm sick of having things that rust, and I've always liked working with stainless. Here are a couple of handrails I made that I'm proud of:
Also I've been thinking about the interior. I've always kinda hated the cheap plasticy interior panels so I might replace them over time. The first ones to go will be the ones in the very back. You can see in this pic I swapped one out for crap plywood on my daily driver:
I think I'll do the same thing with painted plate steel maybe 1/16 plate or something similar. I'm not really sure where I'll be mounting speakers and amps yet either, that'll be the project after I get this truck on the road.
I might steal the door panels here:
They came with the '89 I'm driving, and I've always really liked them. I'll probably go with component speakers and mount the tweeters inside the factory speaker holes so they can't get bumped, and I won't have to mount them on the dash. And then I'll have to buy seat covers, because I tend to be filthy after a day's work. Too many ideas, too little time.
If anyone has experience in such things, are there brands for body mounts I should avoid/brands you'd recommend? I'm still not sure If I'll be lifting the thing 3 inches, or only 2. I'd like to lift the drivetrain up as high as possible, but a 3 inch body lift might be more than I need to run nerf bars straight out the sides from the frame. I'd like the bottom of the nerf bars to be flush with the bottom of the frame, just for the visual. I'd like to start ordering parts now so I don't have a huge bill all at once.
05-02-2011, 11:51 AM
#7
Super Moderator
Staff
iTrader: (1)
Join Date: Aug 2008
Location: Anderson Missouri
Posts: 11,788
Likes: 0
Received 21 Likes
on
19 Posts
Hello Dutchbelly.. Just found your thread and subscribed. I follow a few 1st gen runner and found yours.
I have done a frame off on a pickup and really enjoyed it. Looking forward to doing another sometime, so finding your thread perked my intrest. I would like to do my 4Runner, but want to be able to use it.
I dont know if you have done one, but I took notes but not any pictures, it was before I found Yotatech. I will leave a link below. Good job on using your thread for notes. I had my pics on a phone and than ran over it.
#88 is where the steps I used and I tried to make note of 4Runners. Anything you find different, I would like to know so I can update my notes. Not a big difference between a truck and 4Runner. https://www.yotatech.com/forums/f199...99/index4.html
Looking forward to your build and great job so far.
Trending Topics
 05-02-2011, 12:08 PM
#9
Registered User
Thread Starter
Join Date: Apr 2011
Location: Southern Ontario
Posts: 428
Likes: 0
Received 0 Likes
on
0 Posts
@Terry
Hey Terry thanks for your link, I haven't done this before, so I'll probably end up using your thread for a checklist before the Lift. There are a ton of things I've always wanted to do to one of these trucks but never did because like you, I couldn't afford to jeopardize my daily driver. Now that I'm driving my '89, I can afford to be fearless in working on my '88. I'll be going back at it tonight after work for a couple hours. Thanks again for your post, I should be able to update this thread by tomorrow night, if not before.
05-02-2011, 01:01 PM
#10
Registered User
Thread Starter
Join Date: Apr 2011
Location: Southern Ontario
Posts: 428
Likes: 0
Received 0 Likes
on
0 Posts
@James Woods
I hear you James. That's exactly what I'm hoping to avoid. But instead of fixing my one truck, I ended up buying another one. If this keeps up I'll have to buy a house with a really big parking lot. I'm off to continue working on the '88 now. Cheers!
05-03-2011, 02:09 PM
#11
Registered User
Thread Starter
Join Date: Apr 2011
Location: Southern Ontario
Posts: 428
Likes: 0
Received 0 Likes
on
0 Posts
Slow progress
I didn't get as much done as I'd hoped last night, but I thought I'd update the thread anyway so I don't have 5 days worth of work to write down at the end of the week.
I always spend the first 5mins of the day staring at the thing thinking "now what"
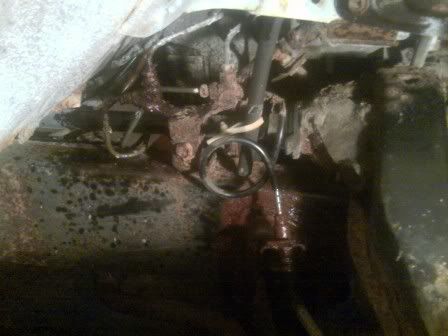
There's a clip I've disconnected here, and also a box holding what I believe is the ground for the alternator.
This nut is rusted solid, so I just cut the wire.
Which frees up the wires that I can drape across the engine with the rest of them.
This is the mounting bracket for the throttle cable where it passes through the firewall. I gave them a squirt of penetrating oil and went back inside the truck
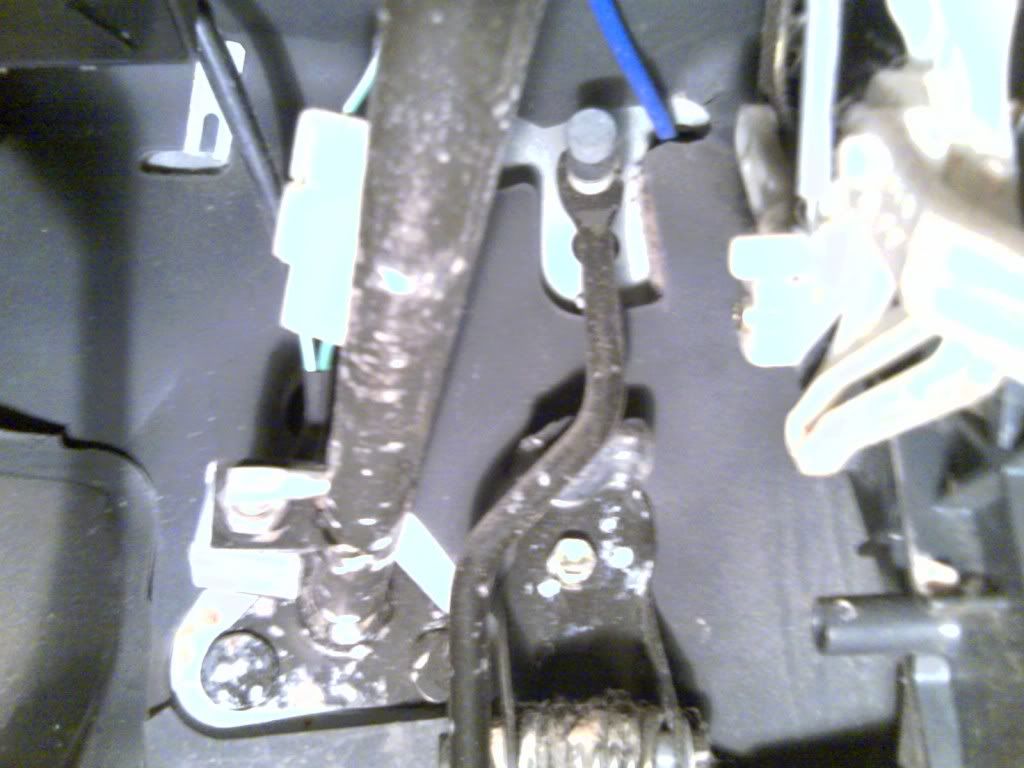
Here it is on the inside. There's a slot on the right side of where the cable passes through the pedal, I had to pinch the plastic holder from the far side of the bracket, pull the cable through the hole towards me, and then slide the thin cable to the right, and out of the slot.
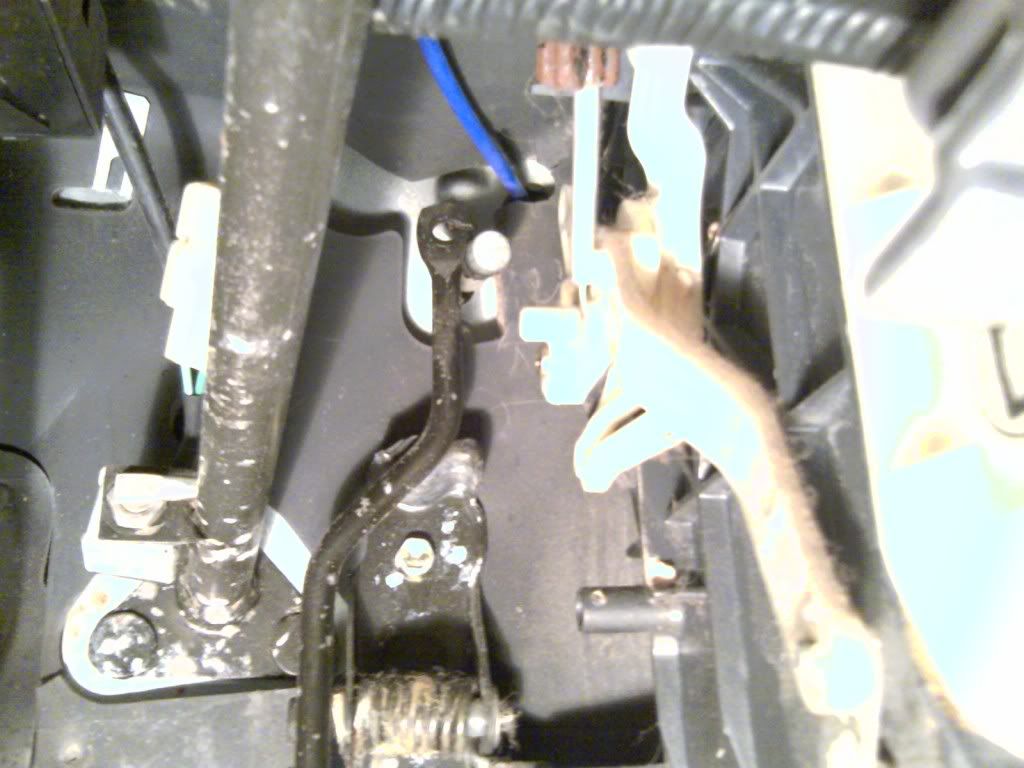
Then back outside the firewall.
Two bolts undone, and it pulls through. Another cable to lay across the mess that the engine has become.
There's a wire clip here underneath where the driver's seat would rest.
My thumb is pointing at where it passes through the floor, my pinkie is trying to point at the o2 sensor it connects to.
And undone. It always amazes me that toyota feels the need to use so many different styles of wiring clips. Almost every one comes apart in a different way.
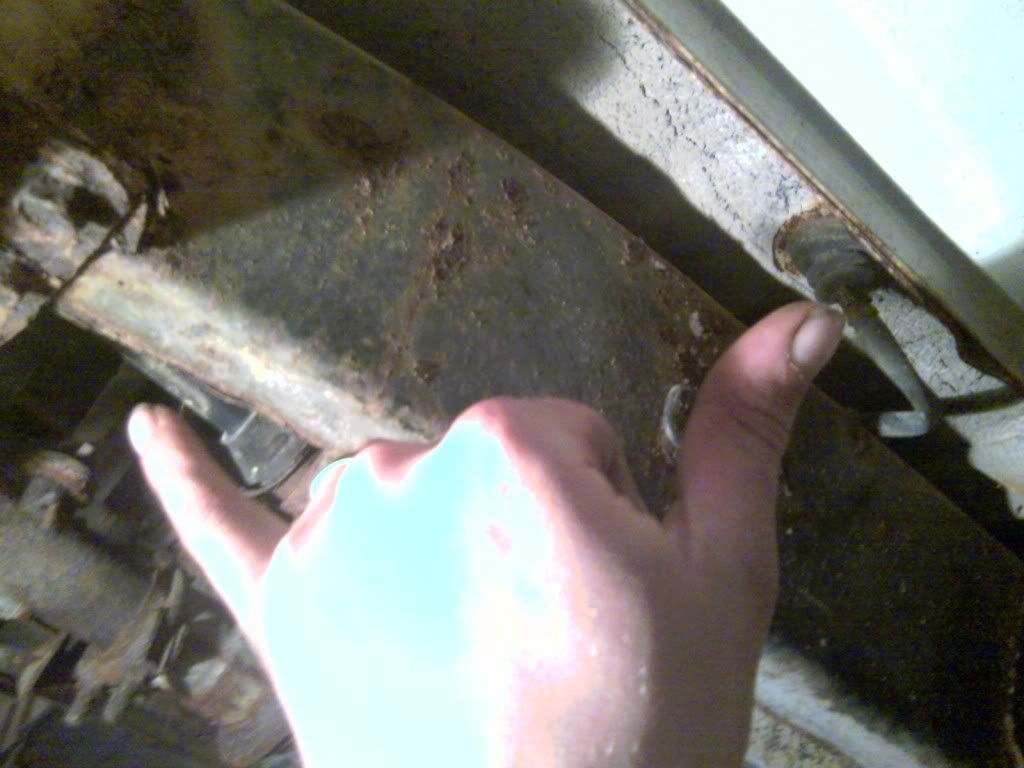
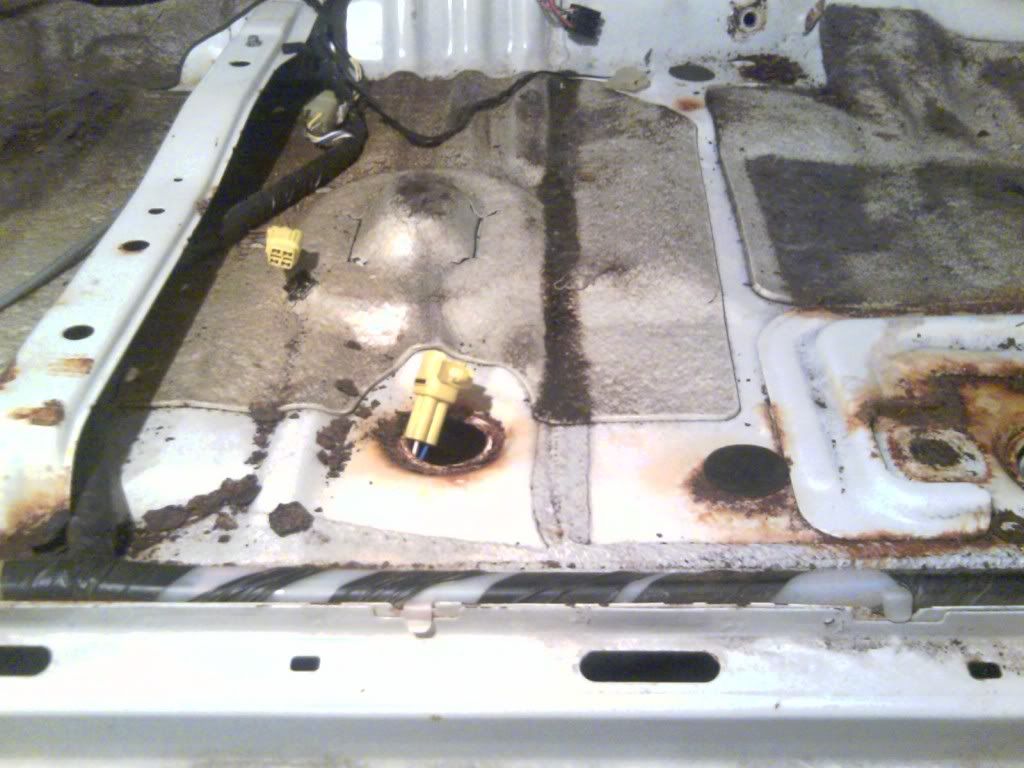
There's a clip on the passenger side too, that looks the same, but it's also a different kind of clip. This one runs along the frame back and above the gas tank.
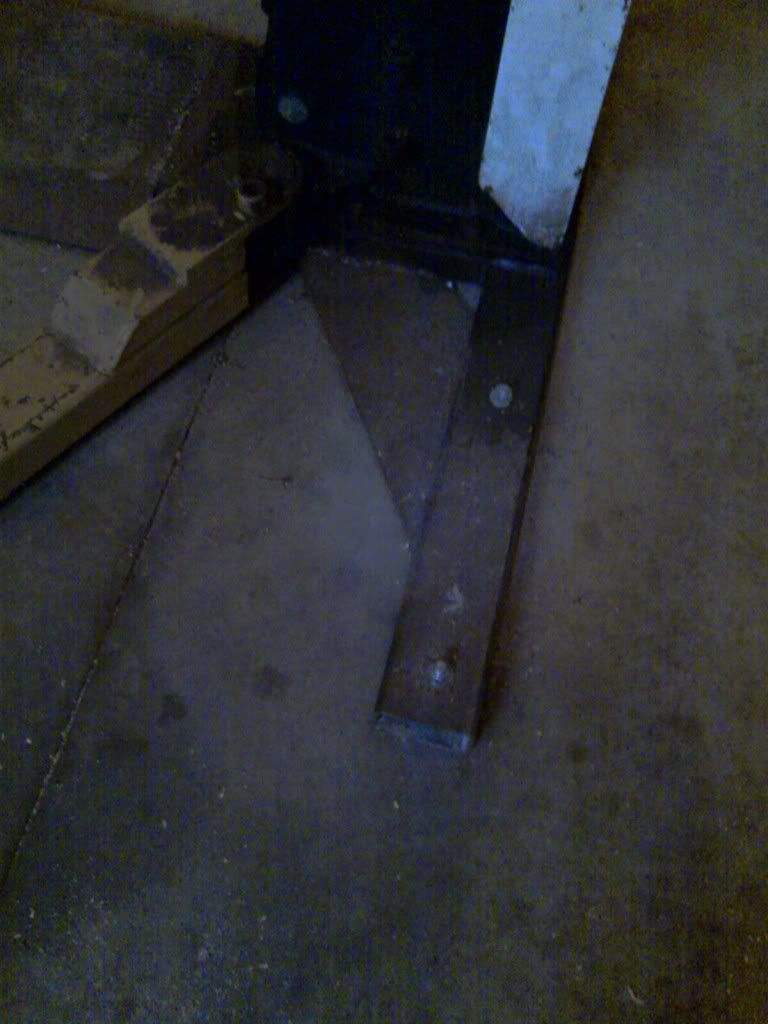
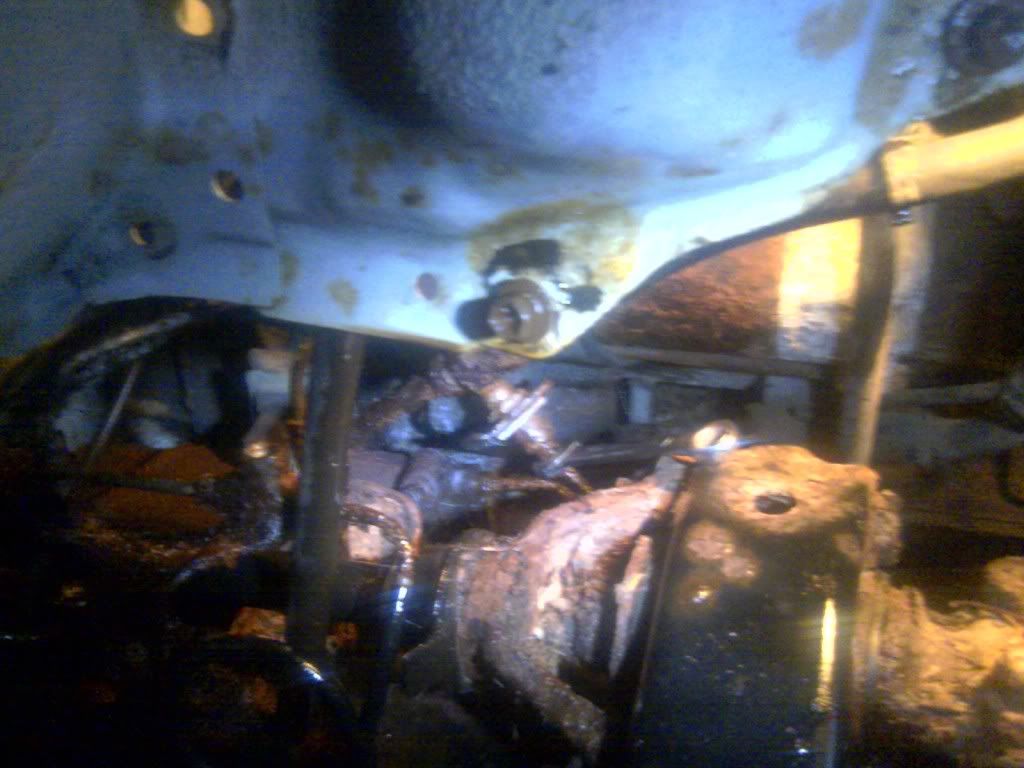
The rubber grommets pull pretty easily through the bottom of the floor. Seeing this side makes me wish the driver's side was equally clean. There's almost no rust under this grommet. At this point I'm running out of obvious things that need to come apart to lift the body. I know I still have fuel lines connected, but they're so rusted from this truck sitting for years, I'll probably just snip them when I start lifting the body, and replace them later. I still have to figure out where would be easiest to disconnect the parking brake cable too, but I'm starting to get sick of crawling around on my back. There's noone around to help, the truck doesn't run, and I have to get it from here:
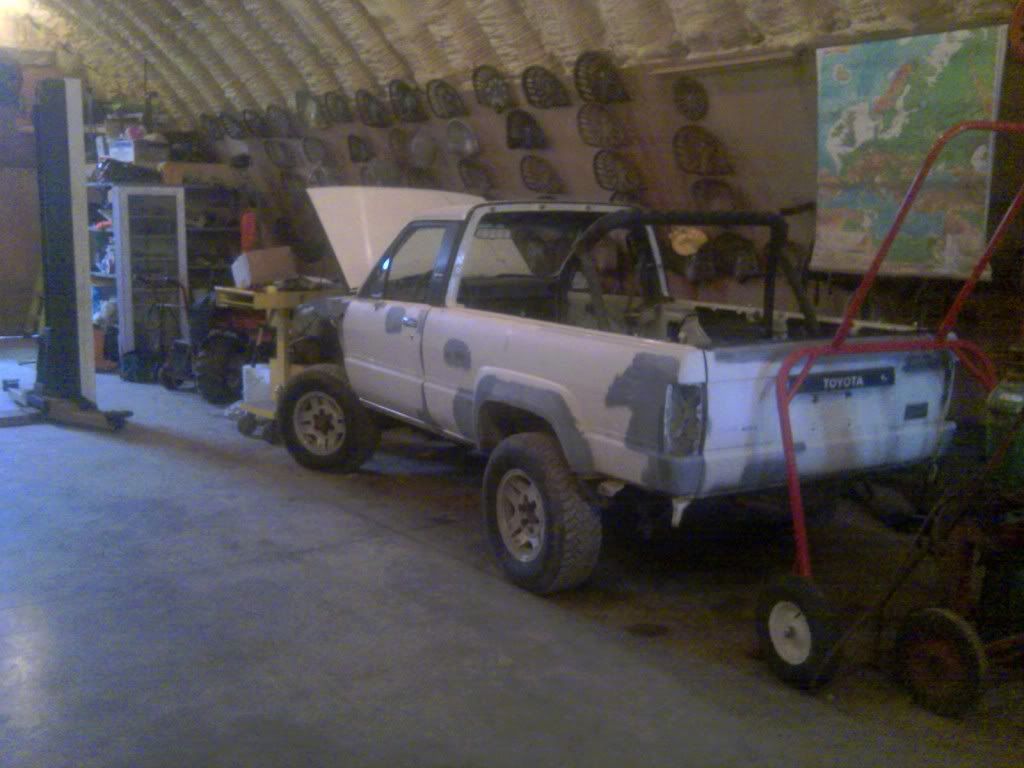
To here:
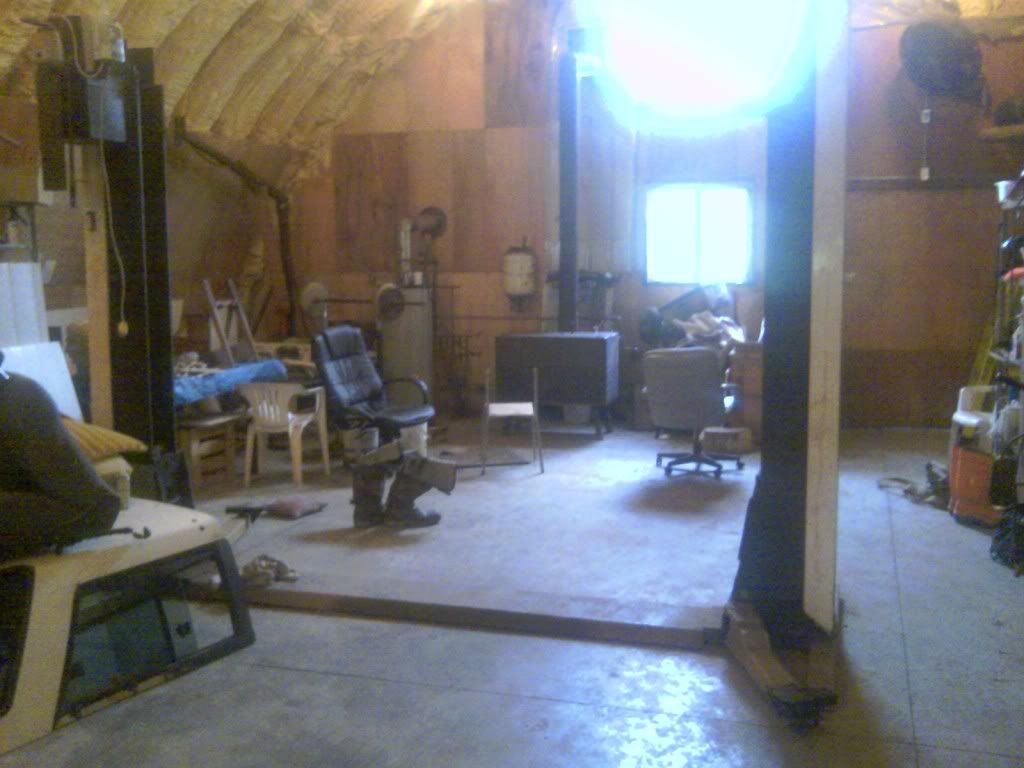
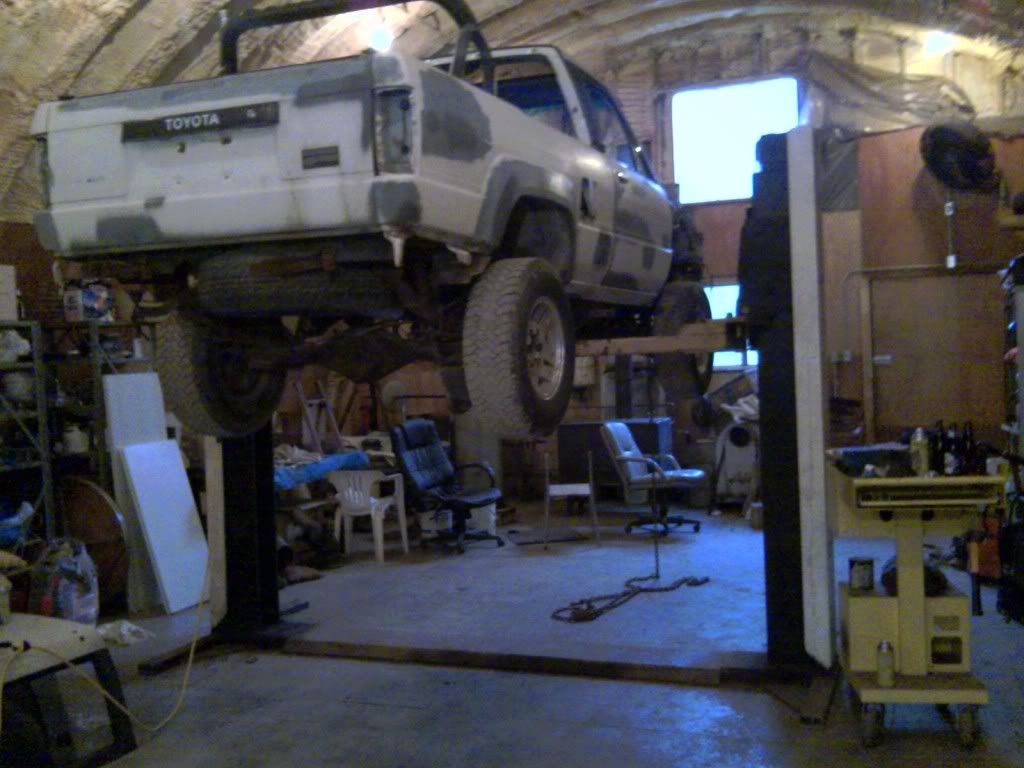
This isn't my shop, by the way. It's my Father-in-law's. I helped build it while I was dating my now wife, so now he lets me use it as long as I don't take up the whole space. That would be why most of the work has been done with me parallel parked against one wall of the shop. That hoist there was actually a salvage. The mounting legs on both masts were rotted out, and a local shop put it out for auction. My father-in-law threw in a ridiculously low bid, and won it because apparently noone else was willing to repair the mounting legs.
I don't have a before pic, but I cut the old legs right out, replaced them with this hollow structural square tube, and welded in plates on the corners as gussets to help distribute the load across the floor. We then lagged them down to the floor and got her running. And now have to find a way to get my truck on it. I muscled it around for a while, pushing it back, turning the wheels, forward, repeat until I sorta had it aimed towards the hoist. It way way more difficult than it should have been to move, I kept checking to see if the park brake was on, or if it had somehow dropped into gear, but that wasn't the case. I then found a length of chain, attached it to the front tow hook, and set in to pull it over the hoist ramp. I simply don't have the muscle for it. I ended up having to take the floor jack, lifting the front end of the vehicle, shimming up the front tires to be level with the ramp, and then pulling it over the level surface.
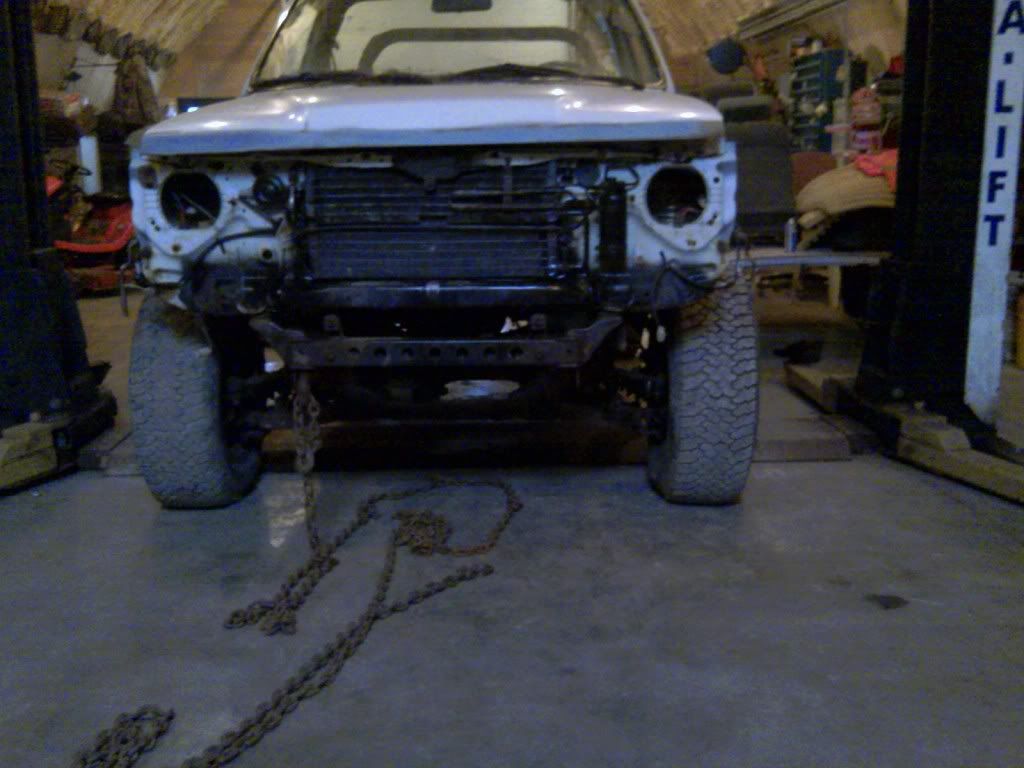
Which got me here. I'm not kneeling for this pic, I'm sitting on my butt. And I was tired enough to stay that way for a while. I had wasted a crap load of time moving the truck around so all I did after that was lift it up and oil all the bolts I could see on the underside of the truck for later.
I found out the reason the truck was so hard to move. There were two brakes that were rusted pretty tight. So I added that to my mental list of thing's I'd eventually have to buy and went home for the night. I won't have time to continue this evening because the wife needed an oil change on her truck, but I should be back at it tomorrow again.
I always spend the first 5mins of the day staring at the thing thinking "now what"
There's a clip I've disconnected here, and also a box holding what I believe is the ground for the alternator.
This nut is rusted solid, so I just cut the wire.
Which frees up the wires that I can drape across the engine with the rest of them.
This is the mounting bracket for the throttle cable where it passes through the firewall. I gave them a squirt of penetrating oil and went back inside the truck
Here it is on the inside. There's a slot on the right side of where the cable passes through the pedal, I had to pinch the plastic holder from the far side of the bracket, pull the cable through the hole towards me, and then slide the thin cable to the right, and out of the slot.
Then back outside the firewall.
Two bolts undone, and it pulls through. Another cable to lay across the mess that the engine has become.
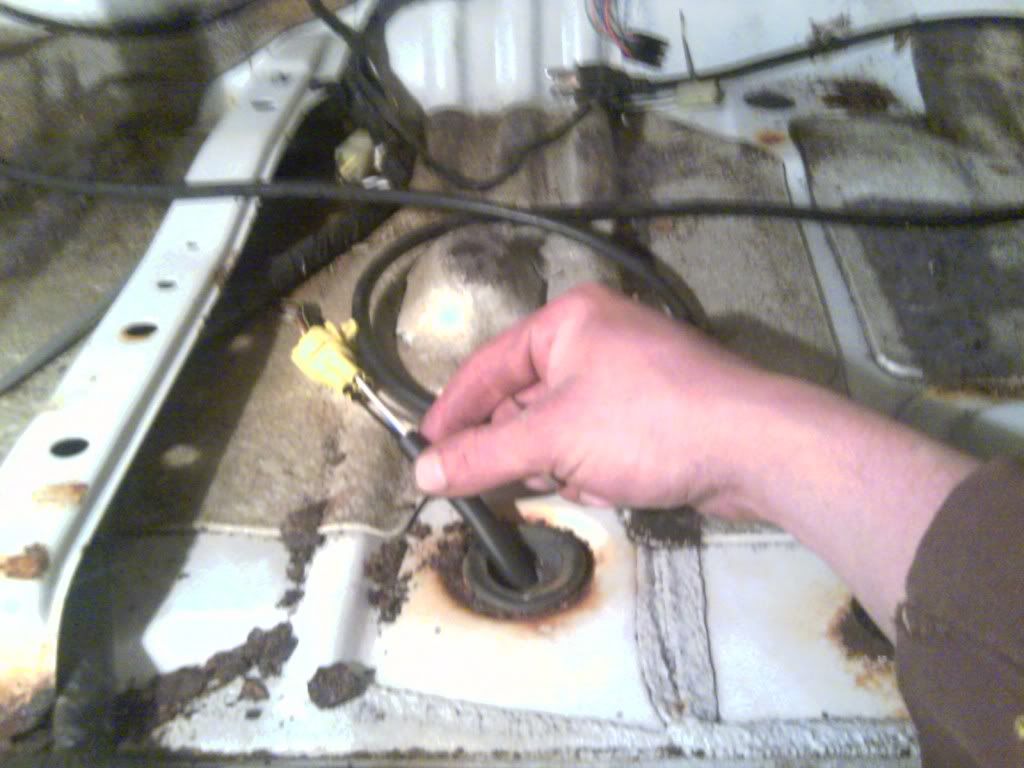
There's a wire clip here underneath where the driver's seat would rest.
My thumb is pointing at where it passes through the floor, my pinkie is trying to point at the o2 sensor it connects to.
And undone. It always amazes me that toyota feels the need to use so many different styles of wiring clips. Almost every one comes apart in a different way.
There's a clip on the passenger side too, that looks the same, but it's also a different kind of clip. This one runs along the frame back and above the gas tank.
The rubber grommets pull pretty easily through the bottom of the floor. Seeing this side makes me wish the driver's side was equally clean. There's almost no rust under this grommet. At this point I'm running out of obvious things that need to come apart to lift the body. I know I still have fuel lines connected, but they're so rusted from this truck sitting for years, I'll probably just snip them when I start lifting the body, and replace them later. I still have to figure out where would be easiest to disconnect the parking brake cable too, but I'm starting to get sick of crawling around on my back. There's noone around to help, the truck doesn't run, and I have to get it from here:
To here:
This isn't my shop, by the way. It's my Father-in-law's. I helped build it while I was dating my now wife, so now he lets me use it as long as I don't take up the whole space. That would be why most of the work has been done with me parallel parked against one wall of the shop. That hoist there was actually a salvage. The mounting legs on both masts were rotted out, and a local shop put it out for auction. My father-in-law threw in a ridiculously low bid, and won it because apparently noone else was willing to repair the mounting legs.
I don't have a before pic, but I cut the old legs right out, replaced them with this hollow structural square tube, and welded in plates on the corners as gussets to help distribute the load across the floor. We then lagged them down to the floor and got her running. And now have to find a way to get my truck on it. I muscled it around for a while, pushing it back, turning the wheels, forward, repeat until I sorta had it aimed towards the hoist. It way way more difficult than it should have been to move, I kept checking to see if the park brake was on, or if it had somehow dropped into gear, but that wasn't the case. I then found a length of chain, attached it to the front tow hook, and set in to pull it over the hoist ramp. I simply don't have the muscle for it. I ended up having to take the floor jack, lifting the front end of the vehicle, shimming up the front tires to be level with the ramp, and then pulling it over the level surface.
Which got me here. I'm not kneeling for this pic, I'm sitting on my butt. And I was tired enough to stay that way for a while. I had wasted a crap load of time moving the truck around so all I did after that was lift it up and oil all the bolts I could see on the underside of the truck for later.
I found out the reason the truck was so hard to move. There were two brakes that were rusted pretty tight. So I added that to my mental list of thing's I'd eventually have to buy and went home for the night. I won't have time to continue this evening because the wife needed an oil change on her truck, but I should be back at it tomorrow again.
05-03-2011, 07:54 PM
#12
Super Moderator
Staff
iTrader: (1)
Join Date: Aug 2008
Location: Anderson Missouri
Posts: 11,788
Likes: 0
Received 21 Likes
on
19 Posts
You are making progress. You having a lift will make a great difference and easier for removing the body. Im guessing you might be a little nervous taking the body off and wondering if you will ever get it back together.
By the time you get it off, you will feel really good about putting it back together. You will know what goes where. You having a lift will be a little different then the way I did it. Sure wish I had a lift. Any qustions that come up, just PM me. I will get a notice a little quicker.
The thumb and pinkie trick is a good way to remember your connections. I will have to remember that one.
05-03-2011, 08:01 PM
#13
Super Moderator
Staff
iTrader: (1)
Join Date: Aug 2008
Location: Anderson Missouri
Posts: 11,788
Likes: 0
Received 21 Likes
on
19 Posts
On your parking brake cable, you can lift the tab on the cable rod handle, on the inside of the cab, just below the handle on the other side of the plastic cover, and it will let the handle slide far enough to get the wire cable with a metal plug (similar to the thorttle cable) to come out of the handle. This isnt the best wording or nameing of things but best I could come up with.
Another option would be to disconnect it at the lever that comes from the pull handle and connects to the rear brakes. Half way down frame from underneath truck. I will try and get picture later tonite, to give you a better idea.
Another option would be to disconnect it at the lever that comes from the pull handle and connects to the rear brakes. Half way down frame from underneath truck. I will try and get picture later tonite, to give you a better idea.
Last edited by Terrys87; 05-04-2011 at 06:44 AM.
05-03-2011, 08:16 PM
#14
Registered User
Thread Starter
Join Date: Apr 2011
Location: Southern Ontario
Posts: 428
Likes: 0
Received 0 Likes
on
0 Posts
@Terry
Yeah every day is progress, however small. I've been waiting probably 6-8 years to dig into one of these trucks, so every time I get that "fear" you speak of, I remind myself that I have a set of 3 dimensional blueprints parked outside the shop and just keep moving. Thanks for the heads up on the parking brake cable, I'm sure I'll have it off tomorrow night, and I should be in good shape for the self inflicted deadline of next weekend for the body lift.
05-03-2011, 08:19 PM
#15
Registered User
Thread Starter
Join Date: Apr 2011
Location: Southern Ontario
Posts: 428
Likes: 0
Received 0 Likes
on
0 Posts
@Terry
and yeah, I was pretty sure I was going to have to disconnect it at the lever at the back of the truck, but I really wanted to unhook it at the cab, but wasn't sure how so I'll take a look at it again after reading your post.
05-04-2011, 06:35 AM
#17
Super Moderator
Staff
iTrader: (1)
Join Date: Aug 2008
Location: Anderson Missouri
Posts: 11,788
Likes: 0
Received 21 Likes
on
19 Posts
The best place to disconnect would be at the lever. Then the cable could just stay with the body. There is a clip that holds just forward of the lever on the frame, and a few bendable clips that hold the cable agaist the body. The clip on the frame is quite similar if not the exact same as the one that holds your gas tank door lock.
You could disconnect at the Brake handle, but it would be a little more work, just depends what all you are wanting to get done. I have to bend the Tab up and I think you still have to disconnect at the lever to pull the handle all the way out to twist it so that the plug will come out of the handle.
There is one nut that holds the emergency brake cable underthe hood. It is on a pulley just above or below the speedo cable. If you go this route it is only like 5-10 minute job. This is the cable that is alot lie your throttle cable.
Last edited by Terrys87; 05-04-2011 at 06:42 AM.
05-04-2011, 08:36 AM
#18
Registered User
Thread Starter
Join Date: Apr 2011
Location: Southern Ontario
Posts: 428
Likes: 0
Received 0 Likes
on
0 Posts
@Terry & Twisted
Hey Twisted, welcome aboard. I tend to only focus on the mountain of tasks I still have left to do, so it's good to be reminded of the progress I've already made.
Thanks for the pics and info Terry. I was thinking it would be best to unhook the cable inside the cab, but now I'm leaning towards just unhooking it at the back lever and leaving it with the body, as you say. I can always take it right off on a later date if i decide it's necessary. I have to keep reminding myself that I have to focus only on the things that are stopping me from lifting the body off for now, and not get carried away in the fun of taking everything in sight apart. Last night was a write off for me because of the wife's oil change, so I'm looking forward to getting back to work this evening for a couple hrs.
Thanks for the pics and info Terry. I was thinking it would be best to unhook the cable inside the cab, but now I'm leaning towards just unhooking it at the back lever and leaving it with the body, as you say. I can always take it right off on a later date if i decide it's necessary. I have to keep reminding myself that I have to focus only on the things that are stopping me from lifting the body off for now, and not get carried away in the fun of taking everything in sight apart. Last night was a write off for me because of the wife's oil change, so I'm looking forward to getting back to work this evening for a couple hrs.
05-04-2011, 08:48 PM
#19
Registered User
Thread Starter
Join Date: Apr 2011
Location: Southern Ontario
Posts: 428
Likes: 0
Received 0 Likes
on
0 Posts
Baby steps
So I lost a bit of time tonight because the father in law had a buddy over so I was distracted having a few frosty "sociables", but I'm still happy with what I did do.
Back to the parking cable
The retaining pin here was rusted pretty tight to the eyelet on the end of the parking cable, and took some time to free up, I was expecting this pin to be the easy part. I was wrong.
This side looked rusted solid, I was expecting it to be the hard part. I was wrong again.
Couple twists with the vice grips and a tug with the pliers and the wedge plate popped out easily, allowing me to pull the parking cable free.
I couldn't get a good pic of this, my camera on my phone refused to focus with the aluminum transfer case reflecting my trouble light, but here's another connection that was necessary.
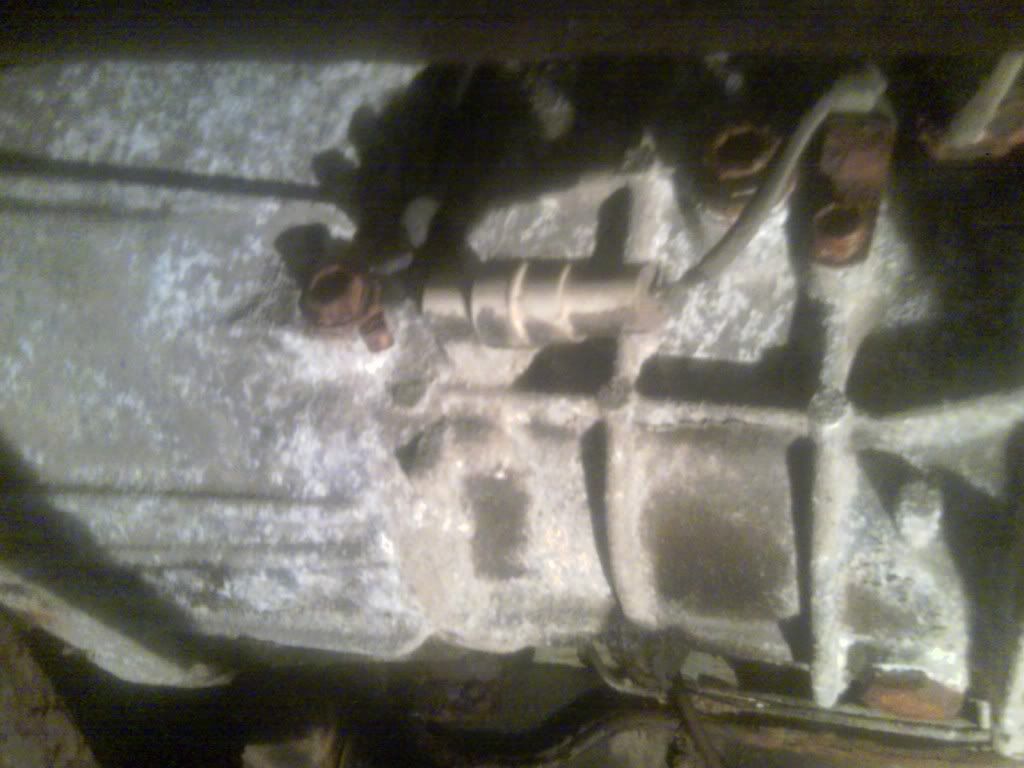
I might have missed this clip on the transmission if I hadn't been looking over Terry's checklist from the link he gave me.
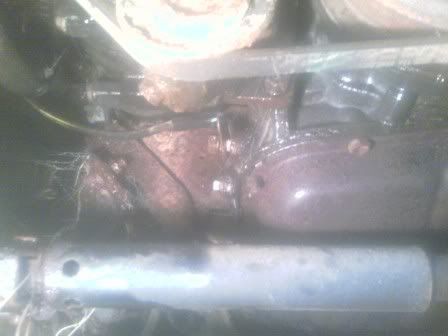
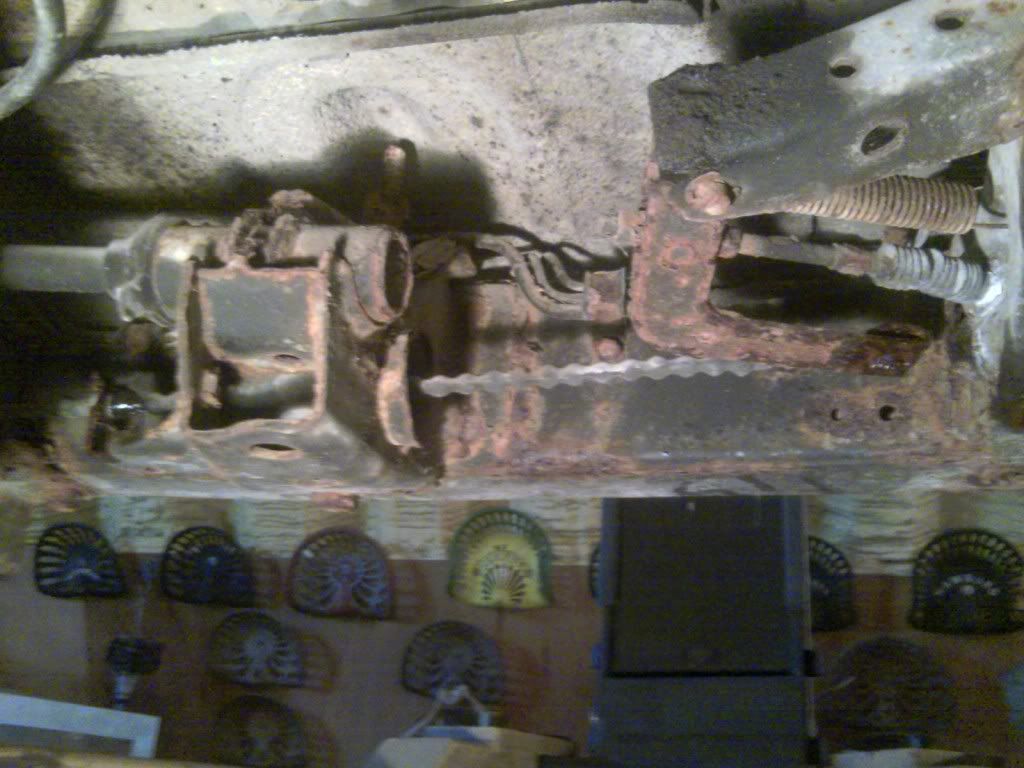
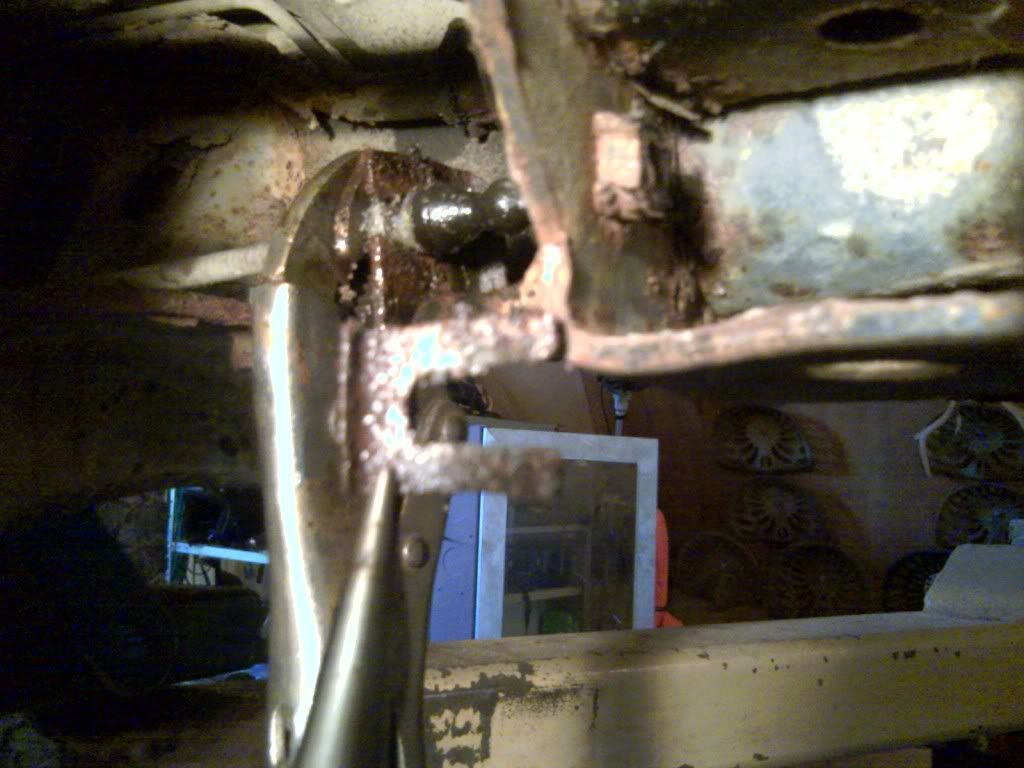
I needed to disconnect the line to the clutch, but I was having difficulty getting to it, so I took this guard off. Things were going too smoothly so I snapped a bolt off to bring balance back to the world.
This is one of the worst pics, but you can see the bracket holding a flex line to where it connects to the short metal line that goes into the clutch. The line was rusted, and I wasn't surprised when I broke it, despite a lot of oiling and wiggling. I was hoping to keep it intact so I could match the shape of the bends later with a new line. No such luck.
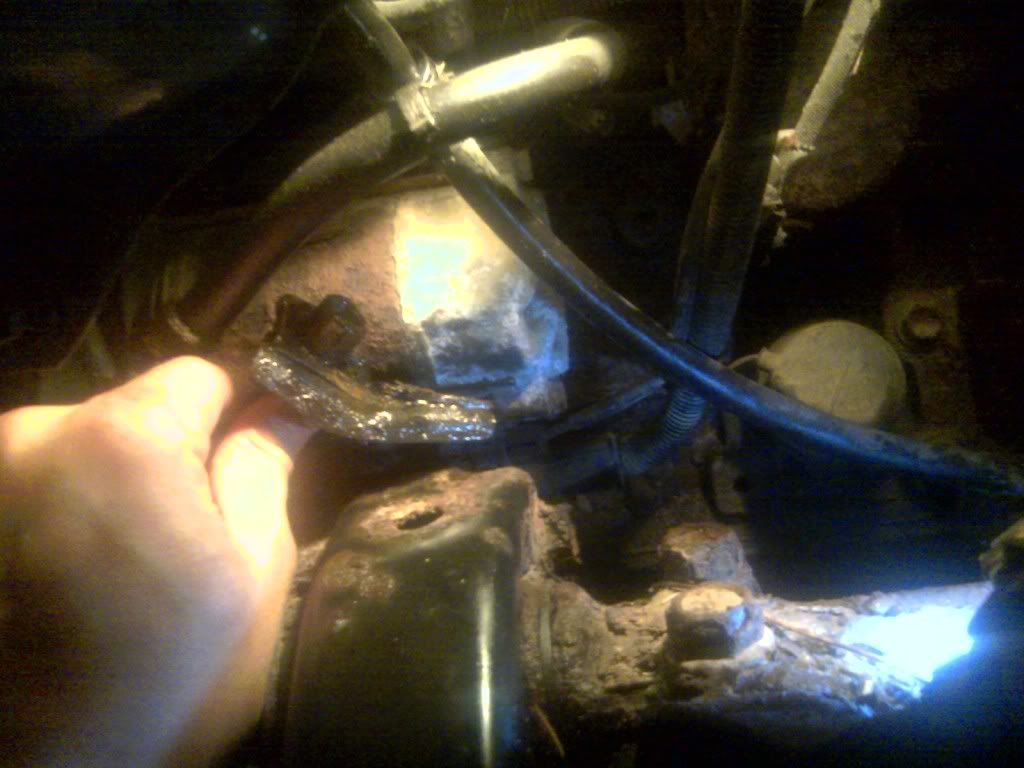
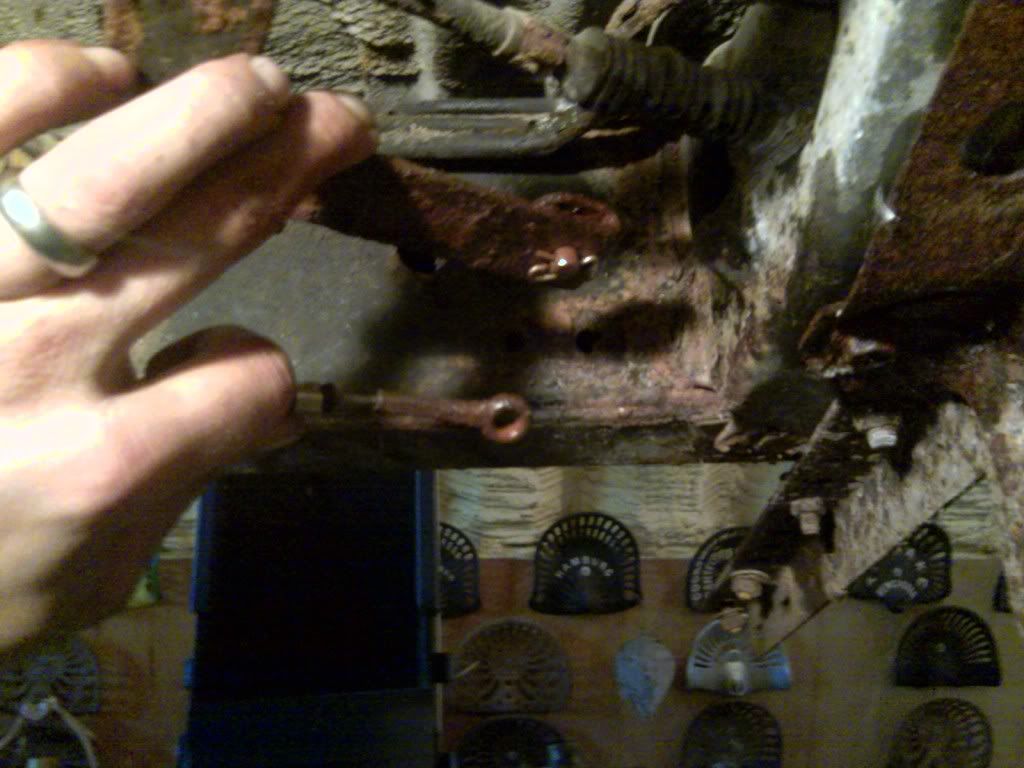
I couldn't get this freed from the bracket with so little room to wiggle, so I disconnected the bracket instead.

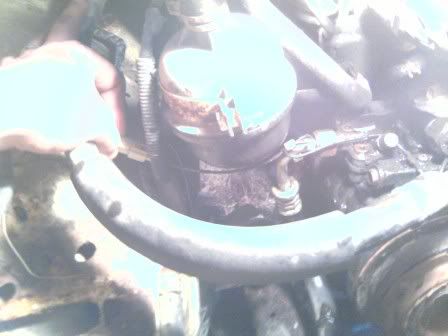
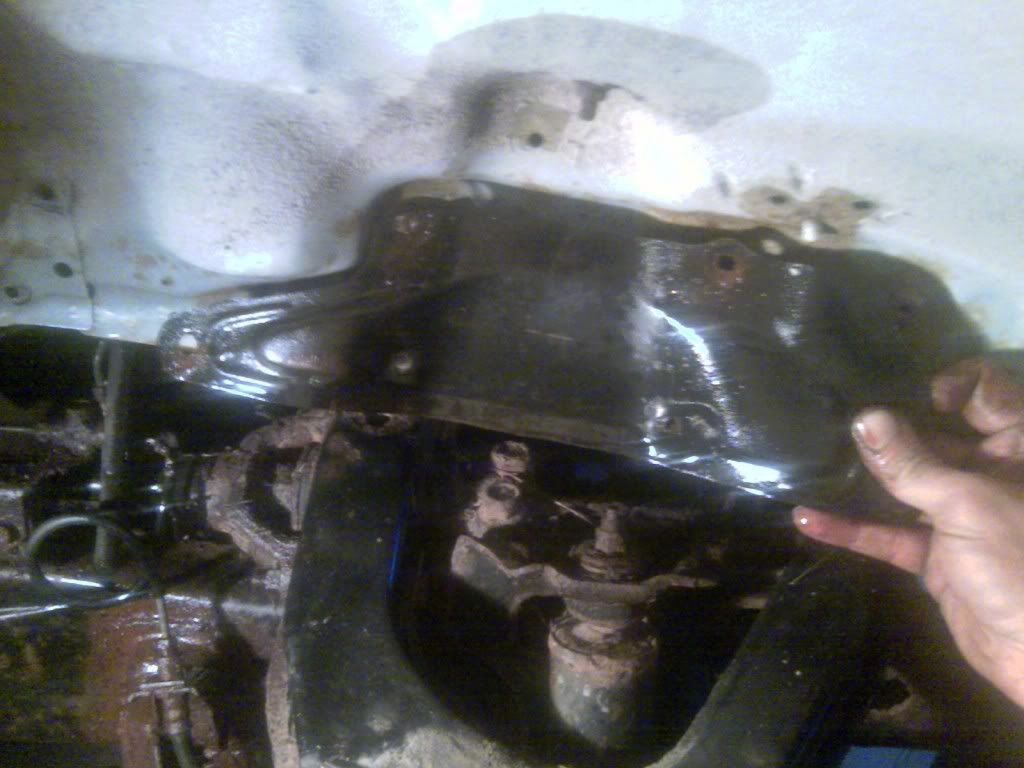
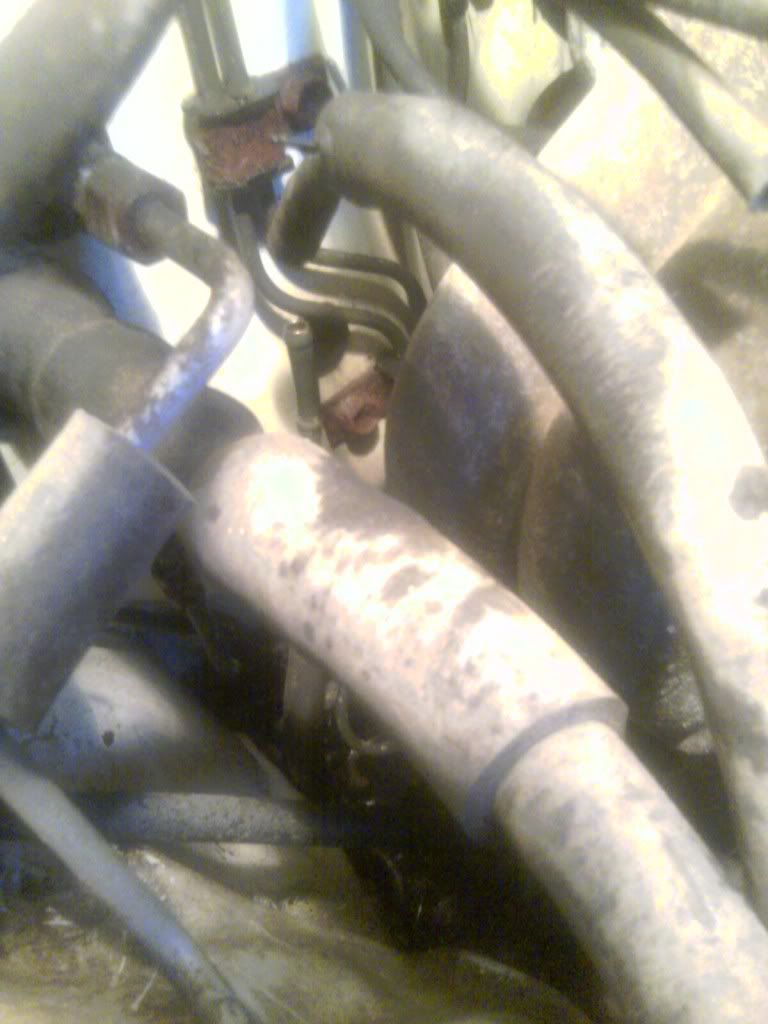
I almost completely missed this fuel line
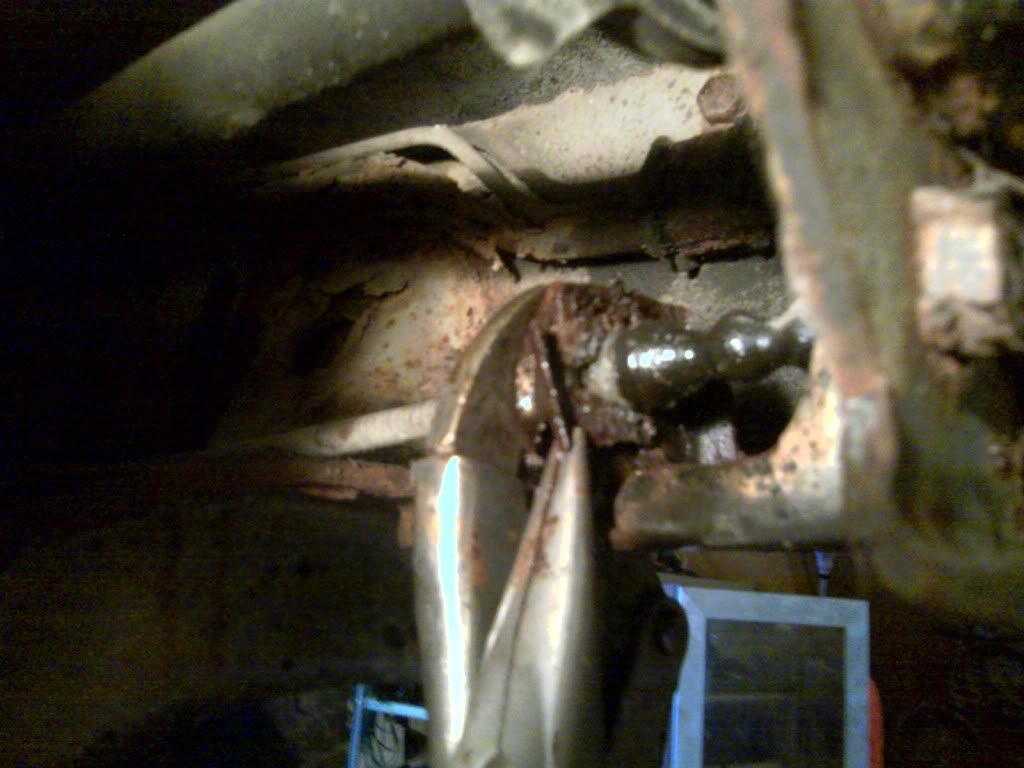
I'm starting to run out of things to disconnect now, and it's a good feeling.
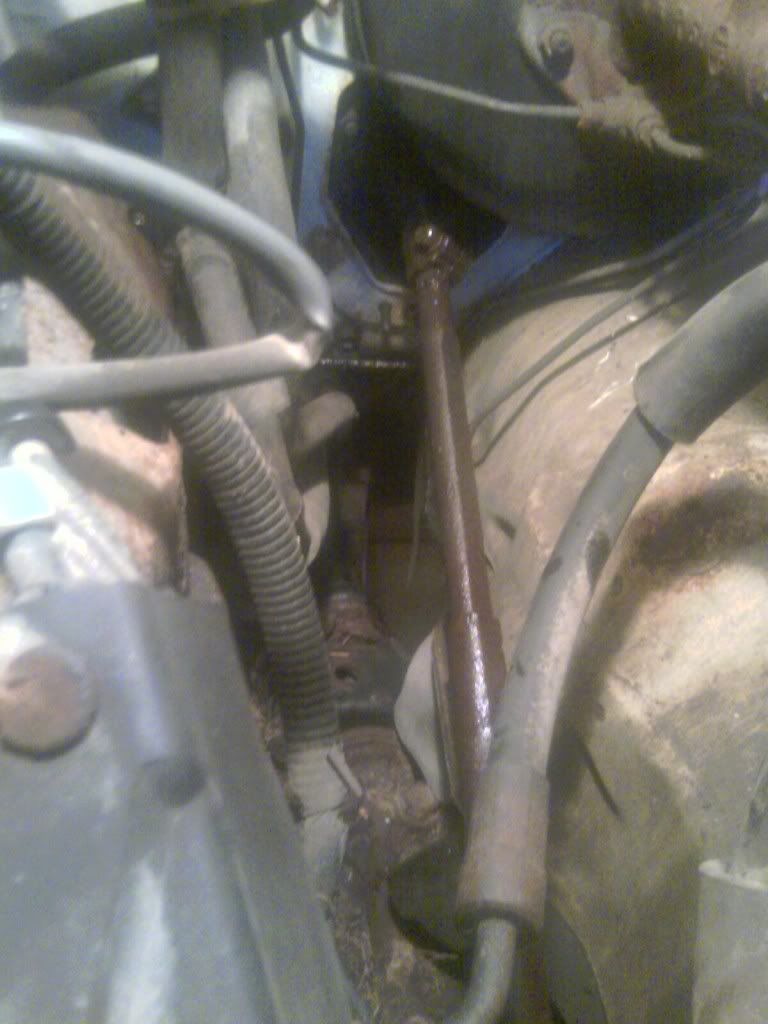
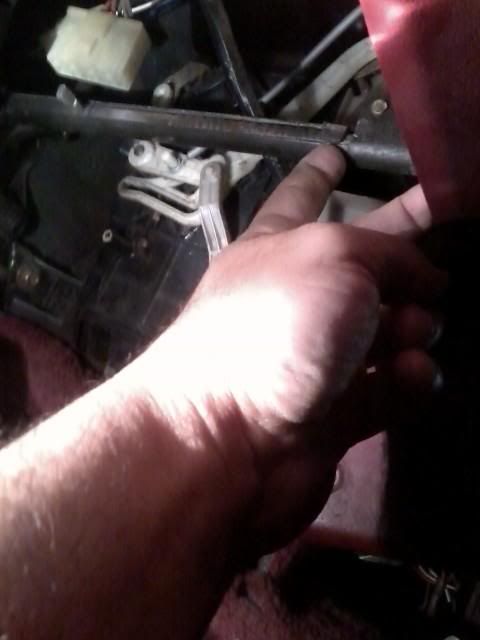
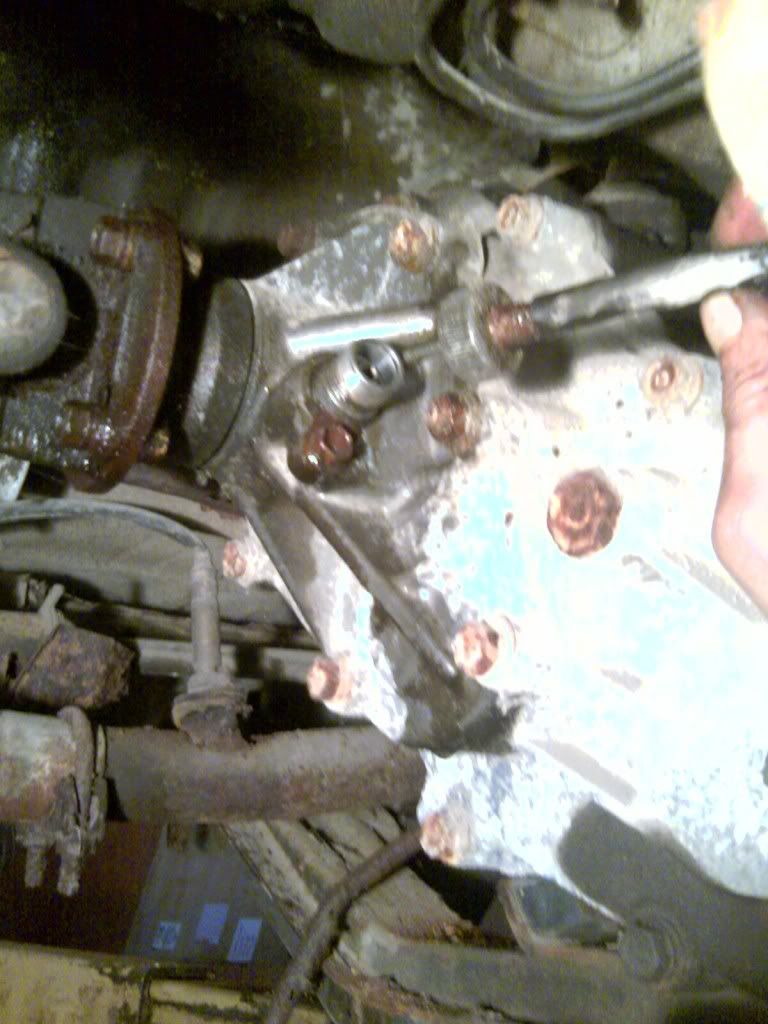
I'm pretty sure the steering is the last thing that needs to come apart before the lift. I'm also pretty sure I'm being naive thinking I haven't missed anything, but such is life. I thought I could pop the bolt near the firewall and pull back and collapse the shaft, but either the shaft wouldn't collapse or the splines are seized near the firewall.
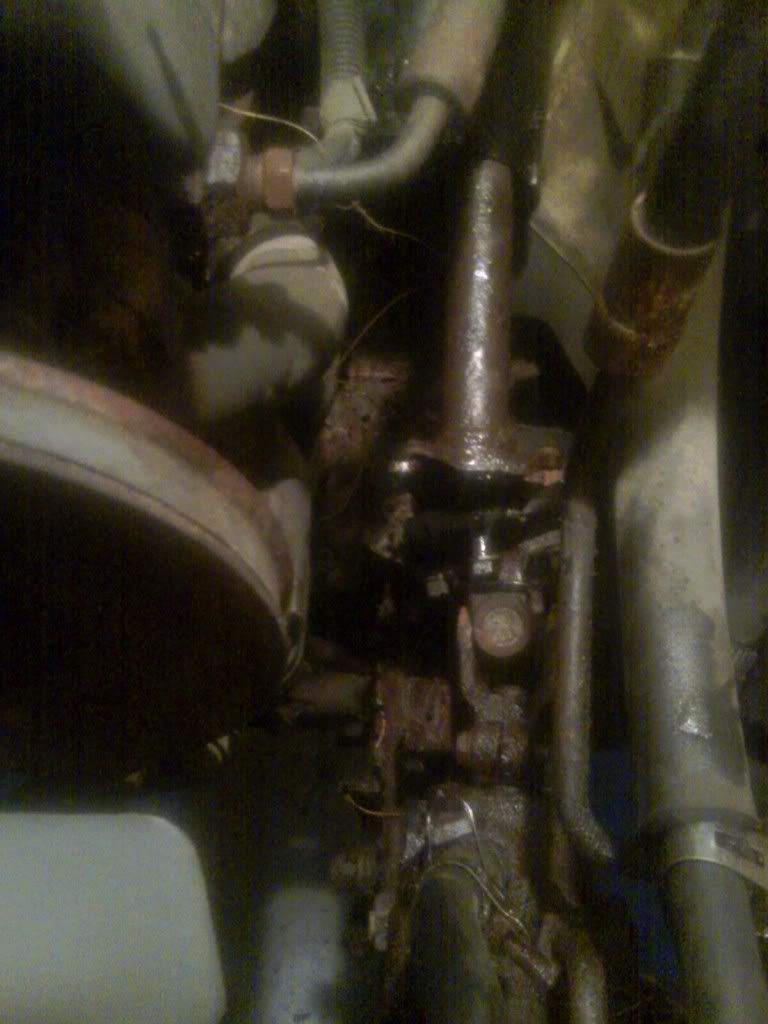
I ended up separating it near the ujoint instead.
I'm pretty sure that's everything that needs to be separated before my lift, so if any of you can think of something I've missed, please post, because I think I might try to lift it tomorrow if nothing comes up. I was going to try to crack the body mounts, but then I decided to wait until tomorrow. I was feeling pretty good with where I was, and finding out the body mount bolts were seized (which they will be) would cause me to end the night on a low note. I oiled them again as I have been every night, and went home happy. Fingers crossed for tomorrow.
Back to the parking cable
The retaining pin here was rusted pretty tight to the eyelet on the end of the parking cable, and took some time to free up, I was expecting this pin to be the easy part. I was wrong.
This side looked rusted solid, I was expecting it to be the hard part. I was wrong again.
Couple twists with the vice grips and a tug with the pliers and the wedge plate popped out easily, allowing me to pull the parking cable free.
I couldn't get a good pic of this, my camera on my phone refused to focus with the aluminum transfer case reflecting my trouble light, but here's another connection that was necessary.
I might have missed this clip on the transmission if I hadn't been looking over Terry's checklist from the link he gave me.
I needed to disconnect the line to the clutch, but I was having difficulty getting to it, so I took this guard off. Things were going too smoothly so I snapped a bolt off to bring balance back to the world.
This is one of the worst pics, but you can see the bracket holding a flex line to where it connects to the short metal line that goes into the clutch. The line was rusted, and I wasn't surprised when I broke it, despite a lot of oiling and wiggling. I was hoping to keep it intact so I could match the shape of the bends later with a new line. No such luck.
I couldn't get this freed from the bracket with so little room to wiggle, so I disconnected the bracket instead.
I almost completely missed this fuel line
I'm starting to run out of things to disconnect now, and it's a good feeling.
I'm pretty sure the steering is the last thing that needs to come apart before the lift. I'm also pretty sure I'm being naive thinking I haven't missed anything, but such is life. I thought I could pop the bolt near the firewall and pull back and collapse the shaft, but either the shaft wouldn't collapse or the splines are seized near the firewall.
I ended up separating it near the ujoint instead.
I'm pretty sure that's everything that needs to be separated before my lift, so if any of you can think of something I've missed, please post, because I think I might try to lift it tomorrow if nothing comes up. I was going to try to crack the body mounts, but then I decided to wait until tomorrow. I was feeling pretty good with where I was, and finding out the body mount bolts were seized (which they will be) would cause me to end the night on a low note. I oiled them again as I have been every night, and went home happy. Fingers crossed for tomorrow.
05-04-2011, 09:07 PM
#20
thts a lot of rust, makes me love my trucks more.
just thinking of things. did u get:
tranny lines?
a/c lines?
do you have trailer wiring?
their is a ground wire on the back of the head drivers side?
all the wiring in the engine compartment is staying with the engine right?
just thinking of things. did u get:
tranny lines?
a/c lines?
do you have trailer wiring?
their is a ground wire on the back of the head drivers side?
all the wiring in the engine compartment is staying with the engine right?


