CO_94_pu's 1994 truck Build-Up Thread
 02-26-2013, 12:05 AM
#61
Super Moderator
Staff
iTrader: (1)
Join Date: Aug 2008
Location: Anderson Missouri
Posts: 11,788
Likes: 0
Received 21 Likes
on
19 Posts
He has some great tips on painting and bodywork. Everyone always has a different way of teaching and some times someone will say something that you just missed in the past that just clicks. Glad you posted the videos. I will be looking for more of hs videos.
The guy that taught me to paint didnt believe in sealer. After a friend of mine conviced me to spend the extra for sealer, it is well worth the cost. Between the different shades of primer and paint, sealer makes it all one solid color and you dont have to add extra paint to the light areas. It is also one last oppurtunity to fix any flaws that come up before putting on the paint.
The gravity feed guns are alot better and do save on paint. If you can find a paint gun that has the disposable plastic tanks, that is a blessing in disguise. Makes clean up a breeze and switching from paint to clear is just replacing the tank. Wish I had known of mine earlier. I found mine at Harbor Freight and even with the more expensive gun, I love my little HF gun as I get the same results and clean up is so much quicker and eaiser.
Where you have the paint mixing buckets that have 8:1:1 ratios or any other ratios, I like to just go get me some cheap, plastic mixing cups. In stead of trying to mix to all the different lines and gets confusing to me. I mix 8 onces to 1 once to 1 once or 10 total onces when done. If I want to double I mix 16 onces to 2 onces to 2 onces or 20 total. Those paint buckets are just to confusing to me. Clean up is easy again and very cheap to get new mixing cups.
Last edited by Terrys87; 02-26-2013 at 12:07 AM.
 02-26-2013, 01:35 PM
#62
Registered User
Ha I really did kill your day!
I'll be watching your restoration. You've seen what I'm going to get into.
Subbed.
When I move back to Australia I want to set up a home garage like that fella did. I want to be my own boss.
I'll be watching your restoration. You've seen what I'm going to get into.
Subbed.
When I move back to Australia I want to set up a home garage like that fella did. I want to be my own boss.
02-26-2013, 03:15 PM
#63

Yep I think I watched all the restolad videos, even started watching the Landrover keys stuck in the ignition and had to stop myself.
It's snowing sideways here again today, 20+ steady 35mph gusting. Holy crap I just heard a small plane fly over, guy has castiron testis and a sweet nav system. Er distracted maybe a lil'. Not much I can do today but browse parts, tools, supplies and ideas online.
I'll try to remeber to get a picture of the dash where the dye has rubbed thru, its a grey dash with the raw (yellow/cream) abs color showing thru. I'd like to try the rit dye on these abs parts but I don't have a large enough plastic tub todo the upper/main dash cover, and don't imagine I'd be very popular if I did it in the bathtub the smaller parts would fit in a plastic tub no problem. The formula for dye is 10-30% acetone v. water, varies by water temp and pentration depth desired. This can also be done with a spray bottle, ala. SEM or Duplicolor interior dye sprays, for about half the cost.
Check list of free/man-hour-only/already-have-material things todo..
Pull steering wheel, disassemble CC switches, paint horn cover switches and lower clam shell.
Mount lower bumper valance.
Seal camper shell with weather strip, fab/install locator pins.
Check tightness on leaking PS return line, clean PS fluid off apron.
Prep and paint fourTWO rims and both spares.
Disassemble dash, clean trim, paint&install P side vent, adjust tach.
Pull seats, wash carpet, drill&mount bucket seatbelt latches, sand seal and epoxy fill wear spot in drivers floor.
Adjust headlights.
Paint shift knob.
Pull drivers fender, weld cracks and rear stiffener, sand rust, hammer out ripples, adjust door.
Unmount igniter coil and wires, hammer and weld wheel arch in apron, reseal/paint.
Check tightness on oil pan bolts.
Remove bed, straighten front wall.
Sunday looks ok for painting but we'll have to wait and see what the forecast changes to, saturday was supposed to be ok too but they've changed it.
I'll shoot for getting the camper sealed, valance mounted, misc tightened, steering-clamshell-rims painted, and the headlight adjustment.
bbcode s test textbbcode strike test text, Neither work currently but I put-in/bumped a request and added instruction links for it in the support/feedback section. If they implement it I can put the list properly in the first post.
Feedback thread link
It's snowing sideways here again today, 20+ steady 35mph gusting. Holy crap I just heard a small plane fly over, guy has castiron testis and a sweet nav system. Er distracted maybe a lil'. Not much I can do today but browse parts, tools, supplies and ideas online.
I'll try to remeber to get a picture of the dash where the dye has rubbed thru, its a grey dash with the raw (yellow/cream) abs color showing thru. I'd like to try the rit dye on these abs parts but I don't have a large enough plastic tub todo the upper/main dash cover, and don't imagine I'd be very popular if I did it in the bathtub
the smaller parts would fit in a plastic tub no problem. The formula for dye is 10-30% acetone v. water, varies by water temp and pentration depth desired. This can also be done with a spray bottle, ala. SEM or Duplicolor interior dye sprays, for about half the cost.Check list of free/man-hour-only/already-have-material things todo..
Pull steering wheel, disassemble CC switches, paint horn cover switches and lower clam shell.
Mount lower bumper valance.
Seal camper shell with weather strip, fab/install locator pins.
Check tightness on leaking PS return line, clean PS fluid off apron.
Prep and paint fourTWO rims and both spares.
Disassemble dash, clean trim, paint&install P side vent, adjust tach.
Pull seats, wash carpet, drill&mount bucket seatbelt latches, sand seal and epoxy fill wear spot in drivers floor.
Adjust headlights.
Paint shift knob.
Pull drivers fender, weld cracks and rear stiffener, sand rust, hammer out ripples, adjust door.
Unmount igniter coil and wires, hammer and weld wheel arch in apron, reseal/paint.
Check tightness on oil pan bolts.
Remove bed, straighten front wall.
Sunday looks ok for painting but we'll have to wait and see what the forecast changes to, saturday was supposed to be ok too but they've changed it.
I'll shoot for getting the camper sealed, valance mounted, misc tightened, steering-clamshell-rims painted, and the headlight adjustment.
Feedback thread link
Last edited by Co_94_PU; 03-16-2013 at 05:56 PM. Reason: strike through available yay let the check lists commence!
02-26-2013, 05:38 PM
#64
there are many like it, but this one IS MINE
Found something I could do while it was snowing.
Nothing big or fancy and it's been done before. Not really thrilled with the blue it is drying way too dark, you can just make it out in the lower right corner if it would have stayed that color it'd be perfect. There should be enough room in there to give it a top coat of a white/blue mix but I need to let it finish drying first. Need to sand out the gouge where my pick sliped at the top and clear coat it still.
"Cool now if someone steals it they know it's a five speed", gee thanks guys
02-27-2013, 11:47 AM
#65
Registered User
I'm going to get my dad to turn an oak shifter knob for me on his little lathe. One for the T-case as well.
I think it would be cool. Plus my dad would have made it.
I think it would be cool. Plus my dad would have made it.
02-27-2013, 02:22 PM
#66
Brightened up the blue by mixing in some white and I'm ok with the color, wish it would have been the same shade as the pure wet ultramarine blue, it's just a few shades lighter. Two clear coats and it's done.

Now to go shovel a big enough spot to put the valance on before it gets dark and the temp drops
Now to go shovel a big enough spot to put the valance on before it gets dark and the temp drops
02-27-2013, 05:12 PM
#67
Couldn't get all the screws back in the valance with the bumper mounted, between the cold and tight spaces. Got the two corner ones and one of the lower ones, I don't have a lower mount bracket on the drivers side. Did it in the hardware store parking lot, when I picked up new nylon nuts, so I didn't have to shovel snow.
I got 4wd envy today, got stuck twice on tiny little ridges in my drive way grr.
I got 4wd envy today, got stuck twice on tiny little ridges in my drive way grr.
02-27-2013, 05:55 PM
#68
Registered User
working on your rig in the elements... i love it!! Was gusting 35mph today but no snow, just drifting acrost the road from earlier this week. Hang in there.
02-28-2013, 04:54 PM
#69
Got the two side corner screws in the valance, lost one of the nylon nuts out of the middle two somewhere between the hardware store and home(valance is cracked and mishapen at that hole, figured it'd hold it didn't, got a few extras of the original ones).
Was going to take off the steering clamshell to paint. and ARGG! I left my running lights on and drained the battery. Promptly hooked the buzzer back up, thats not happening again. Cleaned up my battery posts and clamps while I was waiting for someone to drive past. Positive clamp wasn't tight at all after I blasted the gunk out, Negative side is due for a replacement soon the short ground wire to the fender is maybe 5-15% frayed and nowhere near shiney.
Spent the rest of my daylight poking around the pontiac, odd noises, battery not staying charged, and lackluster performance. PS belt needs replaced soon, not sure I managed to get it any tighter but I tryed atleast. Found the major cause for the lackluster performance it's been getting, #4 sparkplug had backed its self loose. Aircleaner needs replaced, way past cleaning yuck. Found a loose valve cover bolt, hopefully it quits spiting oil out now. Reattached the MAP vacuum line, not sure if that was my fault or if it's been disconnected for awhile.
And for your daily laugh, I couldn't find the diagnostics port after ten minutes of laying in the snow with my head on the floor. I layed the seat back and climbed in upside down prepared to start pulling the dash covers off, spoted the cover right away and wondered how I'd missed it.
Charge circuit appears to be operating w/in spec but it keeps draining the battery. Measuring the voltage with the engine off you can watch the voltage drop about 10mv per second(eg battery drained in 20minutes WTF?!), pulled the clock and radio fuses and it stabilized. (thats OK moms too old for modern radio and wears/carries a watch anyway)
Got my eye on two pre-90 4runner's, w 22re's. Can't get a response from one guy, and the other is still at work I expect. Trying to get thru spamfilters with a yahoo email is kind of difficult sometimes Hopeing not to have to take out a big loan to get her into a 4wd. She doesn't need great fuel economy, but a 22re should do nicely. I was planning on getting one to clean up and sell, but I think moms gets dibs on the first one unless I get a great deal(~500$) I know winters almost over but don't want her getting stuck out here in the boonies in that low slung 2wd pontiac.
Yep starting to ramble Got squat done today. Need more work more $$ and to win that lottery thing I never play 
P.S. All that work on the valance lip to get it flush and tight, useless the bumper isn't manufactured flat across the bottom
Was going to take off the steering clamshell to paint. and ARGG! I left my running lights on and drained the battery. Promptly hooked the buzzer back up, thats not happening again. Cleaned up my battery posts and clamps while I was waiting for someone to drive past. Positive clamp wasn't tight at all after I blasted the gunk out, Negative side is due for a replacement soon the short ground wire to the fender is maybe 5-15% frayed and nowhere near shiney.
Spent the rest of my daylight poking around the pontiac, odd noises, battery not staying charged, and lackluster performance. PS belt needs replaced soon, not sure I managed to get it any tighter but I tryed atleast. Found the major cause for the lackluster performance it's been getting, #4 sparkplug had backed its self loose. Aircleaner needs replaced, way past cleaning yuck. Found a loose valve cover bolt, hopefully it quits spiting oil out now. Reattached the MAP vacuum line, not sure if that was my fault or if it's been disconnected for awhile.
And for your daily laugh, I couldn't find the diagnostics port after ten minutes of laying in the snow with my head on the floor. I layed the seat back and climbed in upside down prepared to start pulling the dash covers off, spoted the cover right away and wondered how I'd missed it.
Charge circuit appears to be operating w/in spec but it keeps draining the battery. Measuring the voltage with the engine off you can watch the voltage drop about 10mv per second(eg battery drained in 20minutes WTF?!), pulled the clock and radio fuses and it stabilized. (thats OK moms too old for modern radio and wears/carries a watch anyway)
Got my eye on two pre-90 4runner's, w 22re's. Can't get a response from one guy, and the other is still at work I expect. Trying to get thru spamfilters with a yahoo email is kind of difficult sometimes
Hopeing not to have to take out a big loan to get her into a 4wd. She doesn't need great fuel economy, but a 22re should do nicely. I was planning on getting one to clean up and sell, but I think moms gets dibs on the first one unless I get a great deal(~500$) I know winters almost over but don't want her getting stuck out here in the boonies in that low slung 2wd pontiac.Yep starting to ramble
Got squat done today. Need more work more $$ and to win that lottery thing I never play P.S. All that work on the valance lip to get it flush and tight, useless the bumper isn't manufactured flat across the bottom
Last edited by Co_94_PU; 02-28-2013 at 04:55 PM. Reason: PS
02-28-2013, 05:00 PM
#70
PPS. I don't think my carpet is salvagable. Spotted what maybe multiple types of mold while cleaning out the drivers side wear spot I need to fill. Good news is there is actually a factory rubber "carpet" under there aswell. So if I can get the carpet unstuck from it I can have an easier to clean interior. Have to make a mental note to wander past the carpet shop and see what they have for freebies next time I'm in the city.
03-01-2013, 03:30 AM
#71
Registered User
if you fall into the right deal you can get a 4runner for a great price. I picked mine up for $100 out of a farmers field. Im pretty sure it would still be sitting there today if i had not of saved it. Good luck!
03-02-2013, 02:01 PM
#72
Did the dash stuff, tach adjustment, wash, and some new seals on the D-side and center vents.
Digital tach wasn't rock steady like it was the other day, kind aggrevating. Washing off the ancient coffee spills of the lower center dash cover sort of back fired, it's clean now but apparently it was painted black at the factory, never noticed when I had it off it was grey all the way top to bottom on the in/back-side. Vent weather stripping went mostly alright, untill I put the dash back on and noticed the "crotch" vent on the D-side doesn't even come close to going in the hole in the duct can fit my hand between the vent and duct WTH?!
Good news it's warm! Bad news still 6-12" or more of snow every where..
Too wet to paint rims, way to soggy to put the truck on jackstands and worried about masking sucking up water and I just don't want to sit in a puddle.
*edit/PS*
had some day light left over. Sorry no pictures was kind of rushing.
got the spare tire off the hanger and both spare tires mostly preped for paint. turns out the one on the hanger has been mounted before, it had some scuff marks on the back and lug holes, and turns out it's not black it's the same AL grey as the others just nasty dirty. The rear spare (rears are wider&taller than fronts) is black, and it has a ton of welding spatter on the inside for some reason also a few spots that will need hit with a file to smooth up. Not real thrilled about having to paint with the tires mounted to the rims, have to work around the valve-stems ect, but I'm not equipped to remount or balance them. Whatever long as they're abit more weather resistant than they were I'll be happy.
Last edited by Co_94_PU; 03-02-2013 at 04:36 PM. Reason: PS
03-03-2013, 01:15 PM
#73
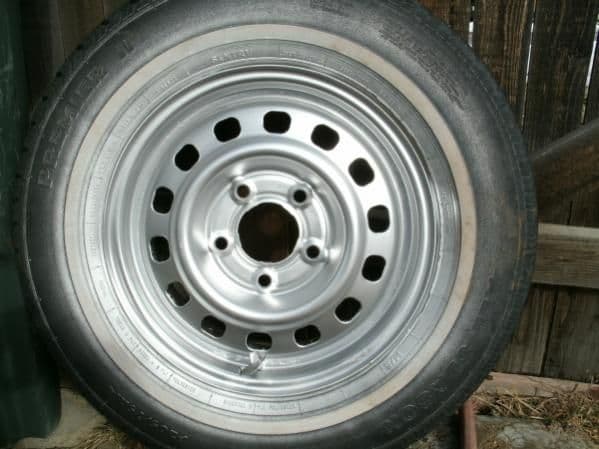
Spares drying, yay
Got lazy with the masking, since it's rubber paint will come off with some light rubbing. And it's not like they are my every day run around tires, or fancy expensive offroaders. Primer stayed well focused on the rims, but I forgot how bad the AL stuff drifts and fogs.
I'll slip these on in the next day or so, so I can do the others off the truck. That way I don't have to spend the time to cover everything within 20'.
It's a little colder than I'd like out, would prefer they got a nice hot cure so the paint is harder.
Front spare.
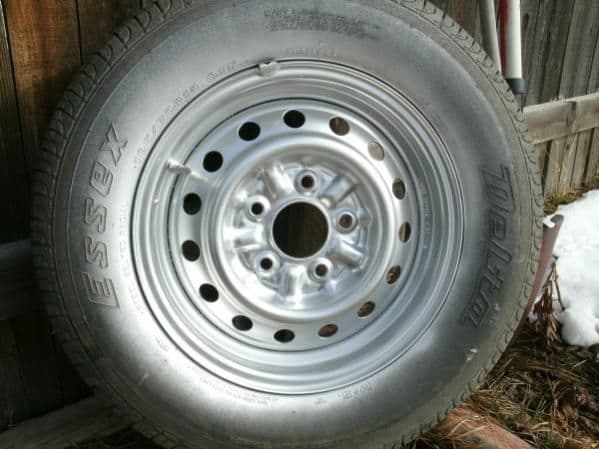

Rear spare.

I'll slip these on in the next day or so, so I can do the others off the truck. That way I don't have to spend the time to cover everything within 20'.
It's a little colder than I'd like out, would prefer they got a nice hot cure so the paint is harder.
Front spare.
Rear spare.
03-05-2013, 02:37 PM
#74
Got my P/S leak fixed, turned out it wasnt the hardlines on the gear box it was the softline hose clamps(rubber hose just spun around freely).
Got a bit of oil puddling on top of the water pump, head to timing cover junction leaking probably at the "hidden" bolt =(
Supposed to be near 60 for the next three days. *fingers crossed* I can get the other rims painted and inspect my oil pan.
Got a bit of oil puddling on top of the water pump, head to timing cover junction leaking probably at the "hidden" bolt =(
Supposed to be near 60 for the next three days. *fingers crossed* I can get the other rims painted and inspect my oil pan.
03-05-2013, 03:15 PM
#75
Tailgate stay stopper, this is the plastic clips on my gate I've been wondering about.
Thread link: https://www.yotatech.com/forums/f116...runner-260746/
Picture of unbroken ones(Or maybe just a different style): http://www.tacomaworld.com/gallery/d...livewx3bPl.jpg
Also poked around abit in google image. The 4runners use the same type of W/S on the rear gate pinch welds as is used on the door seams(Pictured in the headliner pics).
03-05-2013, 05:34 PM
#77
Registered User
As for the oil leak, i highly doubt the "hidden bolt" is to blame. Im assuming the one under the valve cover to the timing cover? Probably just needs a head gasket or timing cover gasket. Id deal with it until you have the engine out of the vehicle.
03-05-2013, 05:48 PM
#78
Hidden bolt is always to blame, it the reason guys are nuts and chicks are crazy don't you know!
I'll give it a poke sometime soon. Need to redo the valve clearance #2 intake is getting a little loud for my tastes. Was going to worry about it when I did the frontend-kit but I had to pay back some borrowed cash and didn't have enough for the enginebldr FEK.
It's just an annoyance really it's been like that for years, some call it underbody rust protection Just bugs me when it hits the pulleys and wants to go everywhere.
*sigh* 86 Turbo truck on CL sold in under 2 hours, I couldn't hardly even of drove there that fast from out here. Atleast he responded to the email, thats a start
I'll give it a poke sometime soon. Need to redo the valve clearance #2 intake is getting a little loud for my tastes. Was going to worry about it when I did the frontend-kit but I had to pay back some borrowed cash and didn't have enough for the enginebldr FEK.
It's just an annoyance really it's been like that for years, some call it underbody rust protection
Just bugs me when it hits the pulleys and wants to go everywhere.*sigh* 86 Turbo truck on CL sold in under 2 hours, I couldn't hardly even of drove there that fast from out here. Atleast he responded to the email, thats a start
03-06-2013, 08:37 PM
#79
Rim painting
Found the loose bolt on the oil pan. Wiped off a bunch of oily dirt, some with my shoulder Oops. And discovered that my oil pan gasket isn't "the good stuff", looks like generic clear silicone applied by a blind one armed monk  Oozing out several bolt holes front&side
I jacked it up put the front on the stands and mounted up the spares temp' so it doesn't completely burry my stands if the decide to sink into the not so dry gravel&mud drive way.
Also the astute among you might have noticed my spare rims don't match, your right they don't match each other, or the other four! To top that off the rear spare with the larger tire mounted on it, doesn't have the same offset it binds on the upper control arm/ball joint area, when mounted at the front.
Spend awhile scrubbing at the back sides waiting for the silver/AL to show up, turns out they're not silver on both sides. Not sure if this was a dealer or PO paint job, but it's crap pure crap Wasn't primed or scuffed and just started to flake off in 1/4inch sections when I was scotch-padding the rust spots. Started to get dark and cold so one only got a light scrubing but the other has almost all the silver removed it had some pretty large surface rust area going also.
D-side front brake caliper is rubbing, need to locate the right rebuild kit.
Parts diagram 4wd, 2wd, indicates it is a four piston, but I only saw one... 4wd is what the diagram showed, 2wd is a single. Ok so it's a single, but is it 57(dlx) or 60mm(base?!). PNC 04479, **479-22010 ~40$.. It is not actually leaking so I'll have to do the brake pedal adjustment first I guess. I fear it's bad adjustment, gunky piston and clogged lines
Hoping for an earlier start tomarrow!
Wash, degrease, and primer front rims, check brake pedal adjustments, paint front rims, inspect caliper mount (bushing?), check ebrake adjustment, unmount AFM and scrub apron and PS gearbox, weather seal shell.
Find something to hammer on if it's still warm out, can't go pick up parts or materials with the wrong rims mounted have to find something fiddley-bitish to do forgot to grab dye at the store for interior and something else I can't remeber
Oozing out several bolt holes front&side I jacked it up put the front on the stands and mounted up the spares temp' so it doesn't completely burry my stands if the decide to sink into the not so dry gravel&mud drive way.
Also the astute among you might have noticed my spare rims don't match, your right they don't match each other, or the other four! To top that off the rear spare with the larger tire mounted on it, doesn't have the same offset it binds on the upper control arm/ball joint area, when mounted at the front.
Spend awhile scrubbing at the back sides waiting for the silver/AL to show up, turns out they're not silver on both sides. Not sure if this was a dealer or PO paint job, but it's crap pure crap
Wasn't primed or scuffed and just started to flake off in 1/4inch sections when I was scotch-padding the rust spots. Started to get dark and cold so one only got a light scrubing but the other has almost all the silver removed it had some pretty large surface rust area going also.D-side front brake caliper is rubbing, need to locate the right rebuild kit.
Parts diagram 4wd, 2wd, indicates it is a four piston, but I only saw one... 4wd is what the diagram showed, 2wd is a single. Ok so it's a single, but is it 57(dlx) or 60mm(base?!). PNC 04479, **479-22010 ~40$.. It is not actually leaking so I'll have to do the brake pedal adjustment first I guess. I fear it's bad adjustment, gunky piston and clogged lines
Hoping for an earlier start tomarrow!
Wash, degrease, and primer front rims, check brake pedal adjustments, paint front rims, inspect caliper mount (bushing?), check ebrake adjustment, unmount AFM and scrub apron and PS gearbox, weather seal shell.
Find something to hammer on if it's still warm out, can't go pick up parts or materials with the wrong rims mounted have to find something fiddley-bitish to do forgot to grab dye at the store for interior and something else I can't remeber
Last edited by Co_94_PU; 03-07-2013 at 04:59 PM. Reason: Productive day
03-06-2013, 08:51 PM
#80
Registered User
Couldn't get all the screws back in the valance with the bumper mounted, between the cold and tight spaces. Got the two corner ones and one of the lower ones, I don't have a lower mount bracket on the drivers side. Did it in the hardware store parking lot, when I picked up new nylon nuts, so I didn't have to shovel snow.
I got 4wd envy today, got stuck twice on tiny little ridges in my drive way grr.
I got 4wd envy today, got stuck twice on tiny little ridges in my drive way grr.


