CO_94_pu's 1994 truck Build-Up Thread
 02-17-2013, 07:15 PM
#41

Last great weather day for atleast the next ten, no more painting for awhile maybe.
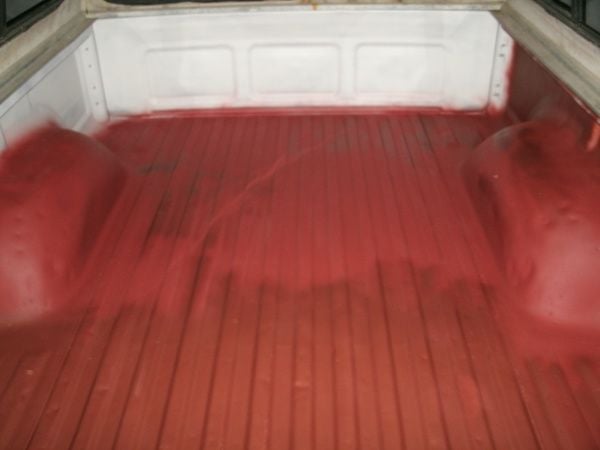
Got a bit of a late start but it's no longer bare metal. It's also three different colors of primer, Oops. I had a can of rustoleum white direct to metal, so used that up first, then a rust red which I expected to finish with but it ran out with about 8ft/sq left at the gate so had to run and grab another can and wound up with a different primer from the same company. Not sure if I got the last can or just mucked up memory wise.
A bit of dryness in the middle section, attributing this to the wind picking up.
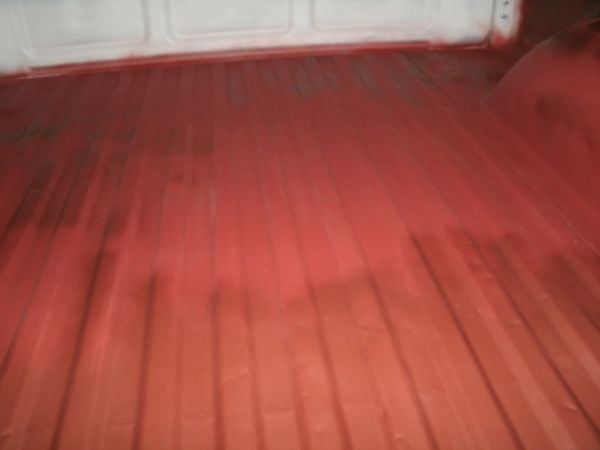
Bed has "character", or as mom called it "customized". Should have took 30mins and pulled the left inner fender to knock out that bigger dent but, it was now or never with the weather moving in.

Crappy picture, thanks flash reflection.

And the final overview shot
I spent way more than I should have on paint. I got an aluminium w/ flakes to redo the front bumper. Royal red looked good matching the cap maybe a little off, a candy apple red metallic, silver reflective, clear gloss, white direct to metal primer, and then two more Rust red primers.
They wouldn't let me test shoot anything so I had to buy the cans and shoot some tests in the parking lot. I started with the Royal red and a dusting of the AL, on a white fedex box,too bright. So I figured I'd try the candy apple, looked the same to me so I took it back in and ask the guy inside, since I don't see red correctly. We both agreed one was just a bit darker and maybe it'd look darker with another coat. So I did another coat after the carwash powerwash, tons of crap in my tail gate ew still need that handle to keep the dirt out, and it didn't change much in my estimation. So I snagged the red primer on the way home too. I have a coat of red between the color and grey primer, but it's much more of an orange to me than the rust red. I also did a few test shoots on my other fedex box I had handy that had the grey primer and flat black. The candy apple over the black is the best match, I was told, but it's not perfect and I want factory color damnit! So I will be picking up a half case or so of the generic flat black from the bigbox.
While I still had a little bit of light left.. I pulled the rear light assemblys off and straightened out the flanges they mount into and bend them in a little so the lights fit tighter. And installed the missing plastic screw holders from my pile of fiddly bits. I also pulled the front corner marker/parking lamps, and brought all four inside to clean up.
The rear truck lamp lenses are just held in by the screws and rubber gasket, these came apart no problems. The front were an ordeal, these are held together by a top in the middle top and bottom and some crazy stupidly strong sealant. I didn't know about the glue and was worrying they were going to just shatter, from being UV brittle, while prying at them and had to soak them with some hot water to give me the nerve to try prying abit more. I got one tab to release and realized they were stuck because of the seal. This is stuff is no joke! I got them to release by using very hot running water, and some creative screwdriver work. Once I had them open enough to get hot water directly on the sealer it started to string out like hot sidewalk bubble gum, and I just started cutting it loose from the lense with the flat head screwdriver soon as I could reach it. Once this stuff gets back to room temp it's like 5 year old bubble gum on the bottom of a resturant table, ie get out the chisel hard..
Wasn't at all fun and once I got in there I found out there wasn't any reflector paint on the front ones to refurbish. Oh well atleast I don't have to be so carefull masking the lense for paint. Which is what I did next, refurb the trim paint with the metallic AL.
Not sure about the orginal color, after looking at the underside it was abit darker like the charcoal grey metallic. Not sure why the stuff I could still see on the faces was definetly silver.

Vastly improved over the yellowed bare plastic. Compared to the front fender picture(post on the 13th), the washed out yellow looking bit yeah thats not glare they were really piss yellow.

I also found out one of my rear lamp assemblies has been replaced. It's OEM but from 1997, same stickers and markings as the other but a different date and the internals are slightly different.

The older one is on the right, it has a metal heat shield on the center(reverse) lamp. The newer one is missing this feature, it's bowing and has paint flaking. Toyota "JIT manufacturing" in demonstration we didn't want to pay for that high of quality, I guess.
Didn't get around to replacing my door inner seals, or any of the other bits I've been putting off since I don't recall any of those off hand I guess that is ok.
I did find out my front valance/lower-bumper-cover, it's not actually black it has metal flakes, bah another color I can't match, you'd think I'd of noticed this when I was straightening it but It was too dirty I guess.
I need to get rid of that rubber camper to cab rubber, the clips in part of it are trash and it's gonna drip rusty crud on my bed. upullandpay the nearest salvage yard in the city has a sweet deal on glass this weekend, 9.99. I'm not sure the 89 truck rear window fits in my camper shell hole it looks a cut a little too large. For 20$ and a ride into the city. I could have me a spare rear and front windshield, If I can get it out in the cold without breaking it which is pretty tempting to try.
Still deciding if I want to put a coat of one of the reflective paints in the front marker lights or not. Silver mirror, or metallic AL ho hum
Got a bit of a late start but it's no longer bare metal. It's also three different colors of primer, Oops. I had a can of rustoleum white direct to metal, so used that up first, then a rust red which I expected to finish with but it ran out with about 8ft/sq left at the gate so had to run and grab another can and wound up with a different primer from the same company. Not sure if I got the last can or just mucked up memory wise.
A bit of dryness in the middle section, attributing this to the wind picking up.
Bed has "character", or as mom called it "customized". Should have took 30mins and pulled the left inner fender to knock out that bigger dent but, it was now or never with the weather moving in.
Crappy picture, thanks flash reflection.
And the final overview shot
I spent way more than I should have on paint. I got an aluminium w/ flakes to redo the front bumper. Royal red looked good matching the cap maybe a little off, a candy apple red metallic, silver reflective, clear gloss, white direct to metal primer, and then two more Rust red primers.
They wouldn't let me test shoot anything so I had to buy the cans and shoot some tests in the parking lot. I started with the Royal red and a dusting of the AL, on a white fedex box,too bright. So I figured I'd try the candy apple, looked the same to me so I took it back in and ask the guy inside, since I don't see red correctly. We both agreed one was just a bit darker and maybe it'd look darker with another coat. So I did another coat after the carwash powerwash, tons of crap in my tail gate ew still need that handle to keep the dirt out, and it didn't change much in my estimation. So I snagged the red primer on the way home too. I have a coat of red between the color and grey primer, but it's much more of an orange to me than the rust red. I also did a few test shoots on my other fedex box I had handy that had the grey primer and flat black. The candy apple over the black is the best match, I was told, but it's not perfect and I want factory color damnit! So I will be picking up a half case or so of the generic flat black from the bigbox.
While I still had a little bit of light left.. I pulled the rear light assemblys off and straightened out the flanges they mount into and bend them in a little so the lights fit tighter. And installed the missing plastic screw holders from my pile of fiddly bits. I also pulled the front corner marker/parking lamps, and brought all four inside to clean up.
The rear truck lamp lenses are just held in by the screws and rubber gasket, these came apart no problems. The front were an ordeal, these are held together by a top in the middle top and bottom and some crazy stupidly strong sealant. I didn't know about the glue and was worrying they were going to just shatter, from being UV brittle, while prying at them and had to soak them with some hot water to give me the nerve to try prying abit more. I got one tab to release and realized they were stuck because of the seal. This is stuff is no joke! I got them to release by using very hot running water, and some creative screwdriver work. Once I had them open enough to get hot water directly on the sealer it started to string out like hot sidewalk bubble gum, and I just started cutting it loose from the lense with the flat head screwdriver soon as I could reach it. Once this stuff gets back to room temp it's like 5 year old bubble gum on the bottom of a resturant table, ie get out the chisel hard..
Wasn't at all fun and once I got in there I found out there wasn't any reflector paint on the front ones to refurbish. Oh well atleast I don't have to be so carefull masking the lense for paint. Which is what I did next, refurb the trim paint with the metallic AL.
Not sure about the orginal color, after looking at the underside it was abit darker like the charcoal grey metallic. Not sure why the stuff I could still see on the faces was definetly silver.
Vastly improved over the yellowed bare plastic. Compared to the front fender picture(post on the 13th), the washed out yellow looking bit yeah thats not glare they were really piss yellow.
I also found out one of my rear lamp assemblies has been replaced. It's OEM but from 1997, same stickers and markings as the other but a different date and the internals are slightly different.
The older one is on the right, it has a metal heat shield on the center(reverse) lamp. The newer one is missing this feature, it's bowing and has paint flaking. Toyota "JIT manufacturing" in demonstration we didn't want to pay for that high of quality, I guess.
Didn't get around to replacing my door inner seals, or any of the other bits I've been putting off since I don't recall any of those off hand I guess that is ok.
I did find out my front valance/lower-bumper-cover, it's not actually black it has metal flakes, bah another color I can't match, you'd think I'd of noticed this when I was straightening it but It was too dirty I guess.
I need to get rid of that rubber camper to cab rubber, the clips in part of it are trash and it's gonna drip rusty crud on my bed. upullandpay the nearest salvage yard in the city has a sweet deal on glass this weekend, 9.99. I'm not sure the 89 truck rear window fits in my camper shell hole it looks a cut a little too large. For 20$ and a ride into the city. I could have me a spare rear and front windshield, If I can get it out in the cold without breaking it which is pretty tempting to try.
Still deciding if I want to put a coat of one of the reflective paints in the front marker lights or not. Silver mirror, or metallic AL ho hum
Last edited by Co_94_PU; 02-27-2013 at 07:12 PM. Reason: had double image, fixed final overview
 02-18-2013, 01:29 AM
#42
Super Moderator
Staff
iTrader: (1)
Join Date: Aug 2008
Location: Anderson Missouri
Posts: 11,788
Likes: 0
Received 21 Likes
on
19 Posts
I wish spring would hurry up and get here as well. The cold just takes the fun out of it. Hope it wont be much longer. I have spent alot of time getting the wheel wells straight and then sure enough, I will haul something and they get dinged back up.
I had never tried pulling the front lense apart. Always thought they were basically plastic that was melted together. Glad you explain how to get them apart as that does give a truck a lot cleaner look. I used to just reach as far as I could with my finger or high pressure water to get the film off as best as I could. That should improve looks alot better.
I will be working on some tail lights later on and was thinking aluminum paint. Never tried it on tail lights, but what I have anything will be an improvement.
Replacing door seals made a huge difference on one of my trucks. I just dont care for wind noise and to me a quieter ride is what adds to a nice ride. The small things make a big difference. Wish our salvages had the good deals but I think our salvages have parts made of gold or so they seem to think. I have been doing as much business on Craigslist or ebay and get better or even new parts for the same price the salvages want.
02-18-2013, 03:46 AM
#43
Registered User

Another way of getting that glue loose is to put the piece in the oven. I've had to do it with headlights and tail lights. At most 5 minutes at about 200 degrees does it.
02-18-2013, 05:08 PM
#44
Registered User
Join Date: Aug 2012
Location: Gadsden, AL
Posts: 266
Likes: 0
Received 0 Likes
on
0 Posts
I am real interested in your rear 4Runner speaker boxes. I had never thought about using rear enclosures behind the seat. To be honest, I didn't even know they had them! So what year had the ones you are using?
Great work on the truck so far. You are much more talented than I am, and I learn something from just about every post you make. Thanks!
Great work on the truck so far. You are much more talented than I am, and I learn something from just about every post you make. Thanks!
02-18-2013, 10:53 PM
#45

I think hot water is the best way to go, it's pretty safe no gloves required, if you discount any posible BPA leeching into the water. meh it's 15-20 miles of ground filtering before the next town down stream, not my problem

I am real interested in your rear 4Runner speaker boxes. I had never thought about using rear enclosures behind the seat. To be honest, I didn't even know they had them! So what year had the ones you are using?
Great work on the truck so far. You are much more talented than I am, and I learn something from just about every post you make. Thanks!
Great work on the truck so far. You are much more talented than I am, and I learn something from just about every post you make. Thanks!
The 6 speaker 2nd gen 4runners have these self powered boxes. The next years have a slightly bigger speaker. I'm not 100% sure on all the sizes but 4" 4-1/2" and 5" I think, depending on the year.
They are located just forward of the side storage areas inside the quarter panel trim. I got mine out of I think a 95, same one I got all my cluster bulbs out of actually.
To get these trim panels off all the way you'll need to open the rear, my donor was a bit bashed in and I managed to get the panels far enough out of the way w/o breaking anything. I'm not sure if the rear upper trim will cause issues it was already removed.
Lean the rear seats forward. Remove the seatbelt mounts, 9/16 or ~14mm not sure I used the 9/16 so not to snap another 1/4inch adapter. The lower door trim can be rotated forward to free up the panel w/o removing the trim on the lower door plates, I think i shoved a flat head in the top and gave it a smack so I didn't pinch my fingers, then flex it passed the seat retainer. Pry loose the wedge type clip at the forward upper corner of the rear quarter trim and work your way around, once you have the first clip undone you can spot the rest of them if not it's pretty big and tough just give it a yank when you need to. The boxs are held in by 2-3 10mm bolts. Don't forget to grab the pigtails, you can use a 1/8th(?) inch female connector if they're really strict about pigtails at the salvage yard. There is plenty of wire attached to them if you're inclined to pull all the trim and deloom it, it's likely cheaper than buying wire from napa like I did. If you don't have the six pin plug for rear speakers you'll want that also if you have a 4 channel stereo.
The wiring diagrams are in the 1990-1995 4runner book, and is how I figured out there were amps back there. But here is the short version.
Plug B is the four channel rear speakers, this is a 6 pin plug aranged in a C looking shape. A picture is worth a 1000 words so. http://www.installdr.com/Harnesses/Toyota-Wiring.pdf
N (i'm pretty sure) was the ground for my Illumination.
J is the power for Illumination. (Since those aren't listed in the pdf)
I/a9 is the pink-blue power antenna switch line, this runs to each box
D/a4 is the blue-yellow constant power from dome light, to each box
G/a7 is ground, again to each box
K/b1 is red right rear +
M/b3 is white right -
L/b2 is black left rear +
P/b6 is yellow left rear -
If you use the longer "oops" wires like I sortof did, have to do them all not just the speaker signal wires.. You'll be able to hang them off the windows like a drive in style speaker by moving the 4runner brackets to the rear side. Mine are just a few inches to short to reach the wiindows.
I don't think there is much or anything in the drivers side wiring channel if you want to go that route it's about another 2-3 foot of wire to get across the drivers side dash.
I wish spring would hurry up and get here
...
Replacing door seals made a huge difference on one of my trucks. I just dont care for wind noise and to me a quieter ride is what adds to a nice ride. The small things make a big difference. Wish our salvages had the good deals but I think our salvages have parts made of gold or so they seem to think. I have been doing as much business on Craigslist or ebay and get better or even new parts for the same price the salvages want.
Mine are in pretty good shape, all my tears are on the passenger side. It's just really hard to evaluate where the air is passing thru while driving so I'm not absolutely sure. I know both of my windows have been pryed out and I tryed as best I could to bend them back inwards, and my drivers door still needs some adjusting done at the hinges.
I have three minor issues with the drivers side, the door latch is rubbing the top door pin(hinge adjustment), the airflow thru the door(lack of solid vapor barrier), and some kind of weather seal & drainage thing goin on at the rear corner water puddles up and freezes the door shut somtimes.
I can't hear the passenger door leaking from the drivers side so I assume it's good, it's vapor barrier is shot also, it is good and tightly adjusted and usually in the shade so no freeze thaw issues.
After spending two days on my knees bend over I remeber why laying carpet sucked, my back was killing me. It had me sprawled out on the floor for four hours today wishing I'd just passout. I'd blame it on age but I was just a kid when I did carpet and t did it alot then too.
Didn't make it to the city today for the glass sale. Decided the shell was cut too large in the vertical to fit a stock window, and who needs that extra 20lbs of glass it's heavy enough to lift on and off already(yeah thats BS after excuses maybe). If anyone is wondering I got about 14inches measuring from between the ridges in the trim on mine. My shell opening is atleast 14-1/2x52 inch.
Could rig up a wood and fiber glass spacer, but I don't have a router or table saw available. There are some economical choices for plexiglass but I definatly don't want a seam in the middle, and they are super thin (1.5-2.25mm). A full sheet of acrylic is kind of overkill 110$ and I'll have two spares
Anyway.. here is some eye candy, 1989 2wd w/ 3K3 paint and an ultra high top shell, from toyotareference.com
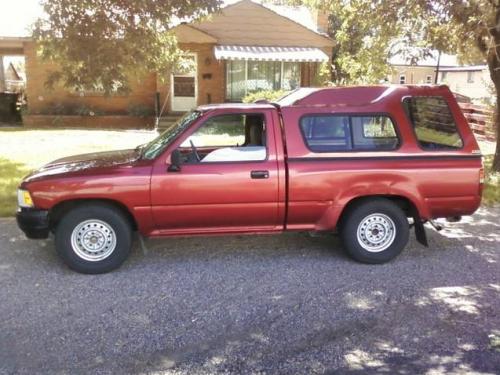
One day!! I'll be restored and look like that too.
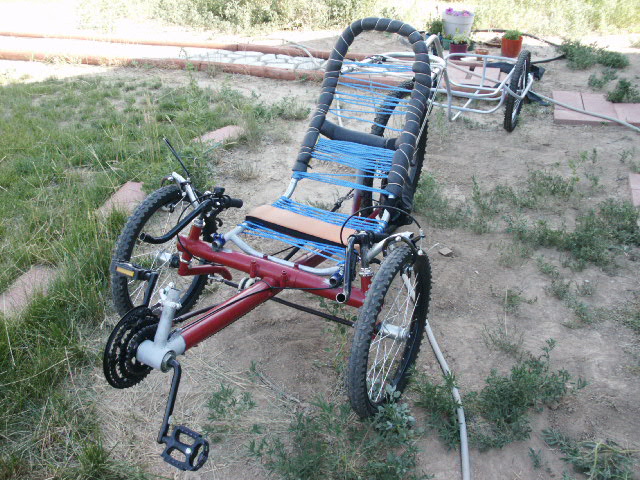
And for some original filler content.
My custom trike and trailer, before I got the canvas seat cover installed. It is a recumbent delta trike with removable cross member, my design and build on my back porch.
Last edited by Co_94_PU; 03-27-2013 at 05:08 PM.
02-19-2013, 09:03 AM
#46
Registered User
Join Date: Aug 2012
Location: Gadsden, AL
Posts: 266
Likes: 0
Received 0 Likes
on
0 Posts
Thanks man I'm humbled. I just do it and work out the kinks as they appear. Cocky, over confident, capable, good, all the same thing You can't do or learn unless you get in there and find out. Even bad or botched jobs make for good references.
The 6 speaker 2nd gen 4runners have these self powered boxes. The next years have a slightly bigger speaker. I'm not 100% sure on all the sizes but 4" 4-1/2" and 5" I think, depending on the year.
They are located just forward of the side storage areas inside the quarter panel trim. I got mine out of I think a 95, same one I got all my cluster bulbs out of actually.
To get these trim panels off all the way you'll need to open the rear, my donor was a bit bashed in and I managed to get the panels far enough out of the way w/o breaking anything. I'm not sure if the rear upper trim will cause issues it was already removed.
Lean the rear seats forward. Remove the seatbelt mounts, 9/16 or ~14mm not sure I used the 9/16 so not to snap another 1/4inch adapter. The lower door trim can be rotated forward to free up the panel w/o removing the trim on the lower door plates, I think i shoved a flat head in the top and gave it a smack so I didn't pinch my fingers, then flex it passed the seat retainer. Pry loose the wedge type clip at the forward upper corner of the rear quarter trim and work your way around, once you have the first clip undone you can spot the rest of them if not it's pretty big and tough just give it a yank when you need to. The boxs are held in by 2-3 10mm bolts. Don't forget to grab the pigtails, you can use a 1/8th(?) inch female connector if they're really strict about pigtails at the salvage yard. There is plenty of wire attached to them if you're inclined to pull all the trim and deloom it, it's likely cheaper than buying wire from napa like I did. If you don't have the six pin plug for rear speakers you'll want that also if you have a 4 channel stereo.
The wiring diagrams are in the 1990-1995 4runner book, and is how I figured out there were amps back there. But here is the short version.
Plug B is the four channel rear speakers, this is a 6 pin plug aranged in a C looking shape. A picture is worth a 1000 words so. http://www.installdr.com/Harnesses/Toyota-Wiring.pdf
N (i'm pretty sure) was the ground for my Illumination.
J is the power for Illumination. (Since those aren't listed in the pdf)
I/a9 is the pink-blue power antenna switch line, this runs to each box
D/a4 is the blue-yellow constant power from dome light, to each box
G/a7 is ground, again to each box
K/b1 is red right rear +
M/b3 is white right -
J/b2 is black left rear +
P/b6 is yellow left rear -
If you use the longer "oops" wires like I sortof did, have to do them all not just the speaker signal wires.. You'll be able to hang them off the windows like a drive in style speaker by moving the 4runner brackets to the rear side. Mine are just a few inches to short to reach the wiindows.
I don't think there is much or anything in the drivers side wiring channel if you want to go that route it's about another 2-3 foot of wire to get across the drivers side dash.
And for some original filler content.
My custom trike and trailer, before I got the canvas seat cover installed. It is a recumbent delta trike with removable cross member, my design and build on my back porch.
My custom trike and trailer, before I got the canvas seat cover installed. It is a recumbent delta trike with removable cross member, my design and build on my back porch.
02-19-2013, 10:11 AM
#47
I have an aftermarket stereo. Do you know if the input sound signal coming out of the factory stereo to the amps is powered? Also, what ohm speakers are in the factory boxes? I'd like to have the amplified boxes, and I would like to try and run them off my aftermarket head. If not, my head should have enough power to push 4 1/2 or 5 inch speakers comfortably. It would just be cool to use the factory stuff.
My speakers are marked 2Ohm 30watt.
And yep, designed and built. It's comparable to a "sun EZ", they retail for a little under 1k, mine is a little lower or taller I don't recall offhand. The top of the line is a "scorpion" they're alot lower and about 2k. Trikes are really great for grinding up hills since you can go snail slow and not tip over. Recumbents are almost a must for dealing with the wind out here. We get lots of guys on two wheelers riding by doing training runs out of denver and just watching them makes my legs ache!
02-19-2013, 01:58 PM
#48
Super Moderator
Staff
iTrader: (1)
Join Date: Aug 2008
Location: Anderson Missouri
Posts: 11,788
Likes: 0
Received 21 Likes
on
19 Posts
You will eventually get your truck to the point that you like, each task is one step closer to getting it there. Just focus on each indvidual project and try not to look at the big picture. It will be done before you know it.
It is always nice to see the creativity side and just a little thought and planning you will be suprised at what you can come up with.
02-19-2013, 02:26 PM
#49
Hammer time, drivers fender
Got to the mid 40's today, and If i sit in the bed with the camper shell on I get to stay out of the wind. HA take that stupid winter weather 
Pulled the front fender again.
Start

Round 1

Round 2


I need to trace the passenger side and cut templates for the hood and fender arch. This will allow me to get the archs correct. They need to be perfect or a little shallow to put finishing glaze on. Most of the bad lines are due to lazy remount since it go cold on me. There is also still a bit of bowing, in the last picture, that needs straightened still.
I'm not satisfied with the paint job on the front parking lamps. They look fine from a few feet away. But are showing excessive pitting. They will need some sanding to smooth them out at the least, maybe a foil tape. One of them has a small chip missing also, right side upper corner, I can fill this with some epoxy. But if I run across replacements in better shape I'll take em, upnp says 2$ for markerlenses sounds like a deal unless they have some other crazy person on the register.
Pulled the front fender again.
Start
Round 1
Round 2
I need to trace the passenger side and cut templates for the hood and fender arch. This will allow me to get the archs correct. They need to be perfect or a little shallow to put finishing glaze on. Most of the bad lines are due to lazy remount since it go cold on me. There is also still a bit of bowing, in the last picture, that needs straightened still.
I'm not satisfied with the paint job on the front parking lamps. They look fine from a few feet away. But are showing excessive pitting. They will need some sanding to smooth them out at the least, maybe a foil tape. One of them has a small chip missing also, right side upper corner, I can fill this with some epoxy. But if I run across replacements in better shape I'll take em, upnp says 2$ for markerlenses sounds like a deal unless they have some other crazy person on the register.
Last edited by Co_94_PU; 02-27-2013 at 07:23 PM. Reason: I cun speel, typos fixed?
02-20-2013, 05:59 PM
#50
Snowed, nothing to see here
Well it is snowing so I'm not going going to brave the wind and crud.
Got supplies from the city. Case of flat black and an extra can of primer. I love my little village hardware store, but I'm going to be driving to the city just about anytime I need more than 1can, didn't notice the markup was so high out here. I also picked up a few cheap plastic drop cloths and a roll of 3' masking paper, no more having to wipe off overspray that worked it's way between newspaper sheets. And two spare rolls of tape.
Home depot has a instore paint testing box with cards in thier spray paint isle, grr! Oh well, I guess I can re do my trike, to sort of match the truck, with the metallic candy apple I bought local. Still going to try a spot match and blend on the front fender with it. If i get lucky it won't look like the truck has the plague with the flat black spots over the body work 'till I can get the overall paint done. And if it goes horribly wrong meh that fender could do with a yard replacement anyway since it is missing a large chunk of the reinforcement flap on the door end.
Not much I can do till it warms up a little.
Saturday maybe I can get the front bumper pulled again, treat the surface rust repaint it and get it remounted. The front turn signals need the haze sanded off and clear coated, I can do that while the bumper is setting up but I won't be able to buff them out, should still be an improvement.
02-20-2013, 06:09 PM
#51
Super Moderator
Staff
iTrader: (1)
Join Date: Aug 2008
Location: Anderson Missouri
Posts: 11,788
Likes: 0
Received 21 Likes
on
19 Posts
I hear you on the snow. We are to get an ice storm and some snow. So far I can handle working in the 50s, I am not tough enough to do the 40s just yet. I hope this weather warms up soon. But the next week isnt looking any better either.grrr
Looks like you are getting the lines closer to lining up.
Looks like you are getting the lines closer to lining up.
02-21-2013, 04:58 PM
#52
Here spring, come on it's ok, your such a good boy come on..
Was nice and sunny out today, right untill I got to work on the truck of course.
Spent 5-10minutes cleaning my o2 sensor plug again, and the next 30 inside getting my hands warmed back up. It'd be nice if it decided to quit conducting when it was warm enough to disassemble the plug and give it a proper cleaning but not happening anytime soon. A little bit of wiggling and wd40 should hold it another 2-4weeks. I really envy you guys that can fit under there with coats on and not have to suck in your gut or bench press the truck to get past the exhaust pipes. Yeah thats 4wd envy. Oh well.
After I got warmed back up I went out and pulled the tailgate cover. After I got the 2nd set of screws out it started trying to curl/roll it's self up into a spool. So i had go slow and make sure it didn't spring up and slap me.
Spent about an hour sitting in the bed hammering this out. It looks much better now and has a slight curve in the other direction.
And it was nice and cozy under the camper shell, right up untill I started working the upper lip of the tailgate and had to open the door. There is one major and some minor dents there. I was hoping to be able to attack them from the inside, but it is double walled at the upper lip I quickly found out. So i just knocked in the three creases and called it a day.
The none hatch portion of the inner sde of the tailgate poses a problem there just isn't any room to work the ridges back up without deskinning. I could pull most of the bowing out by hand but that still leaves the reinforcing/stabilizing ridges rather flat.
The tailgate will need a u-channel or angle iron riveted to it, this will prevent it from bowing again with moderate loads like someone sitting on it ect. The tailgate lip is a bad place for a bondo edge, this will need some type of aftermarket trim like the diamond plate channels to keep the body putty from chipping or cracking due to sharp impacts.
I need to finish sealing the camper shell, there is no weather stripping on the front edge. I found a large icicle running down the passenger side and a skating rink pluging up the forward drain hole on that side.
The leer shell I have doesn't have a flat edge at the front, so this needs a full width piece of rubber attached to the shell.
I think I've mentioned before not sure. The bedsides have a bit of seperation happening, the gap at the tail gate is larger at the top than at the bottom. Not sure how to handle this. Maybe a come-a-long between the rope shackles or a ratchet strap around the bed? It is mostly a minor cosmetic issue(Not sure anyone but me would notice), but it was letting snow in and you can see daylight looking thru the sides of the tailgate. Is there supposed to be some weather striping here? I have a plastic piece on both the gate and bed I've no idea what it's for if not to hold some weatherstrip.
02-22-2013, 03:25 PM
#53
My skating rink melted but didn't go out the drain hole, it's clear so it must have melted from the top down. There was also an icewall between the cab & bed, and ontop of the fuel tank. The perils of parking in the open i guess.
Front end round 3


It looks worse in person than in the pictures of course but you have to look really close to notice. There is no body filler used, just a quick shot of primer. Still need to take it off and straighten the stiffening bends, don't have a pair of sheet metal clamps/pliers. very time I turn around it wants a new tool or something.. Templates taken from the passenger side worked out well. There are some issues with the vertical portions where it bolts down to the cab apron, I needed to pry it out at the bottom and push it down at the top to get the gaps to match the other side.
I have some issue with the hood. I think the latch is up to high. It rattles alot and if you screw the forward bump stops up so it doesn't rattle it sits higher than , not flush with, the fenders. I tried loosening the bolts and shoving/hammering it down some but it didn't do much if any good. Maybe the hood is a little bent upwards not really sure it is pretty tight to the grill.
While I was playing with the latch I found out the latch brace that runs up and down in front of the radiator and a/c condenser, where I had the issue with the grill not lineing up with the hole. These are reversible, just flip it over left to right to switch between the 2wd or 4wd grills, unfortunatly there is no nut welded into the apron on the passenger side of mine. But I could flip the brace and the grill wouldn't be floating in the middle anymore.
Tryed to adjust the drivers door a little better. The door side of the hinges are at thier limits so I'll need to do it on the body side next time I have the fender off. I also found some of my leaking door gasket issues. Two of the plastic retainer clips had worked themselves part way out of the rubber, just needed to restretch these over the clips. The other issue is a bit of a roll in the bottom rear corner, the flat side that should be against the bottom of the door was/is up against the side of the door, this might be fixable with some heat gun action or some rubber cement. I placed it the way it's supposed to go and carefully pinched it in the closed door I'll see if it pops right back the next time I open the door.
Remounted the straighted out tailgate cover. It really doesn't fit well at the middle section, where I can't raise the reinforcement ridges. Will need to try a hubcap tool or figure something out to bend that section back up without putting pressure on the outside tailgate skin.
Remeber safety first!! I uhm gave my self a black eye when the hammer handle I was using to pry with decided I was too close and it slipped out and bite me.
Might not get the bumper stuff done till monday or after, 50% chance of rain tomarrow and snow sunday. There is supposed to be a 3-6 hour window so I might try anyway, that gives me 30 to remove it and pull the valance 30 to treat it another 30 for primer to cure and another hour for the paint and another 30 to mount it. Sounds easy but it won't be,I need enough snow free area to paint on
Front end round 3
It looks worse in person than in the pictures of course but you have to look really close to notice. There is no body filler used, just a quick shot of primer. Still need to take it off and straighten the stiffening bends, don't have a pair of sheet metal clamps/pliers. very time I turn around it wants a new tool or something.. Templates taken from the passenger side worked out well. There are some issues with the vertical portions where it bolts down to the cab apron, I needed to pry it out at the bottom and push it down at the top to get the gaps to match the other side.
I have some issue with the hood. I think the latch is up to high. It rattles alot and if you screw the forward bump stops up so it doesn't rattle it sits higher than , not flush with, the fenders. I tried loosening the bolts and shoving/hammering it down some but it didn't do much if any good. Maybe the hood is a little bent upwards not really sure it is pretty tight to the grill.
While I was playing with the latch I found out the latch brace that runs up and down in front of the radiator and a/c condenser, where I had the issue with the grill not lineing up with the hole. These are reversible, just flip it over left to right to switch between the 2wd or 4wd grills, unfortunatly there is no nut welded into the apron on the passenger side of mine. But I could flip the brace and the grill wouldn't be floating in the middle anymore.
Tryed to adjust the drivers door a little better. The door side of the hinges are at thier limits so I'll need to do it on the body side next time I have the fender off. I also found some of my leaking door gasket issues. Two of the plastic retainer clips had worked themselves part way out of the rubber, just needed to restretch these over the clips. The other issue is a bit of a roll in the bottom rear corner, the flat side that should be against the bottom of the door was/is up against the side of the door, this might be fixable with some heat gun action or some rubber cement. I placed it the way it's supposed to go and carefully pinched it in the closed door I'll see if it pops right back the next time I open the door.
Remounted the straighted out tailgate cover. It really doesn't fit well at the middle section, where I can't raise the reinforcement ridges. Will need to try a hubcap tool or figure something out to bend that section back up without putting pressure on the outside tailgate skin.
Remeber safety first!! I uhm gave my self a black eye when the hammer handle I was using to pry with decided I was too close and it slipped out and bite me.
Might not get the bumper stuff done till monday or after, 50% chance of rain tomarrow and snow sunday. There is supposed to be a 3-6 hour window so I might try anyway, that gives me 30 to remove it and pull the valance 30 to treat it another 30 for primer to cure and another hour for the paint and another 30 to mount it. Sounds easy but it won't be,I need enough snow free area to paint on
02-22-2013, 03:32 PM
#54
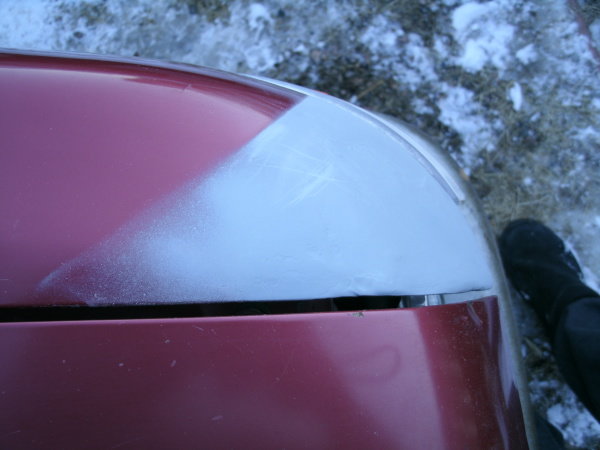
P.S. That spot in the first picture where it looks like the clearcoat is delaminating, that is actually where the clear coat is gone completely that is the under/color coat seems really wierd but the foggy stuff is the clear coat and the shiney stuff is my color.
02-22-2013, 06:43 PM
#55
Registered User
Join Date: Aug 2012
Location: Gadsden, AL
Posts: 266
Likes: 0
Received 0 Likes
on
0 Posts
Where did you learn to use the body tools? I would really love to learn that particular skill set. I can't believe you have made that fender look that good without filler.
02-23-2013, 06:31 AM
#56
Super Moderator
Staff
iTrader: (1)
Join Date: Aug 2008
Location: Anderson Missouri
Posts: 11,788
Likes: 0
Received 21 Likes
on
19 Posts
You did great and no body filler, that is something. On the rubber that stretches over the little clips, it can start to dry rot and rip easily. I have fixed a few of the rips with a little super glue. Ouch on the black eye.
02-23-2013, 03:09 PM
#57
Thanks guys, I'm pretty happy with it. You can see the flat'ish spot in the second photo of the last round, and third picture of the one before. I don't have a cold chisle to fix that seam, I'll give it a few whacks with a flathead in there and see if I can get it right next time it's off. I was intending to put something glossy on it so you could see the highs and lows a bit better, but I'll just have to sand it off when it comes time to putty everything.
I'm holding off on putty till I can do it all at once. Which means I need to get the five or six big ones raised up, and all the little hail dents and dings sanded after those. So I have places to put any extra I mix up when I do the big ones. I only have the small can not a full gallon of putty. Big box didn't have full gallons and small sized was/is 30-50% cheaper there than the parts stores.
I've had a few teachers.
When I was (maybe) 10 my uncle would take us to a biker buddies autobody shop in texas, Hey AL, they used to run us out of the shop when they were painting. I mostly remeber doing sanding, "Don't screw it up or your going to be the one that chips it out so I can redo it!", mostly wet sanding filler, wet so we couldn't do too much damage or inhale a bunch of junk. He showed us how to work the masking machine and mix paint and lots of stuff I was too busy running my mouth to hear and remeber. My favorite was running the sand blaster cause I got to wear the darthvader suit.
I'm kind of old, like before the big insurance company was telling everyone how to run thier business, they didn't used to be so strict about employees only in the shop areas. So I used to hang out at another shop when i was 11-12, Hey tony! He/They showed me window tint and some other stuff I was still too busy running my mouth to hear/remeber.
From 14-19 I was apprenticing with a mechanic, there was a talented guy next door that did body work. I got the same lessons from him as the first place, "If you screw it up yer fixin it!", but I was too busy chasing girls at that point to run my mouth or remember.
So since I wasn' paying full attention most of what I learned that stuck is lodged in there somewhere A few refresher videos off you tube, and a can do attitude. Add in some metal you might wind up replacing anyway, and "get'er'done".
Long story not quite so long..
On with the show!
Best shot I have of before with it still mounted is this one, wish I'd of got some of the signal lenses.
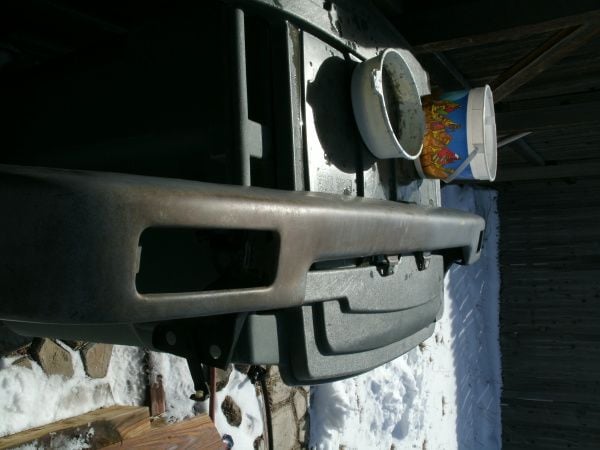
But I got some inprogress ones after it was unmounted.
Drivers side done, passengers only wetted. (I didn't notice that dent in the drivers side untill I was posting the pictures or I'd of knocked that one out too, got one just to the passengers side of center before I started)

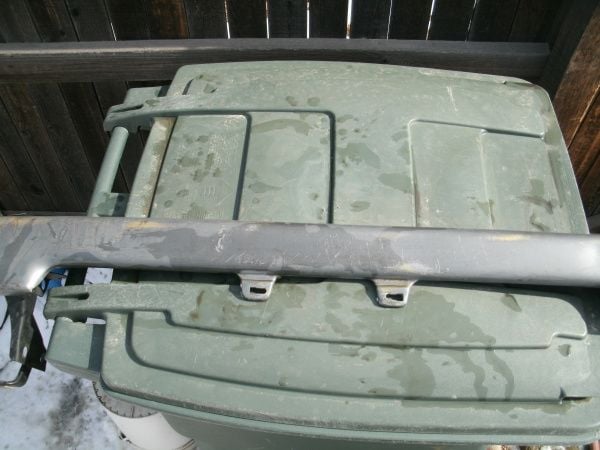
Rust dead and gone.
2-3: You'll get this film when the wash drys


4: But it wipes right off with some clean water, maybe a bit of rubbing if it's heavy, and doesn't come back
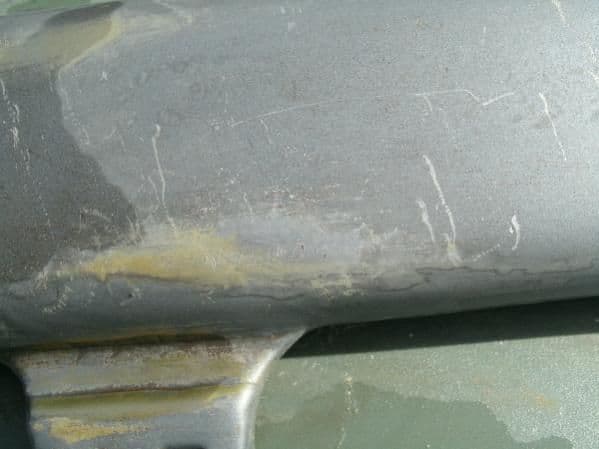
5: This is the spot from the first pic where the corner lamp had rubbed off all the paint.

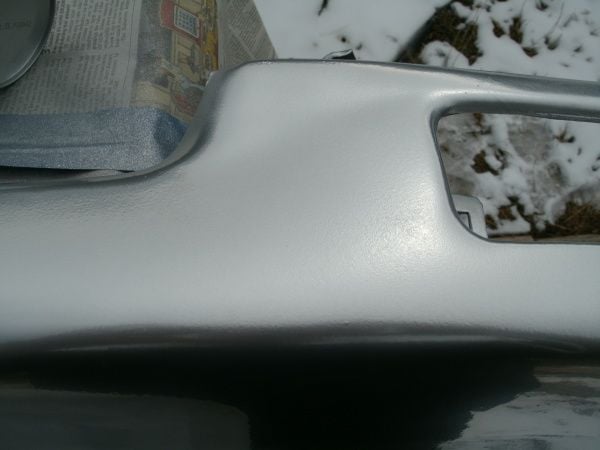
Painted!
Signal lamps refurb.
I didn't spot a date difference on these but the one on the left, drivers side, has been replaced. Crappy paint, and no seal, OEM toyota manufactured by Koito same as the passengers Maybe someone lost the rubber, but the paint was junk different shade even in the clean spots.


Had a little misshap with the clearcoat on the signal lenses. At first I thought it was the weather. But after looking abit I noticed it wasn't foggy so much as metallic speckled Oops need more than the ten feet away and not down wind. Had to wet sand it off and recoat it with the clear coat.

Can seet the silver flakes on the cardboard also.

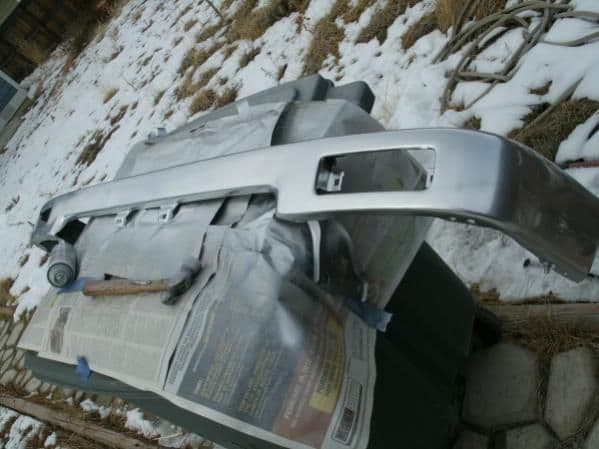
Finished and mounted.


Much better! The bumper could of used multiple coats, this would allow for some wet sanding to get the texture chrome smooth and a clear coat. And I'm really happy with the signal lamps, these didn't get buffed jusst a quick wet sand and clear coat. I stood in the driveway watching them blink for awhile grinning like the cheshire cat the whole time, had an audience(neighbors) sure they thought I was loopy from paint fumes.
Bumper removal: 12mm nuts inside wheel wells one on each side(the ones that face the rear, not the ones that hold the rubber), 9/16 or 14mm bolts bumper mounts to frame two on each side. Don't forget to disconnect the signal lamp plugs, I do this while the bumper is in my lap makes getting to the tabs easier. 10mm valance to bumper screws 3 on each side, and whatever you have for license plates.
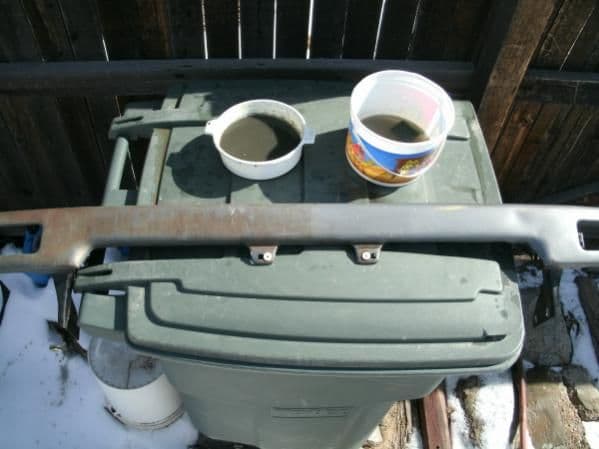
Prepare a vinegar and water solution, 8oz water & 8oz of white vinegar thi doesn't have to be exact. Cut a 2 inch square of scotch pad. And grab another bucket if you want a seperate rinse pail.
Wet the surface and keep wet for 5-10 minutes, you can start immediatly but it'll come off easier if you give it some time to work. It will turn from the rust/russet red to a chocolate brown or black.
Start scrubbing the flat areas first, using light pressure and a swirling motion provides the most effect for your effort. Save the edges and creases or any rough areas for last, they tear up the pad. Keep the surface wetted, when you see the area you're not working starting to dry up it's a good time to rinse and dip the pad.
You know your done when you have bright shiney clean metal or black that won't come off, the black will generally come off with more soaking and/or pressure but it shouldn't be a big concern one it's black the conversion is complete and the bacteria dead. I'm a bit color impaired so the chocolate brown and black look pretty much the same, the brown comes off easier and isn't fully treated.
Once your finish the edges and creases and other ruff spots go ahead and give it another all over wipe down, just incase there is anymore bacteria/rust lingering.
Wash with soap and water, then rinse, and towel dry. Wipe down with degreaser(if you haven't been wearing gloves). Sand down any rough spots if you want to then rewash. Yes wash before you sand don't want to spread the rust monsters that might still be lurking.
And it's ready for primer and paint.
You can remove most of the mounting brackets if you want to, but there will still be some areas you just can't get to like behind the welded plates they mount to. You can treat these with something like por15, if you want to, that will keep it from rusting from the inside out.
For the signal refurb:
Lenses: wet sand with 200 grit or higher (I had 400 so thats what I used), dry buff (no wax!!) if you want(I didn't), dry and spray a good solid coat of UV resistant clear coat. You'll know you have enough clear on them by looking at a sharp angle, you'll see texture just wait a moment and add some more.
Reflectors: wash dry prime(Yeah I skipped this and shouldn't have) and give a light coat of silver, aluminium, or mirror type paint.
Don't skip primer!!
So Like I said I skipped the priming stage cause I was rushing to have the lights ready. I didn't really need to I wound up having to wait for the bumper since it's kind of cold out. When I sprayed the "mirror" silver the solvents released the factory paint and I got some blending. They also didn't want to dry properly so I had to put the hair dryer to them. The primer should give a bit of a barrier to my solvent issue. They came out "ok" but I was expecting better from my mirror paint than I got, could have just used the metalic aluminium finish stuff and got the same.
I'm holding off on putty till I can do it all at once. Which means I need to get the five or six big ones raised up, and all the little hail dents and dings sanded after those. So I have places to put any extra I mix up when I do the big ones. I only have the small can not a full gallon of putty. Big box didn't have full gallons and small sized was/is 30-50% cheaper there than the parts stores.
I've had a few teachers.
When I was (maybe) 10 my uncle would take us to a biker buddies autobody shop in texas, Hey AL, they used to run us out of the shop when they were painting. I mostly remeber doing sanding, "Don't screw it up or your going to be the one that chips it out so I can redo it!", mostly wet sanding filler, wet so we couldn't do too much damage or inhale a bunch of junk. He showed us how to work the masking machine and mix paint and lots of stuff I was too busy running my mouth to hear and remeber. My favorite was running the sand blaster cause I got to wear the darthvader suit.
I'm kind of old, like before the big insurance company was telling everyone how to run thier business, they didn't used to be so strict about employees only in the shop areas. So I used to hang out at another shop when i was 11-12, Hey tony! He/They showed me window tint and some other stuff I was still too busy running my mouth to hear/remeber.
From 14-19 I was apprenticing with a mechanic, there was a talented guy next door that did body work. I got the same lessons from him as the first place, "If you screw it up yer fixin it!", but I was too busy chasing girls at that point to run my mouth or remember.
So since I wasn' paying full attention most of what I learned that stuck is lodged in there somewhere
A few refresher videos off you tube, and a can do attitude. Add in some metal you might wind up replacing anyway, and "get'er'done".Long story not quite so long..
On with the show!
Best shot I have of before with it still mounted is this one, wish I'd of got some of the signal lenses.
But I got some inprogress ones after it was unmounted.
Drivers side done, passengers only wetted. (I didn't notice that dent in the drivers side untill I was posting the pictures or I'd of knocked that one out too, got one just to the passengers side of center before I started)
Rust dead and gone.
2-3: You'll get this film when the wash drys
4: But it wipes right off with some clean water, maybe a bit of rubbing if it's heavy, and doesn't come back
5: This is the spot from the first pic where the corner lamp had rubbed off all the paint.
Painted!
Signal lamps refurb.
I didn't spot a date difference on these but the one on the left, drivers side, has been replaced. Crappy paint, and no seal, OEM toyota manufactured by Koito same as the passengers
Maybe someone lost the rubber, but the paint was junk different shade even in the clean spots.Had a little misshap with the clearcoat on the signal lenses. At first I thought it was the weather. But after looking abit I noticed it wasn't foggy so much as metallic speckled
Oops need more than the ten feet away and not down wind. Had to wet sand it off and recoat it with the clear coat.Can seet the silver flakes on the cardboard also.
Finished and mounted.
Much better! The bumper could of used multiple coats, this would allow for some wet sanding to get the texture chrome smooth and a clear coat. And I'm really happy with the signal lamps, these didn't get buffed jusst a quick wet sand and clear coat. I stood in the driveway watching them blink for awhile grinning like the cheshire cat the whole time, had an audience(neighbors) sure they thought I was loopy from paint fumes.
Bumper removal: 12mm nuts inside wheel wells one on each side(the ones that face the rear, not the ones that hold the rubber), 9/16 or 14mm bolts bumper mounts to frame two on each side. Don't forget to disconnect the signal lamp plugs, I do this while the bumper is in my lap makes getting to the tabs easier. 10mm valance to bumper screws 3 on each side, and whatever you have for license plates.
Prepare a vinegar and water solution, 8oz water & 8oz of white vinegar thi doesn't have to be exact. Cut a 2 inch square of scotch pad. And grab another bucket if you want a seperate rinse pail.
Wet the surface and keep wet for 5-10 minutes, you can start immediatly but it'll come off easier if you give it some time to work. It will turn from the rust/russet red to a chocolate brown or black.
Start scrubbing the flat areas first, using light pressure and a swirling motion provides the most effect for your effort. Save the edges and creases or any rough areas for last, they tear up the pad. Keep the surface wetted, when you see the area you're not working starting to dry up it's a good time to rinse and dip the pad.
You know your done when you have bright shiney clean metal or black that won't come off, the black will generally come off with more soaking and/or pressure but it shouldn't be a big concern one it's black the conversion is complete and the bacteria dead. I'm a bit color impaired so the chocolate brown and black look pretty much the same, the brown comes off easier and isn't fully treated.
Once your finish the edges and creases and other ruff spots go ahead and give it another all over wipe down, just incase there is anymore bacteria/rust lingering.
Wash with soap and water, then rinse, and towel dry. Wipe down with degreaser(if you haven't been wearing gloves). Sand down any rough spots if you want to then rewash. Yes wash before you sand don't want to spread the rust monsters that might still be lurking.
And it's ready for primer and paint.
You can remove most of the mounting brackets if you want to, but there will still be some areas you just can't get to like behind the welded plates they mount to. You can treat these with something like por15, if you want to, that will keep it from rusting from the inside out.
For the signal refurb:
Lenses: wet sand with 200 grit or higher (I had 400 so thats what I used), dry buff (no wax!!) if you want(I didn't), dry and spray a good solid coat of UV resistant clear coat. You'll know you have enough clear on them by looking at a sharp angle, you'll see texture just wait a moment and add some more.
Reflectors: wash dry prime(Yeah I skipped this and shouldn't have) and give a light coat of silver, aluminium, or mirror type paint.
Don't skip primer!!
So Like I said I skipped the priming stage cause I was rushing to have the lights ready. I didn't really need to I wound up having to wait for the bumper since it's kind of cold out. When I sprayed the "mirror" silver the solvents released the factory paint and I got some blending. They also didn't want to dry properly so I had to put the hair dryer to them. The primer should give a bit of a barrier to my solvent issue. They came out "ok" but I was expecting better from my mirror paint than I got, could have just used the metalic aluminium finish stuff and got the same.
02-25-2013, 07:56 PM
#59
Me youtube and phpbb tags aren't getting along so no inline video..
This guy on youtube is freaking amazing with a fender dolly(slap stick as he calls it), makes me upset my hammer set didn't have one. He covers how to make one with an old bastard file, but I don't have a spare one of those or a torch so might have to invest in the other hammer set from HF. I can get by without it but HOLY CRAP that guy was amazing.
He covers my questions on pot-fed v gravity guns. Pot gun twice the pressure at twice the flow = expensive compressor.
Some of my questions about what paint system I might want. This also looks close to my color, but I'm not recognizing the bumper cover as a mid 90s toyota.
And some tips and tricks for reskinning folded edge panels, not sure if it was in 1 or 2 nice little trick for raiseing dents in seams by edge hammering.
Painting rims for a durable shiney finish. Mix clear coat and color inthe top layer.
And fillerless repair with the slapstick er fender dolly
I didn't get alot done today. Went out with the intention of attaching the weather stripping in the front of the shell, since I noticed there is abit of a flat edge there where the AL trim sits. I forgot why I went out there by the time I'd shoveled all the snow off the walk and from around the truck.
I spent some time working on the lower bumper/valance, pulled all the plastic screw clips and knocked in all the tabs so it'l fit flush instead of having a gap caused by the plastic between the sheet metal and bumper. There is still a bit of unevenness in the old dented area. Along one of the edges it needs rolled out abit further so it's flat like the over side instead of curled inwards, not sure which is correct but the flat looks more like a factory line so I'll adjust the rolled part.
I'd forgot to bring my gloves of course, I didn't notice I was cold till the neighbor walked by and asked if I was frozen yet at which point I smacked my self in the hand and droped the dolly and decided I was frozen and done since I didn't really feel either one happen.
He covers my questions on pot-fed v gravity guns. Pot gun twice the pressure at twice the flow = expensive compressor.
And fillerless repair with the slapstick er fender dolly
I didn't get alot done today. Went out with the intention of attaching the weather stripping in the front of the shell, since I noticed there is abit of a flat edge there where the AL trim sits. I forgot why I went out there by the time I'd shoveled all the snow off the walk and from around the truck.
I spent some time working on the lower bumper/valance, pulled all the plastic screw clips and knocked in all the tabs so it'l fit flush instead of having a gap caused by the plastic between the sheet metal and bumper. There is still a bit of unevenness in the old dented area. Along one of the edges it needs rolled out abit further so it's flat like the over side instead of curled inwards, not sure which is correct but the flat looks more like a factory line so I'll adjust the rolled part.
I'd forgot to bring my gloves of course, I didn't notice I was cold till the neighbor walked by and asked if I was frozen yet at which point I smacked my self in the hand and droped the dolly and decided I was frozen and done since I didn't really feel either one happen.
Last edited by Co_94_PU; 02-25-2013 at 07:59 PM.


