Brad88nl's 1994 Pickup Build-Up Thread
 03-21-2013, 02:37 PM
#1
Registered User
Thread Starter

Join Date: Jun 2012
Location: Penticton, BC
Posts: 28
Likes: 0
Received 0 Likes
on
0 Posts
Brad88nl's 1994 Pickup Build-Up Thread
Well I've had my 1994 Toyota Pickup for about a year now and think it's about time I start my own build thread. This thread won't be quite as involved as others here, but none the less it's a start. Enjoy 
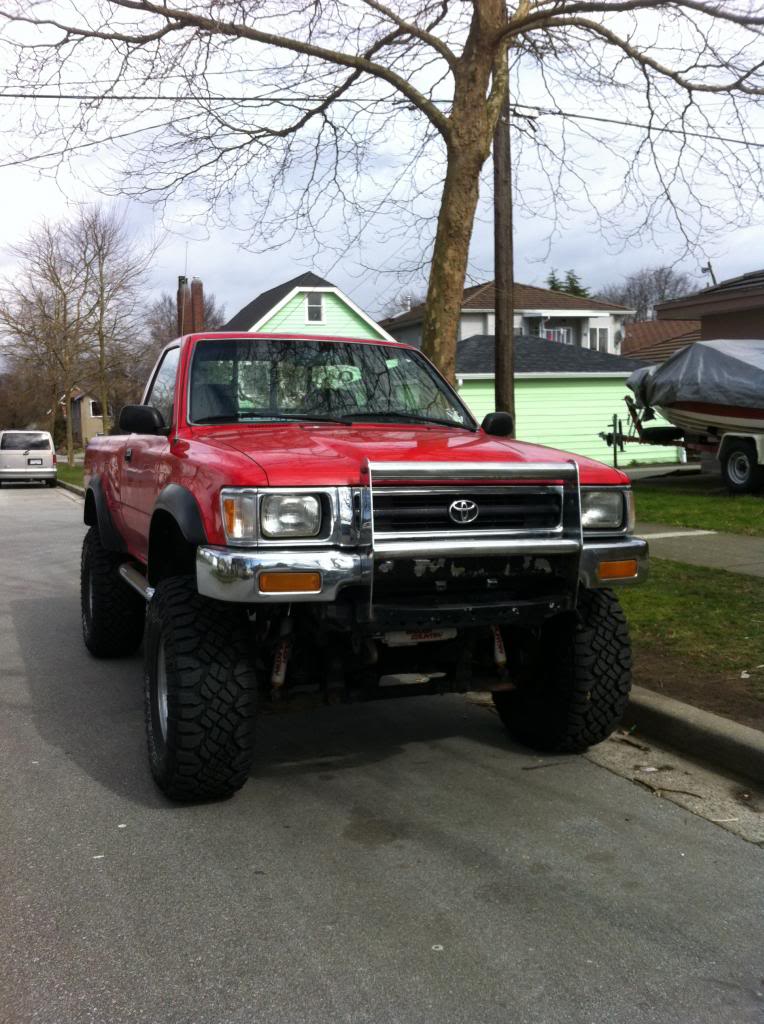
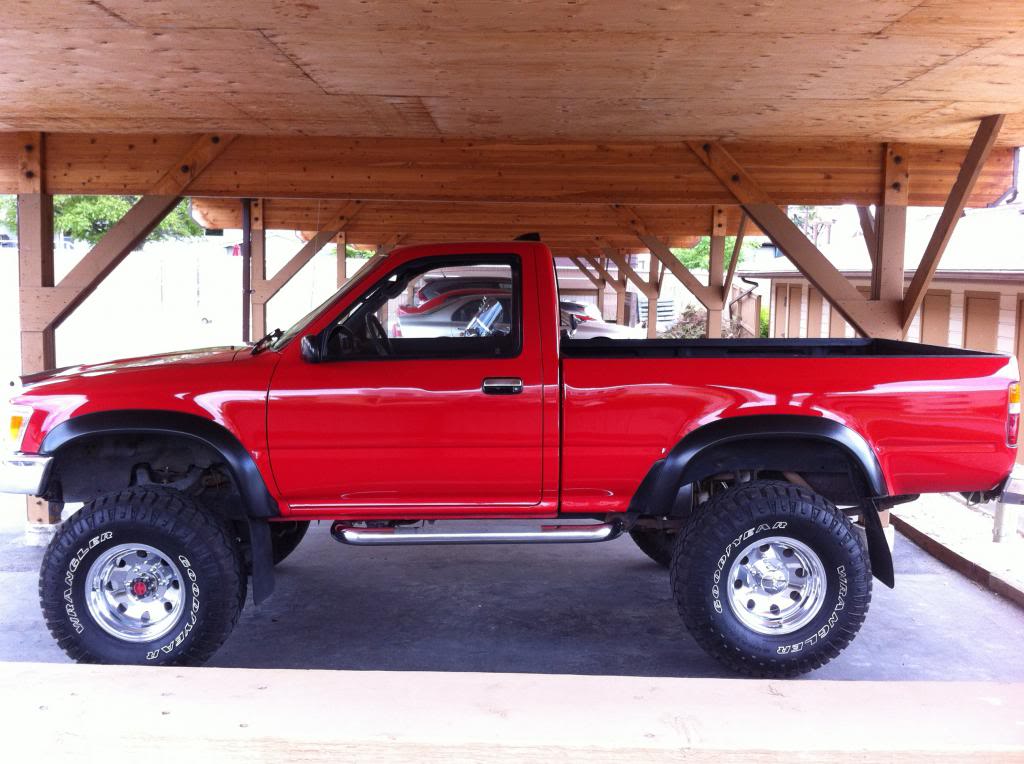
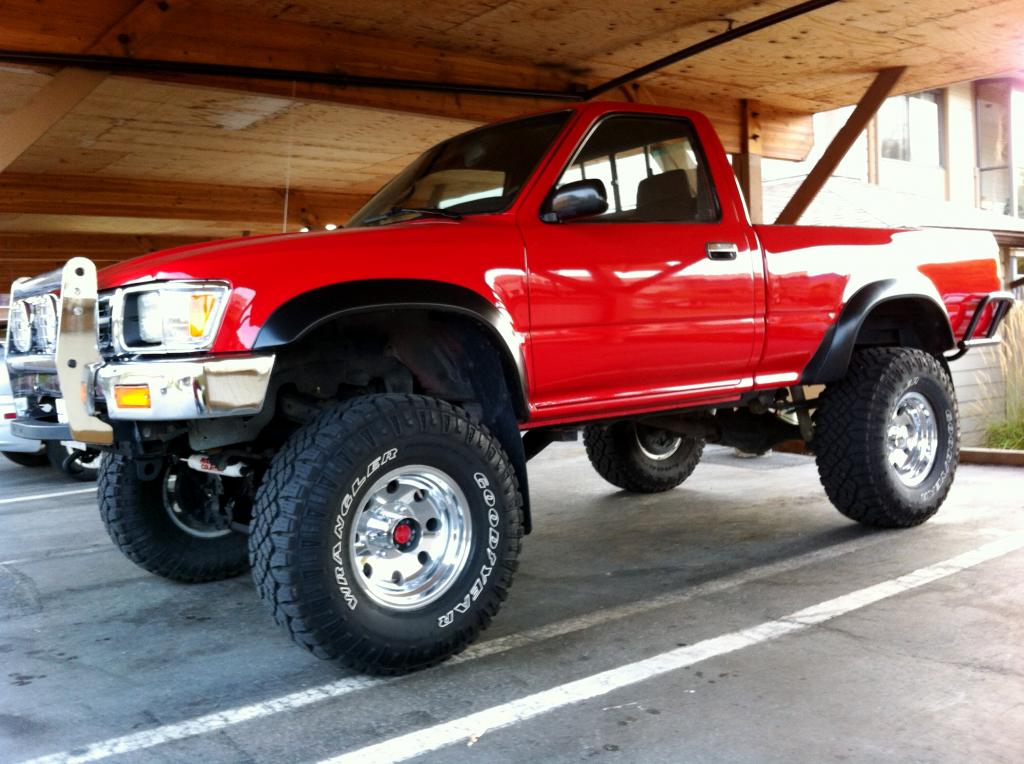
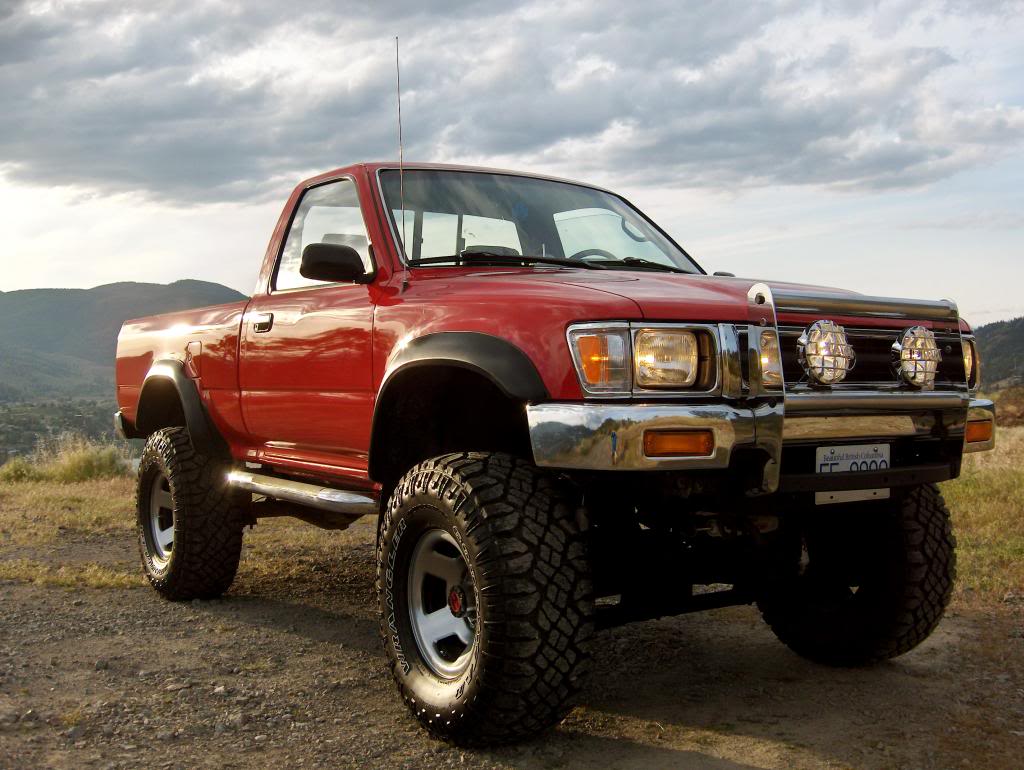
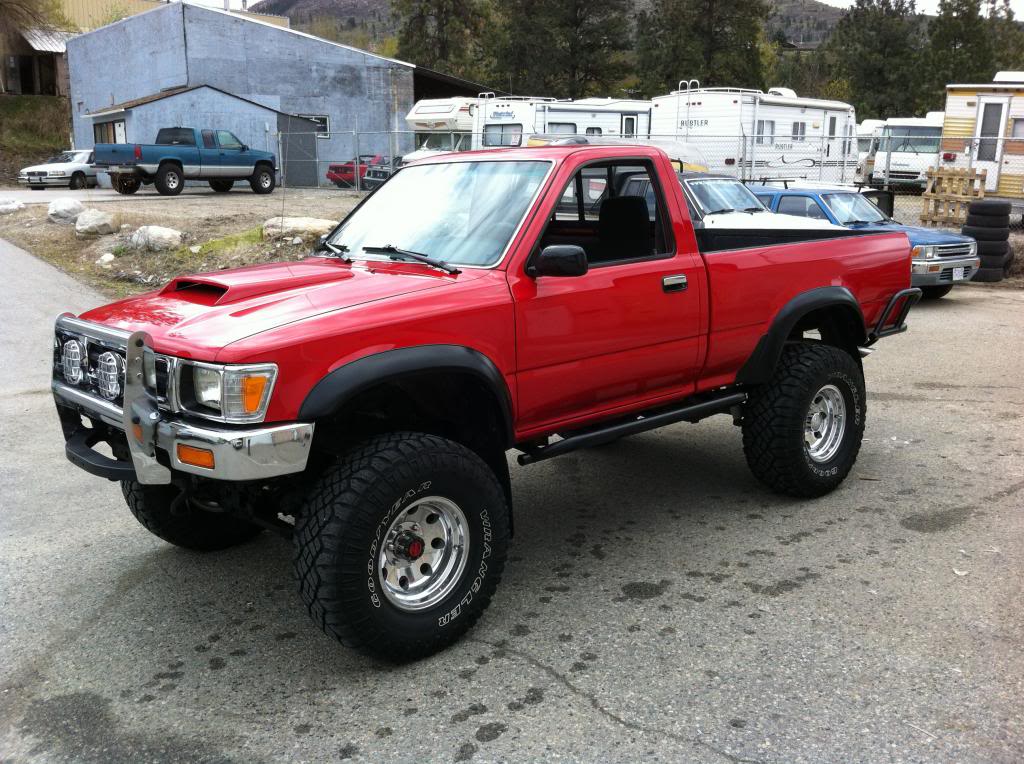
Here she is, my 1994 Toyota Pickup Base 22RE. After doing some extensive shopping around, I located her sitting in an underground parking garage. I knew that the truck needed a little TLC and elbow grease, but overall I was impressed with the body and frame condition... Up here in Canada, finding a truck this age without rust is a huge bonus! ... eh!
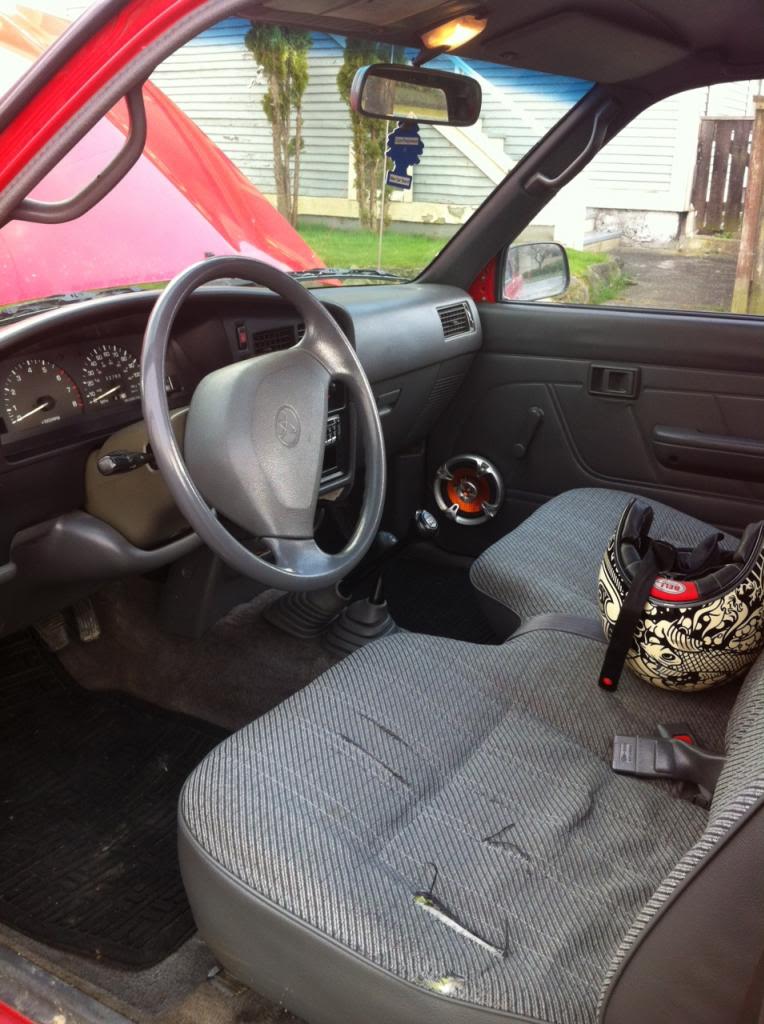
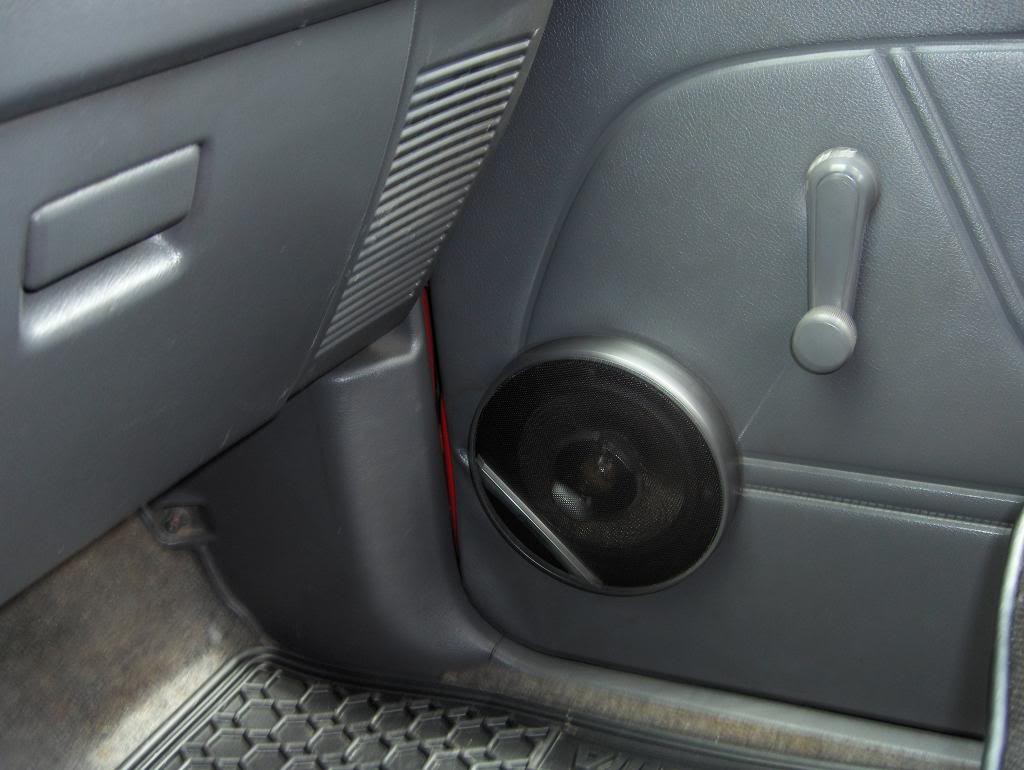
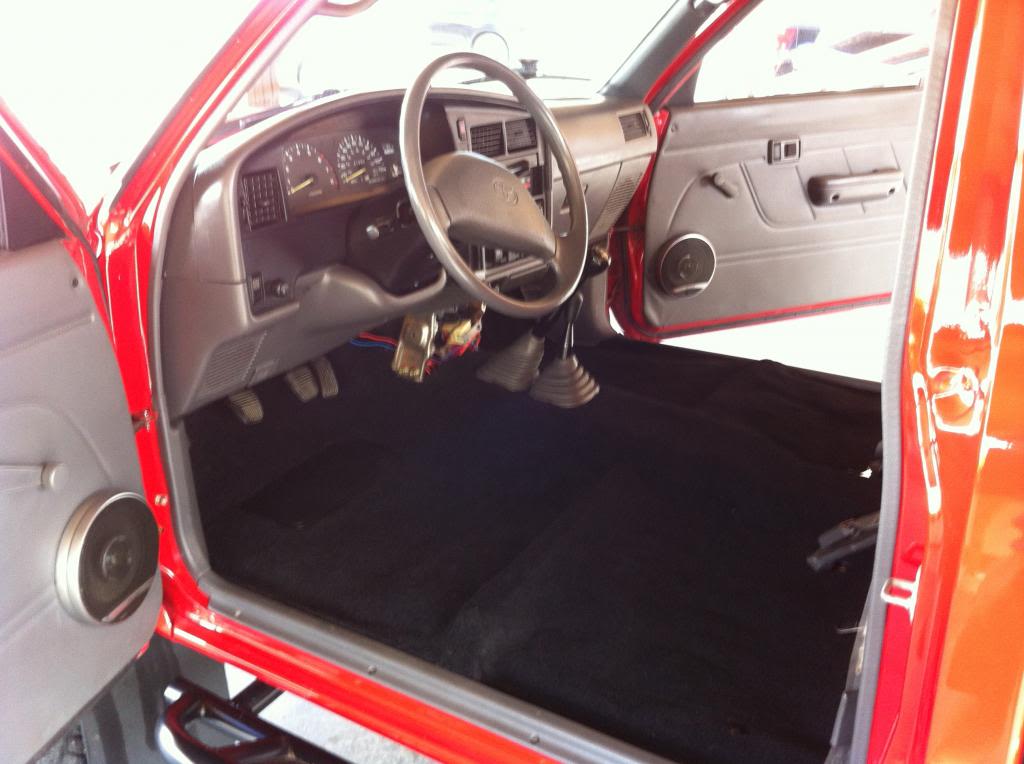
Here's a shot of the interior. This is where the elbow grease will come into play haha.. At least one of the speakers worked for my drive home!
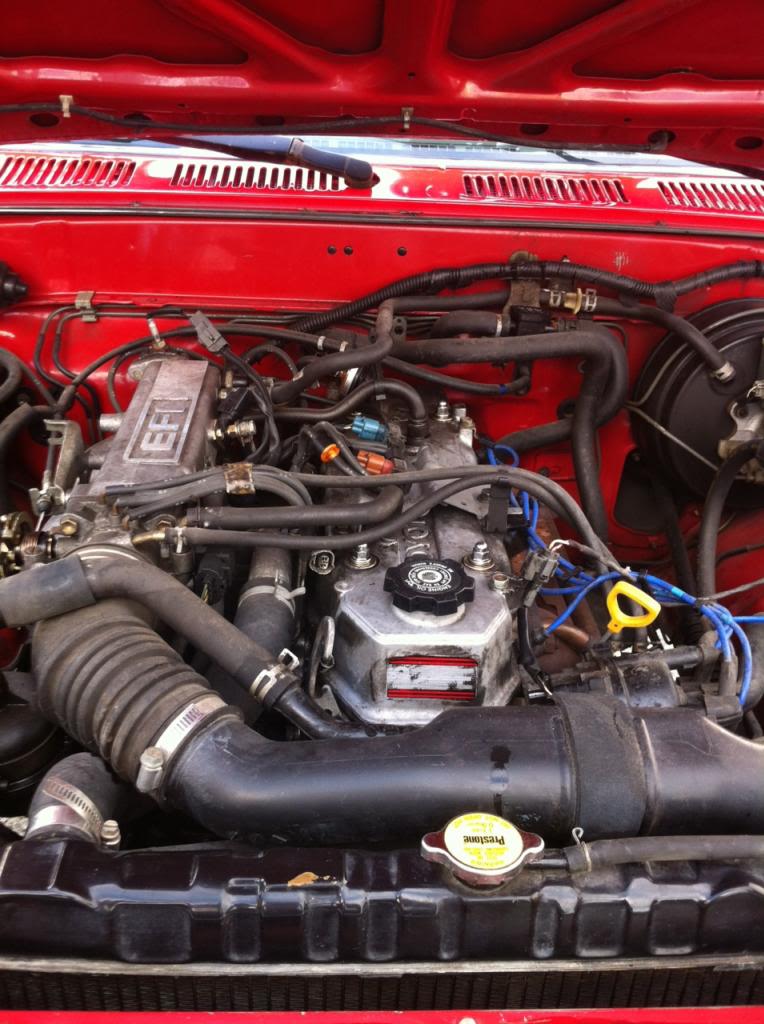
The good old reliable 22RE motor. I was happy to see it was still running strong! I lifted the Valve cover to take a look at the timing chain and could see that the plastic guides were starting to take a beating... Hmm..
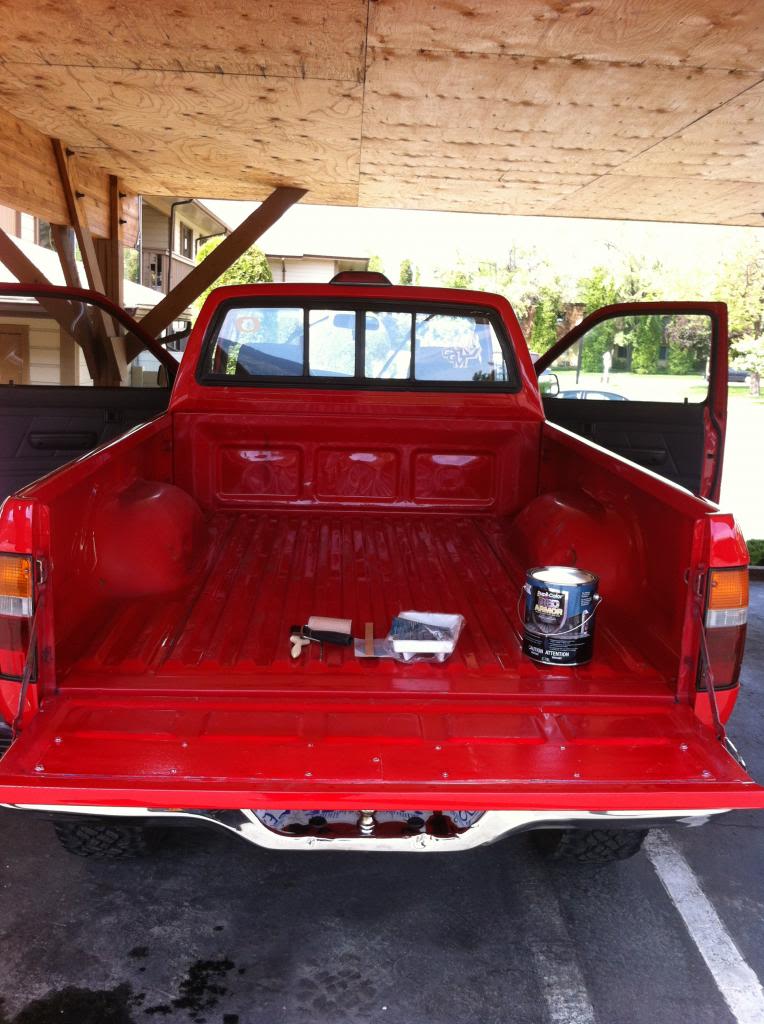
So my OCD started kicking in sooner than i thought. The bed rails were scratched up and showing bare metal in areas. As a temporary solution, I just picked up a can of paint and clear coat to cover it all up.
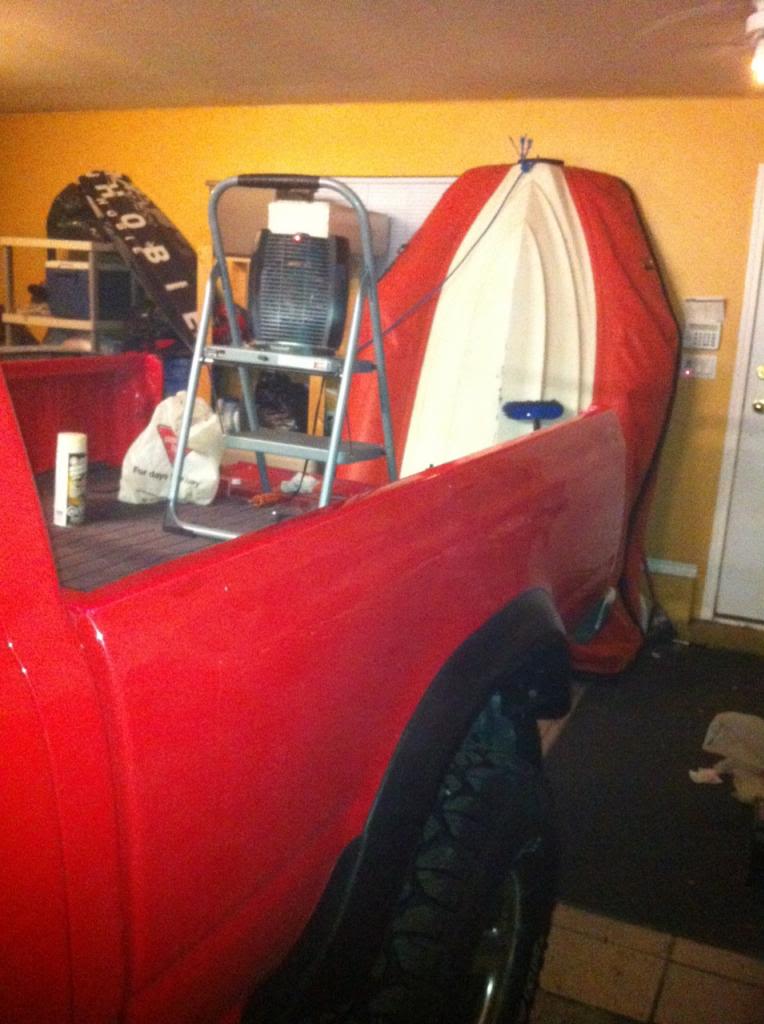
Not Perfect, but it did the job!
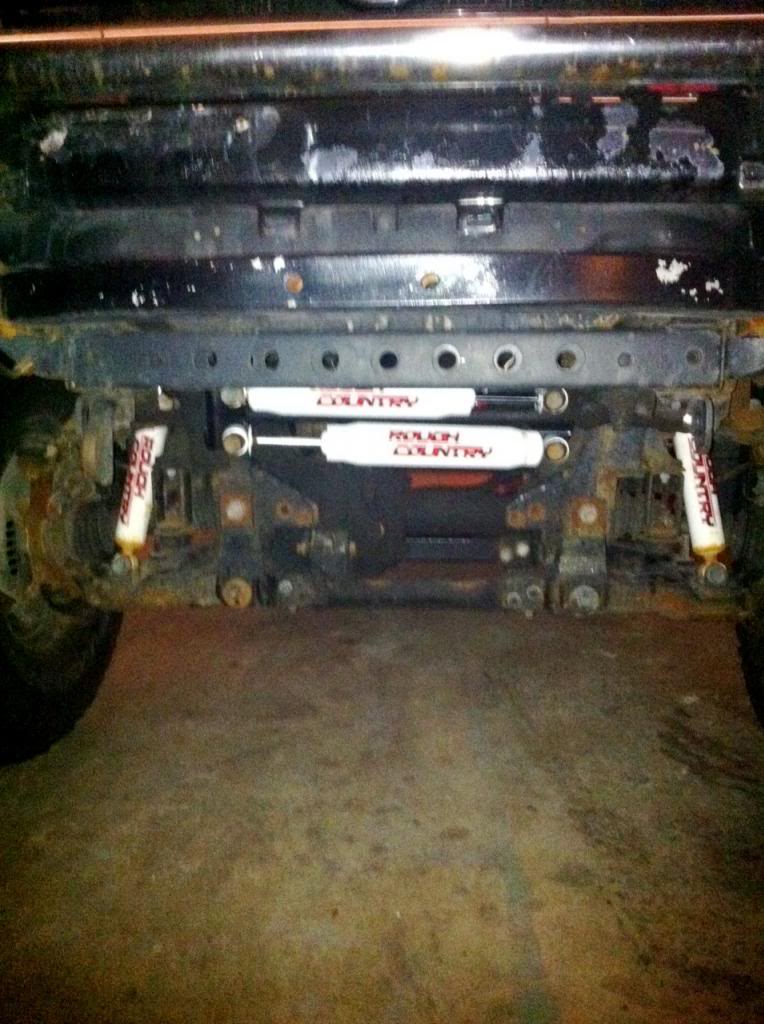
I know that there aren't a whole lot of IFS bracket lift fans out there... I'm still making my decision. The Rough country kit seems to do the job for me right now... Although it also looks like it could use a little elbow grease!
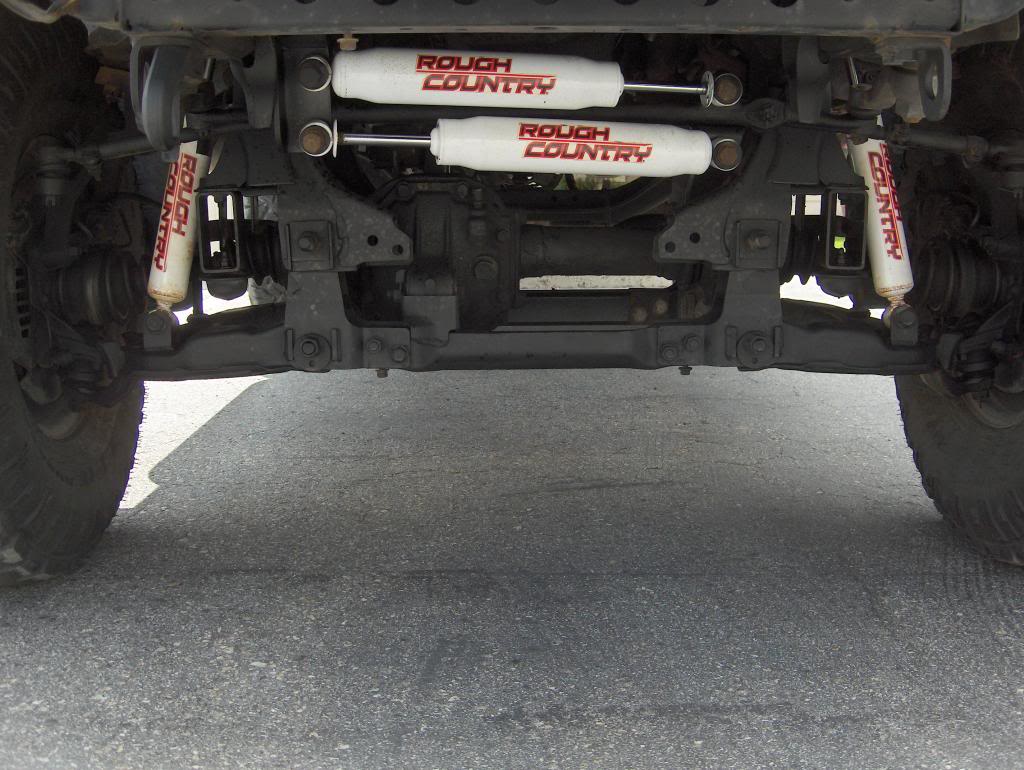
That's more like it! Gotta love SOS pads, sand paper and rust check paint! Also had a chance to experience the fun of scraping black paint off of my chrome bumper which the last owner "customized".. bla.
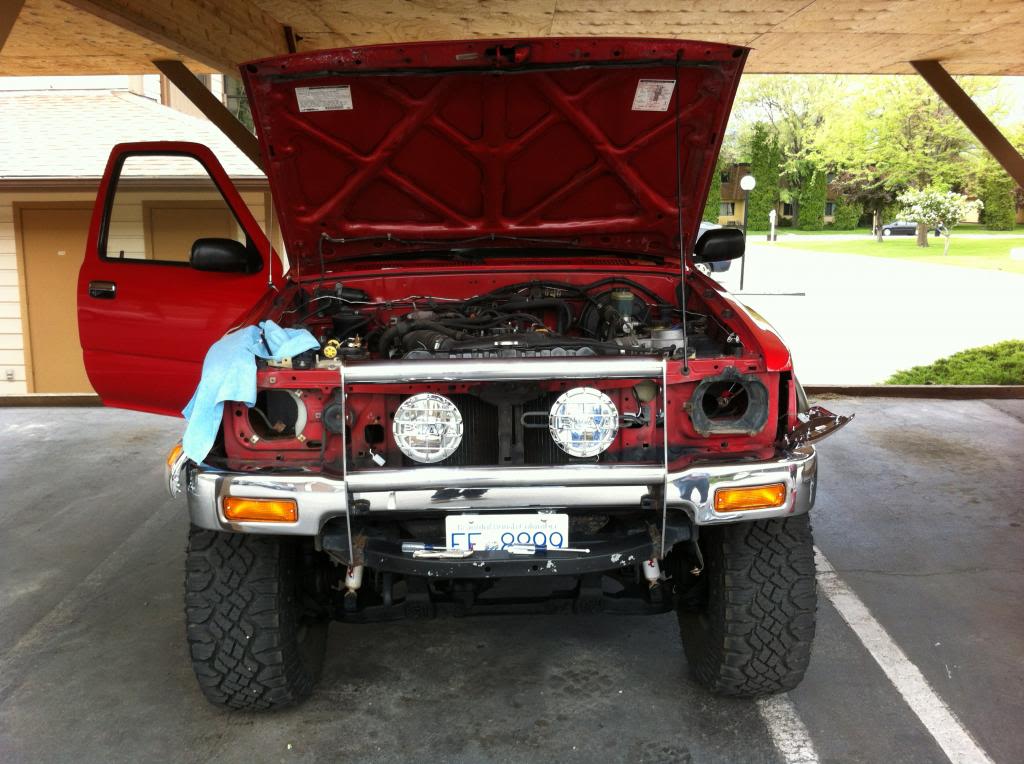
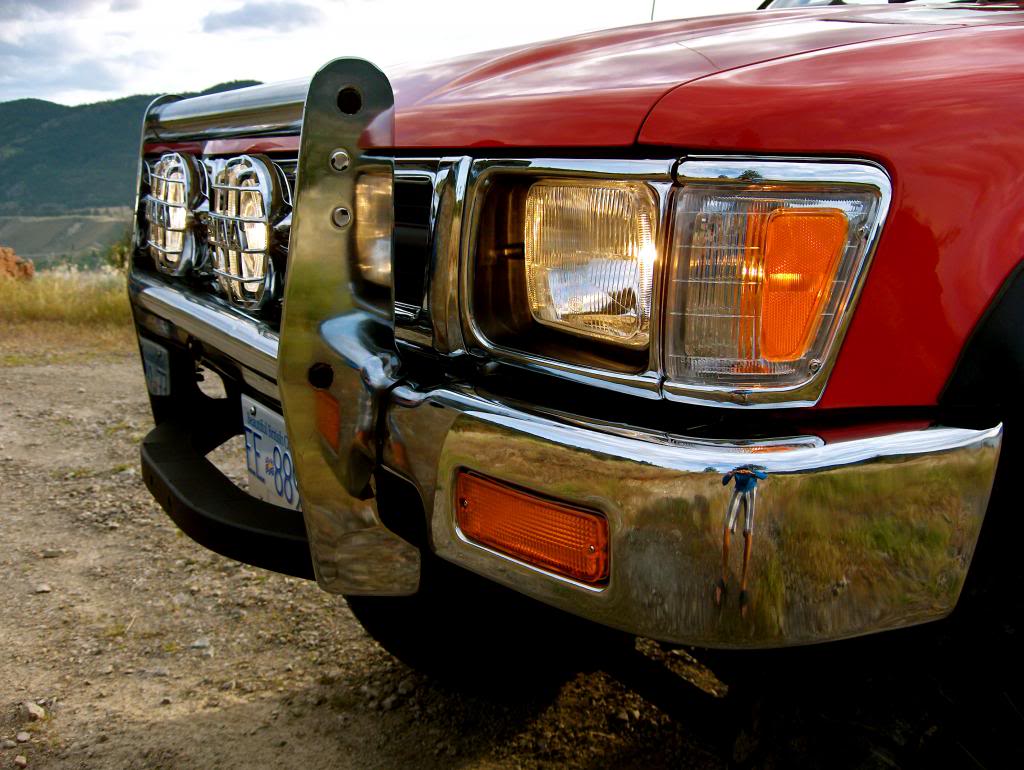
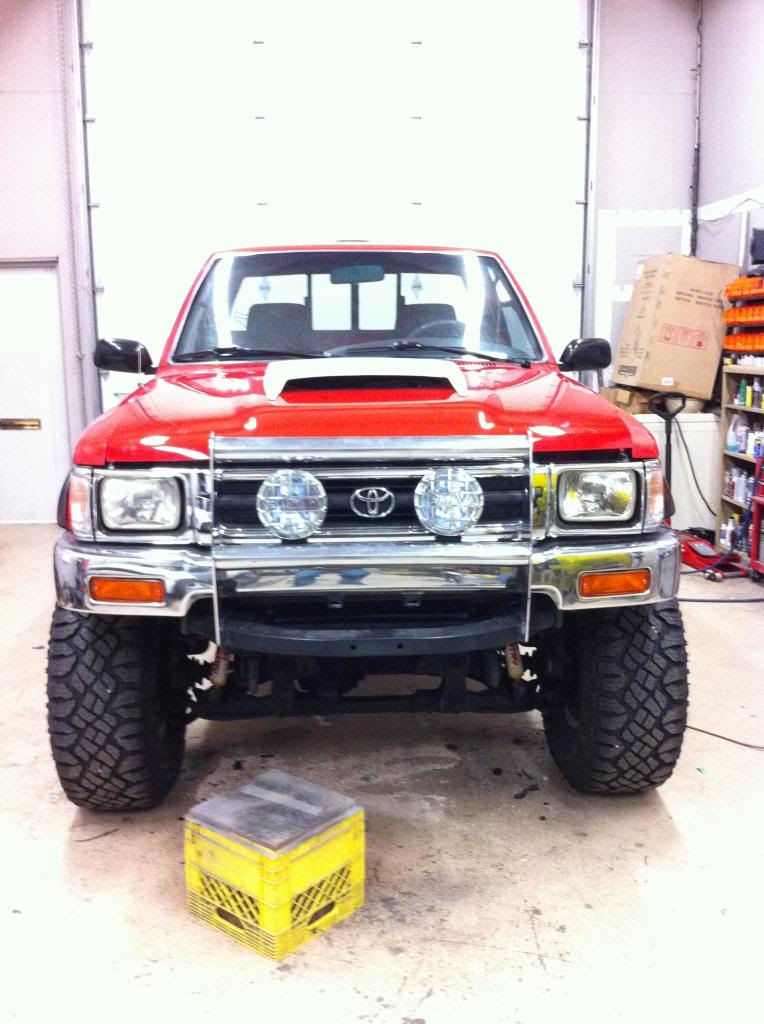
So while I was scraping all of the paint off of my now fully chrome bumber, I noticed that the grill and light surrounds were beginning to show their age with rock chips, etc.. So I hit up ebay and ordered myself some new parts, including some much brighter head lights and Pia 520's!
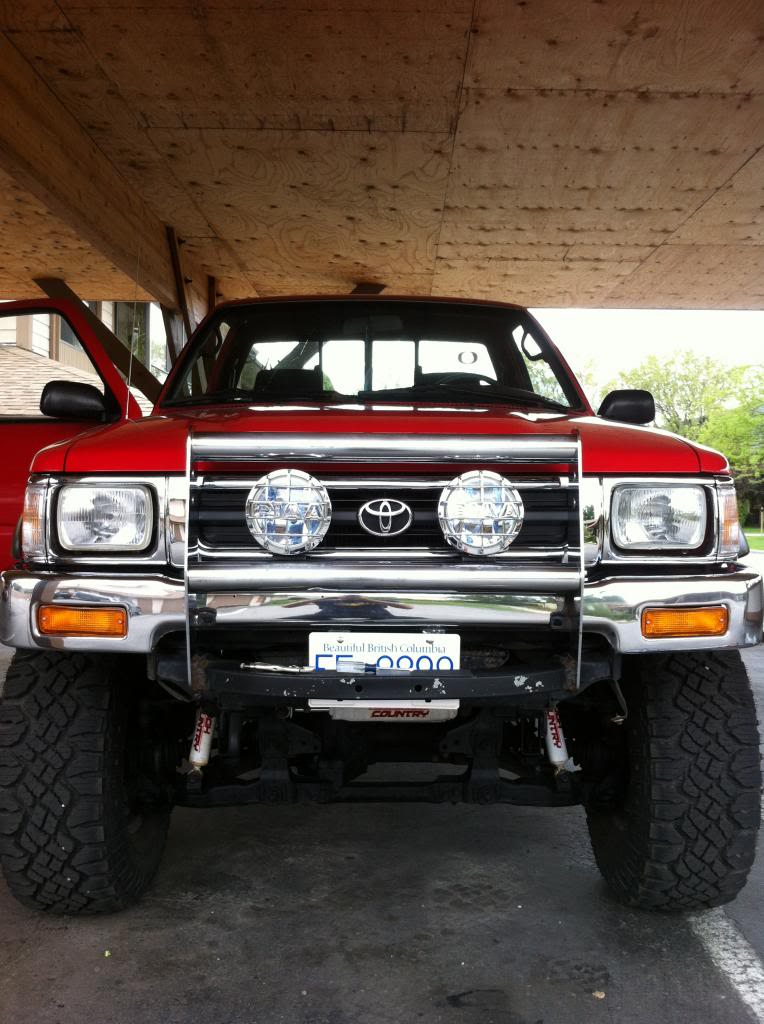
Looking a little more refreshed one step at a time!
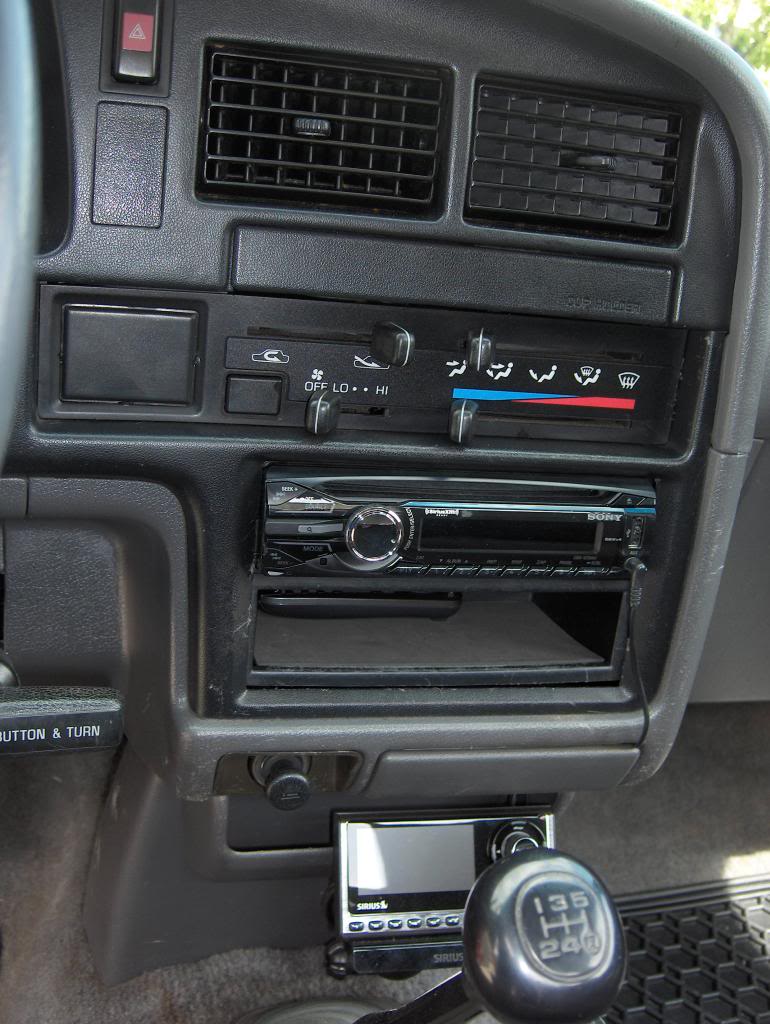
Alright. So I think it's time I put a little bit of focus on the interior of the truck. Remember those unique orange "noname" speakers you seen in the original interior photo? Well they have been replaced with some nice covered pioneers. I also changed out the "noname" deck with a decent Sony system. To say the least I was much happier with the sound quality.
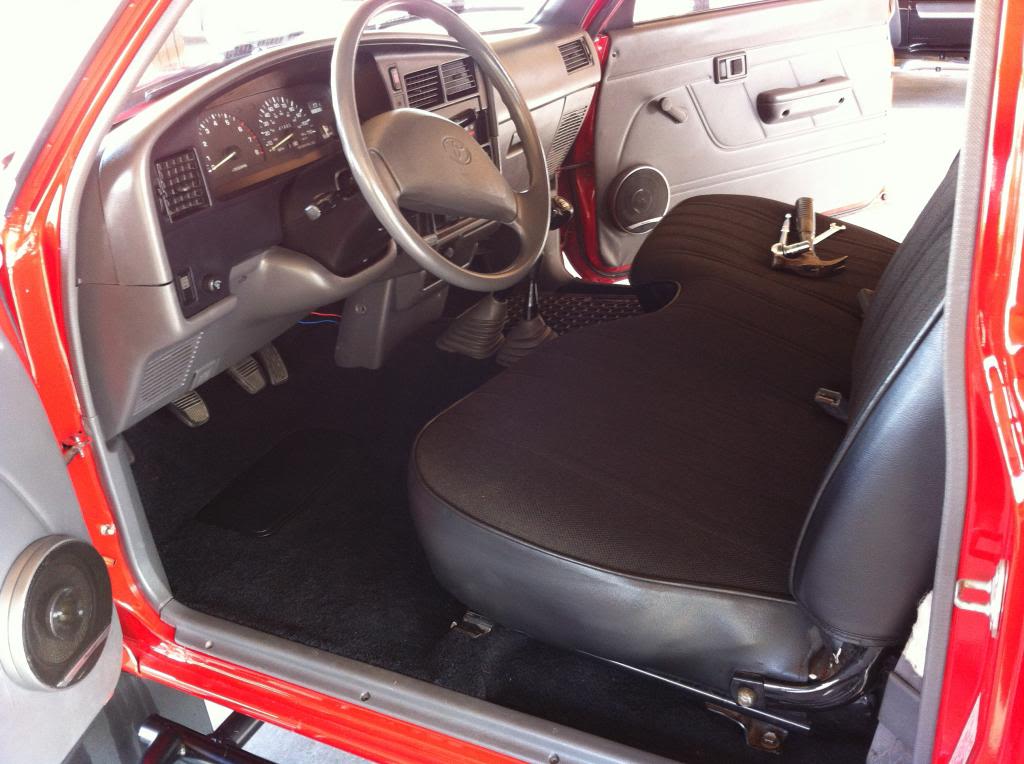
Next on the list.. My butt comfort. The old stock bench seat was a little "used" shall we say. I had a local upholstery shop do a full restore on the bench and I was 100% satisfied with the quantity of work, price and new found comfort!

A few other small things I've been working on with the interior:

Otrattw Rocker Switches to help clean up some of the Aux power
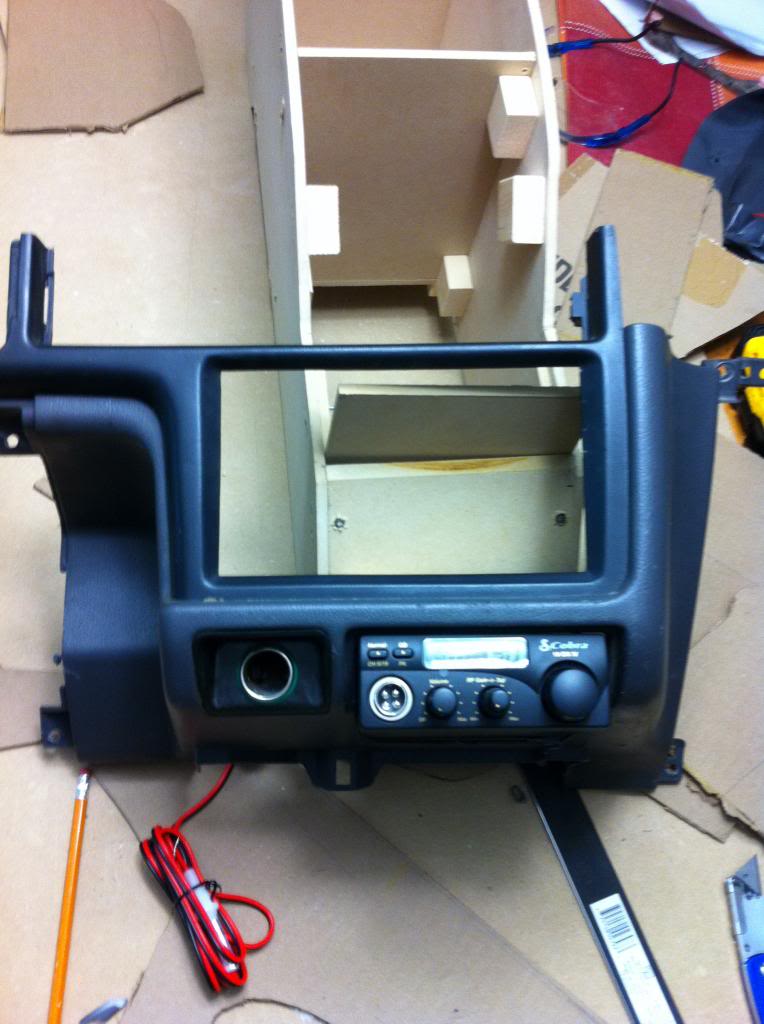
Cobra CB Radio ready for install
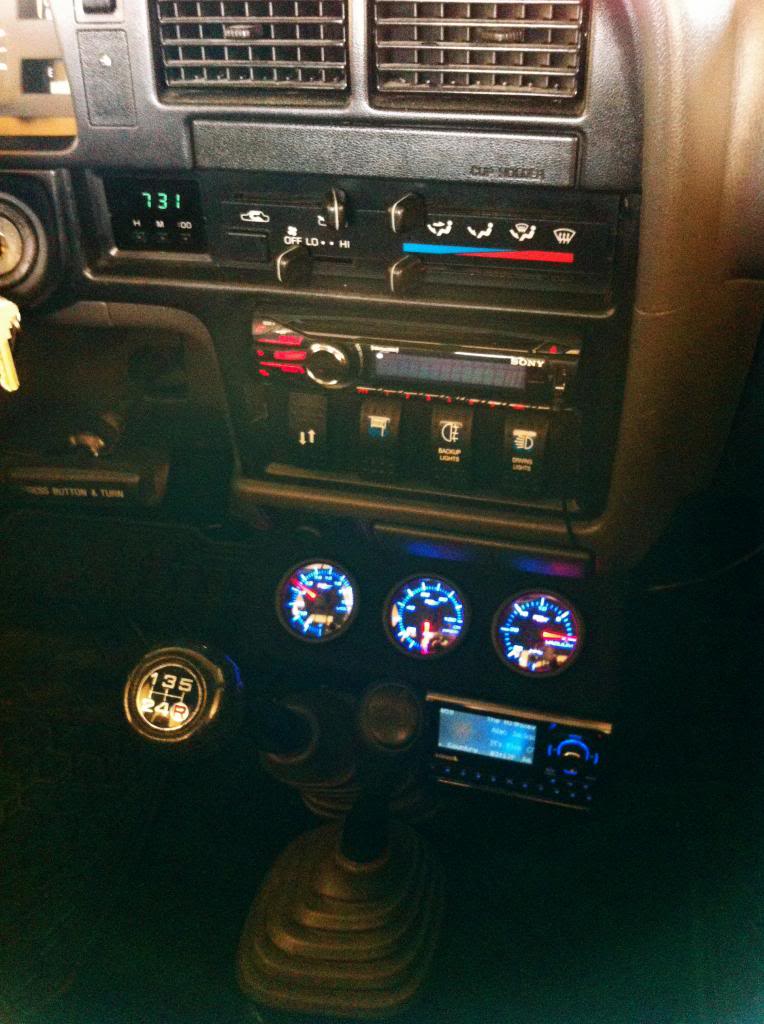
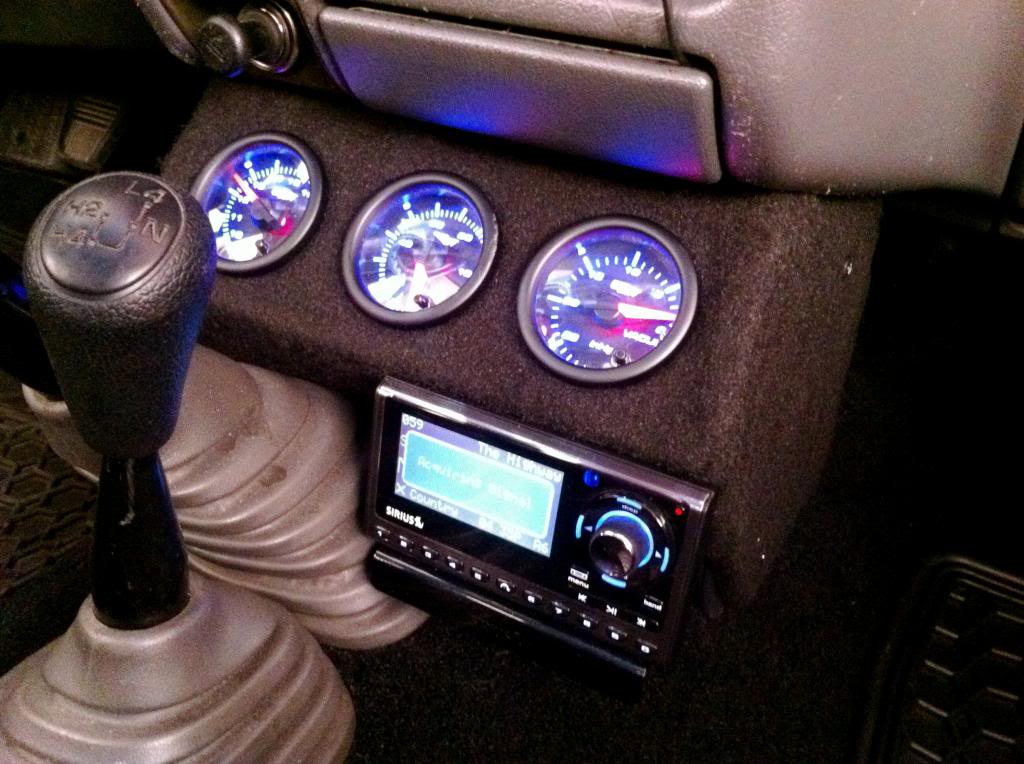
The start of my custom Glow Shift Gauge Pod:
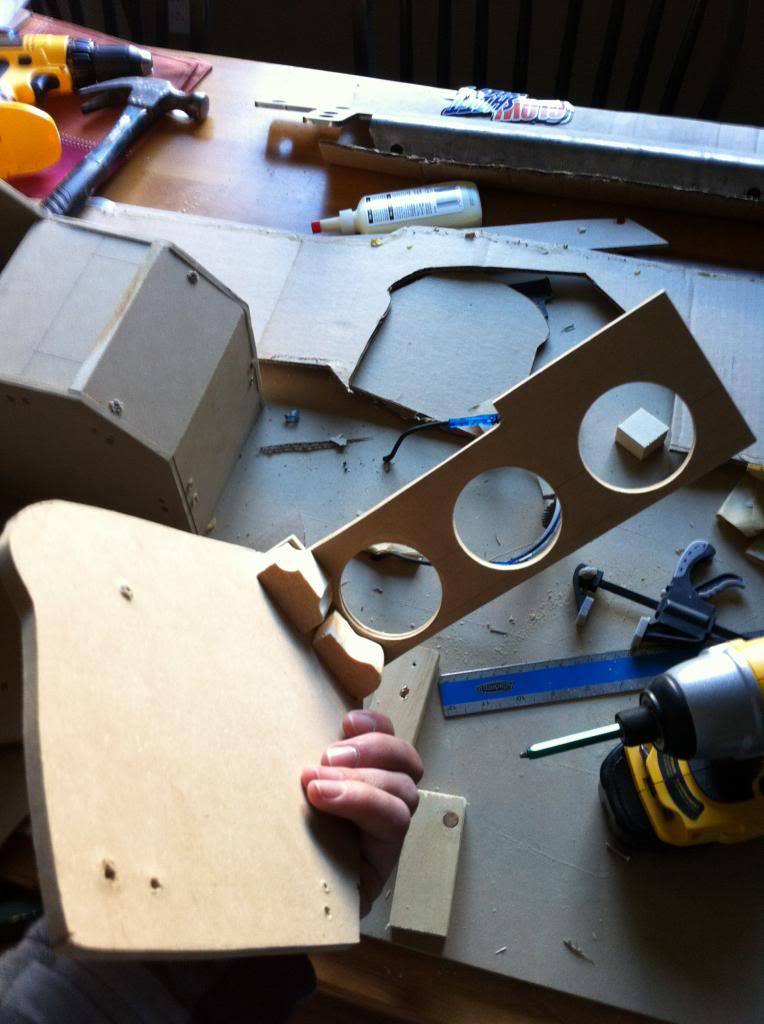

Still a work in progress, but it's coming together!
So with my interior sitting where I was comfortable, I turned my attention to the truck bed. I decided to have body work and paint done on the full bed. I would have loved to do the entire truck, but a full paint job would have broke the bank. My intent was to do the bed this time and do the cab in the near future.
I figured that I would clean up the inside of the bed by putting in a liner. I ended up picking up the Dupli-Color Bed Armor kit. It came with everything you need to get the job done right... minus the beer to pay off your buddies for helping you sand. It took 3 coats to make it look good and thick. After almost a year it has held up well, but I think I'll do a touch up coat once it gets warm again!
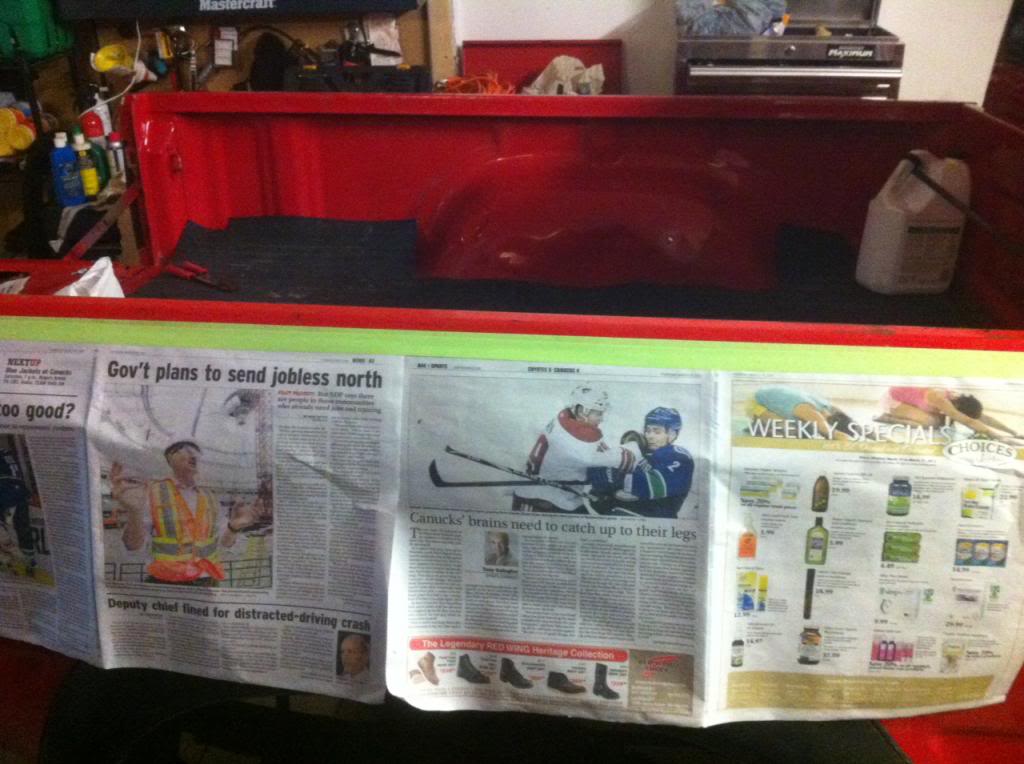
Of course I can't do one thing and not notice something else that needs work. The rear window surround had started chipping and a bunch of scratches could be seen in the paint. Time to haul out the good old rust check and clean it up! Good thing news paper is free
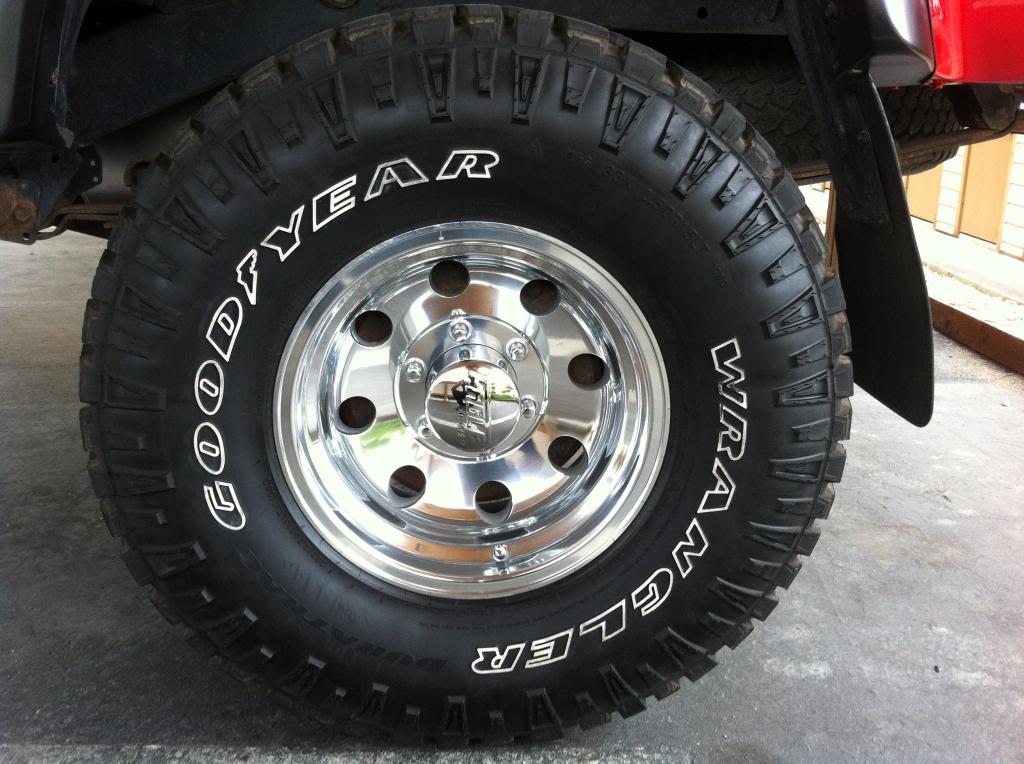
Alright.. Next on the to do list was the wheels. The old stock rims had seen some good use in the past 18 years and they deserved retirement. I found a nice set of Eagle wheels that sport a clean look that I'm going for.
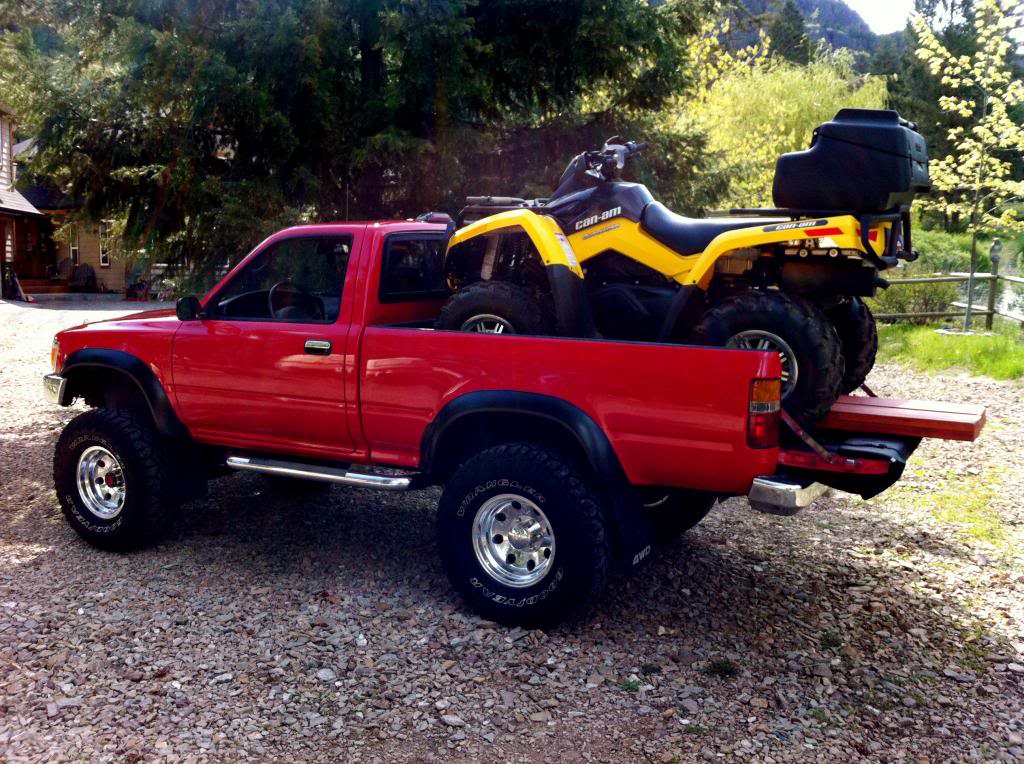
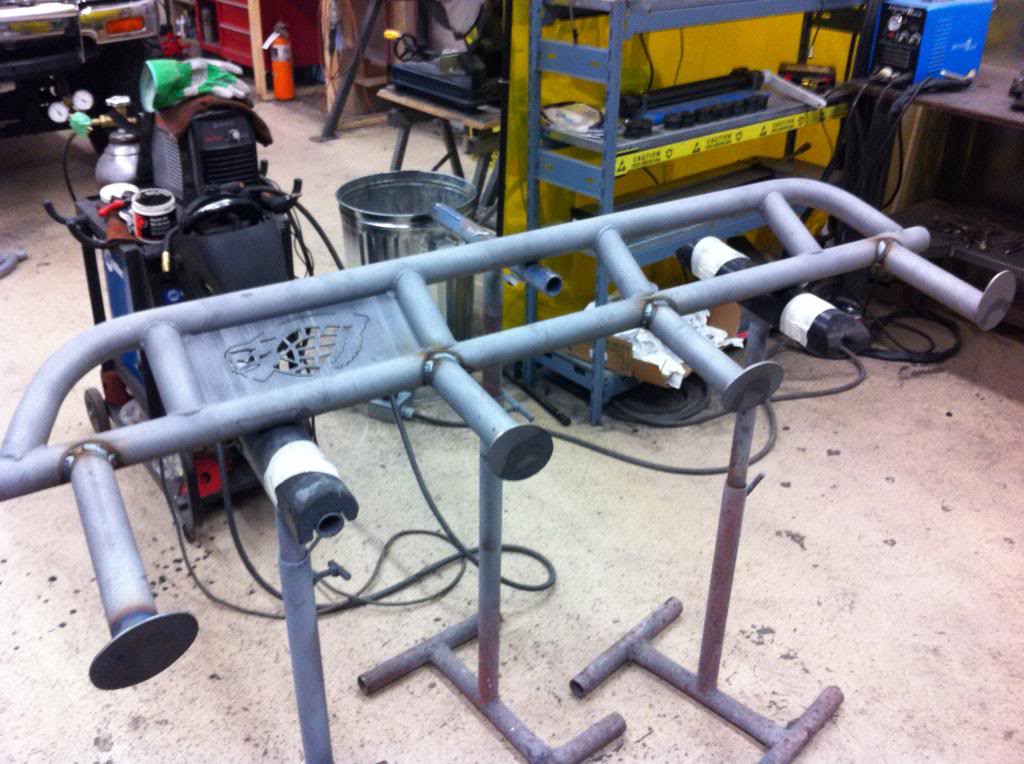
So it didn't take long before I got the itch to make another change. This time the rear bumper and nerf bars were on my target list. After doing much searching, I found Marlin's new rear bumper. I was a little hesitant to put tube on my truck, as I have always enjoyed the fullness of a plate bumper... So far I have not been disappointed with my decision. This bumper is built right and will have no problems towing my quad trailer.
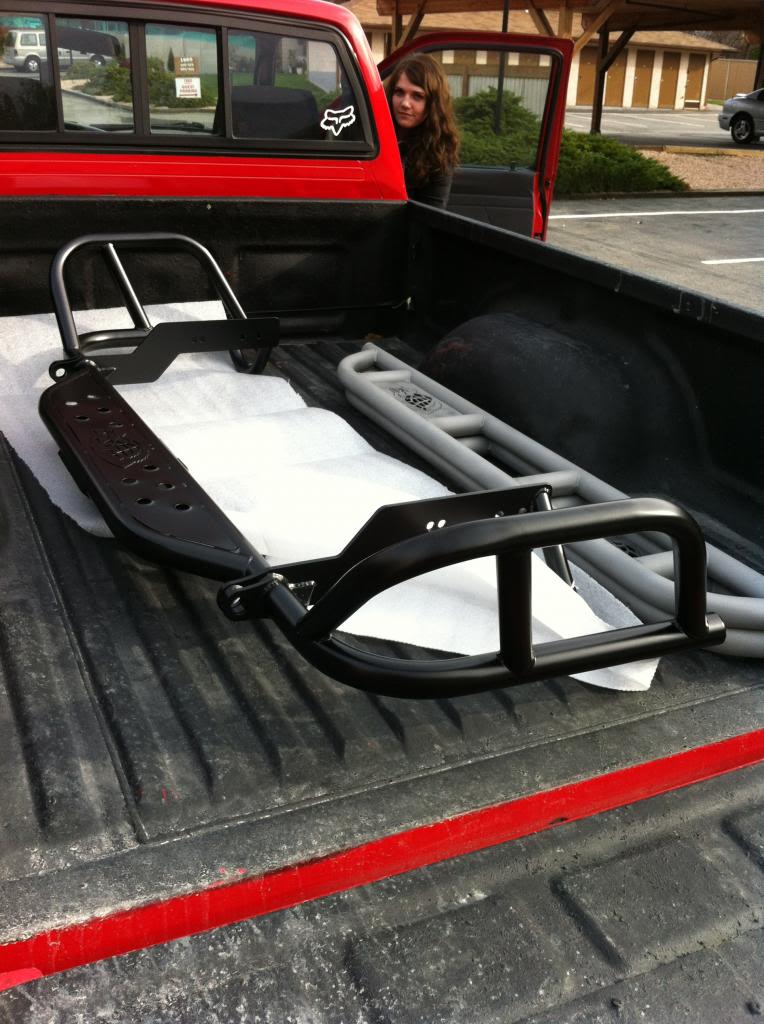
I had the bumper powder coated black. The sliders will also be powder coated once I make the fitment cuts and welds have been completed.
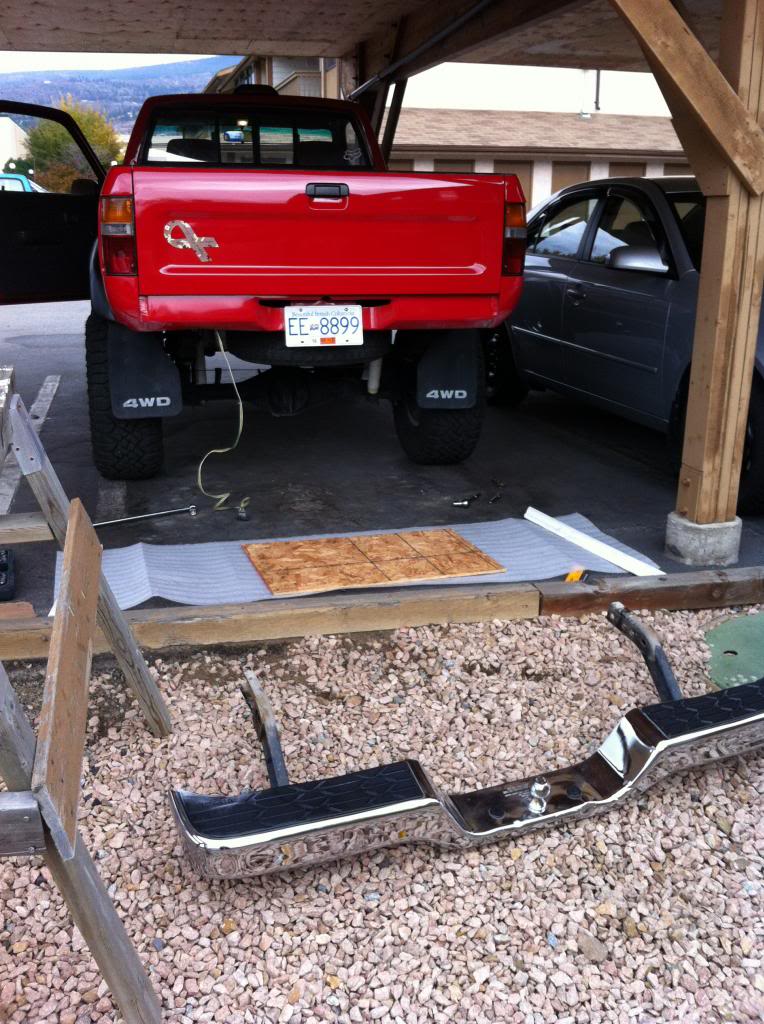
Off with the old and on with the new:
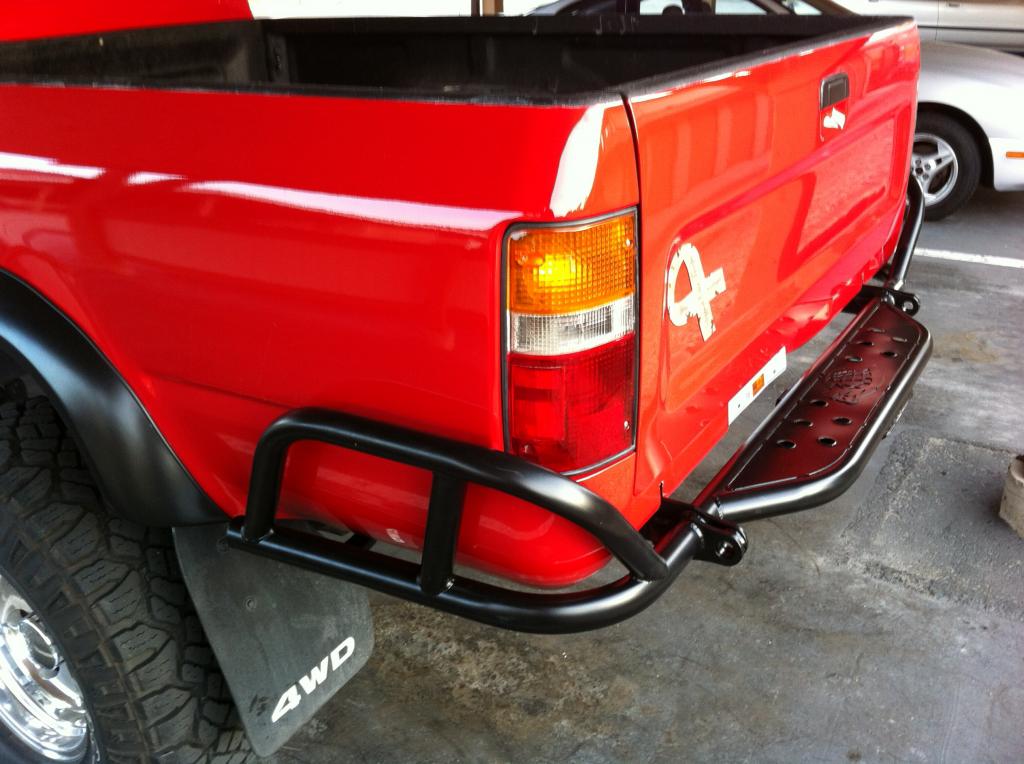
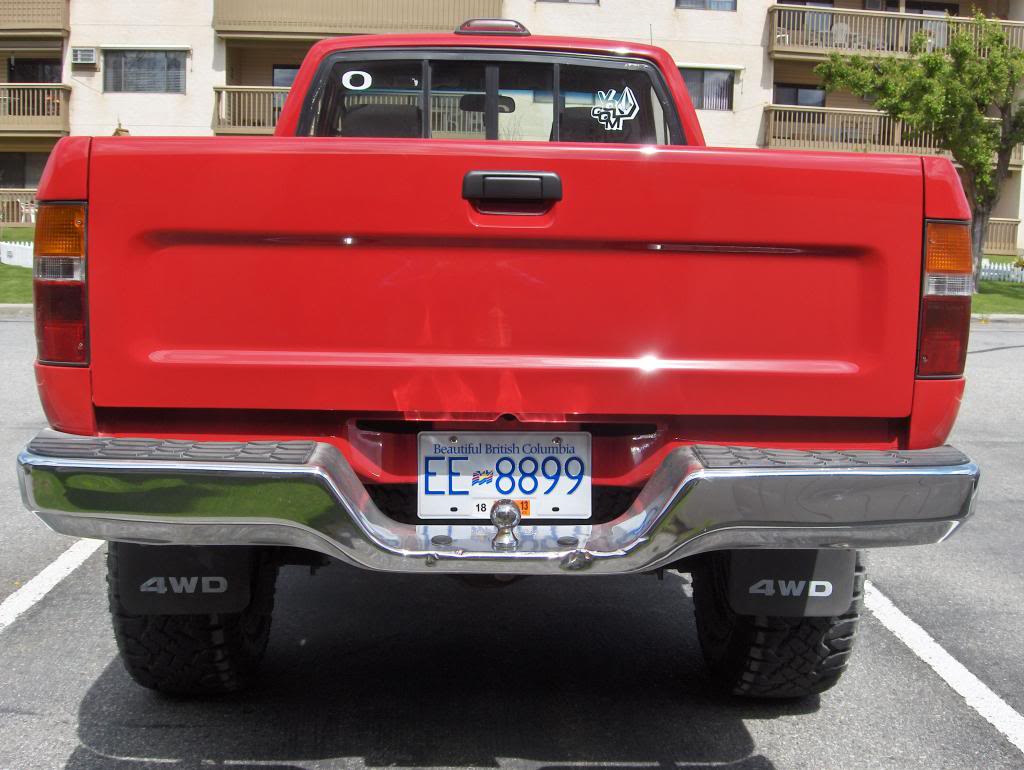
Remember how I said I like the fullness of a plate bumper? I had to find a way to fill some of the empty spaces. After doing a little yotatech searching, I noticed a lot of people with rear aux lighting... Bingo!
I feel pretty good about the bumper and it will look even better once I get the sliders on. Just a side note; your license plate will have to be moved up in order for it to be seen. I haven't been approached about my plate placement yet, but it could easily become an issue if it sat any lower.
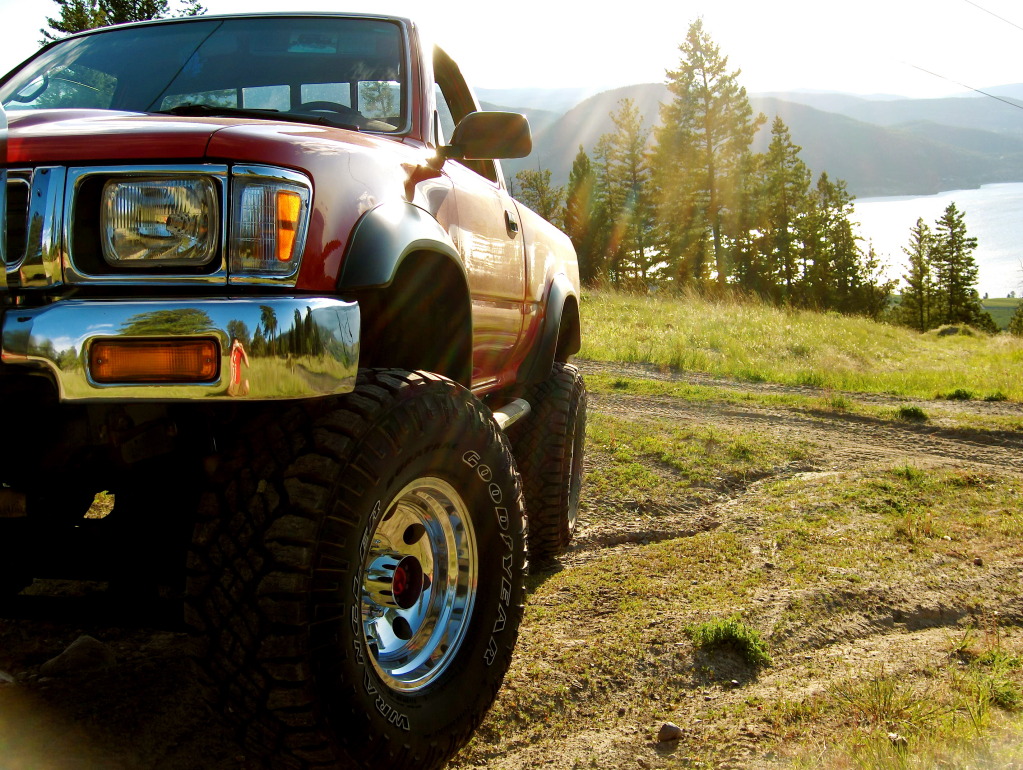
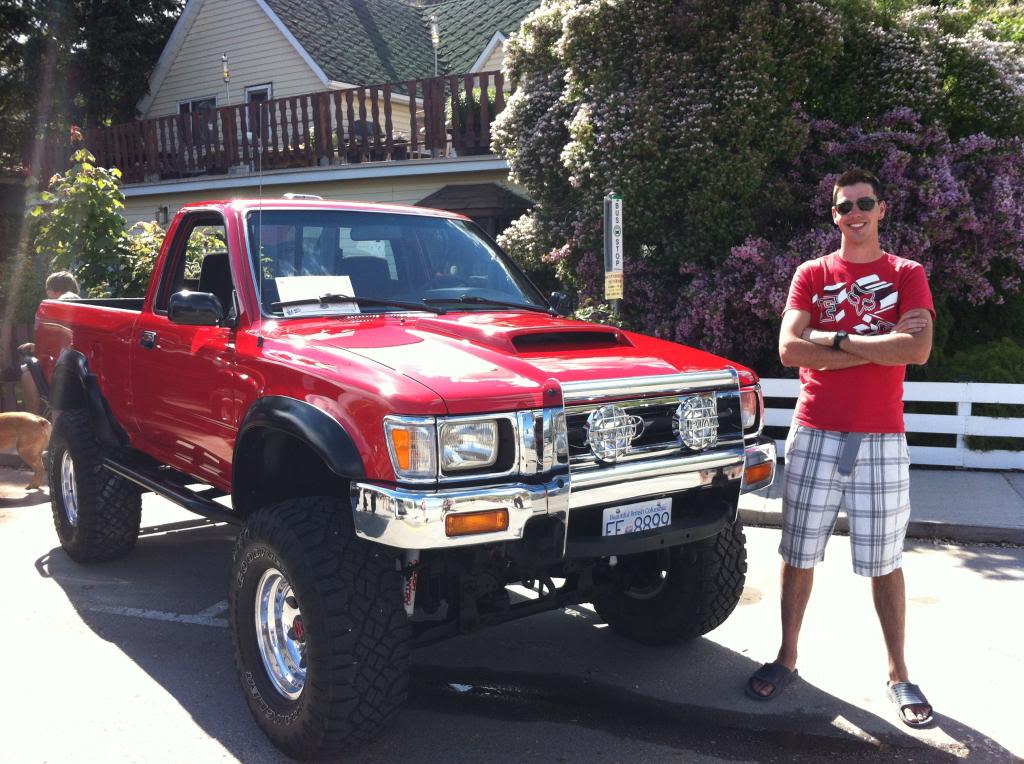
Here are a few photos that I've have snapped over the past year when out and about with my truck:
So after almost a full year with my truck, I was noticing some more noise coming from the reliable 22re. I had already encountered some oil seal issues and knew that it would soon be time for a rebuild but had made up my mind months earlier that I would want more power.
With that being said I started researching yotatech and found some of Corey's (Slacker's) work with engine swaps. It was quickly evident that if I was going to do a swap, I would want it done right and clean. After having a few conversations with Corey, we decided that the 5vzfe would be the best swap for my needs. Corey booked me into his busy schedule and after 8 months of restless waiting, my truck rolled into his shop.
I've borrowed these photo's from the engine build thread. If you want to see the entire swap click on the link, or check out Toyota Fiberglass in the Vendors Build section: https://www.yotatech.com/forums/f209...e-swap-263793/
The Original 22RE ready for retirement:
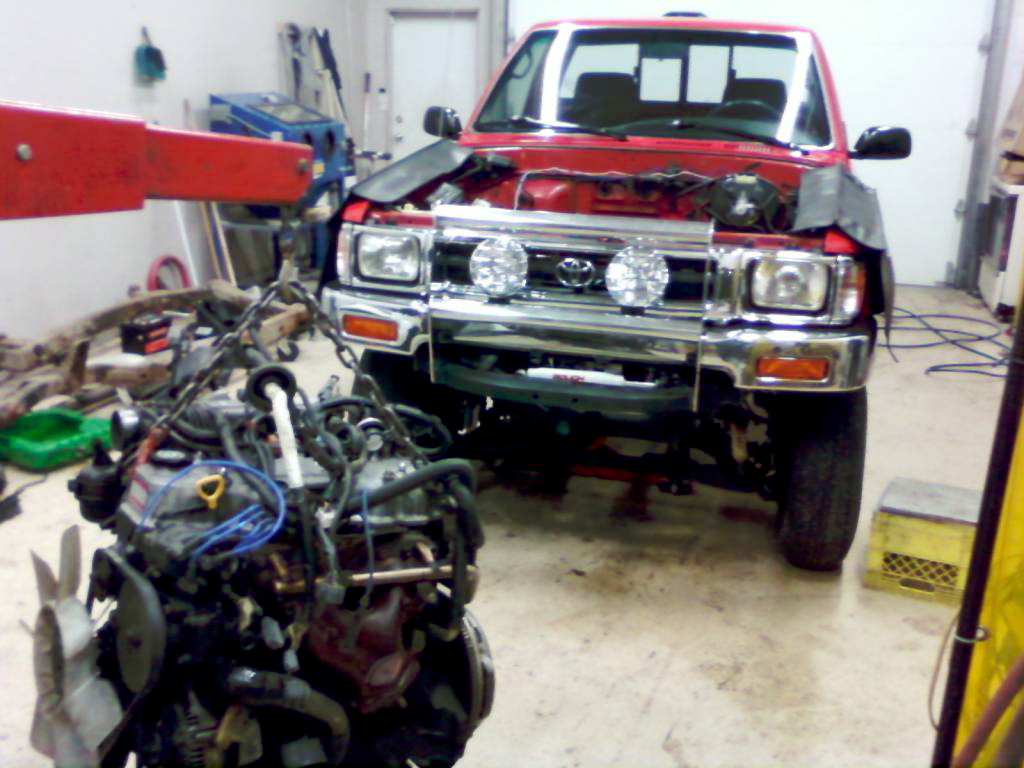
The 5vzfe waiting patiently for it's new home:
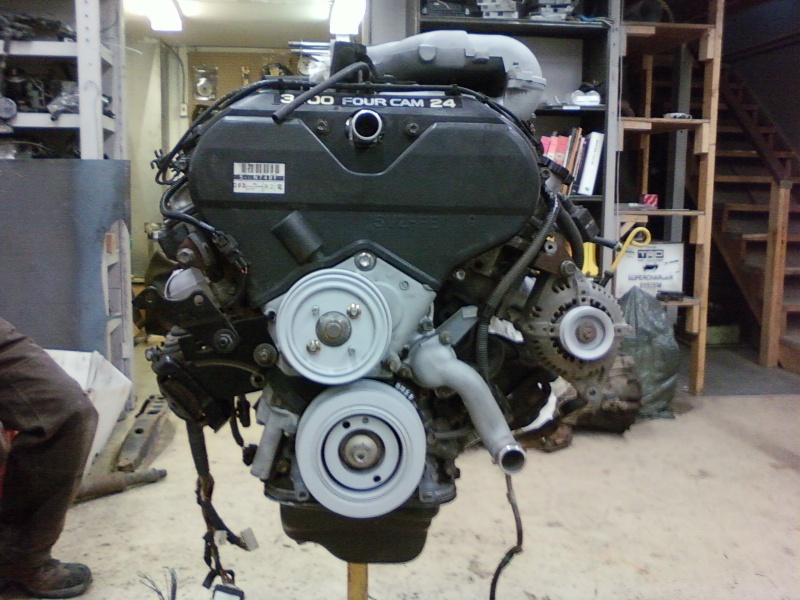
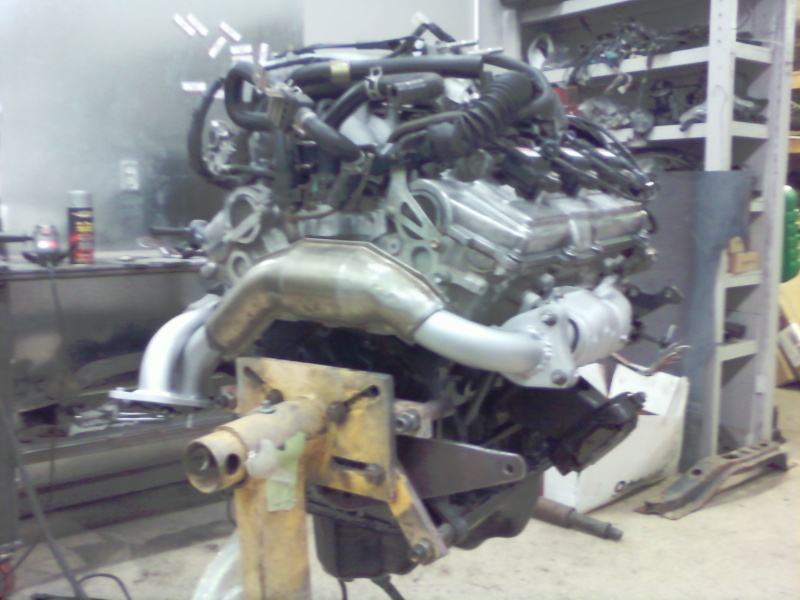
Ready to go! You can see the pride of workmanship that Corey has:

Flowmaster 40 muffler , with 2.5" pipe:
Here is my new hood scoop that Corey made. This scoop had to be done in order to clear the intake on the new 5vzfe. The truck is in the body shop this week, getting some body work and paint
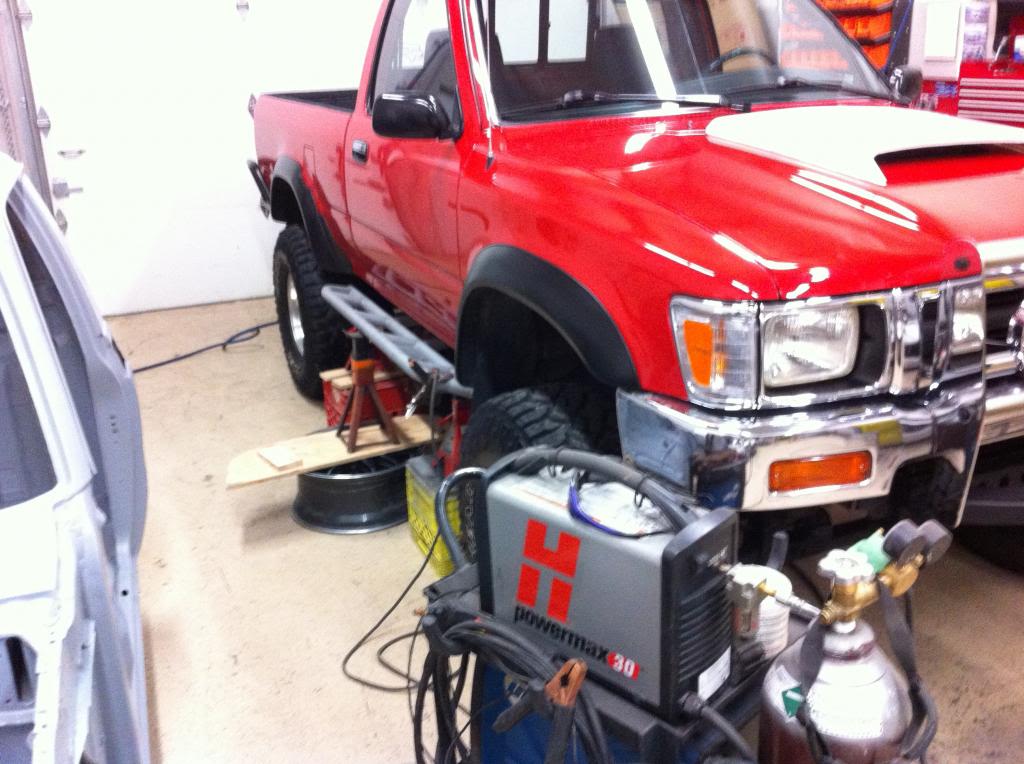
Almost forgot about my rock sliders. We measured them up, made the cuts and welds required. The sliders have been sent to the powder coaters this week while the truck is in the body shop.
I will have updates once the truck is out of the paint shop and on the road. Hope you like my build so far. I think the front bumper is next on the to do list but I'm having a hard time finding something I like. I'm open to suggestions on anything you guys have to offer!
Here she is, my 1994 Toyota Pickup Base 22RE. After doing some extensive shopping around, I located her sitting in an underground parking garage. I knew that the truck needed a little TLC and elbow grease, but overall I was impressed with the body and frame condition... Up here in Canada, finding a truck this age without rust is a huge bonus! ... eh!
Here's a shot of the interior. This is where the elbow grease will come into play haha.. At least one of the speakers worked for my drive home!
The good old reliable 22RE motor. I was happy to see it was still running strong! I lifted the Valve cover to take a look at the timing chain and could see that the plastic guides were starting to take a beating... Hmm..
So my OCD started kicking in sooner than i thought. The bed rails were scratched up and showing bare metal in areas. As a temporary solution, I just picked up a can of paint and clear coat to cover it all up.
Not Perfect, but it did the job!
I know that there aren't a whole lot of IFS bracket lift fans out there... I'm still making my decision. The Rough country kit seems to do the job for me right now... Although it also looks like it could use a little elbow grease!
That's more like it! Gotta love SOS pads, sand paper and rust check paint! Also had a chance to experience the fun of scraping black paint off of my chrome bumper which the last owner "customized".. bla.
So while I was scraping all of the paint off of my now fully chrome bumber, I noticed that the grill and light surrounds were beginning to show their age with rock chips, etc.. So I hit up ebay and ordered myself some new parts, including some much brighter head lights and Pia 520's!
Looking a little more refreshed one step at a time!
Alright. So I think it's time I put a little bit of focus on the interior of the truck. Remember those unique orange "noname" speakers you seen in the original interior photo? Well they have been replaced with some nice covered pioneers. I also changed out the "noname" deck with a decent Sony system. To say the least I was much happier with the sound quality.
Next on the list.. My butt comfort. The old stock bench seat was a little "used" shall we say. I had a local upholstery shop do a full restore on the bench and I was 100% satisfied with the quantity of work, price and new found comfort!
A few other small things I've been working on with the interior:
Otrattw Rocker Switches to help clean up some of the Aux power
Cobra CB Radio ready for install
The start of my custom Glow Shift Gauge Pod:
Still a work in progress, but it's coming together!
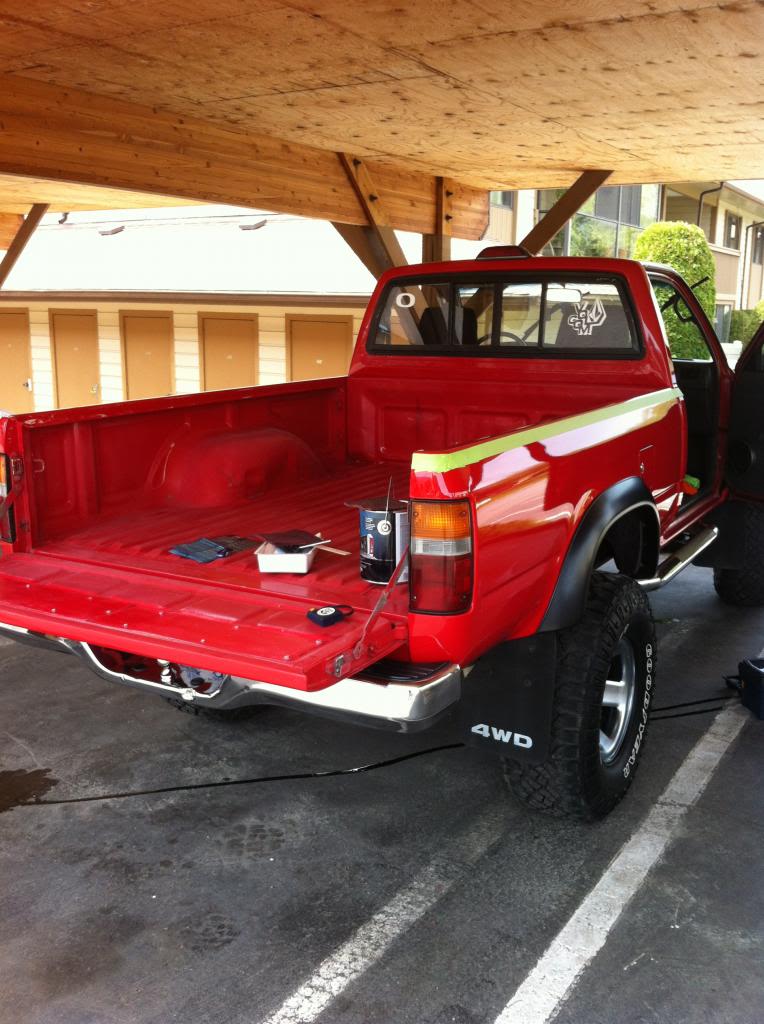
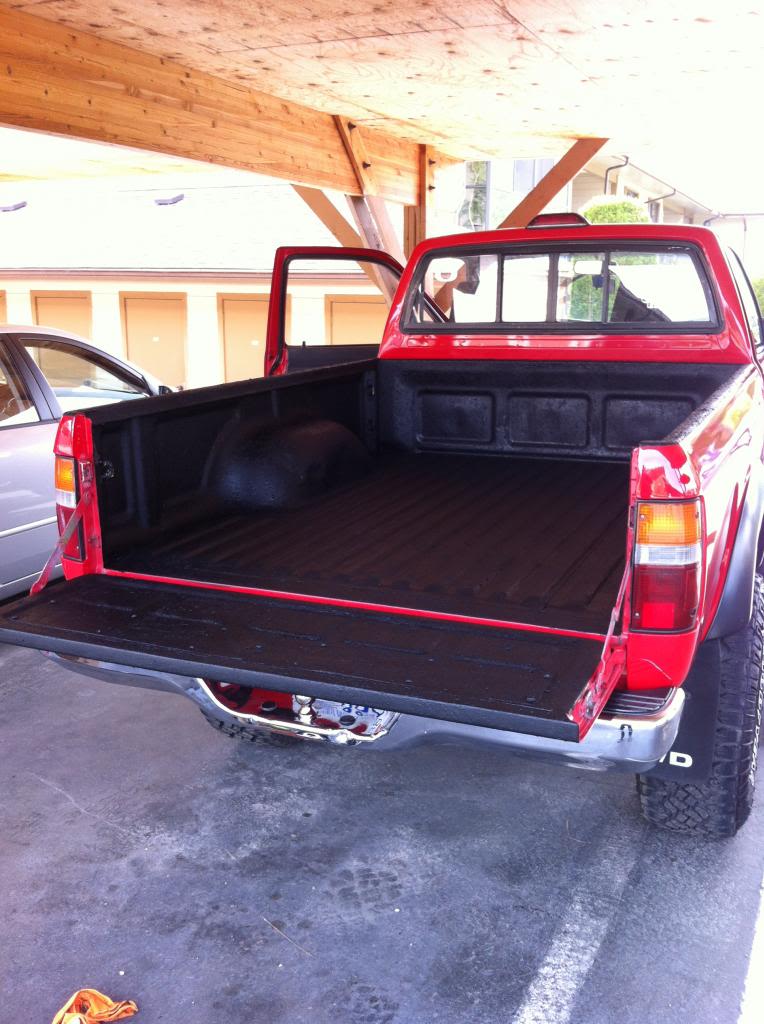
So with my interior sitting where I was comfortable, I turned my attention to the truck bed. I decided to have body work and paint done on the full bed. I would have loved to do the entire truck, but a full paint job would have broke the bank. My intent was to do the bed this time and do the cab in the near future.
I figured that I would clean up the inside of the bed by putting in a liner. I ended up picking up the Dupli-Color Bed Armor kit. It came with everything you need to get the job done right... minus the beer to pay off your buddies for helping you sand. It took 3 coats to make it look good and thick. After almost a year it has held up well, but I think I'll do a touch up coat once it gets warm again!
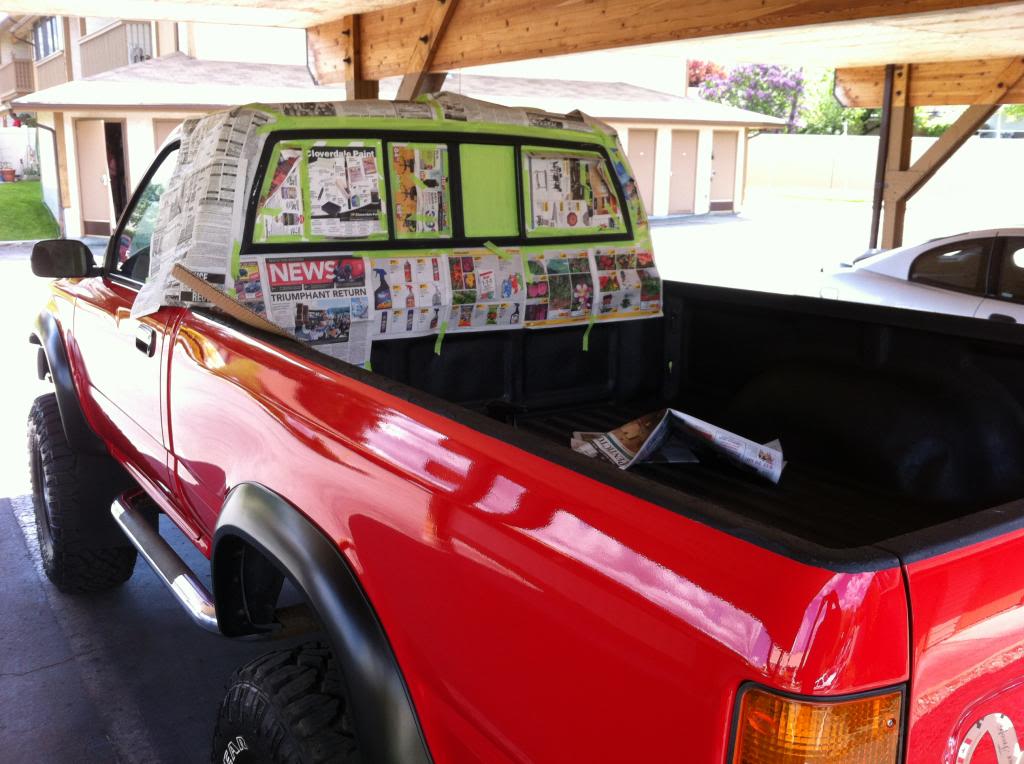
Of course I can't do one thing and not notice something else that needs work. The rear window surround had started chipping and a bunch of scratches could be seen in the paint. Time to haul out the good old rust check and clean it up! Good thing news paper is free
Alright.. Next on the to do list was the wheels. The old stock rims had seen some good use in the past 18 years and they deserved retirement. I found a nice set of Eagle wheels that sport a clean look that I'm going for.
So it didn't take long before I got the itch to make another change. This time the rear bumper and nerf bars were on my target list. After doing much searching, I found Marlin's new rear bumper. I was a little hesitant to put tube on my truck, as I have always enjoyed the fullness of a plate bumper... So far I have not been disappointed with my decision. This bumper is built right and will have no problems towing my quad trailer.
I had the bumper powder coated black. The sliders will also be powder coated once I make the fitment cuts and welds have been completed.
Off with the old and on with the new:
Remember how I said I like the fullness of a plate bumper? I had to find a way to fill some of the empty spaces. After doing a little yotatech searching, I noticed a lot of people with rear aux lighting... Bingo!
I feel pretty good about the bumper and it will look even better once I get the sliders on. Just a side note; your license plate will have to be moved up in order for it to be seen. I haven't been approached about my plate placement yet, but it could easily become an issue if it sat any lower.
Here are a few photos that I've have snapped over the past year when out and about with my truck:
So after almost a full year with my truck, I was noticing some more noise coming from the reliable 22re. I had already encountered some oil seal issues and knew that it would soon be time for a rebuild but had made up my mind months earlier that I would want more power.
With that being said I started researching yotatech and found some of Corey's (Slacker's) work with engine swaps. It was quickly evident that if I was going to do a swap, I would want it done right and clean. After having a few conversations with Corey, we decided that the 5vzfe would be the best swap for my needs. Corey booked me into his busy schedule and after 8 months of restless waiting, my truck rolled into his shop.
I've borrowed these photo's from the engine build thread. If you want to see the entire swap click on the link, or check out Toyota Fiberglass in the Vendors Build section: https://www.yotatech.com/forums/f209...e-swap-263793/
The Original 22RE ready for retirement:
The 5vzfe waiting patiently for it's new home:
Ready to go! You can see the pride of workmanship that Corey has:
Flowmaster 40 muffler , with 2.5" pipe:
Here is my new hood scoop that Corey made. This scoop had to be done in order to clear the intake on the new 5vzfe. The truck is in the body shop this week, getting some body work and paint
Almost forgot about my rock sliders. We measured them up, made the cuts and welds required. The sliders have been sent to the powder coaters this week while the truck is in the body shop.
I will have updates once the truck is out of the paint shop and on the road. Hope you like my build so far. I think the front bumper is next on the to do list but I'm having a hard time finding something I like. I'm open to suggestions on anything you guys have to offer!
Last edited by brad88nl; 03-22-2013 at 11:06 AM.
 04-12-2013, 09:03 PM
#2
Registered User
Thread Starter
Join Date: Jun 2012
Location: Penticton, BC
Posts: 28
Likes: 0
Received 0 Likes
on
0 Posts
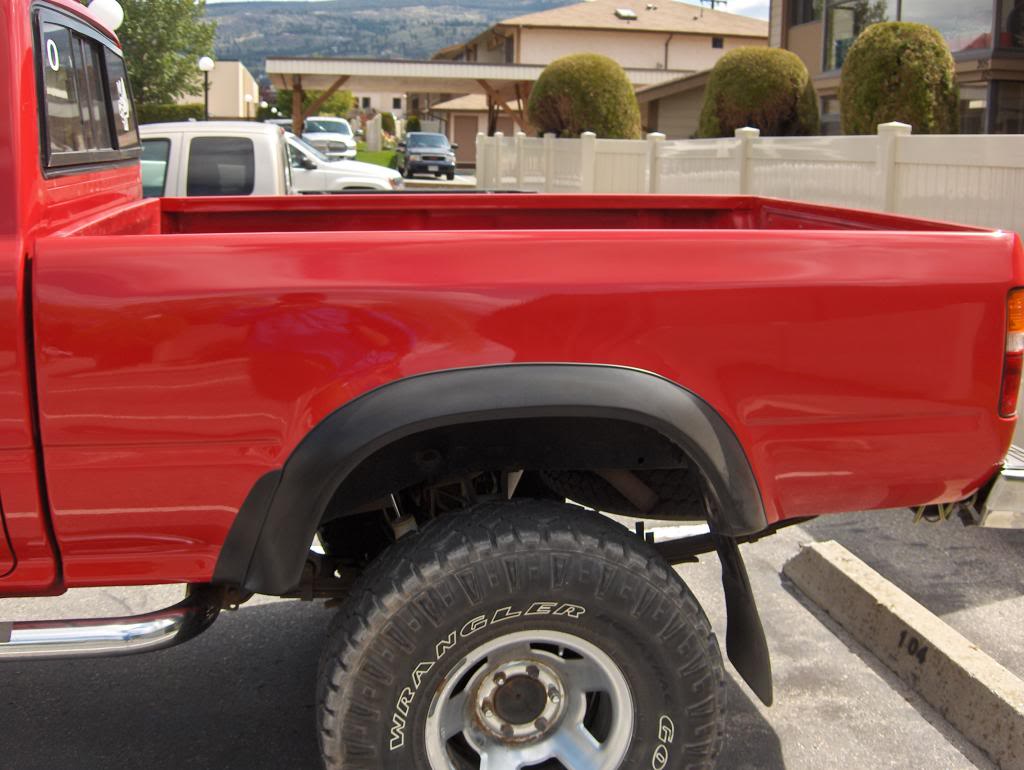
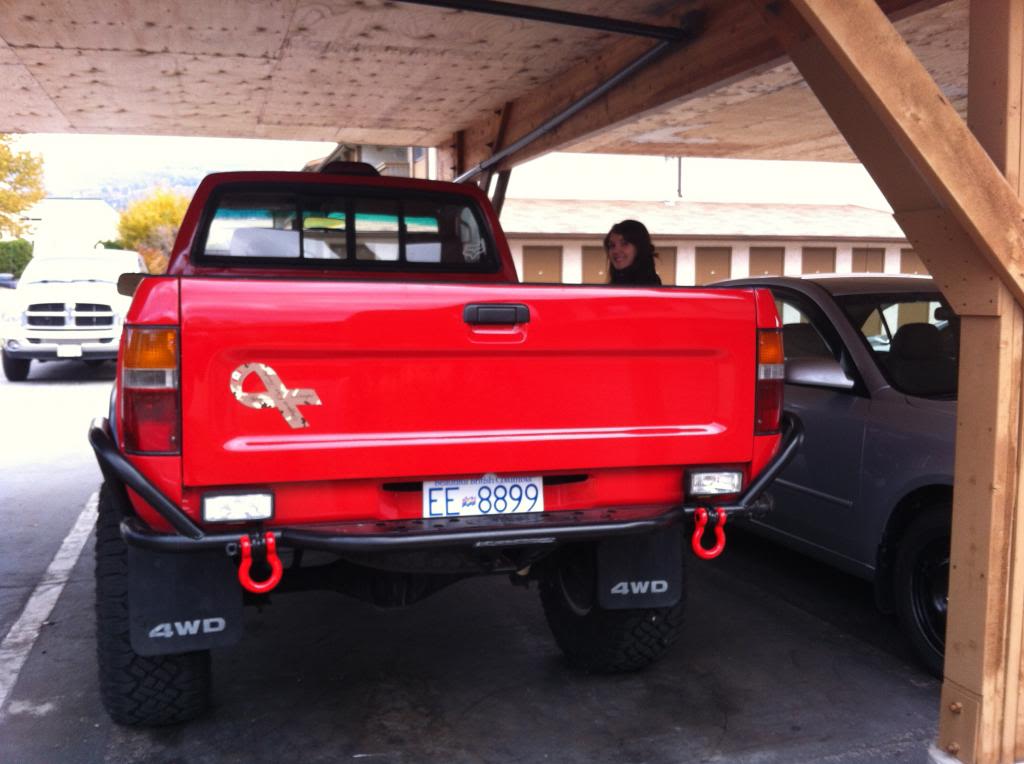
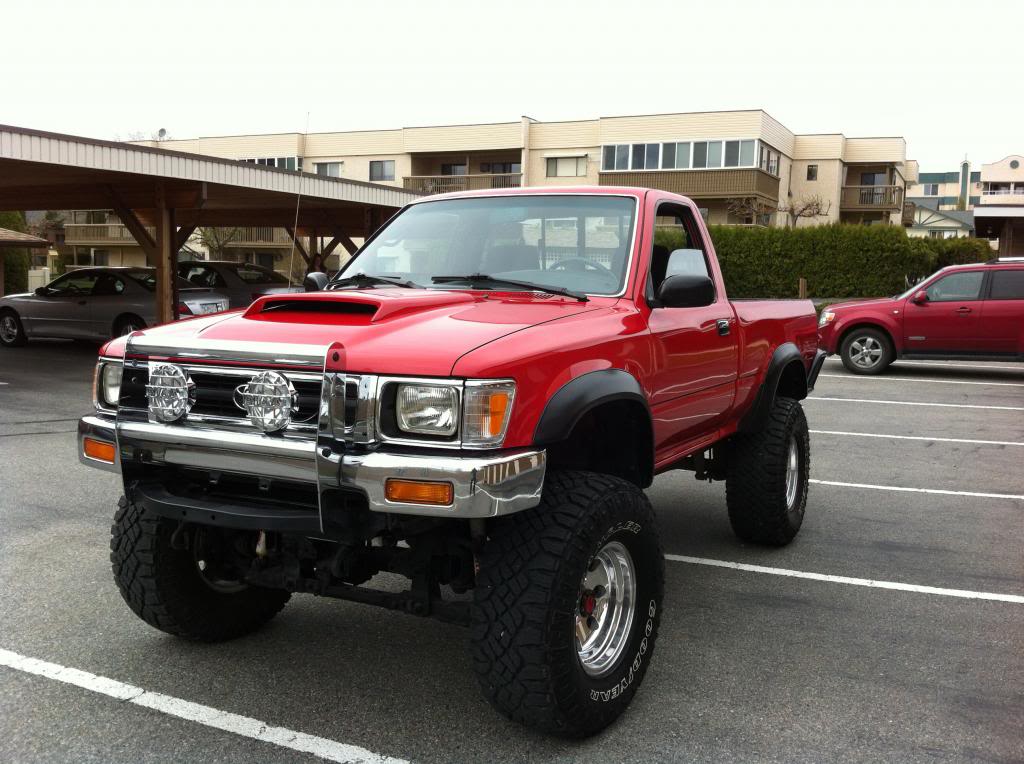
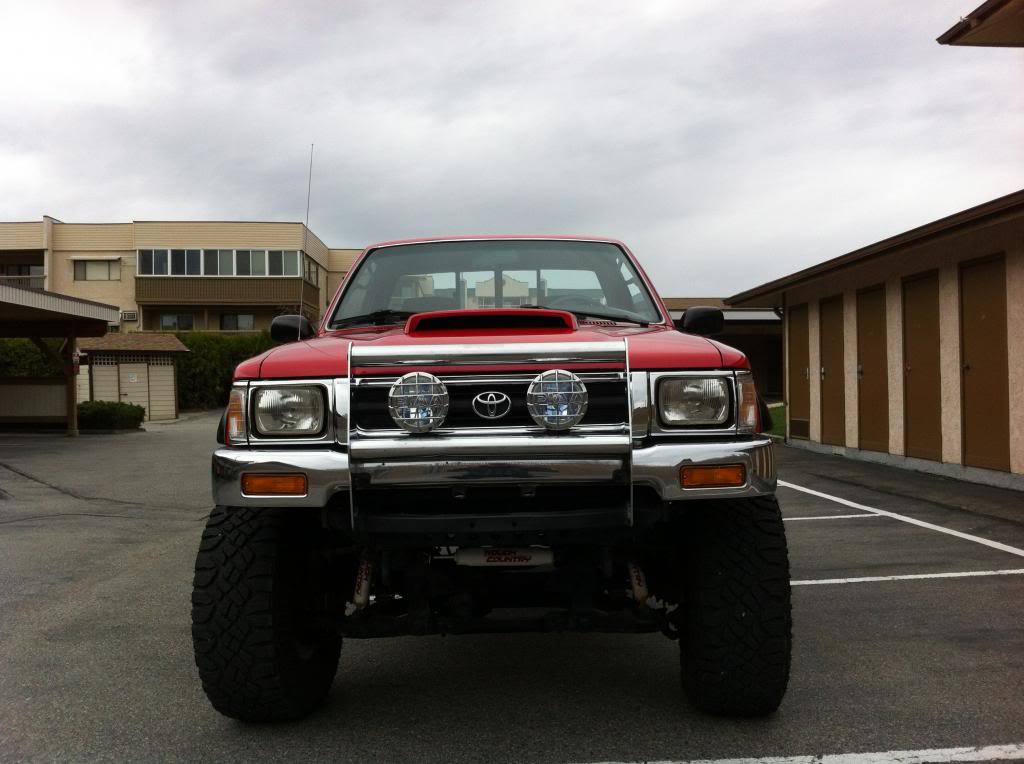
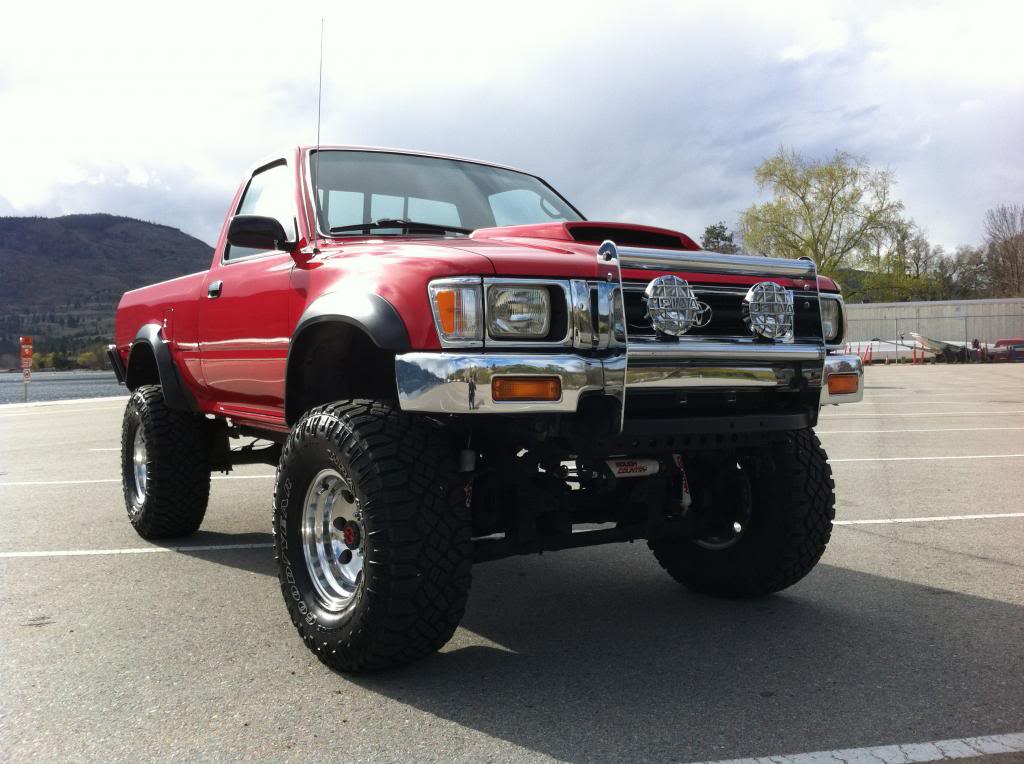
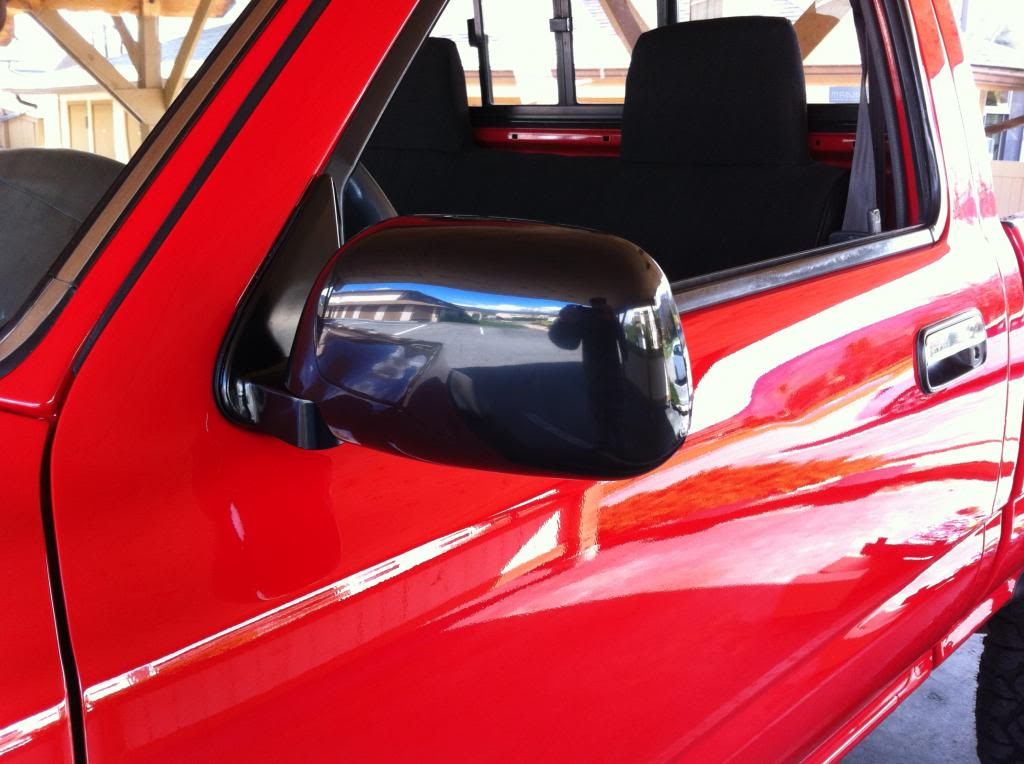
So after a long wait, the truck came back from paint. Here are some pics!
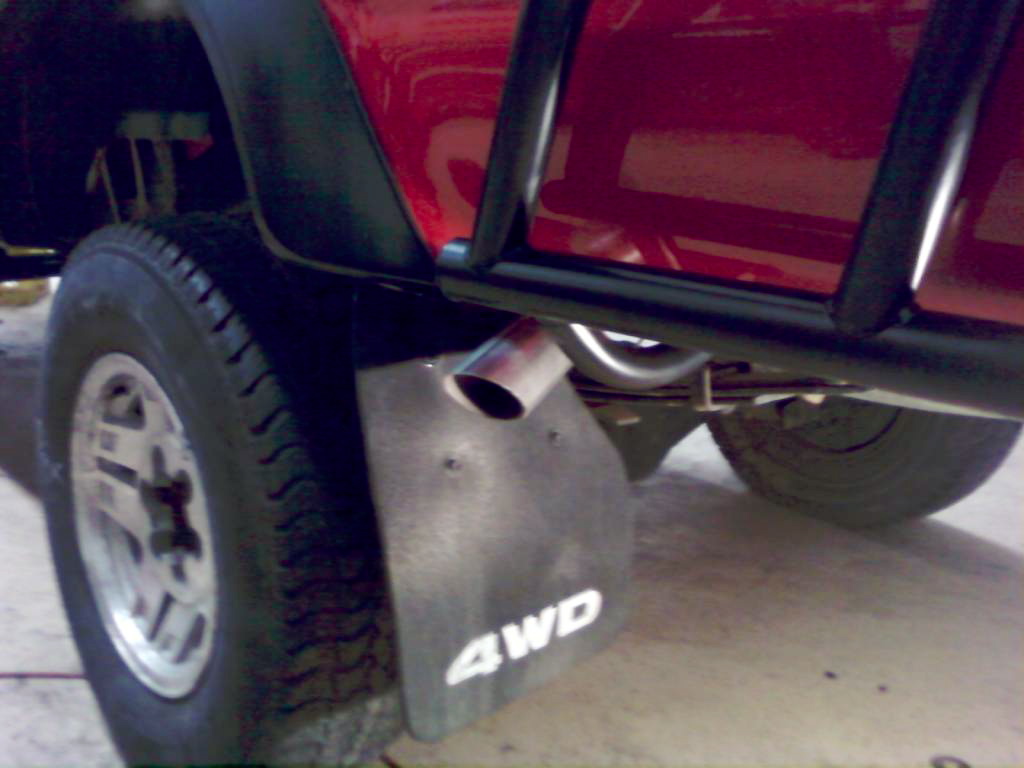
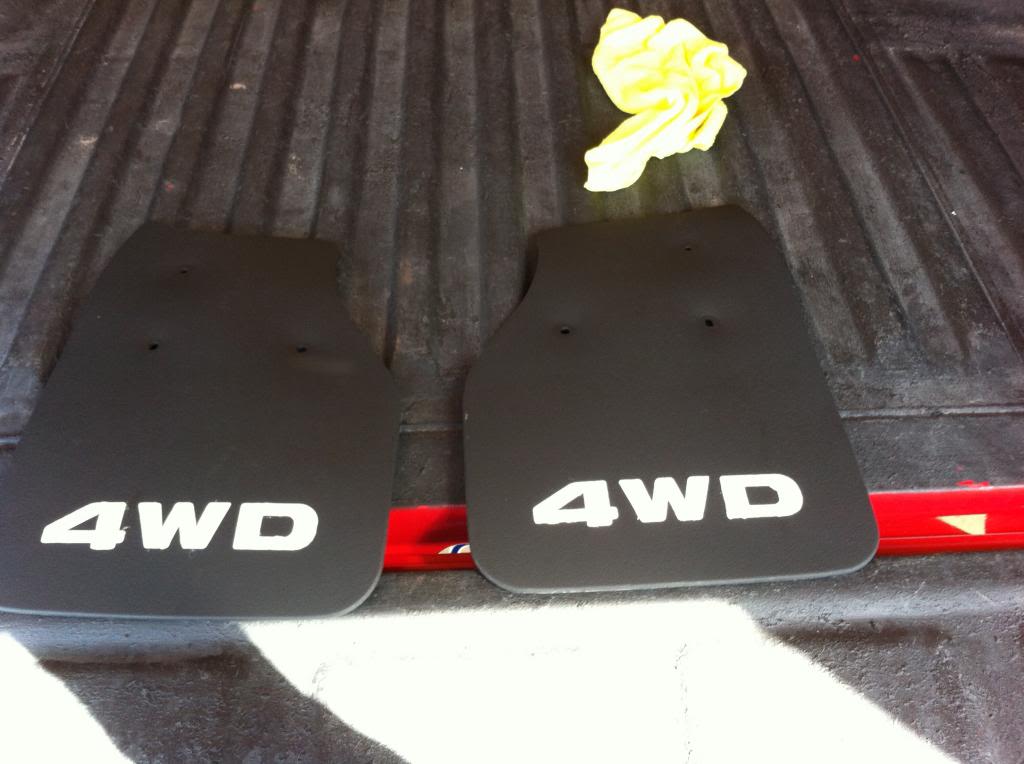
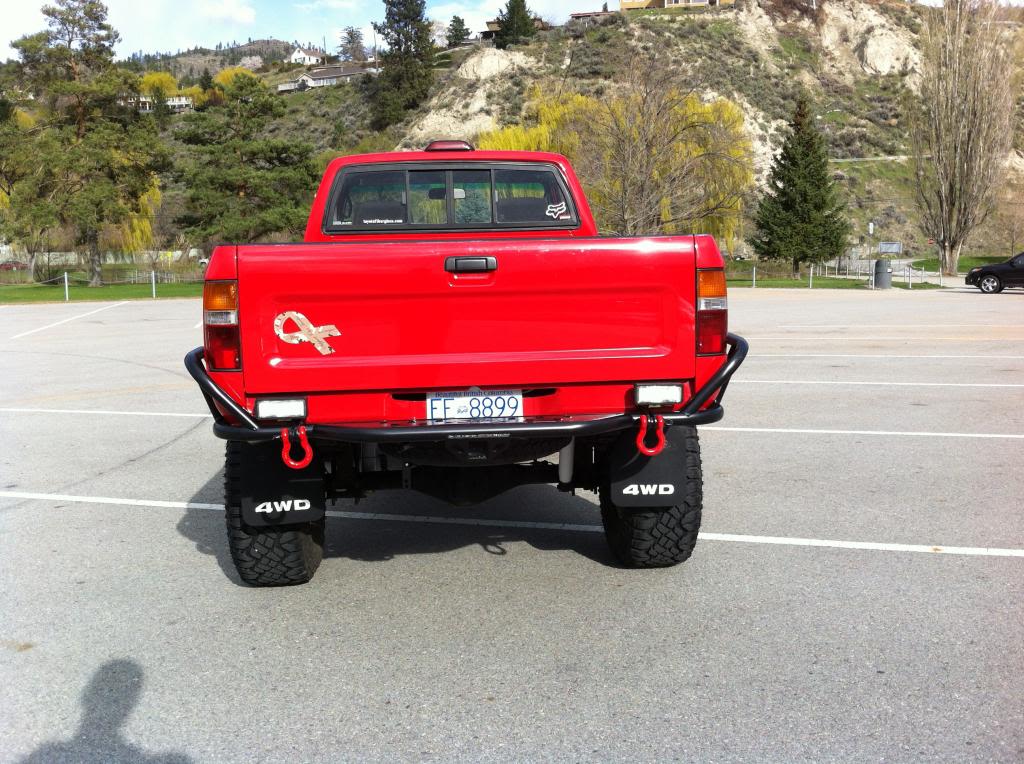
Also had a chance to clean up and paint my mud flaps yesterday. I think they look a fair bit better than the original faded ones in the above pics.
And some new side view mirrors to go with the new paint job
Sliders are back from Powder Coating and next on the to do list
Also had a chance to clean up and paint my mud flaps yesterday. I think they look a fair bit better than the original faded ones in the above pics.
And some new side view mirrors to go with the new paint job
Sliders are back from Powder Coating and next on the to do list
Last edited by brad88nl; 04-12-2013 at 09:05 PM.
04-13-2013, 04:03 PM
#5
lookin awesome Brad .. and tell Alanna to smile !!
maybe next weekend we can get the sliders on , if I ever get over this stupid cold !!
hey what did ya do with the rear bumper ? I could probabally sell it for ya
.
maybe next weekend we can get the sliders on , if I ever get over this stupid cold !!
hey what did ya do with the rear bumper ? I could probabally sell it for ya
.
Last edited by slacker; 04-13-2013 at 04:05 PM.
04-14-2013, 01:10 PM
#6
Registered User
Thread Starter
Join Date: Jun 2012
Location: Penticton, BC
Posts: 28
Likes: 0
Received 0 Likes
on
0 Posts
Thanks guys,
It's still a work in progress, but getting close to where I want it to be for the summer!
I have the stock bumper and a few other parts kicking around somewhere.. Maybe I'll make up a list and bring it in next time haha.
It's still a work in progress, but getting close to where I want it to be for the summer!
I have the stock bumper and a few other parts kicking around somewhere.. Maybe I'll make up a list and bring it in next time haha.
Trending Topics
04-19-2013, 08:40 PM
#8
Registered User
Thread Starter
Join Date: Jun 2012
Location: Penticton, BC
Posts: 28
Likes: 0
Received 0 Likes
on
0 Posts
Thanks Gilzer, The bumper is a nice fit and good quality.
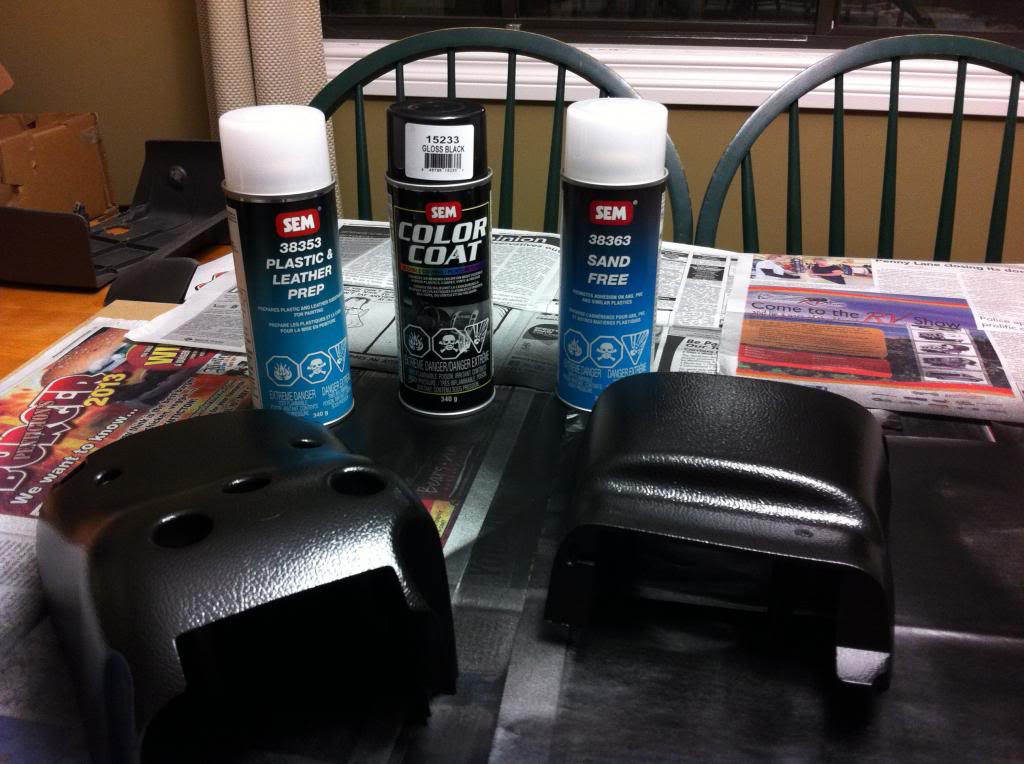
I decided to paint my steering column. For some reason, mine turned almost green with the past 19 years sitting in the sun. SEM paint was a little more pricey, but I am happy with the quality. We'll see how it does in the truck, maybe I'll have more black interior to show off soon enough!
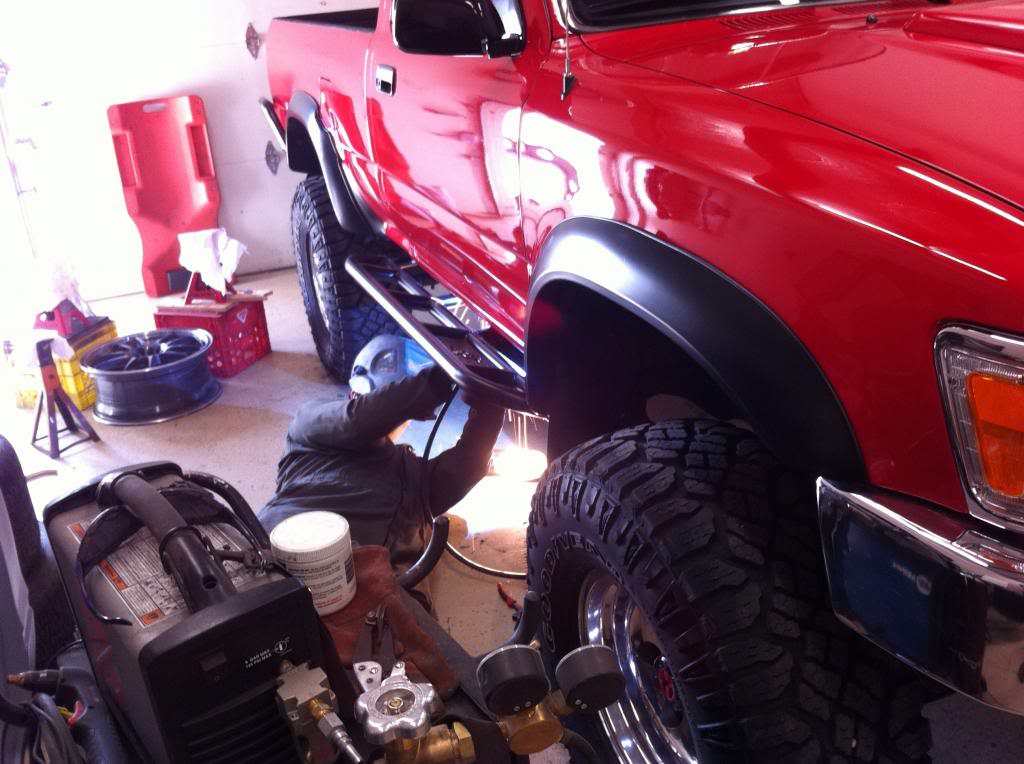
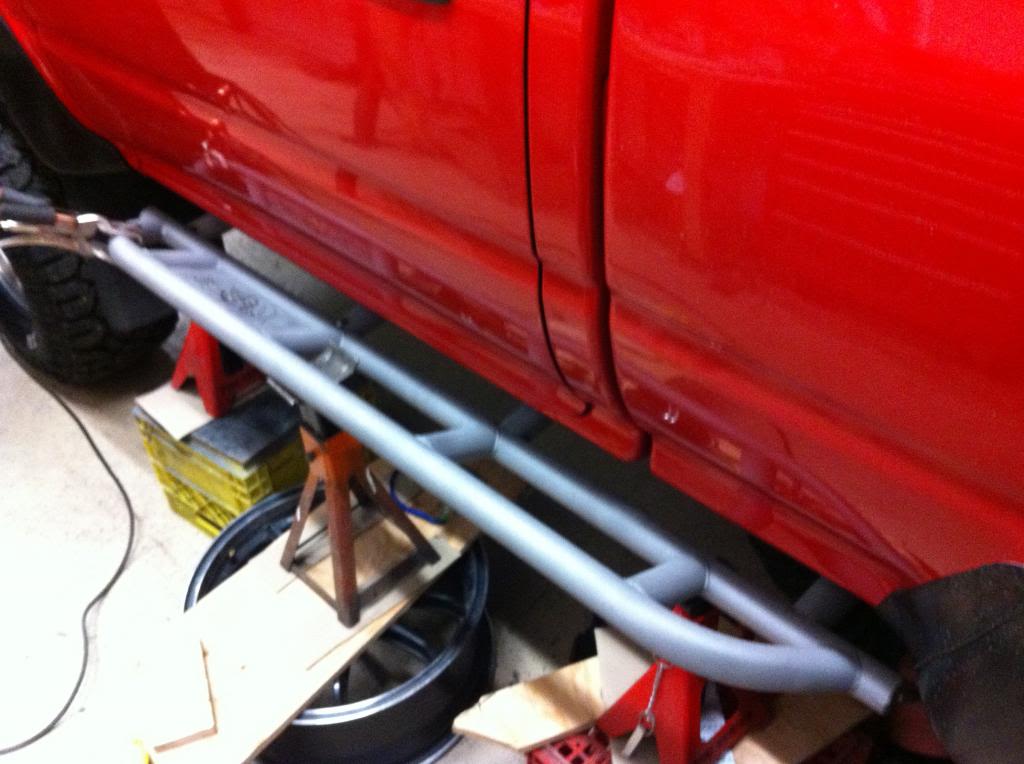
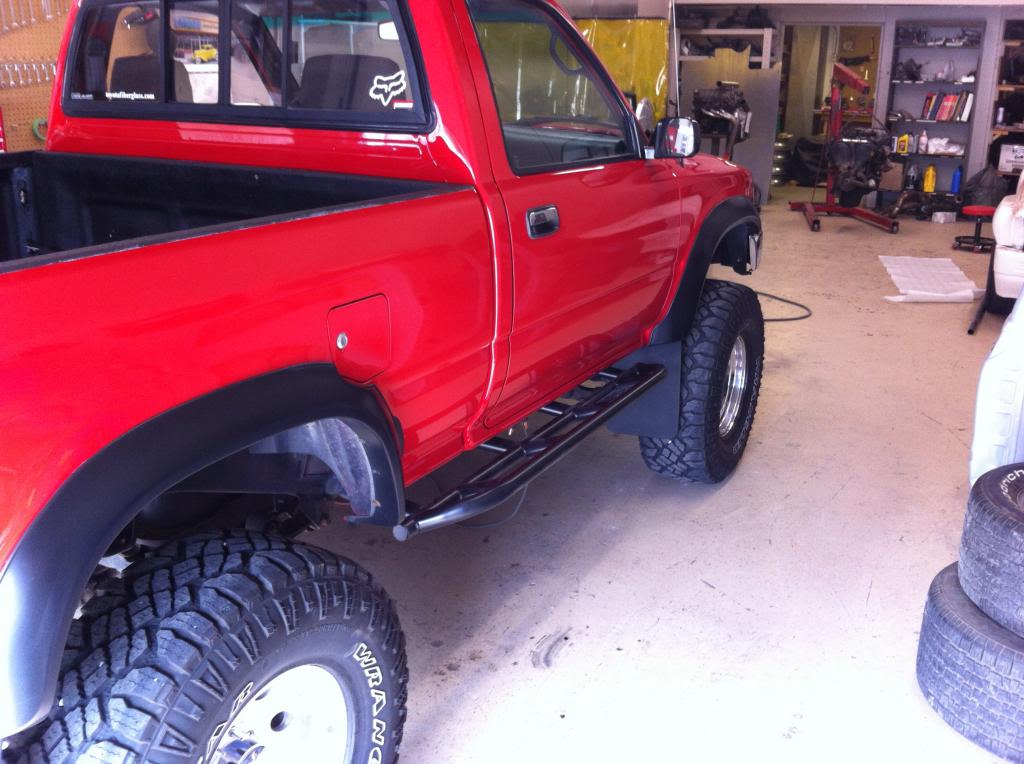
With some big help from Corey, we mounted and welded up my sliders. Very pleased with the look!
I decided to paint my steering column. For some reason, mine turned almost green with the past 19 years sitting in the sun. SEM paint was a little more pricey, but I am happy with the quality. We'll see how it does in the truck, maybe I'll have more black interior to show off soon enough!
With some big help from Corey, we mounted and welded up my sliders. Very pleased with the look!
 05-18-2013, 07:19 PM
#11
Registered User
Thread Starter
Join Date: Jun 2012
Location: Penticton, BC
Posts: 28
Likes: 0
Received 0 Likes
on
0 Posts
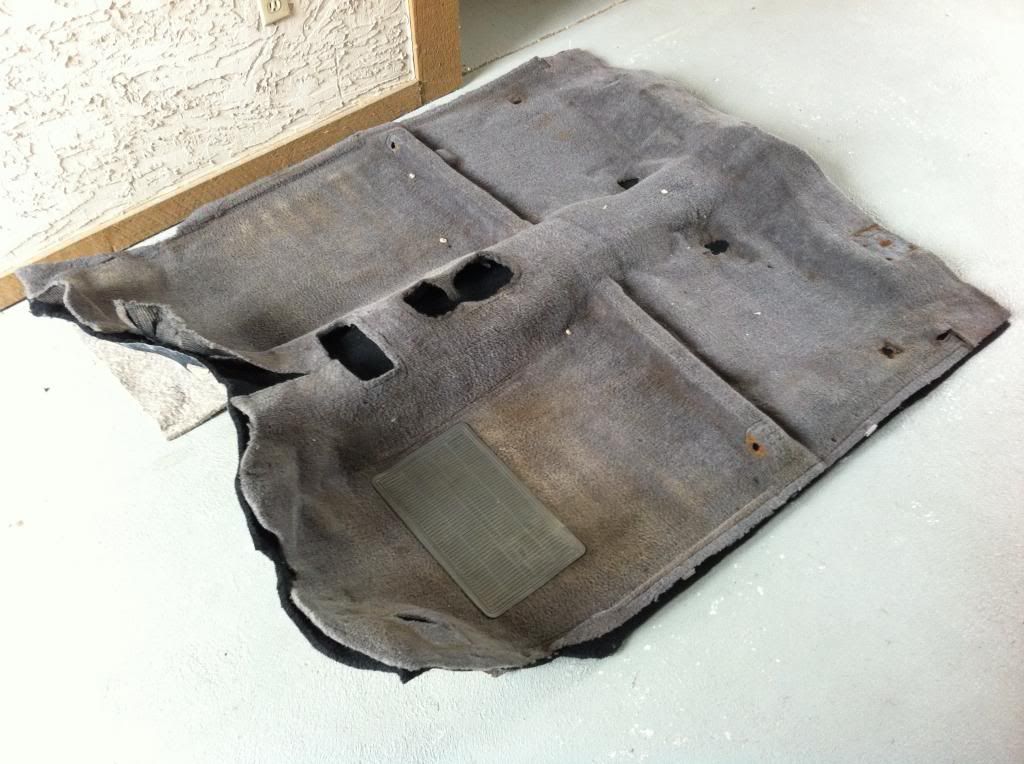
Today I decided to change out the 19 year old stained and abused stock carpet for something a little more nicer on the eyes. This tasking is more time consuming than you may think, but worth the outcome!
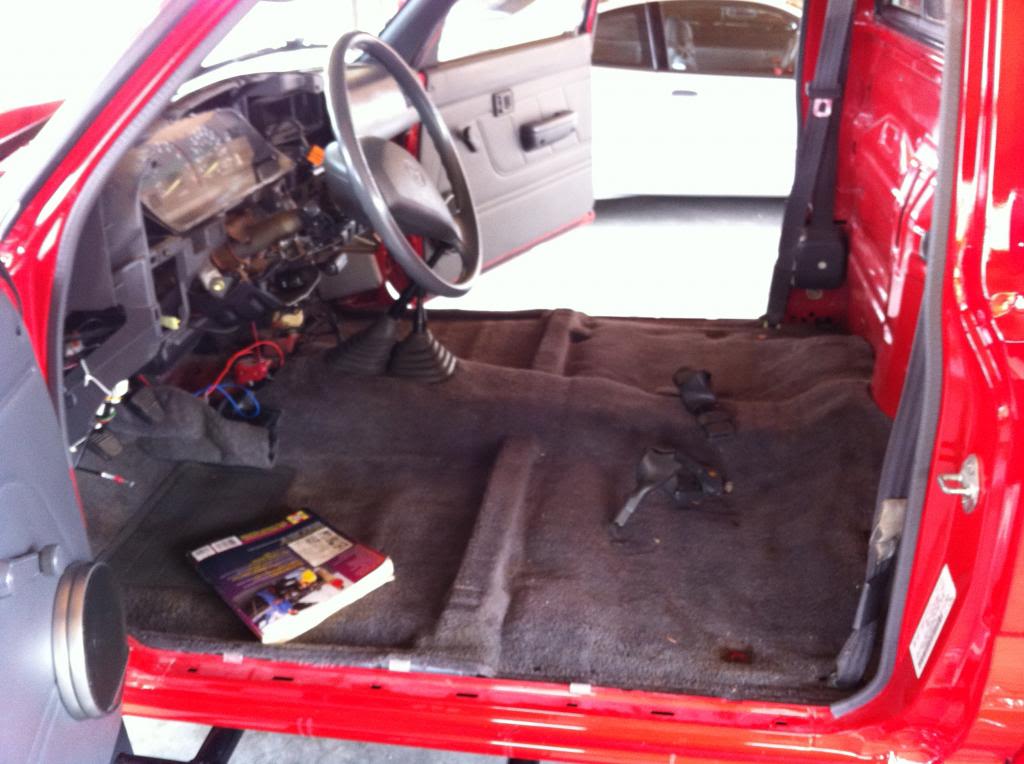
Using the old carpet as a cutting template
After vacuuming out 19 years of dirt, sunflower seeds and assorted change:
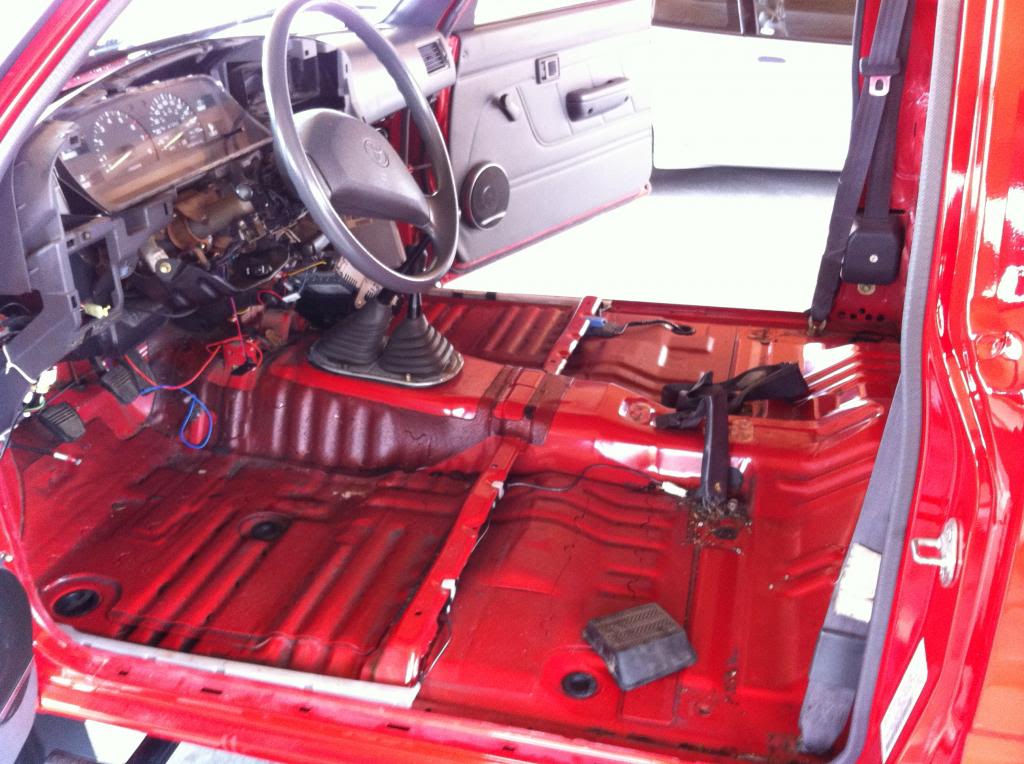
Done deal:
Using the old carpet as a cutting template
After vacuuming out 19 years of dirt, sunflower seeds and assorted change:
Done deal:
 07-30-2013, 04:05 PM
#17
Registered User
Thread Starter
Join Date: Jun 2012
Location: Penticton, BC
Posts: 28
Likes: 0
Received 0 Likes
on
0 Posts
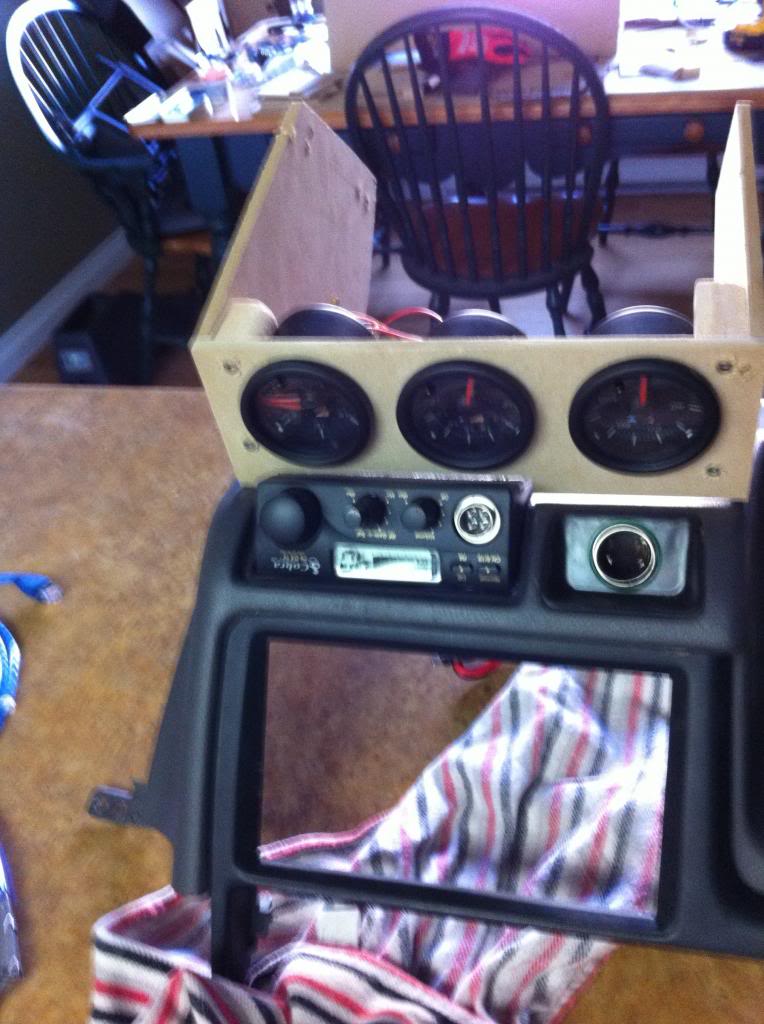
Well I finally got around to finishing up my gauge mount. I wired the gauges today and I'm happy with the outcome. Glow Shift seems to put out a good product!
 11-03-2013, 05:52 PM
#19
Registered User
Thread Starter
Join Date: Jun 2012
Location: Penticton, BC
Posts: 28
Likes: 0
Received 0 Likes
on
0 Posts
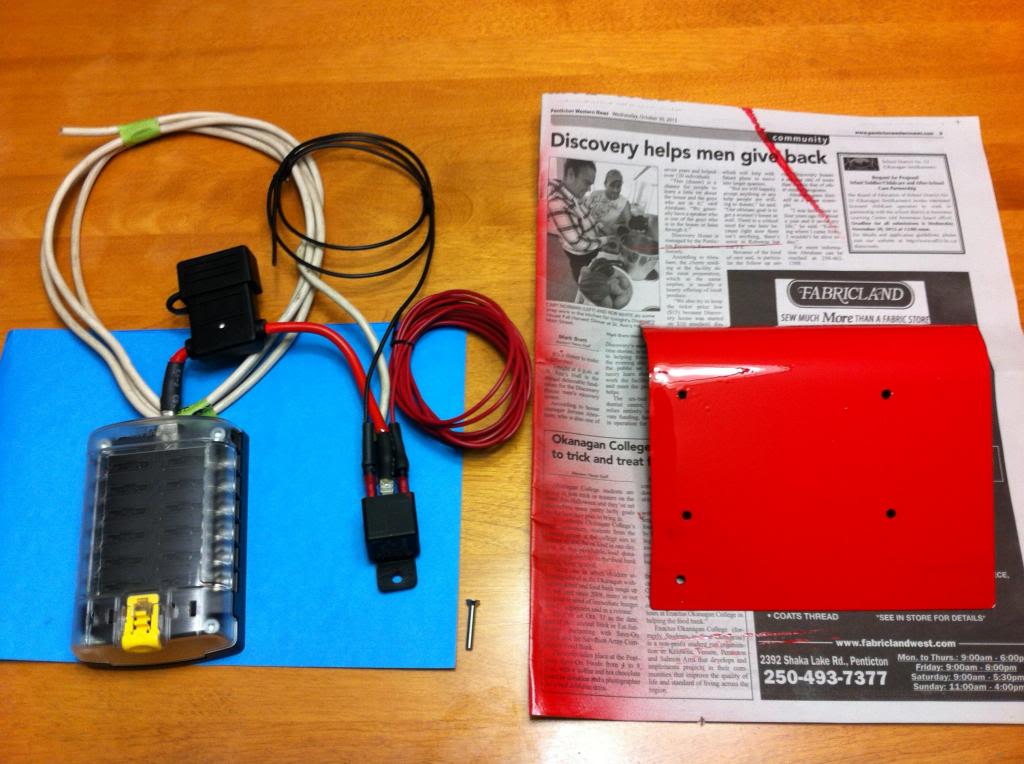
Well I decided to add an auxiliary fuse box today. Now I have an excuse to add some more lights and cool accessories
Pre Wiring the Blue Sea System Fuse Box
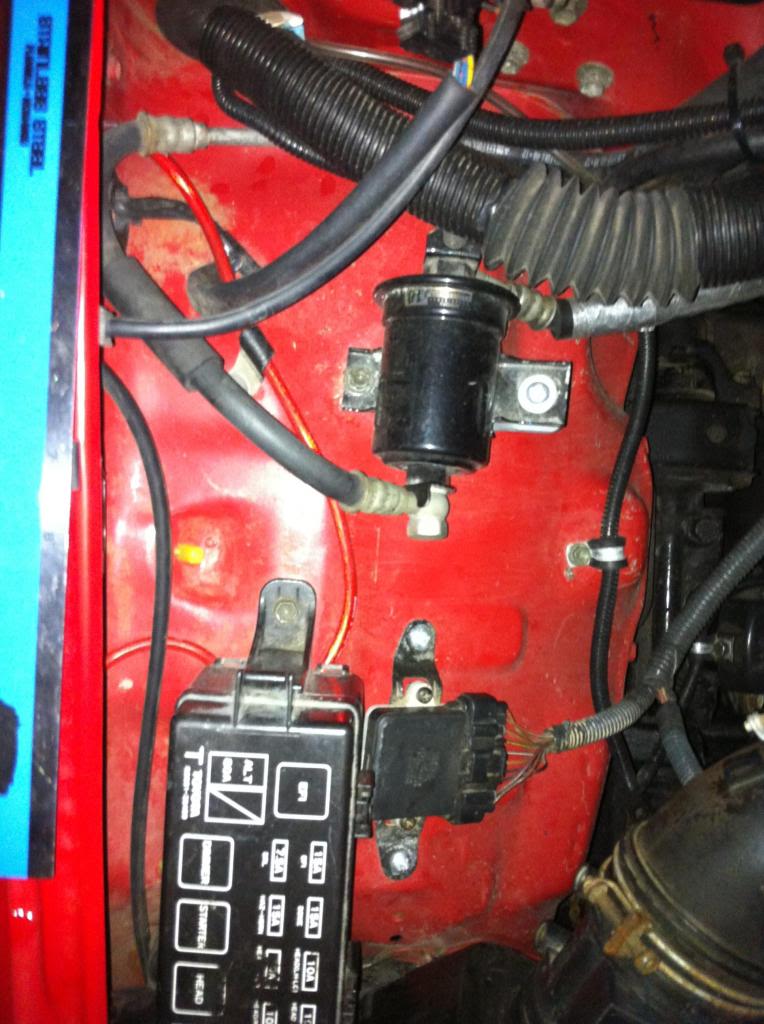
Space is getting a little tight under the hood, but I found a spot
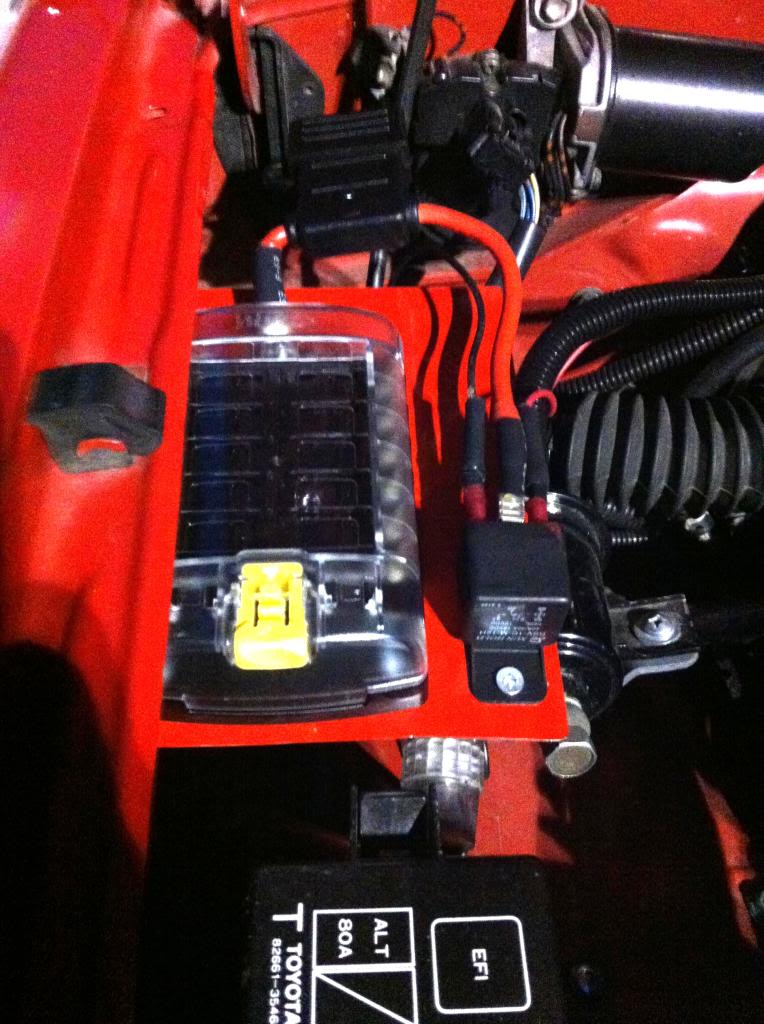
All Done!
Pre Wiring the Blue Sea System Fuse Box
Space is getting a little tight under the hood, but I found a spot
All Done!


