94 pickup 1uz with R150 swap build
 04-26-2014, 04:57 AM
#1
Registered User
Thread Starter

94 pickup 1uz with R150 swap build
Hello everyone, this is my first thread here, but I have been doing research and collecting parts for the 1uz swap. I have started the rebuild of the 1uz, the list below is what I know and have so far.
1uz from a 1993 lexus sc400 (rear sump), with computer and wireharness
1994 toyota pickup with the 3.0 and manual tranny
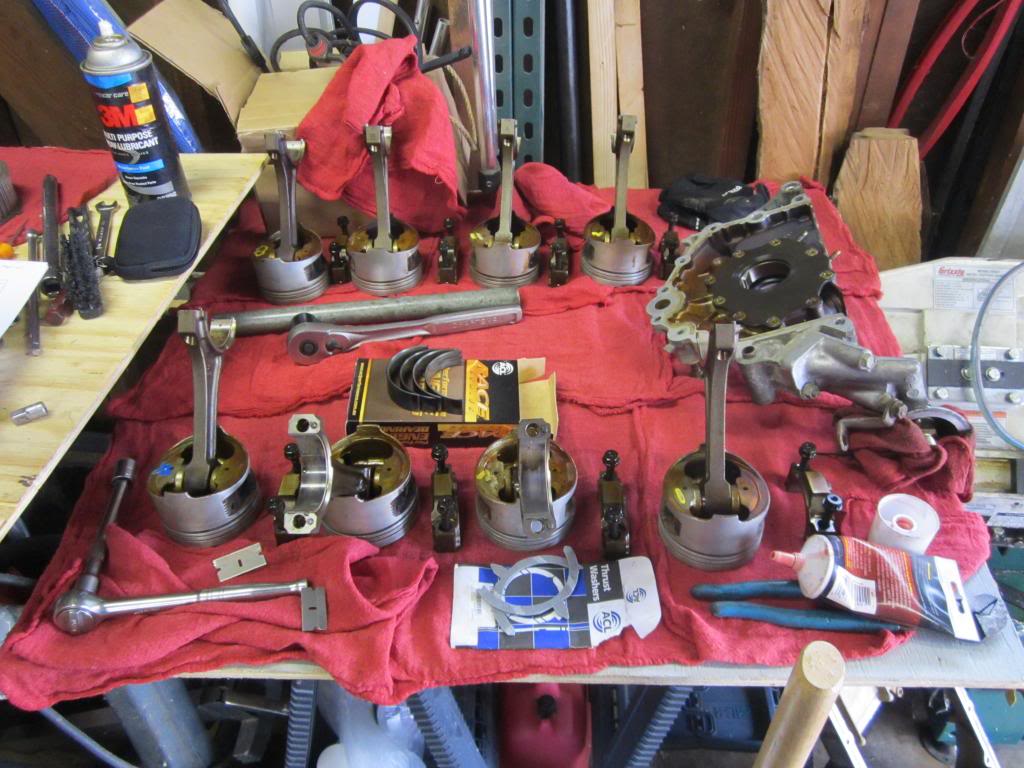
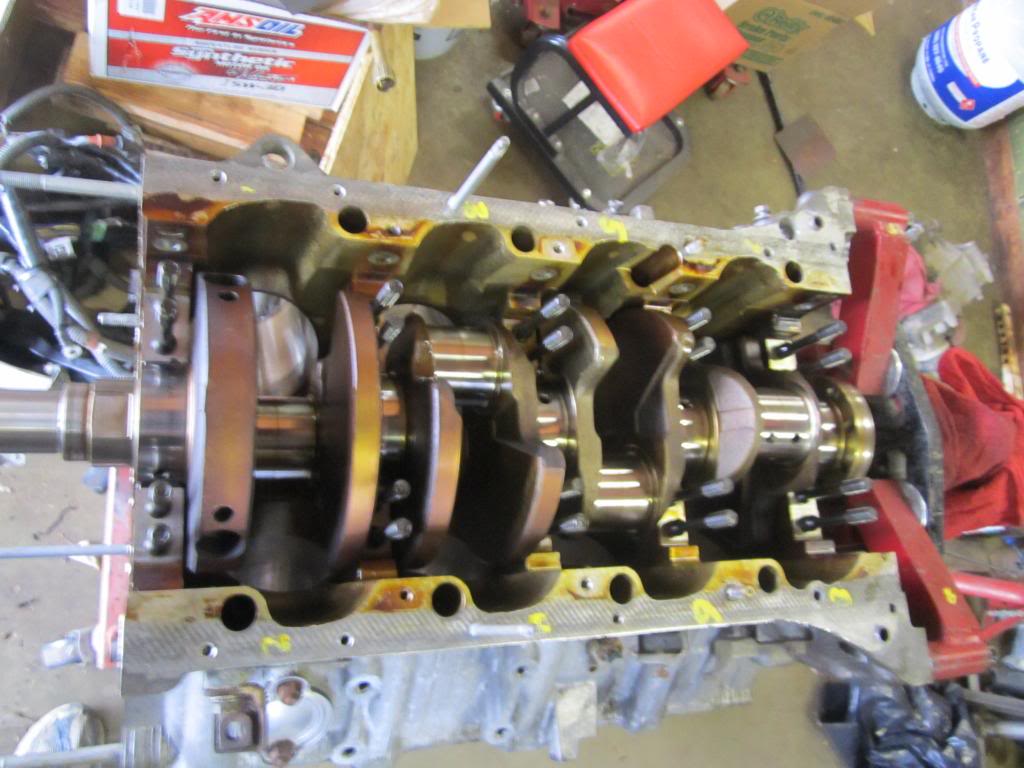
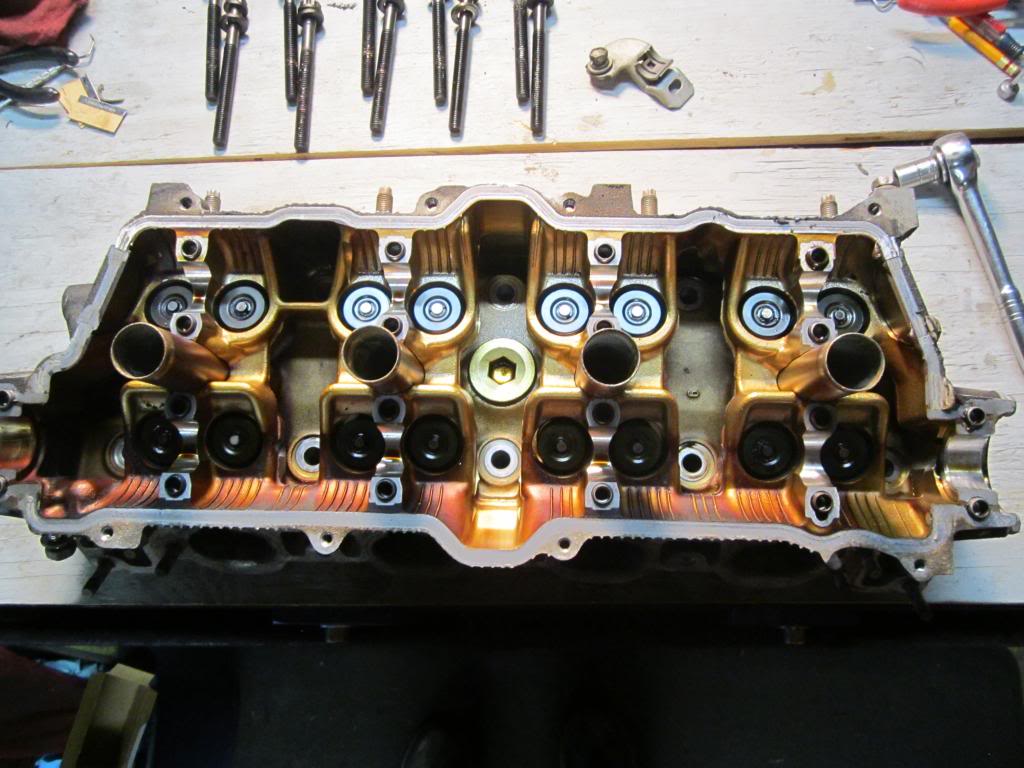
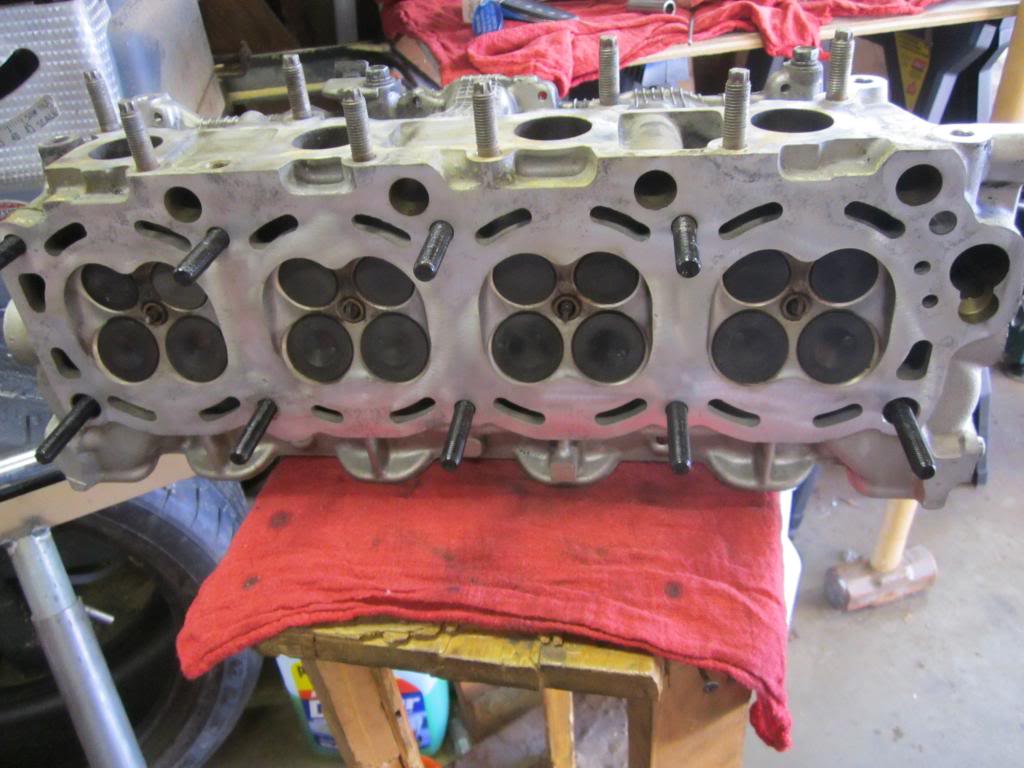
rebuilding the 1UZ
new rings, ACL bearings, and seals to go around
new alternator, starter, water pump, timing belt and AC pump.
Rebuilding the stock power steering pump
using the bell housing from ebay to fit it to the R150
I hear the auto drive shaft will work because it is shorter, I have one so I will try it out
I will be keeping the engine stock with the AC
I want to keep this truck as stock looking as possible, I may lower the front diff to make the oil pan clear
wiring is my weakness, so I was planning on using Tweaked for that
I have read with mixed results on weather the stock V6 radiator is enough, but for cost sake I may end up trying to keep it.
1uz from a 1993 lexus sc400 (rear sump), with computer and wireharness
1994 toyota pickup with the 3.0 and manual tranny
rebuilding the 1UZ
new rings, ACL bearings, and seals to go around
new alternator, starter, water pump, timing belt and AC pump.
Rebuilding the stock power steering pump
using the bell housing from ebay to fit it to the R150
I hear the auto drive shaft will work because it is shorter, I have one so I will try it out
I will be keeping the engine stock with the AC
I want to keep this truck as stock looking as possible, I may lower the front diff to make the oil pan clear
wiring is my weakness, so I was planning on using Tweaked for that
I have read with mixed results on weather the stock V6 radiator is enough, but for cost sake I may end up trying to keep it.

Last edited by JAR3289; 06-01-2014 at 09:04 AM.
 05-04-2014, 09:49 PM
#3
Registered User
Thread Starter
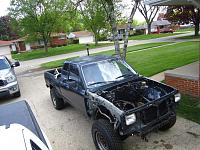
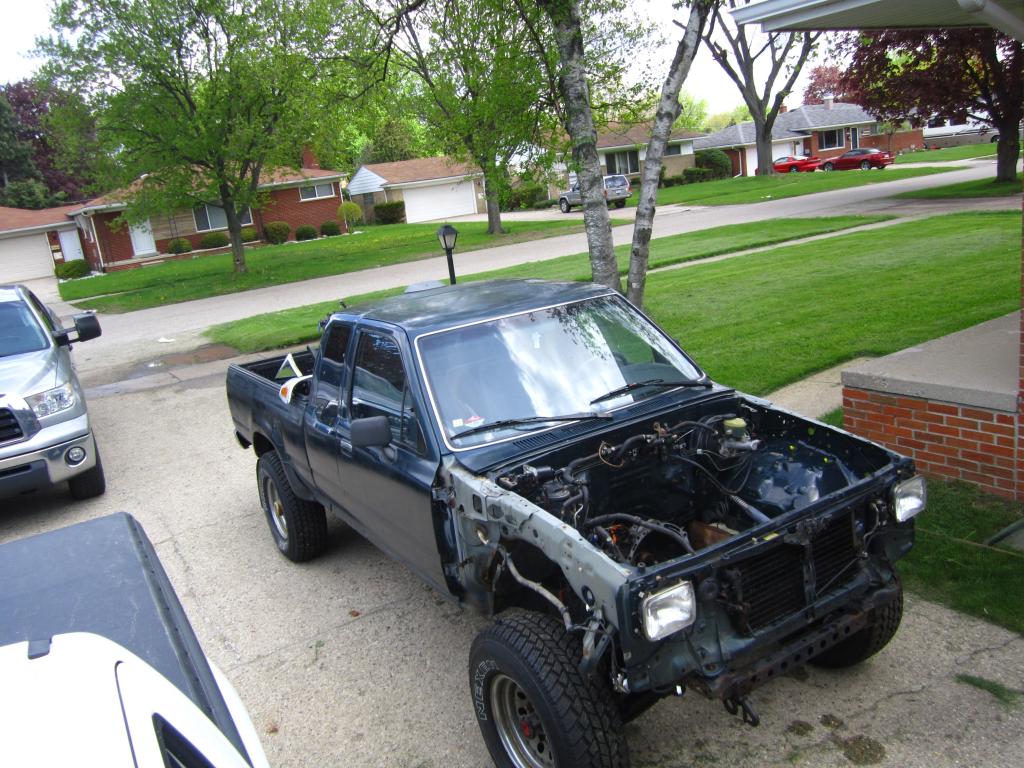
Worked on the truck a bit this weekend. got the old 3.0 out of the engine bay and started to remove everything else out of the fender wells. Lots of rusted bolts snapping off ....
Last edited by JAR3289; 06-01-2014 at 09:09 AM.
05-21-2014, 05:38 PM
#4
Registered User
Thread Starter
alright, a small update.
more updates to come as things start happening, we will see how far I get over the holiday weekend.
- the wire harness has been ordered
- the fly wheel is going out for modification I will try to post a pic of the drawing for it for anyone who may be looking for that, I know when I was researching that was one thing I couldn't find.
- the KC racing bell housing is on the trans
- I put the engine down in the truck the other night just to get a feel for what I needed to do about the oil pan and diff situation. I got a 3.0 oil pan off ebay for 26$ and I will be cutting and hacking that up to fit the 1uz sense it has the perfect mold of the diff case already.
- to make things easier on my life I am going to drop the front diff 1.25" just to give me some extra room to work with, plus I should not need to do any body lift that way. I can always put some bigger tires on it to make up the difference.
- more things came in the mail, I know have my marlin clutch kit!
more updates to come as things start happening, we will see how far I get over the holiday weekend.
05-21-2014, 05:42 PM
#5
Registered User
Thread Starter
Inferno451 - if this swap goes well I may have a v-6 for your hydro locked truck. I did the same thing the first year I bought my truck. first trip up to college went into a deep water hole and didn't come back out on its own power :-(
05-28-2014, 05:38 PM
#6
Registered User
Thread Starter
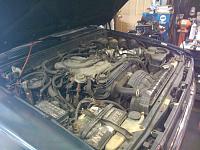
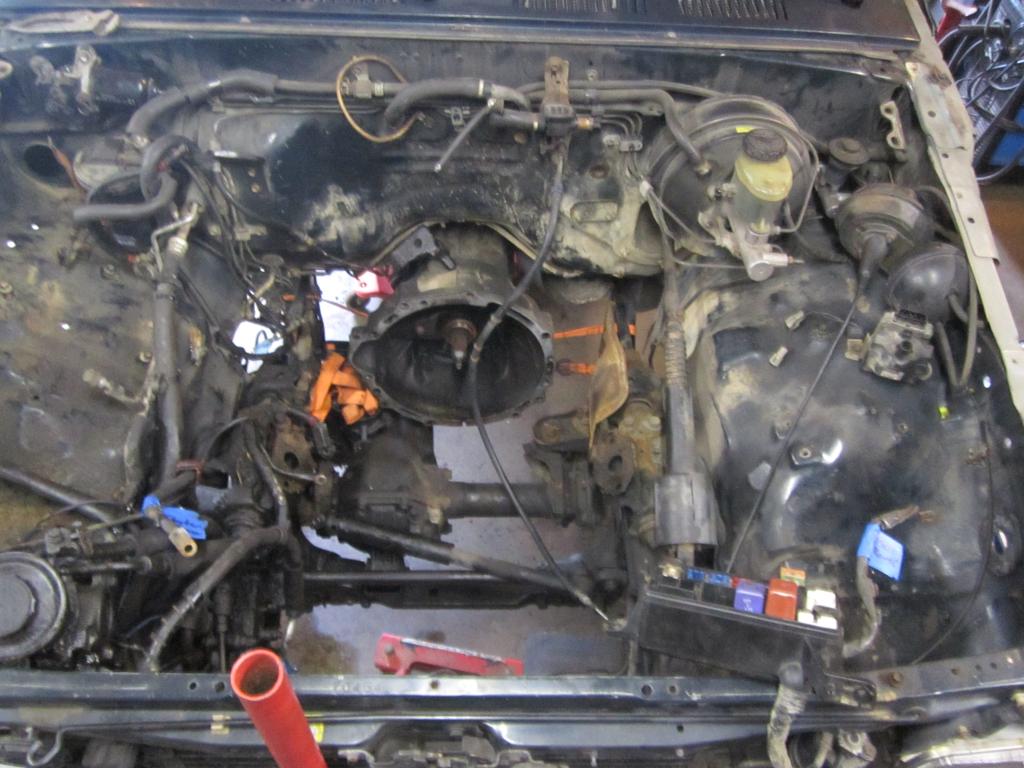
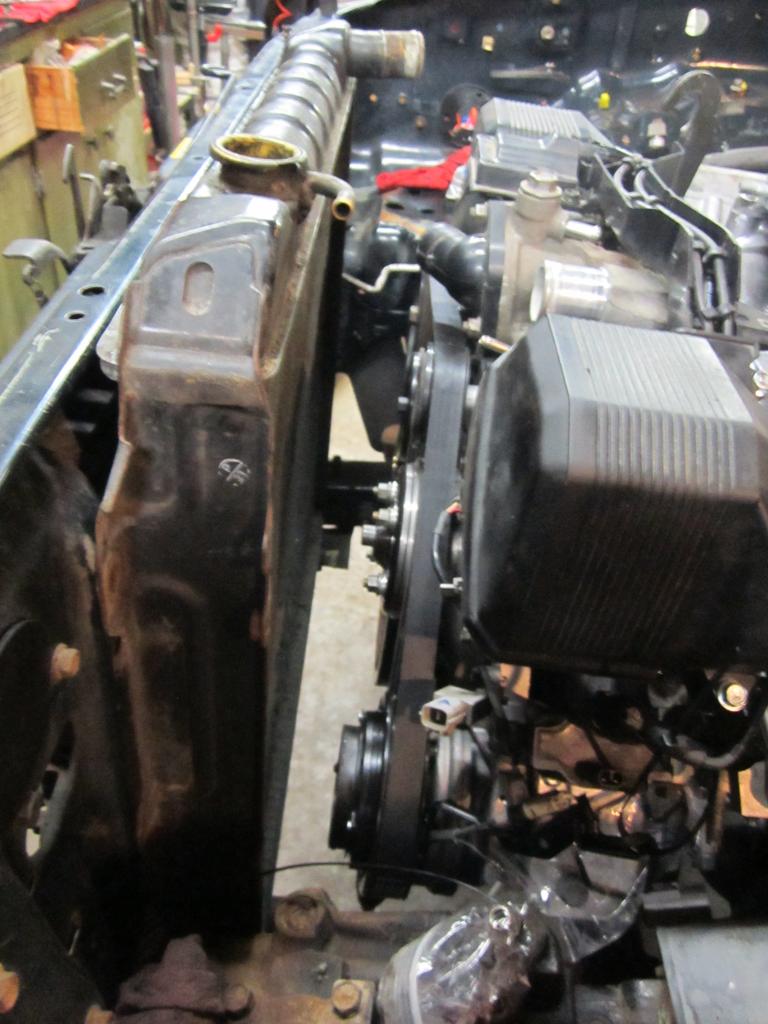
here is the engine bay all cleaned up
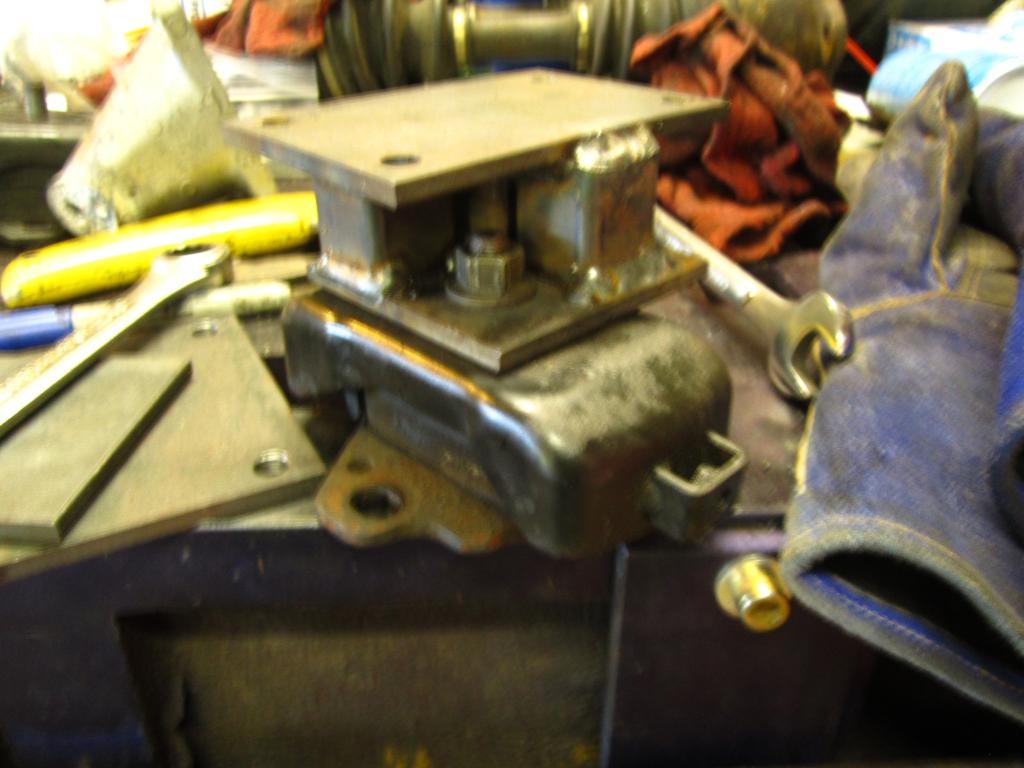
a little custom machining to the hydralic pulley to make it fit on the idler bracket.
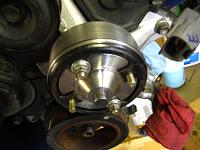
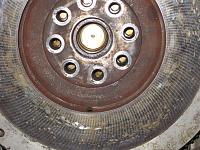
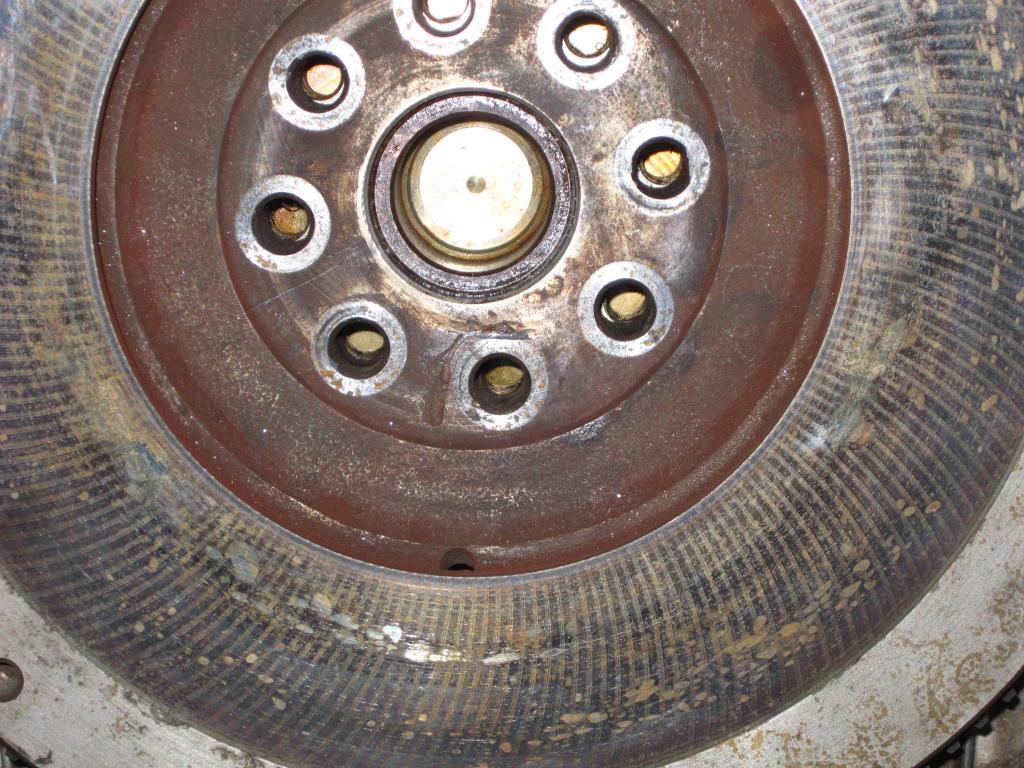
The 3,0 flywheel on the 1uz, they are truly close. I am getting this machined down.

a little custom machining to the hydralic pulley to make it fit on the idler bracket.

The 3,0 flywheel on the 1uz, they are truly close. I am getting this machined down.
Trending Topics

 05-30-2014, 04:54 PM
#12
Registered User
Thread Starter
1UZ engine and drive shaft into pickup
A few more things I have found so far
- the trans does need to move back 2-2.5" depending on your fan/radiator combination.
- If doing the swap with the R150 as I am, you can use the automatic drive shaft, I happened to have both around and the front section of the auto shaft is approximatly 2.5" shorter than the manual tranny one. I was pleasently surprised that worked out well. I remember reading it somewhere on here, but it was such a long time ago and I have not been able to find that thread since.
- so far it appears that the SC oil filter adapter clears the frame with the oil filter mounted by about 1.5", thats not to bad I have had to deal with worse.
- for a radiator I have been looking at a 2" thick 19" tall 24" wide aluminum dule core. it seems that it is about a 1/2" thinner than the original with much more cooling capacity. I am no expert at radiators so if anyone wants to chime in with what they have used and what has worked that would be GREAT.
 05-31-2014, 02:23 PM
#14
Registered User
Thread Starter
thanks man, it has been an interesting build so far. I think I spent over a year reading other peoples builds before I finally got a 1UZ for the swap. I hope to make some progress next weekend on this build. If I can find some pics tonight of the engine rebuild I may post the up.
06-01-2014, 09:15 AM
#15
Registered User
Thread Starter
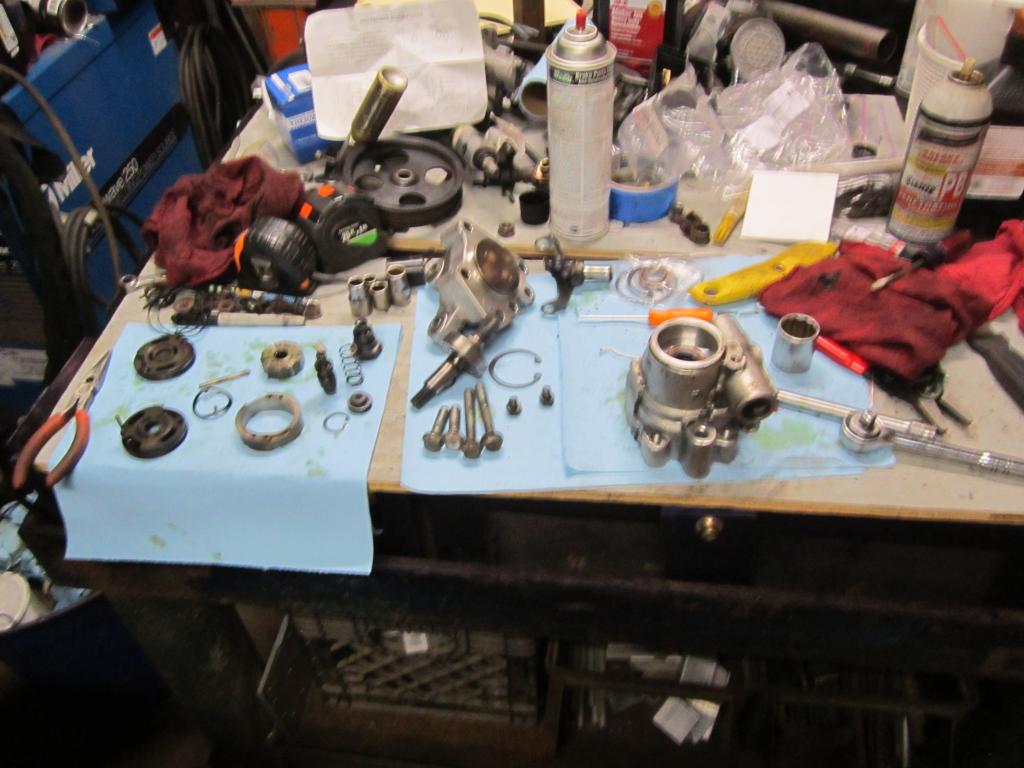
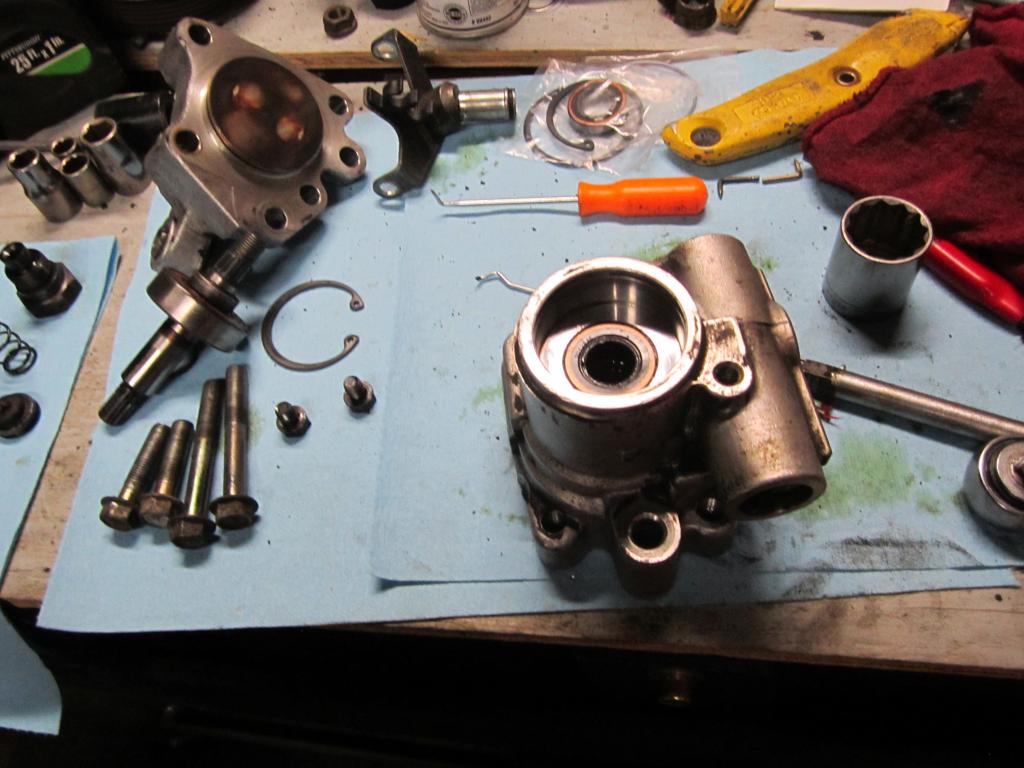
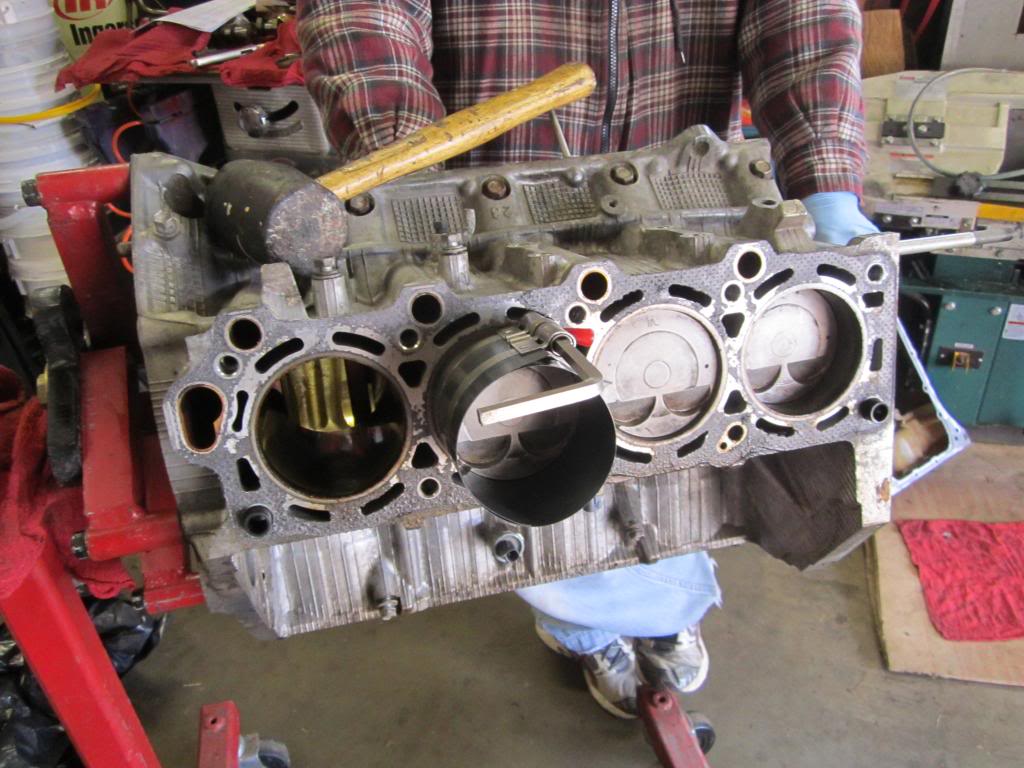
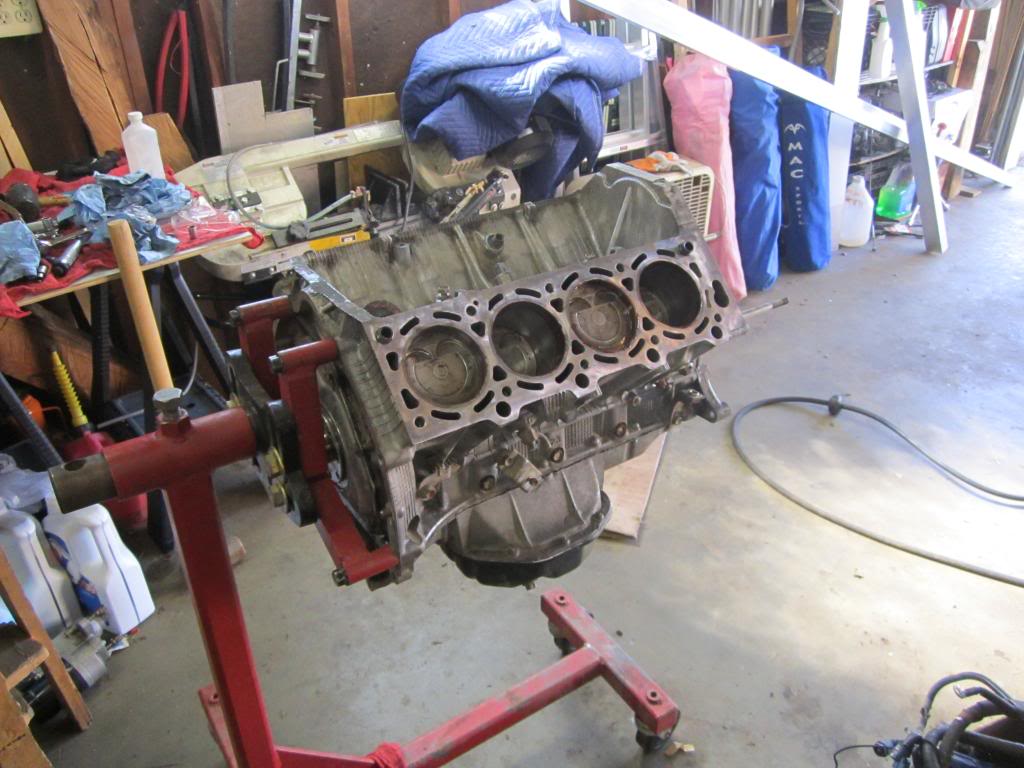
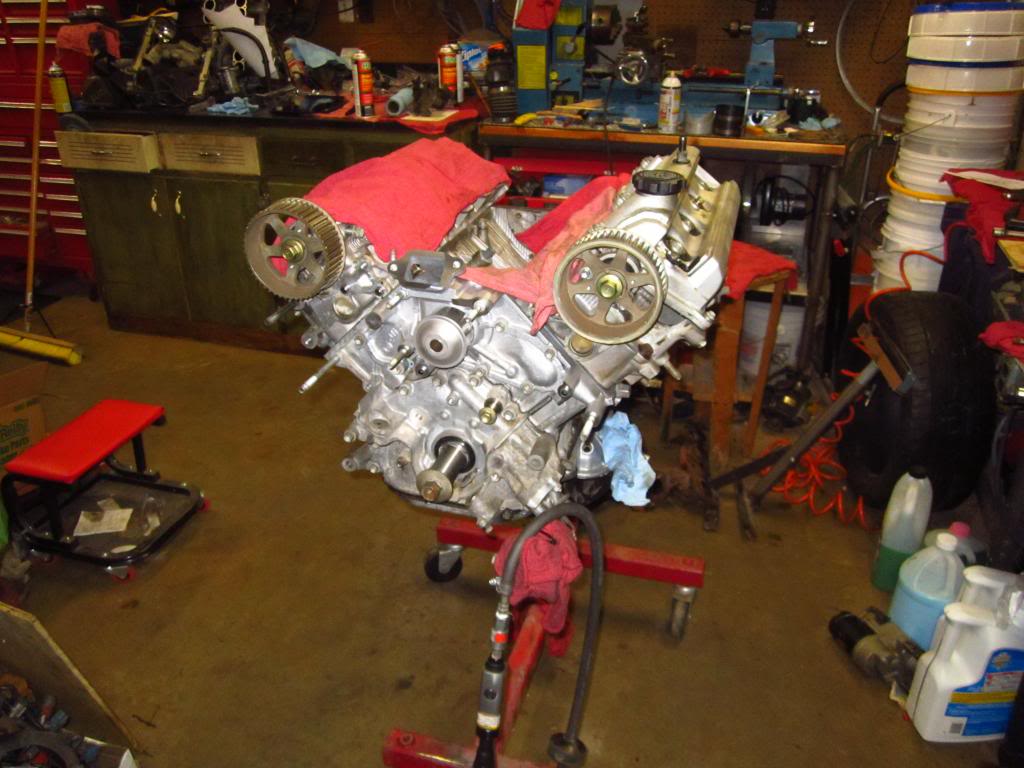
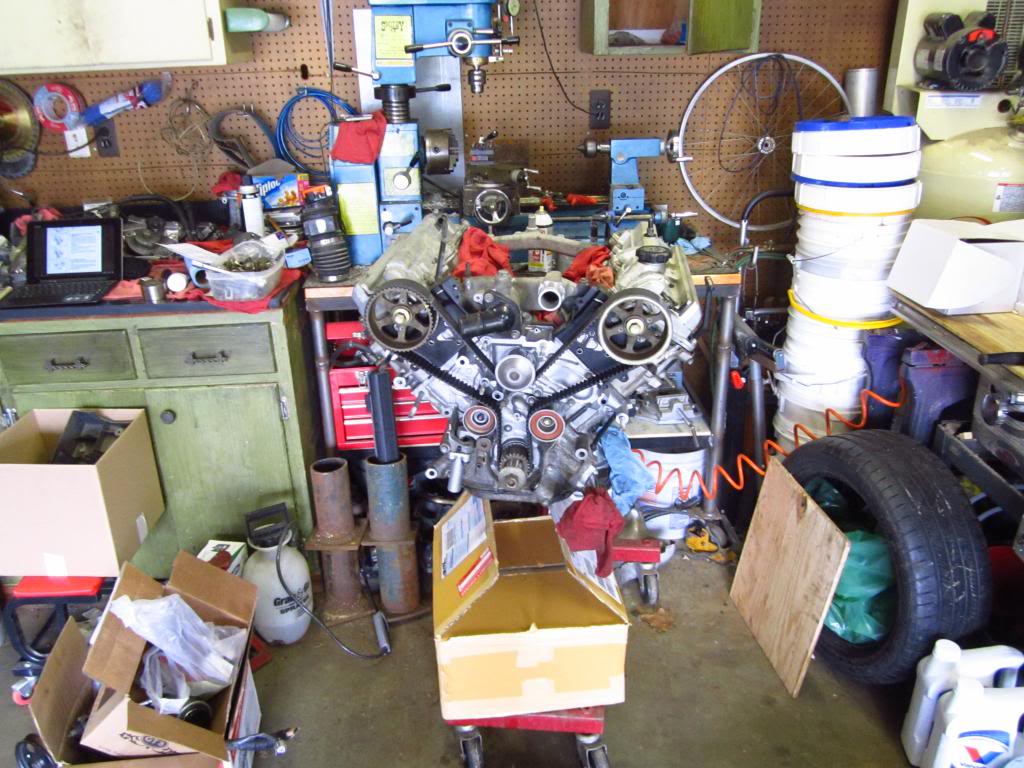
1UZ rebuild
I know this is out of order but I just found these pictures of the engine rebuild and thought I would share.
Last edited by JAR3289; 06-01-2014 at 09:32 AM.
07-10-2014, 06:59 PM
#16
Registered User
Thread Starter
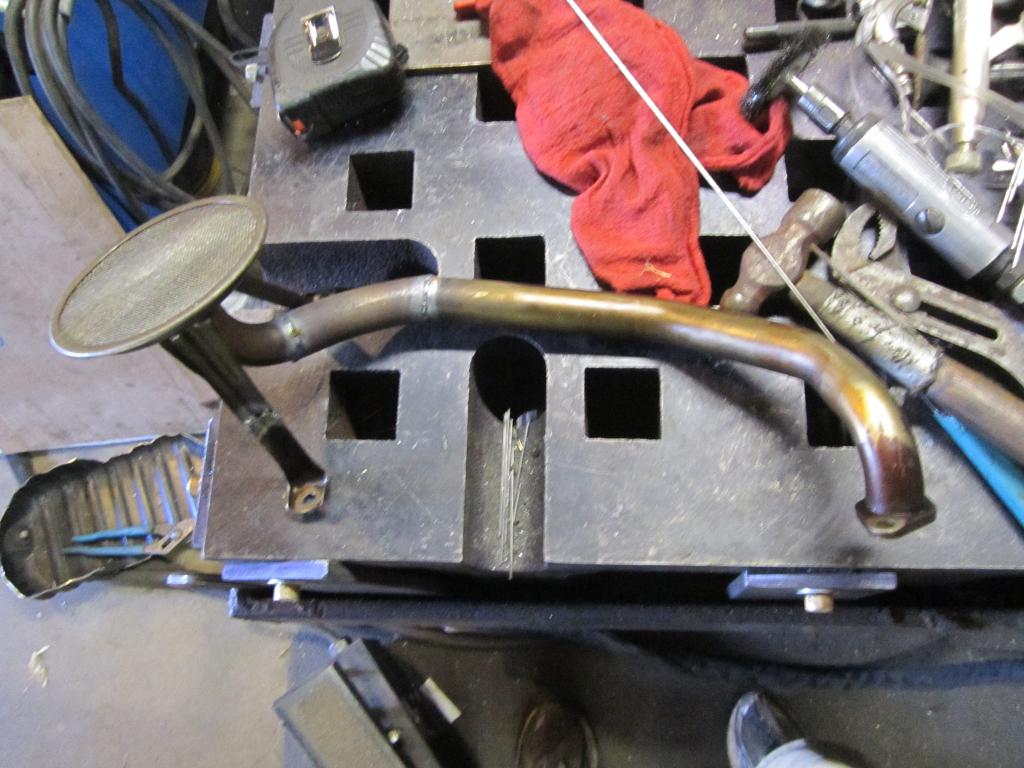
Exhaust manifold as it was from the SC400
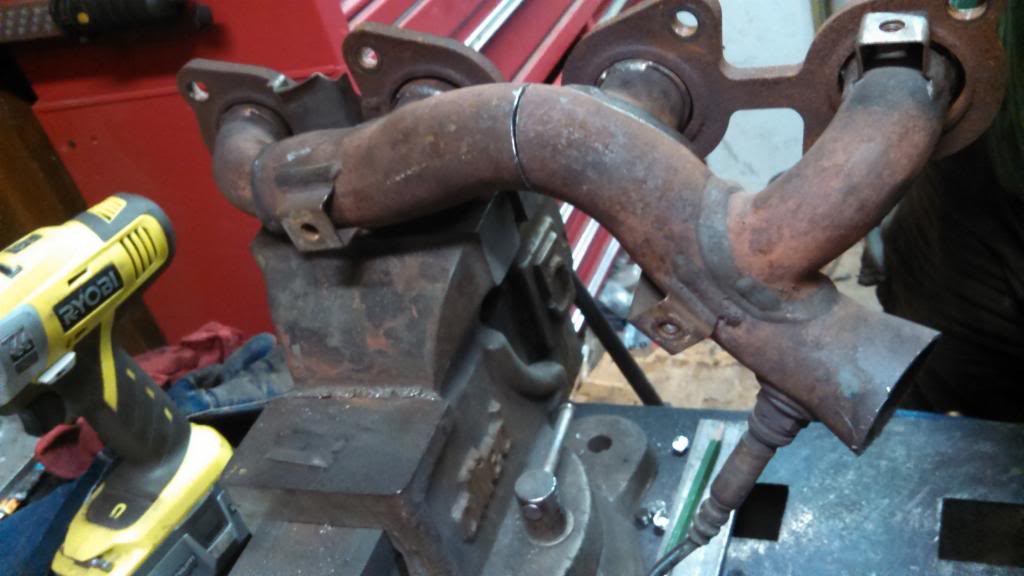
Modified to mock the tundra 4.7 ones because I couldn't find any local

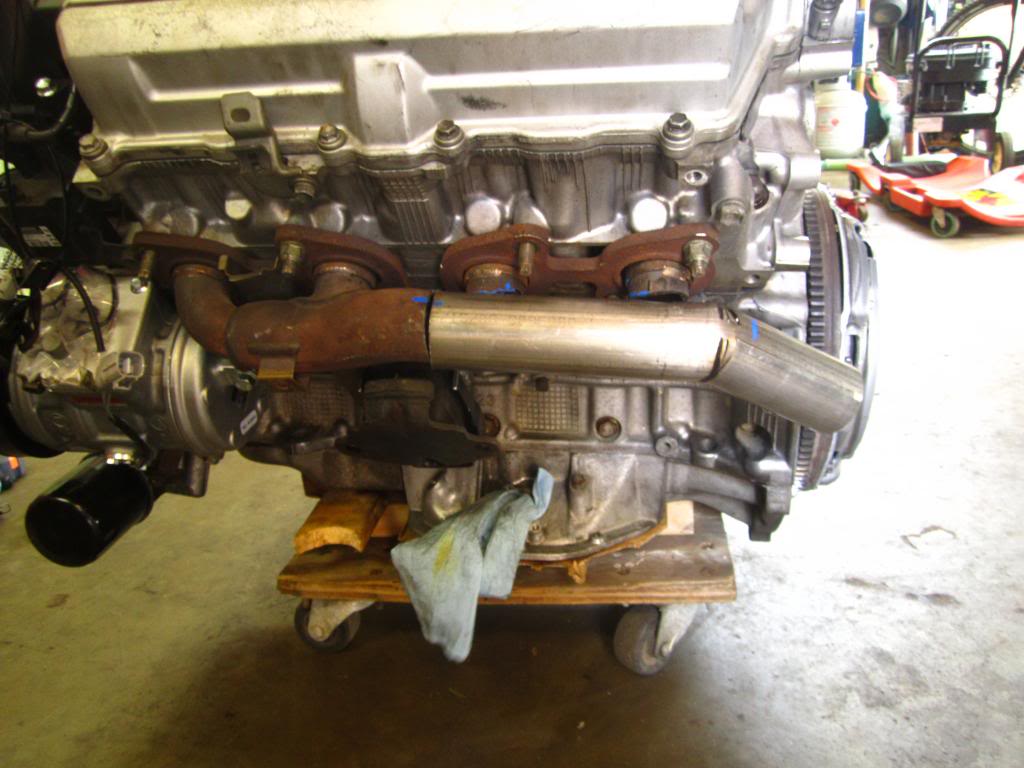
Exhaust mounted and in the truck
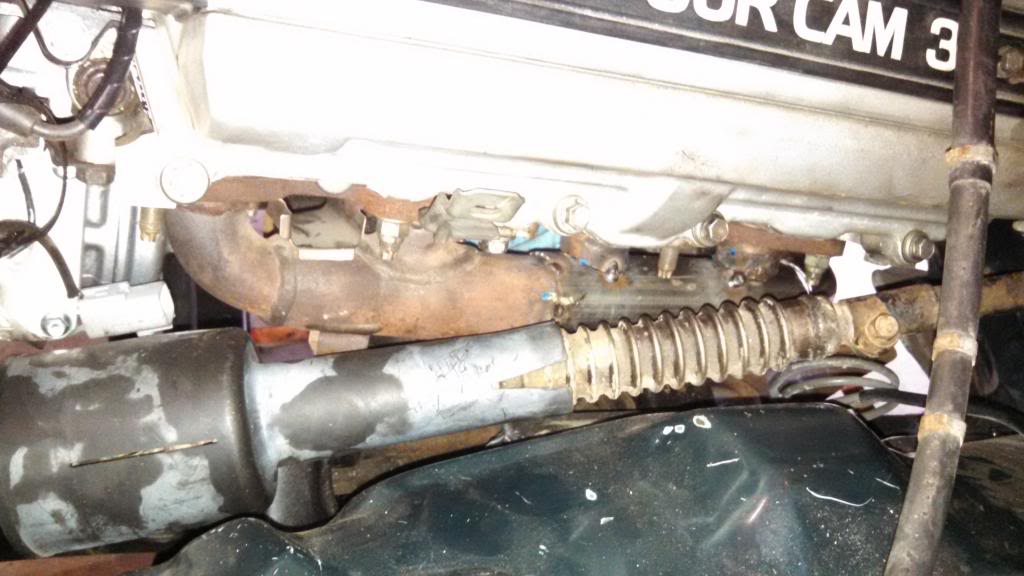
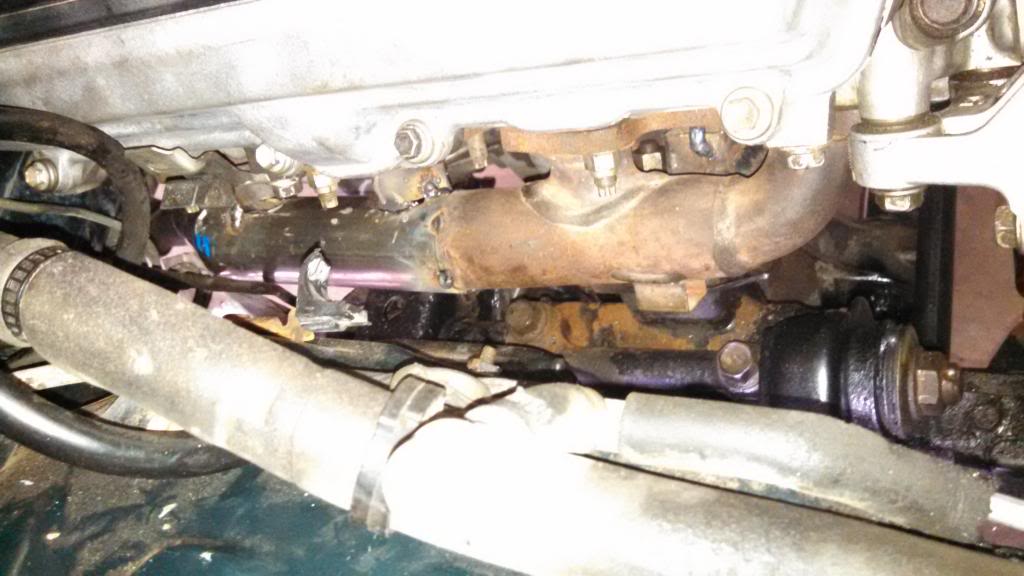
Exhaust underneath the truck
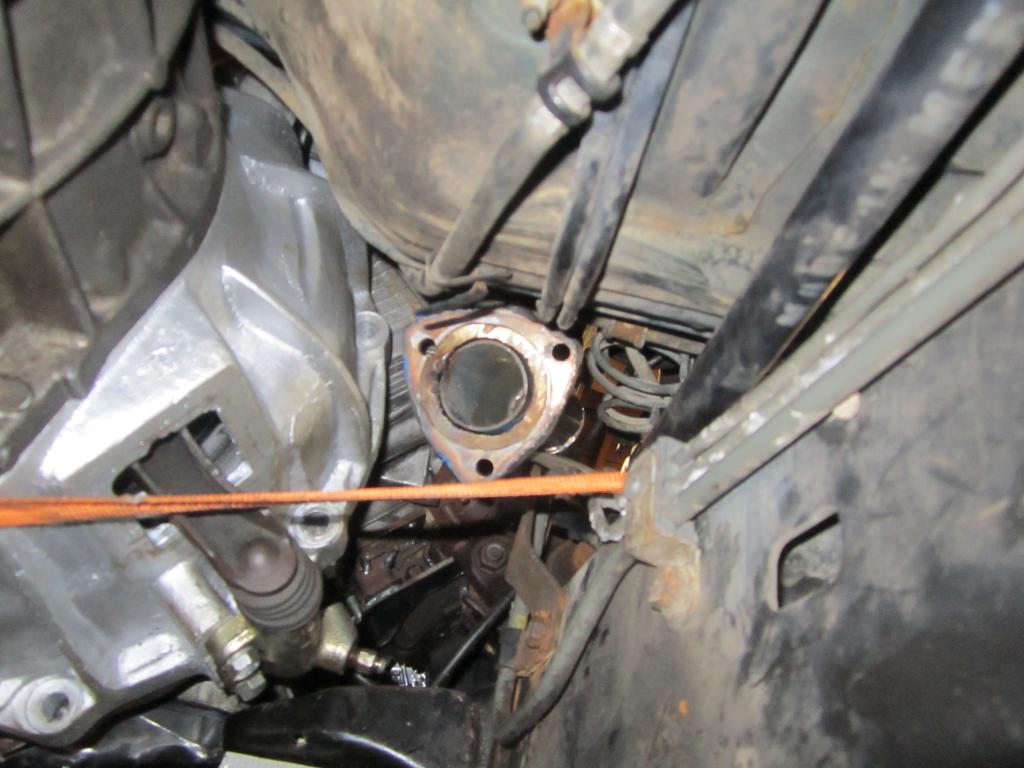
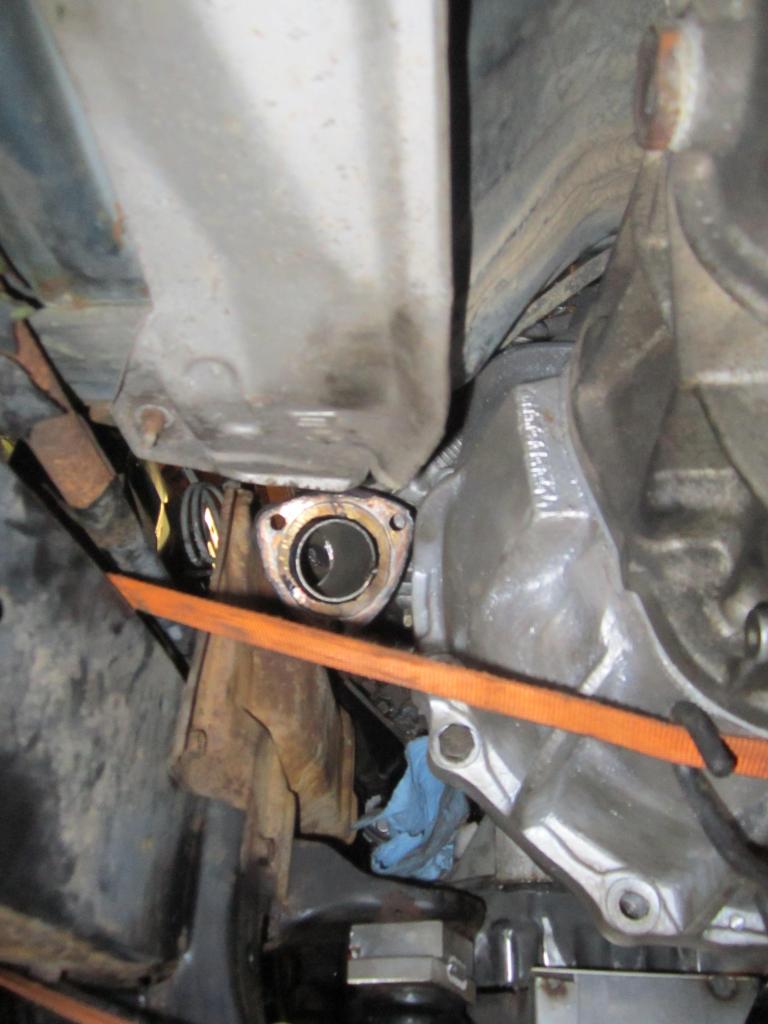
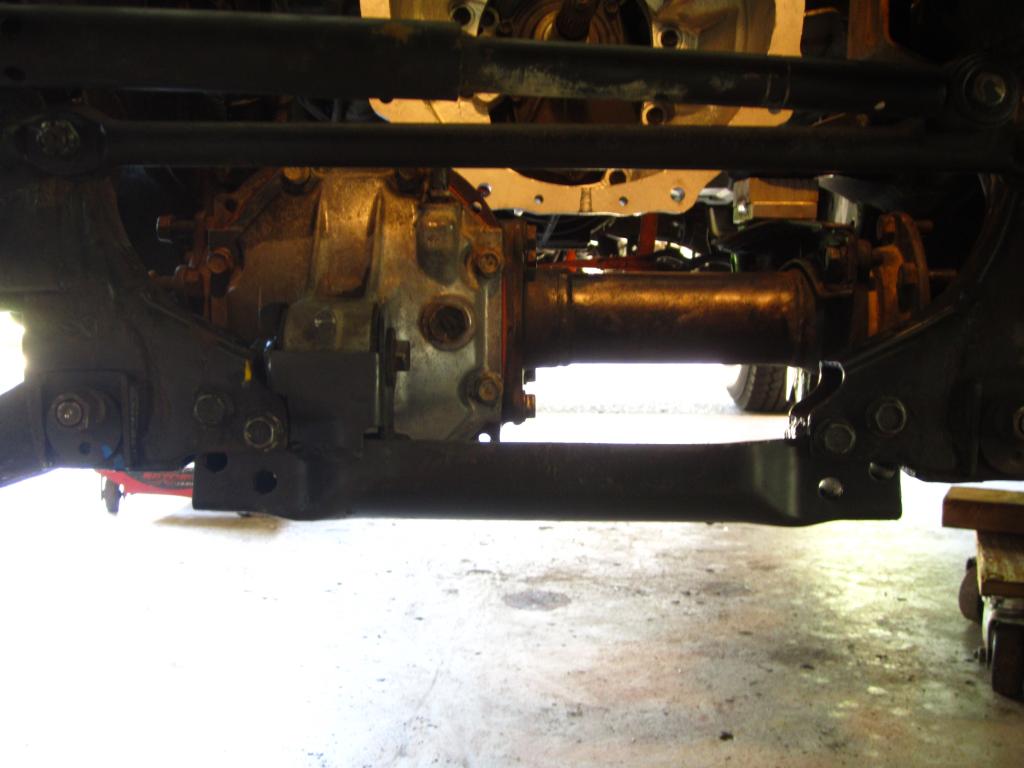
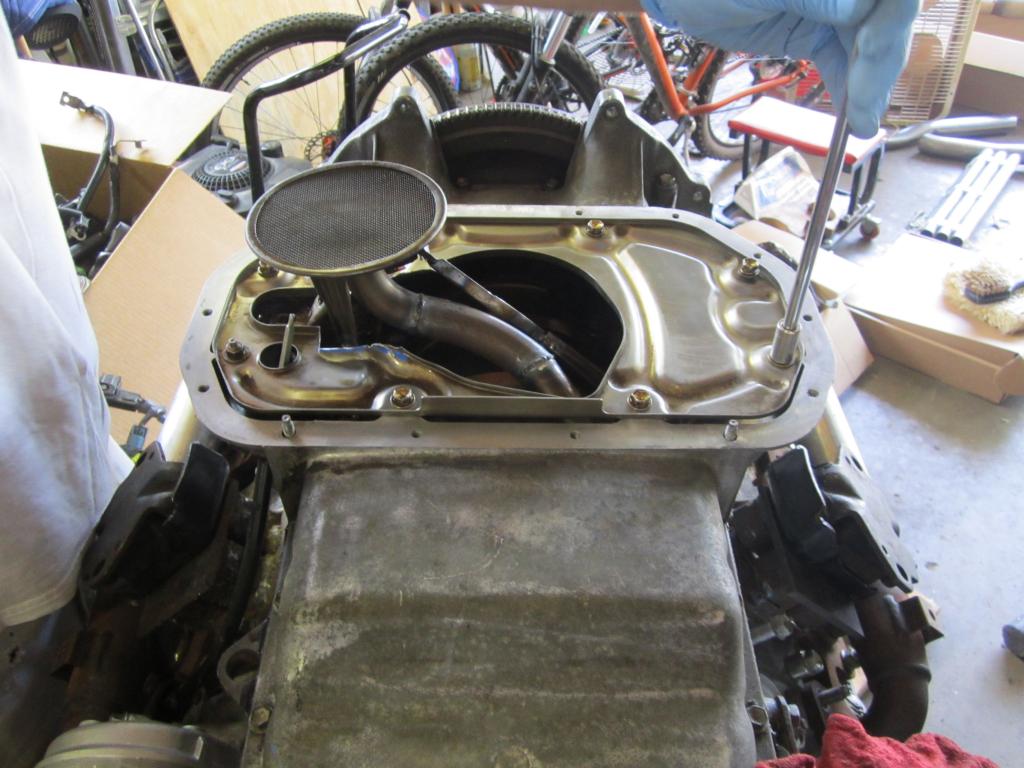
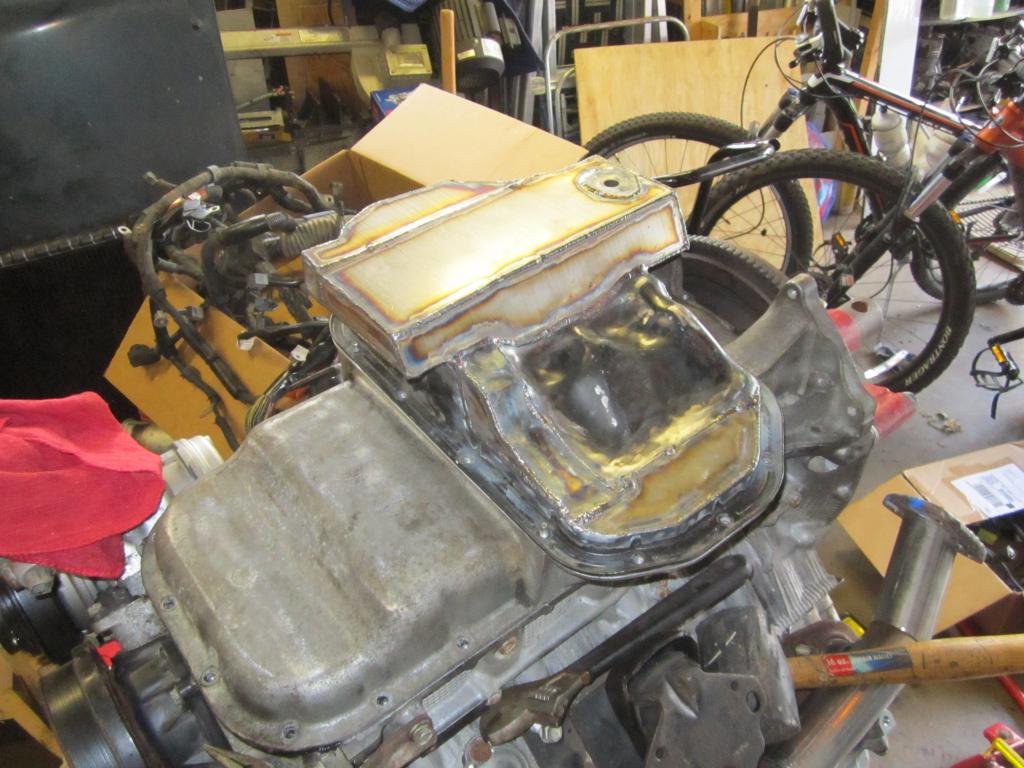
stock location of the sump with the modified oil pan
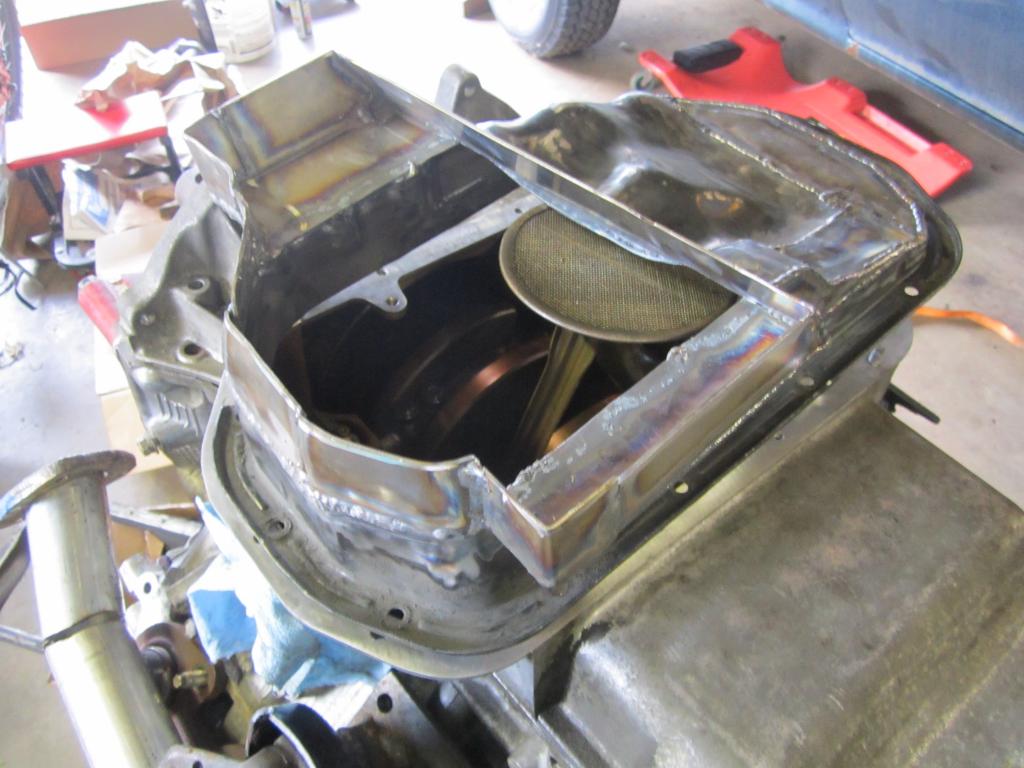
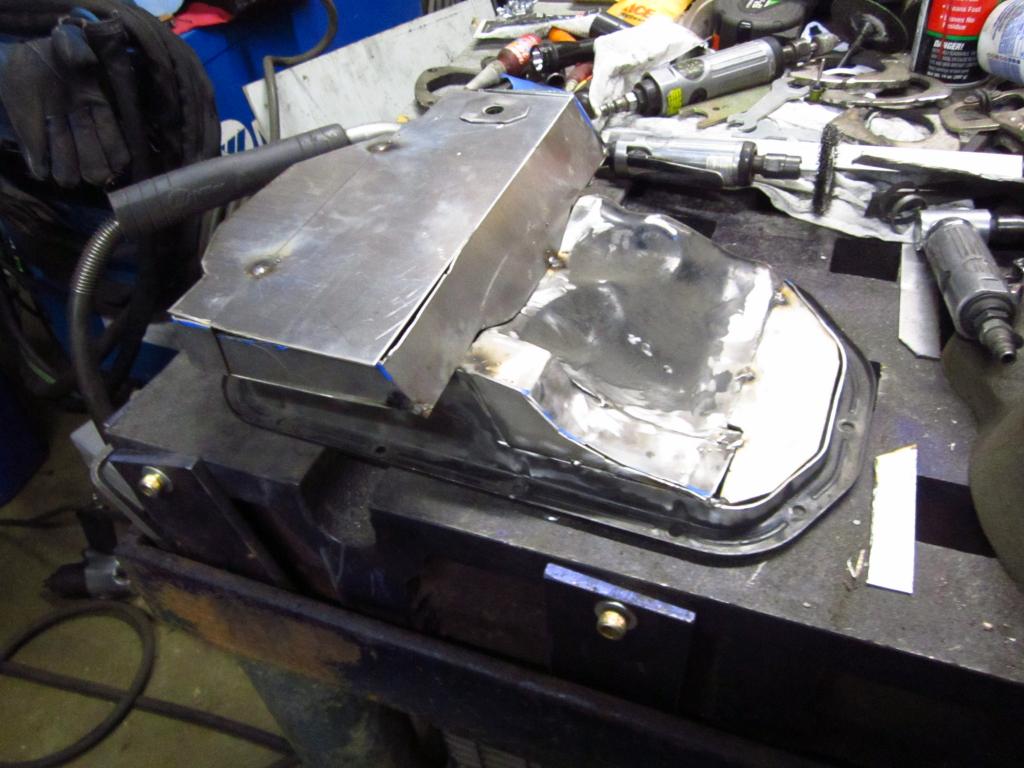
Here are the sump modifications
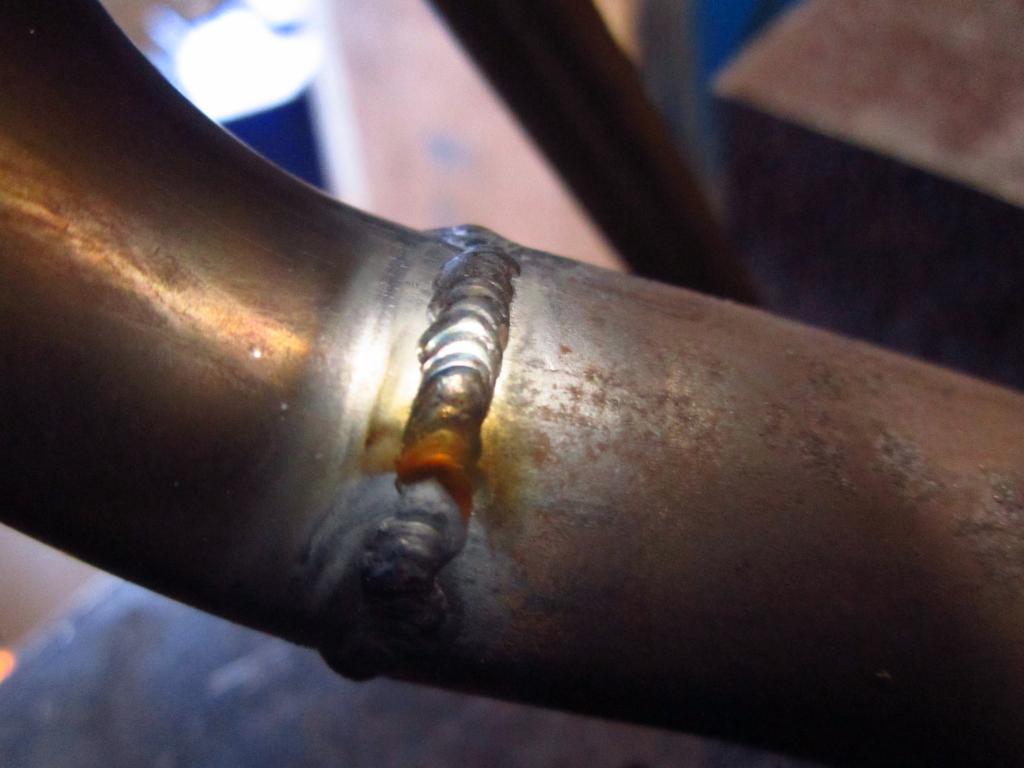
some tig welding
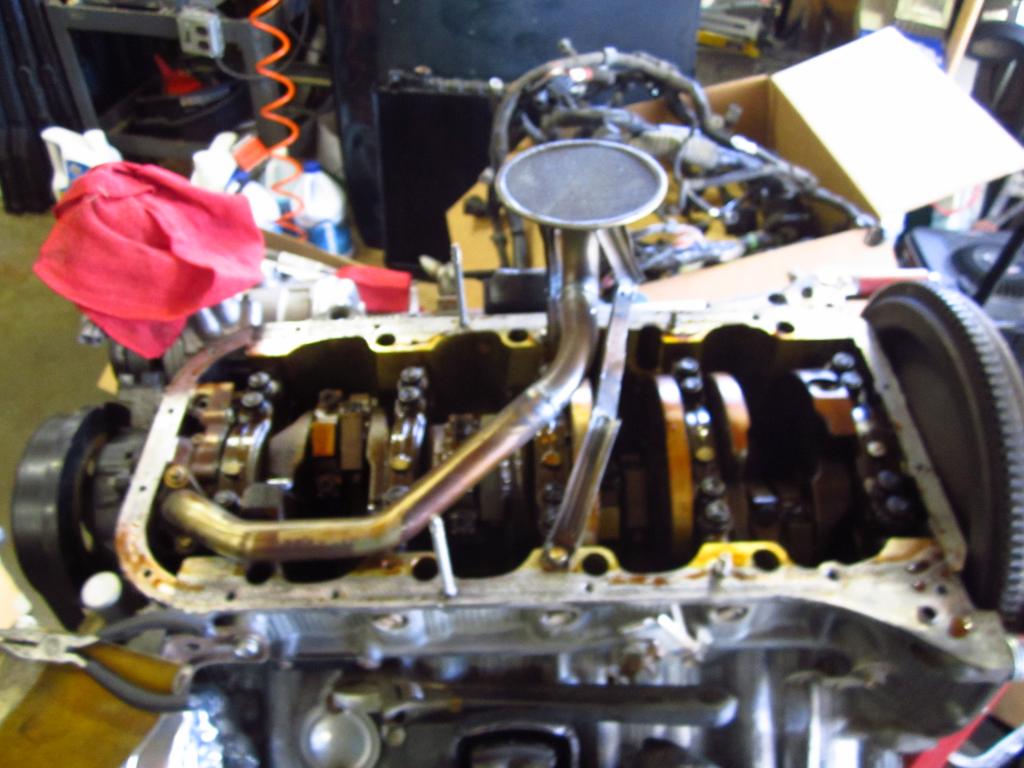
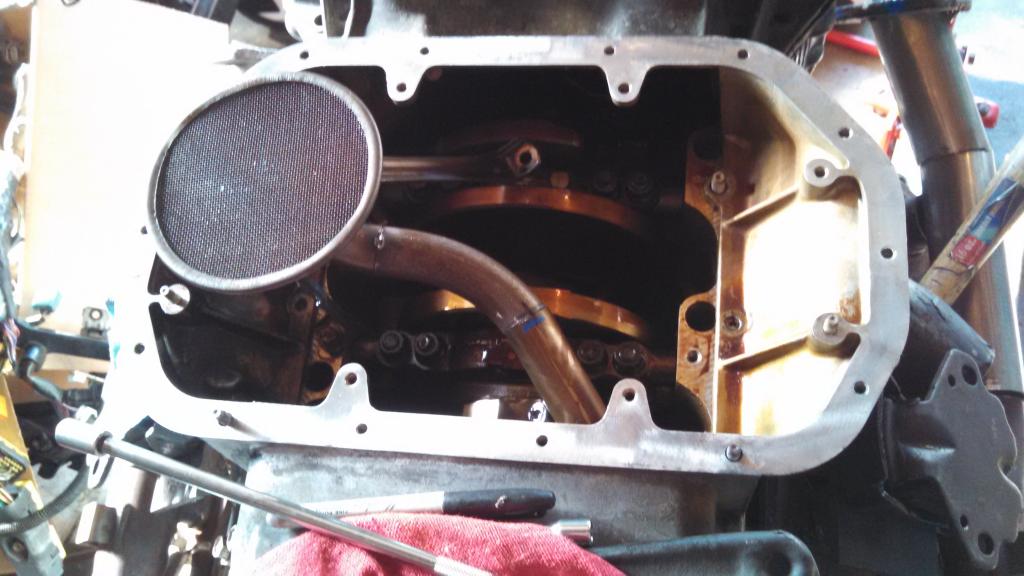
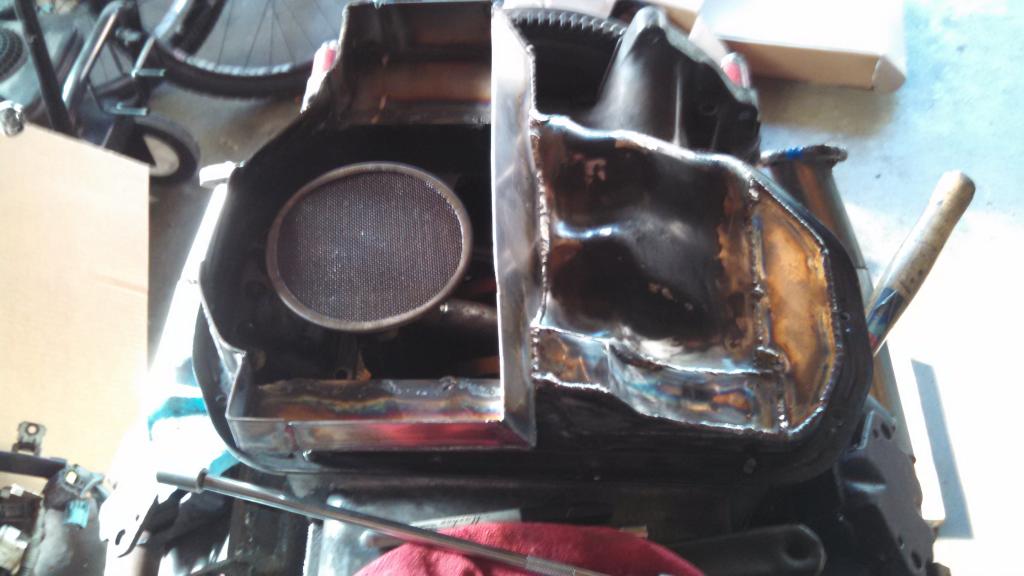
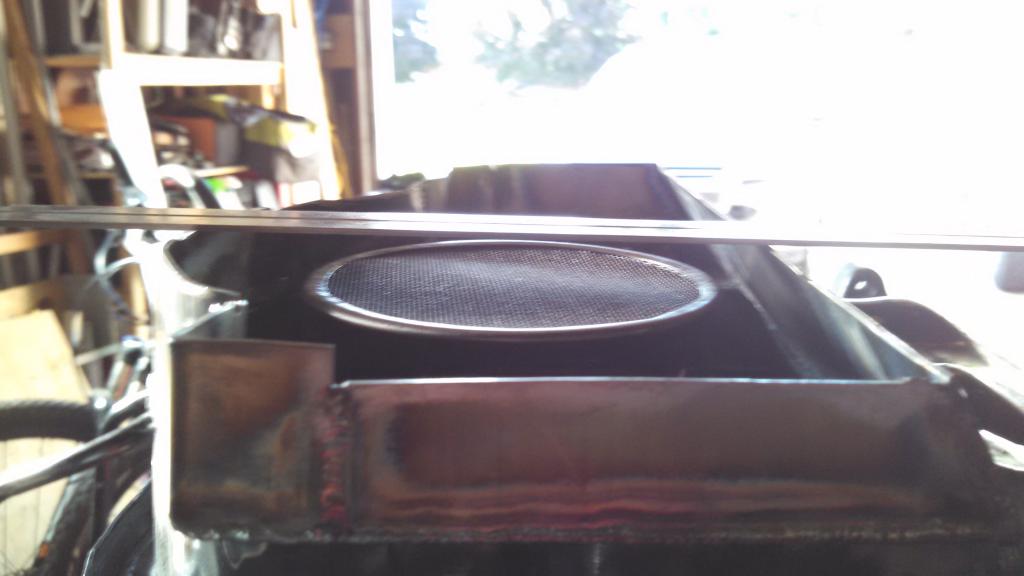
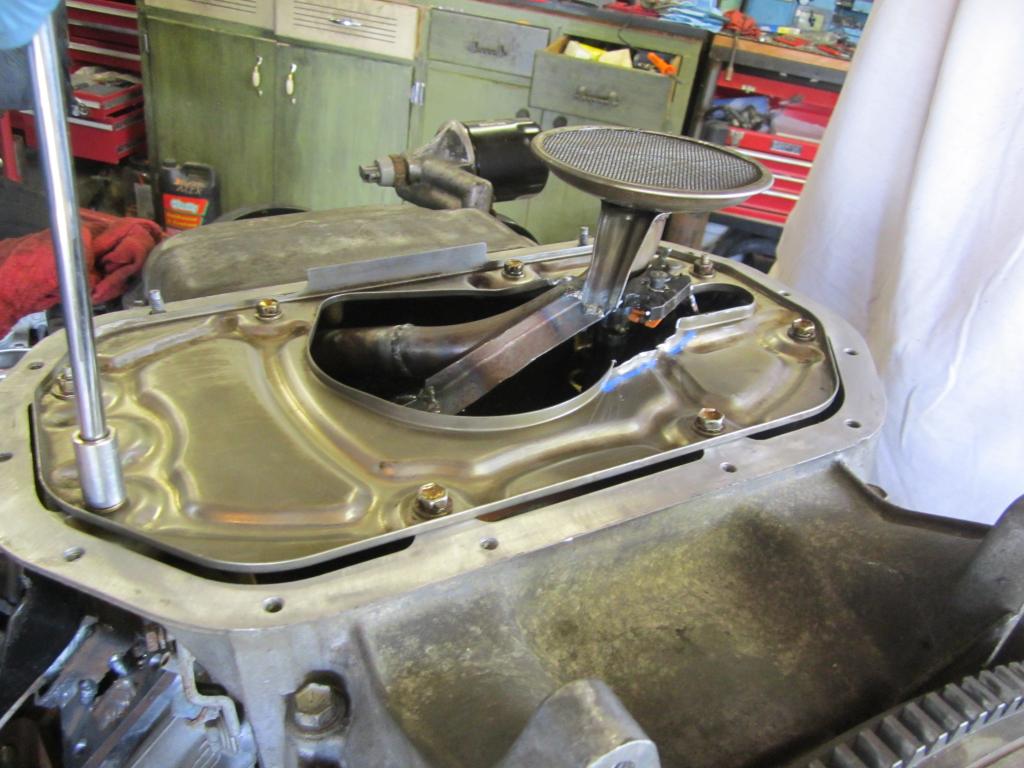
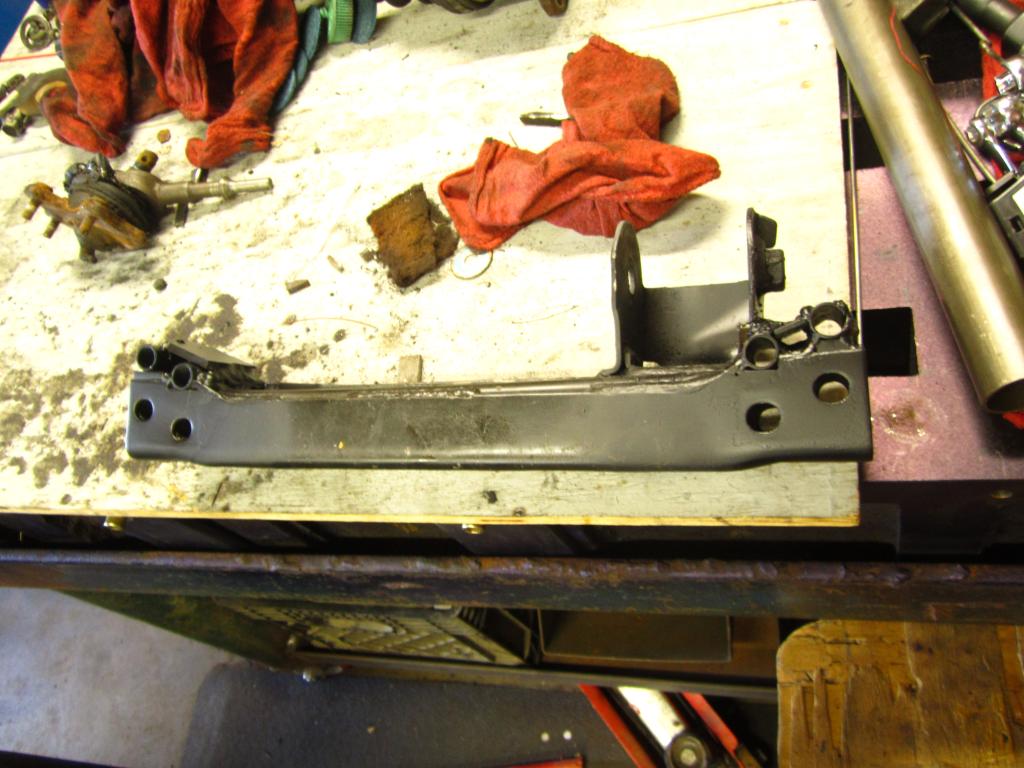
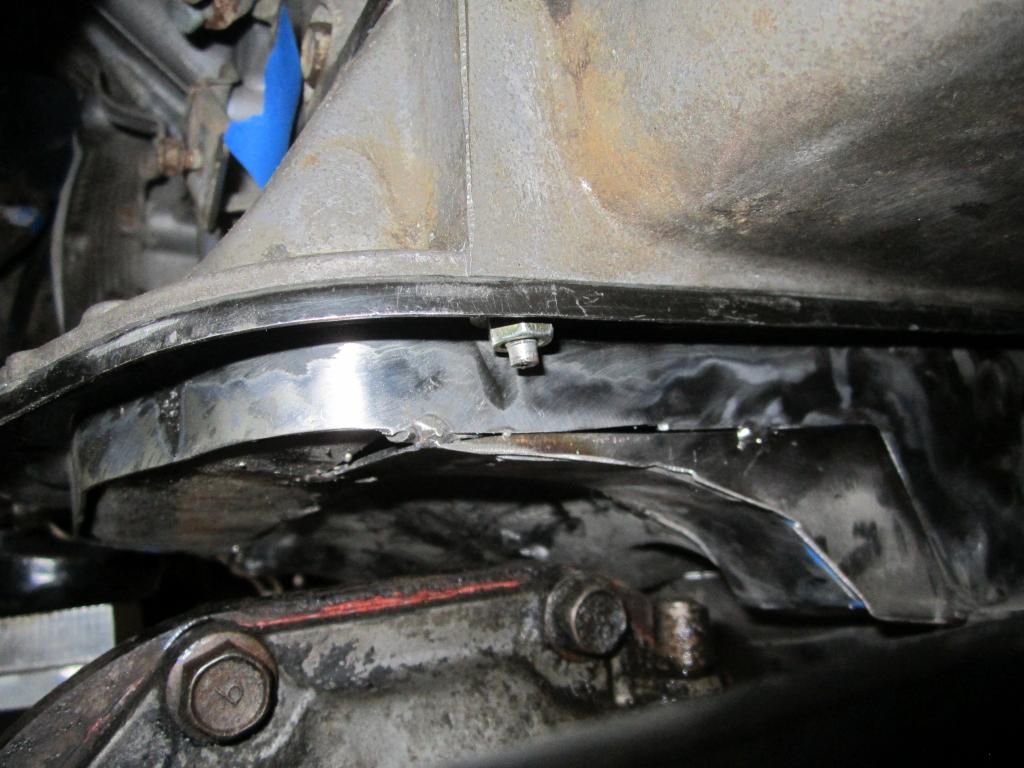
Oil pan modifications, I used an extra 3.0 oil pan and the sc oil pan to make one that fit around the front differential
oil pan clearance in the truck

Radiator mounting and clearance
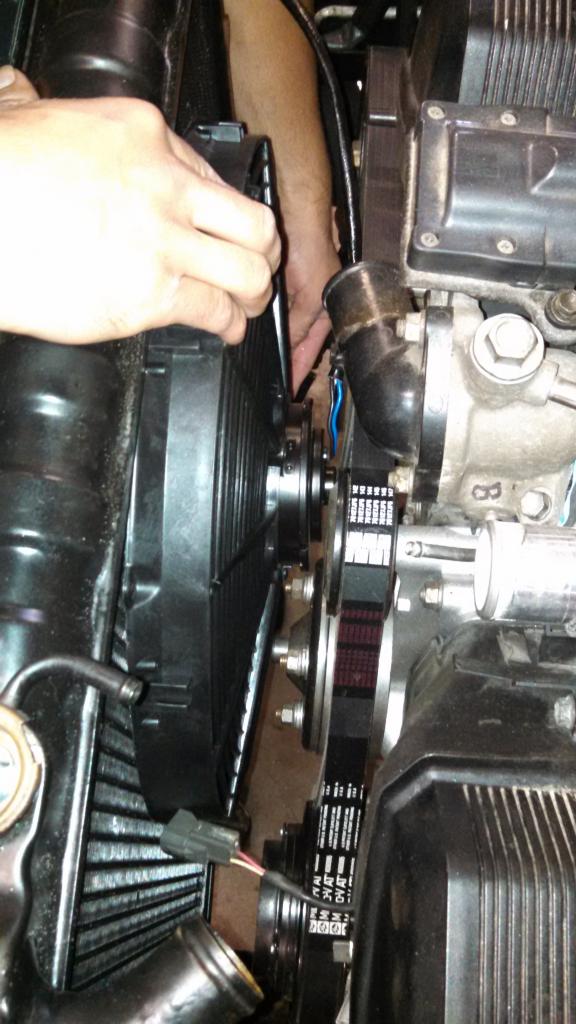
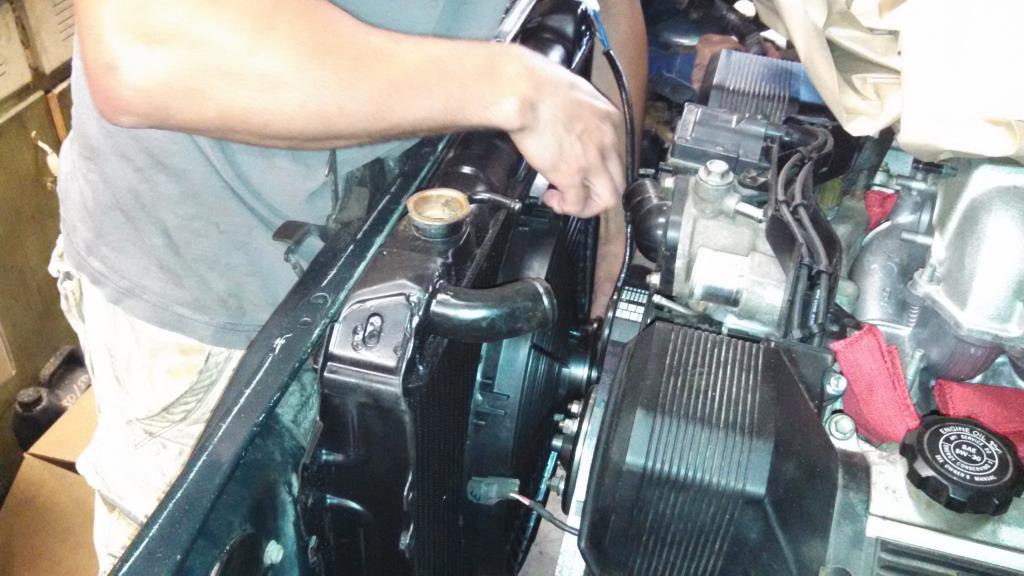
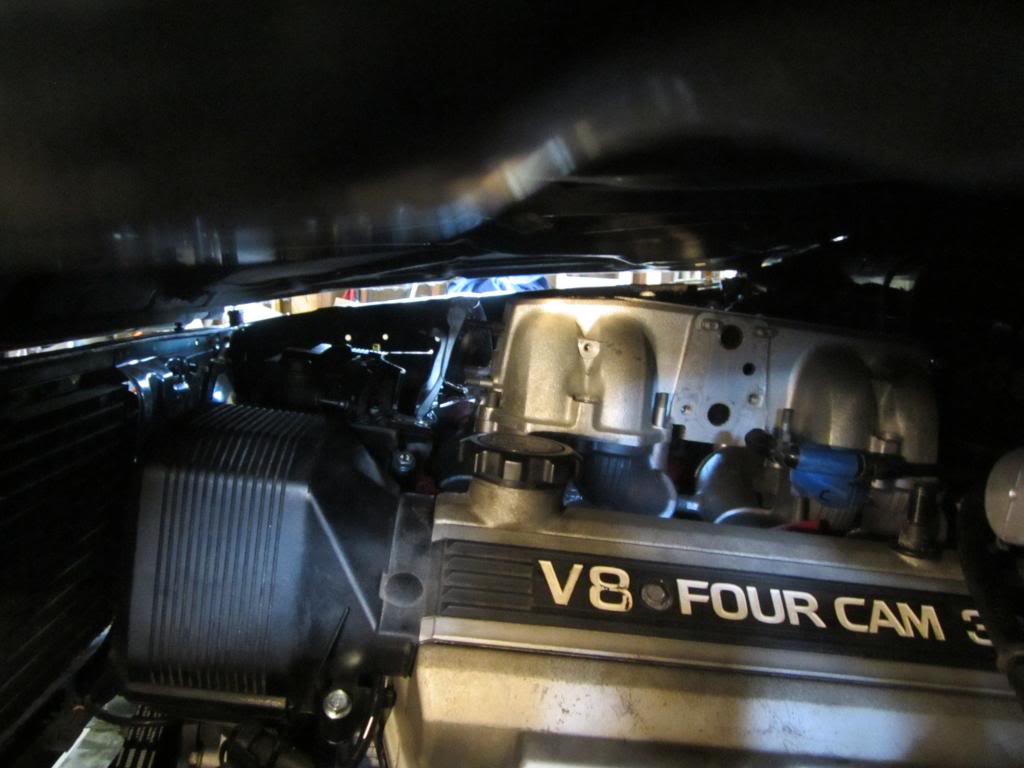
Engine hood clearance
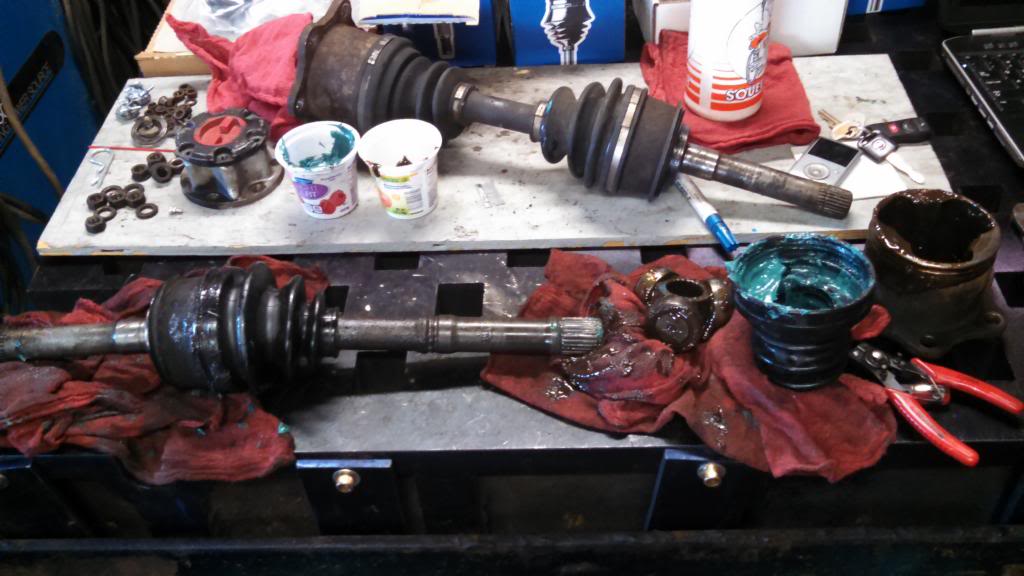
Front CV shaft, putting new boots on

Modified to mock the tundra 4.7 ones because I couldn't find any local


Exhaust mounted and in the truck


Exhaust underneath the truck


stock location of the sump with the modified oil pan

Here are the sump modifications

some tig welding


Oil pan modifications, I used an extra 3.0 oil pan and the sc oil pan to make one that fit around the front differential


oil pan clearance in the truck


Radiator mounting and clearance


Engine hood clearance

Front CV shaft, putting new boots on

Last edited by JAR3289; 07-10-2014 at 07:31 PM.
07-25-2014, 10:52 AM
#17
Registered User
Thread Starter
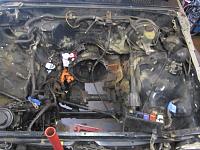
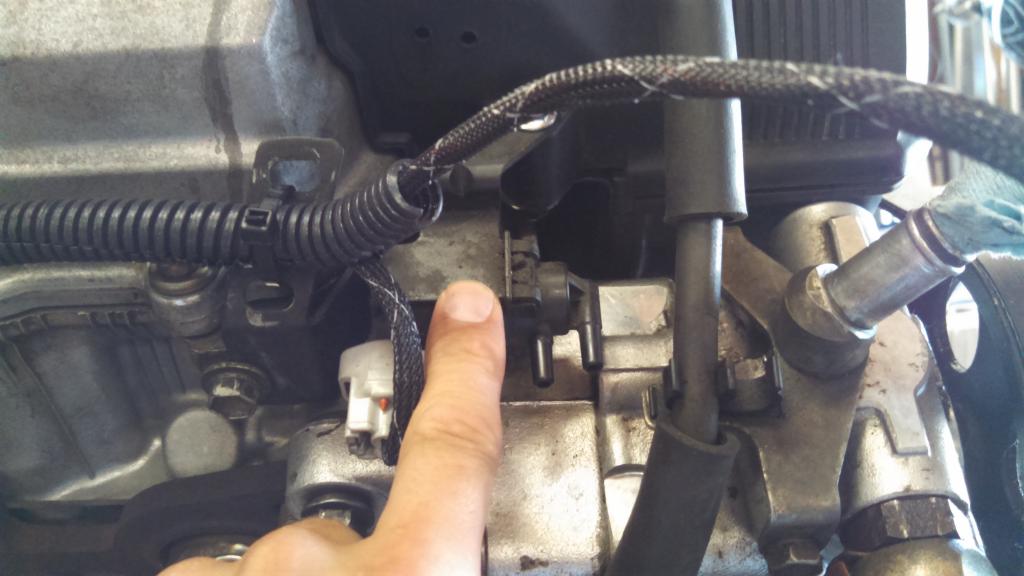
Mystery VSV
Hello everyone, I am hoping that someone can help me out here. below is a picture of a VSV behind the power steering pump of the 1UZ and I do not know what it is for or where the vacuum lines are supposed to go. any help would be greatly appriciated.

 07-30-2014, 08:20 AM
#19
Registered User
Thread Starter
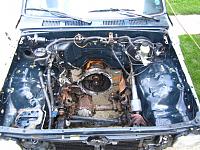
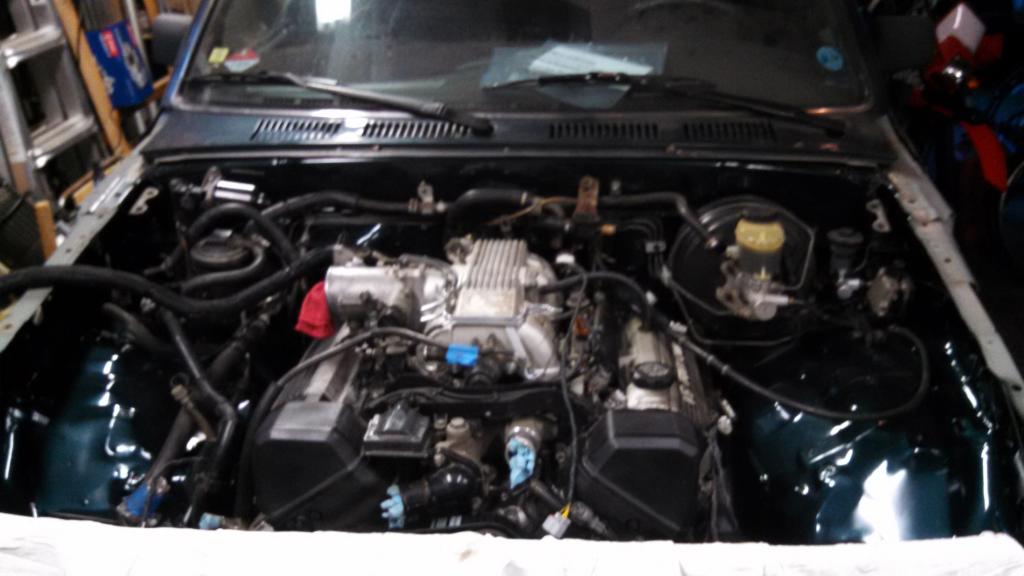
Just one shoot of the engine back in the bay. The bay was painted with the engine out.
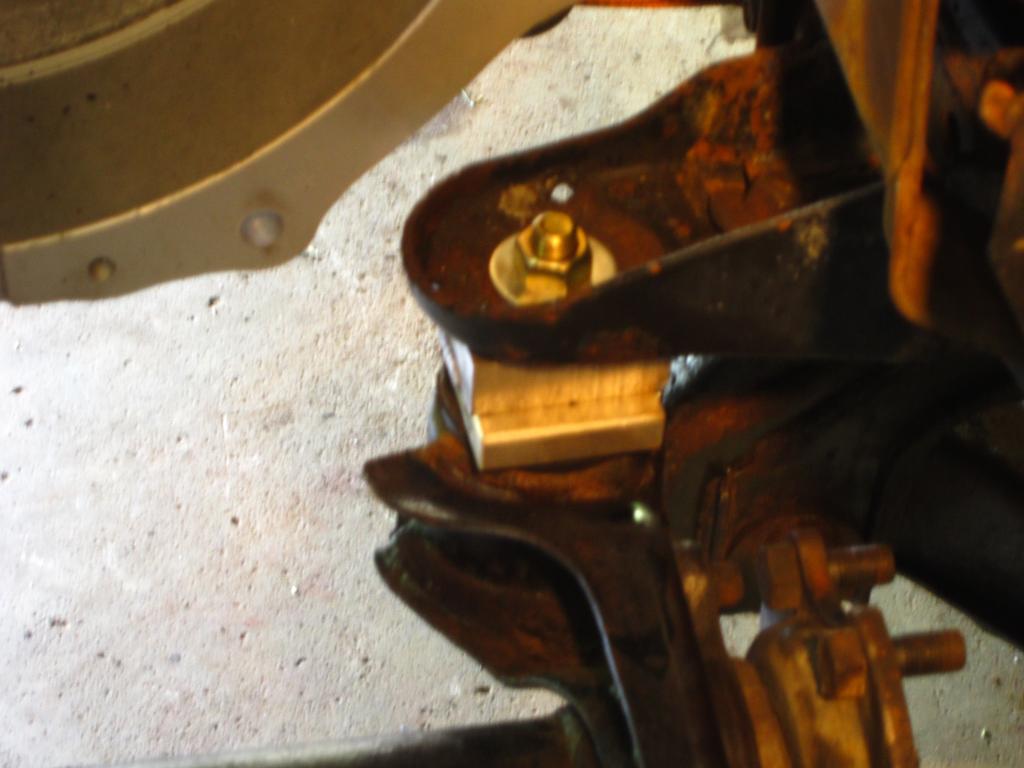
Motor mounts are complete
Exhaust manifolds are welded and wrapped in fiberglass
Clutch is in and functioning. I will do a separate post on the clutch setup.
Motor mounts are complete
Exhaust manifolds are welded and wrapped in fiberglass
Clutch is in and functioning. I will do a separate post on the clutch setup.
 08-13-2014, 08:17 PM
#20
Registered User
Thread Starter
1uz to manual R150 clutch setup
So for the clutch this is my setup:
-3.0 flywheel modified, between 1/4" and 5/16" was removed from the backside to make the starter engagement correct.
-used the 3.0 flywheel bolts, had to cut them down as they were to long
-Purchased the marlin crawler clutch kit
- used the input shaft adapter that came with the bell housing
- used the pilot bearing that came with the bell housing
- I tried the 3.0 throw out bearing with 1/4" spacer behind the pivot point, and that did not work. Currently I have the 3.4 throw out bearing with 1 washer behind the pivot point and the clutch now works at least with me turning the output shaft of the trans with my dad pushing the clutch in and out. time will tell if it will work under power, but I am pretty confident that this combination will do the trick.
- to make the slave clutch mounting work, i had to remove about 3/4" off the casting of the bell housing. I had to drill the mounting holes deeper and while i was at it I put heli coils in there.


