When you click on links to various merchants on this site and make a purchase, this can result in this site earning a commission. Affiliate programs and affiliations include, but are not limited to, the eBay Partner Network.
Thanks space-junk, I don't remember reading that particular answer from Jeff he answers it so often, I think I would have remembered the rx7 injectors maybe. Love this part at the end so I must quote him...
"At about this point, most of us get so frustrated trying to tune the motor that we ditch the stock ECU and move to a standalone Jeff" Jeff's AFM page gives some advice on how many clicks to adjust based on upgrades. These are cumulative, so 4-6 clicks is his recommendation and having ran it at +2 already that would probably get me there.
1: Cone filter, CHECK it came without an airbox, Free flowing exhaust, CHECK it's the downtube/elbow/o2 housing and about 10-12 inches of the intermediate pipe plumbed into the wheel well.
"Maybe one click"
5: Moderate boost increase, CHECK thanks china for the tiny exhaust
"1-2 clicks"
6: Aggressivly increased boost(13.5-15psi), MAYBE again wtg China
"2-3 clicks"
7:"If you've added an intercooler and a bigger turbo, and are running over 12 psi of boost...you had better get some bigger injectors in that puppy, as you won't be able to increase the fuel delivery via the AFM enough to meet demands without hitting fuel cut!"
The oxygen sensor analysis HERE, Probably a red hering BUT.. If the learned trim is moderately rich (2nd voltage) or moderately lean (4th voltage) the system delivers the fuel +-10%. adjusting the gear 5 clicks (2% per tooth) should put it back near the middle voltage and give the ECU it's full range of trim back. I think it could maybe help? Here is why, if it's to far lean 11-20% at cruise when the demand for fuel comes it hits the maximum duty cycle sooner.
Three 10mm bolts hold the ECU, my lower one on the firewall is broken off. Wiper control is the green box, lives on a hanger behind the ECU.
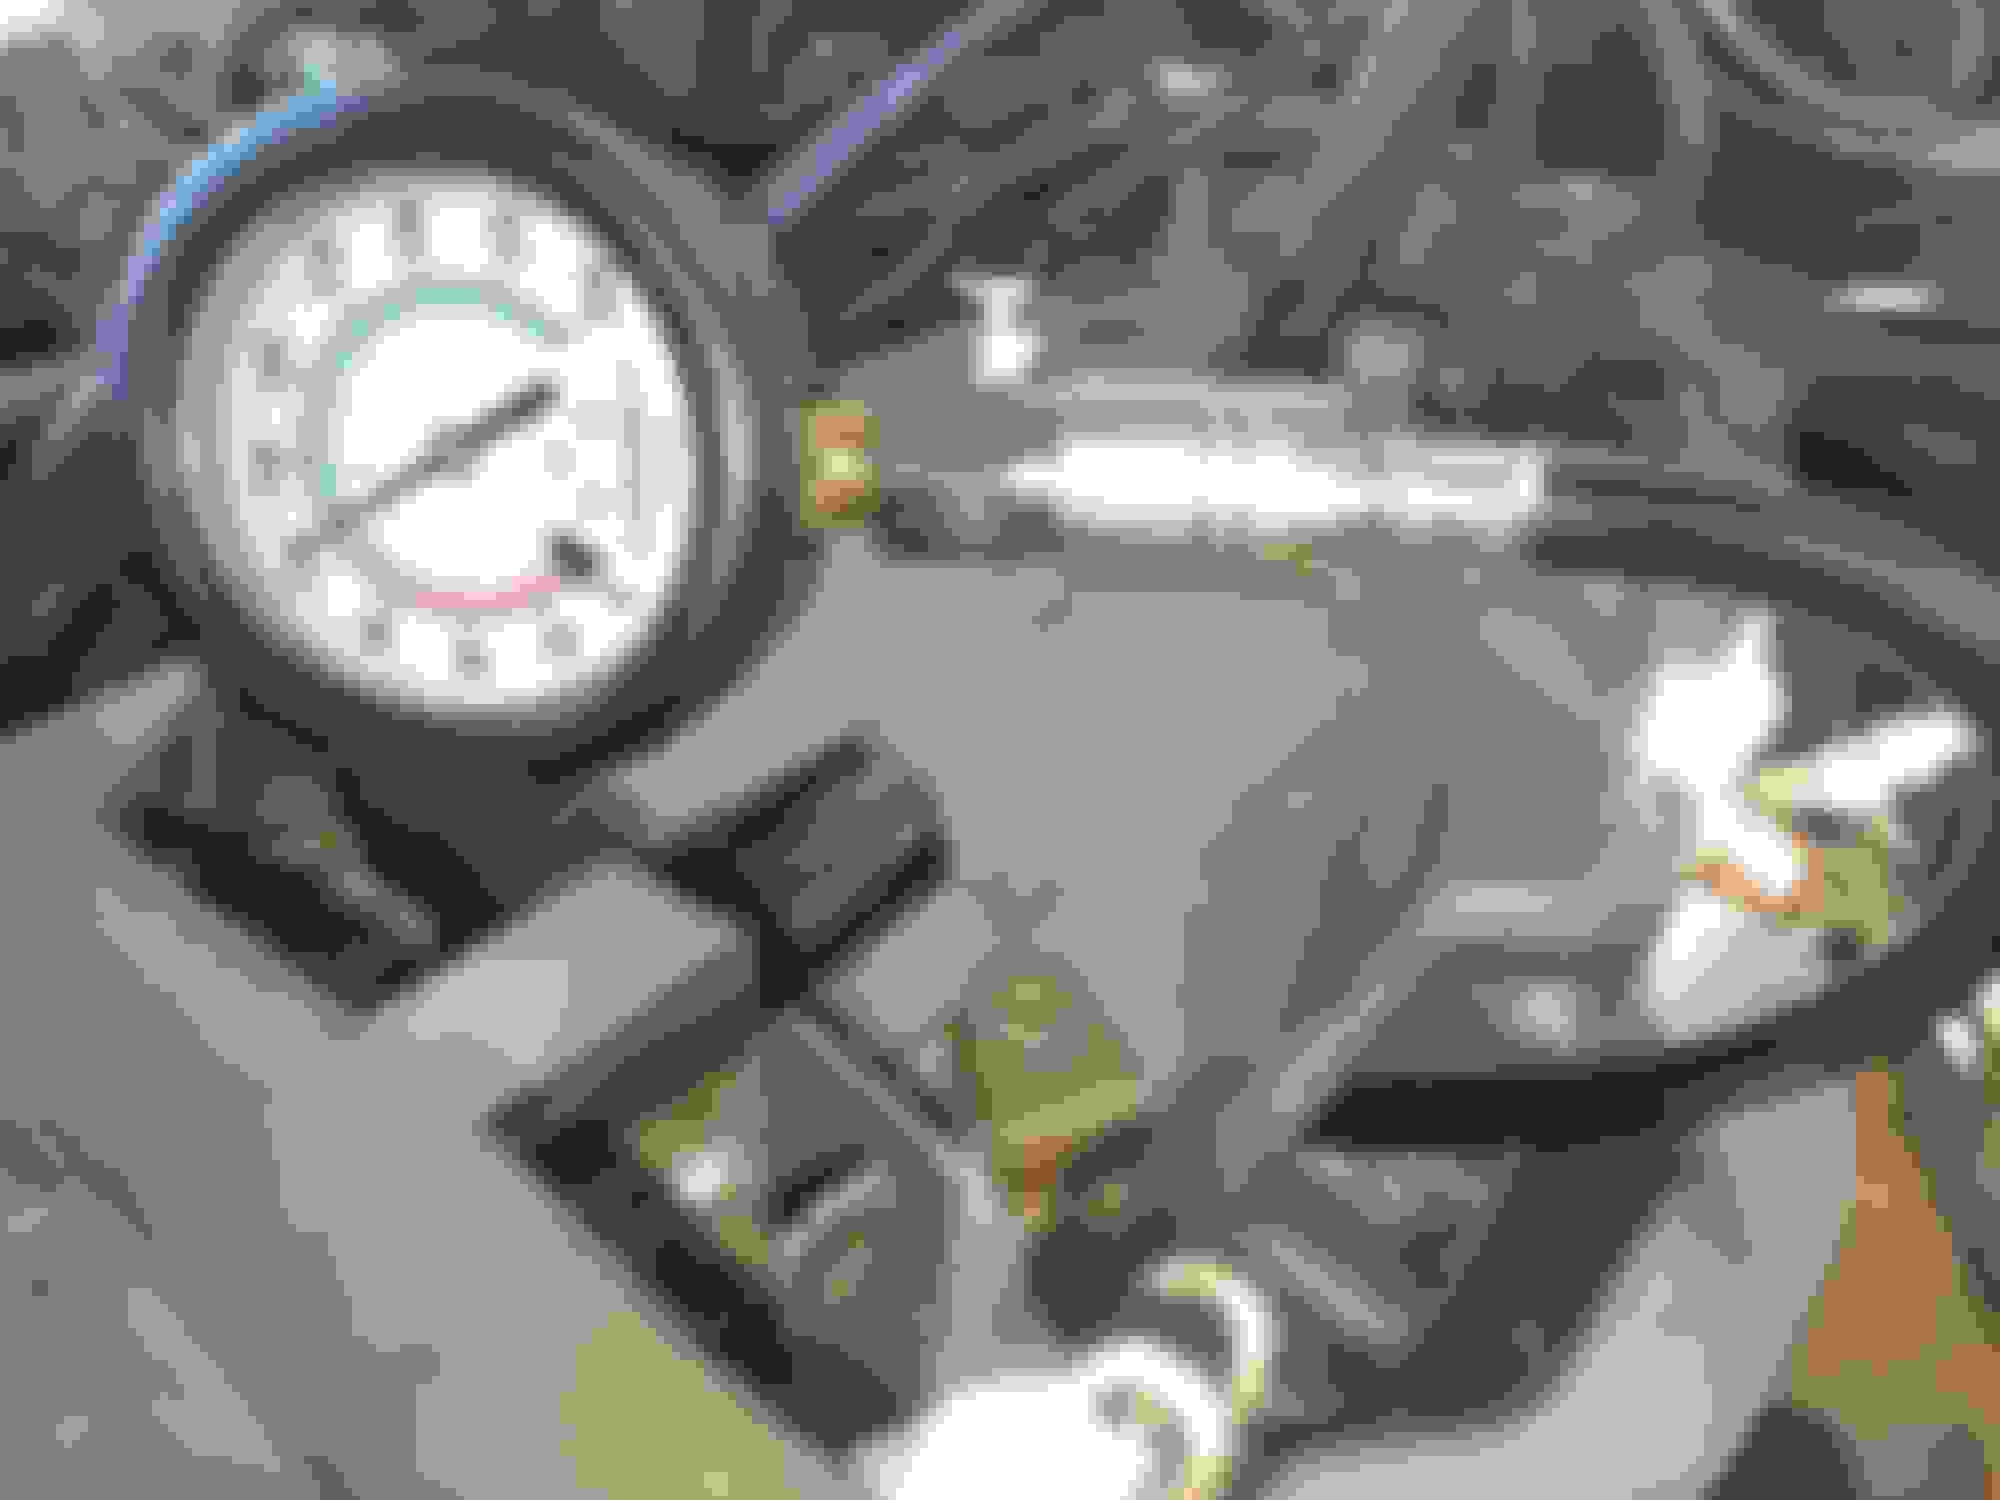
Battery voltage. 11.48
Vta, closed 0.66v
Vta, open 3.73v
Vcc, 5.00v
Idl should be zero and isn't!! Double checked at the TPS sure enough no idle connection. Pulled it off and find the spring is bound up!! Top center is the bottom of the spring, there was a small hunk of granite under the armature here.
It should be here..
Spray scrubby spray scrubby.. I should have noticed how sluggish the spring was as often as I've handled it. If it doesn't snap back hard and crisp it is wrong fix it!!
Hard to see but there is a tunnel the armature sits in, if you don't flood over that level it reduces any flow into the circuit area.
I don't plan on drowning it but want to keep the dust down. So rtv and some paper towel will serve my need
Reinstalled the TPS, throttle closed 0.01k.
Don't have the exact size feeler. Using 0.203 + 0.66 = 0.863mm.
Press the stop against the feeler and the stop screw, there is a nice flat spot on top.
a moment about the FSM TPS adjustment procedure. It has you insert the TPS at its maximum CCW orientation. This is so the engagement is oriented correctly with the throttle pushing the sensor. Then it goes in to taking up the slack, and tells you to insert the 0.47mm and "rotate cw until the needle deflects". You need to take up any slack between the throttle and the sensor and any slack in the sensor. So if it's not zero with the 0.47mm, and it fluctuates at all when you touch it that is deflection tighten it! The next two will be in spec with the .5mm it's under 2k, .8 it's open.
You can totally tweak it with in the limits. As long as .5 isn't to close to open and 8 is open. About more on his in a second.
Anyways I stabbed that blind just took out the mechanical slack tightened it up and tested with .5 and .8mm. back to voltage readings at the ECU.
Vta, 0.33
Vta, 3.66
Vcc, 5.0
Vta is out of spec wot is 4-5v. So fiddle with the TPS. Adjust it to 4.01 wot, idle doesn't contact! Finally settled with..
finished all the above TPS fun, and reset the gear +4 from the -2 it was at when I got to cold and stopped yesterday, capped the leaking oil for the manual gauge, check and top fluids. I let it warm up a little and it idled fine.
Test method is a rolling start 50mph cruise to WoT, simulation of "get outta the way" on the highway or a passing situation. Made two attempts and triggered the code. If it down shifts or unlocks(?) It's more touchy?
Next Test 1st gear WoT, boost should hit ~7 by 2400 (and stabilize?!). I read 6 at the plenum as it passes thru 2400-3000. The dash glitches, some lamps between 3-3500 arent lit. As my brain processes that.. Indicated speed hits 40, 45 actual. RPM somewhere over or near 4000, 12psi showing at the wastegate.
I let it shift, put it in D, and cruise back to the turn around. Idled it a little while I pondered over the results and decided a little bit more cw should keep it running during most down shift needs.
Adjust to +6, and repeat test. This time it triggers at the kick down also but it recovers and hardly bucked any more than the shifting. As I am scanning gauges slight miss maybe speeds high rpm is high, pressure at the waste gate climbs thru 20! Letting off the throttle I read 15psi at the intake.
It's smoking as a I pulled into the turn around!! Oil pressure is good, shut it off and check the hoses are all there and we're not about to become a torch. Every thing is still on the turbo, drain might be binding. Shout you know what as I get the screw driver to reset the AFM. Proceed to drive it back and try not build any boost.
Could be just the drain bent or too much crank case pressure. I let it smoke and idle long enough to listen to the oil pan area and valves didn't hear any major changes no gnomes hammering.
Not enough light or warmth left to look into it.
PS. My heater fan resistor needs replacing I lost the middle settings.
Thank you!
I have seen that I think, there was another similarly that had a bad return spring recently I recall they just replaced it and I cringed at the stealer-ship price.
I did consider increasing the tension untill I found all the mud and grit. It didn't look like I could get it around 180* to the other notch, and it would have to fish under the mechanism. It was while I was looking how to fish it around the biggest chunk fell out. I might never of thought to stretch some tension into it and re link it, well done
I didn't detail the cleaning. It got picked for the big stuff, a tooth brush scrub and lubricated with silicone spray. If my resistance strip wasn't so worn-out it would be good as new I expect I'd get the full voltage range. All in all I'm still ahead with all the refurbishing that TPS has gotten vs the cost of a dealerships sensor, but might be getting close to a knock off (th212 iirc)
Wow it sure gets cold fast with no sunshine and a little breeze.
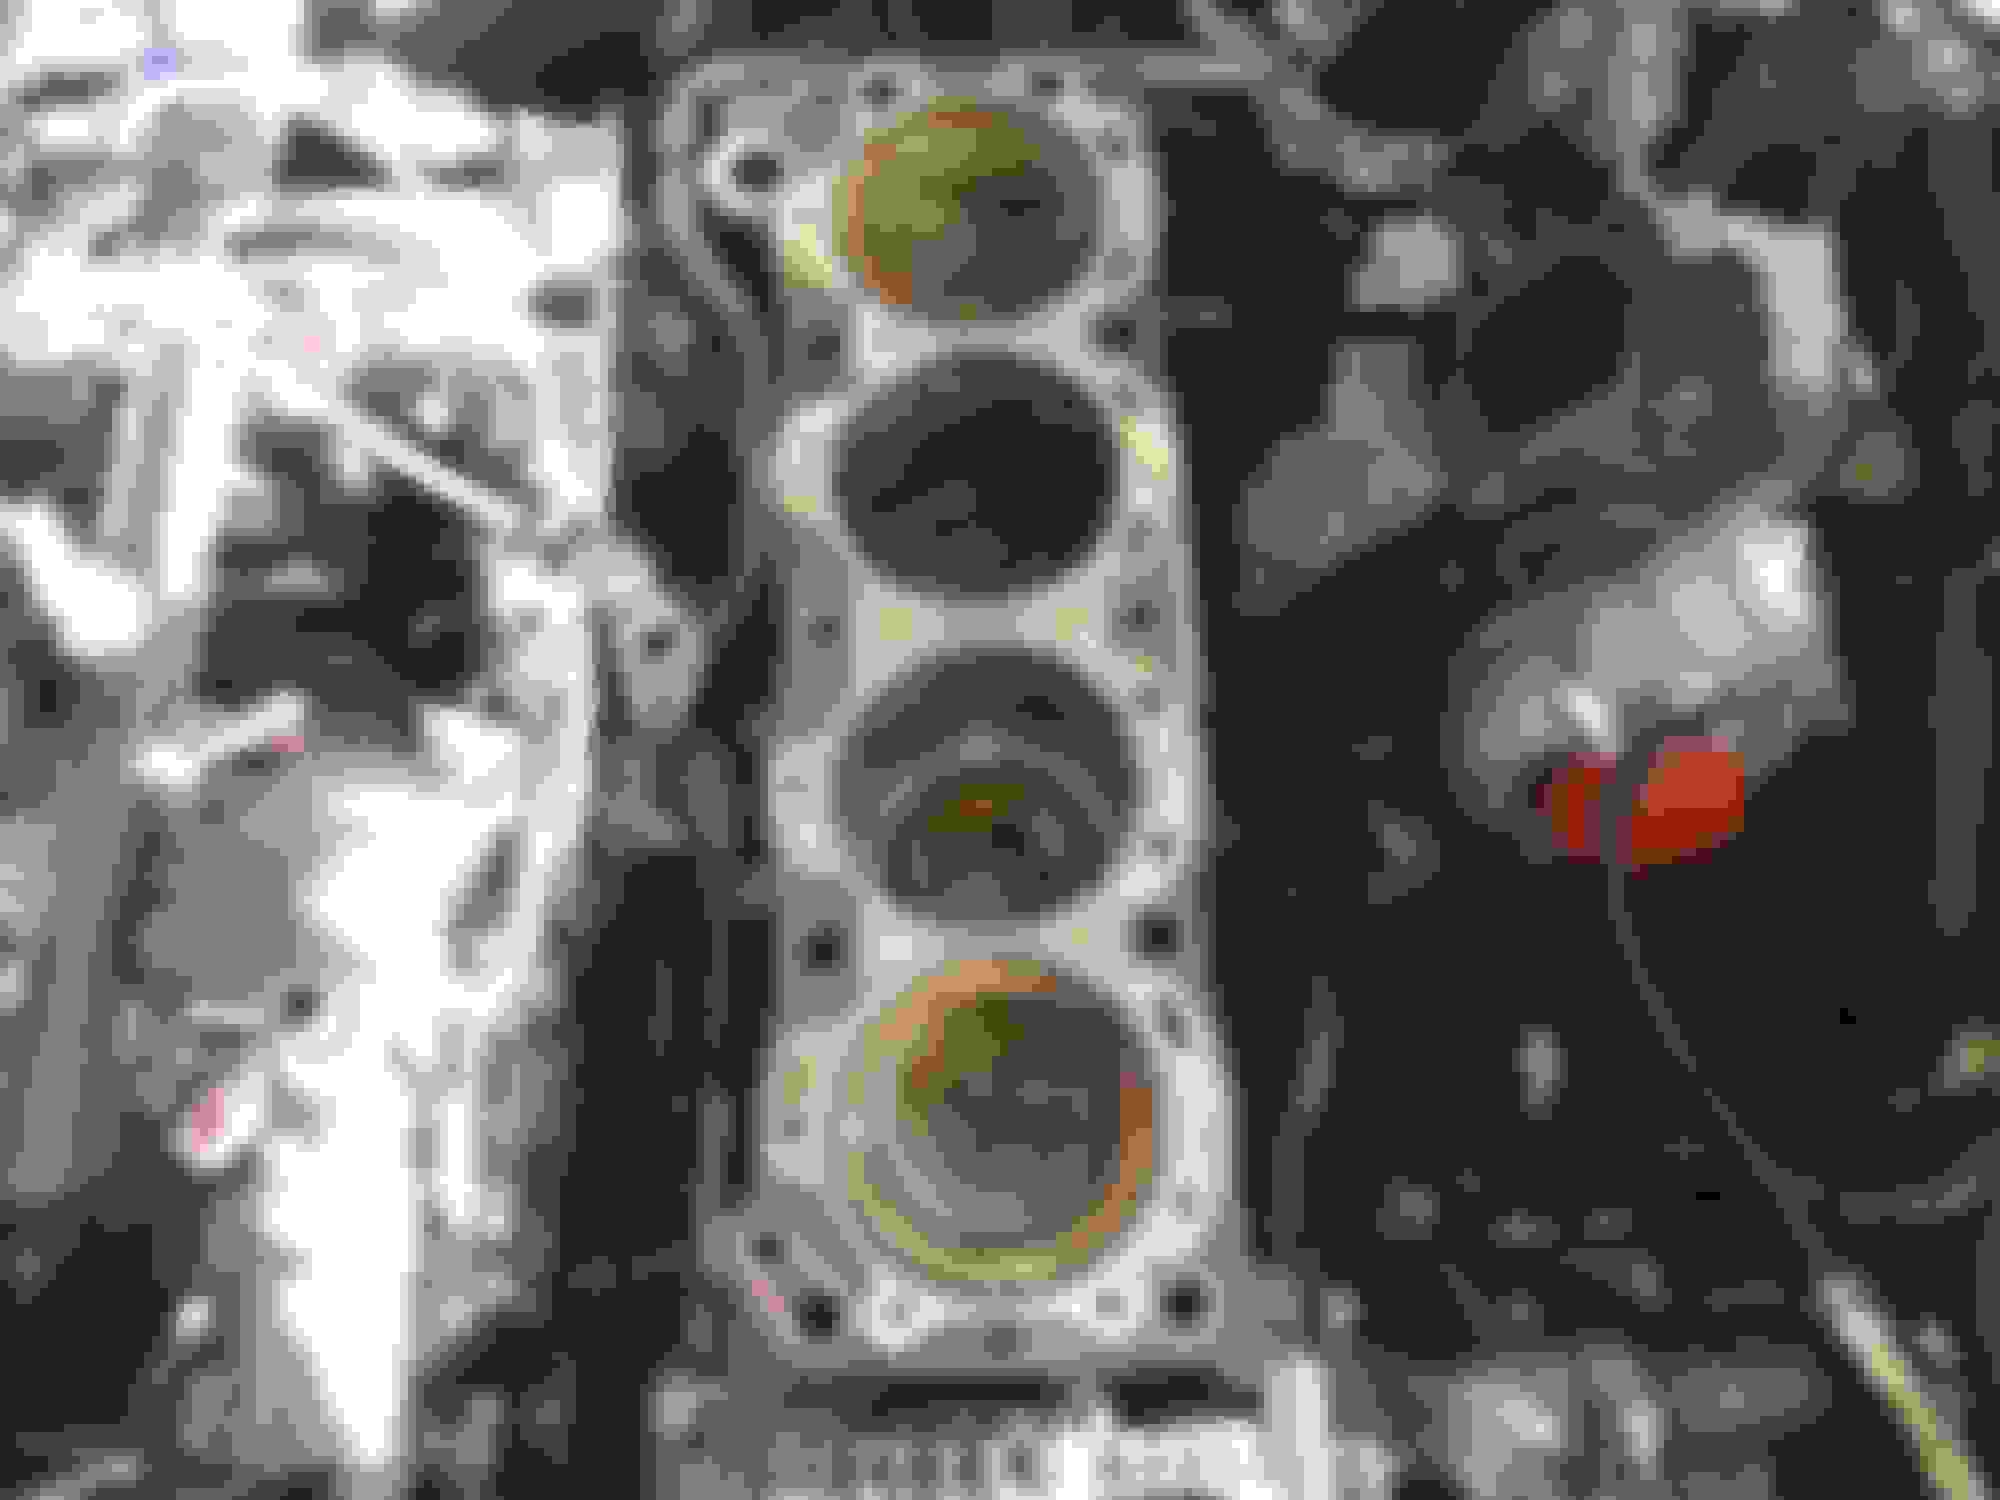
Ok so plug #2 was wet as seen above.
the #6 bolt in the diagram, moved about 1/2-3/4 of a turn before it clicked 45ft/lb. Went over them all 5lb at a time up to the 65ft/lb spec, actually 64 so I didn't stretch anything, but its a harbor torque wrench so who knows what that actually is. I got maybe 2-3cc of water thru or settled in the exhaust, excessive for my 3ft of exhaust but about normal condensation wise on a full length one. Re wired the plugs and it fired on the 3rd rev, not billowing steam I get a too short to identify puff of blue, grey, and green? I get out and examine exhaust there is a little bit of residual moisture that blows away at 2000 rpm. My cold idle kind of sucks, or it wasn't cold enough, so I held the revs at 12-1500 untill the oil & water temp came up then went and poked around at the engine.
Exhaust is dry, doesn't smell sweet. I can get a little chuff of oil from the turbo when the throttle is snapped closed since there is no blow off valve. It does have some misfires I'm hoping is heal-able and not a valve.
Very wet, some fuel obvious from the odor and it evaporated to a smaller puddle, some coolant, maybe a little bit of oil but I couldn't taste it over the antifreeze . I tried to capture the little murky puddle on the ground arm but it wouldn't cooperate and evaporated so I just used the group picture.
Guess I need go hit the loan-a-tool for the compression tester again. I don't have air so I'll have to hillbilly something up or pay for a leak test.
I have the spare head-gasket and intakes. And it looks like with the fuel line off the front of the rail you can get that long bolt out of the head? After that it's just twister to get the lower ones out and the Intake will "fall off" to the side? I'd need to drop the turbo off the exhaust mani to get the studs clear, but the turbo would stay in. The Dside accessories are on the head also but they "fall off" and stay with the vehicle. Then it's prayers, and zip ties for the cam sproket.
God willing and the creek don't rise! I've only mildly abused the head-gasket learned my lessons and I'll find I didn't get a plug wire all the way on or left something loose.
Was this a new head gasket or already on it? Sorry o haven't actually followed your thread. If it was new it's possible that tightening it up will do the trick since it was so loose. 3/4 of a turn is alot.
And i personally have a harbor freight click wrench and i always add 5lbs. If rather it be to tight by five than to loose by 5
Oh it's uhm post #45 that gives details. In short I put somewhere between 20-15psi of boost into it not skipped over that one bolt while torqueing the head on. It's a long block from sunwest, with 80 miles I think it is showing now. I originally was going to recheck them at 50, but pushed it back to 100 and do it while I did fluids, and didn't so it might have already stretched or settled. They were tight cold and after the valve adjustment after that I don't know I had the other issues.
I think what causes a lot of head gasket failures is the head bolts loosening up. #6 and #3 I have seen loose on several occasions and caused it to blow a head gasket. Never had one on the Intake side loose, just the exhaust side.
the oil slick that was in the radiator, not a drop made it into the drain pan when emptied the Cooling system. It is all in there some where.
This radiator does not fit the core is to short, doesn't have the turbo line, and is only two row. Failed machine pick from the database but it let me move the water line closer to the side, and gives more room for a fmic which is sure to help the 2 row vs 3 row cooling. Will worry about that come summer maybe, untill then it's a snow machine uh if we ever get any snow..
...
On to the rear end. Drain the oil with my new 24mm socket, then spend five minutes wondering why I didn't have a rag handy not a single one. Scribe two sides of the driveshaft and a match mark on one corner/bolt. Break loose the four bolts, three of them are excellent still showing the factory coating( AL antisieze?) the third is kind of cruddy. Pry the shaft off the flange. Snapped pics of the color code on the pinion, and a "B" on the shaft(because I could..?). Pinion nut stake looks ok not restaked or reused. No notable wobble at the flange, was really expecting some thrust but I'm not a multi ton force either. Drained the catch pan and didn't find any large chucks of gear, found only two substantial flakes of metal on the drain plug under the sludge. My prior "oil sample" was done kind of in the dark and I've still not hosed the sand off the under side, what I got in the drain pan looked alot better. With the pinion not obviously loose, the fluid not being the 1/3rd sand 1/3 water I thought it had, topped off with I cant afford a new gear set and more tools. I decided to save the cash I'd spend on clean up and resealing, and just pumped some new oil into it. Painted the bolt shafts with fresh anti-seize and thread locked the threads. At this point I remembered I don't have another 14mm wrench and get to keep cranking on a partially spinning bolt and nut combo until the lockwasher bites enough it quits spinning. Cranked it down with a cheater wrench to ow ow owoouch tight. The noise has gone from "OMG what is that" to "I think that was the rear end noise only quieter". Between tires turbos and air leaks it just blends into the symphony now!
Assembly mark on rear of shaft
Pink pinion
Drop of fresh gear oil floating in the nasty stuff.
The issue is compounded in the AT 4runners by the neutral safety switch which not only has to carry the same current the switch does but is subjected to lots of mechanical slop in its mount and bad shifter bushings.
I need to remove my starter to cinch up the stud, as the nut tightens the stud breaks loose slightly. So I have a solid connection between the cable and stud, but then the stud is loose and the cable wobbles. There is more looseness than can be taken up by twisting the stud with the cable at this point and it tends to back off. It's probably flat lock washers or none at all from the PO just glad it has both mounting bolts I guess. That's the primary problem, but while I am there it makes since to do some essentially free prevention.
I need to get more specific pictures. The starter wiring consists of the large battery cable and a single spade connection. Remove the wire from the switch, attach to hot side of relay's activating circuit(switch). There are three tapped unuses bosses between the starter and oil filter, this becomes the mount and ground for the relay activation. Attach relay activation ground wire to block with ring terminal and wire lead. Attach hot side of relay to battery cable located at starter with ring terminal, attach switched side to starter. This now flows only the energising current for the add-on relay through the ignition and neutral switch. The starter receives all its current from the large cable and the short run of wires to the relay. Questions or concerns?
Auxiliary fuses, relay boxes, and engine bay layout..
I haven't really decided what to locate where inside the engine bay exactly yet, but since I suckered the kid into welding my exhaust I need to prep a list of what all he and his brother really get to help do. Sorry kiddos love ya bunches, surprise!!
I have the oil filter to deal with and the 4runner is going to need the obligatory auxiliary fuse panel and various relays. Weld nuts, reinforcements and bracketry on right side inner fenders.
All the valve cover clutter needs to be moved to the runner side of the plenum. One plate, probably just band clamps to hold it.
The ignition wires get new stand offs not on the cover and hopefully not off the exhaust either. Don't see that is happening without being more in the way and they will wind up attached to the exhaust with a heat choke cut into the stand off.
Air cleaner needs a stabilizer bracket, actually it needs an air box built around it and the outside air reestablished. Two no three birds with one stone there. Might need to arrange some metal, maybe a half sheet of medium or light gauge, so we have plenty and aren't digging through piles of scrap for hours looking for a piece "just one more inch" bigger. Or a dishwasher.
The power steering vacuum lines just flop around. Need a bracket off the distributor or the hot air tube. The tube will go away if I put the fmic so I guess maybe something off the wire clip.
I have none of the turbocharger attached heat shields. If I have to buy a sheet to do the air box and the price isn't crazy I can do the box from AL and have heat shields too. Anything is better than what I have to keep the radiant down, because I have nothing but air and that's wrong for sure.
Tailgate spring guide perch needs fabricated and welded in. U shaped metal bracket that holds up one end of the spring guide.
There is a hole punched into the driver's side that is plugged with rtv this needs welded. Unless of course I get the plug out and it is an obvious bullet wound I might have to preserve it.
If we, meaning they, are really ambitious we can tackle some patch panels for the passenger side.
Firewall to floorpan needs repaired on the driver's side, passenger side needs fully inspected. Some over ambitious clearance made by the PO, intentionally or trail I don't know.
That is all I can think of right now. Asking as I get exhaust the rest is gravy.
In the future.. There are some rather long vacuum lines I would like to see ran as hardline from point to point with hose junctions at flex points that need them. The vacuum resivore dohicky located under the battery for example and the charcoal canister, also the vacuum pump near the cruise actuator, all these would combine into a tidy manifold along the firewall
Found out what the stumbling, missing, noise I heard was.
#4 Spark-plug wasn't torqued down and spun as I put the socket on it to pull it. Can see the blow by carbon up the threads.
Cold compression. #1, 120 @ 8 revs. #2-4, 125 @ 10 revs. These pictures are reversed, 4-1, I started with #1 but couldn't see the gauge 8 revs started to slow down so I stopped. #2 I could see it still climbing so went to 10 revs before my lame batteries started to give out. Spec in the 88 manual is low 120, High 149, 14 psi variance.
Water in the pipes again.
-- supposed to be a video clip here --
Hot compression: Aborted, steam heard venting into cylinder #2 once the spark-plug was removed.
-- supposed to be a video clip here --
I guess it wants me to change out that gasket before we can be friends again.
Uploading photos to the Album "36522 HG#1", 46 of them a couple blurry or duplicate.
When I left off I was trying to set the lower intake onto its studs and just couldn't see anything down in there, cold and dark ran me inside.
And I just remembered I forgot to put the bolt back in the EGR plate that holds the "heater hose of frustration" while I had the head on the bench, So I get to sit on top of the engine and put that back in tomorrow. There is a intake bolt that sits behind the IACV and it's a PITA to get to. but it gets even worse the one behind the OEM oil cooler water pipe has just a few mm between the bolt head and the water line I'm going to have to replace the line If I have to bend it that hard to many more times.
I think I should have just pulled the motor out it would have gone smoother maybe, but I didn't want to rehang all the AT fluid lines of all things which is silly because they're easy. I wound up spending 30 minutes or more on each of 3 stubborn bolts, the two intake bolts and a head bolt. Interesting note the rear drivers side head bolt and the heater line interfere, don't pinch your finger between them if the bolt binds your in trouble. I had the heater hose jammed flat with my thumb and the bolt jammed in the head from too much angle so slipped out of my other hand, and I almost had to hollar for help to get loose.
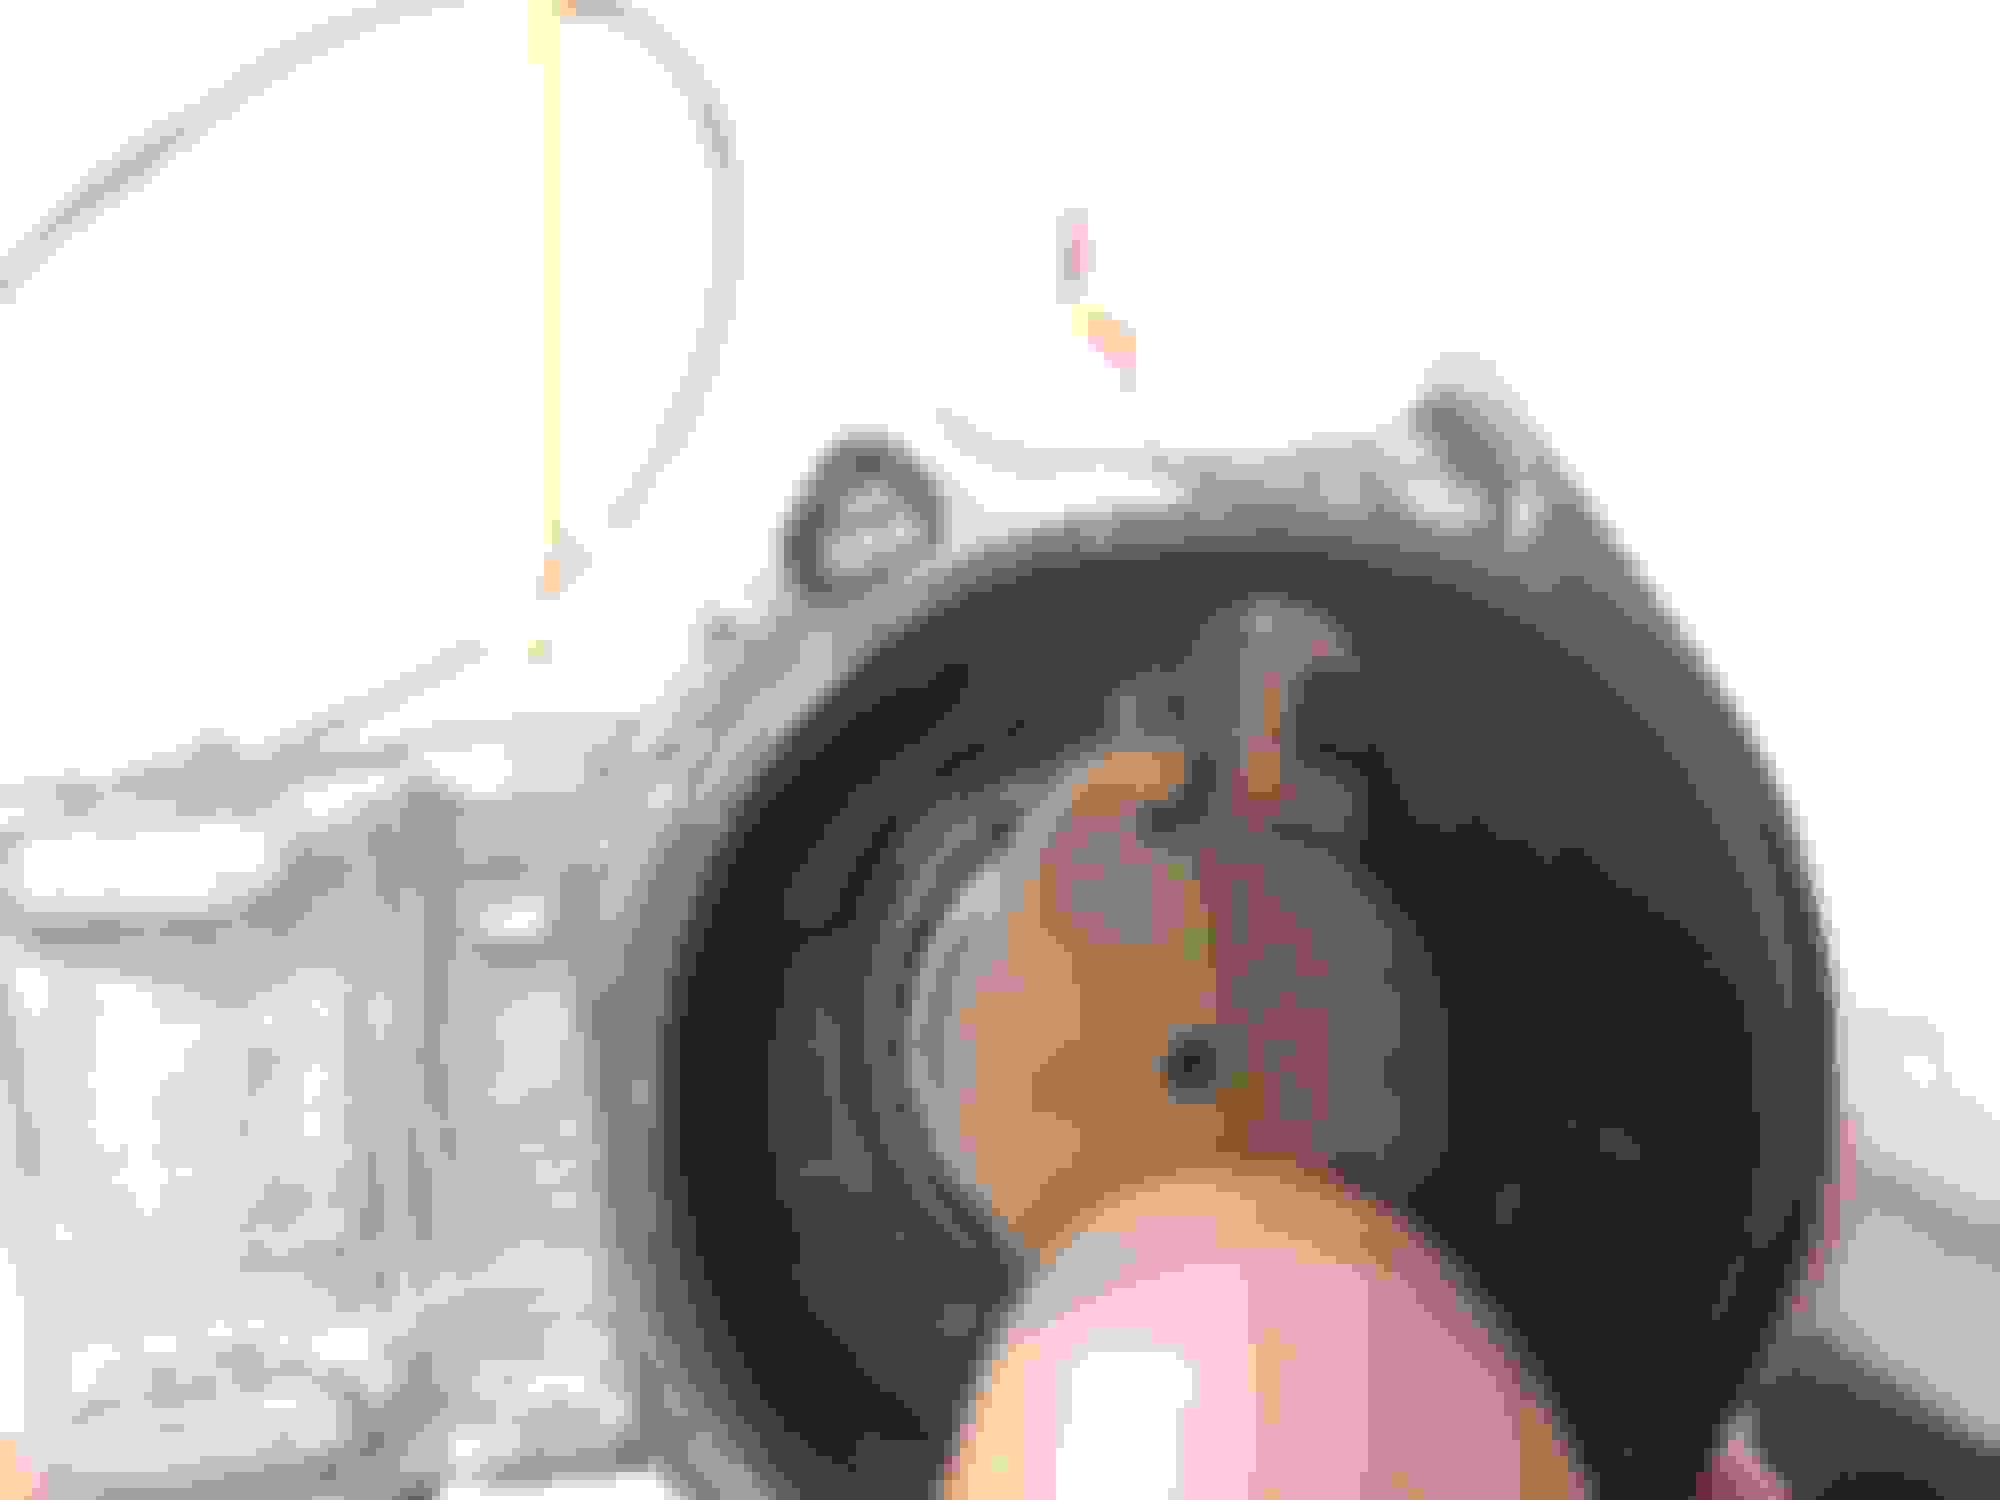
#1
#2
#2, closeup.
You can see some abnormal wear, vertical marks, to the cylinder walls in #2 and #3. Cant say for sure if that was machine shop debris, dry start, or what. Just speculating the rings and cylinders weren't pre-lubed, since It didn't give any smoke at start up.
 12-26-2016, 10:57 AM

 Jeff"
Jeff"


 . I tried to capture the little murky puddle on the ground arm but it wouldn't cooperate and evaporated so I just used the group picture.