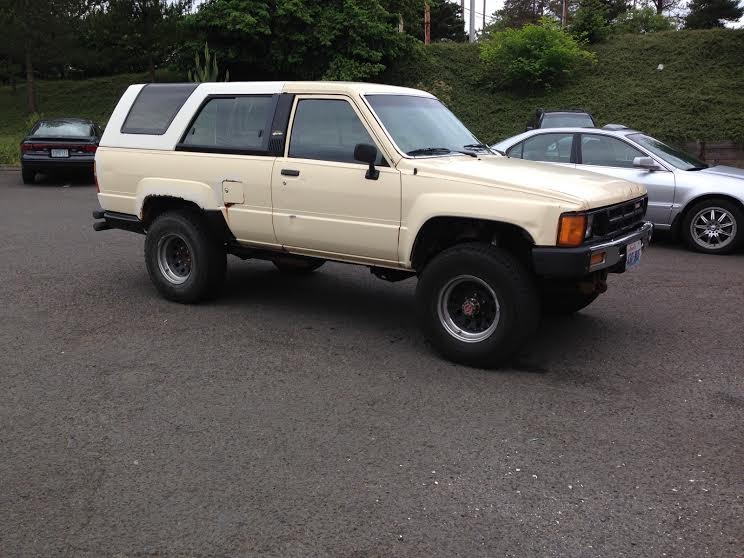
My 1985 4Runner
 05-20-2015, 10:03 PM
#21
Registered User
Thread Starter

Join Date: Oct 2013
Posts: 57
Likes: 0
Received 0 Likes
on
0 Posts
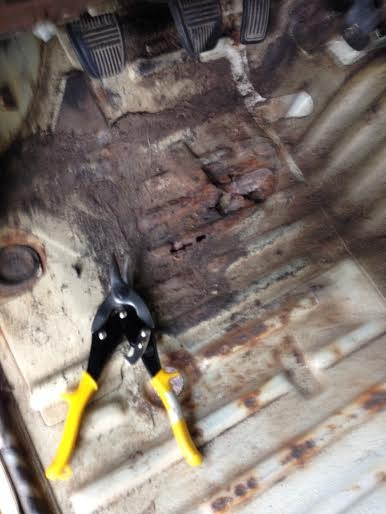
DAY 8-9
I do not believe I will be welding any holes in the floorpans afterall. Turns out that a policy in the welding workshop is that working on anything with an engine or a gas tank is prohibited in the shop. To be fair, one of the holes IS directly above a fuel line, but I offered to relocate it, and still got turned down. I understand why completely, it's just a bummer (can you really not just block the tank and the fuel lines off?). So, I could rent a welder for about $50 a day and do it on my own time, but that does still leave the issue of pressurized combustibles beneath approximately 20 gauge rusted steel, and without the help of a trained professional I feel I may be knocking on troubles door. Or dropping the fuel tank and moving the fuel lines, may be more trouble than it's worth if I consider the alternatives. For approximately the same price after the welder rental, sheet metal, etc. I could go with POR15's floor pan kit (http://www.por15.com/FLOOR-PAN-TRUNK-KIT_p_61.html), and honestly, it may turn out better with that anyways. Plus, I may have supplies left over for when I paint the chassis (and I'll be 100% positive I wont blow up the neighbors).
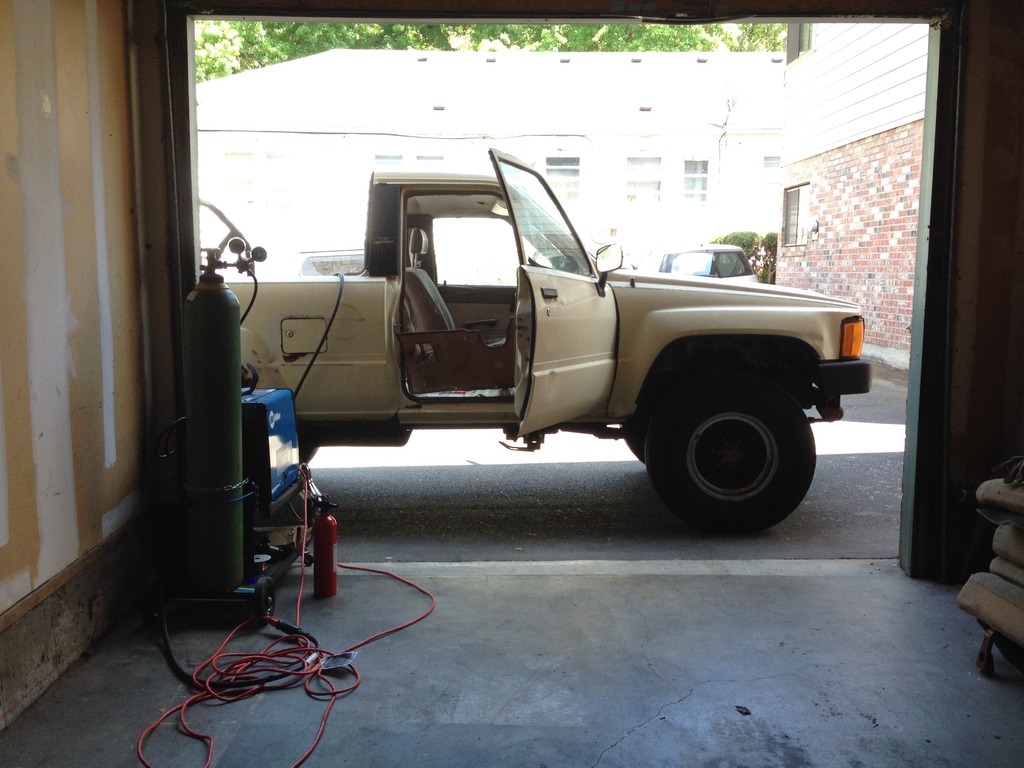
Swapped the tires on from my pickup to the 4Runner today. I'm sure y'all know - but swapping eight tires with just one factory jack and a jack-stand has me dogged. They are both sets of 31" tires but the "new" ones are a newer, a litle wider, and a little taller, and they are rubbing on something. I can't pin-point it exactly for sure, probably because it's dark and i'm kind of sick of thinking about tires, but it's got to be the mudflaps swinging back and forth when in motion, slapping the tire, frame, tire, frame. Not a big deal, except 'round here you get a ticket if you don't have mudflaps. Whatever, still not a big deal.
I'm trying to prioritize what needs to happen first while simultaneously praying the "to-do" list doesn't get any bigger. But, she didn't pass DEQ the first time either. I didn't giver her the fairest shot at passing (barely had the engine hot, but hey, it's free till you pass in these parts!) so I'm going to do the simplest thing first - throw a can of Seafoam in her, burn some premium gas, and go for a long drive before I put her through the test again. Until then, temporary registration ($30 for 21 days).
I also did more sanding. I'll also be doing more sanding. And more sanding. More sanding. Sanding. Sand. There isn't much out there about people painting the chassis "body-on." I understand why - you will obviously be forced to miss spots - but is painting the undercarriage with the body on really that futile? What else do you do? Pray? I have no space. funding, time, or expertise for an off body frame restoration.
Marlin Crawler Ecoseals are going on order tomorrow. Seams like you can make a seal insert tool pretty easily out of some common household stuff. WheeliePete's got those great videos. What else do I need to know?
I'm going to start keeping my eye open for a good deal on an angle grinder.
I meant to take some more pictures of her but the phone was inside, and then it was dark. More pictures later.
I do not believe I will be welding any holes in the floorpans afterall. Turns out that a policy in the welding workshop is that working on anything with an engine or a gas tank is prohibited in the shop. To be fair, one of the holes IS directly above a fuel line, but I offered to relocate it, and still got turned down. I understand why completely, it's just a bummer (can you really not just block the tank and the fuel lines off?). So, I could rent a welder for about $50 a day and do it on my own time, but that does still leave the issue of pressurized combustibles beneath approximately 20 gauge rusted steel, and without the help of a trained professional I feel I may be knocking on troubles door. Or dropping the fuel tank and moving the fuel lines, may be more trouble than it's worth if I consider the alternatives. For approximately the same price after the welder rental, sheet metal, etc. I could go with POR15's floor pan kit (http://www.por15.com/FLOOR-PAN-TRUNK-KIT_p_61.html), and honestly, it may turn out better with that anyways. Plus, I may have supplies left over for when I paint the chassis (and I'll be 100% positive I wont blow up the neighbors).
Swapped the tires on from my pickup to the 4Runner today. I'm sure y'all know - but swapping eight tires with just one factory jack and a jack-stand has me dogged. They are both sets of 31" tires but the "new" ones are a newer, a litle wider, and a little taller, and they are rubbing on something. I can't pin-point it exactly for sure, probably because it's dark and i'm kind of sick of thinking about tires, but it's got to be the mudflaps swinging back and forth when in motion, slapping the tire, frame, tire, frame. Not a big deal, except 'round here you get a ticket if you don't have mudflaps. Whatever, still not a big deal.
I'm trying to prioritize what needs to happen first while simultaneously praying the "to-do" list doesn't get any bigger. But, she didn't pass DEQ the first time either. I didn't giver her the fairest shot at passing (barely had the engine hot, but hey, it's free till you pass in these parts!) so I'm going to do the simplest thing first - throw a can of Seafoam in her, burn some premium gas, and go for a long drive before I put her through the test again. Until then, temporary registration ($30 for 21 days).
I also did more sanding. I'll also be doing more sanding. And more sanding. More sanding. Sanding. Sand. There isn't much out there about people painting the chassis "body-on." I understand why - you will obviously be forced to miss spots - but is painting the undercarriage with the body on really that futile? What else do you do? Pray? I have no space. funding, time, or expertise for an off body frame restoration.
Marlin Crawler Ecoseals are going on order tomorrow. Seams like you can make a seal insert tool pretty easily out of some common household stuff. WheeliePete's got those great videos. What else do I need to know?
I'm going to start keeping my eye open for a good deal on an angle grinder.
I meant to take some more pictures of her but the phone was inside, and then it was dark. More pictures later.
Last edited by Quinn's87RE; 05-20-2015 at 10:05 PM.
 05-21-2015, 09:32 AM
#22
Registered User
Since you can't weld maybe you can rivet some new steel on those small holes. You cut back the rusty area 'til you get to clean steel. I think I paid about $20 for a rivet tool kit at Home Depot. You also need a 1/4" drill bit and a corded drill (more power). Google for a video on how to rivet. It's very easy and good for small spots that won't be seen. POR-15 over top might be good. For the beaded (bent) metal areas maybe someone on here who is parting a truck can cut a piece for you. Good luck.
05-21-2015, 11:16 AM
#23
Registered User
Thread Starter
Join Date: Oct 2013
Posts: 57
Likes: 0
Received 0 Likes
on
0 Posts
Since you can't weld maybe you can rivet some new steel on those small holes. You cut back the rusty area 'til you get to clean steel. I think I paid about $20 for a rivet tool kit at Home Depot. You also need a 1/4" drill bit and a corded drill (more power). Google for a video on how to rivet. It's very easy and good for small spots that won't be seen. POR-15 over top might be good. For the beaded (bent) metal areas maybe someone on here who is parting a truck can cut a piece for you. Good luck.
Hmm...I've thought about riveting it, and the cost would definitely be a big plus. It would also definitely work to keep moisture/debris out of the cab - which is good. However, I've heard that riveting can actually speed up the deterioration of the floor pans because of the pockets it creates which store moisture and thus formulate rust (although perhaps it is possible to counteract this with POR15 preventative measures?). Something to think about though. And yes, if I choose to rivet, cutting a pre-existing floor pan to fit would be ideal because as I understand it the beaded metal dramatically increases it's strength opposed to if it were just flat.
Last edited by Quinn's87RE; 05-21-2015 at 11:50 AM.
05-22-2015, 05:24 AM
#24
05-24-2015, 09:19 PM
#25
Registered User
Thread Starter
Join Date: Oct 2013
Posts: 57
Likes: 0
Received 0 Likes
on
0 Posts
DAY 10-13
Another two days off starting tomorrow - two days with nothing on the schedule but the 4Runner.
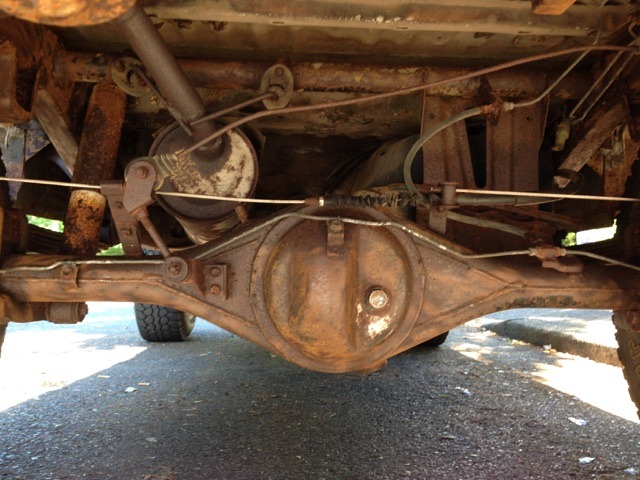
I have decided I won't make substitute for welding in new floor pans. I bought an angle grinder and my plan is to get the floor pans entirely prepped and ready to patch. Since my only consistent access to welding machine is at a workshop where they deliberately inhibit my ability to use their welding machine for my desired project, I have been forced to become an opportunistic welder - where there's a will there's a weld. Anyways, I figure get everything prepped so whenever the opportunity presents itself I can jump on it. I'm going to just do my best to block off the fuel lines and tank, unless this is generally considered suicide (although, it seems more like common practice)? Besides, it seems like cutting out the rusty pieces of floor boards, where they rest above the fuel line, is quite a bit more dangerous, so I'll be sure to be super careful there too.

The local Sherwin Williams Automotive division will open again on Tuesday and I should be able to get, or at least order, the Toyota Beige 557. I plan on skipping the replacement carpet and just painting the floorboards for now. It will be nice to have the leftover paint on hand, and the experience with it too, for when I start touching up the exterior paint.
Marlin Crawler Ecoseals are order and en route, delivery ETA is some time this week. She's really not leaking THAT bad but it will be nice to have the parts on hand to fix it when motivation and time strike together.
Tuesday I am going to MAKE time to go to the DMV and get her temporarily registered - which will allow the transition in to her being my daily driver, and then the pickup will officially go on the market.
Hopefully I can cross these off my list and move on to the next things...

Since I have the console out of the truck I cleaned up the cab rear window switch - tested her and she is fully functioning now, cool!
So, goals for my weekend:
100% prep for welding floor pans
100% finish sanding frame
Place order for POR15 process for frame
Temporary registration
Acquire correct paint
Grease drive-shafts (any suggestions on specific grease?)
Prepare and place ad for the pickup for sale
Another two days off starting tomorrow - two days with nothing on the schedule but the 4Runner.
I have decided I won't make substitute for welding in new floor pans. I bought an angle grinder and my plan is to get the floor pans entirely prepped and ready to patch. Since my only consistent access to welding machine is at a workshop where they deliberately inhibit my ability to use their welding machine for my desired project, I have been forced to become an opportunistic welder - where there's a will there's a weld. Anyways, I figure get everything prepped so whenever the opportunity presents itself I can jump on it. I'm going to just do my best to block off the fuel lines and tank, unless this is generally considered suicide (although, it seems more like common practice)? Besides, it seems like cutting out the rusty pieces of floor boards, where they rest above the fuel line, is quite a bit more dangerous, so I'll be sure to be super careful there too.
The local Sherwin Williams Automotive division will open again on Tuesday and I should be able to get, or at least order, the Toyota Beige 557. I plan on skipping the replacement carpet and just painting the floorboards for now. It will be nice to have the leftover paint on hand, and the experience with it too, for when I start touching up the exterior paint.
Marlin Crawler Ecoseals are order and en route, delivery ETA is some time this week. She's really not leaking THAT bad but it will be nice to have the parts on hand to fix it when motivation and time strike together.
Tuesday I am going to MAKE time to go to the DMV and get her temporarily registered - which will allow the transition in to her being my daily driver, and then the pickup will officially go on the market.
Hopefully I can cross these off my list and move on to the next things...

Since I have the console out of the truck I cleaned up the cab rear window switch - tested her and she is fully functioning now, cool!
So, goals for my weekend:
100% prep for welding floor pans
100% finish sanding frame
Place order for POR15 process for frame
Temporary registration
Acquire correct paint
Grease drive-shafts (any suggestions on specific grease?)
Prepare and place ad for the pickup for sale

Last edited by Quinn's87RE; 05-24-2015 at 09:57 PM.
05-27-2015, 07:32 PM
#26
Registered User
Thread Starter
Join Date: Oct 2013
Posts: 57
Likes: 0
Received 0 Likes
on
0 Posts
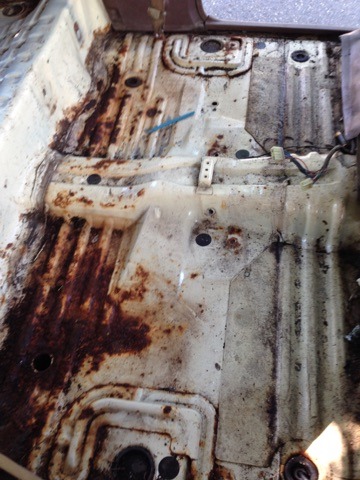
DAY 14-16
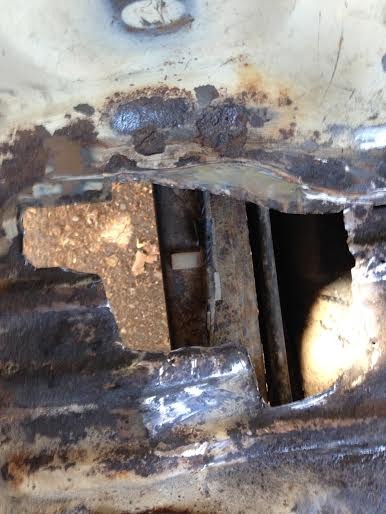
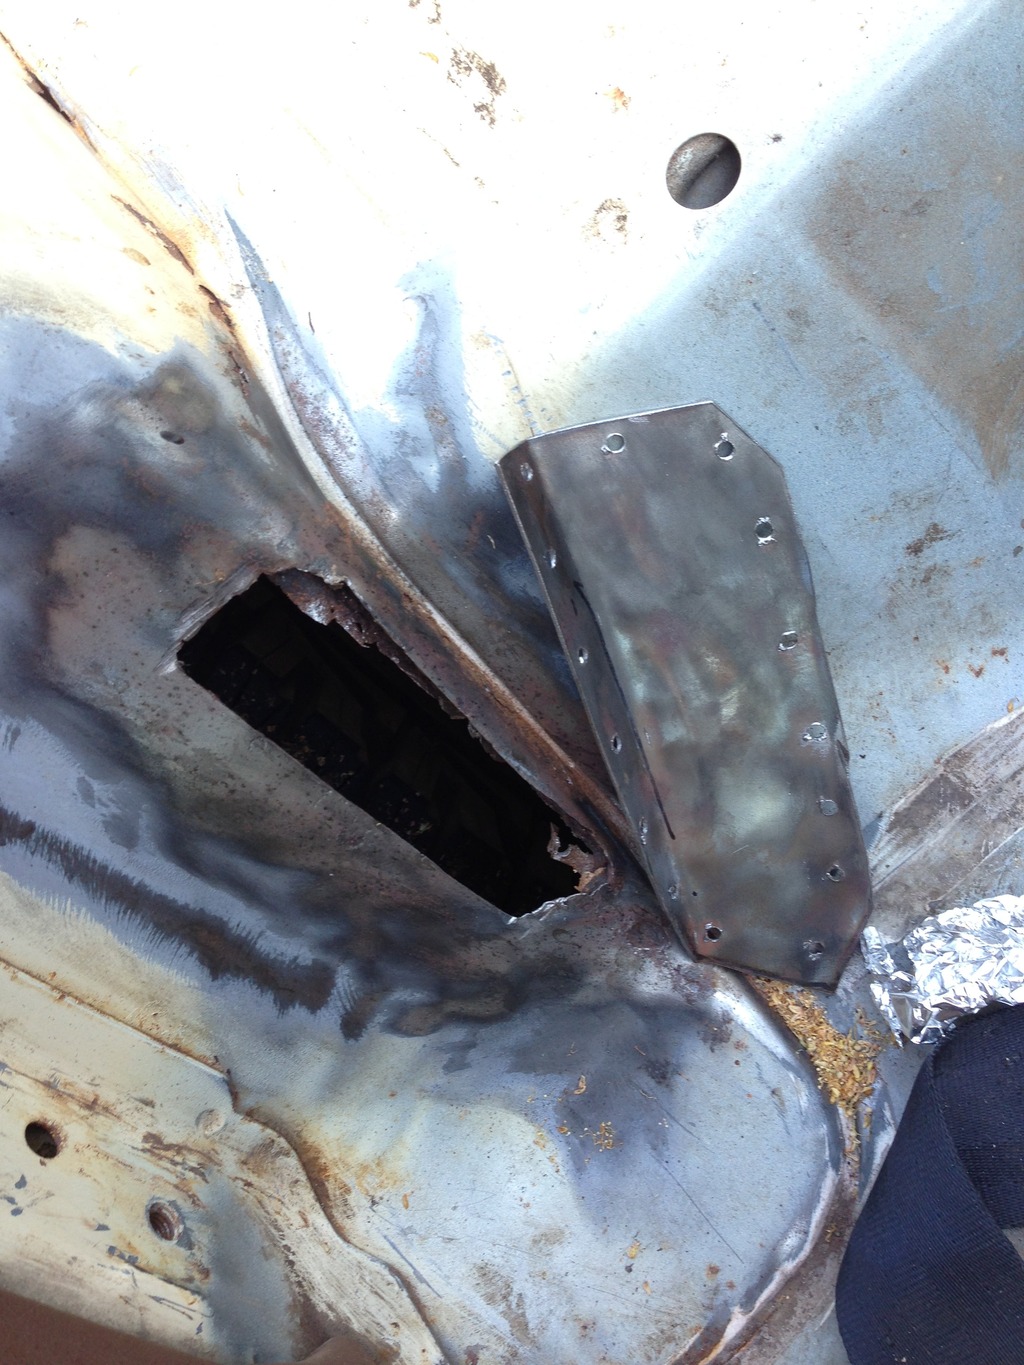
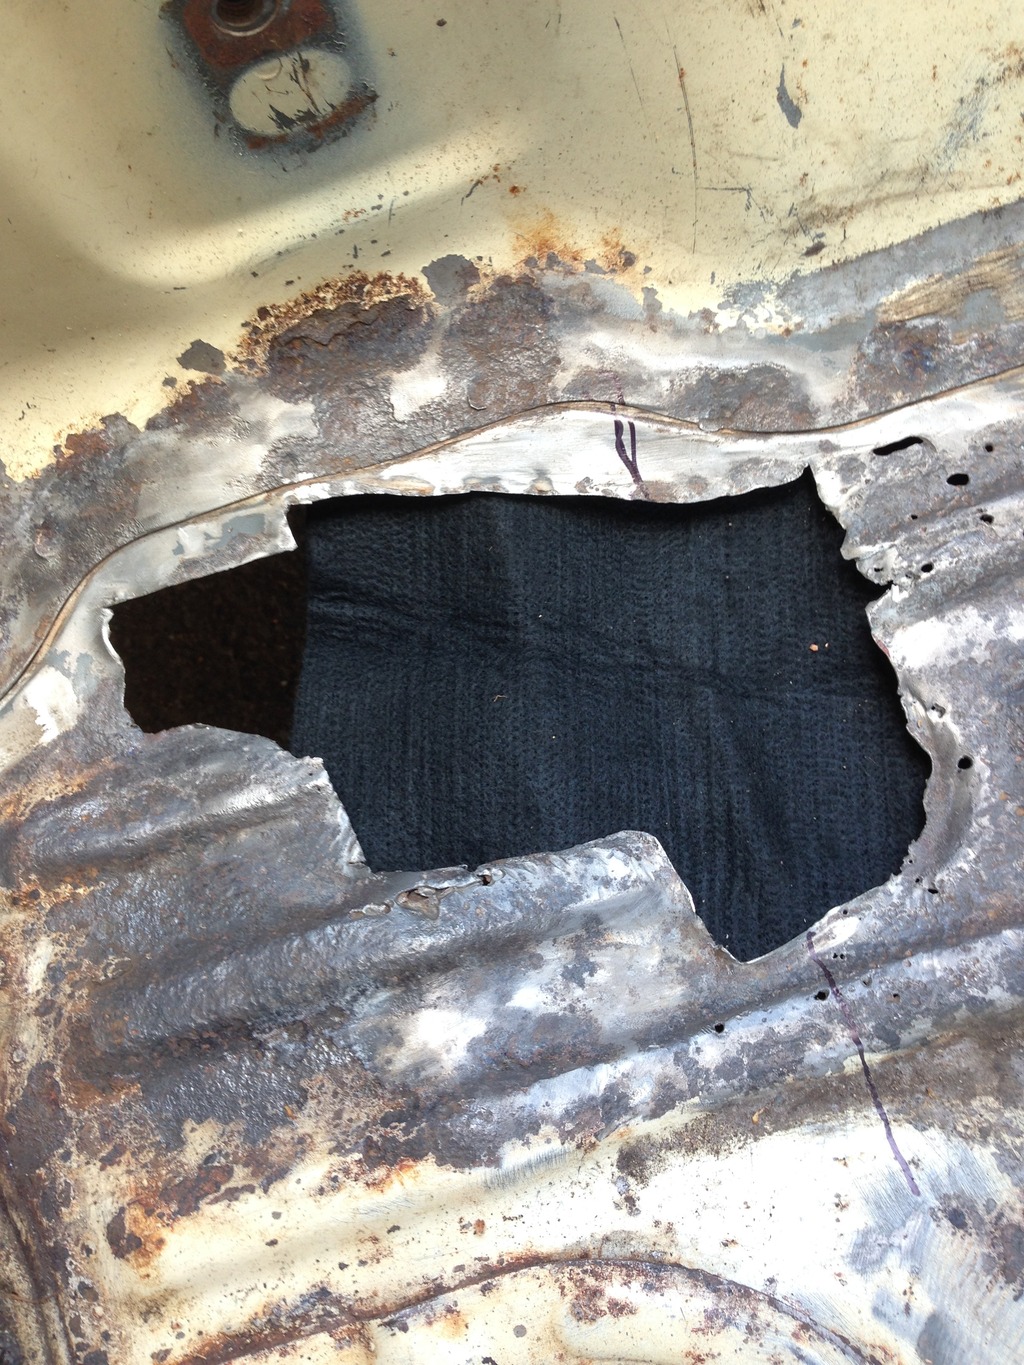
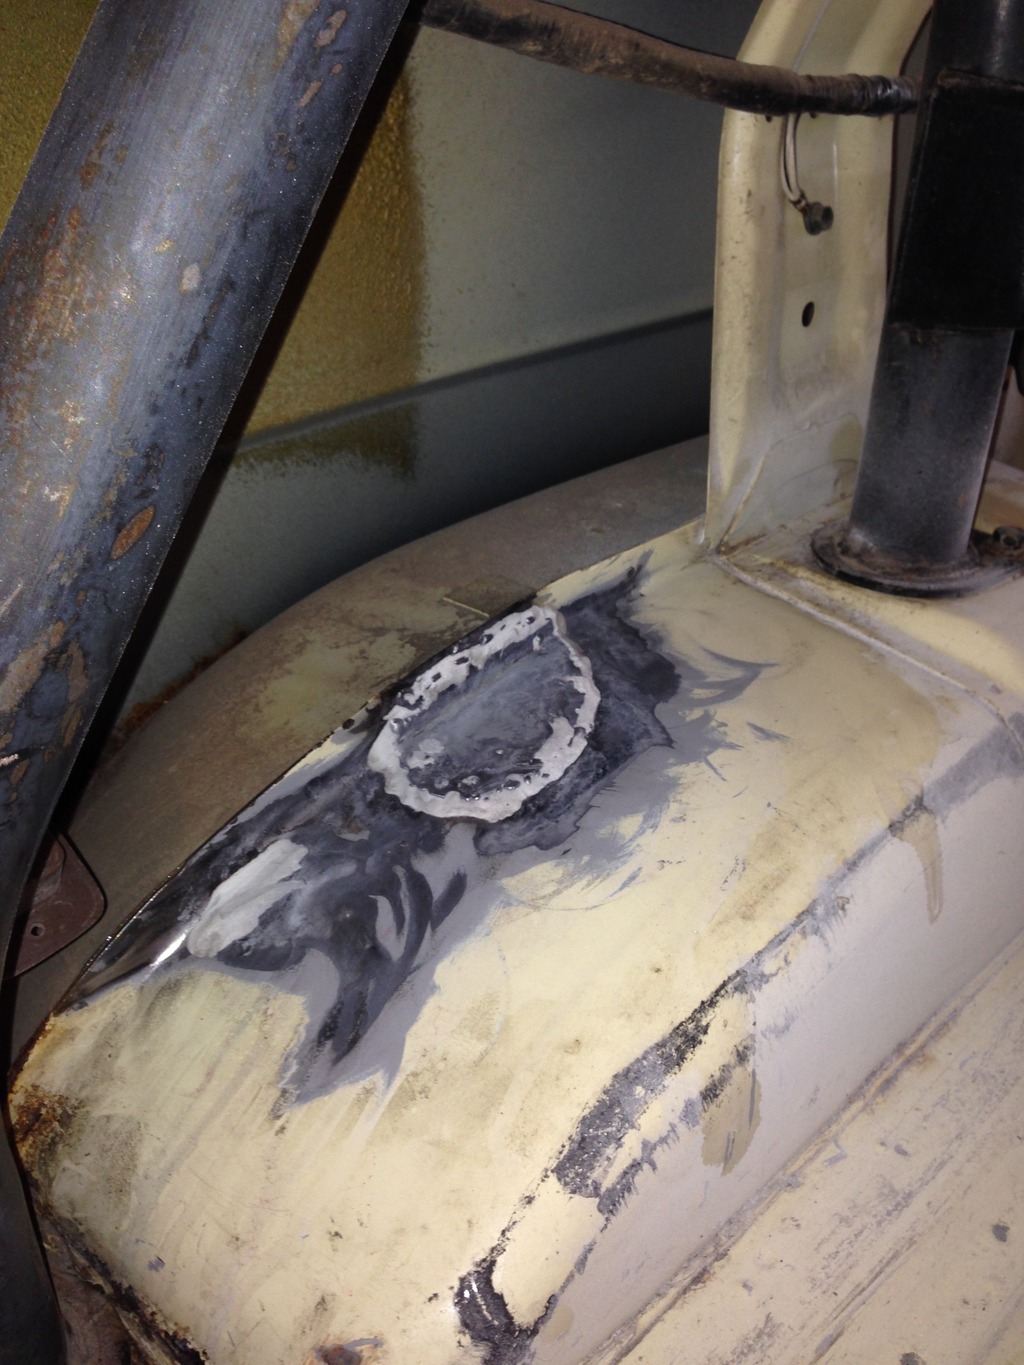
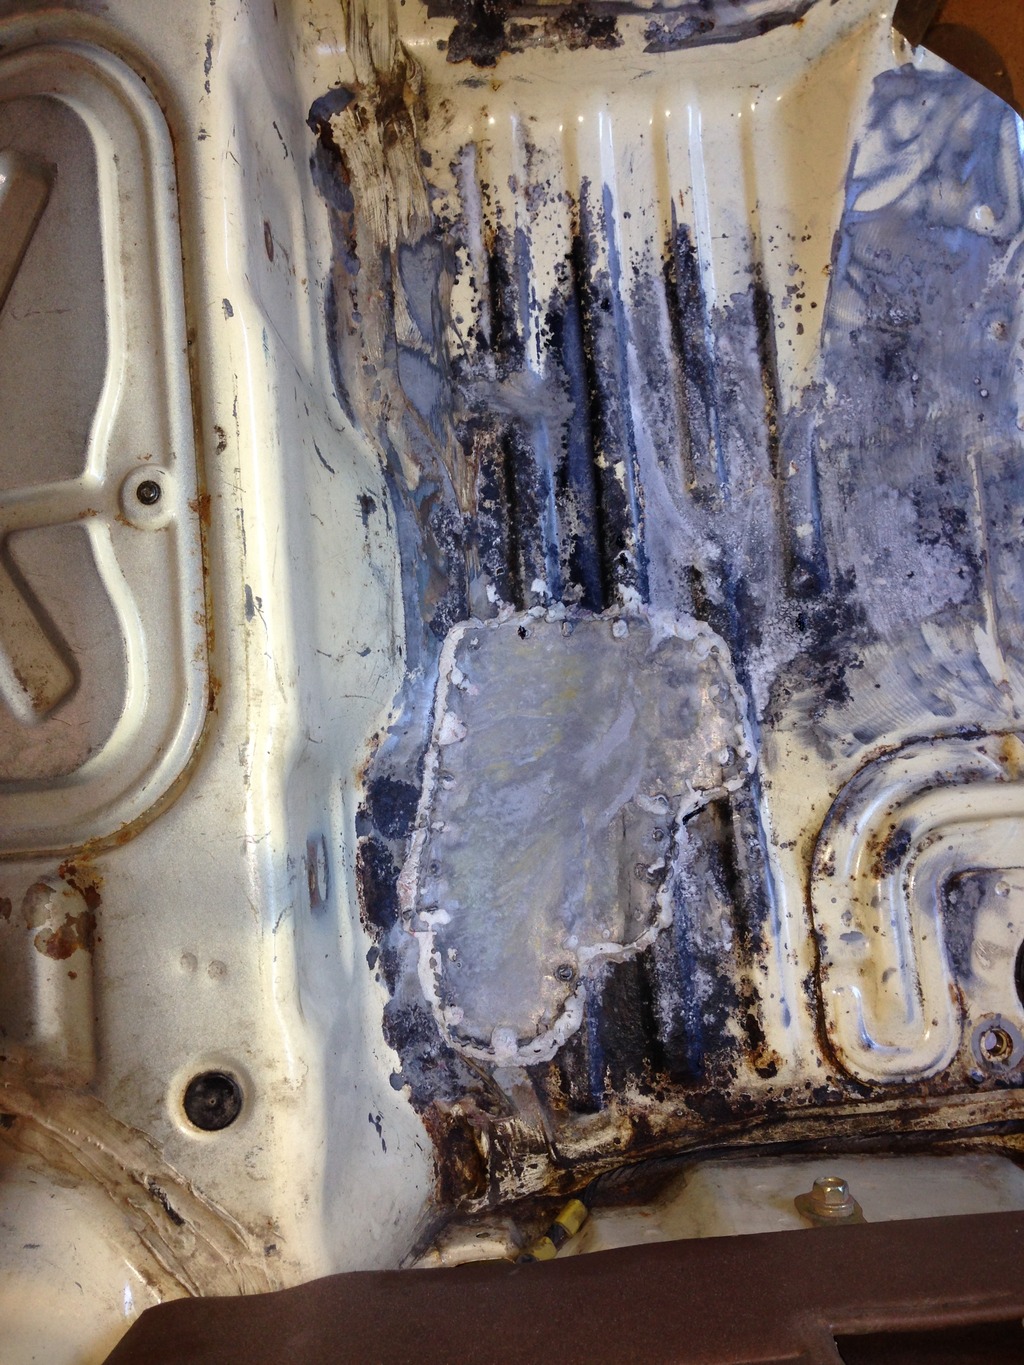
I got the rust cut out and the holes into remake-able shapes, as well as prepping them into almost, well I still have a ways to go but we're getting there, completely weldable surfaces. I also picked up a little 16ga sheet metal to make the patches from.
Into:
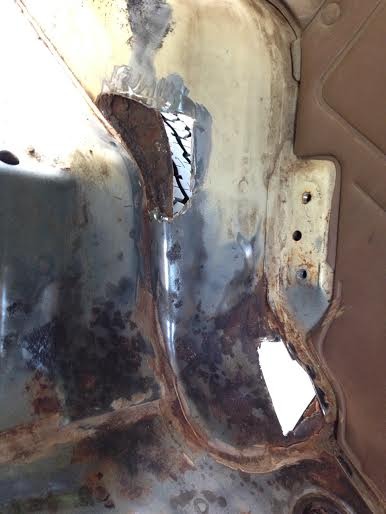
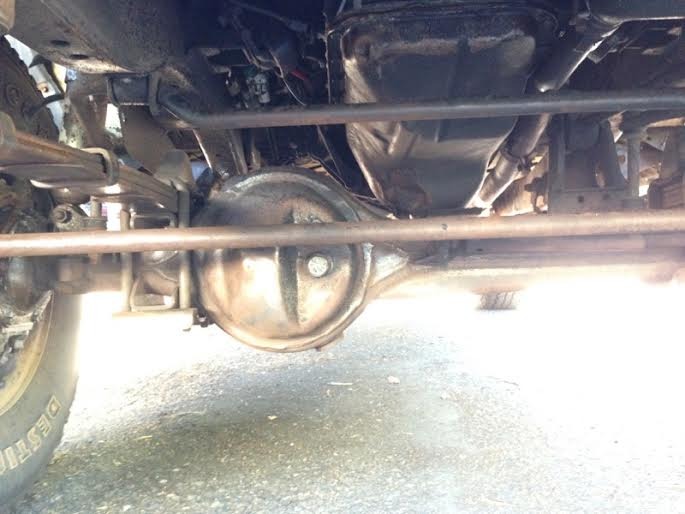
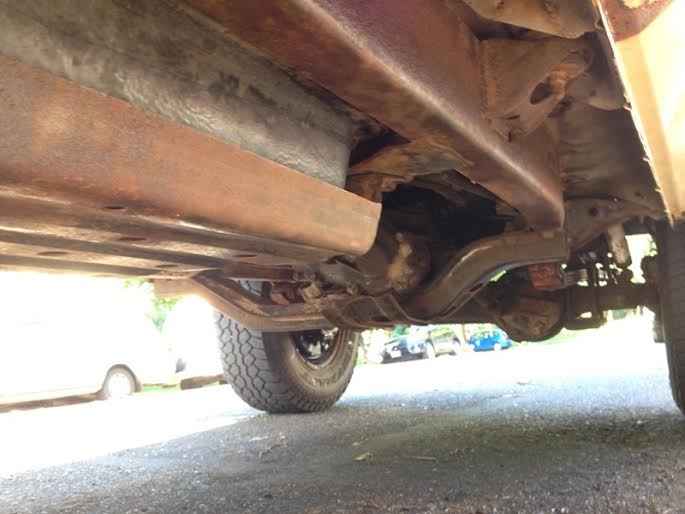
Got closer on getting the whole chassis prepped for POR15ing. Again, still a ways to go but at least she's not, in most places, all flaky like an old log.
Talked to Sherwin Williams Automotive and they can definitely get me the correct color.
The real breakthroughs were A) securing a garage in my building, which I take possession of on the 1st, and B) my neighbor who rents the garage next to mine has a pretty darn nice welding machine which he has offered to share.
Seriously though, what do y'all do to shield the fuel lines while welding? Wet rags? Just slide some sheet metal between the welding surface and the line?
I got the rust cut out and the holes into remake-able shapes, as well as prepping them into almost, well I still have a ways to go but we're getting there, completely weldable surfaces. I also picked up a little 16ga sheet metal to make the patches from.


Into:


Got closer on getting the whole chassis prepped for POR15ing. Again, still a ways to go but at least she's not, in most places, all flaky like an old log.


Talked to Sherwin Williams Automotive and they can definitely get me the correct color.
The real breakthroughs were A) securing a garage in my building, which I take possession of on the 1st, and B) my neighbor who rents the garage next to mine has a pretty darn nice welding machine which he has offered to share.
Seriously though, what do y'all do to shield the fuel lines while welding? Wet rags? Just slide some sheet metal between the welding surface and the line?
Last edited by Quinn's87RE; 05-27-2015 at 07:33 PM.
06-02-2015, 11:29 AM
#27
Nice thread you have going here. You also have a nice platform to build from with this 4runner.
I would definitely try to weld the holes up rather than rivet them. Even after welding I do as terry suggested with the Fiberglass. I skim coat them with some type of fiberglass reinforced filler then topcoat it, then seal it all up to prevent future rust as best as I can.
As far as covering up the fuel lines goes, I typically use a Leather welding jacket or leather welding apron and try to wrap it around the lines and any area thats exposed to fuel.
Also, Check out my build thread for a reference on the floor pan. When I did mine, I cut out the same section from another 4runner at the u-pull it and made a template for it to be an exact fit of what I cut out. Then I made it hang over about an inch all around on the pan to have an overlap that I could weld up. Again, I sealed it up with seam sealer, skim coated with the reinforced filler, and then painted over top of it.
Let me know if you need anything I have a ton of pictures, and I would be willing to take any more for you to help guide you along the way.
07-16-2015, 11:09 AM
#28
Registered User
Thread Starter
Join Date: Oct 2013
Posts: 57
Likes: 0
Received 0 Likes
on
0 Posts
[QUOTE=Gizler00;52275192] Nice thread you have going here. You also have a nice platform to build from with this 4runner. [/QUOTE
Thanks!
I used epoxy-putty and some seam filler.
Thanks for the suggestion! I’m sure this would have worked, but I got a heat shield thing for considerable cheaper than leather.
I would have loved to have used a genuine floor pan, but wasn’t sure about going to pick’n’pull with my angle grinder and a 100ft extension cord. Is that how you did it?!
Love the support of the YotaTech community!
It’s been awhile since an update - It's amazing (uh, maybe not) how inexperience and other obligations in life can slow things down. But I've gotten through the mucky part of this floor pan repair.
Shaping the sheet metal really stumped me. It has been the part I did the least amount of research on because I figured, well oh, whatever, I'll just bend it. But making the contours of the floor pan proved to be a bit of a challenge.
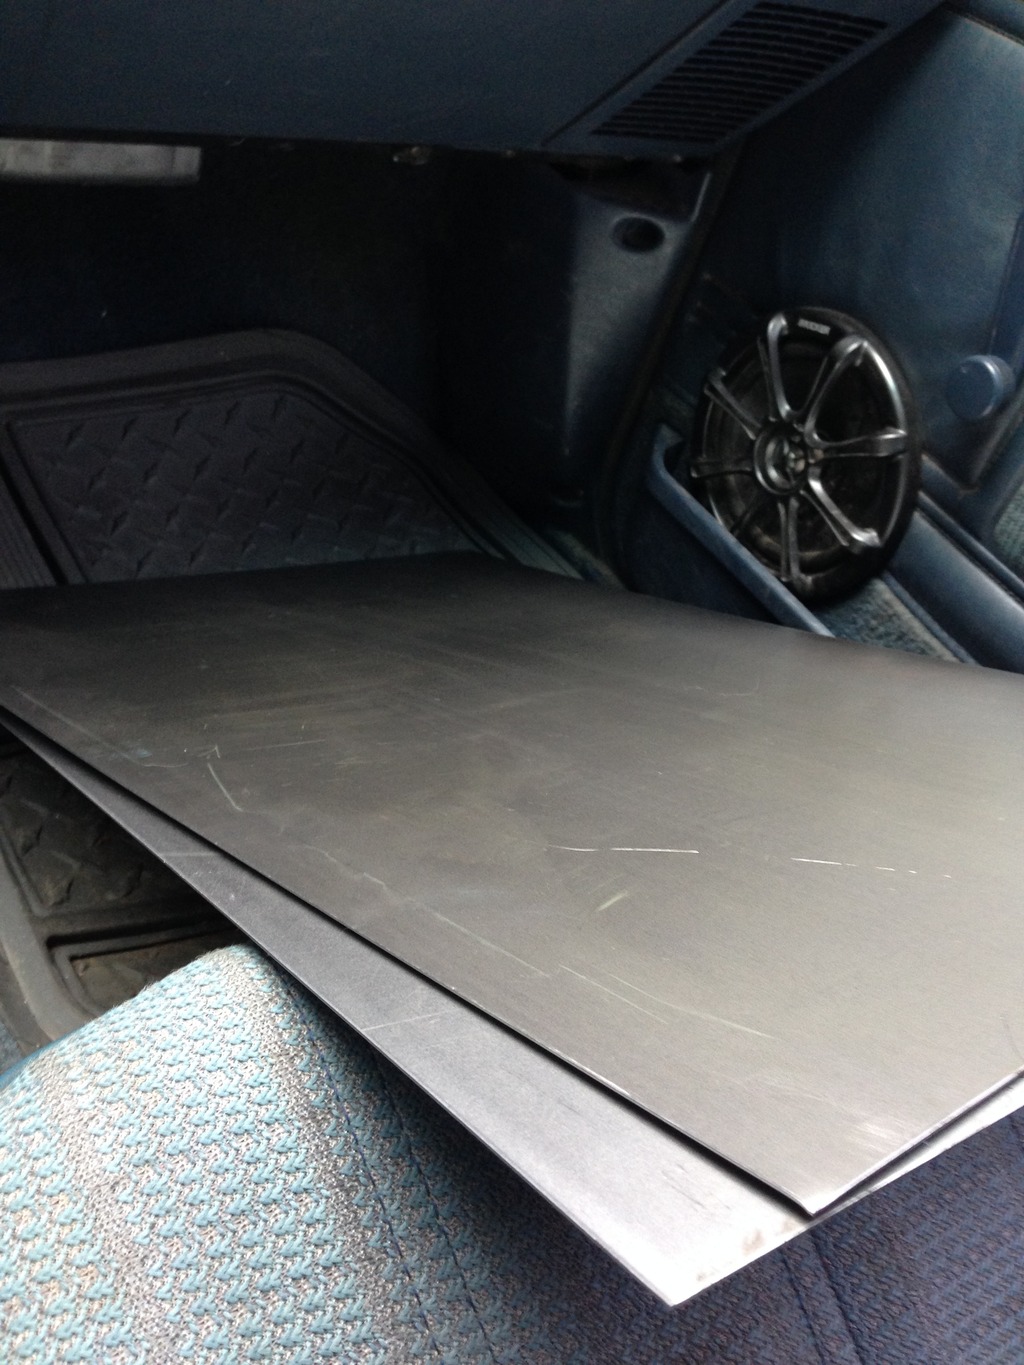
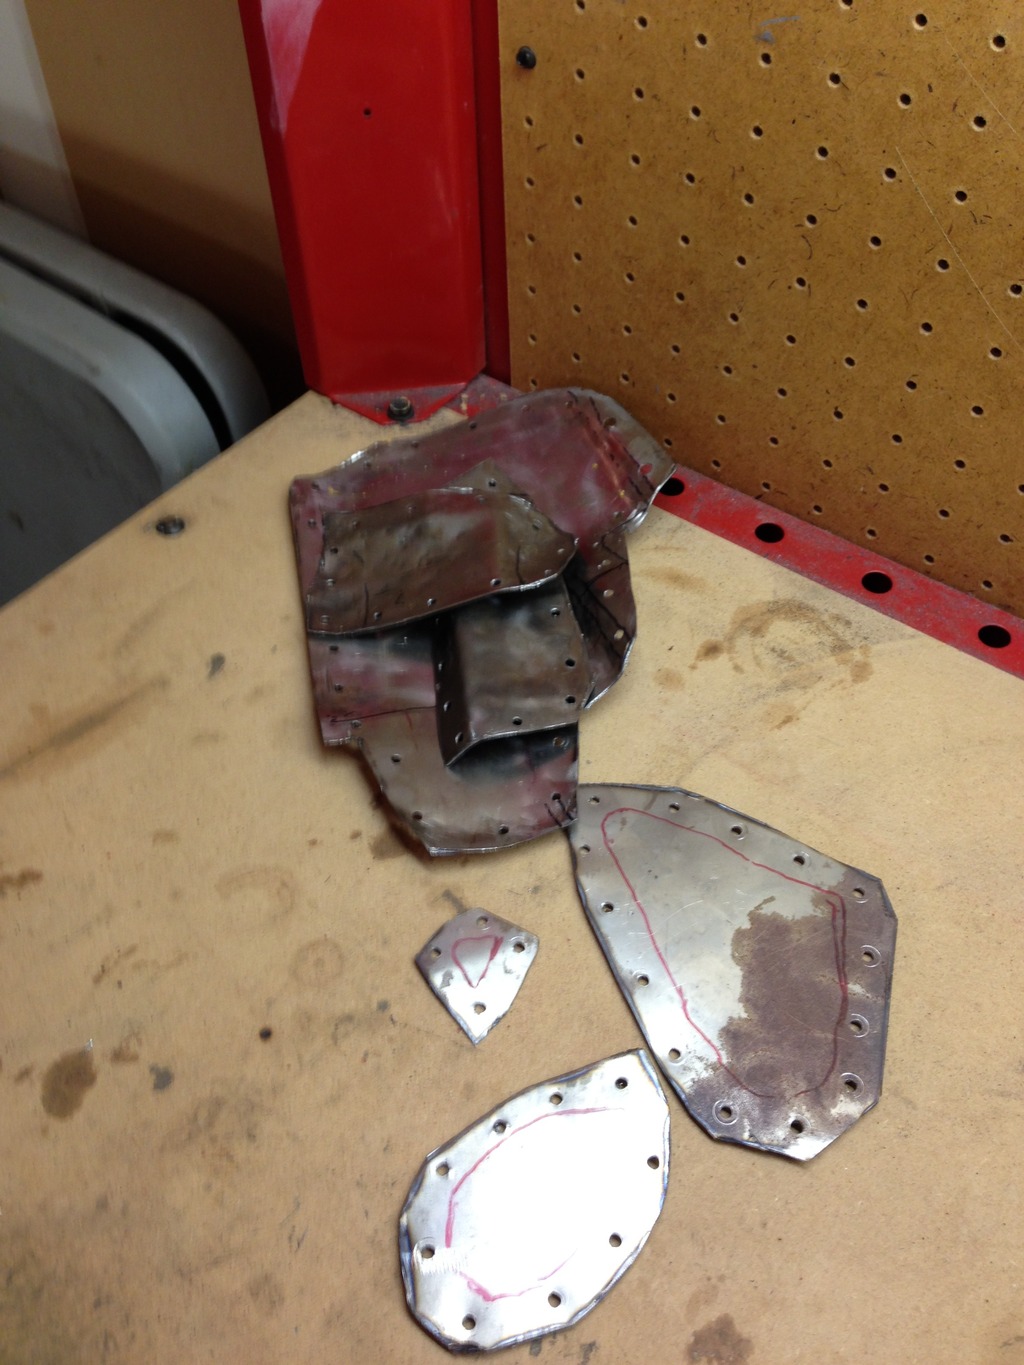
Started off with some fresh 20ga sheet metal
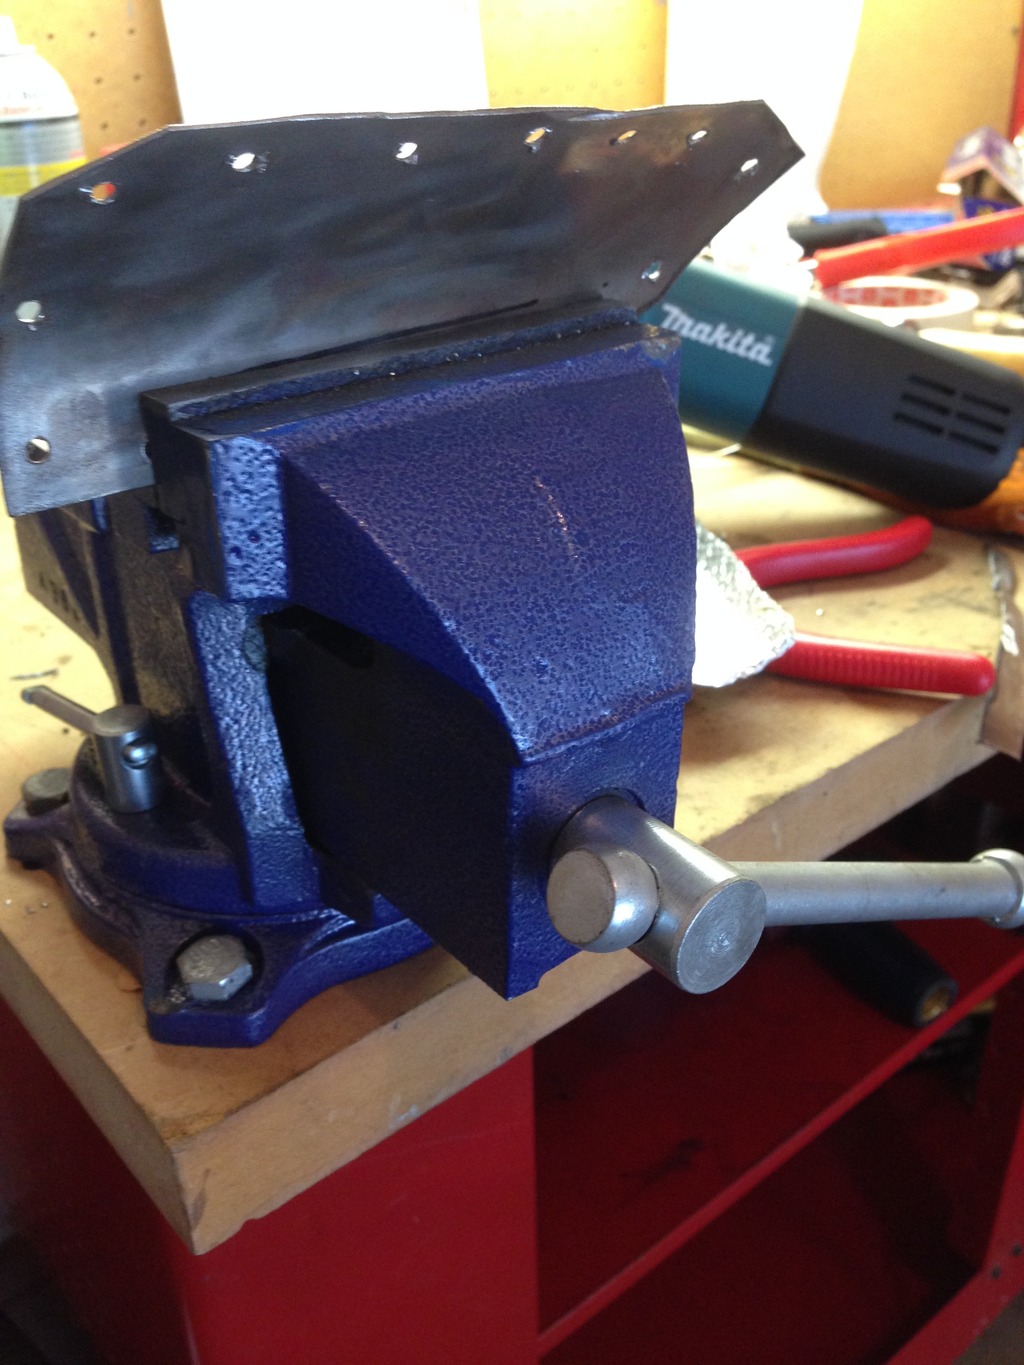
While shaping it, removing the top offered far superior access and was an incredibly advantageous move.


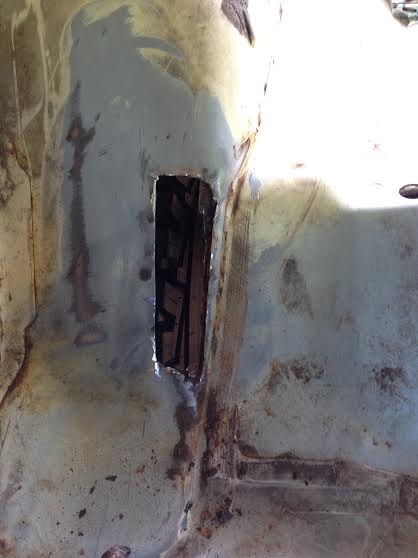
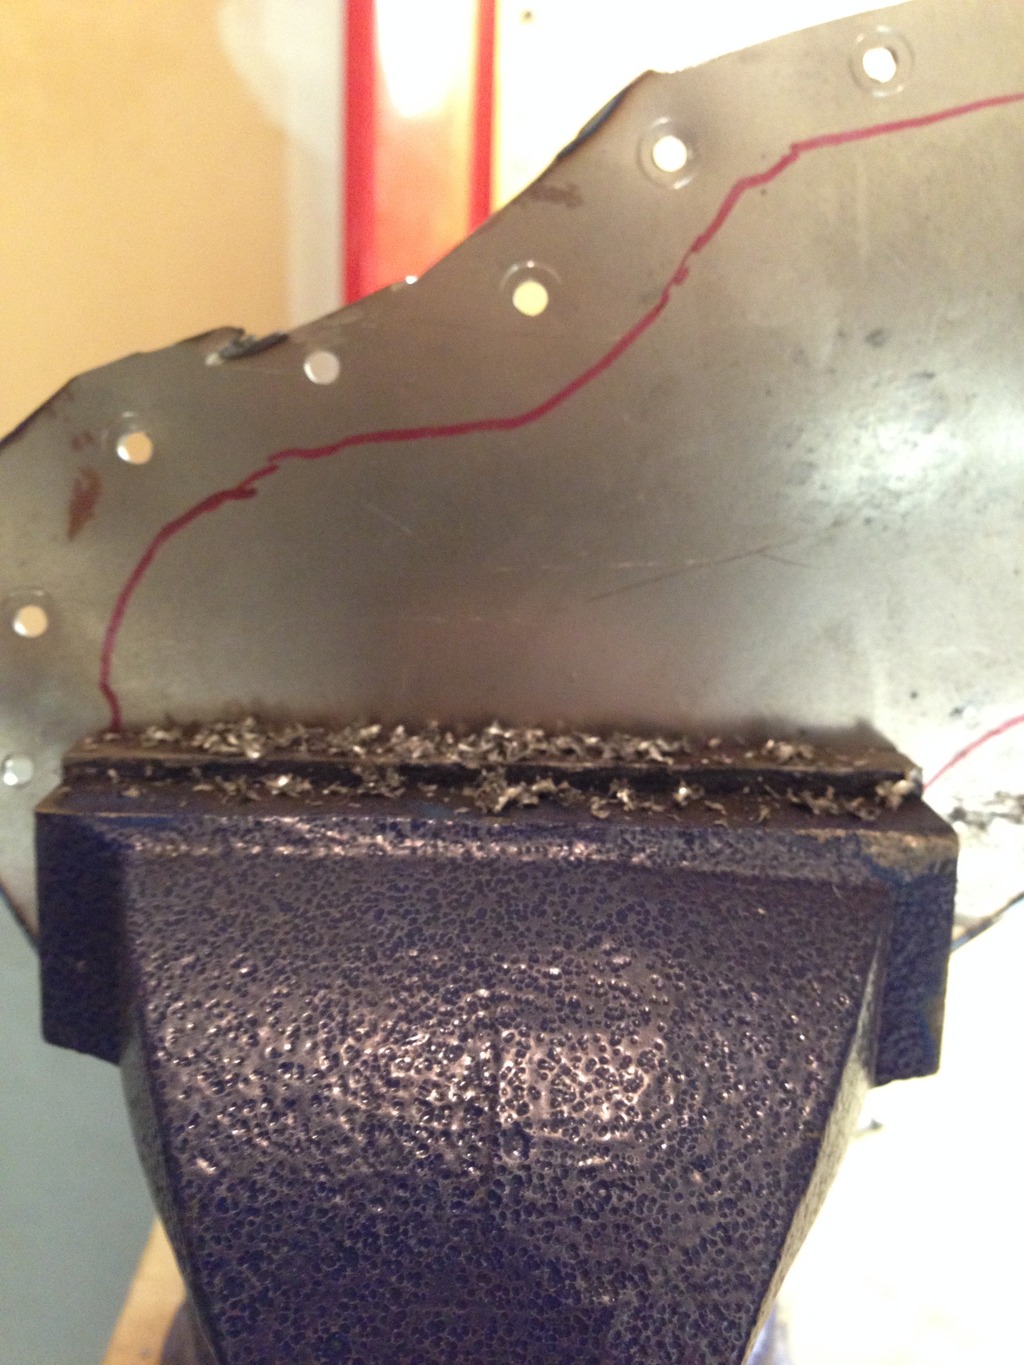
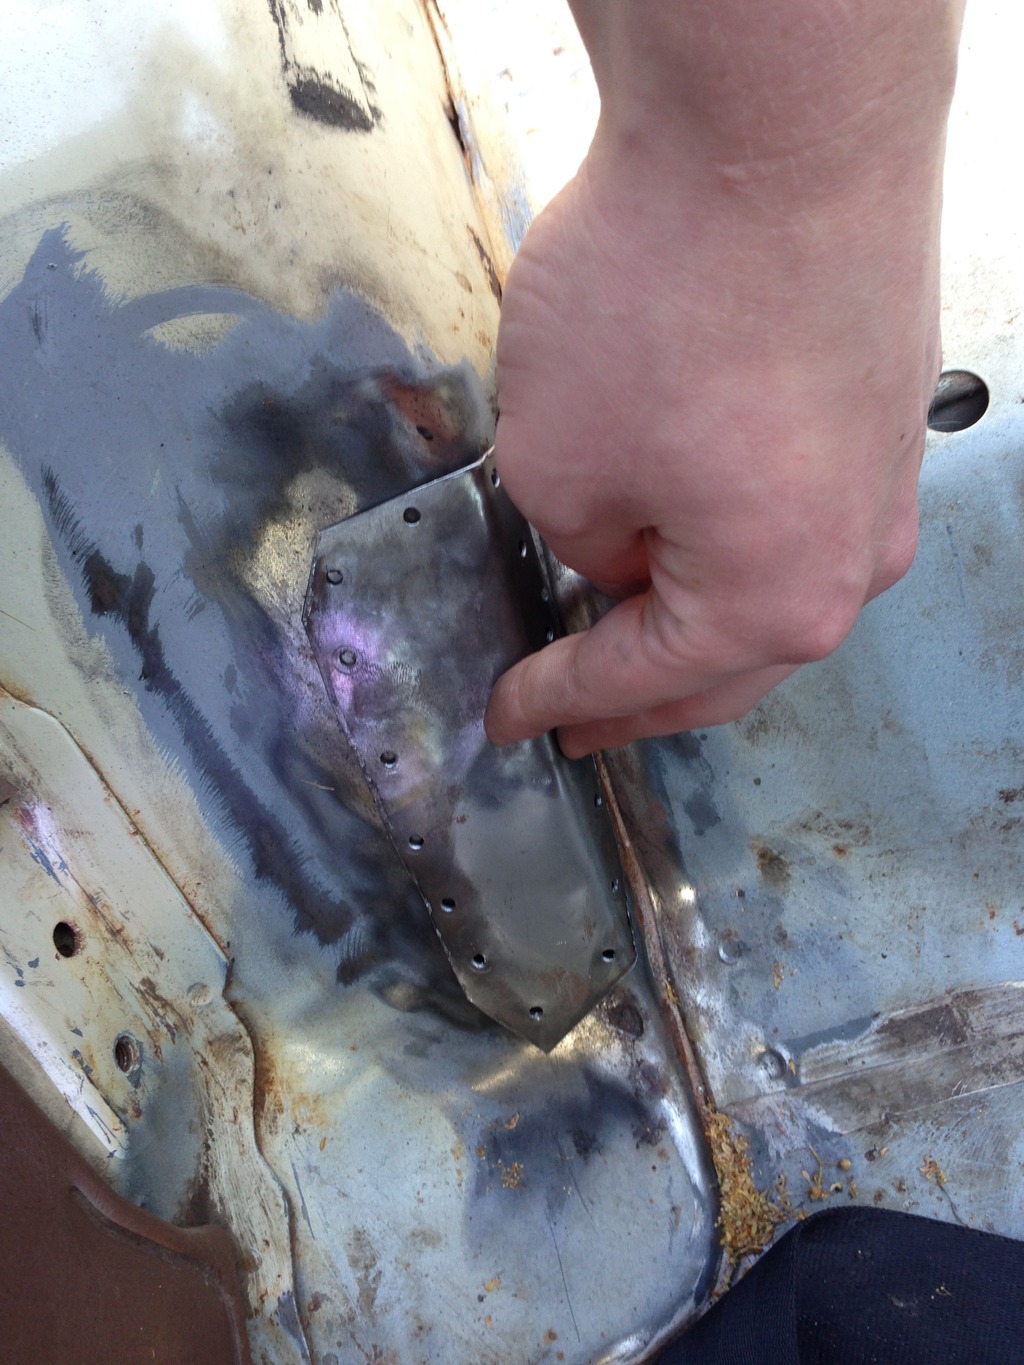
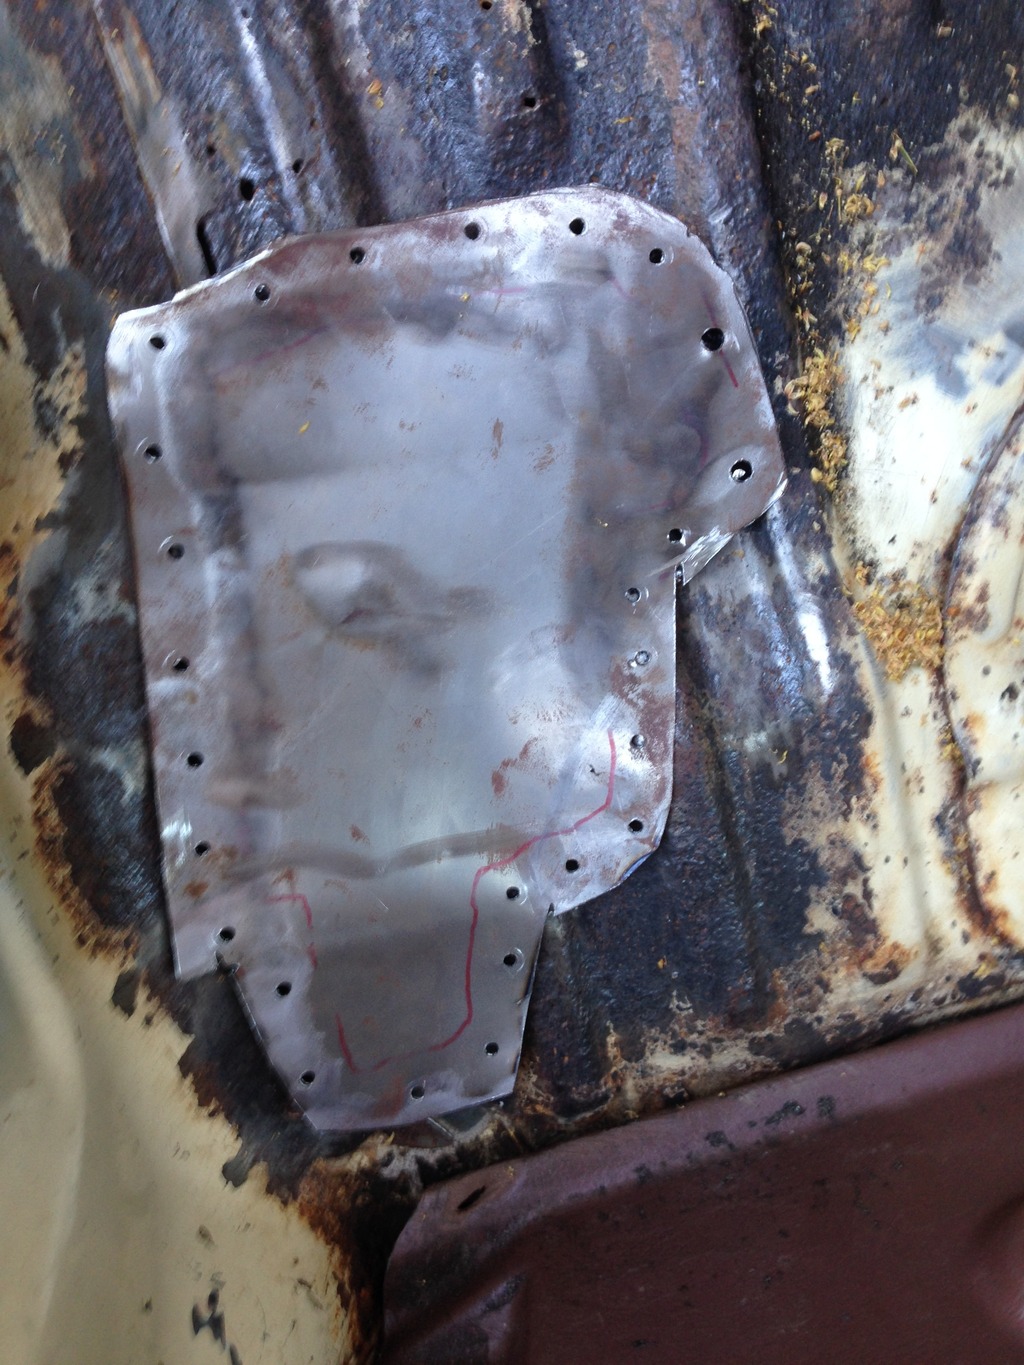
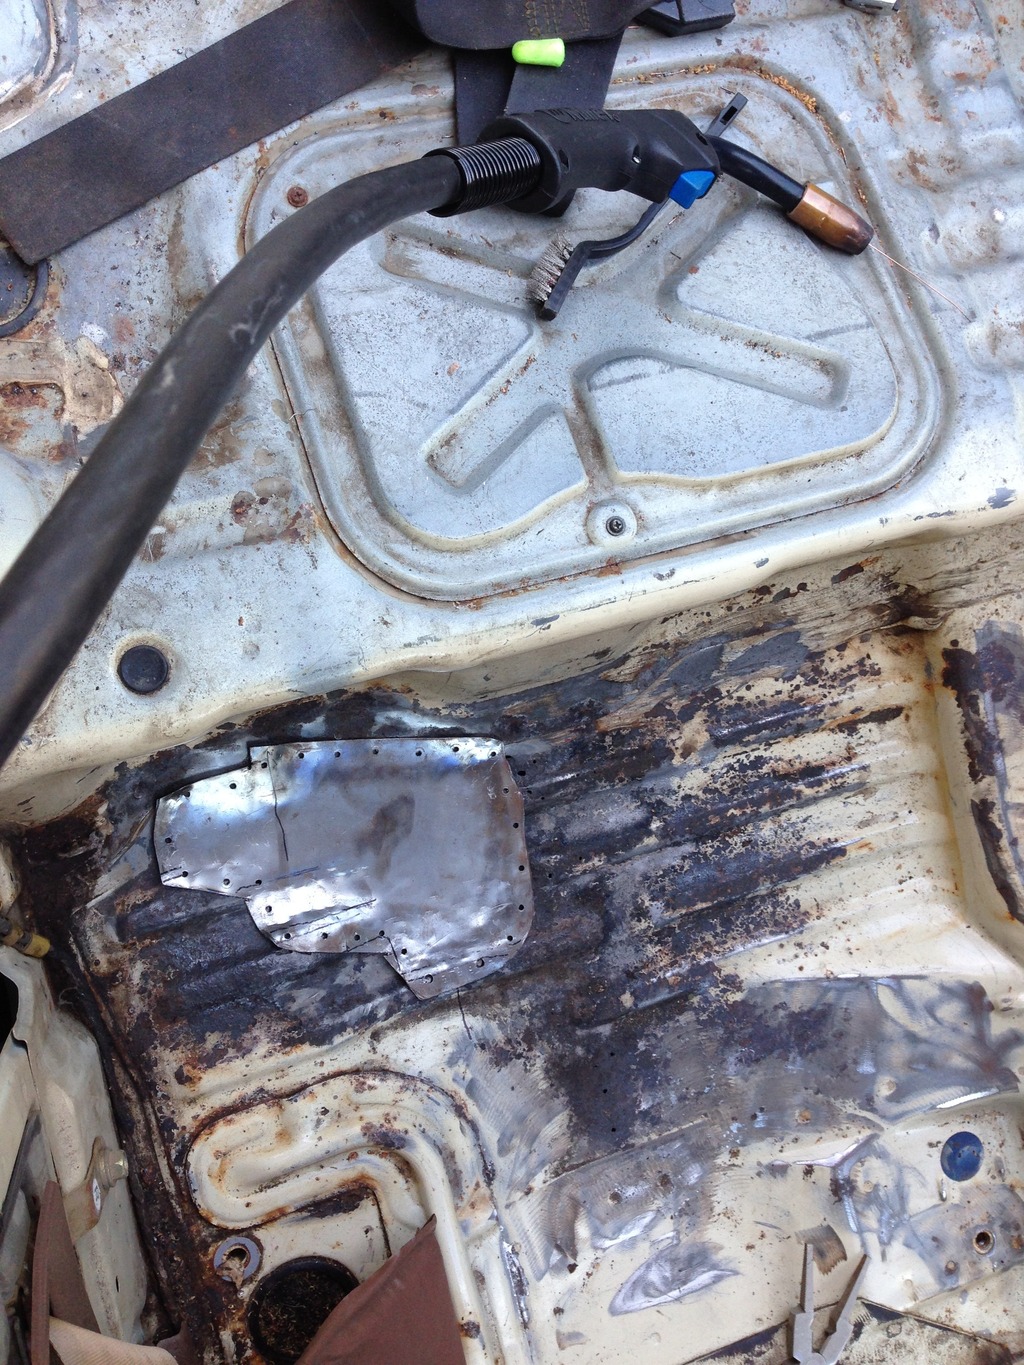
I created stencils of the holes using aluminum foil. I then traced the shapes on to the sheet metal. Next, I used an angle grinder with a cut off wheel to cut the sheet metal while it was clamped in a vise. After I re-clamped it and drilled holes in it which I planned to use to make plug welds. I also used a wire wheel to smooth the edges and holes and polish the metal. Next came shaping the metal into its necessary three-dimensional form. After struggling at first I made it out to be more complex than necessary. What ended up working for me was to start out the bends in the vice and then place it in truck, step on it, and hit it with a hammer. Not exactly rocket science.

Once they were shaped, and I had coordinated with my neighbor who has a welding machine and had generously, miraculously, like the heavens had opened up-dly, offerd to let me borrow it. It was time to get started melting that metal stuck.
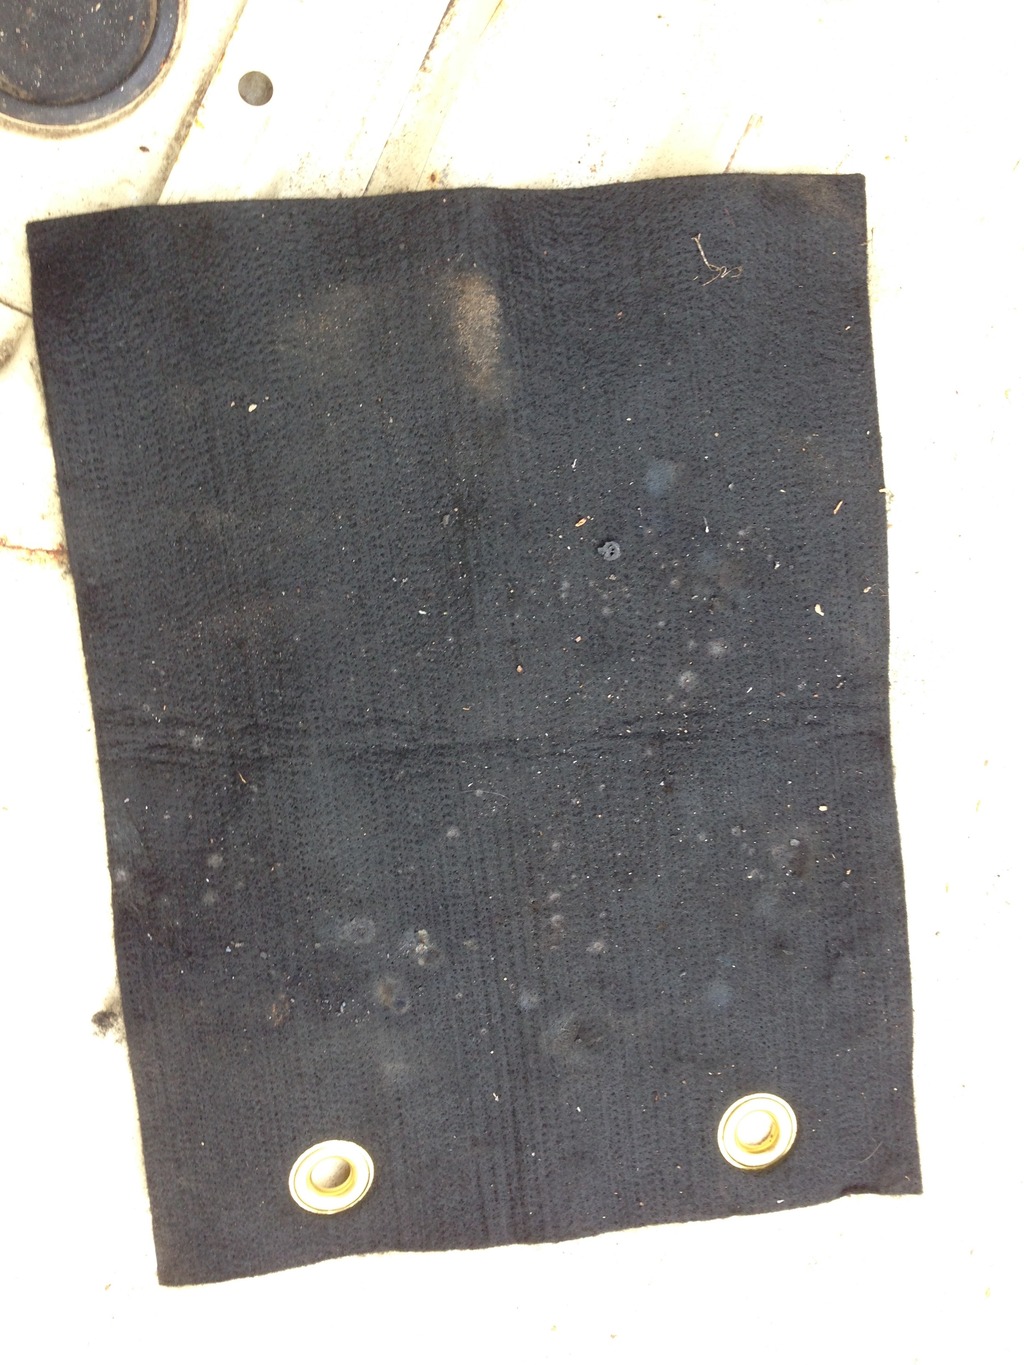
I bought this “heat shield” blanket thing to cover the fuel lines and gas tank while welding above them. It was in the plumbing section at Home Depot for $15.
Looking at it after the job was done and seeing the use it got I think it was worth the $15 as far as not blowing myself up goes.
And, welding them in place. I’m not sure if welding them turned out better or worse than using a fiberglass kit. But, I sure learned a hell of a lot more doing it this way. First ever welding project complete!
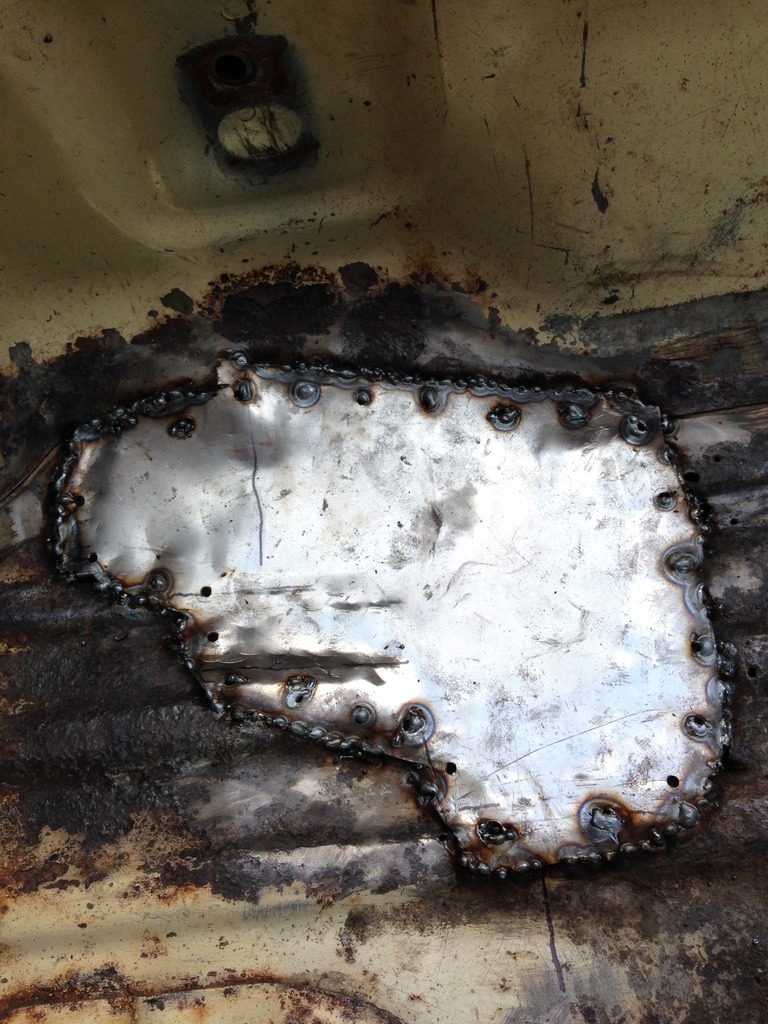

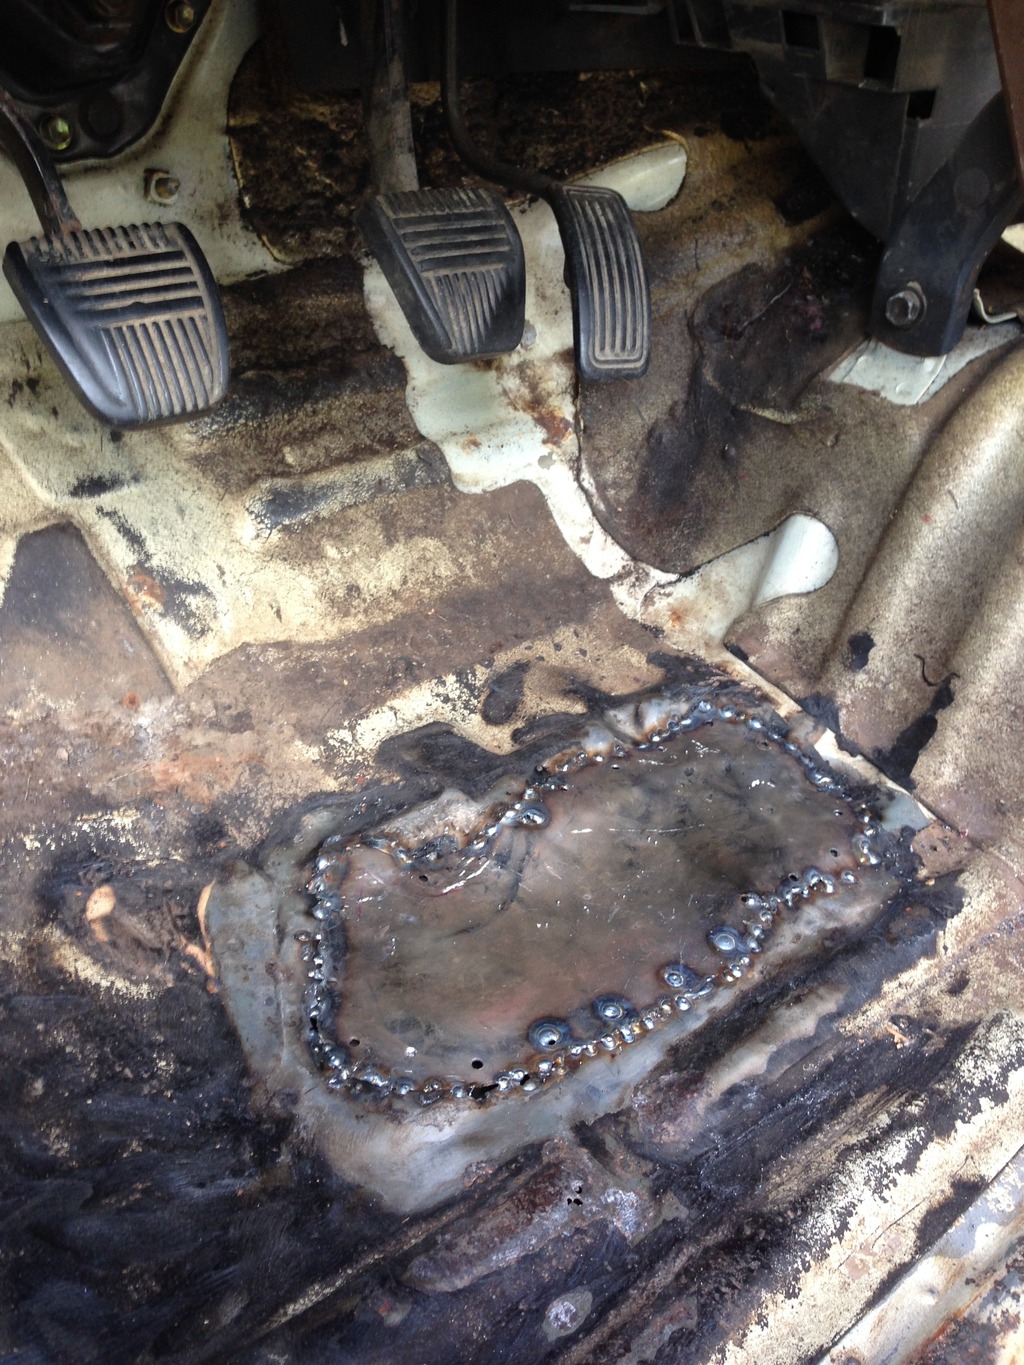
Man, I can make some ugly welds!
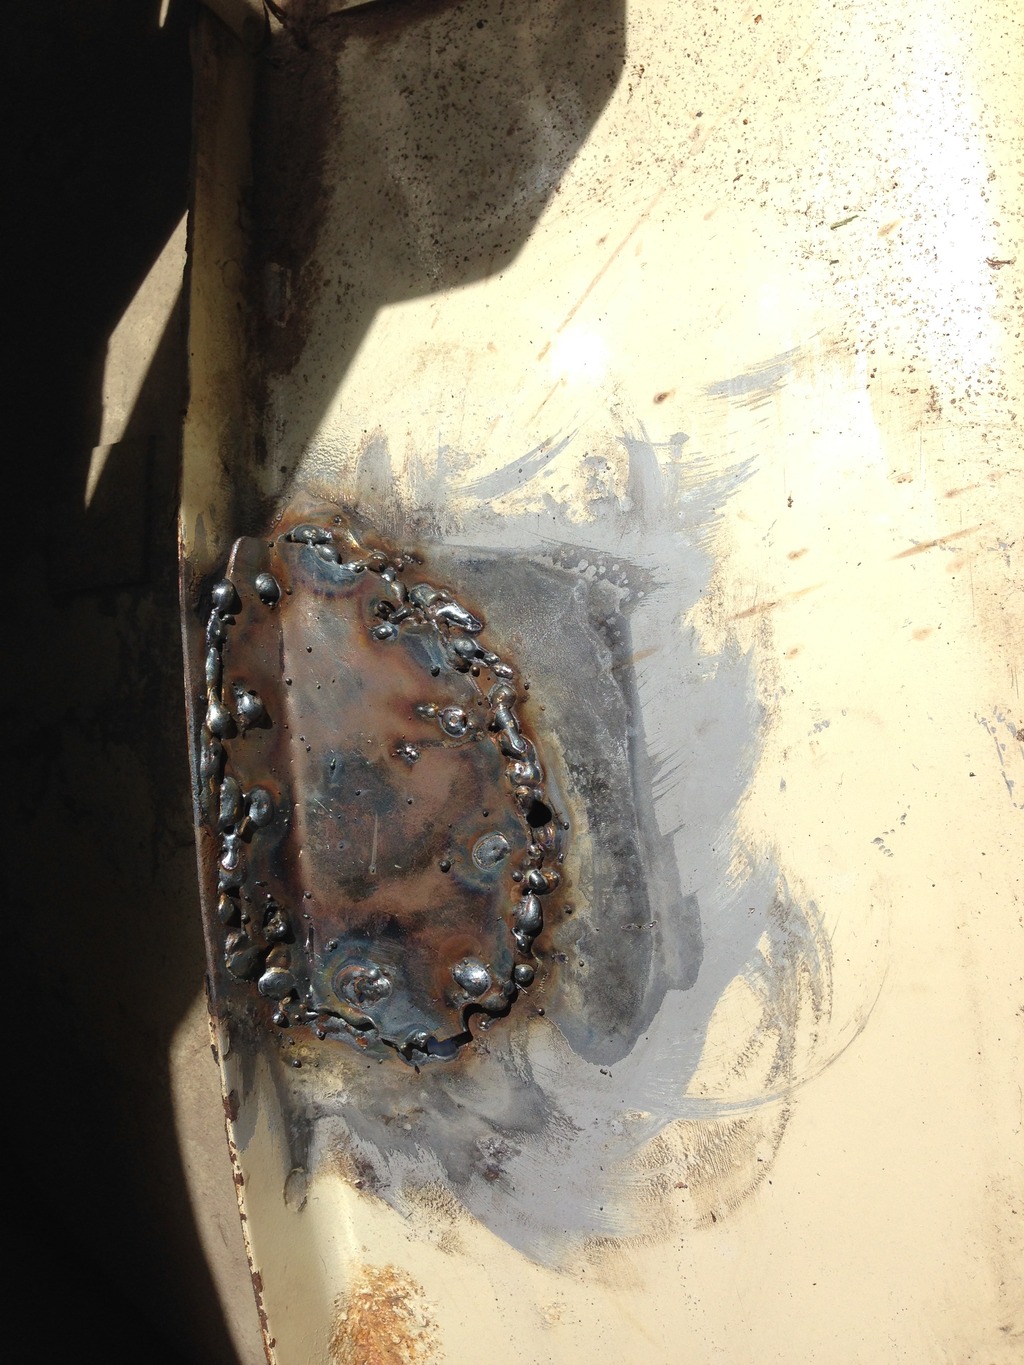
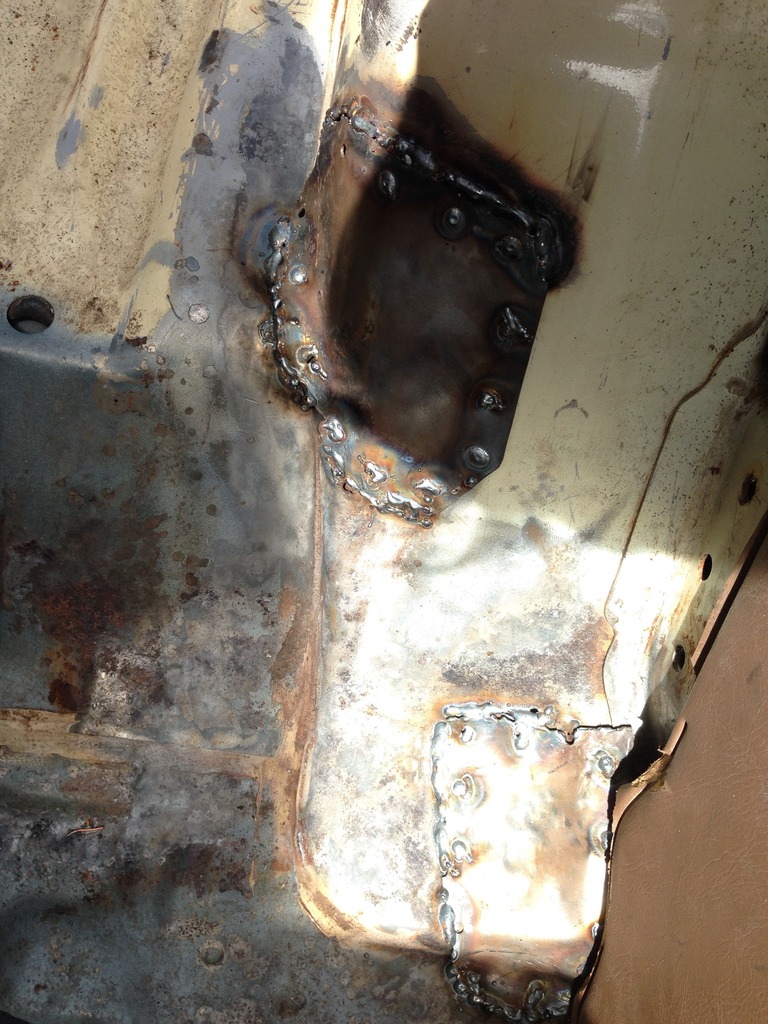
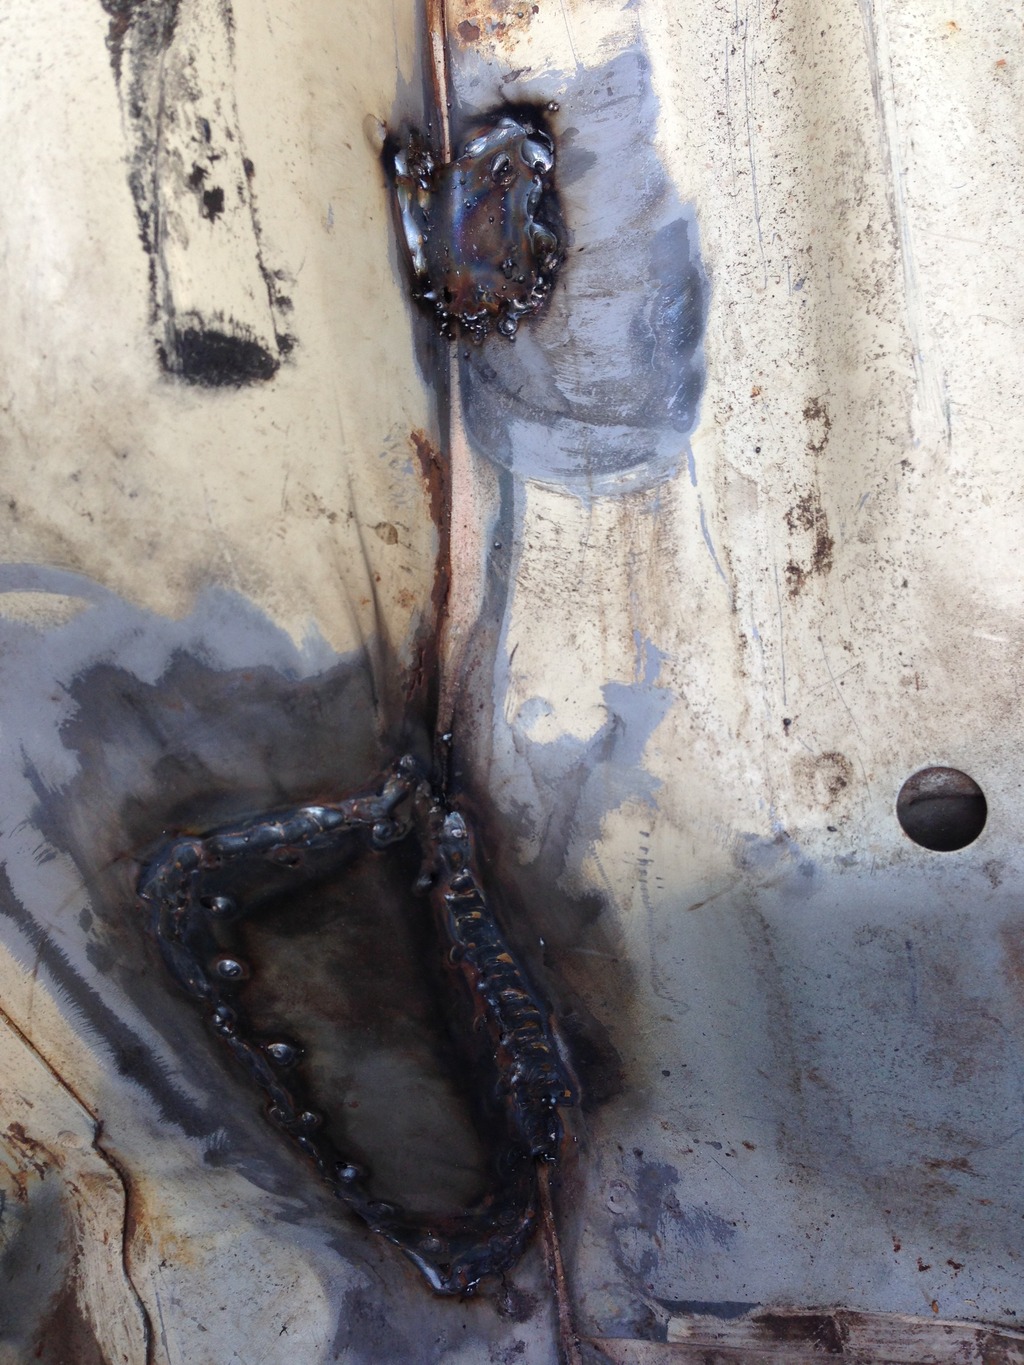
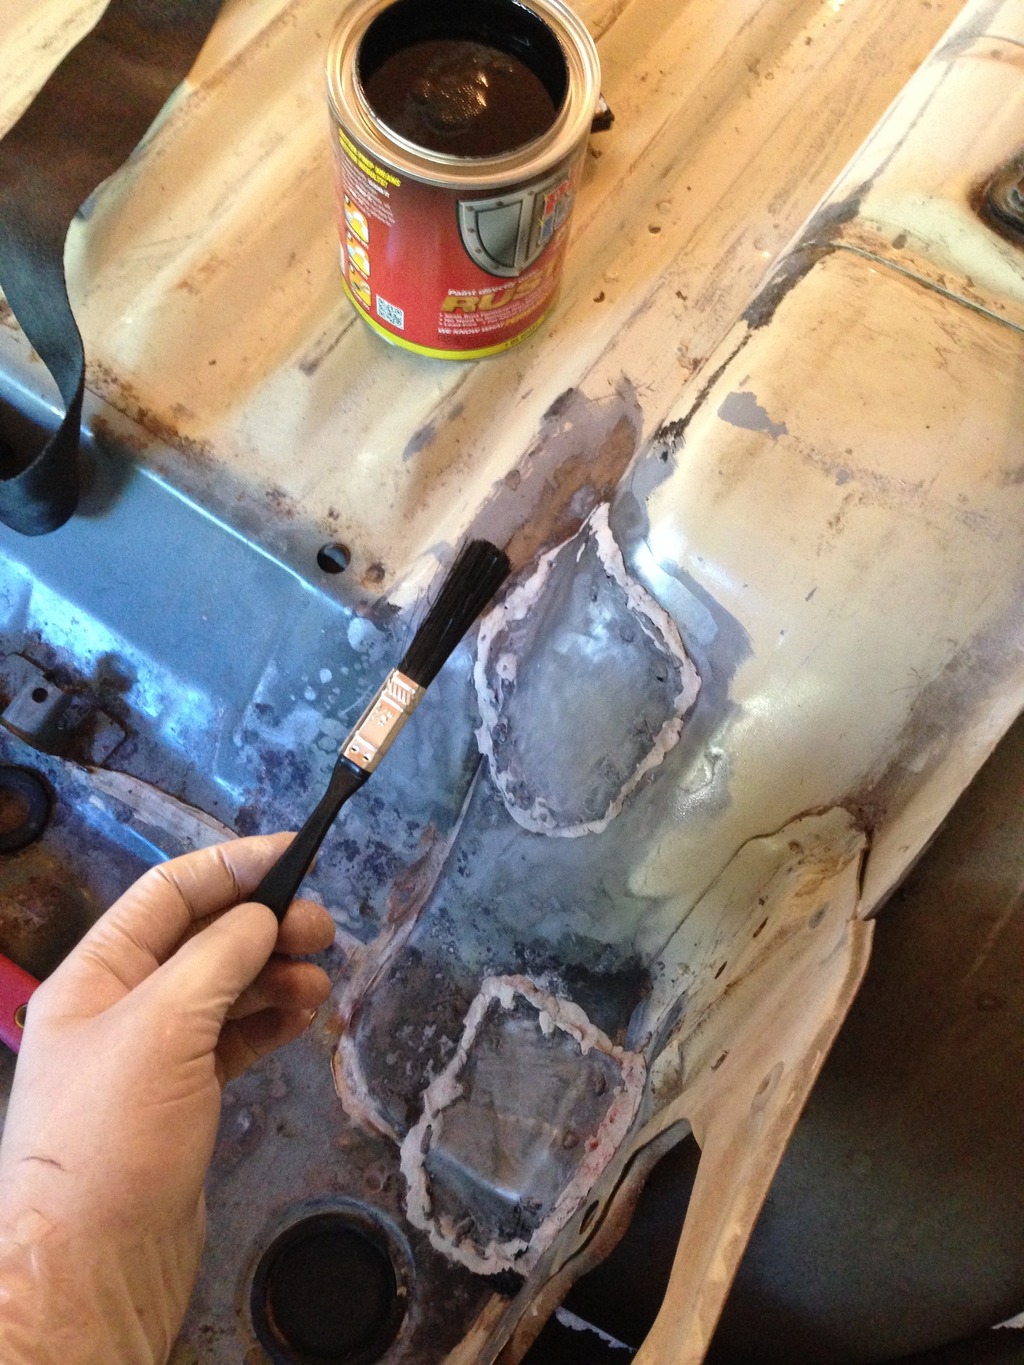
So, not exactly a professional job - but I think they look better than a $1000 bill from an auto-body shop! And since they are obviously not water tight welds I filled the gaps with some epoxy-putty and a little bit of seam filler.
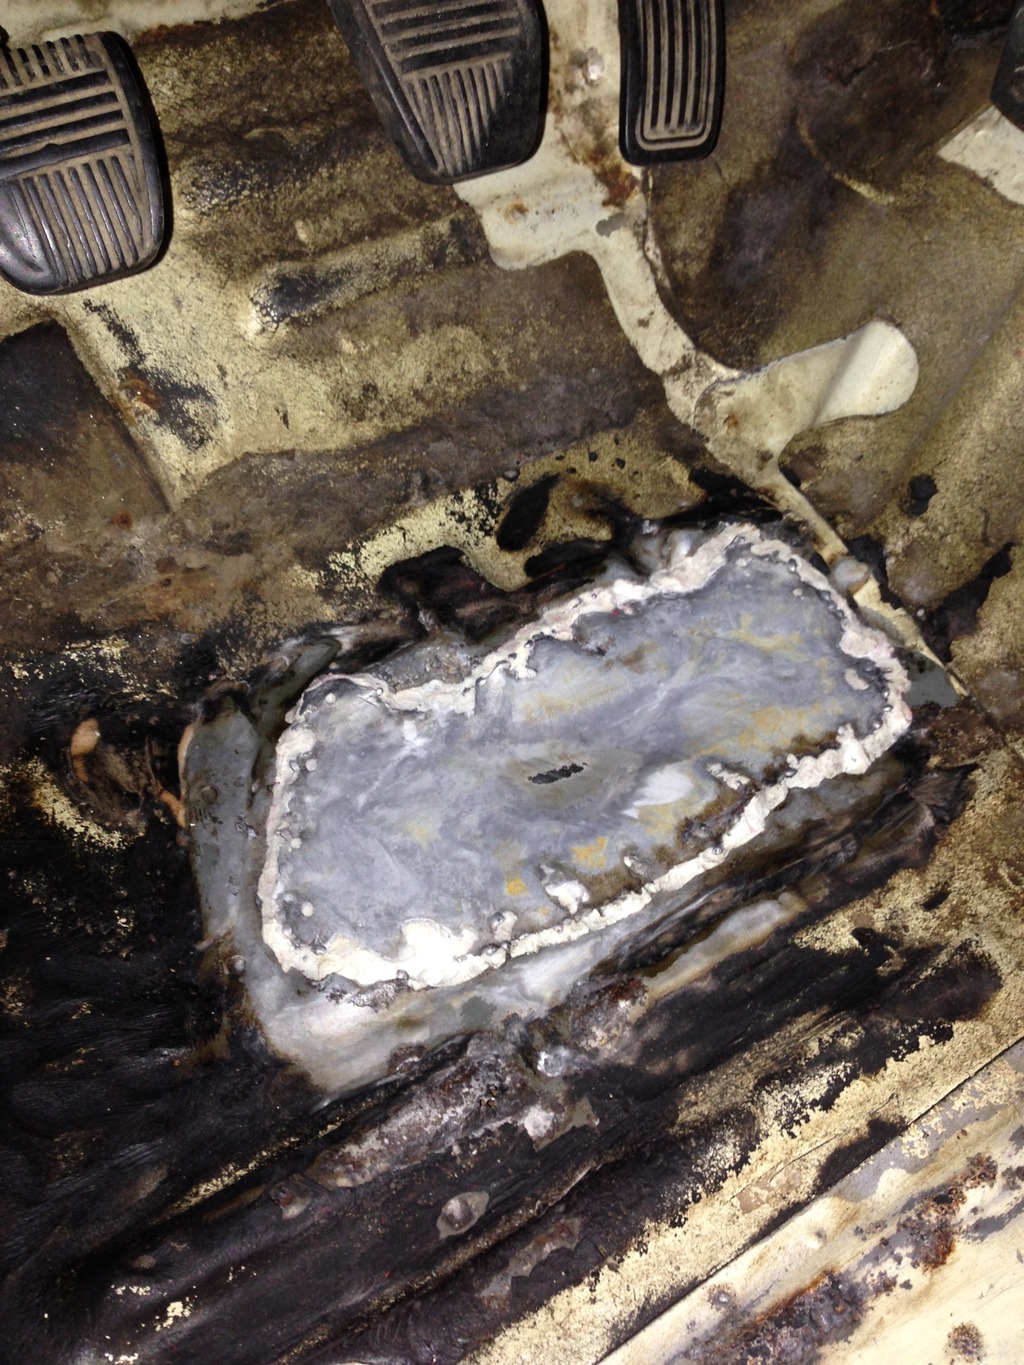
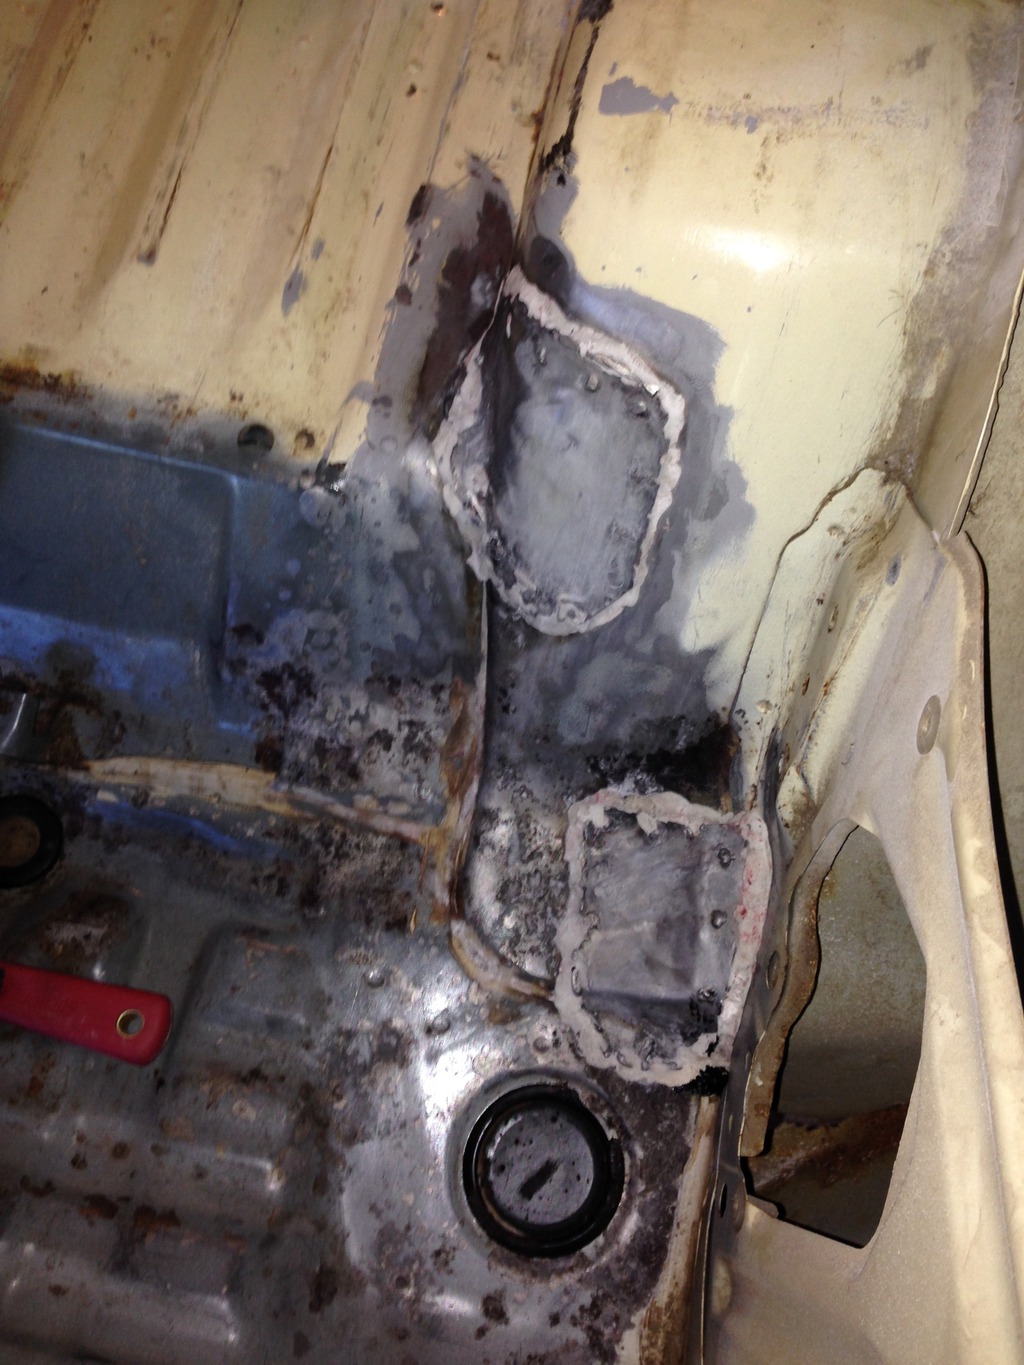
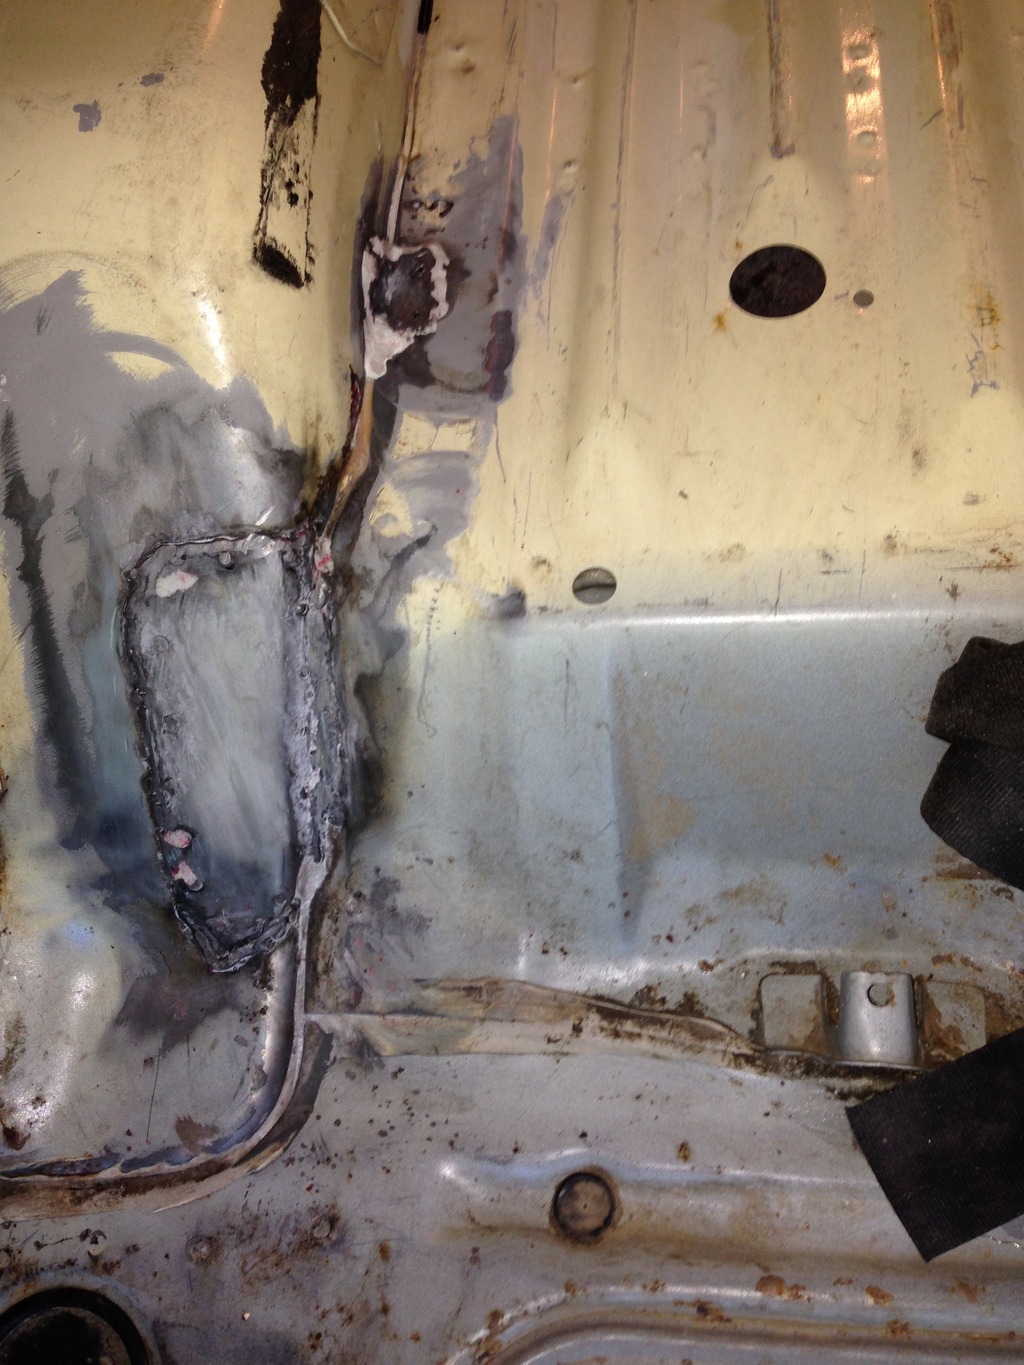
Since I have some Por15 that I’m going to use to paint the frame I used it to paint over the patches. Yes, I used the Marine Clean and Metal Prep.
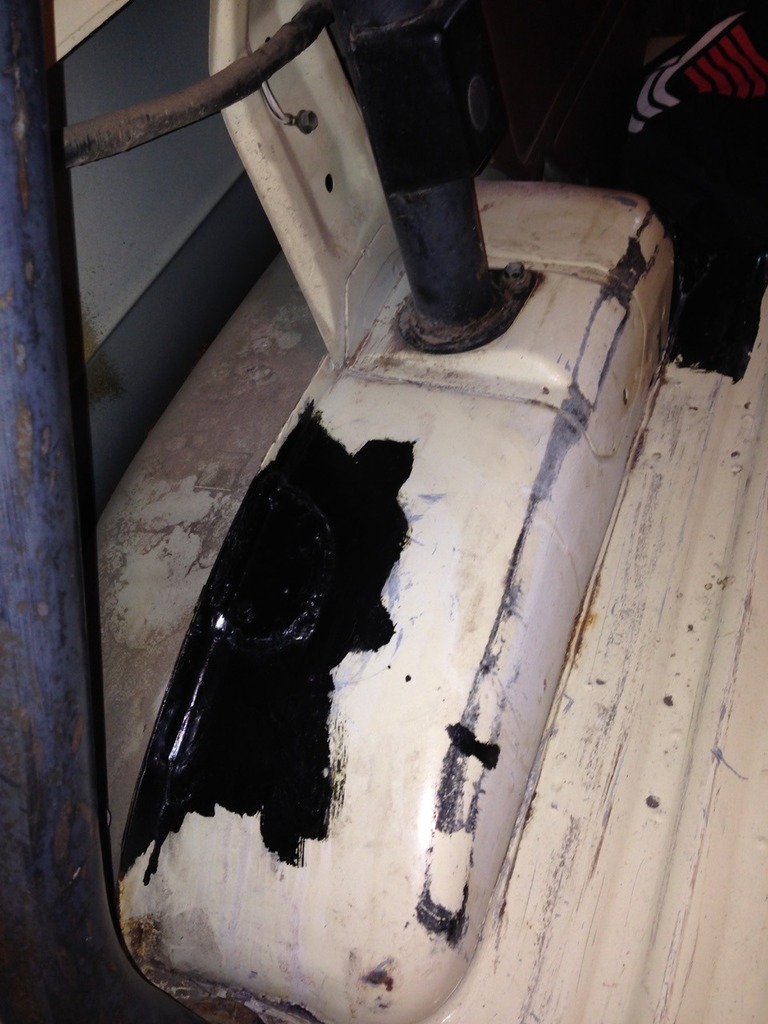
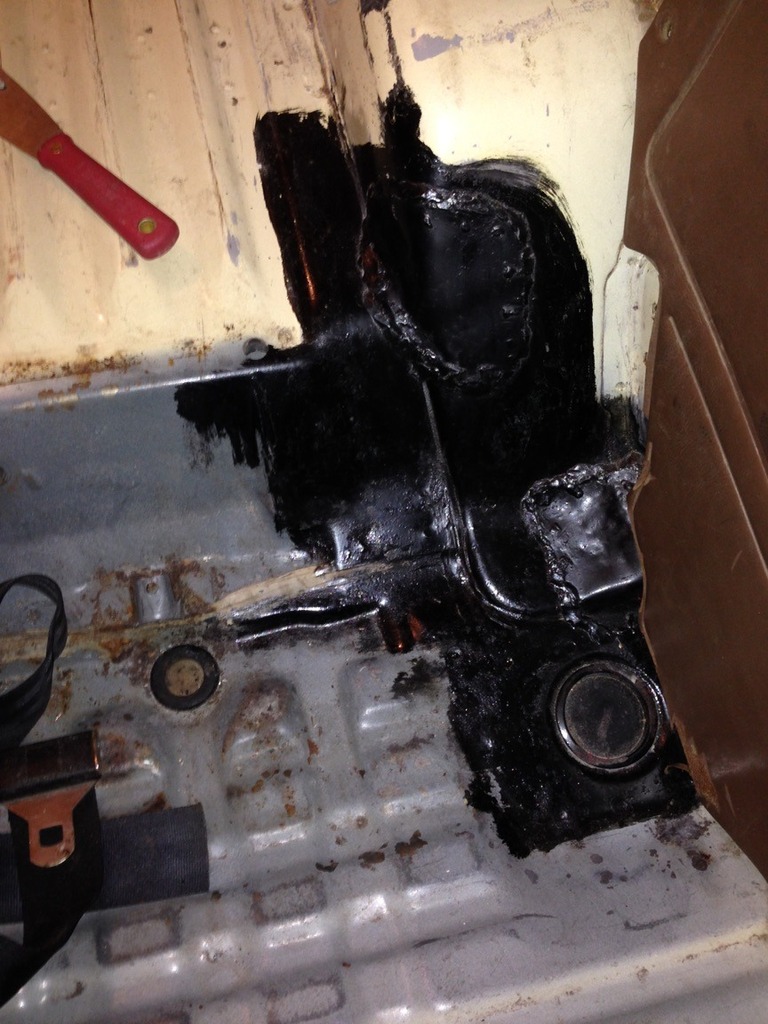
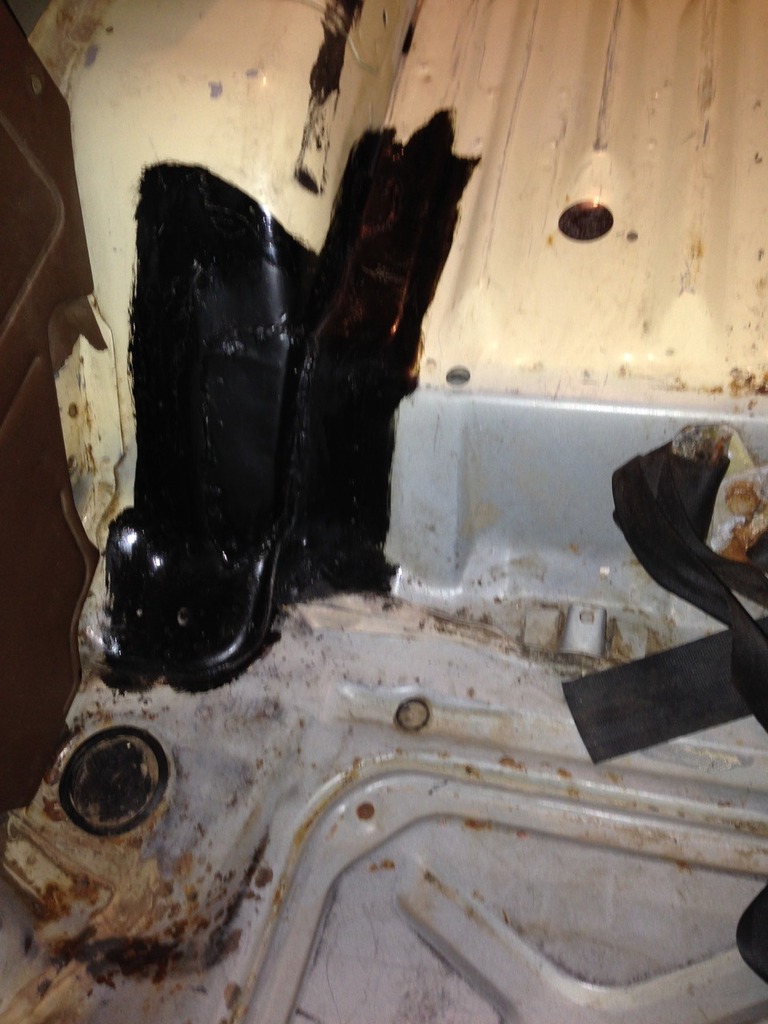
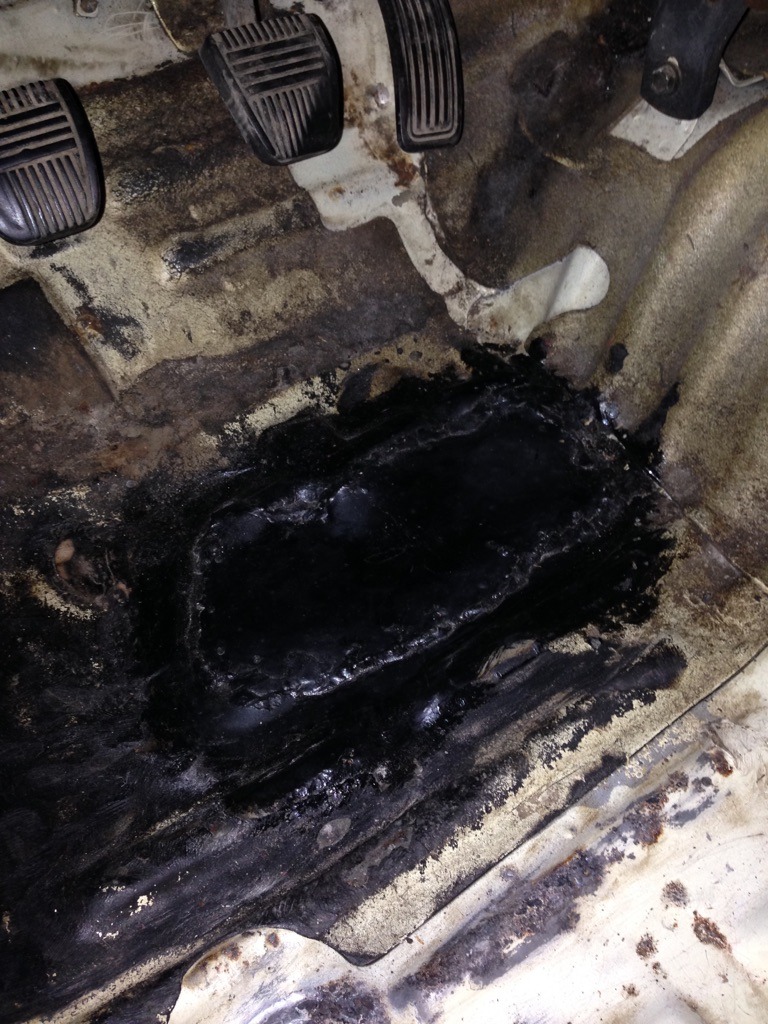
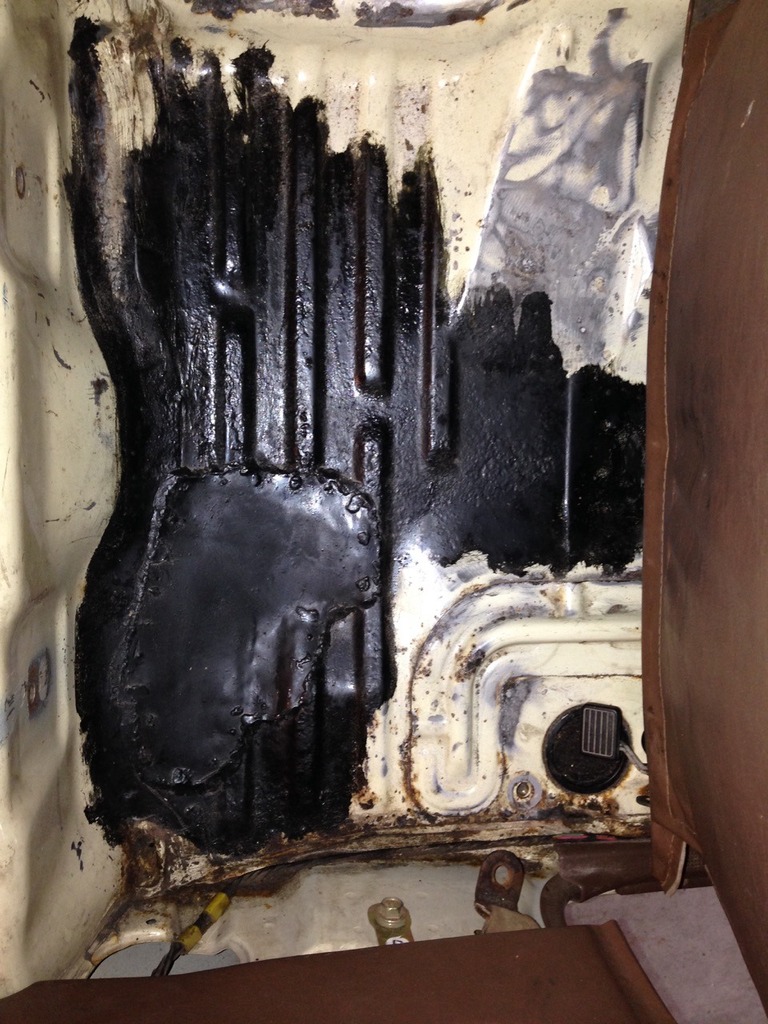
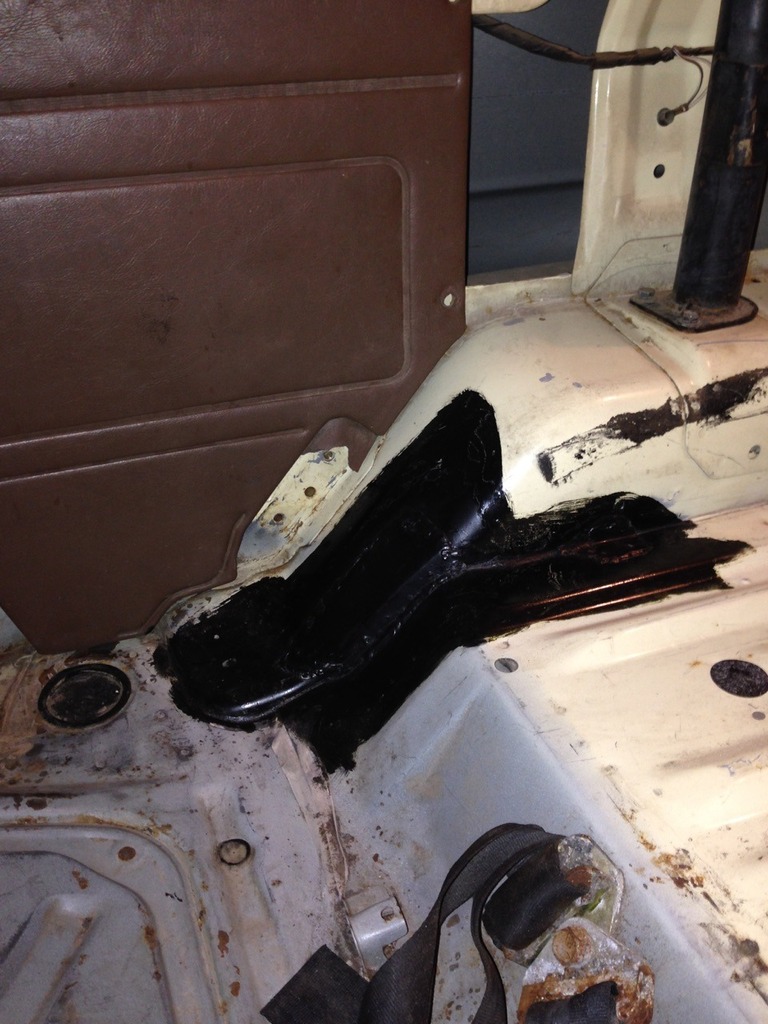
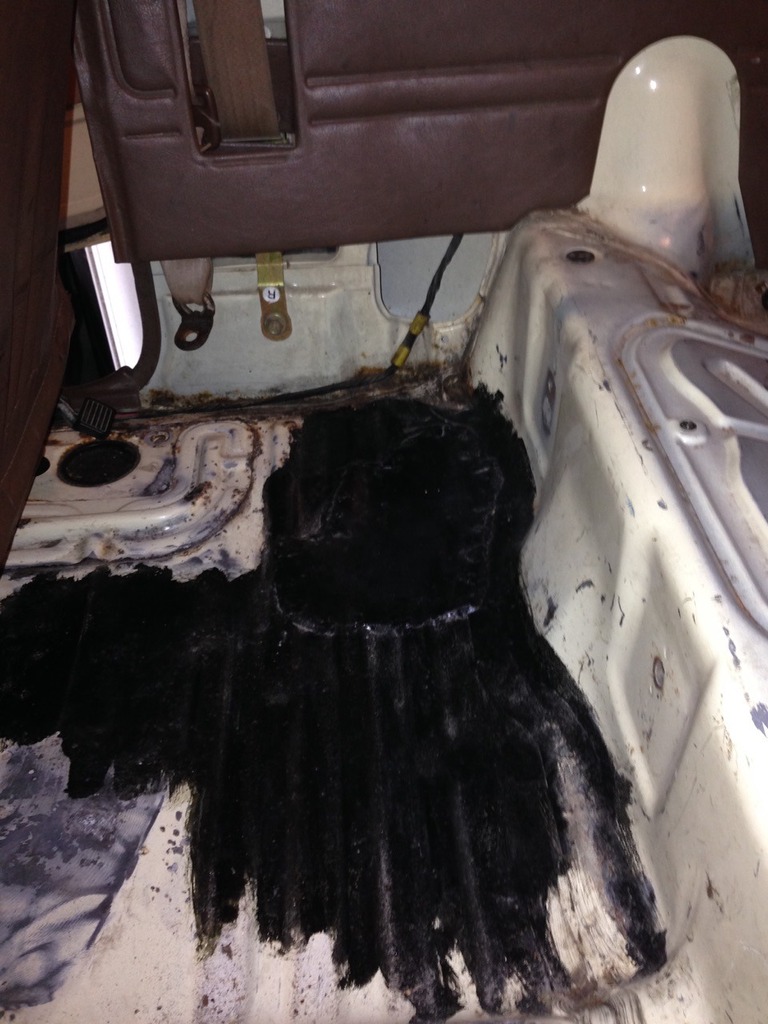
Not exactly pretty but I think it's going to work!
I ordered fresh carpet today. After reading this thread http://forum.ih8mud.com/threads/repl...t-kits.563528/ I decided to order from the same place as him. He seemed happy with product and in the picture it looked to be of good quality. He ordered color “Camel” because he said it was the only OEM color code that they suggested to him, but they suggested “Saddle 820” to me so I went with that. My original plan was to sand the whole floor pans down and repaint them in their entirety, but honestly, I don’t think I have the energy for that. But for sake of excuses I’ll say I’m sparing the neighbors from hours of a blasting angle grinder (living in an apartment sucks!) While it ships I’ll prep and paint over the spots that are clearly developing into rust problems, or shortly soon holes I’m sure, and clean the hell out of it before I lay the fresh stuff down.
Thanks!
I would definitely try to weld the holes up rather than rivet them. Even after welding I do as terry suggested with the Fiberglass. I skim coat them with some type of fiberglass reinforced filler then topcoat it, then seal it all up to prevent future rust as best as I can.
Also, Check out my build thread for a reference on the floor pan. When I did mine, I cut out the same section from another 4runner at the u-pull it and made a template for it to be an exact fit of what I cut out. Then I made it hang over about an inch all around on the pan to have an overlap that I could weld up. Again, I sealed it up with seam sealer, skim coated with the reinforced filler, and then painted over top of it.
It’s been awhile since an update - It's amazing (uh, maybe not) how inexperience and other obligations in life can slow things down. But I've gotten through the mucky part of this floor pan repair.
Shaping the sheet metal really stumped me. It has been the part I did the least amount of research on because I figured, well oh, whatever, I'll just bend it. But making the contours of the floor pan proved to be a bit of a challenge.
Started off with some fresh 20ga sheet metal

While shaping it, removing the top offered far superior access and was an incredibly advantageous move.


I created stencils of the holes using aluminum foil. I then traced the shapes on to the sheet metal. Next, I used an angle grinder with a cut off wheel to cut the sheet metal while it was clamped in a vise. After I re-clamped it and drilled holes in it which I planned to use to make plug welds. I also used a wire wheel to smooth the edges and holes and polish the metal. Next came shaping the metal into its necessary three-dimensional form. After struggling at first I made it out to be more complex than necessary. What ended up working for me was to start out the bends in the vice and then place it in truck, step on it, and hit it with a hammer. Not exactly rocket science.


Once they were shaped, and I had coordinated with my neighbor who has a welding machine and had generously, miraculously, like the heavens had opened up-dly, offerd to let me borrow it. It was time to get started melting that metal stuck.


I bought this “heat shield” blanket thing to cover the fuel lines and gas tank while welding above them. It was in the plumbing section at Home Depot for $15.

Looking at it after the job was done and seeing the use it got I think it was worth the $15 as far as not blowing myself up goes.

And, welding them in place. I’m not sure if welding them turned out better or worse than using a fiberglass kit. But, I sure learned a hell of a lot more doing it this way. First ever welding project complete!


Man, I can make some ugly welds!


So, not exactly a professional job - but I think they look better than a $1000 bill from an auto-body shop! And since they are obviously not water tight welds I filled the gaps with some epoxy-putty and a little bit of seam filler.


Since I have some Por15 that I’m going to use to paint the frame I used it to paint over the patches. Yes, I used the Marine Clean and Metal Prep.


Not exactly pretty but I think it's going to work!
I ordered fresh carpet today. After reading this thread http://forum.ih8mud.com/threads/repl...t-kits.563528/ I decided to order from the same place as him. He seemed happy with product and in the picture it looked to be of good quality. He ordered color “Camel” because he said it was the only OEM color code that they suggested to him, but they suggested “Saddle 820” to me so I went with that. My original plan was to sand the whole floor pans down and repaint them in their entirety, but honestly, I don’t think I have the energy for that. But for sake of excuses I’ll say I’m sparing the neighbors from hours of a blasting angle grinder (living in an apartment sucks!) While it ships I’ll prep and paint over the spots that are clearly developing into rust problems, or shortly soon holes I’m sure, and clean the hell out of it before I lay the fresh stuff down.
Last edited by Quinn's87RE; 07-16-2015 at 11:13 AM.
07-16-2015, 02:54 PM
#29
Outstanding job on the patch panels. I would say thats some great work for your first time!! I think you will find that those panels will last a very long time before you have to worry about them again.
Yotatech is a great place with great people that are willing to offer a ton of help. I also love it here!!
I used a cordless Sawzall when I cut my patch panels out.
Seeing your work makes me really excited to get back home and get to work on my runner.
Yotatech is a great place with great people that are willing to offer a ton of help. I also love it here!!
I used a cordless Sawzall when I cut my patch panels out.
Seeing your work makes me really excited to get back home and get to work on my runner.
07-28-2015, 07:16 AM
#31
Registered User
Thread Starter
Join Date: Oct 2013
Posts: 57
Likes: 0
Received 0 Likes
on
0 Posts
Week 10
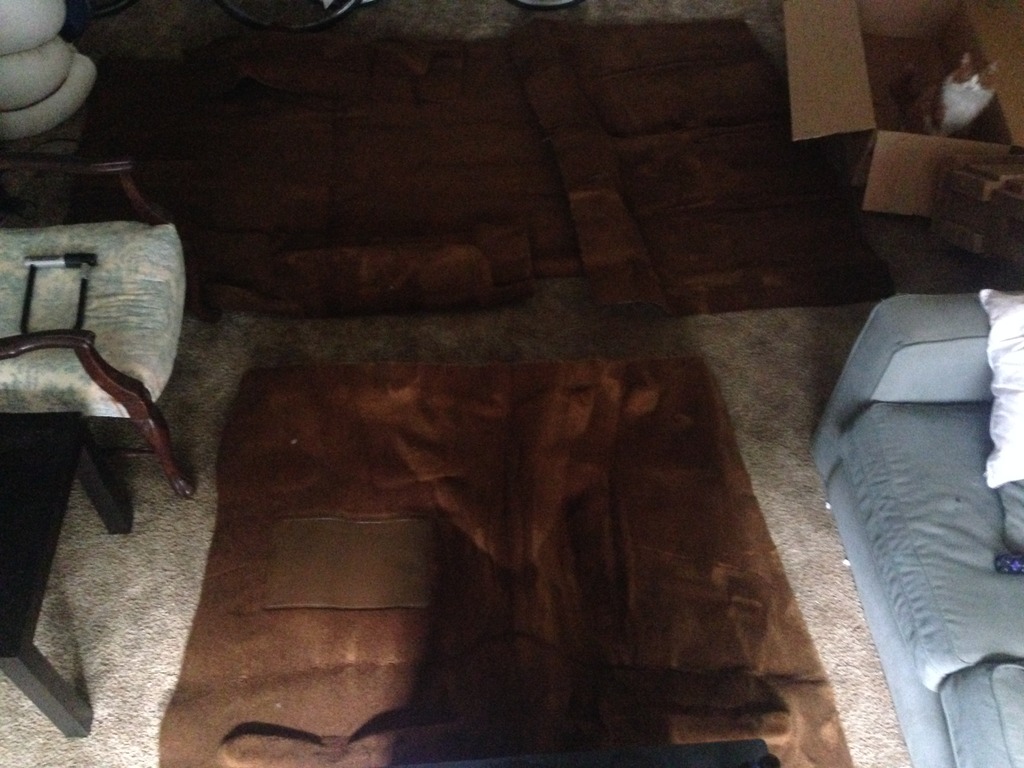
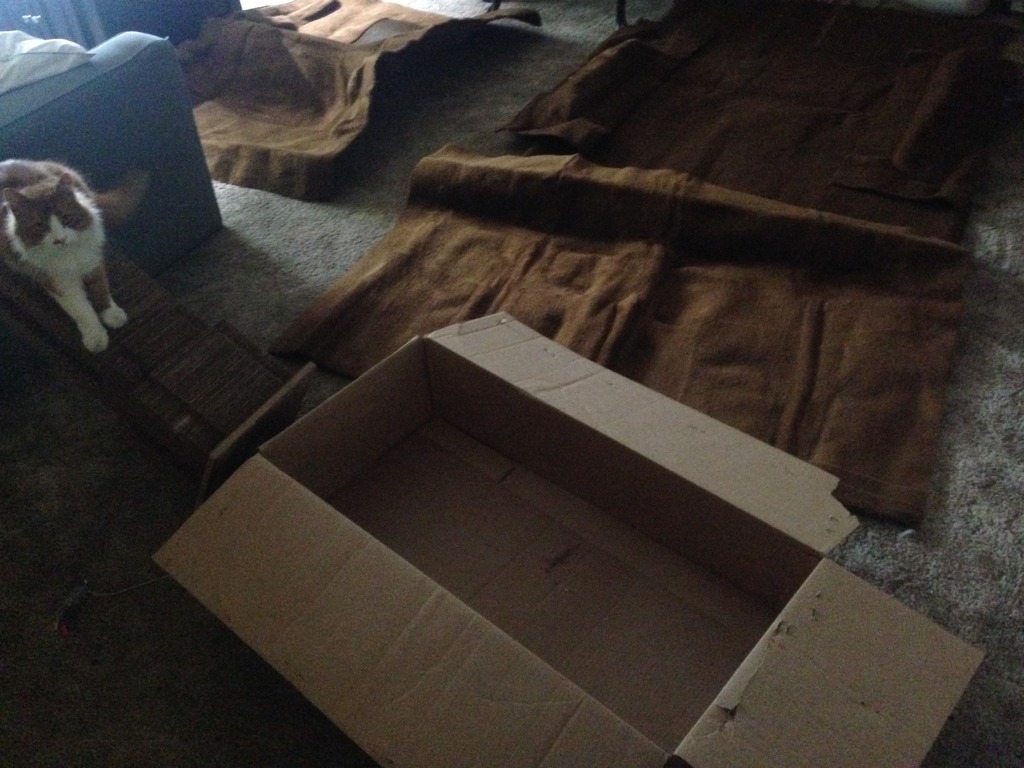
The carpet came FedEx about a week after ordering it.
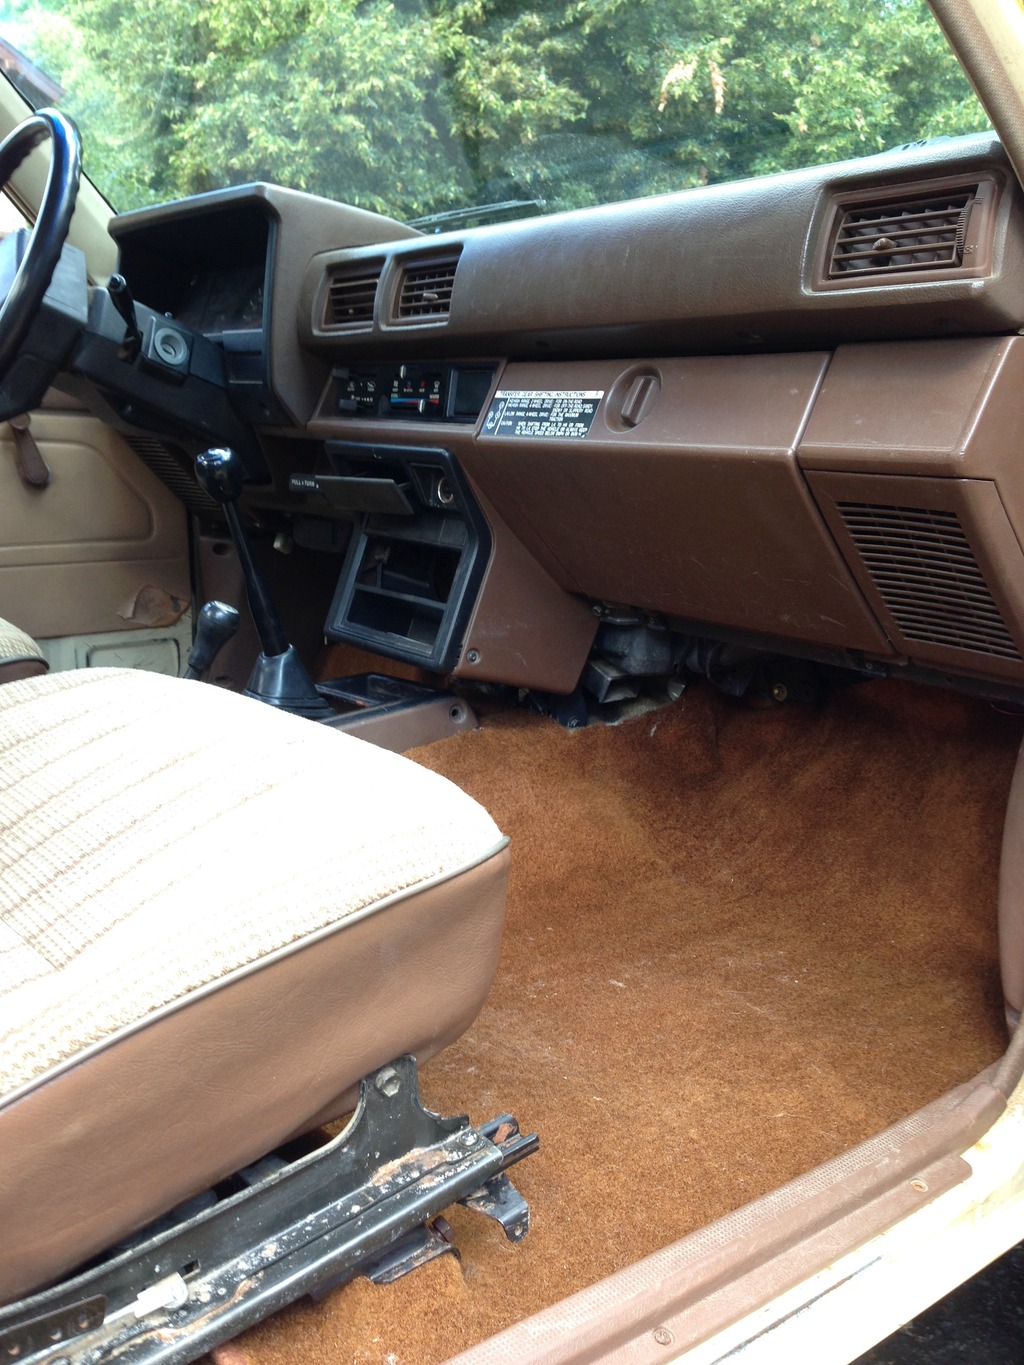
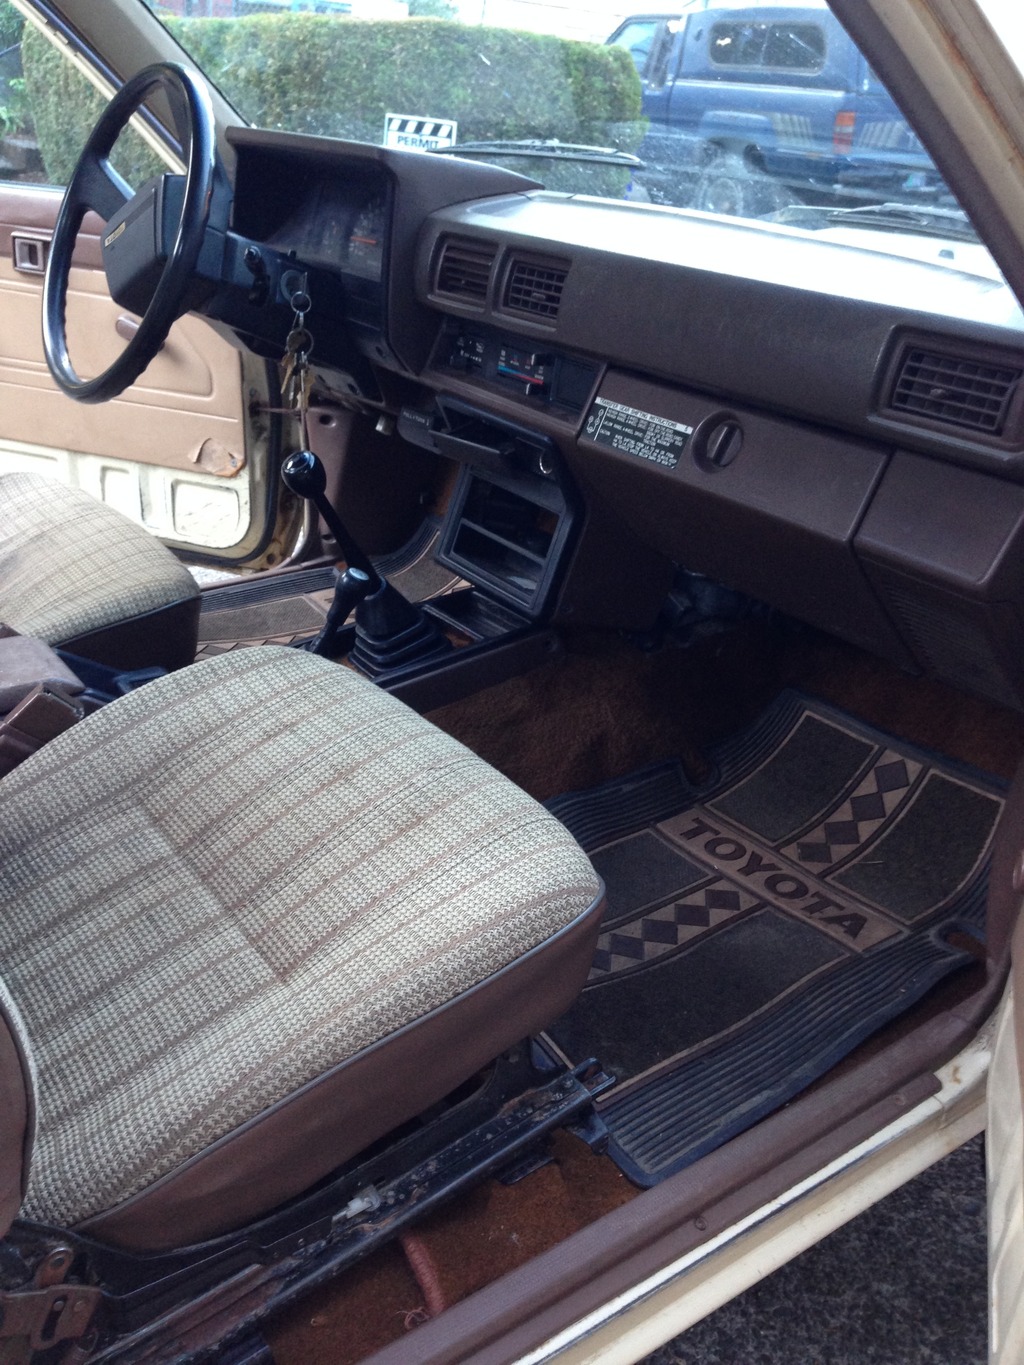
I had hosed down and scrubbed the rear seats earlier in the week, so I pulled out the front seats and did the same. It happened to be raining the whole weekend, so note the seats drying in front of the heater which I put a fan in front of. I also really cleaned the floor pans. This part was just mucky � scrubbing rust mud cake from corners, yuck. But got it clean using a degreaser and then POR15 painted more over any bare metal left from sanding or places where it had rusted through the factory paint.
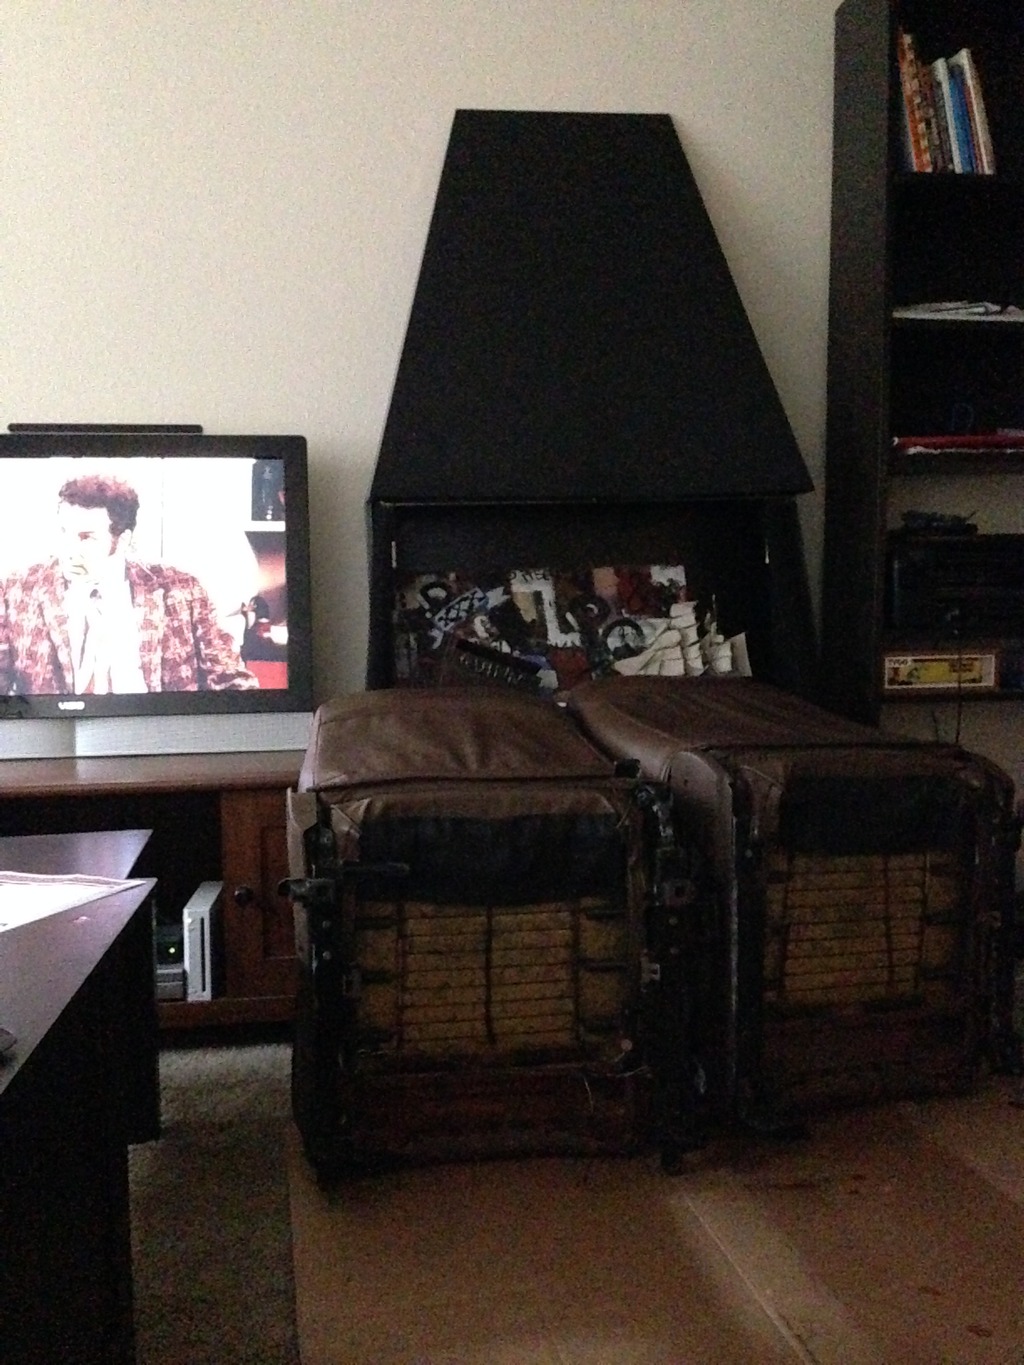

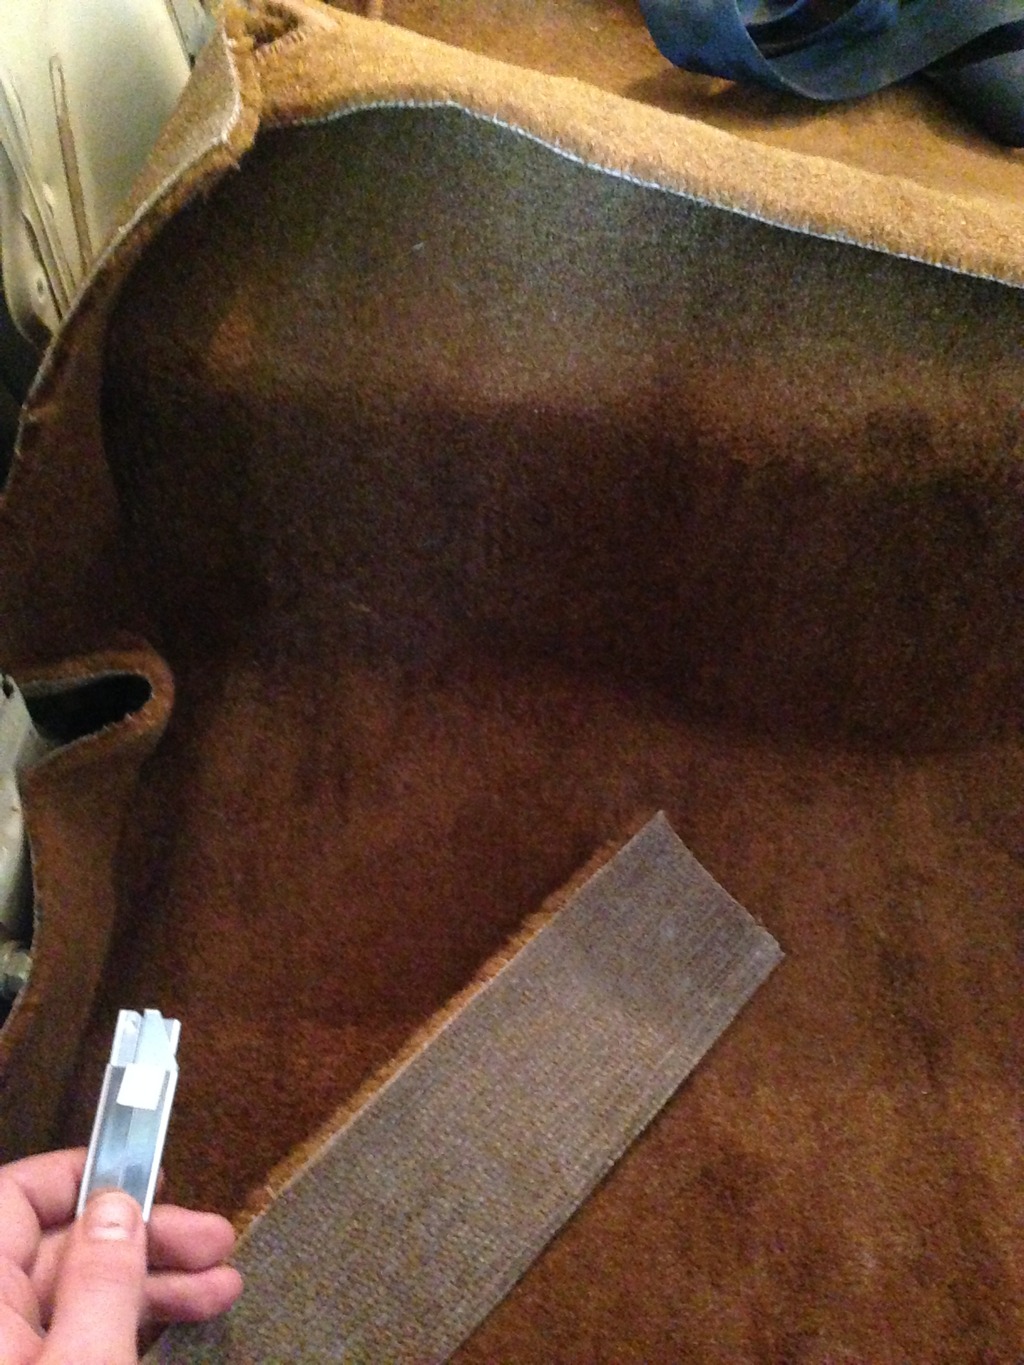
Getting the carpet fit was mostly just a PITA. A good pair of scissors would have made this go a lot smoother than the two tools I used � a razor blade and a pocket knife. The carpet itself seemed to be of good quality. The standard �mass backing� it came with was thick, you really start to notice the quality when you are trying to slice through it for bolt holes. You have to trim the width on the center section, front section, and wheel covers. Also length on front section, as well as a gap around the firewall.
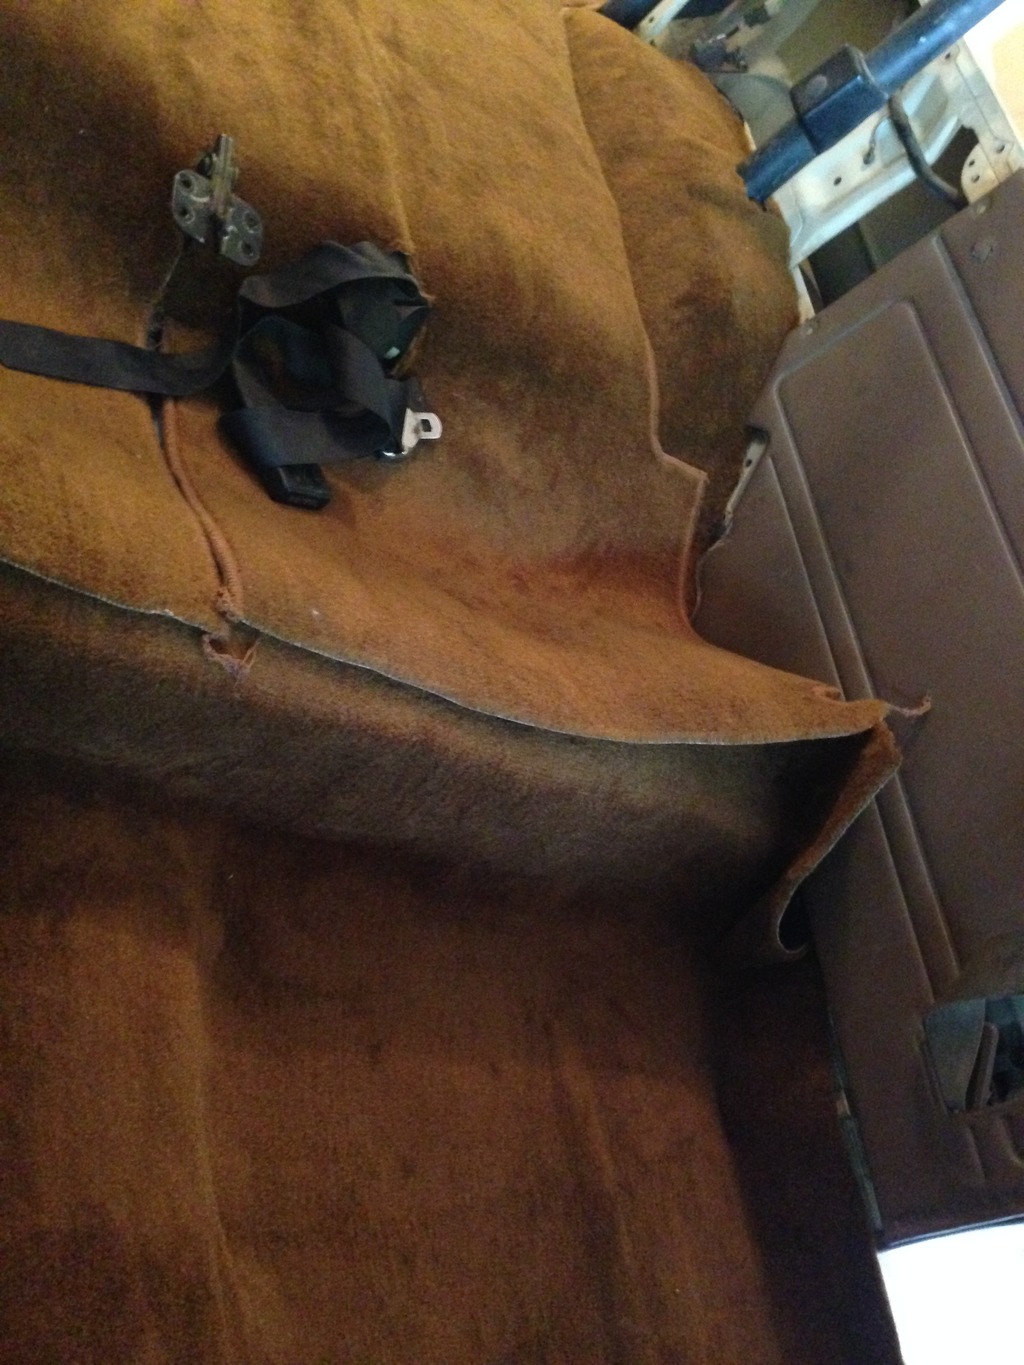
All in all, I�m happy with the way it turned out.

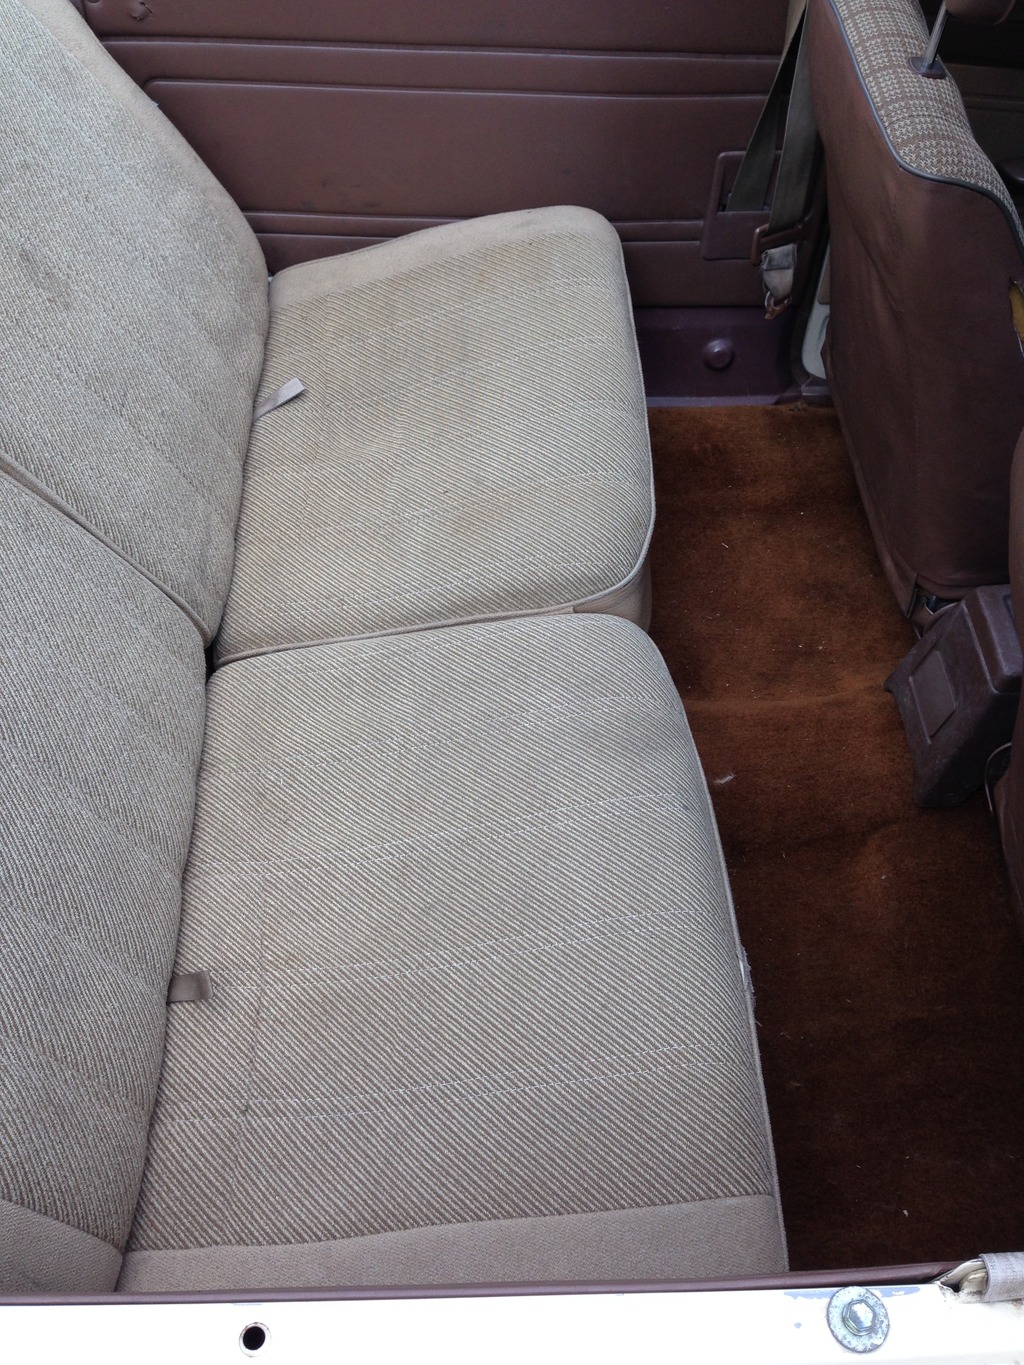
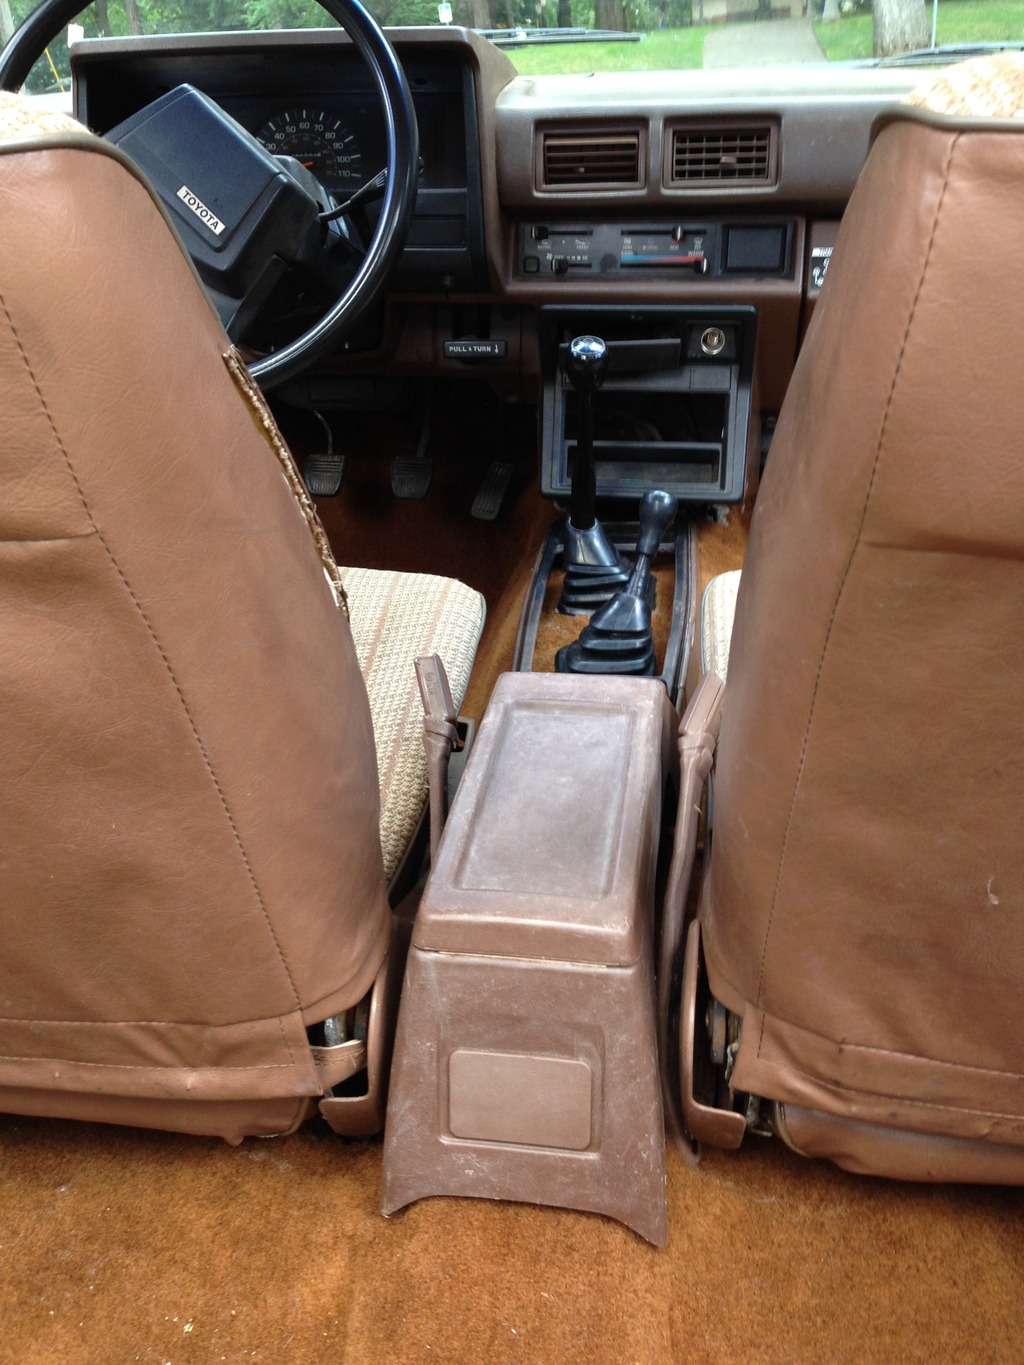
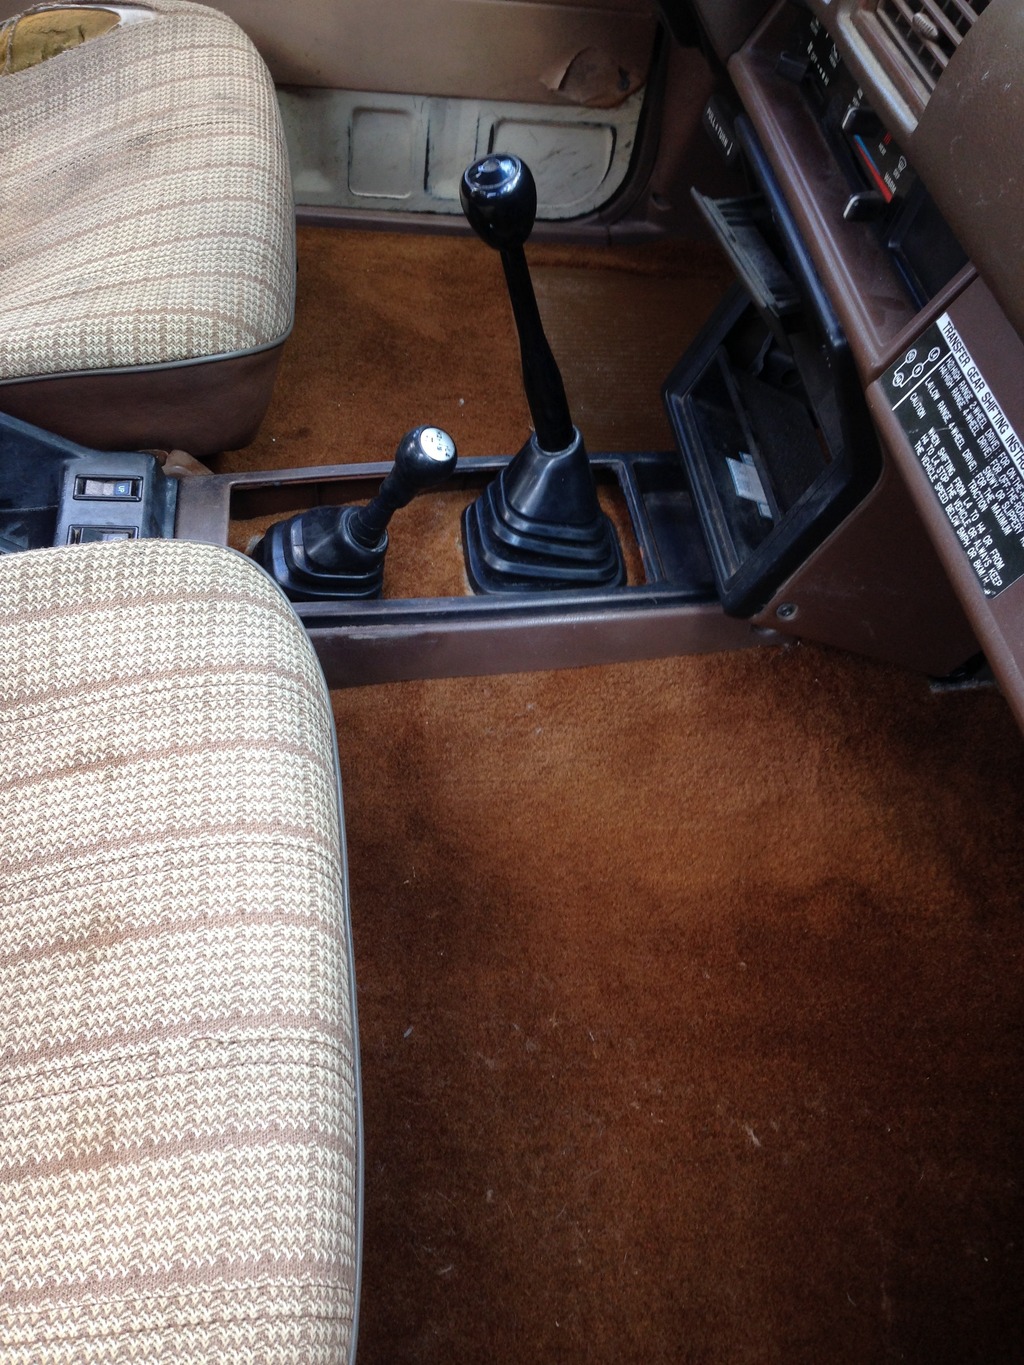


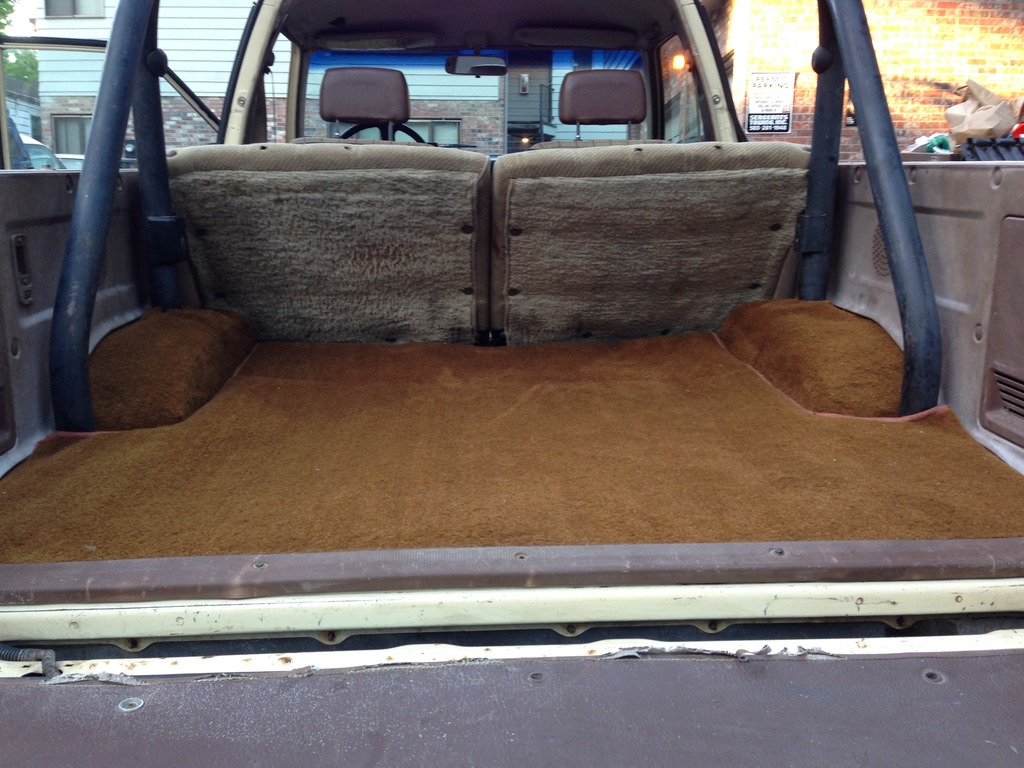
I LOVE the factory floor mats:
On to the next stuff�

The carpet came FedEx about a week after ordering it.


I had hosed down and scrubbed the rear seats earlier in the week, so I pulled out the front seats and did the same. It happened to be raining the whole weekend, so note the seats drying in front of the heater which I put a fan in front of. I also really cleaned the floor pans. This part was just mucky � scrubbing rust mud cake from corners, yuck. But got it clean using a degreaser and then POR15 painted more over any bare metal left from sanding or places where it had rusted through the factory paint.


Getting the carpet fit was mostly just a PITA. A good pair of scissors would have made this go a lot smoother than the two tools I used � a razor blade and a pocket knife. The carpet itself seemed to be of good quality. The standard �mass backing� it came with was thick, you really start to notice the quality when you are trying to slice through it for bolt holes. You have to trim the width on the center section, front section, and wheel covers. Also length on front section, as well as a gap around the firewall.


All in all, I�m happy with the way it turned out.


I LOVE the factory floor mats:

On to the next stuff�
08-11-2015, 09:27 AM
#35
Registered User
Join Date: Aug 2014
Location: Reno/Elko, Nevada
Posts: 143
Likes: 0
Received 0 Likes
on
0 Posts
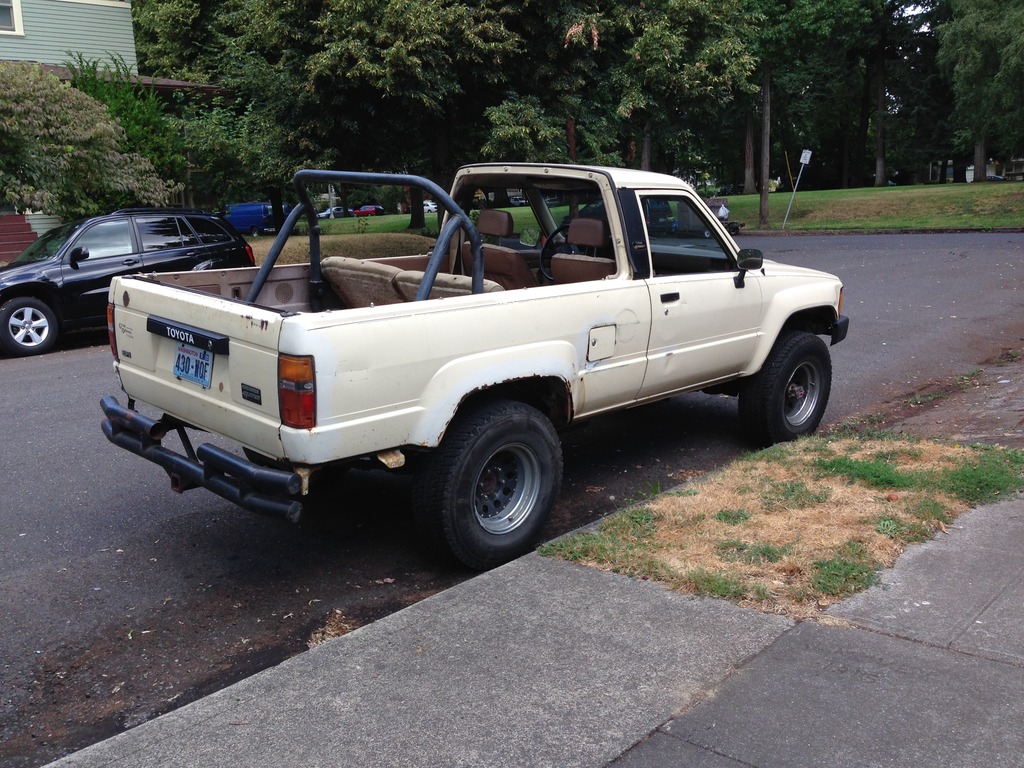
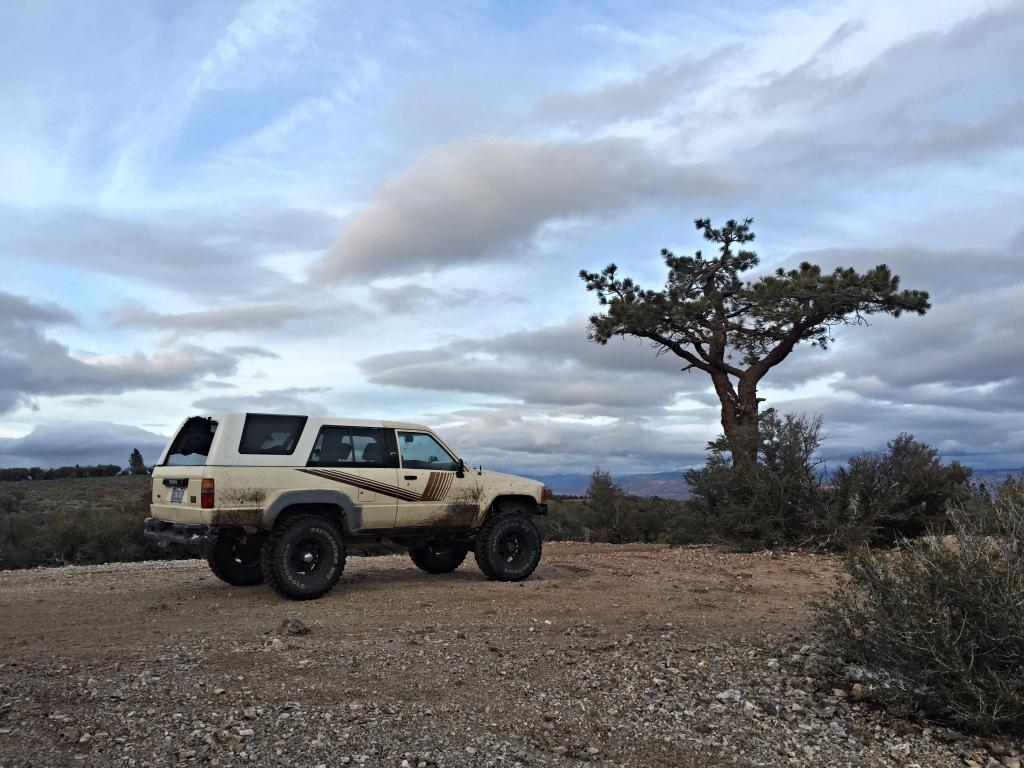
Aside from mine having a V8 and larger tires they're almost twins! My girlfriend hates the color but I dig it, planning on repainting it the same color. Nice 4Runner, have fun wrenching on it!
 08-26-2015, 11:37 AM
#37
Registered User
Thread Starter
Join Date: Oct 2013
Posts: 57
Likes: 0
Received 0 Likes
on
0 Posts
Just pulled the trigger on a full OME Old Man Emu suspension kit, as well as suggested extras like a Procomp drop draglink and extended brake lines. Not cheap. Free shipping helped out a lot. I have pretty high expectations for this setup. Hopefully it ships within a timely manner. Ordered from LowRangeOffroad.
Ordered: 1 Shipped: 1 CS009FB Toyota OLD MAN EMU / DAKAR LEAF SPRINGS $103.91 Ship Date:
Ordered: 1 Shipped: 1 OMECS009FA Old Man Emu Front Leaf Spring, Heavy Load, 110-240LBS, 2" Lift (CS009FA) $103.91 Ship Date:
Ordered: 2 Shipped: 2 OMECS009R OME MEDIUM LOAD (0LBS TO GVW) Rear Toyota 1979-88 $102.11 Ship Date:
Ordered: 2 Shipped: 2 OMEN84 Old Man Emu Nitrocharger Front Shock Absorber, 2" Lift (60061) $107.35 Ship Date:
Ordered: 2 Shipped: 2 OMESB5 Old Man Emu Front Spring Bushing Kit, Per Spring (OMESB5) $21.67 Ship Date:
Ordered: 2 Shipped: 2 OMESB6 Old Man Emu Rear Spring Bushing Kit, Per Spring (OMESB6) $21.04 Ship Date:
Ordered: 2 Shipped: 2 OMEU52 Old Man Emu Front U Bolt (OMEU52) $14.00 Ship Date:
Ordered: 6 Shipped: 6 OMEU53 Old Man Emu Rear U Bolt (OMEU53) $13.00 Ship Date:
Ordered: 1 Shipped: 1 OMESD21 1979-1985 Toyota Steering Dampener $82.77 Ship Date:
Ordered: 1 Shipped: 1 OMEGS4 Toyota OLD MAN EMU GREASABLE SHACKLES & PINS $144.39 Ship Date:
Ordered: 1 Shipped: 1 OMEGS3 Toyota OLD MAN EMU GREASABLE SHACKLES & PINS $88.47 Ship Date:
Ordered: 2 Shipped: 2 SOI OLD MAN EMU NITROCHARGER SHOCK (N85) $99.00 Ship Date:
Ordered: 1 Shipped: 1 SOI Toyota Drop Drag Link (Pro Comp EXPTOY400) $87.99 Ship Date:
Ordered: 1 Shipped: 1 TB-LK3 Toyota Brake Line Kit (2 front 1 rear) $71.10 Ship Date:
================================================== ================
Product Total: $1,490.88
Sales Tax: $0.00
Shipping: $0.00
Grand Total: $1,490.88
Last edited by Quinn's87RE; 08-26-2015 at 01:23 PM.
08-26-2015, 11:10 PM
#39
Registered User
Thread Starter
Join Date: Oct 2013
Posts: 57
Likes: 0
Received 0 Likes
on
0 Posts
I'm going to have some more sheet metal work coming up too - once I trim the rust from the rear fenders I'll have to weld in some sheet metal to close the gap b/w it and the inside of the truck. I'd also like to eventually get around to making custom side trim for the bed area.
I saw you said NWTI was your buddy...that's super cool! I've emailed him a couple of times, I wanted to, and probably still will, buy the bumper kit but the OME stuff just ended up blowing my whole budget for the time being.
08-27-2015, 08:40 AM
#40
Registered User
Join Date: Dec 2012
Location: La Center Wa
Posts: 147
Likes: 0
Received 0 Likes
on
0 Posts
Well let me know if you change your mind about doing it in your apartments. We could knock it out in a day. Don't forget I have a car lift. Yes I'm going to Browns on the 5th if we get good enough rain for them to open it back up again. Too bad you spent all that cash, we could have slapped a lift kit together for less than 4-500.


