Caroline: FGZ's '85 4Runner DD project
 04-27-2014, 05:29 PM
#1
Registered User
Thread Starter

Caroline: FGZ's '85 4Runner DD project
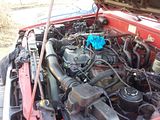
This is my on-going build thread. Here is me trying to DD and maintain a mildly-built 30 year old truck.
I'm a truck guy and was stuck in a Civic. We can't be a 3-car family right now, so in late 2012 I started seriously pursuing an 84/85 4Runner, hoping it would be the all-around vehicle I wanted: topless in the summer, 4x4 in the snow, buildable for mild wheeling, decent MPG, reliable, back seat for the kiddos, and simple enough for me to work on when it was down. After giving a few sellers the run-around (sorry, guys ) in my nation-wide, 12 month search, I finally found the best fit I thought I would come up with - a nearly rust-free mildly modded '85 in South Carolina which was headed to auction:
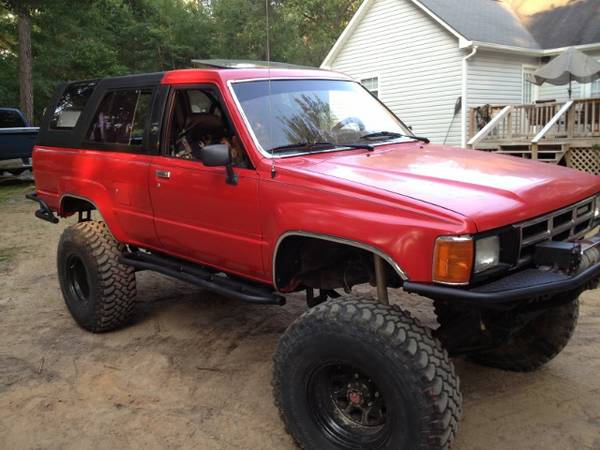
The Specs
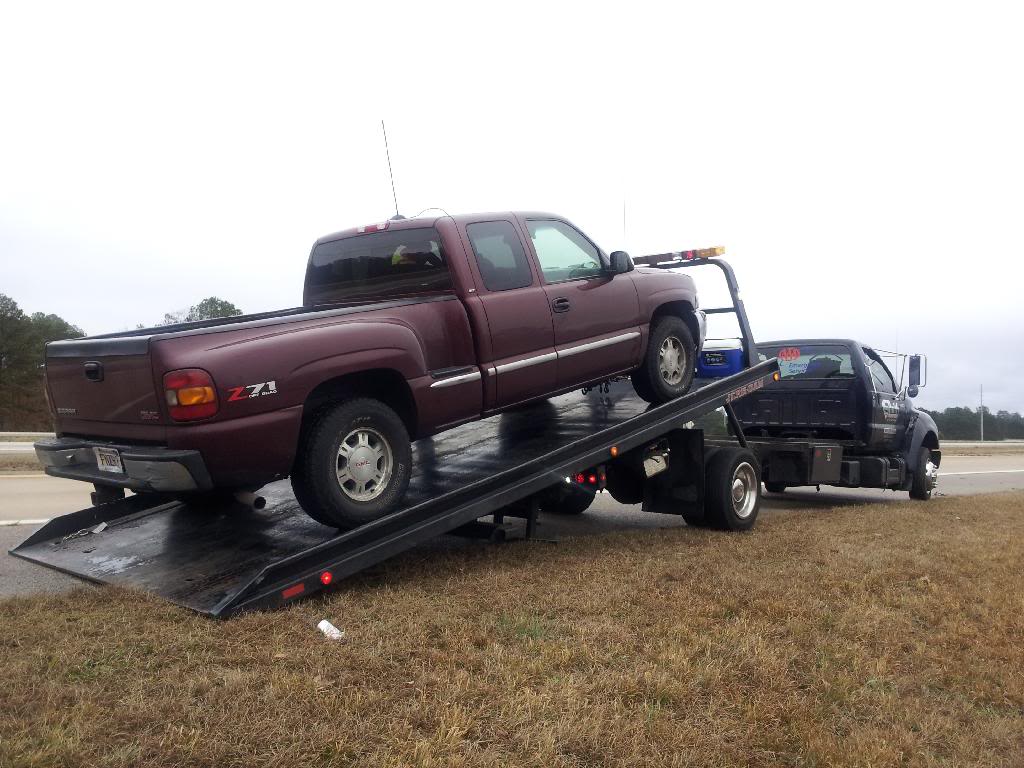
I won the auction in late Nov 2013, so in early December it was time to go pick it up and bring it back to MA. We decided to trailer it home instead of fly-n-drive, so...
ROADTRIP!!
It's about 16 hours non-stop 1-way from MA to SC, we were on hour 15 when the buddy's tow rig fuel pump gave out. Hooray for AAA
That was the only excitement of the trip, thank goodness. After I made it home and got it on the road I realized the truth in what everyone had been telling me about such an old truck: it'll need work.
She's kept me on my toes from day 1. By the end of Dec I had already gone through:
-Power fell flat on its face under 2000 rpm. Needed 2 intake hose clamps tightened so the AFM readings would quit screwing up the EFI.
-Very hard to start under 30 degrees. Cold start injector connection was loose. Still kinda shoddy, need a new connector, but it fires right up again.
-Coolant temp spikes and dives several times while warming up. Freaking scary watching a head gasket prone motor get into red zone on temp, but it always dives back down. Problem discussed all over pirate, Roger Brown did a writeup and got a 2 stage high priced thermostat on the way from LC Engineering.
The list of stuff that needed to be fixed stacked up pretty quickly, too:
-Brakes, generally suck and a caliper leaks
-Tires/wheels, because I don't like BFG muds or wide rims and this has both
-Welds, PO likes booger welds and I don't
-Suspension, lower it a bit, she's wicked tall and I don't want that kind of attention
-Exhaust, leaks at the muffler
-Horn, doesn't work and needs the contact fixed in the steering column
-Trans mount, dry rotted
-Rear driveshaft vibe
-Needs rear seat belts, and for the rear seat to be bolted in...and I don't have the bolts.
As of 4/27/14, I have done:
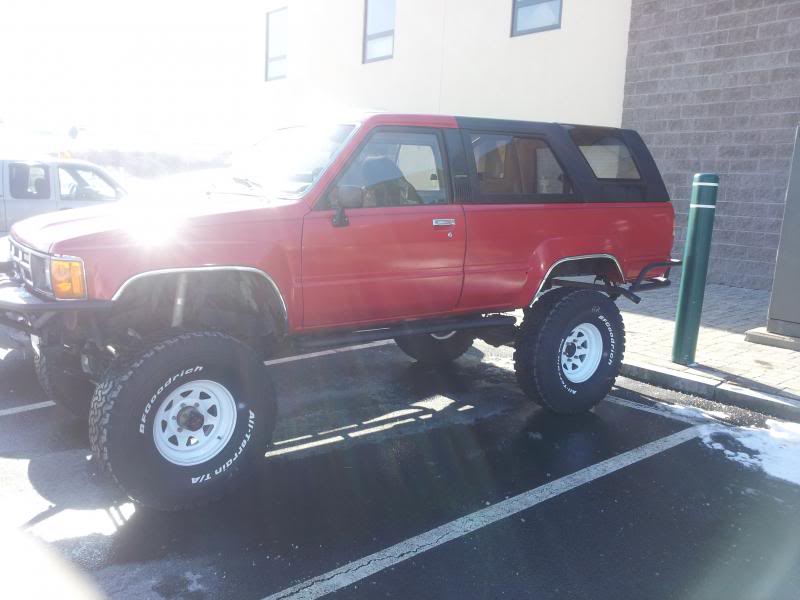
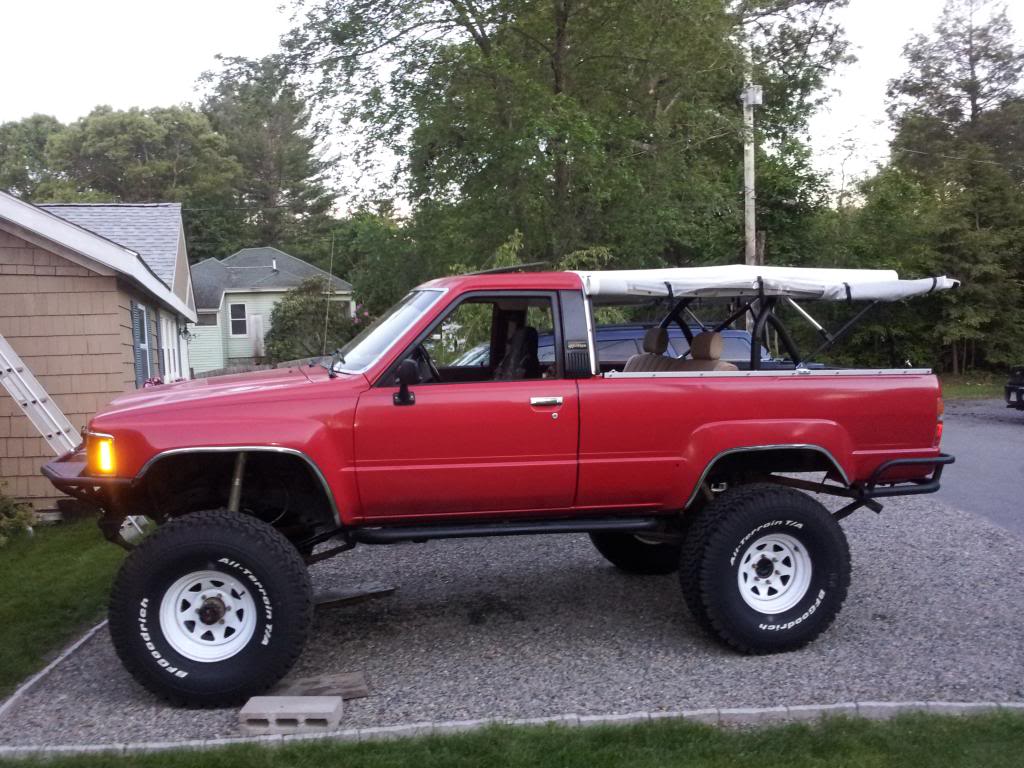
Here's what it looks like today.
Some upcoming mods I'd like to get done during the coming warm weather:
-white soft top
-go doorless
-lower it
And of course there is a laundry list of future dreams, but let's keep it simple for a few years.
Right...like anything has been simple in the 6 months I've owned it
I'm a truck guy and was stuck in a Civic. We can't be a 3-car family right now, so in late 2012 I started seriously pursuing an 84/85 4Runner, hoping it would be the all-around vehicle I wanted: topless in the summer, 4x4 in the snow, buildable for mild wheeling, decent MPG, reliable, back seat for the kiddos, and simple enough for me to work on when it was down. After giving a few sellers the run-around (sorry, guys
) in my nation-wide, 12 month search, I finally found the best fit I thought I would come up with - a nearly rust-free mildly modded '85 in South Carolina which was headed to auction:The Specs
- 22RE, unknown mileage. One owner says 60k, the other previous owner says 280k. Either way, I have good compression so I'll take it.
- '86 trans and t-case
- Rear ARB locker
- 5.29s
- Alcan springs, bilstein shocks, roughly 6" overall lift
- Sliders and bumpers
- [foreshadowing]Stock timing set[/foreshadowing]
I won the auction in late Nov 2013, so in early December it was time to go pick it up and bring it back to MA. We decided to trailer it home instead of fly-n-drive, so...
ROADTRIP!!
It's about 16 hours non-stop 1-way from MA to SC, we were on hour 15 when the buddy's tow rig fuel pump gave out. Hooray for AAA
That was the only excitement of the trip, thank goodness. After I made it home and got it on the road I realized the truth in what everyone had been telling me about such an old truck: it'll need work.
She's kept me on my toes from day 1. By the end of Dec I had already gone through:
-Power fell flat on its face under 2000 rpm. Needed 2 intake hose clamps tightened so the AFM readings would quit screwing up the EFI.
-Very hard to start under 30 degrees. Cold start injector connection was loose. Still kinda shoddy, need a new connector, but it fires right up again.
-Coolant temp spikes and dives several times while warming up. Freaking scary watching a head gasket prone motor get into red zone on temp, but it always dives back down. Problem discussed all over pirate, Roger Brown did a writeup and got a 2 stage high priced thermostat on the way from LC Engineering.
The list of stuff that needed to be fixed stacked up pretty quickly, too:
-Brakes, generally suck and a caliper leaks
-Tires/wheels, because I don't like BFG muds or wide rims and this has both
-Welds, PO likes booger welds and I don't
-Suspension, lower it a bit, she's wicked tall and I don't want that kind of attention
-Exhaust, leaks at the muffler
-Horn, doesn't work and needs the contact fixed in the steering column
-Trans mount, dry rotted
-Rear driveshaft vibe
-Needs rear seat belts, and for the rear seat to be bolted in...and I don't have the bolts.
As of 4/27/14, I have done:
- New tires/wheels
- rear seat belts acquired, installed enough to let the little one ride center spot in the back.
- trans fluid switched to Redline MT-90, although neither trans / t-case fill plug would break free. I went in through the shifters to fill, must force the fill plugs into submission sometime.
- Rear driveshaft front u-joint replaced. Helped a lot with driveshaft vibe, but I think the rear pinion angle will be the eventual fix for that, which needs to wait till I lower it.
- Timing set. This took 4 weeks at my slow pace waiting for cooperating weather and whatnot. That's the first time I've done anything that difficult, and it seems to be working so far, I'll summarize that job in my next post.
Here's what it looks like today.
Some upcoming mods I'd like to get done during the coming warm weather:
-white soft top
-go doorless
-lower it
And of course there is a laundry list of future dreams, but let's keep it simple for a few years.
Right...like anything has been simple in the 6 months I've owned it

 04-27-2014, 07:11 PM
#3
Registered User
Thread Starter
So about that stock timing set...
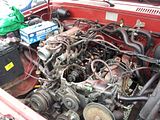
First time I pulled the valve cover, 3/15/14. I should have been more ware the Ides of March
I tried to find an easy way out. Everyone with a lick of sense told me not to try anything dumb. I listened. Truck parked as of Monday 3/17/14, timing set ordered for ENGNBLDR. I did NOT opt for the fast $65 shipping option, because I'm finally starting to learn that haste makes waste.
So, time to do my first timing set. A lot of this work is captured in real-time in THIS THREAD where Red Leader and I practice some real blind leading the blind
First things first, get ya some good help:
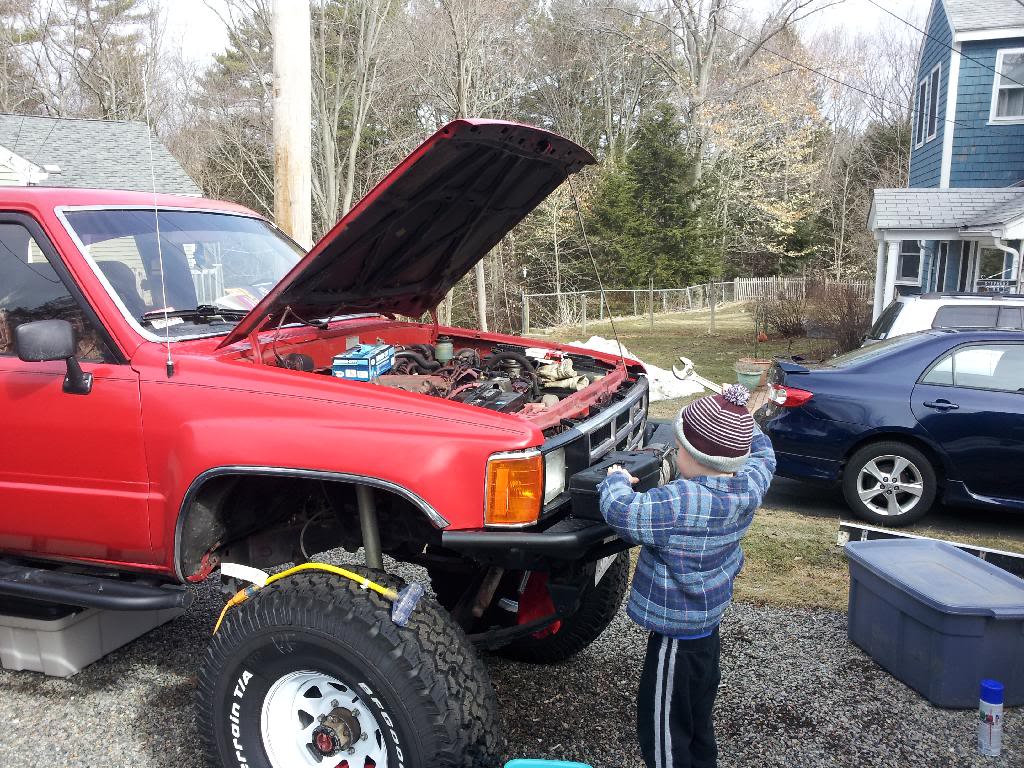
Yeah so if anyone knows where to find good help these days let me know. JK, I love the little man but he's 3.5 and there isn't a lot he can help with right now with a project like this, especially where I'm learning as I go. He's very patient, but got tired of truck work by the end.
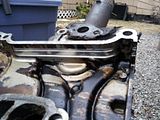
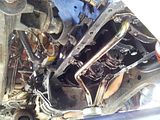
Starting the teardown
TDC at crank, cam, and distributor
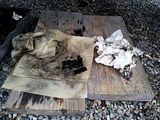
The obligatory guide pieces in the oil pan
Marking the distributor for TDC, then for position at removal
Distributor o-rings are shot, kind yota dealer gave me a new set for a mere $17
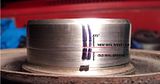
Sometimes you have to improvise a spanner wrench when you can't find one off-the-shelf:

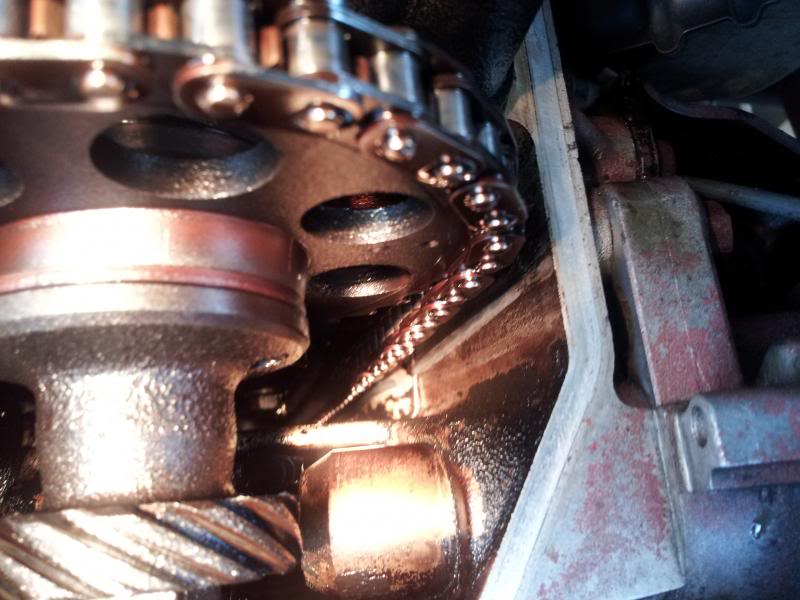
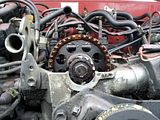
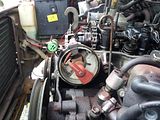
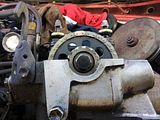
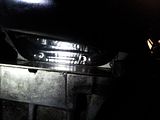
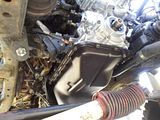
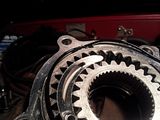
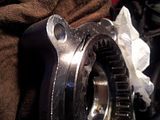
First time I've seen the inside of a timing cover, even a n00b knows you're not supposed to see THAT inside a timing cover.
Getting the new timing set back on went quite fast compared to the rest of it.

I did a dry run fit-up to check the oil seal, things looked good. This is the seal already installed in the oil pump in ENGNBLDRs kit, so that makes it easy.
Had to do some dry fitups on the TC gaskets, too. Passenger needed about 1/16" sliced off the top, driver needed about the same sliced off the bottom.
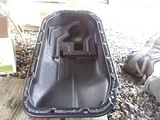
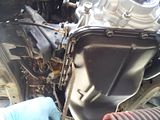
Ordered a new oil pan so I wouldn't have to clean up the old one. At $70, I thought it was a good deal. Pay close attention to your RTVing, though, kids. Haste REALLY makes waste when you're trying to get it all back together at 12:30am.

Catch the mistake? Hint: RTV has a hard time keeping the oil inside the pan when you go on the outside of the bolt holes.
And I bolted the new oil pan on too fast which made 2 bolts not line up well at all.
She looked pretty, but once I figured out I did the RTV wrong it all had to come apart, so it did.
Fast forward to "maybe cleaning up the old pan isn't such a bad idea after all". Look kids, RTV! (pan AND block corners). It needed a little prying to make the bolts line up, too, so I don't think my aftermarket pan is at fault for the mis-alignment.
Going back together, getting there!
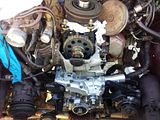
Dist went back in well, despite my best efforts to apparently clean off my TDC / insertion witness marks

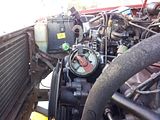
And BAM! She runs again
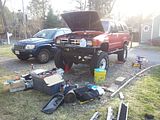
It took me over 3 weeks to get through all this. During that time I tested the radiator, which is good. A buddy let me borrow his loaner, which is even better.
My garage for the duration of this mess:
After all that, it ran for a total of 10 minutes before I started seeing an oil leak.
So shut her down till I can troubleshoot that.
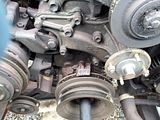
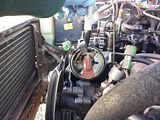
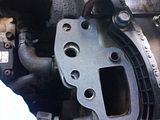
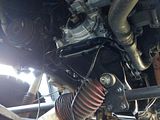
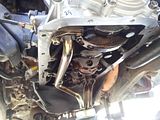
Tear it back down so I can get the fan out of the way and see the leak. Later I took off the power steering bracketry too.
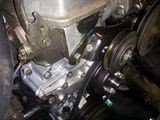
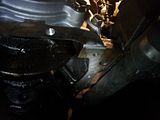
Diagnosis:
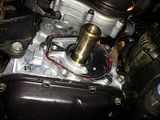
Leak down low: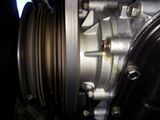 AND high on the driver's side oil pump
 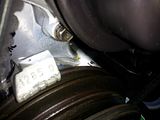 but nothing on the top/passenger oil pump
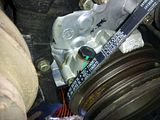
Double-check the oil seal, all OK
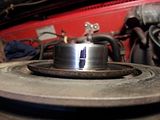
Not the sealed bolt, not the crank oil seal, must be the o-ring. YEP!
I guess I pinched it when I installed it. I used axle grease (as sticky as possible) to hold it still the next time around:
And all of a sudden it doesn't leak any more. (except from the rear main seal, which is a pre-existing condition)
The only thing I have going on now is an odd noise that sounds like a gear-driven timing set whine. Oil pressure is OK and it's running fine, so I'm going to track that down soon but not now.
First time I pulled the valve cover, 3/15/14. I should have been more ware the Ides of March
I tried to find an easy way out. Everyone with a lick of sense told me not to try anything dumb. I listened. Truck parked as of Monday 3/17/14, timing set ordered for ENGNBLDR. I did NOT opt for the fast $65 shipping option, because I'm finally starting to learn that haste makes waste.
So, time to do my first timing set. A lot of this work is captured in real-time in THIS THREAD where Red Leader and I practice some real blind leading the blind
First things first, get ya some good help:
Yeah so if anyone knows where to find good help these days let me know.
JK, I love the little man but he's 3.5 and there isn't a lot he can help with right now with a project like this, especially where I'm learning as I go. He's very patient, but got tired of truck work by the end. Starting the teardown

TDC at crank, cam, and distributor


The obligatory guide pieces in the oil pan

Marking the distributor for TDC, then for position at removal


Distributor o-rings are shot, kind yota dealer gave me a new set for a mere $17


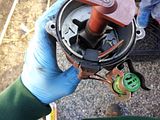
Sometimes you have to improvise a spanner wrench when you can't find one off-the-shelf:

First time I've seen the inside of a timing cover, even a n00b knows you're not supposed to see THAT inside a timing cover.


Getting the new timing set back on went quite fast compared to the rest of it.


I did a dry run fit-up to check the oil seal, things looked good. This is the seal already installed in the oil pump in ENGNBLDRs kit, so that makes it easy.

Had to do some dry fitups on the TC gaskets, too. Passenger needed about 1/16" sliced off the top, driver needed about the same sliced off the bottom.


Ordered a new oil pan so I wouldn't have to clean up the old one. At $70, I thought it was a good deal. Pay close attention to your RTVing, though, kids. Haste REALLY makes waste when you're trying to get it all back together at 12:30am.

Catch the mistake? Hint: RTV has a hard time keeping the oil inside the pan when you go on the outside of the bolt holes.
And I bolted the new oil pan on too fast which made 2 bolts not line up well at all.

She looked pretty, but once I figured out I did the RTV wrong it all had to come apart, so it did.


Fast forward to "maybe cleaning up the old pan isn't such a bad idea after all". Look kids, RTV! (pan AND block corners). It needed a little prying to make the bolts line up, too, so I don't think my aftermarket pan is at fault for the mis-alignment.


Going back together, getting there!

Dist went back in well, despite my best efforts to apparently clean off my TDC / insertion witness marks

And BAM! She runs again

It took me over 3 weeks to get through all this. During that time I tested the radiator, which is good. A buddy let me borrow his loaner, which is even better.
My garage for the duration of this mess:

After all that, it ran for a total of 10 minutes before I started seeing an oil leak.
So shut her down till I can troubleshoot that.
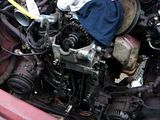
Tear it back down so I can get the fan out of the way and see the leak. Later I took off the power steering bracketry too.

Diagnosis:
Leak down low:
 AND high on the driver's side oil pump
  but nothing on the top/passenger oil pump
Double-check the oil seal, all OK

Not the sealed bolt, not the crank oil seal, must be the o-ring. YEP!


I guess I pinched it when I installed it. I used axle grease (as sticky as possible) to hold it still the next time around:

And all of a sudden it doesn't leak any more. (except from the rear main seal, which is a pre-existing condition)
The only thing I have going on now is an odd noise that sounds like a gear-driven timing set whine. Oil pressure is OK and it's running fine, so I'm going to track that down soon but not now.
04-27-2014, 07:16 PM
#4
Registered User
Thread Starter
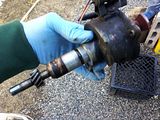
It's the t-case that is the issue. It has a leak so I need to be able to top it off, but that nut is damaged far beyond fitting a wrench so I have applied heat, hammer and chisel, etc to no avail yet. I'll win this one eventually.
04-28-2014, 12:14 AM
#5
Super Moderator
Staff
iTrader: (1)
Join Date: Aug 2008
Location: Anderson Missouri
Posts: 11,788
Likes: 0
Received 21 Likes
on
19 Posts
Great looking little runner you got and like seeing you getting in there and getting it fixed right. With your little helper, you guys will have this done in no time. lol Keep up the great work.
04-28-2014, 05:31 PM
#6
Registered User
Thread Starter
It didn't make the "to do" list above, but I have had a problem with my temp gauge not working ever since I did a t-stat 4 months ago. I'm starting to think it's because of air in the system, so I'm checking into a proper procedure for burping the coolant system
04-28-2014, 07:24 PM
#7
Super Moderator
Staff
iTrader: (1)
Join Date: Aug 2008
Location: Anderson Missouri
Posts: 11,788
Likes: 0
Received 21 Likes
on
19 Posts
There are several things you can do to help improve the temp guage.
Clean the ground wire contact by the fuse box next to the drivers kick panel. I scratch off the paint for a better connection.
Clean the sensor, it is located between cylinders 2 and 3. I think it takes a 17mm deep well to get it out. Usually it has a hard water build up on it.
Burp the system. It will spew out some water. Raise the front end as high as possible and let it idle with the radiator cap off of it for 10-15 minutes.
After going thru this thread https://www.yotatech.com/forums/f116...ge-fix-271152/ make sure all screws are tight in the guage.
Trending Topics
05-16-2014, 06:39 AM
#8
Registered User
Thread Starter
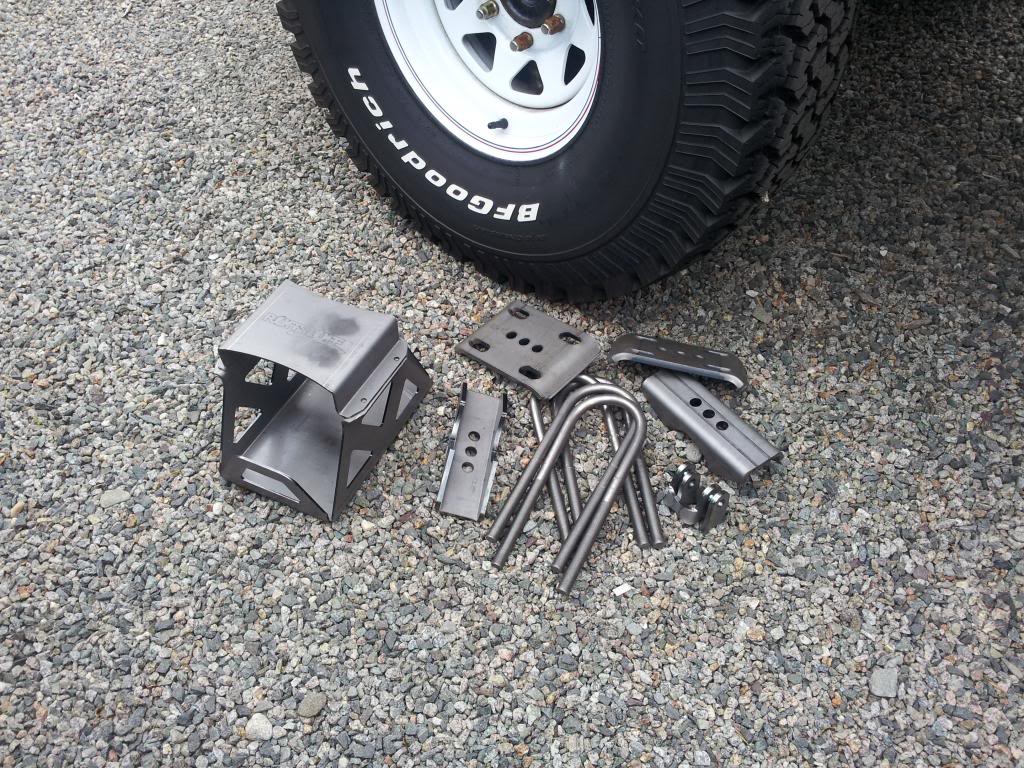
RuffStuff had a 20% off special last weekend. FGZ saved 20% swapping out the cracked rear perches, correcting the rear pinion angle, and boxing his future Odyssey battery.
06-09-2014, 05:32 PM
#9
Registered User
Thread Starter
I haven't done much with it except daily driver troubleshooting.
Leaky windshield or sunroof gives me water in the cab on the regular, but one time it stuck my windshield wipers in the ON mode. Standing water in the wiper relay apparently, fixed
My rear oil seal leak is nice and consistent, I'm adding 1/2 quart every 2 weeks or so. Today I switched to Valvoline maxlife 10W-40 to see if that makes any improvement. It will be a pain to do that RMS, I'd rather wait until I'm putting in a doubler, new clutch, and rebuilt W56 to do a RMS. That's like $1700 away, in parts alone booo.
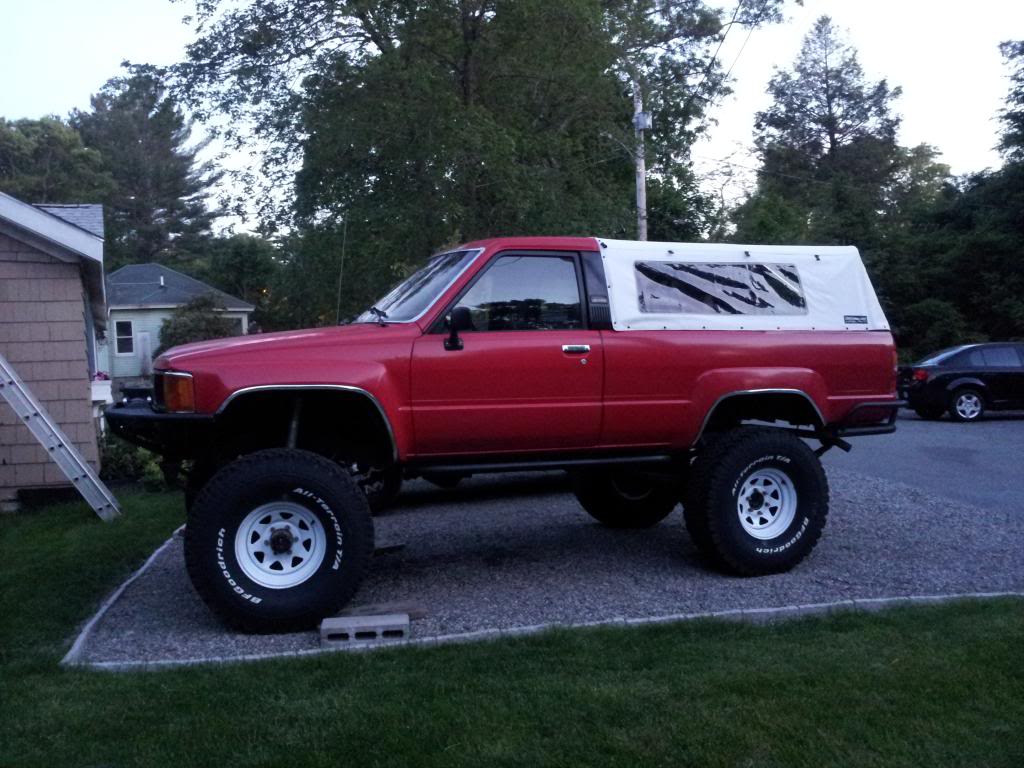
So to make myself feel better I put on the soft top for the first time!
Leaky windshield or sunroof gives me water in the cab on the regular, but one time it stuck my windshield wipers in the ON mode. Standing water in the wiper relay apparently, fixed
My rear oil seal leak is nice and consistent, I'm adding 1/2 quart every 2 weeks or so. Today I switched to Valvoline maxlife 10W-40 to see if that makes any improvement. It will be a pain to do that RMS, I'd rather wait until I'm putting in a doubler, new clutch, and rebuilt W56 to do a RMS. That's like $1700 away, in parts alone booo.
So to make myself feel better I put on the soft top for the first time!

Thread
Thread Starter
Forum
Replies
Last Post
Flying91
86-95 Trucks & 4Runners (Build-Up Section)
45
04-11-2024 04:39 PM
jasonty
Pre 84 Trucks (Build-Up Section)
41
12-23-2018 01:00 PM
BeMiceElf
Misc Stuff (Vehicle Related)
7
10-10-2015 09:40 PM


