BlazeN8s 85 L.A./ 86 L.T. Build-Up Thread
 07-30-2014, 08:40 PM
#61
Registered User
Thread Starter
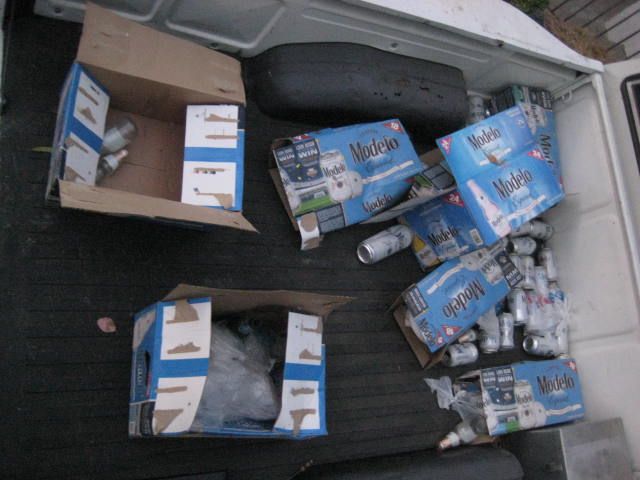
I almost forgot a few more photos from last Sundays outing.
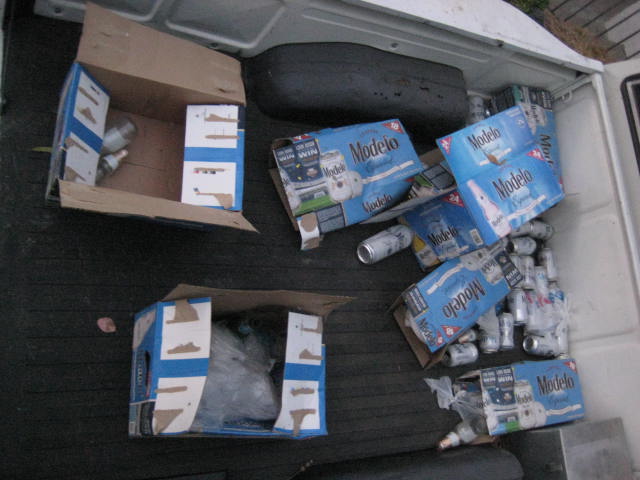
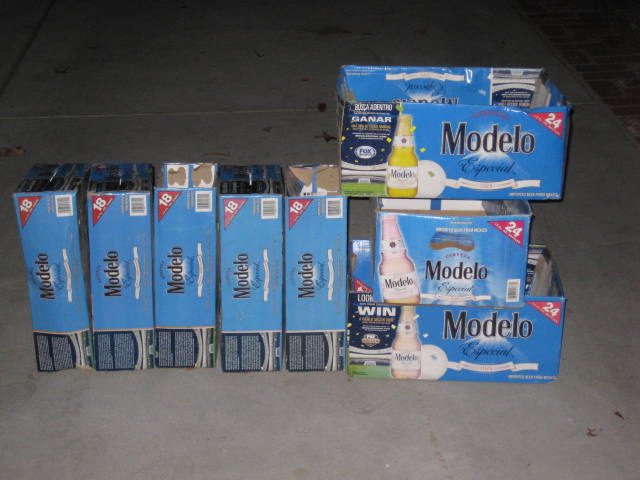
The trash I pulled off the mountainside. No wonder the gate to the trail keeps getting locked. I was only able to recover some of the trash these party fools leave behind. Of the 90 cans from the five cases I may have been able to recover 20. Of the 72 bottles maybe 10. The rest are swallowed up by the sage brush. It just makes me sick some people are so lame. This is what contributes to the closing of our trails. Pack it in pack it out, please!
The trash I pulled off the mountainside. No wonder the gate to the trail keeps getting locked. I was only able to recover some of the trash these party fools leave behind. Of the 90 cans from the five cases I may have been able to recover 20. Of the 72 bottles maybe 10. The rest are swallowed up by the sage brush. It just makes me sick some people are so lame. This is what contributes to the closing of our trails. Pack it in pack it out, please!
 07-31-2014, 04:31 AM
#62
Registered User
I almost forgot a few more photos from last Sundays outing.

The trash I pulled off the mountainside. No wonder the gate to the trail keeps getting locked. I was only able to recover some of the trash these party fools leave behind. Of the 90 cans from the five cases I may have been able to recover 20. Of the 72 bottles maybe 10. The rest are swallowed up by the sage brush. It just makes me sick some people are so lame. This is what contributes to the closing of our trails. Pack it in pack it out, please!
The trash I pulled off the mountainside. No wonder the gate to the trail keeps getting locked. I was only able to recover some of the trash these party fools leave behind. Of the 90 cans from the five cases I may have been able to recover 20. Of the 72 bottles maybe 10. The rest are swallowed up by the sage brush. It just makes me sick some people are so lame. This is what contributes to the closing of our trails. Pack it in pack it out, please!
 07-03-2015, 03:49 PM
#67
Registered User
Thread Starter
The Grudge Match continues.....
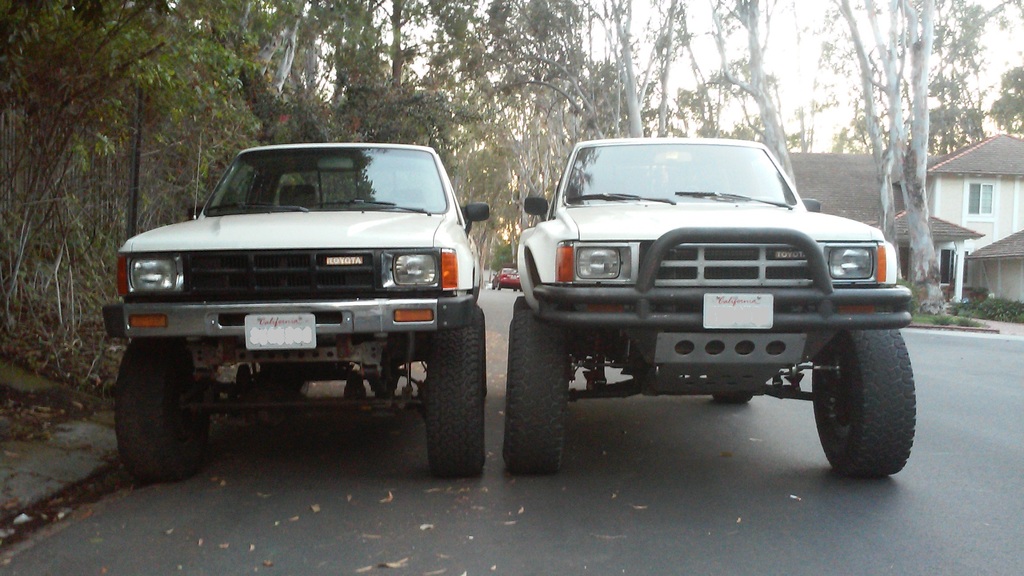
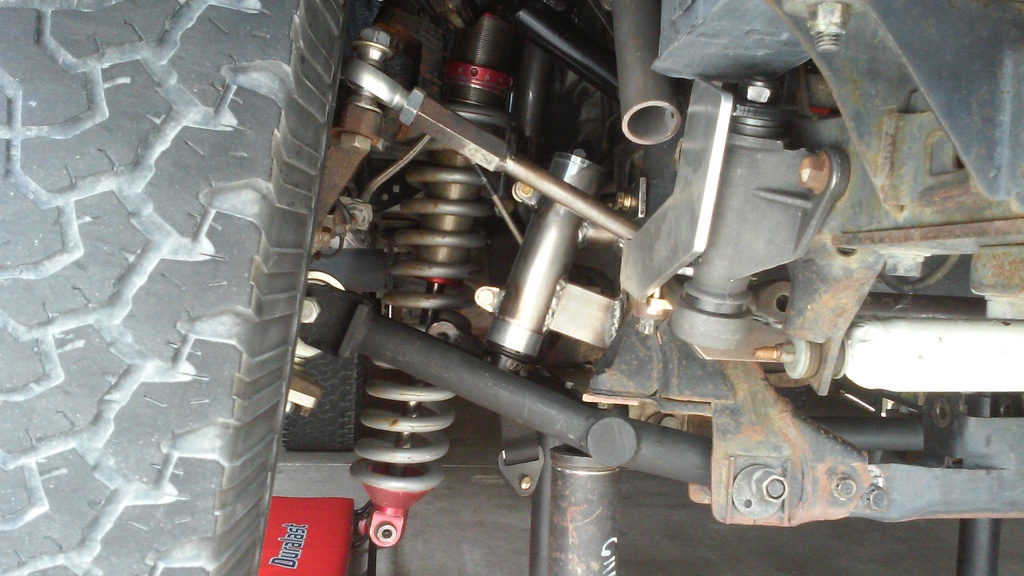
Well actually things are evolving with the Fordota becoming more of a dedicated Pre-Runner, Pro 2 style ride. Yep ditched the 4WD. Added a 4" lift spindle. Gained 4" of clearance at the front cross member. Front end went on a diet and lost a couple of hundred lbs. CVs, driveshaft, drop brackets, front differential, etc. all add up. The LCAs and UCAs are lightened up as well, they are tubular now, 1-3/4 and 1-1/2" .120 wall DOM.
The suspension design is very similar my 4Runner's "Mega Travel" in terms of the UCAs, steering, and 4" spindle spacer, but the LCAs pivot in the factory location and not off a drop bracket subframe. There is a CNC machined spindle adapter, I designed and my brother machined, that accepts a 1" uniball heim with a 1-14 shank. The spindle adapter bracket along with the 4" spindle spacer creates a Poor Man's bolt on lift spindle. Check out the clearance differences between the truck and 4Runner?
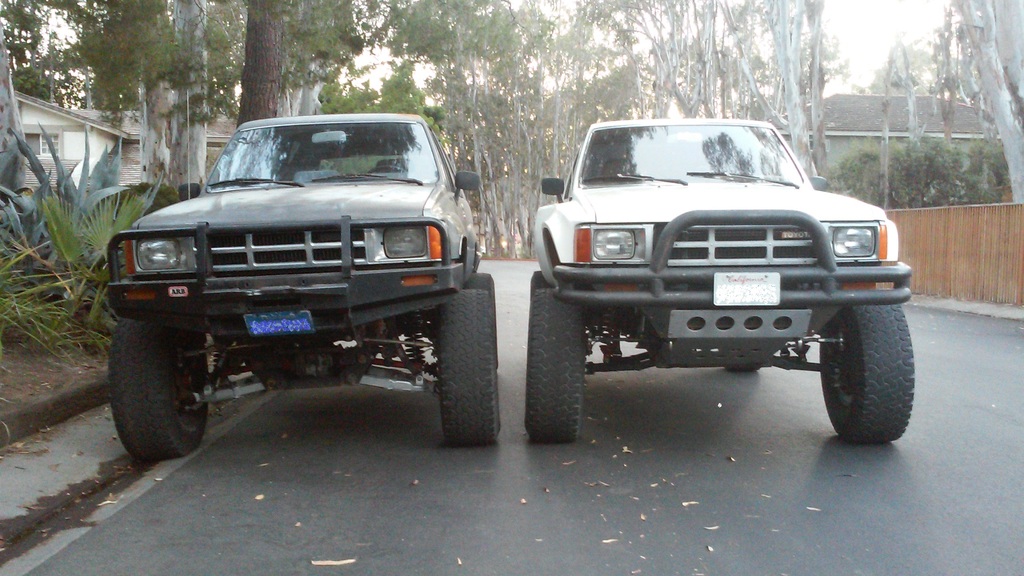
The ride height is about the same as before with the 4" drop bracket, about 5" of lift. The Chevy 63's in the rear give a nice leveling to the equation.
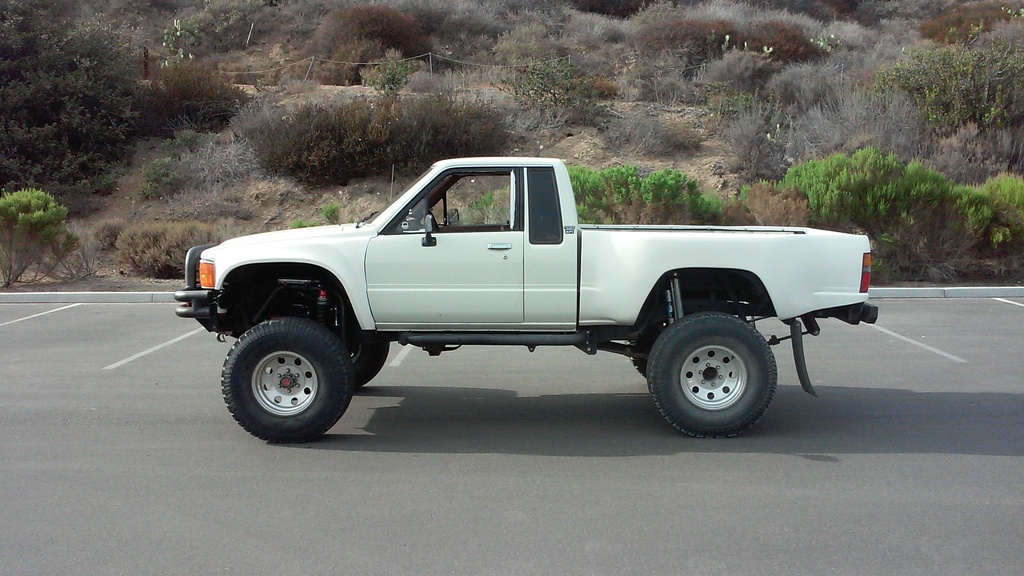
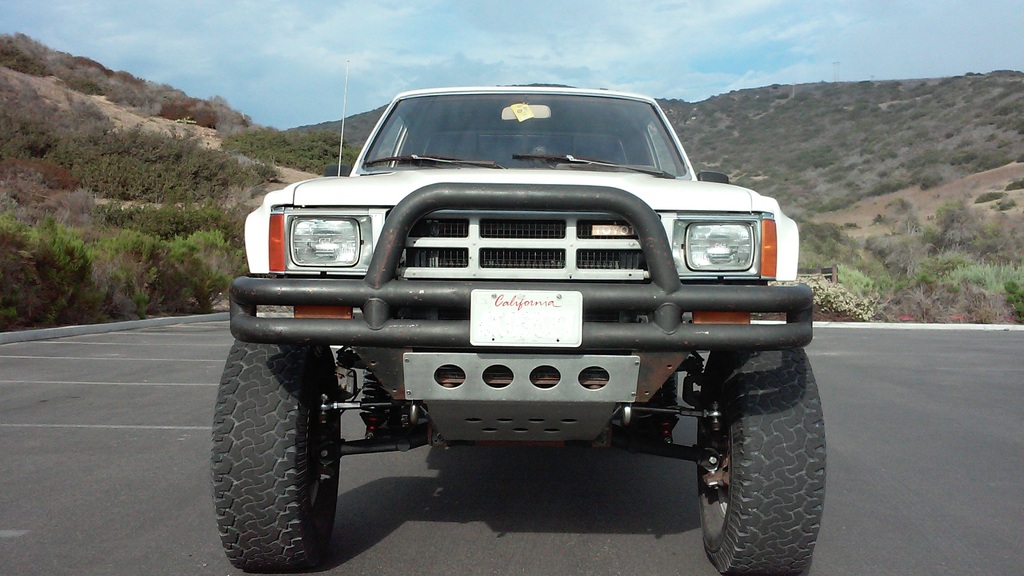
Track width is about +7" or 3-1/2" wider per side. I'm really digging the ground clearance at the front cross member. It worked out nice that I got to put my front skid plate / strut frame back in place without the drop bracket B.S. hanging down.
The 4Runners Mega Travel system (MT-Pro4) cycles around 14-15" of travel. This new lift spindle design (MT-Pro2) is cycling 16-17" of travel. The LCA on the Pro4 rotate on relocated pivots within the drop bracket subframe but the Pro2 pivots in the factory location so its shorter and thus gives more camber change. There is also more bump steer. I am still tweaking geometry and alignment characteristics. I also am playing with ride height and coil spring length and spring rates.
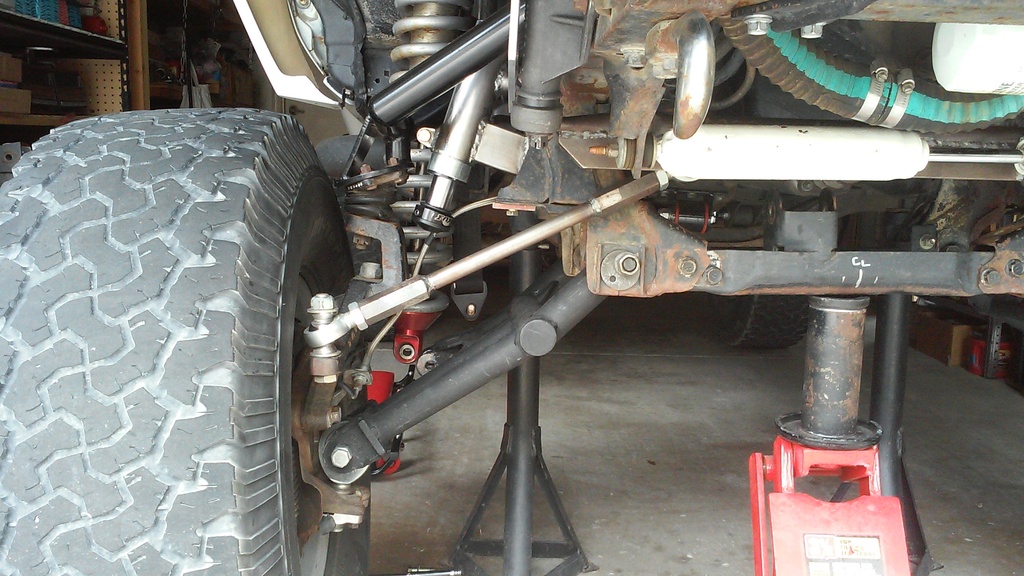
Here are a few photos I took as I did the installation.
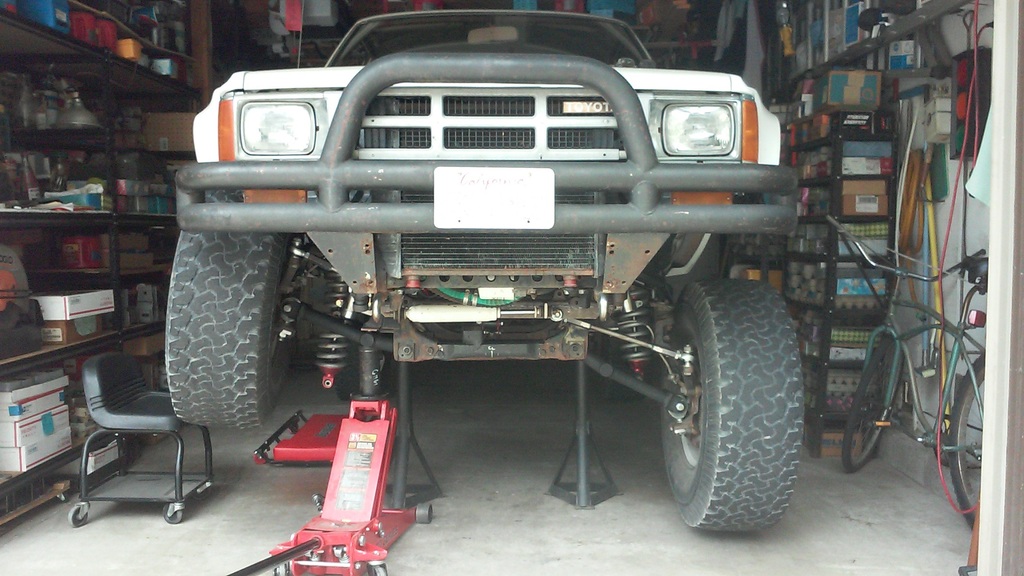
At max up travel with air bump compressed the top of the tire is 5" from the fender.
At max droop with limit straps detached the top of the tire is 22" from the fender. I set the strap to allow some stretch and the distance went from 22" to 21" By my calculations 21" - 5" = 16" The Sweet 16 of usable travel has been attained.
Well actually things are evolving with the Fordota becoming more of a dedicated Pre-Runner, Pro 2 style ride. Yep ditched the 4WD. Added a 4" lift spindle. Gained 4" of clearance at the front cross member. Front end went on a diet and lost a couple of hundred lbs. CVs, driveshaft, drop brackets, front differential, etc. all add up. The LCAs and UCAs are lightened up as well, they are tubular now, 1-3/4 and 1-1/2" .120 wall DOM.
The suspension design is very similar my 4Runner's "Mega Travel" in terms of the UCAs, steering, and 4" spindle spacer, but the LCAs pivot in the factory location and not off a drop bracket subframe. There is a CNC machined spindle adapter, I designed and my brother machined, that accepts a 1" uniball heim with a 1-14 shank. The spindle adapter bracket along with the 4" spindle spacer creates a Poor Man's bolt on lift spindle. Check out the clearance differences between the truck and 4Runner?
The ride height is about the same as before with the 4" drop bracket, about 5" of lift. The Chevy 63's in the rear give a nice leveling to the equation.
Track width is about +7" or 3-1/2" wider per side. I'm really digging the ground clearance at the front cross member. It worked out nice that I got to put my front skid plate / strut frame back in place without the drop bracket B.S. hanging down.
The 4Runners Mega Travel system (MT-Pro4) cycles around 14-15" of travel. This new lift spindle design (MT-Pro2) is cycling 16-17" of travel. The LCA on the Pro4 rotate on relocated pivots within the drop bracket subframe but the Pro2 pivots in the factory location so its shorter and thus gives more camber change. There is also more bump steer. I am still tweaking geometry and alignment characteristics. I also am playing with ride height and coil spring length and spring rates.
Here are a few photos I took as I did the installation.
At max up travel with air bump compressed the top of the tire is 5" from the fender.
At max droop with limit straps detached the top of the tire is 22" from the fender. I set the strap to allow some stretch and the distance went from 22" to 21" By my calculations 21" - 5" = 16" The Sweet 16 of usable travel has been attained.
07-03-2015, 03:57 PM
#69
Registered User
Thread Starter
So far I've been through 3 sets of springs trying to dial in the ride height and spring rate.
The initial 1800.300.0600 springs I've been running now give a ride height that is too high and too firm even with negative pre-load. The other issue is there is spring separation at the coil adjustment nut at full droop.
Next, I reduced the spring rate to a 1800.300.0400 which scavenged off my 4Runner. This helped but ride height but it was still too high even with minimal pre-load at the breaking point of spring / coil adjustment nut separation at full droop.
I then tried adding a 0400.300.0500 tender spring, but to get it to fit into a 10" travel SAW shock I needed to use a spring compressed. It worked, no more spring / coil adjustment nut separation, but even with the tender completely compressed it was too high and there was no room to turn the coil adjustment nut to dial in ride height.
Next up I dusted off a set of 1400.300.0550 springs I had acquired in a trade years ago to sweeten the deal. I thought I would never use these as they are so short for a single spring use and as a dual rate you would need a longer shock than what my IFS designs require.
To my surprise this gave me the desired ride height. I was concerned it might go into coil bind but after I measured the exposed shaft then comparing that to the spring gaps at ride height, I determined it was acceptable. There was no separation at droop either with the tender spring in place. I did have to pre-load the spring stack almost 2" to get the ride height correct but at ride height the tender spring was completely collapsed, so handling characteristics are good.
07-03-2015, 04:00 PM
#70
Registered User
Thread Starter
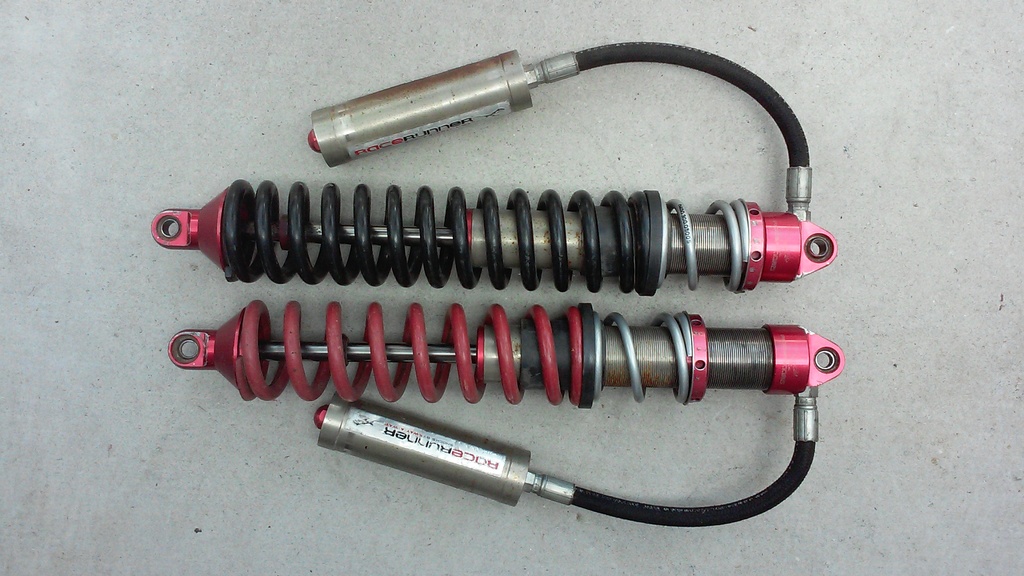
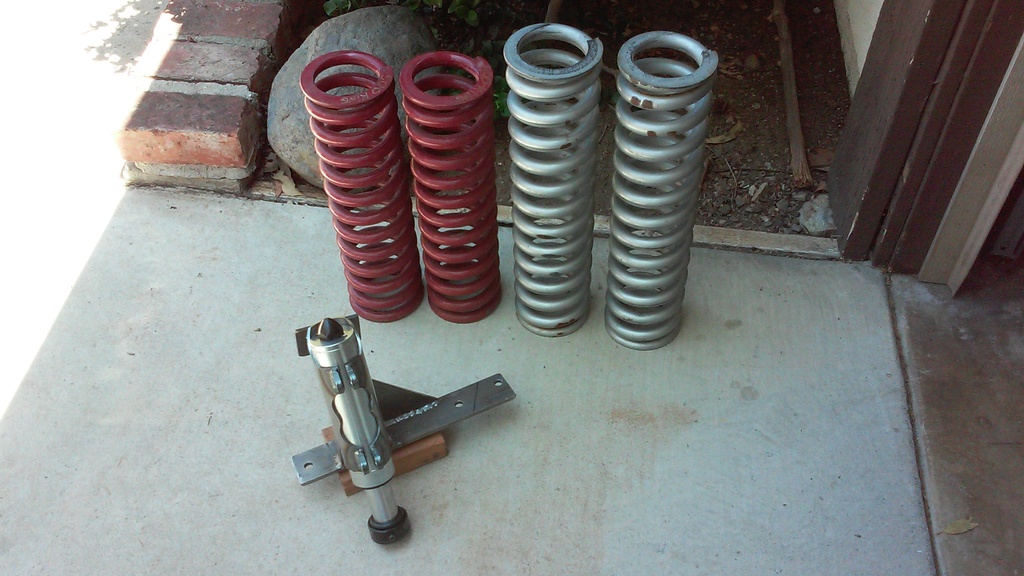
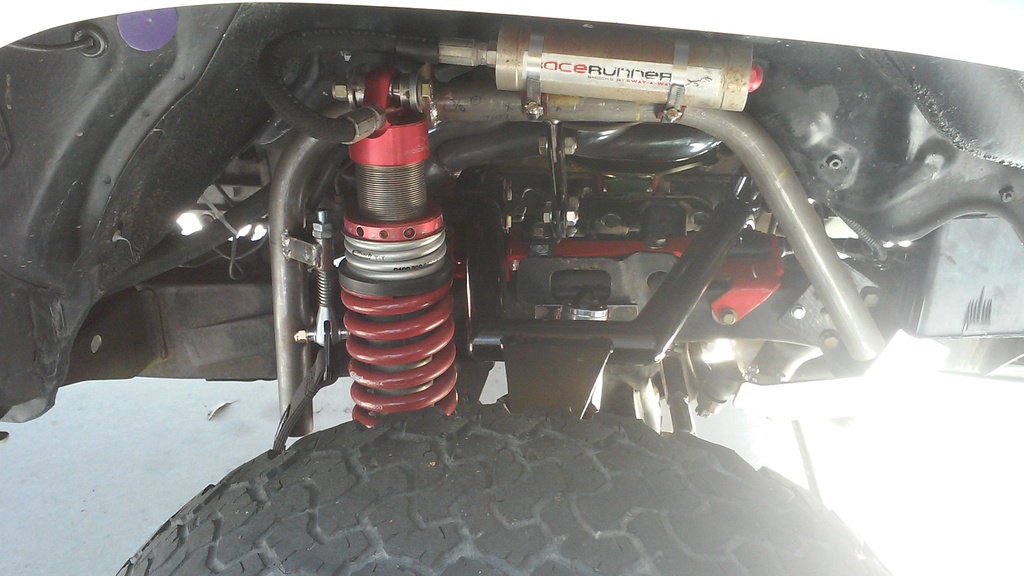
This morning I swung by Giant Motorsports and Jeff charged my Fox 2.0 bumps with nitrogen. It also worked out that he had a set of used Eibach 1600.300.0500 springs (red). Here they are next to the 1800.300.600 springs (silver). And the air bump with attachment bracket.
Jeff also looked over the MT-Pro2 design. I can't say if for sure if he approved but he had some positive as well as constructive comments. I think he sees the potential.
The 2.0 bumps fit into a bracket assembly I came up with that bolts under the factory front and rear bump stop brackets and then triangulates up into the side of the frame.
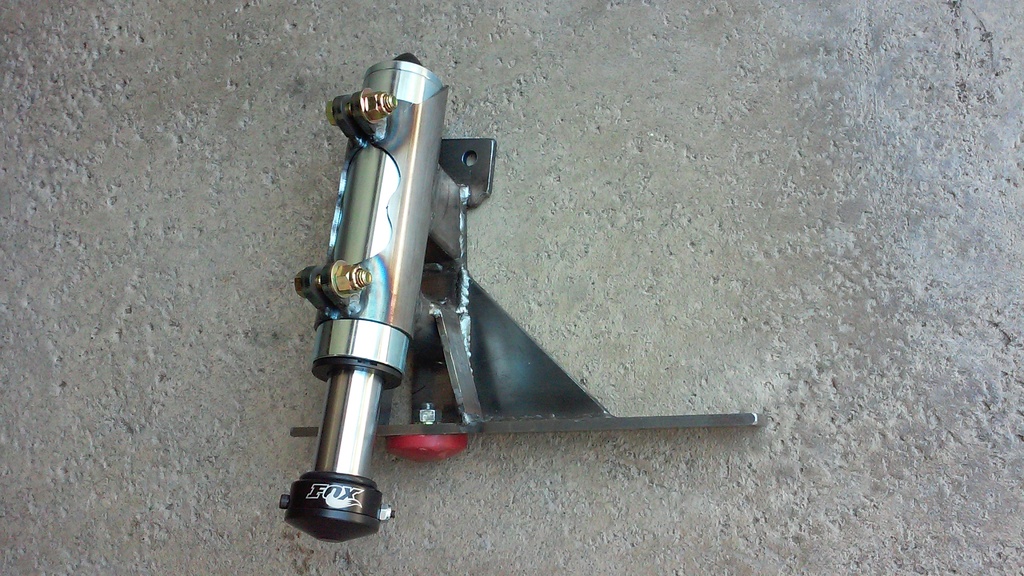
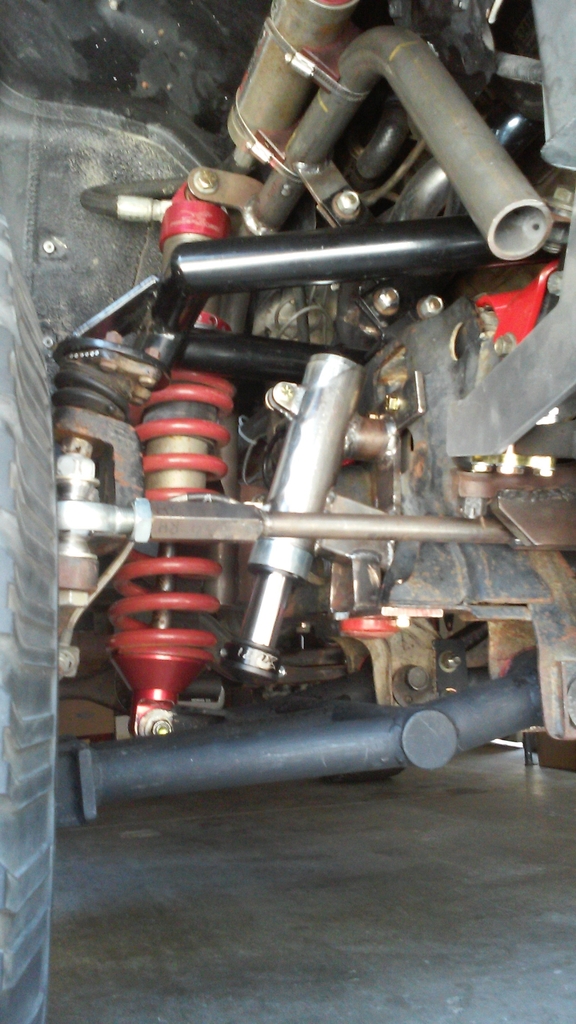
Here are the bumps bolted to the frame. The truck is sitting at ride height with 13.5" fender to tire distance. This gives me 7.5" down travel and 8.5" up travel. The springs in the photo are the 1400.300.550 ones, but I hope to swap them out to the ones I got from Giant and maintain this ride height. I can't wait to try out the latest additions.
A lot more testing ahead, but it seems to be off to a good start. Happy 4th of July everyone!
Jeff also looked over the MT-Pro2 design. I can't say if for sure if he approved but he had some positive as well as constructive comments. I think he sees the potential.
The 2.0 bumps fit into a bracket assembly I came up with that bolts under the factory front and rear bump stop brackets and then triangulates up into the side of the frame.
Here are the bumps bolted to the frame. The truck is sitting at ride height with 13.5" fender to tire distance. This gives me 7.5" down travel and 8.5" up travel. The springs in the photo are the 1400.300.550 ones, but I hope to swap them out to the ones I got from Giant and maintain this ride height. I can't wait to try out the latest additions.
A lot more testing ahead, but it seems to be off to a good start. Happy 4th of July everyone!
07-19-2015, 06:41 PM
#72
Registered User
Thread Starter
Thanks for the complement rustED! I was able to get into the Fox bumps about 2/3 of the way earlier this week. Note the rubber "O" ring marker location in the photo.
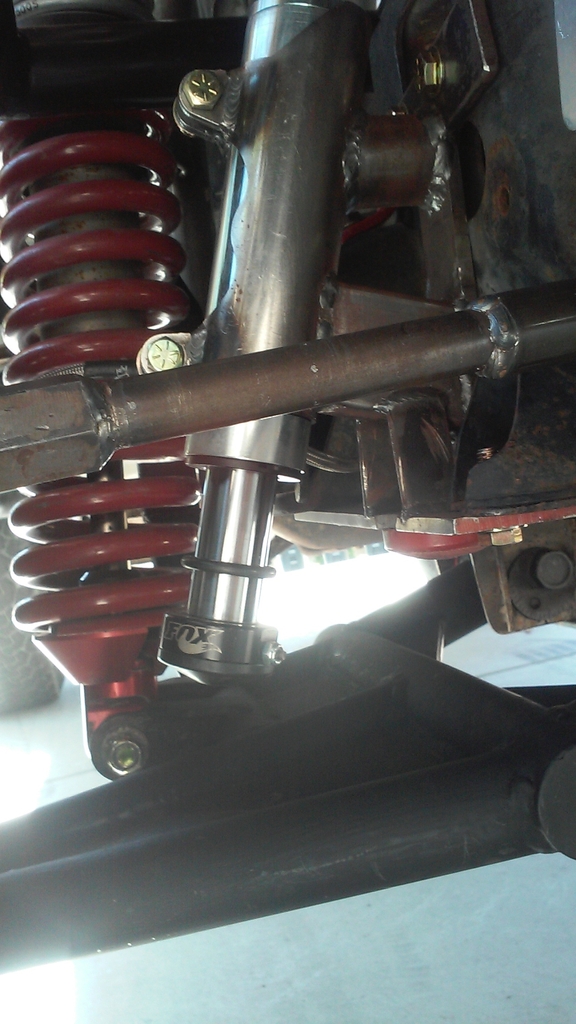
The Fox bumps really smooth out the hard bottoming. I am also happy with the 16" 500lbs springs. Here is a photo of the springs at ride height.
I am able to dial in the ride height with an appropriate amount of spring pre-load. The only concern I am having is it looks like I am getting close to coil bind when the suspension is a full stuff.
In other related news, I reconfigured the centerlink and tie rod adjusting sleeves to reduce bump steer. I did some additional studies and mocked up some changes on the test frame. I found a nice compromise between the ideal pivot location and what was easily buildable.
When I first began this Pro 2WD design I began with a Rancho Centerlink (bottom) because it matched the Rancho UCA pivot relocation bracket, but I found it to have a good deal of bump steer and the Tie Rod Adjusting Sleeves would hit the frame at max up travel with wheels turned all the way to the left or right.
I then tried my Mega Travel Pro 4WD centerlink (top) (I built for my 4Runner) This clears the frame but has too much bump steer due to the LCA pivot location not being reconfigured.
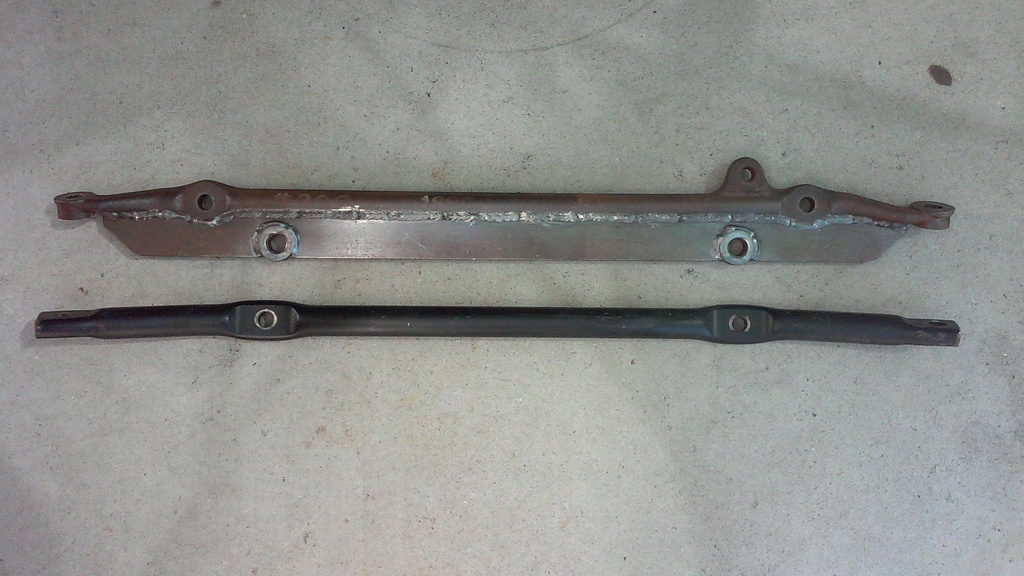
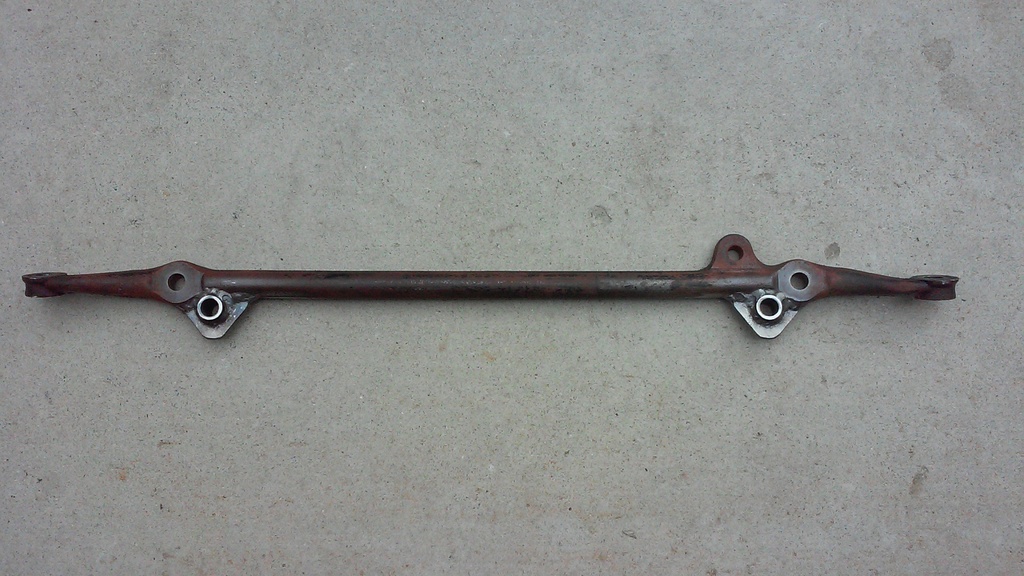
According to my calculations the inner tie rod pivots used on the stock centerlink is in about right location to work with the UCA pivot relocation and the spindle/steering arm changes. However the "hands on" mock up shows the stock centerlink to have bump steer and the sleeve hits the frame as mentioned above. I was able to get the geometry close to minimal bump steer and still clear the frame by welding some new pivot location bungs to the stock centerlink as follows. Its amazing how small changes effect things.
Here are four simple indicators I found helpful to finding the geometry.
Toe in at top and bottom= tie rod too short
Toe out at top and bottom = tie rod too long
Toe in at top and out at bottom= inner tie rod pivot too low
Toe out at top and in at bottom = inner tie rod pivot too high
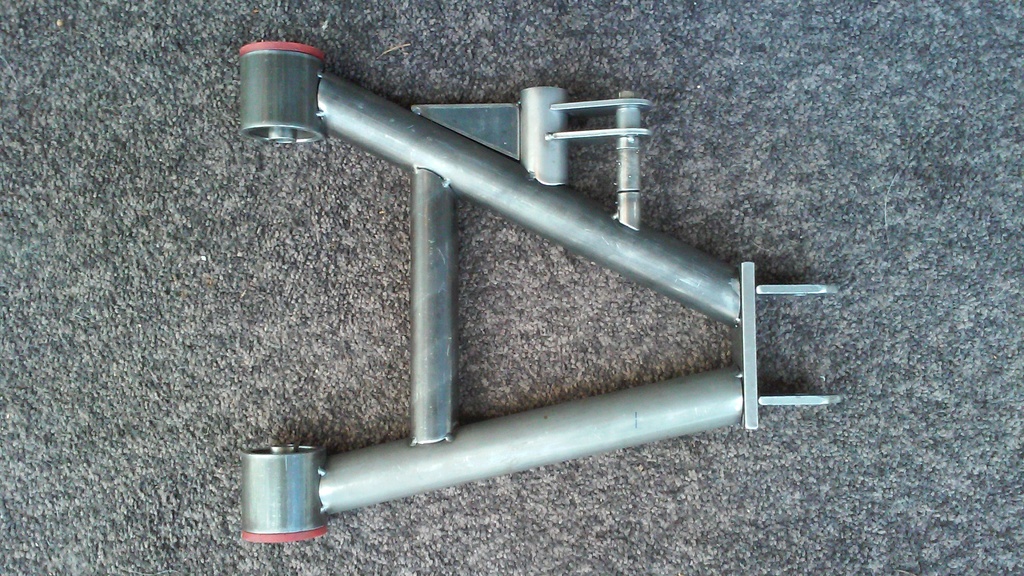
Another thing I discovered as the design progressed is my LCA lengths are a tiny bit off. I made a good first attempt for the baseline but once everything was on the truck and aligned the result was negative camber. Fortunately there is enough adjustment in the eccentric cams to compensate. Here are the LCAs.
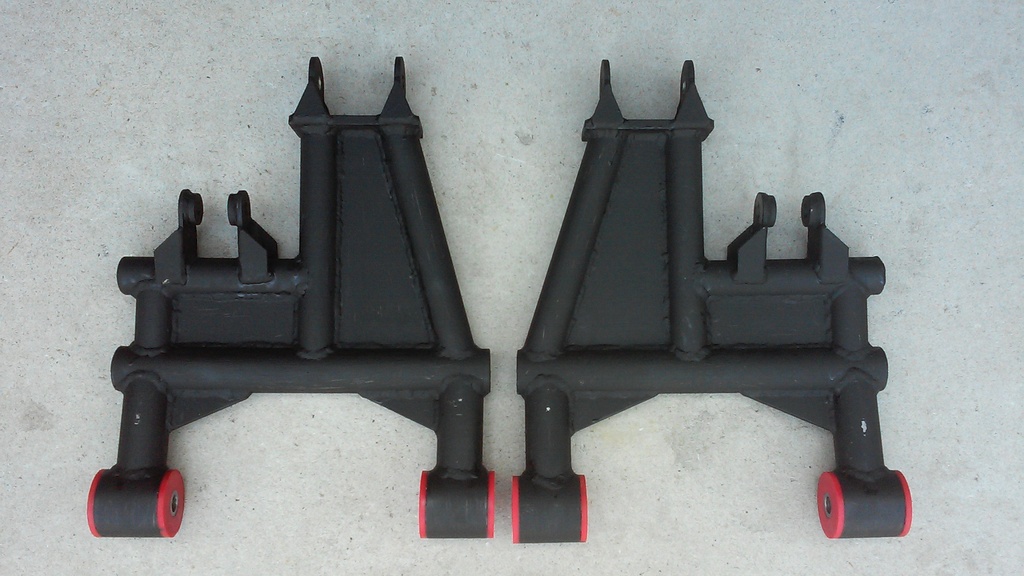
I started mocking up a new set of LCAs that are 1/2" shorter to correct the negative camber, to simplify the tube work, and strengthen the design.
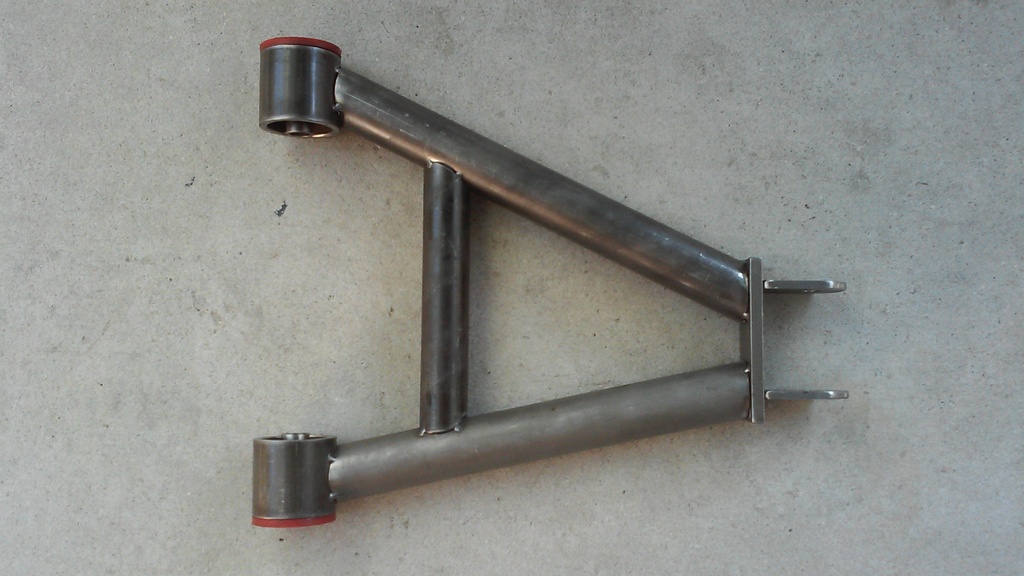
I was able to off set the main tubes on the bushing shell as to clear the bump stop brackets. I reduced the number of parts and connections. I reduced the tube notching. However I complicated the shock tab configuration. The tab location is tricky as the brake calipers need clearance and the shock tabs need to be recessed into the LCAs to fit a 10" travel shock. I could reconfigure the upper shock mount and redesign my shock hoops to go higher but that would mean cutting up the fender wells. Anyway, here is where I'm at.
The Fox bumps really smooth out the hard bottoming. I am also happy with the 16" 500lbs springs. Here is a photo of the springs at ride height.
I am able to dial in the ride height with an appropriate amount of spring pre-load. The only concern I am having is it looks like I am getting close to coil bind when the suspension is a full stuff.
In other related news, I reconfigured the centerlink and tie rod adjusting sleeves to reduce bump steer. I did some additional studies and mocked up some changes on the test frame. I found a nice compromise between the ideal pivot location and what was easily buildable.
When I first began this Pro 2WD design I began with a Rancho Centerlink (bottom) because it matched the Rancho UCA pivot relocation bracket, but I found it to have a good deal of bump steer and the Tie Rod Adjusting Sleeves would hit the frame at max up travel with wheels turned all the way to the left or right.
I then tried my Mega Travel Pro 4WD centerlink (top) (I built for my 4Runner) This clears the frame but has too much bump steer due to the LCA pivot location not being reconfigured.
According to my calculations the inner tie rod pivots used on the stock centerlink is in about right location to work with the UCA pivot relocation and the spindle/steering arm changes. However the "hands on" mock up shows the stock centerlink to have bump steer and the sleeve hits the frame as mentioned above. I was able to get the geometry close to minimal bump steer and still clear the frame by welding some new pivot location bungs to the stock centerlink as follows. Its amazing how small changes effect things.
Here are four simple indicators I found helpful to finding the geometry.
Toe in at top and bottom= tie rod too short
Toe out at top and bottom = tie rod too long
Toe in at top and out at bottom= inner tie rod pivot too low
Toe out at top and in at bottom = inner tie rod pivot too high
Another thing I discovered as the design progressed is my LCA lengths are a tiny bit off. I made a good first attempt for the baseline but once everything was on the truck and aligned the result was negative camber. Fortunately there is enough adjustment in the eccentric cams to compensate. Here are the LCAs.
I started mocking up a new set of LCAs that are 1/2" shorter to correct the negative camber, to simplify the tube work, and strengthen the design.
I was able to off set the main tubes on the bushing shell as to clear the bump stop brackets. I reduced the number of parts and connections. I reduced the tube notching. However I complicated the shock tab configuration. The tab location is tricky as the brake calipers need clearance and the shock tabs need to be recessed into the LCAs to fit a 10" travel shock. I could reconfigure the upper shock mount and redesign my shock hoops to go higher but that would mean cutting up the fender wells. Anyway, here is where I'm at.
09-21-2015, 04:12 PM
#73
Registered User
Thread Starter
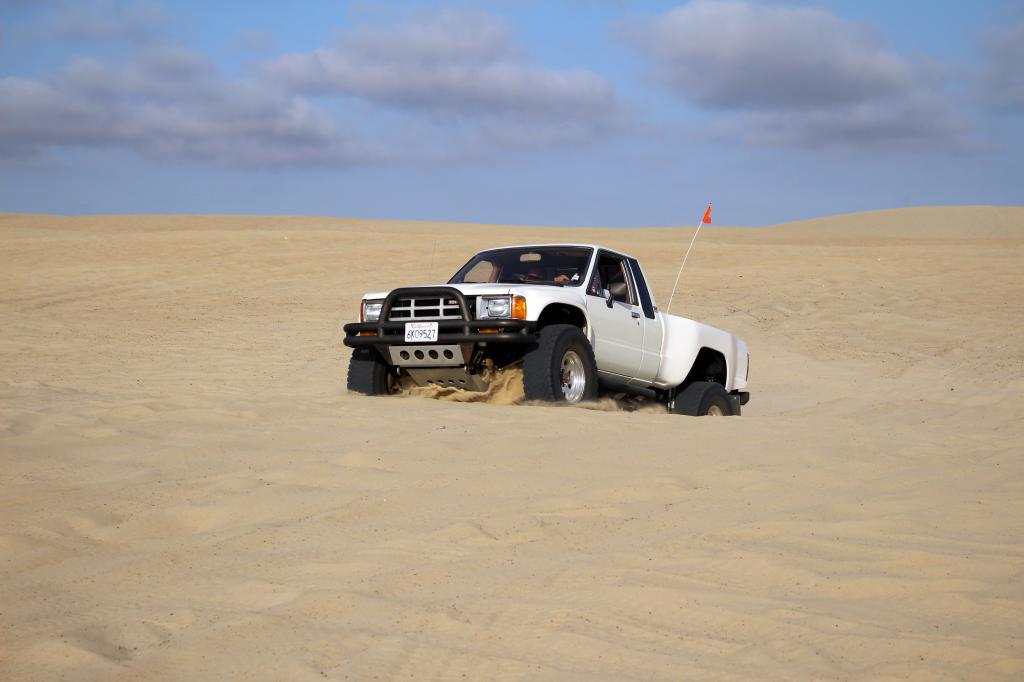
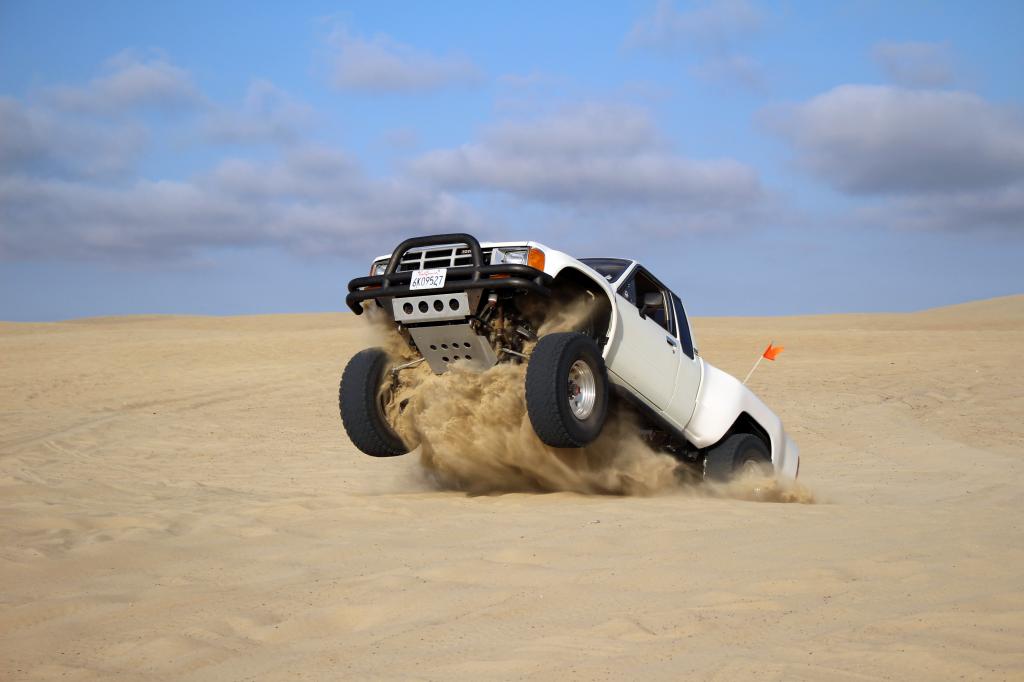
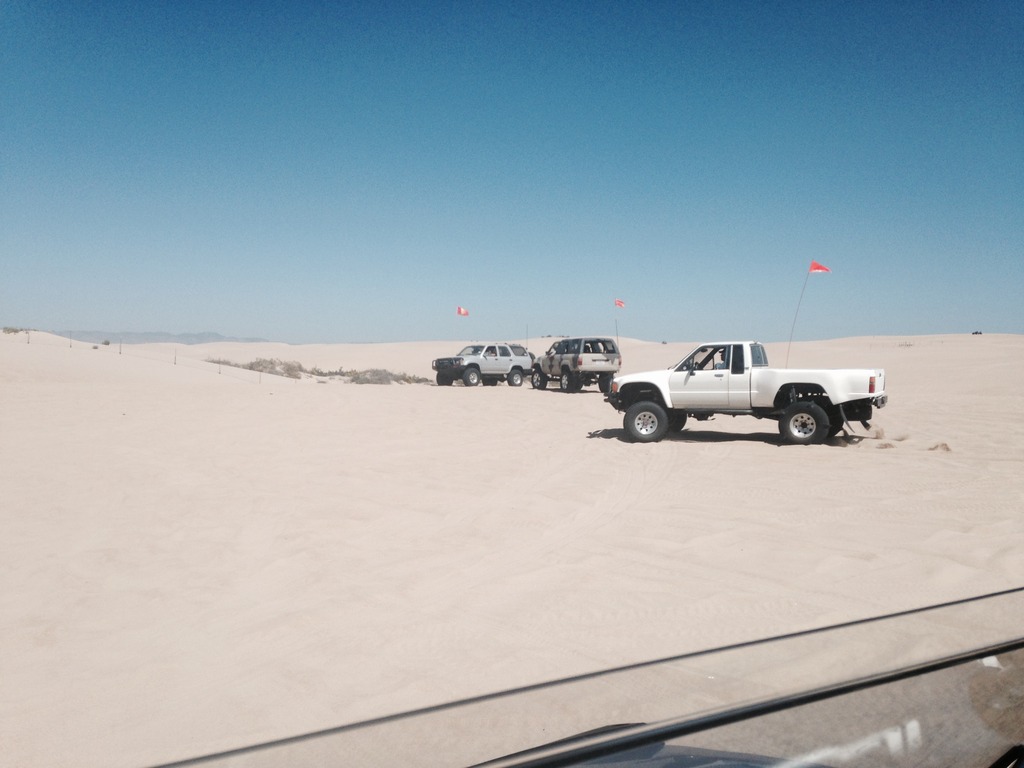
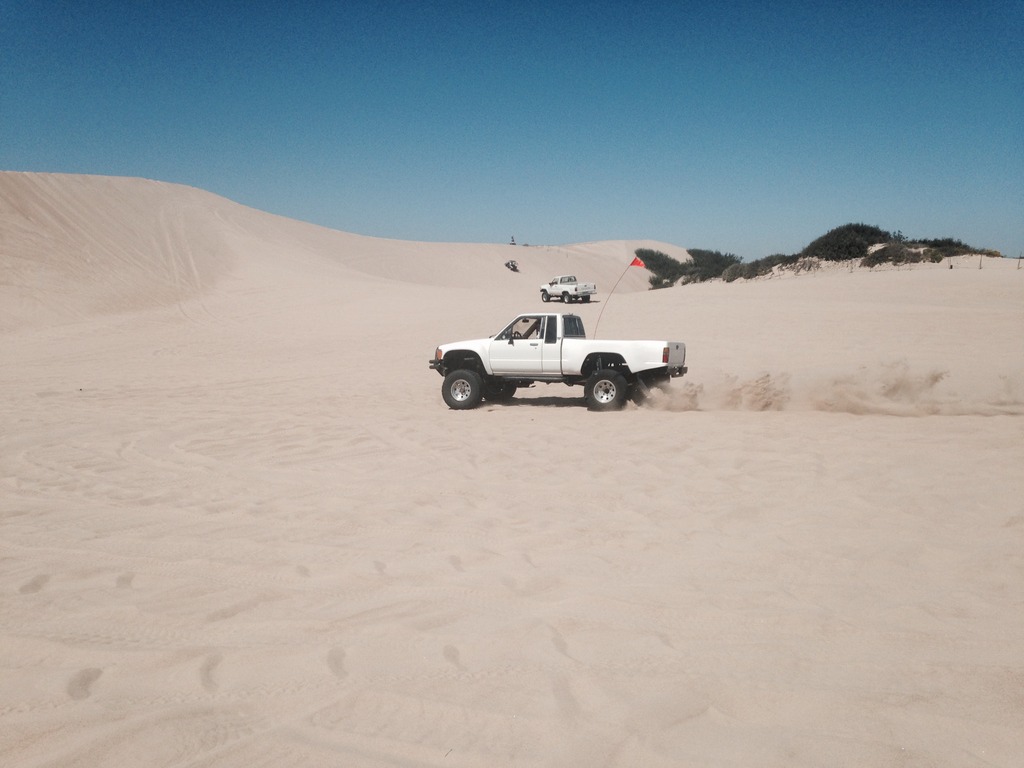
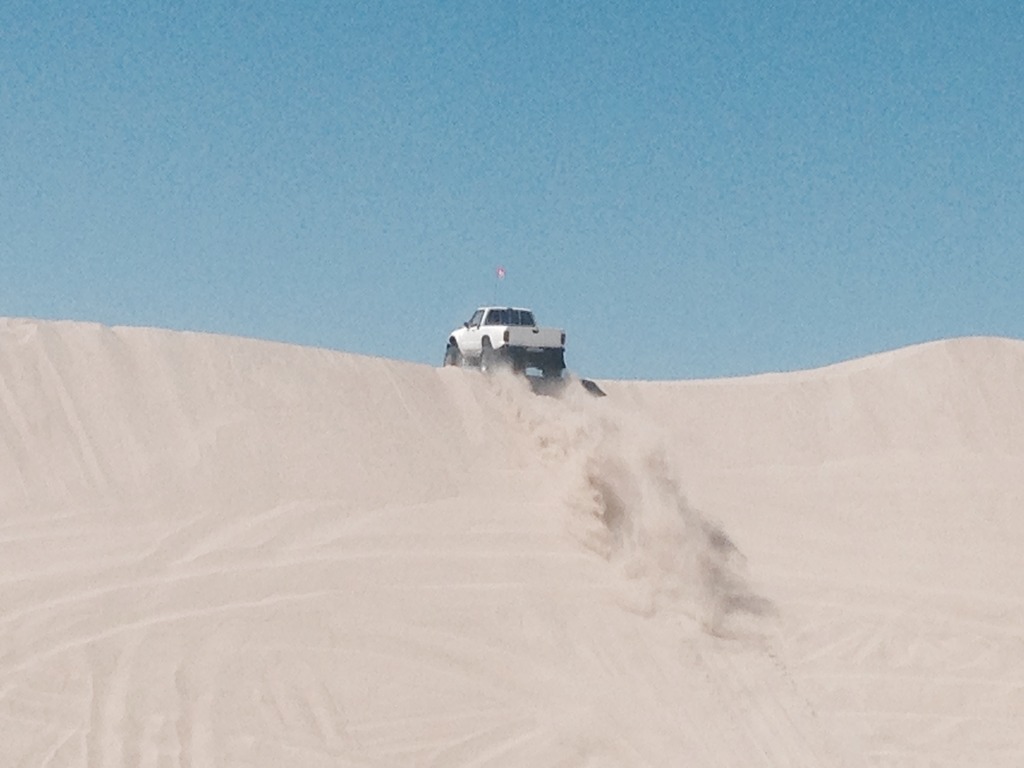
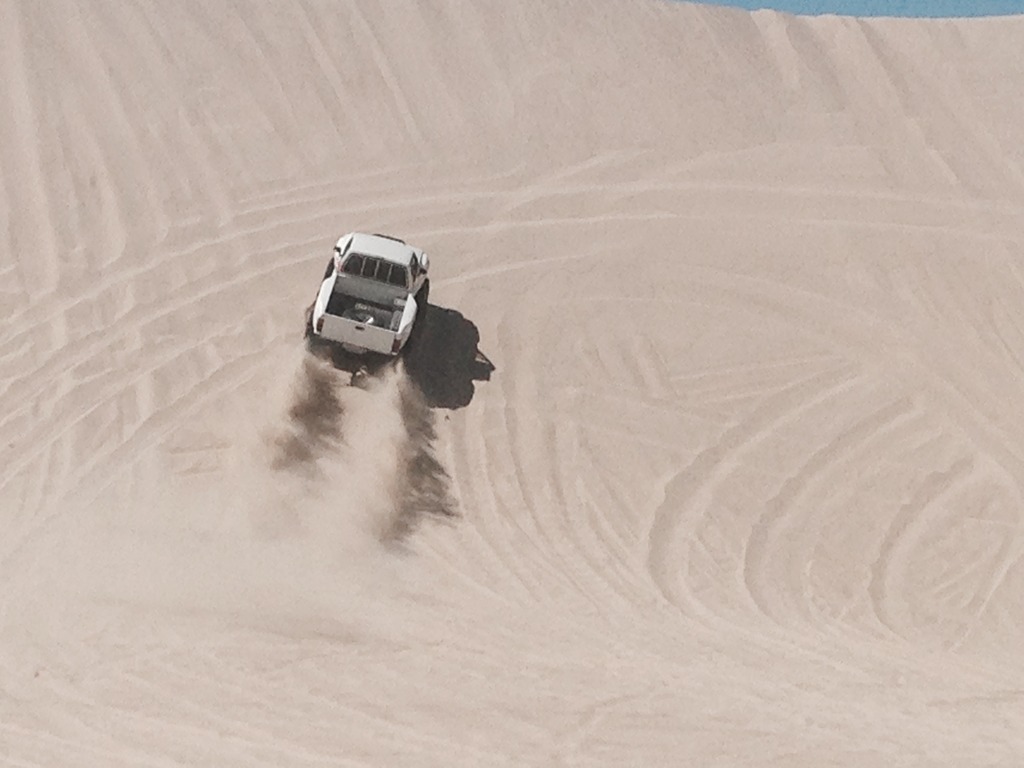
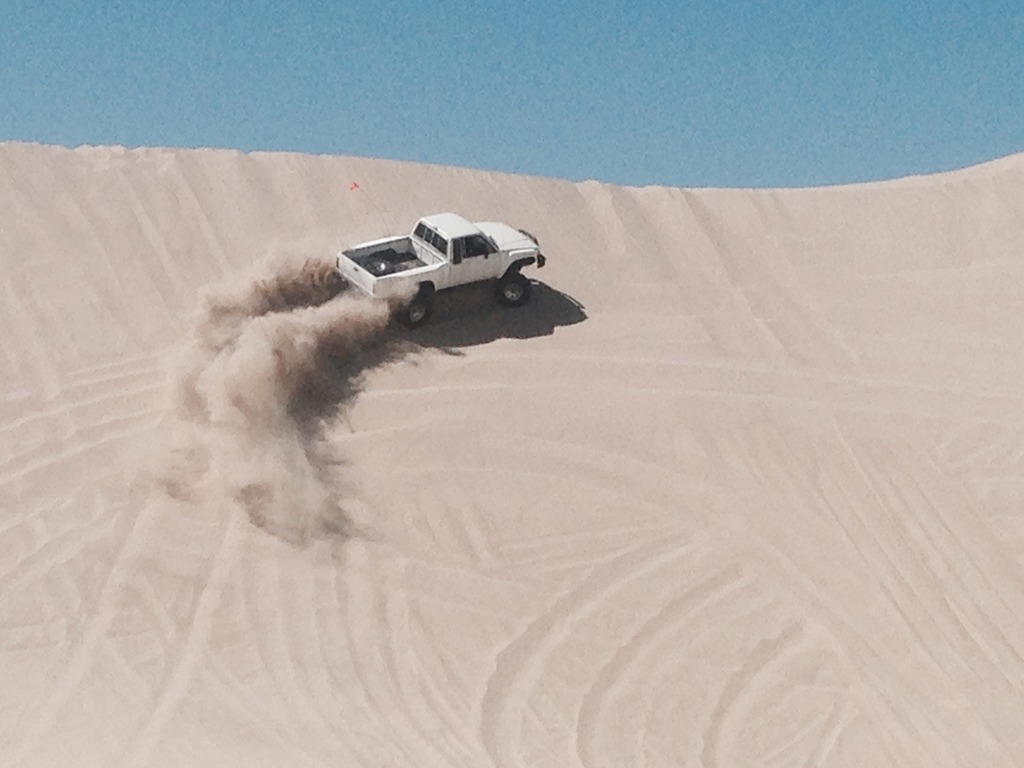
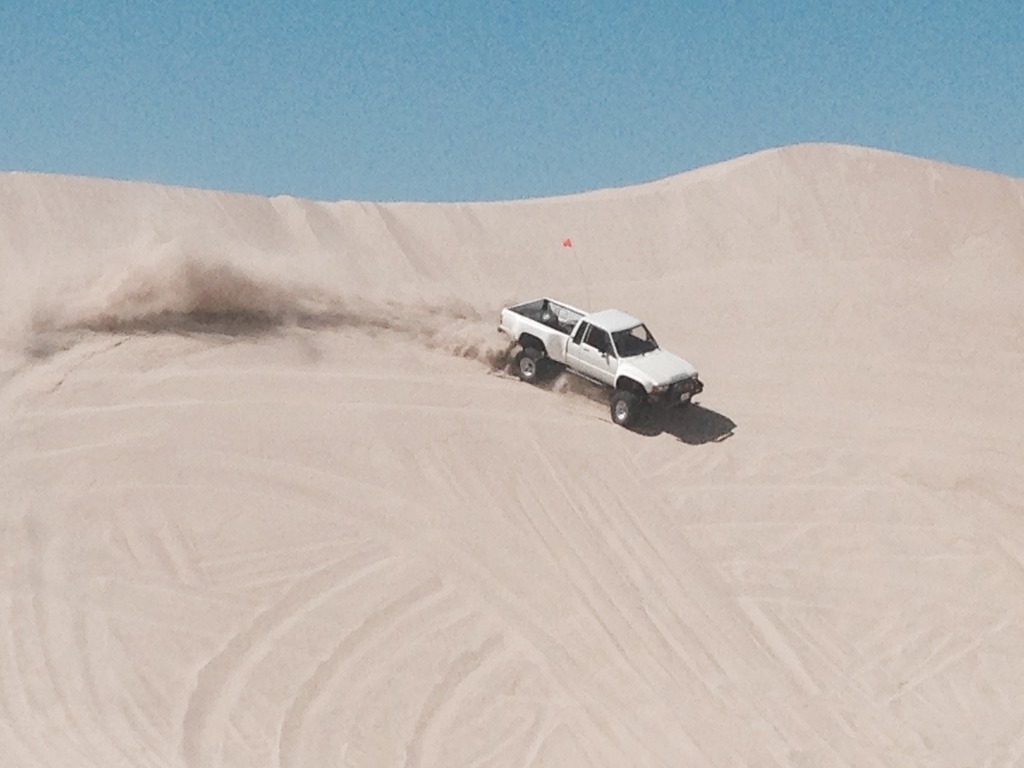
Well I got in some decent suspension testing this past weekend at the Pismo dunes trip. I also got to try out the Skat-Trak paddle tires. Anyway, Toyotech took a few photos, thanks Toyo!

09-22-2015, 12:56 PM
#74
Registered User
Thread Starter
The paddle tires (and v8 power) allowed me to climb hills in 2WD just as well as last years trip when I was running 4WD. What I like about 2WD and E-locked rear is the ability to drift. Climbing dunes and spraying a Rainbow is good fun!

09-22-2015, 03:31 PM
#75
Looks like a great performing truck, V8 power makes me have a little envy
Not sure if I could give up 4WD or not but a dedicated low flying truck would be fun.
How much ground clearance do you have under the rear pumpkin?
Curious how your shock hoop is attached? Bolted to the front of the frame and towards the back? Painted yet?

Not sure if I could give up 4WD or not but a dedicated low flying truck would be fun.
How much ground clearance do you have under the rear pumpkin?
Curious how your shock hoop is attached? Bolted to the front of the frame and towards the back? Painted yet?
09-23-2015, 02:13 PM
#76
Registered User
Thread Starter
Clearance at the rear pumpkin is same as stock rig with 33s or 35s depending what tires I am running. The front has a 4" lift spindle so its 4" higher than stock. I never painted the shock hoops and with the ocean air and time, things are getting rusty! Eventually I will pull everything, have it sand blasted and powder coated. The rear hoop bracket is welded to the side of the frame but it can be bolted after drilling some holes. The truck is welded 4 Runner is bolted. The hoops do show signs of deflecting so I will be adding a strut brace over the engine. I had a strut on previous hoops and it did the trick. The added weight of the V8 and jumping really scream for a strut tying the hoops together.
09-23-2015, 02:30 PM
#77
Registered User
Thread Starter
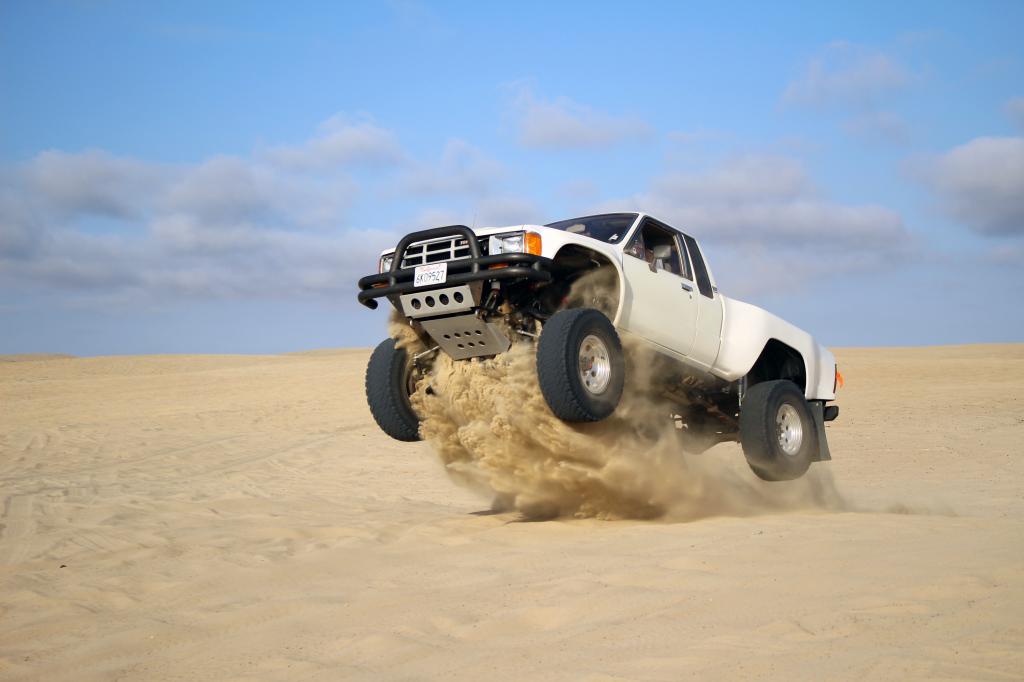
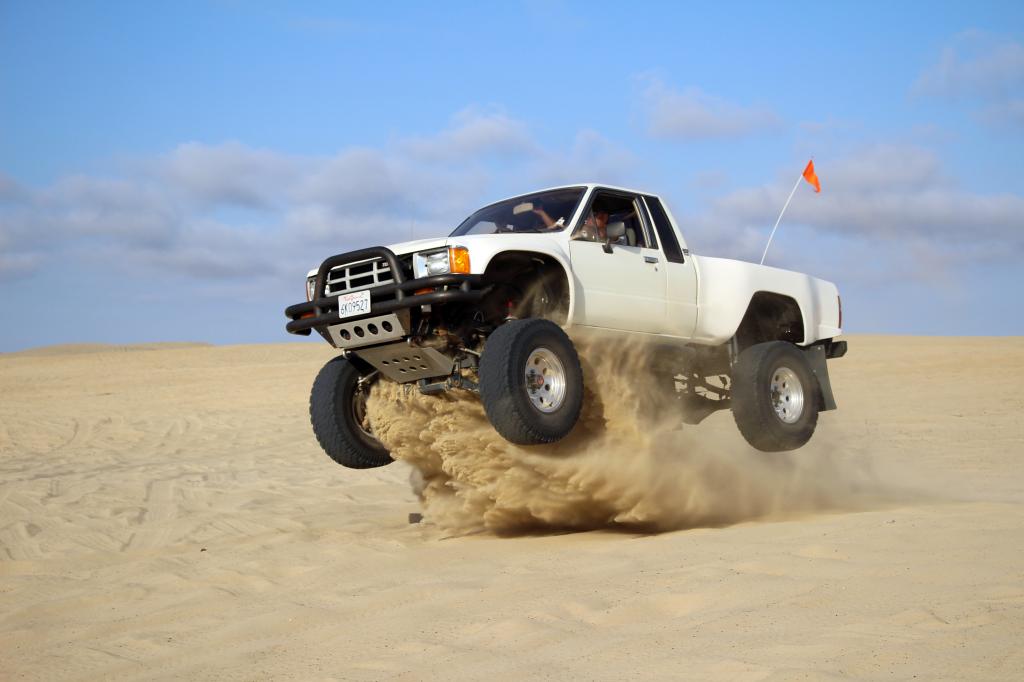
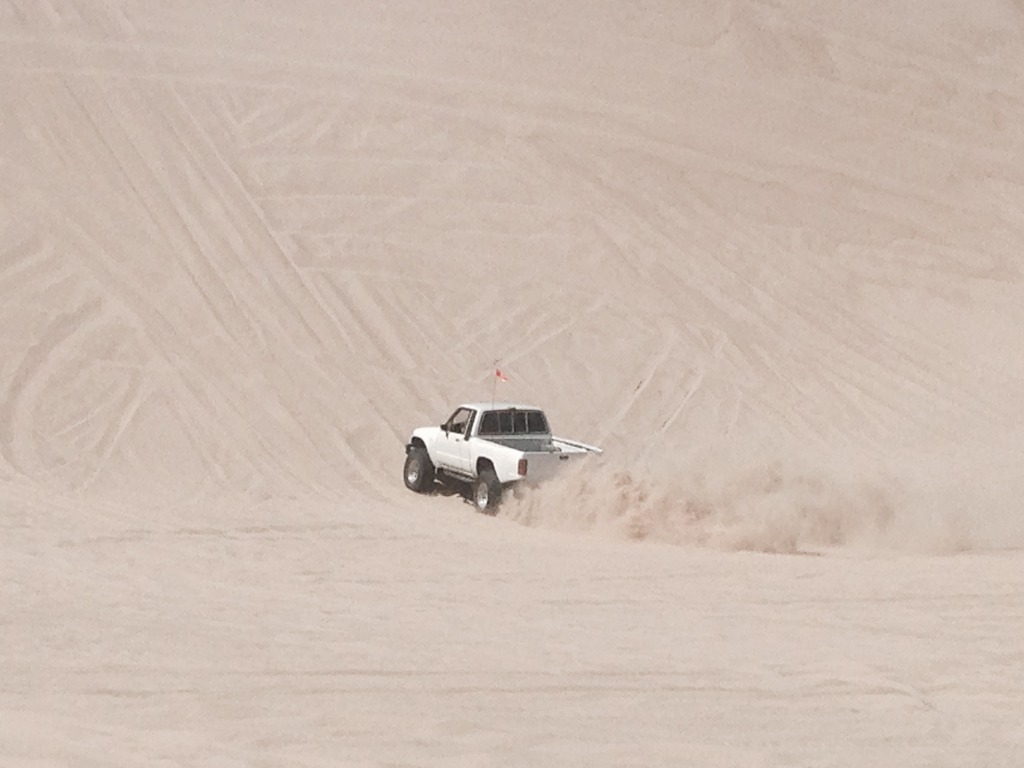
The new front suspension worked awesome! Last year I was dialed in at 13" of wheel travel. This year I was rocking around 16" I didn't get any photos but bombing the whoops was effortless. There were a few times the rear bucked but all in all it was smooth. I think a little tuning to the rear such as adjusting the bypass valves and the addition of air bumps would balance things, but for Chevy 63 leaf springs it is what it is! I would really love to do a 4 link trailing arm set up but converting to a fuel cell and building a bed cage is a back burner project due to budget and time.
My afternoon was cut short with this launch.
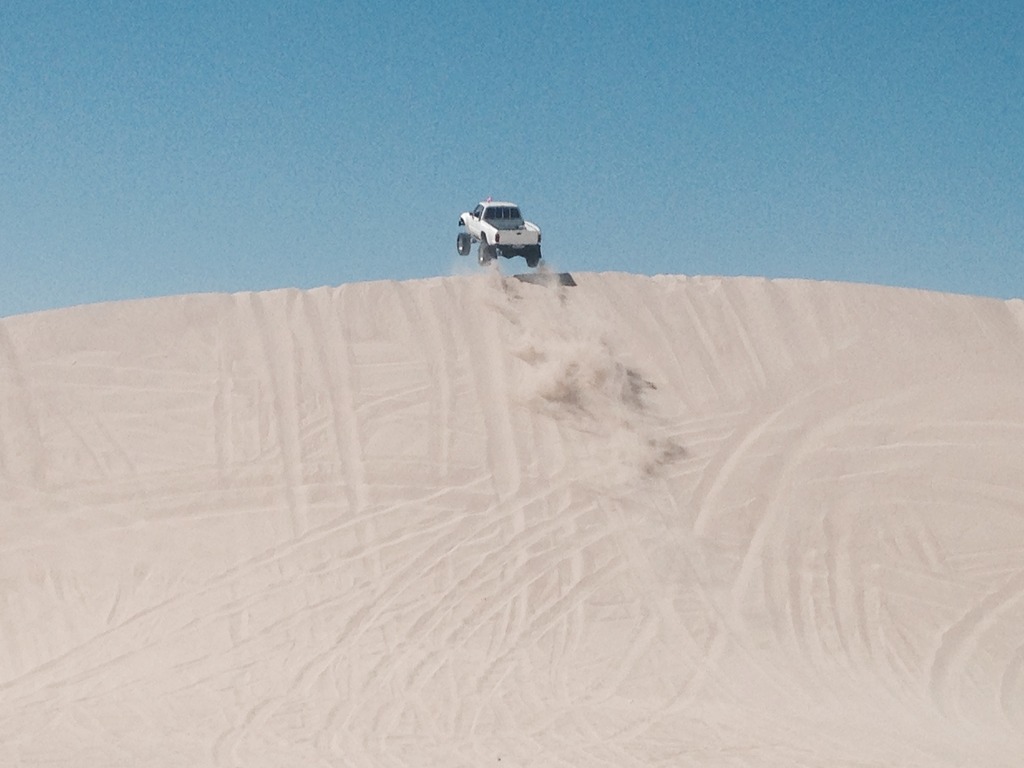
I came down pretty hard and blew by through the air bumps so that driver side UCA pivoted too far and contacted the remote oil filter housing and busted it off. I was expecting some slight contact but didn't realize how fragile the cast aluminum housing was. A jeep towed me back to camp and I was able to track down a new part but it got dark and without decent lighting I called it a day. The following morning I was low on gas so I dismounted the paddle tires and drove into town for more gas. We decided not to go back to the dunes and we cut our losses and decided to go home. It was a 250 mile drive home and the remote oil filter could not be tightened properly to get the oil lines pointing in the right direction. The replacement part, I was lucky enough to find, did not allow the adapter to be clocked to the desired position then tightened, it was a random rotate till tight and pray it pointed in the right direction, you got very little adjustment. As it was I dove home with it less than finger tight loose. Amazingly it didn't leak!
Good times, great seeing everyone!
My afternoon was cut short with this launch.
I came down pretty hard and blew by through the air bumps so that driver side UCA pivoted too far and contacted the remote oil filter housing and busted it off. I was expecting some slight contact but didn't realize how fragile the cast aluminum housing was. A jeep towed me back to camp and I was able to track down a new part but it got dark and without decent lighting I called it a day. The following morning I was low on gas so I dismounted the paddle tires and drove into town for more gas. We decided not to go back to the dunes and we cut our losses and decided to go home. It was a 250 mile drive home and the remote oil filter could not be tightened properly to get the oil lines pointing in the right direction. The replacement part, I was lucky enough to find, did not allow the adapter to be clocked to the desired position then tightened, it was a random rotate till tight and pray it pointed in the right direction, you got very little adjustment. As it was I dove home with it less than finger tight loose. Amazingly it didn't leak!
Good times, great seeing everyone!
Last edited by BlazeN8; 09-23-2015 at 09:58 PM.
09-25-2015, 09:26 PM
#79
Registered User
Thread Starter
I was thinking about that earlier tonight and what a minor issue the broken oil filter relocation adapter was. It was preventable too! I just ran out of time to get to it before the trip.
The trip for me was a 500 mile adventure. A 100 plus miles of street legal race to and through Los Angeles and another 100 miles up the coast. Then it was 20 miles of dunes Friday afternoon and crash out on the beach in a tent. Saturday was 30 miles in the dunes and a few hours of repair work before dinner. Sunday was a nice cruise along the coast with a stop in Santa Barbra for lunch. Not bad for two tanks of gas, 4 quarts of oil and a new Oil Filter Relocation adapter.
The trip for me was a 500 mile adventure. A 100 plus miles of street legal race to and through Los Angeles and another 100 miles up the coast. Then it was 20 miles of dunes Friday afternoon and crash out on the beach in a tent. Saturday was 30 miles in the dunes and a few hours of repair work before dinner. Sunday was a nice cruise along the coast with a stop in Santa Barbra for lunch. Not bad for two tanks of gas, 4 quarts of oil and a new Oil Filter Relocation adapter.
09-27-2015, 07:24 PM
#80
Registered User
Thread Starter
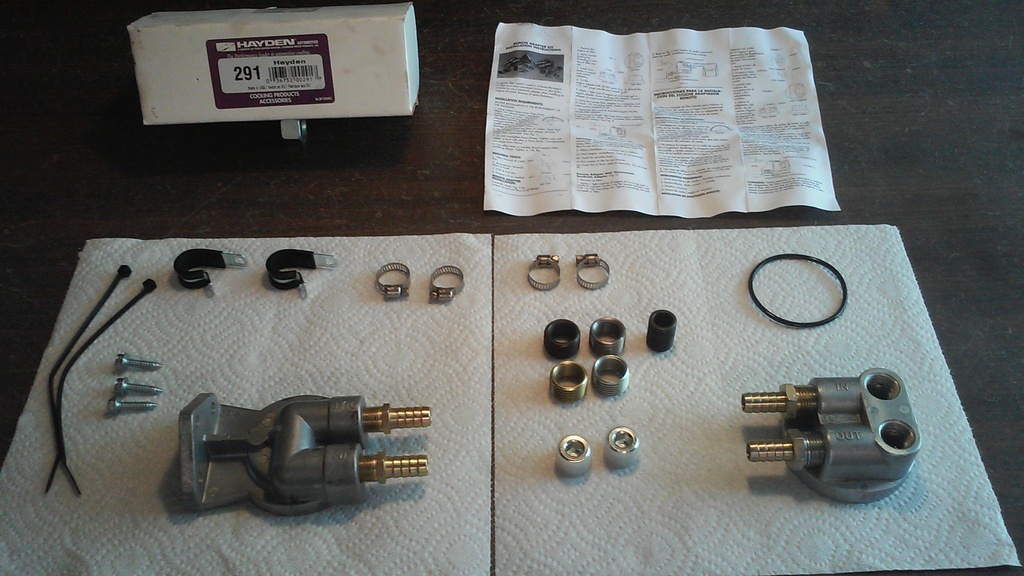
The oil filter relocation kit I was able to find on the spot in the local Oreilly Auto Parts was this one from Hayden. I paid $47 and for all that was in the kit not a bad price. I really only needed the parts on the right paper towl that spin onto the block. And like I mentioned before when I spun it to the block to get it snug the oil lines pointed in the wrong direction.
The past week I did some searching on the old inner web and found a better option at Summit Racing. The new unit was even thinner and it was a direct fit, no adapter fittings needed, and the dual 90 degree ports allowed more options on the direction the hoses pointed. The price was $22 plus S&H. From left to right, the original adapter with 90 degree fittings, the on the spot replacement, and the latest find.
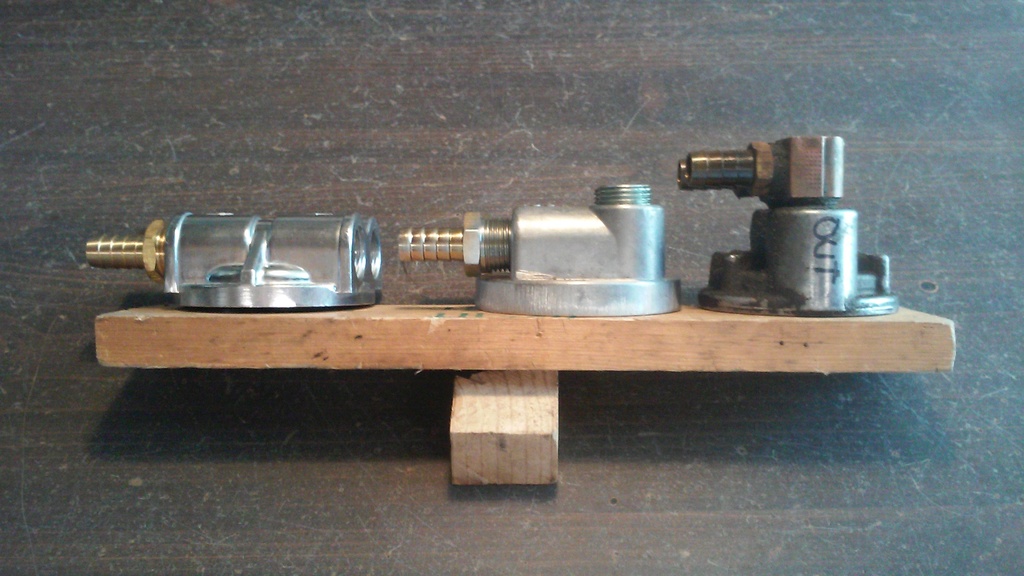
As you can see from the photos the third adapter was the thinnest so there was plenty of clearance with the UCA. At full stuff there was 3/4" of clearance. This adapter also allowed a nice snug fit with the hoses pointing in the right direction.
The past week I did some searching on the old inner web and found a better option at Summit Racing. The new unit was even thinner and it was a direct fit, no adapter fittings needed, and the dual 90 degree ports allowed more options on the direction the hoses pointed. The price was $22 plus S&H. From left to right, the original adapter with 90 degree fittings, the on the spot replacement, and the latest find.
As you can see from the photos the third adapter was the thinnest so there was plenty of clearance with the UCA. At full stuff there was 3/4" of clearance. This adapter also allowed a nice snug fit with the hoses pointing in the right direction.


