775Toy's 84 X-cab build Thread

 01-09-2012, 06:14 PM
#42
Registered User
Thread Starter
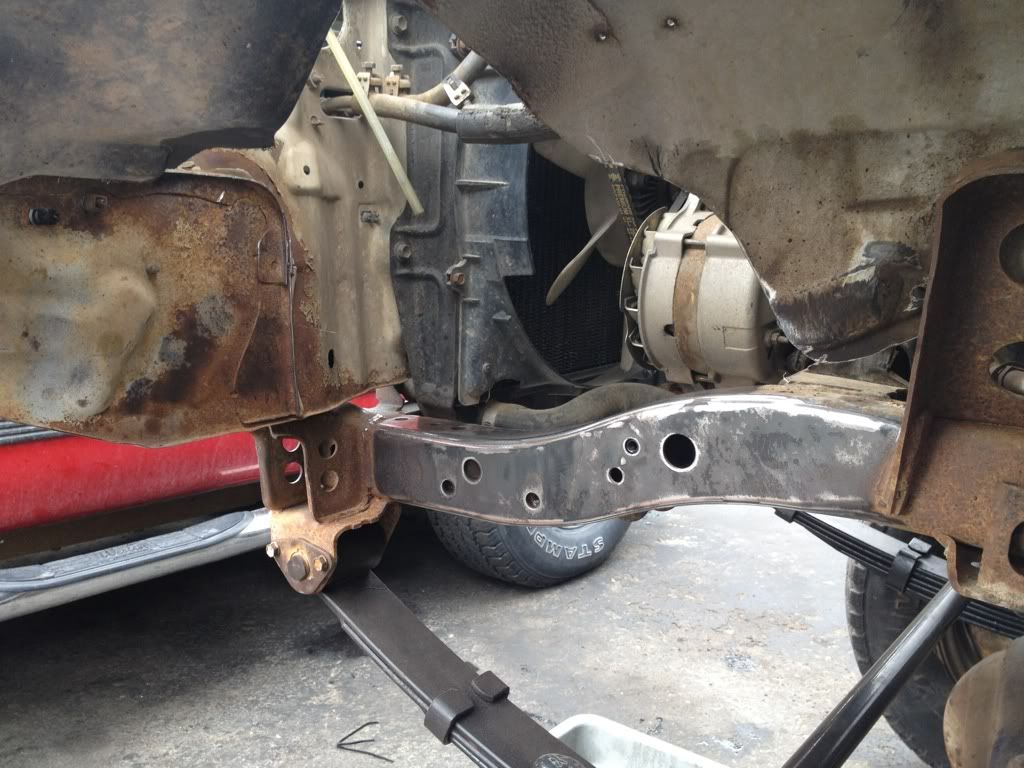
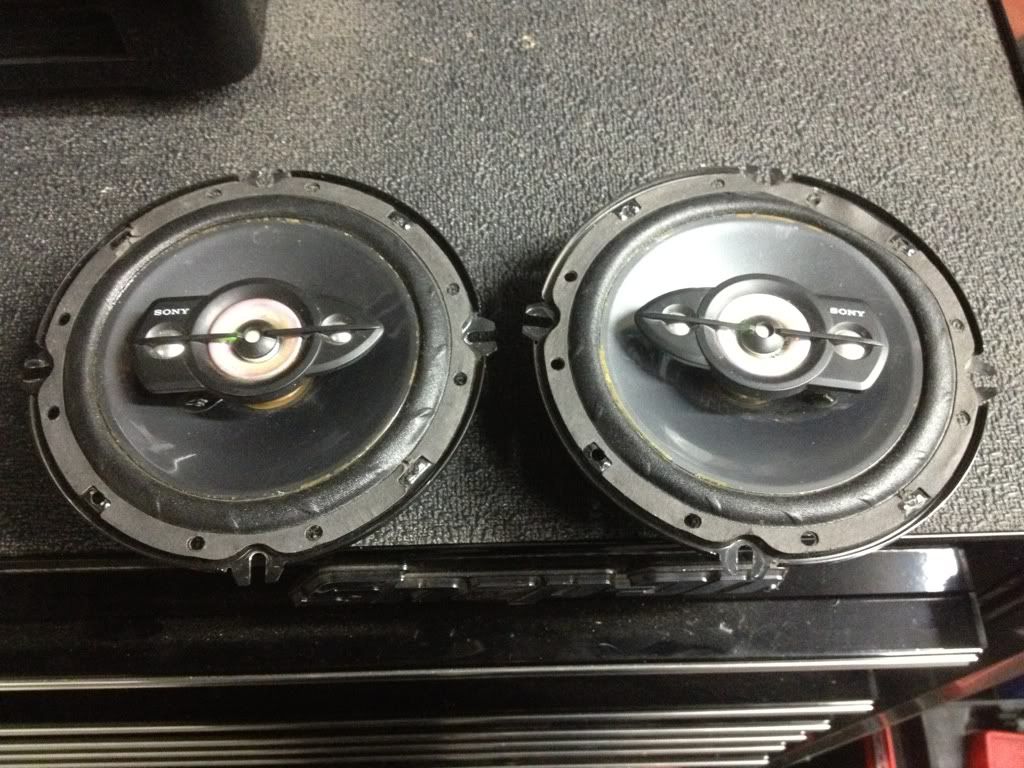
Wire wheeled the rear frame on the lunch break, paint and cut the stock spring mounts tomorrow. I picked up these sony xplods for the rear xcab speakers.
01-11-2012, 06:52 PM
#43
Registered User
Thread Starter
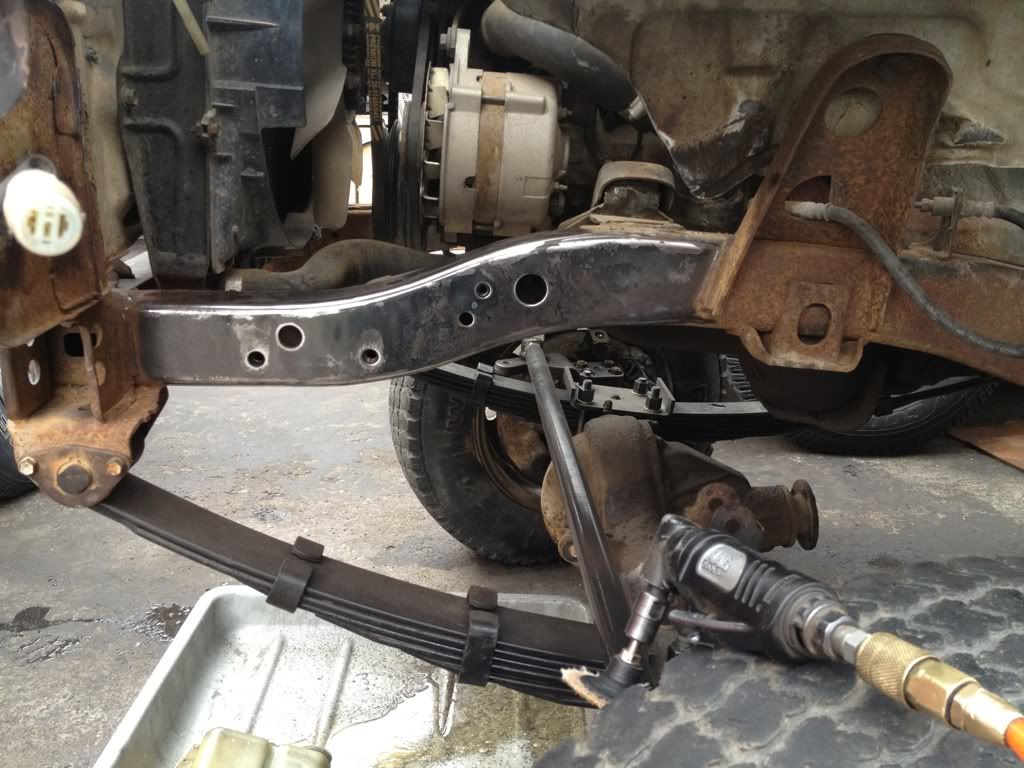
Got the rear all cleaned up and painted , the gas tank is dropped off to be cleaned out. Putting the bed back on tomorrow and start the front suspension and high steer soon.
01-11-2012, 08:57 PM
#45
Nice, very nice! You make quick progress. You'll let us know how those chevies ride won't you? I'll most likely be using those too.
Trail-gear hangers you said? I cant seem to find them in their website.
How did you know where to mount the hangers? Did you use a jig to hold in place or did you just eyeball it? I'm concerned about the placement, for example: how did you manage to get them parallel along the bottom of the frame? If they were off does it eat the tires because off bad alignment?
Last edited by streetlancer; 01-11-2012 at 09:13 PM.
01-12-2012, 09:35 AM
#47
Registered User
Thread Starter
Nice, very nice! You make quick progress. You'll let us know how those chevies ride won't you? I'll most likely be using those too.
Trail-gear hangers you said? I cant seem to find them in their website.
How did you know where to mount the hangers? Did you use a jig to hold in place or did you just eyeball it? I'm concerned about the placement, for example: how did you manage to get them parallel along the bottom of the frame? If they were off does it eat the tires because off bad alignment?
Trail-gear hangers you said? I cant seem to find them in their website.
How did you know where to mount the hangers? Did you use a jig to hold in place or did you just eyeball it? I'm concerned about the placement, for example: how did you manage to get them parallel along the bottom of the frame? If they were off does it eat the tires because off bad alignment?
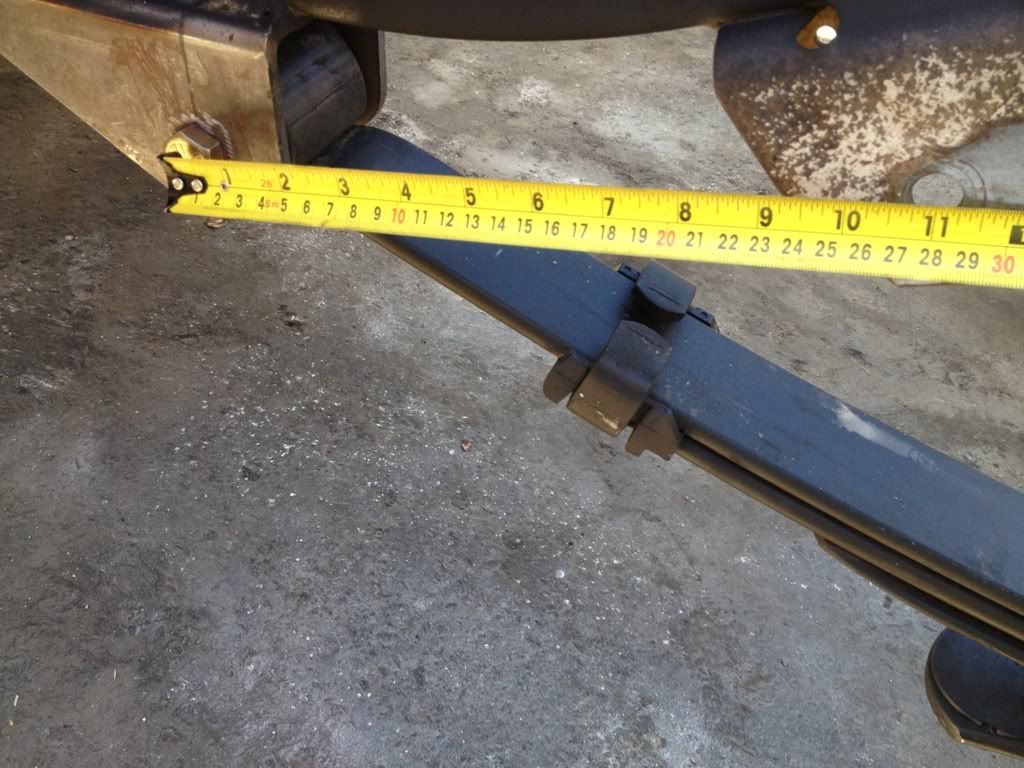
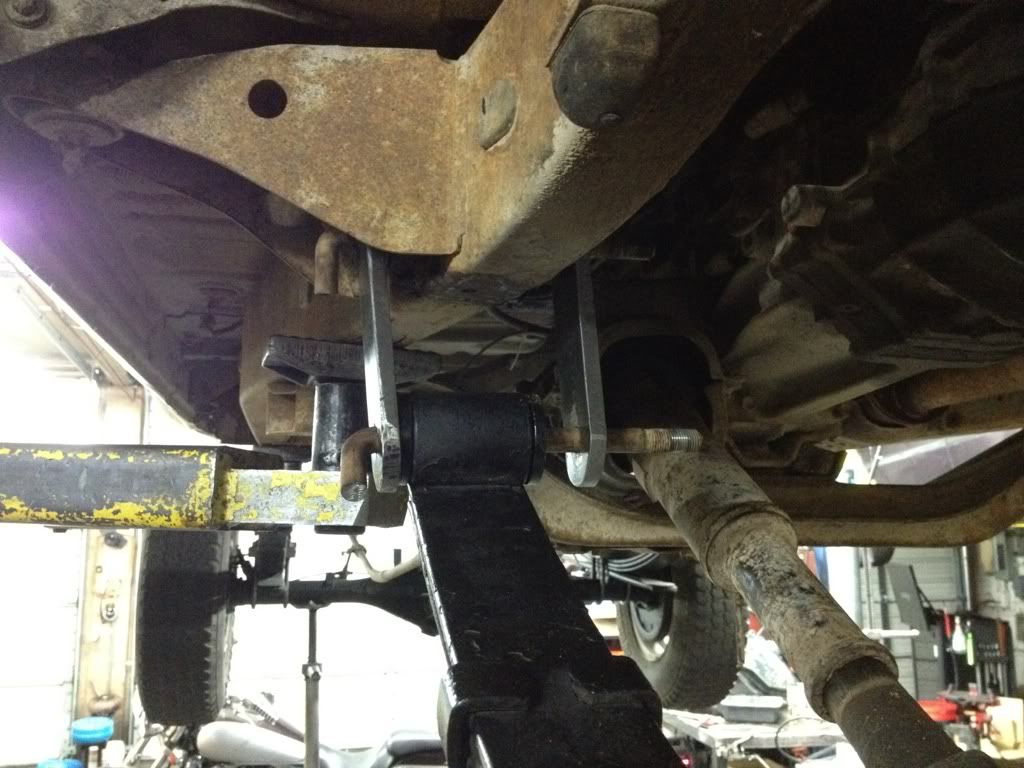
I didn't use a jig , the front hangers are wider than the frame so I basically centered them , then went 11" forward from center of bolt hole from the old hanger to the center of new. Then used a big c clamp to hold them down while I placed the rear shackle mount where I wanted ,Keep in mind like the pics show I have all hangers/shackles/leafs ect bolted up and attached to the diff. Made sure I was in line with the front hanger, then figured out my shackle angle , which I set at 35* which was about 3"back center to center from old shackle mounts. Then tacked the rear shackle mounts , double checked my front hanger measurements and tacked those. Then measured from rear of front hanger to the back of frame on both sides to make sure it was all straight and finished the welds.
Here's a quick idea of how I Got 11" center to center on the front. Keep in mind that every build is gonna be a lil different depending on where you want your rear wheels to sit in the wheel well , I wanted them to be almost stock or a lil forward cause I will be stretching my front axel out a few inches and dont want a crazy long wheel base so I did stock or a 1/2 in or so forward on the rear. I will need to trim wheel wells anyways so it won't be an issue. Some like to set the front hangers less than 11" so it puts the rear axel back in the well to stretch base.
Last edited by 775Toy; 01-12-2012 at 09:48 AM.
01-14-2012, 06:54 PM
#48
Registered User
Thread Starter
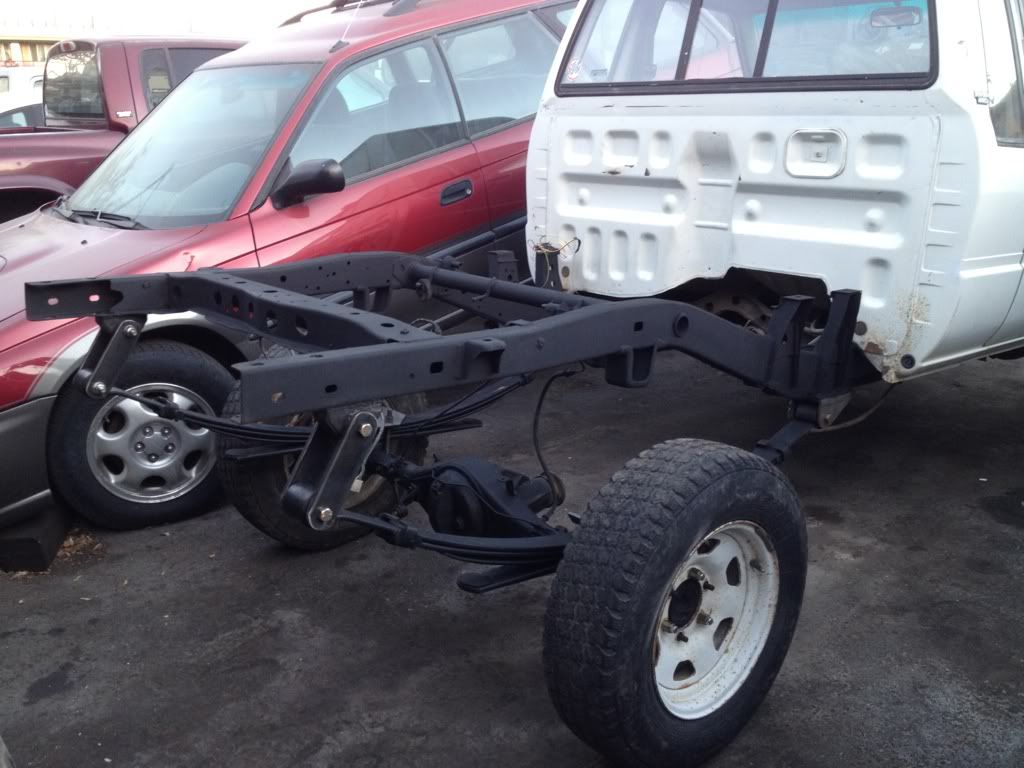
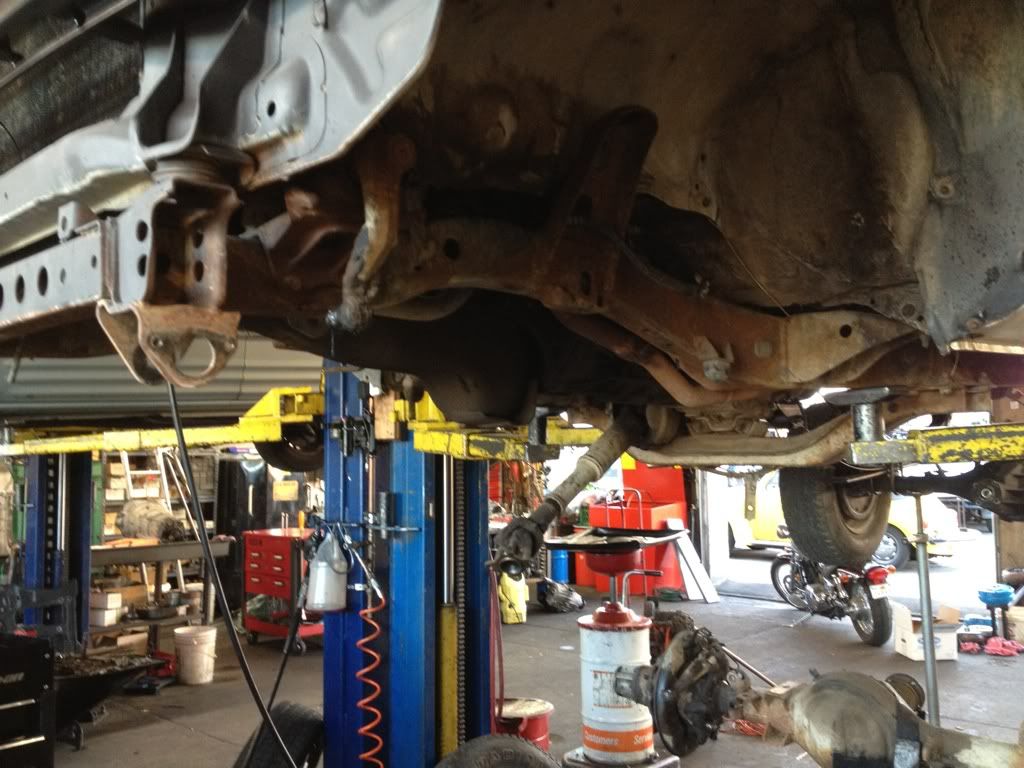
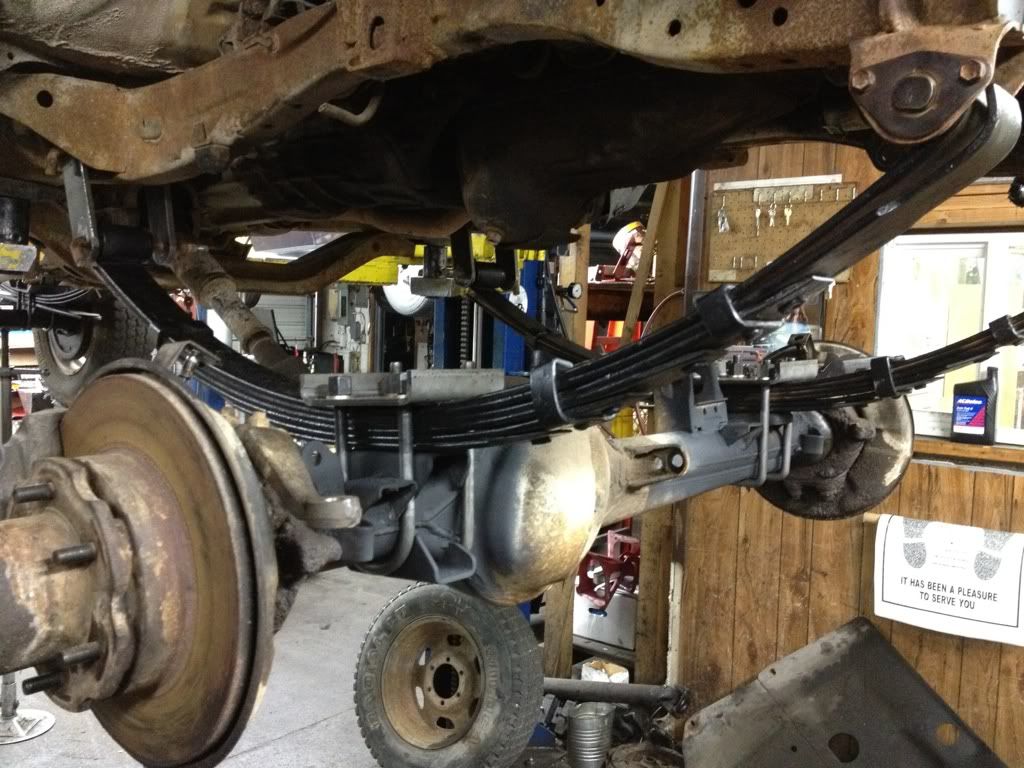
Not a real productive day. Walked around the shop looking for tools I just had ! Nothing lined up , ect ect. I did finish my front shackles , and get started on my front suspension. I didn't bother cleaning the frame or differential , gonna rebuild the front diff and add armor and a truss so it will get cleaned up them and brackets cut off I don't need. The frame will get cleaned up when I get my ifs box mounted.
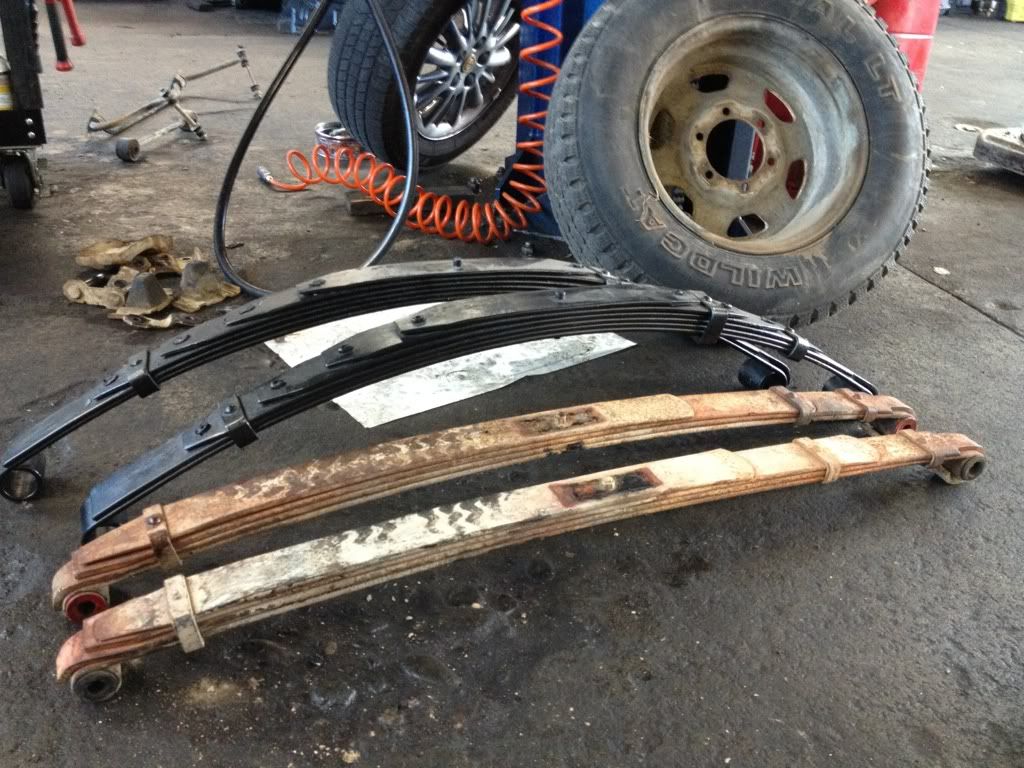
Tore out
Rancho 44044s vs stock
44044s with sky's ubolt flip and homemade shackles mounted up ready to go in.
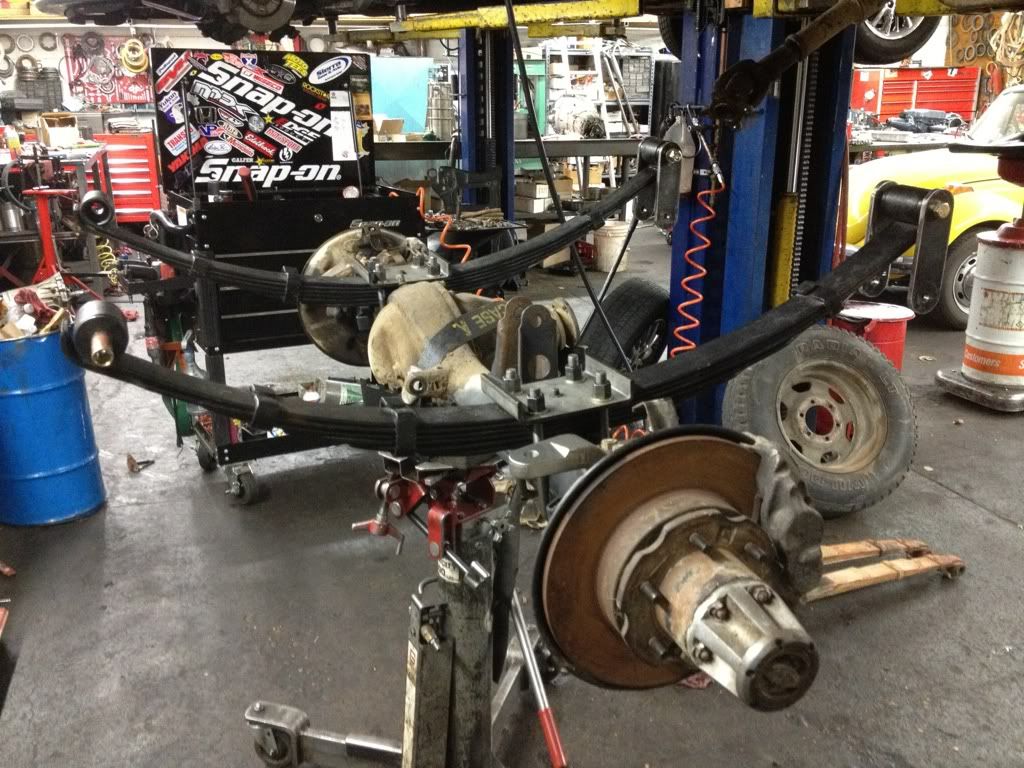
So I had a brain fart when I got my new grade 8 hardware , did compensate for the Toyotas off set shackles in front. So my bolts weren't long enough and didn't have a spacer for the gap it creates. So to get it on its own weight and get it out of the shop I had to improvise. Old ubolt cut in half lol. Will hold it in place till I get correct bolts and spacers.
Hung
Couple of stance shots
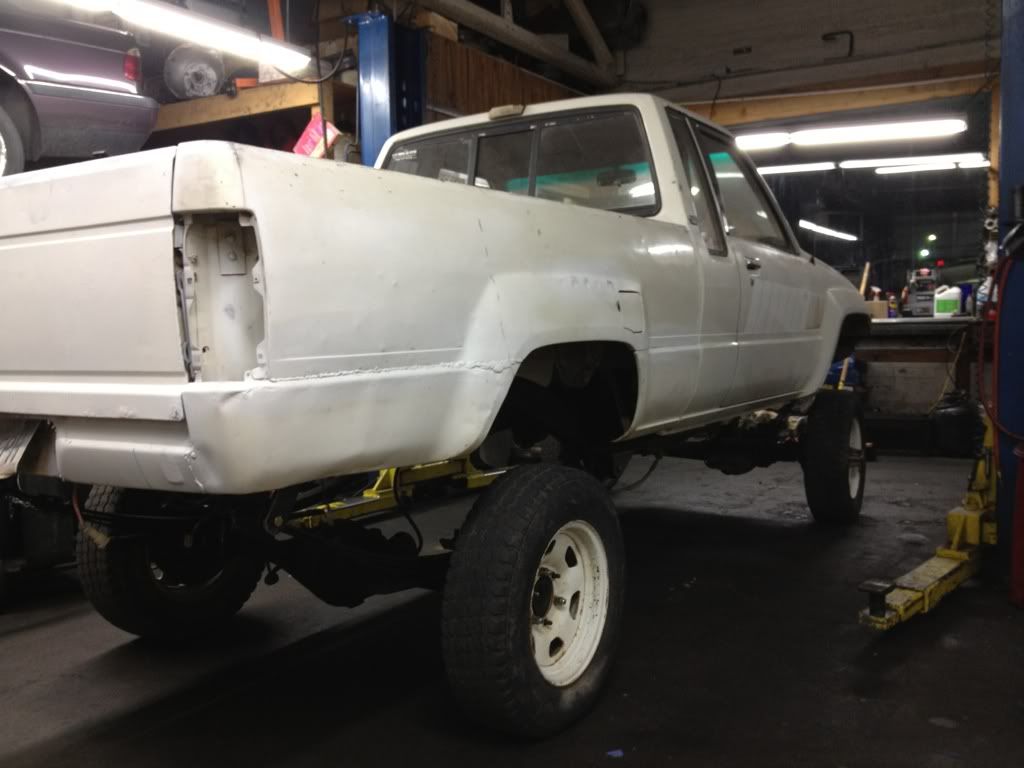
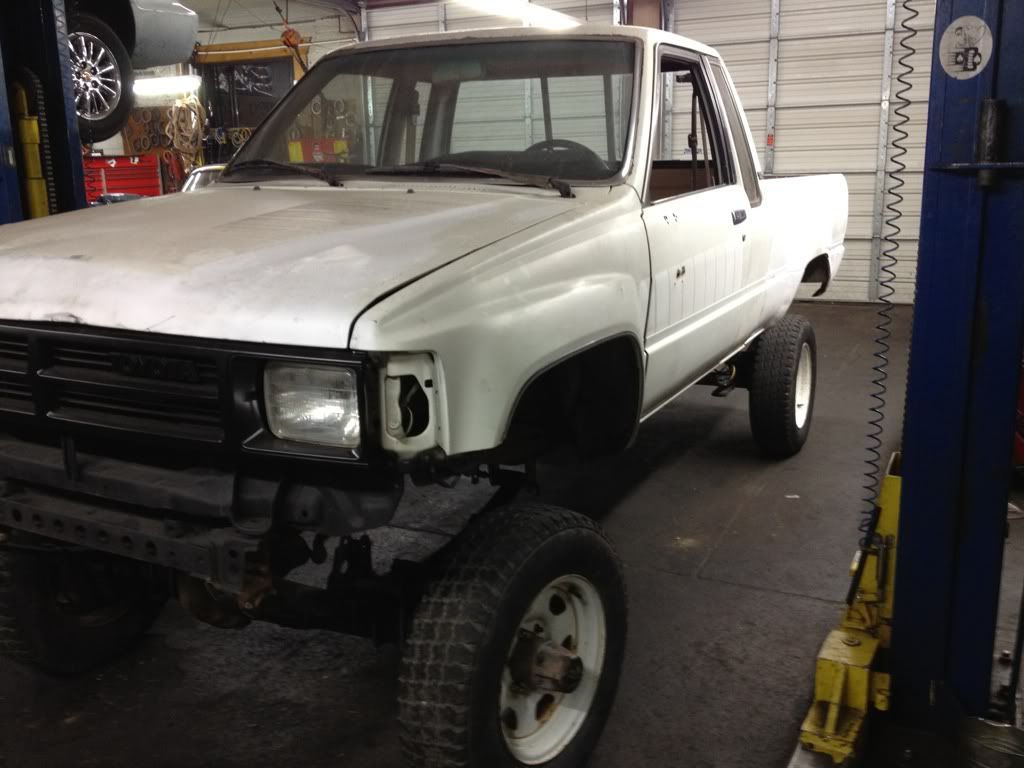
It's pretty tall , about 6" with the 44044s and shackles. It's on stock wheels and tires so it's gonna be a beast on 35s. I might be bringing it down some in the future .
Tore out
Rancho 44044s vs stock
44044s with sky's ubolt flip and homemade shackles mounted up ready to go in.
So I had a brain fart when I got my new grade 8 hardware , did compensate for the Toyotas off set shackles in front. So my bolts weren't long enough and didn't have a spacer for the gap it creates. So to get it on its own weight and get it out of the shop I had to improvise. Old ubolt cut in half lol. Will hold it in place till I get correct bolts and spacers.
Hung
Couple of stance shots
It's pretty tall , about 6" with the 44044s and shackles. It's on stock wheels and tires so it's gonna be a beast on 35s. I might be bringing it down some in the future .
01-14-2012, 09:22 PM
#51
Registered User
Thread Starter
When I got the 63s they were aftermarket oem replacements that were only a year old . So I just ran the bushings they came with since they were practically new. But summit does sell energy suspension bushing kits for 88-98 chevy rear leafs which I will do eventually.
01-14-2012, 09:56 PM
#52
Registered User
Thread Starter
35s with open diffs and stock 4:10s and possibly weld or spool the rear this summer since I will only be wheeling in the local hills and trails and won't see much highway use. Next winter I'd like to regear to 5.29s / lock front and rear and run a set of 30 spline longs with 37s. Got another kid coming soon so I have to set realistic goals. The truck will only run with gas down the carb due to bad fuel pump . It sat many years so the tank got pulled out to be professionally cleaned , I ordered a carb rebuild kit a new pump.
01-18-2012, 12:53 PM
#53
Registered User
Thread Starter
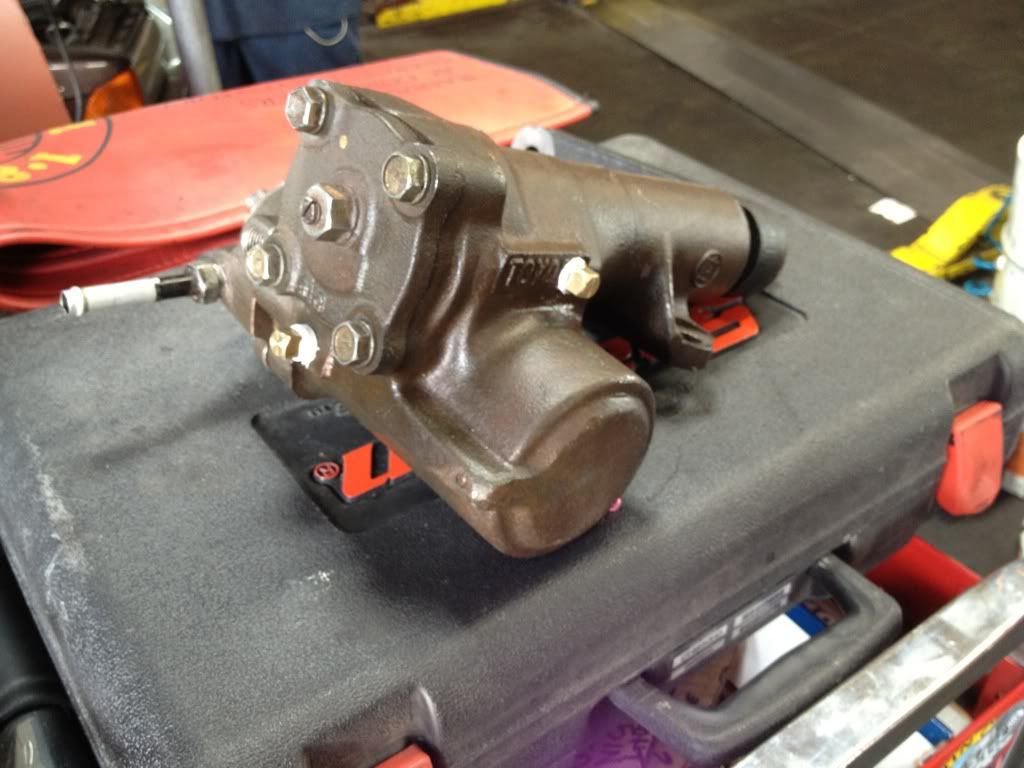
So a week or so ago I got a ifs power steering box thats already tapped for hydro assist to use with my high steer kit, I picked it up for a case of keystone ! I was told it just needs a new o ring on the worm drive cap. So I pulled the worm drive out like a newb and dropped all the little ball bearings in the bott of the piston. So I tore the rest of the pump apart to put the bearings back in. I only counted 43 bearings , but read 43 / 44 and 45 online? So I tried 43 that I had , it would jam up after a turn or 2. So I tried 44 with same results , 45 seemed to work. Got it all back together and made a home depot run to pick up some pipe plugs to plug off the hydro assist holes for now.
01-18-2012, 05:18 PM
#54
Registered User
Join Date: Jul 2009
Location: Eastern NC
Posts: 832
Likes: 0
Received 0 Likes
on
0 Posts
Looks good man, I need to replace the worm drive seal on mine. Supposedly when I bought it, it was a marlin rebuild, but the front seal is leaking t the steering shaft. I may go a head and tap it for hydro steering later on.
01-19-2012, 05:26 PM
#56
Registered User
Thread Starter
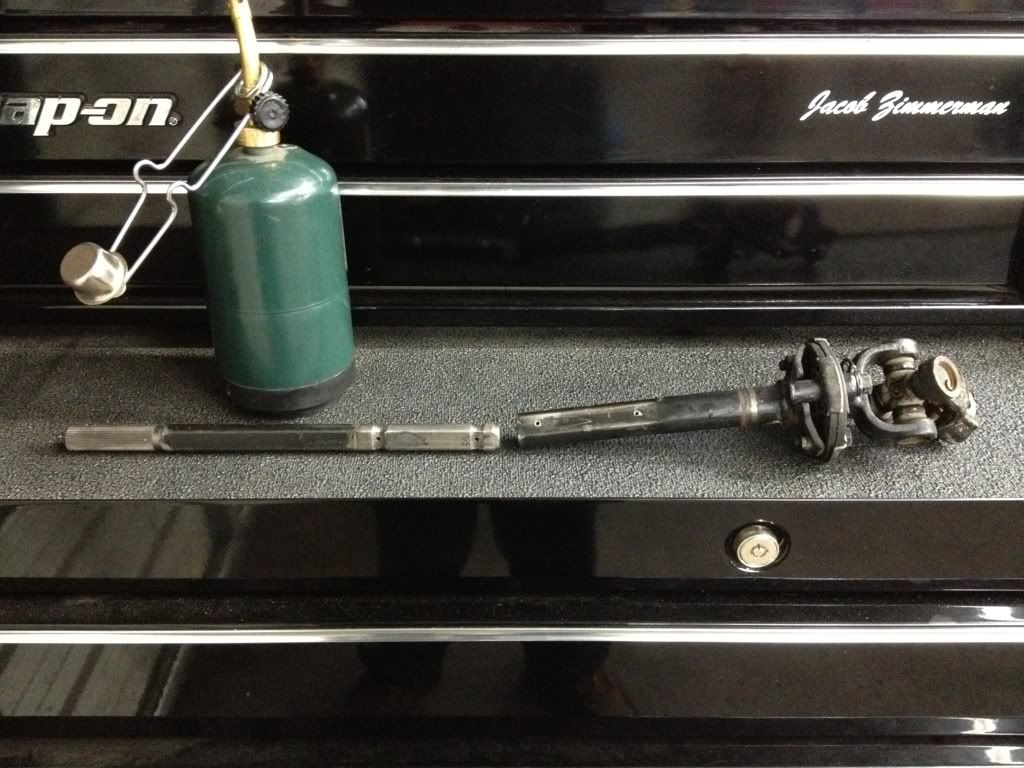
It's been pretty cold and windy in Reno the last few days , I havnt felt like going outside and working on the truck on my lunch breaks. So I've been finding things to do inside like putting the ifs box together and today I got the steering shaft out and got it apart. Don't believe what you read online that you can just drill the 2 Plastic pins out! I drilled them out and gave it quite a few smacks with a big rubber mallet and no budge. So I turned to the lil Coleman propane torch. Heat it up by the holes for a few minutes and the more plastic started flowing out the holes , once I seen no more plastic coming out I gave it a good couple smacks with the mallet and wala came apart. Used a wire wheel and file to Clean the rest of the melted plastic off the shaft ends. Once I get the box mounted I'll figure the length I need to stretch it.
01-21-2012, 01:49 PM
#57
Registered User

Join Date: Dec 2011
Location: Carson City, Nevada
Posts: 19
Likes: 0
Received 0 Likes
on
0 Posts
Cold and windy is it. You guys just had that big fire rollin' up from Washoe too :3 Still a little jealous on the keystone trade for the steering box.
Does the engine have any problems at all?
Does the engine have any problems at all?
 01-23-2012, 07:14 PM
#59
Registered User
Thread Starter
Neren- thanks , you got a build thread?