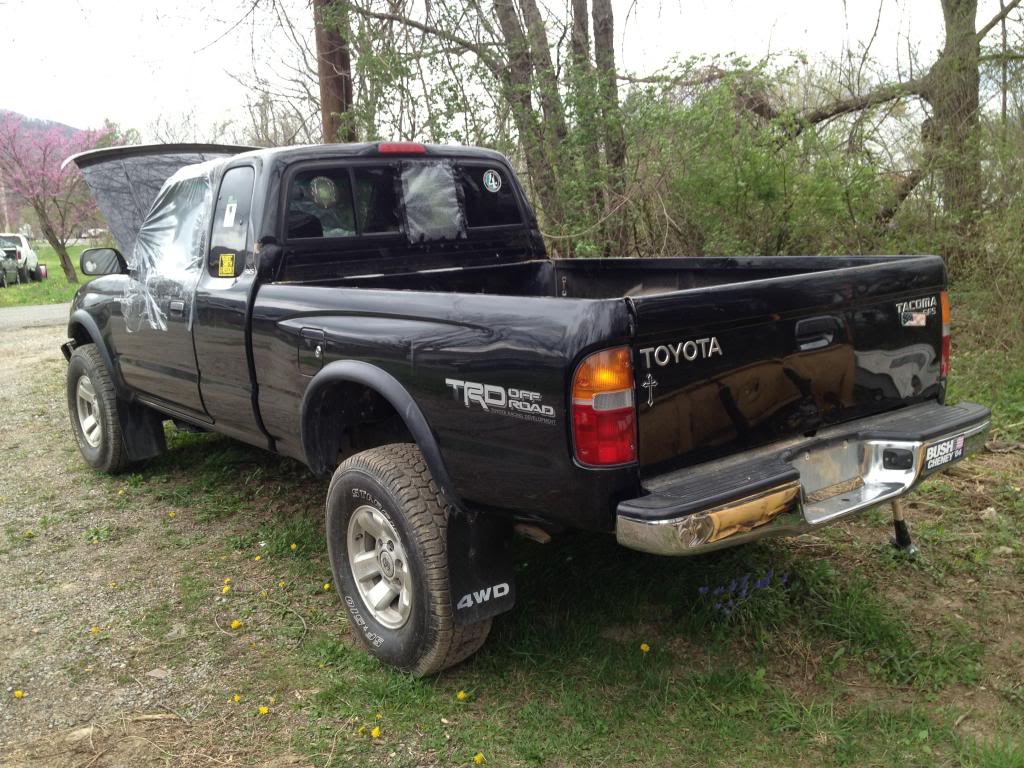
1983 Toyota Pickup.
 02-20-2014, 06:51 AM
#21
Looks good! Don't forget that POR-15 doesn't like the sun so you need to top coat it. I used the POR-15 Chassis Coat on mine. It's UV resistant, hard as hell and has a really good looking satin finish. It is thicker than the POR-15 rust inhibitor, but I was able to brush the first coat on to give it a nice thick coat. Then I knocked it down with some 120g sandpaper, thinned it a and shot it with my primer gun. Mine looks like the whole thing was sprayed evenly.
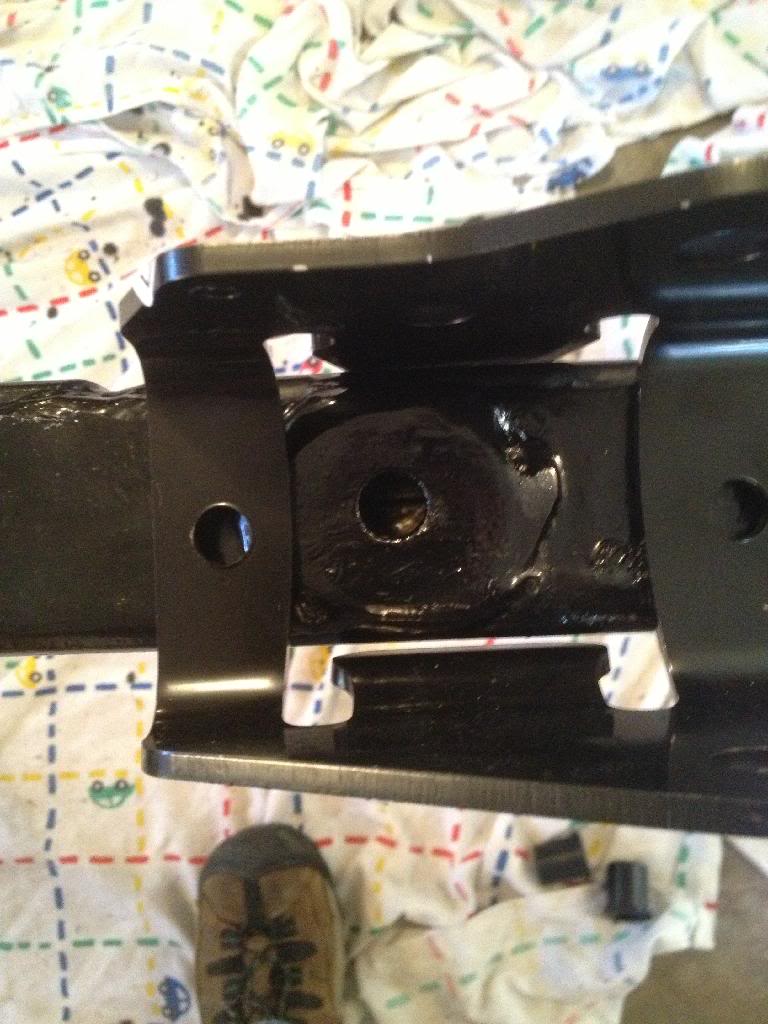
If you go with the TG kit, remember that you will have to relocate the rear hangers so you'll be redoing some of your lovely paint job. I did Old Man Emu on mine with +2" shackles and I am pretty pleased with the high. From what I understand the ride is similar to factory.
How did you like using the 3m Rust Fighter?? Did you use a shutz gun to shoot it?? I still need to do the inside of my frame, but I've heard and seen bad results from Eastwood's product.
 02-20-2014, 01:54 PM
#22
Registered User
Thread Starter

Join Date: Nov 2013
Posts: 83
Likes: 0
Received 0 Likes
on
0 Posts
Looks good! Don't forget that POR-15 doesn't like the sun so you need to top coat it. I used the POR-15 Chassis Coat on mine. It's UV resistant, hard as hell and has a really good looking satin finish. It is thicker than the POR-15 rust inhibitor, but I was able to brush the first coat on to give it a nice thick coat. Then I knocked it down with some 120g sandpaper, thinned it a and shot it with my primer gun. Mine looks like the whole thing was sprayed evenly.
If you go with the TG kit, remember that you will have to relocate the rear hangers so you'll be redoing some of your lovely paint job. I did Old Man Emu on mine with +2" shackles and I am pretty pleased with the high. From what I understand the ride is similar to factory.
How did you like using the 3m Rust Fighter?? Did you use a shutz gun to shoot it?? I still need to do the inside of my frame, but I've heard and seen bad results from Eastwood's product.
I don't remember the details on your springs, but do you know the total lift you'll have? Do you have histeer? My truck is a non P/S truck.
3m's Rust Fighter was decent. It is a yellowish color, similar to cosmoline. I did use a shutz gun and a 360 degree spraying hose that was around 3ft long. It covered well, but I used 1.5 jars. I don't remember the size of the jar. Eventually it will harden up into a waxy like substance and it's supposed to wick away moisture. I didn't have good results with Eastwoods Rust encapsulator. I put pics up awhile ago of the coverage, but I think they won't show up anymore since I moved some pictures around in Photobucket. I will re-upload them so you can see.
02-20-2014, 08:52 PM
#24
Registered User
Join Date: Jan 2011
Location: Memphis, TN
Posts: 1,051
Likes: 0
Received 0 Likes
on
0 Posts
I always like to see a good frame off restore of vehicles.. That frame work looks intensive, but that feeling of accomplishment can't be beat, right?
Keep up the good work, man!
Keep up the good work, man!
02-21-2014, 01:49 PM
#25
Registered User
Thread Starter
Join Date: Nov 2013
Posts: 83
Likes: 0
Received 0 Likes
on
0 Posts
I will check into their lifts. The price is pretty appealing. I haven't heard any bad things about OME products either. I want to be able to comfortably run 35's. Since my truck doesn't have power steering, 35's will likely be an issue which is why I've been looking for lifts that require the use of histeer.
And the feeling of accomplishment is great. I didn't expect to be doing all this when I first got the truck, but I'm really enjoying all of it. I won't be doing a full restore though. A lot of the things I want to do to the truck will be done after the frame swap is completed.
And the feeling of accomplishment is great. I didn't expect to be doing all this when I first got the truck, but I'm really enjoying all of it. I won't be doing a full restore though. A lot of the things I want to do to the truck will be done after the frame swap is completed.
02-22-2014, 07:02 AM
#26
Registered User
Thread Starter
Join Date: Nov 2013
Posts: 83
Likes: 0
Received 0 Likes
on
0 Posts
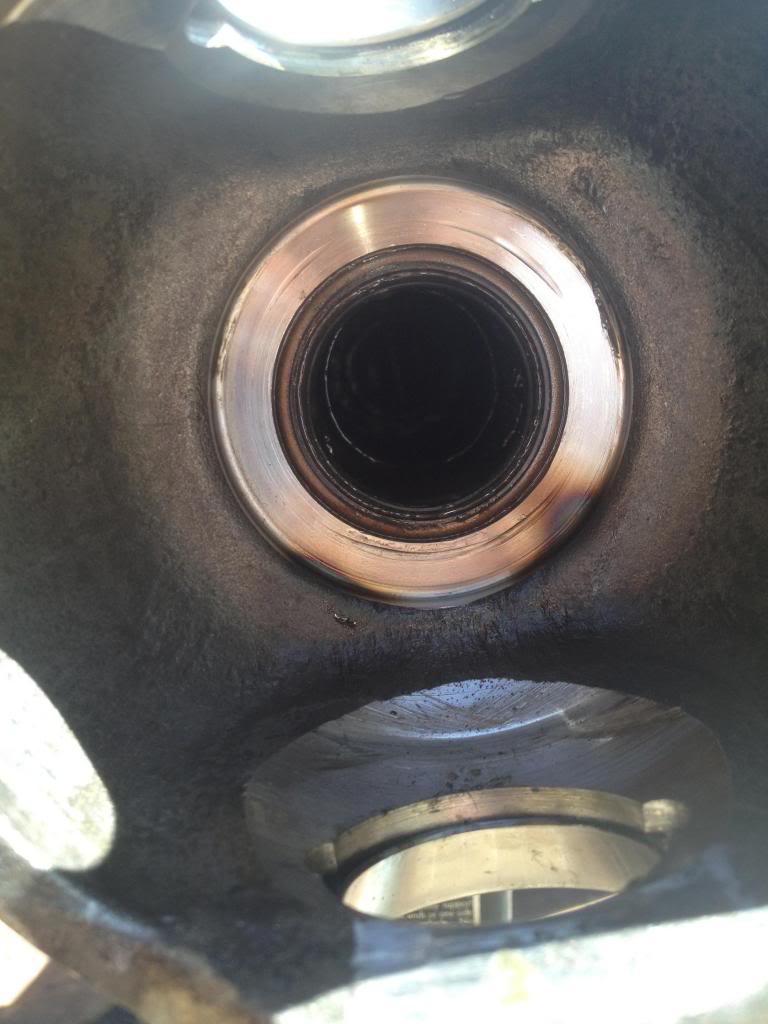
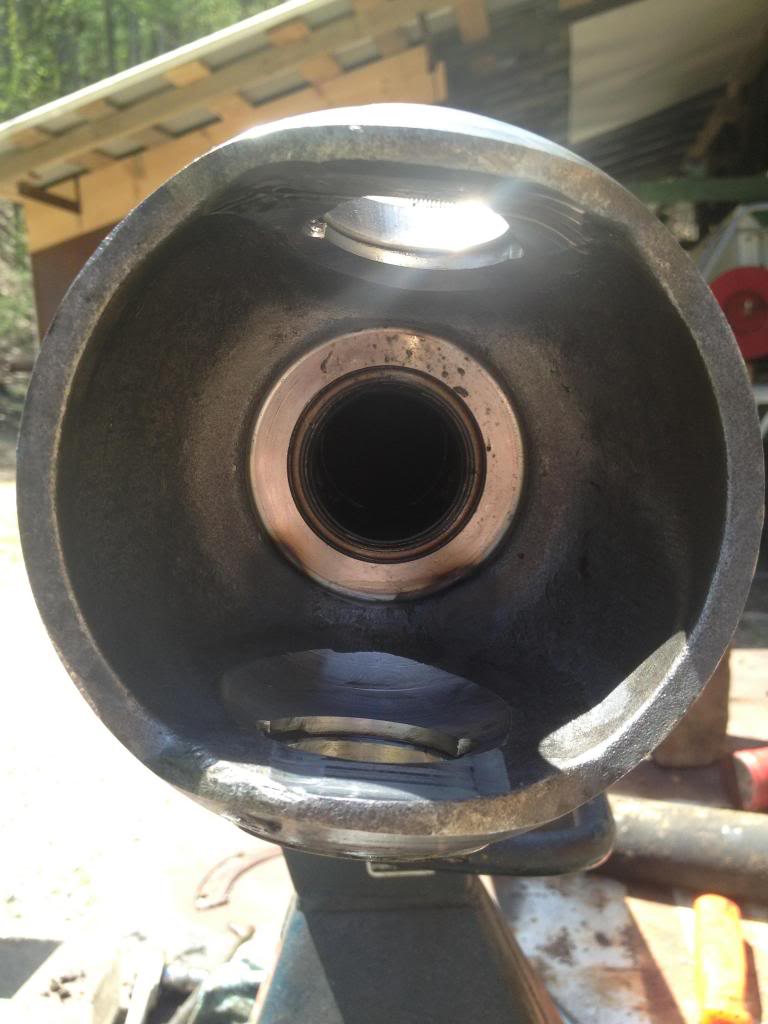
Here are two pictures illustrating the differences between Eastwood's Rust Encapsulator, and 3m's Rust Fighter with a Shutz gun.
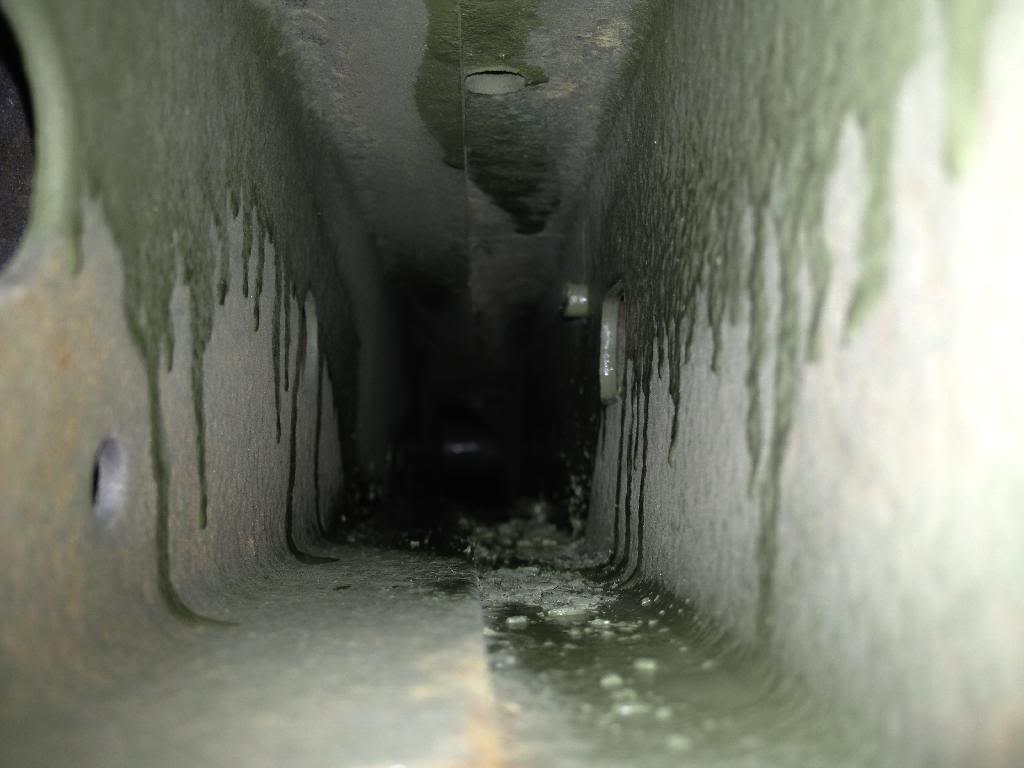
The picture above is Eastwood's product. I ordered two aerosol cans which came out to about $30.00. This is only one coat. Two cans was enough to do one coat on both sides.
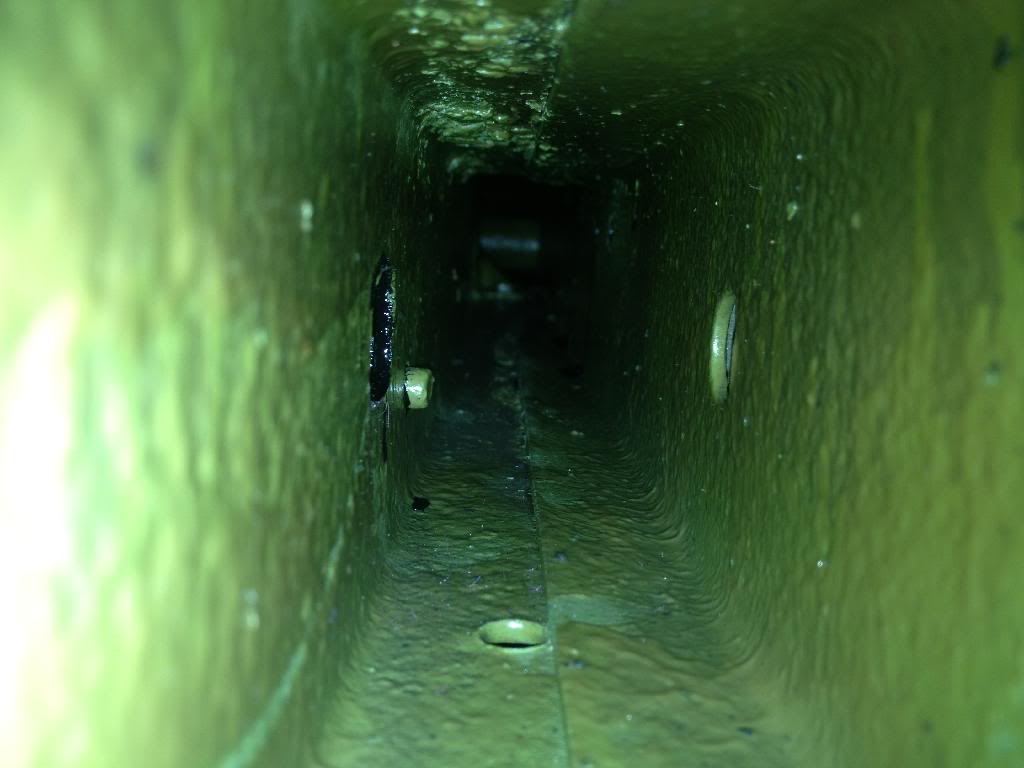
This picture is after doing 3 coats of 3m's Rust Fighter. Now I have about $110.00 total with this, that's the price of the Shutz gun, the 360 degree wand, and two jars of Rust Fighter. To me, the price is worth the piece of mind.
I'm sure if you spent the same amount of money with Eastwood you might get the same coverage. However, the nozzles that came with the aerosol cans had only 4 holes, so it wasn't truly 360 degrees of spray pattern. The wand I bought for the Shutz gun had 2 slots in it, and they overlapped each other making for a better spray pattern. Hopefully this helps anyone trying to decide what to do for the inside of their frame.
02-27-2014, 08:43 AM
#27
Registered User
Thread Starter
Join Date: Nov 2013
Posts: 83
Likes: 0
Received 0 Likes
on
0 Posts
I have a few questions for you guys.
With the curve in my frame, what have most people done when mounting their IFS steering box mount? Since the mount is flat and will be in the curve. Also, would it be a wise choice to go ahead and do high steer without the cab on the truck? Or with the cab on? I've been leaning towards doing it with the cab on, since ill know what's there, what's in the way, and what isn't in the way. If there aren't any real issues then I'd like to do it with the cab off since there will be plenty of space.
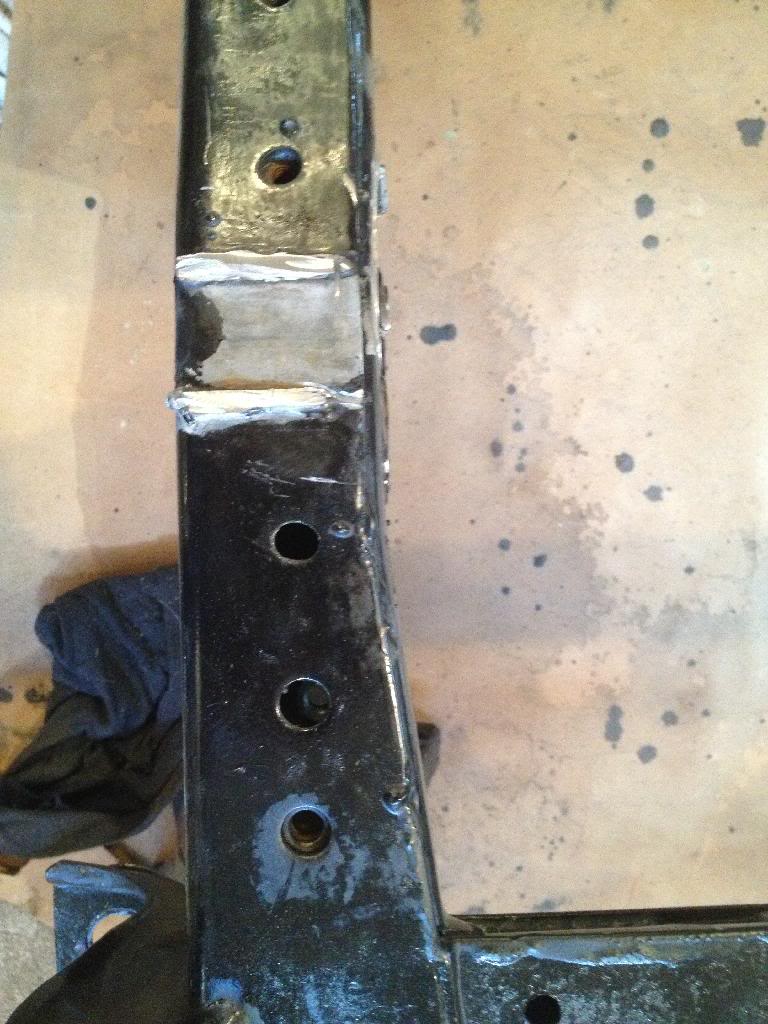
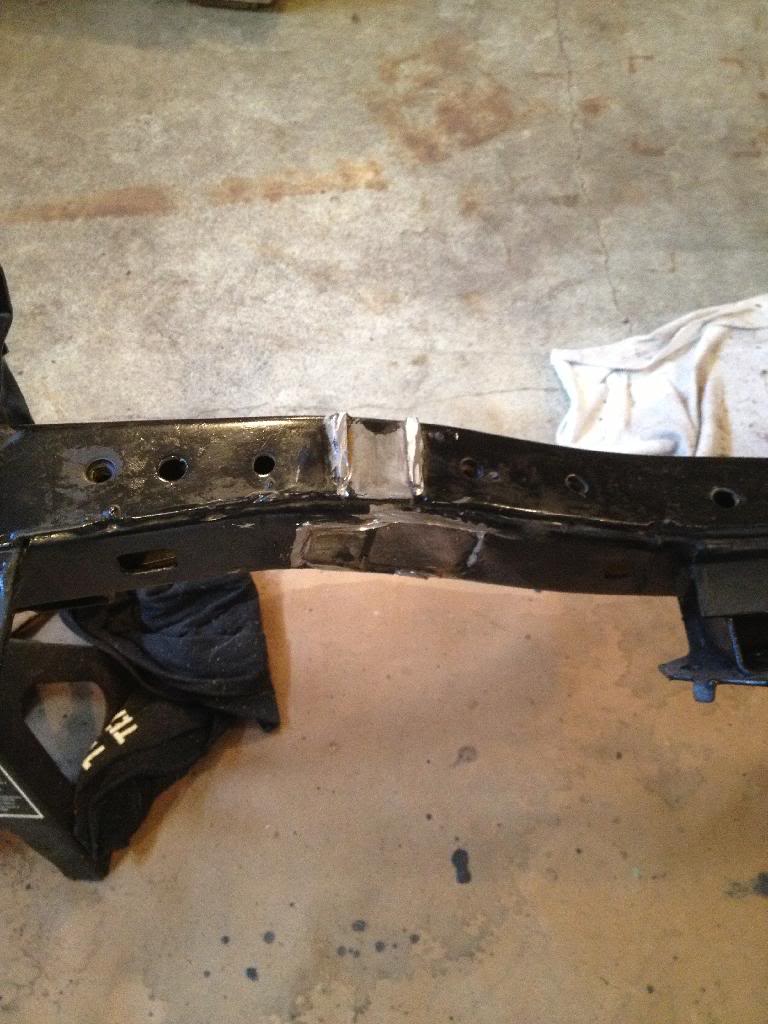
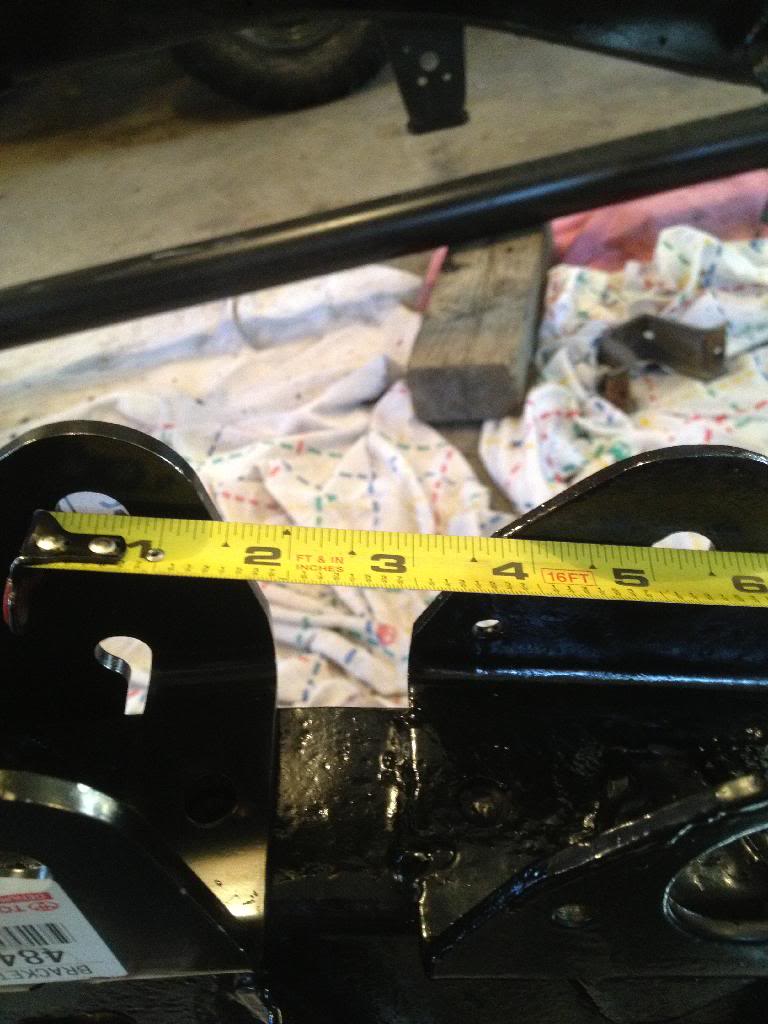
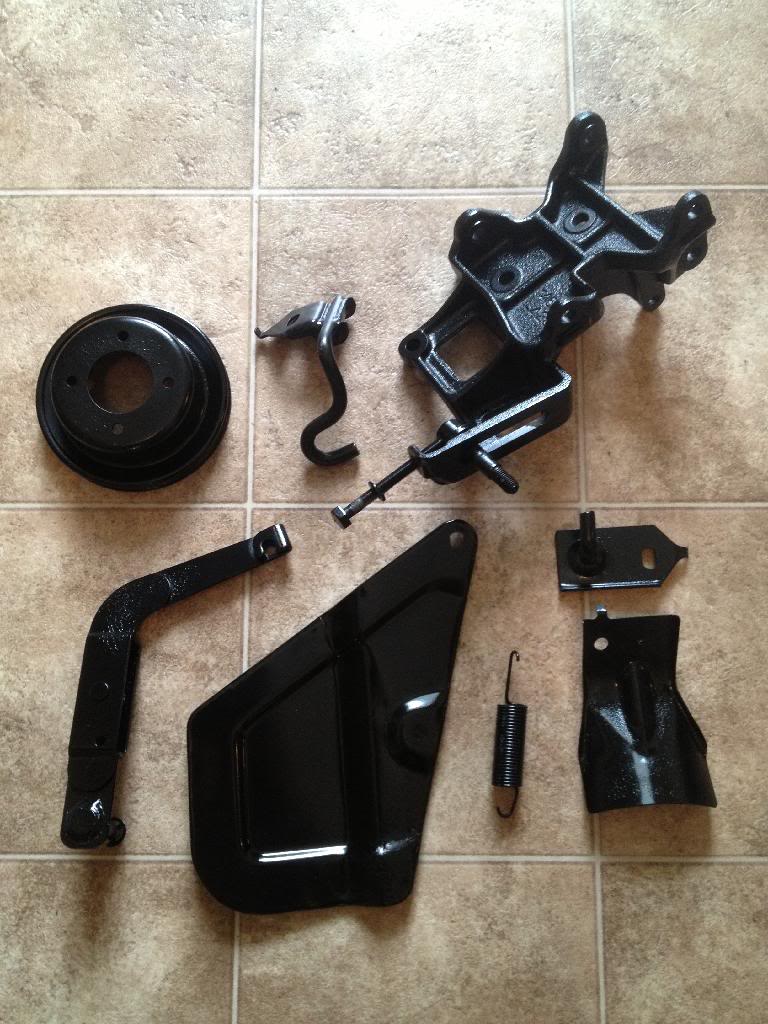
Also, I ordered a few parts for RUFS and the Mazda rear spring swap. Sky boomerang shackles, OEM bushings, and new rear spring hangers. I read somewhere a guy used OEM hangers off a 89-94 pickup for the rear spring swap because they were cheap, like $20.00. Well that wasn't the case for me. I paid like twice that. I noticed after I ordered that TG hangers are somewhere around $30.00, but there is a problem. When I was redoing my frame, I drilled drain holes in the bottom and welded washers there. TG hangers are mostly solid metal on the bottom, and where the new spring hanger is supposed to go, there is a big ass washer in the way. This is why I'm glad I got OEM hangers. The OEM hangers are partially open on the bottom. With the new hanger 5" forward of the old one, the OEM hanger just might work with a little bit of grinding.


With the curve in my frame, what have most people done when mounting their IFS steering box mount? Since the mount is flat and will be in the curve. Also, would it be a wise choice to go ahead and do high steer without the cab on the truck? Or with the cab on? I've been leaning towards doing it with the cab on, since ill know what's there, what's in the way, and what isn't in the way. If there aren't any real issues then I'd like to do it with the cab off since there will be plenty of space.
Also, I ordered a few parts for RUFS and the Mazda rear spring swap. Sky boomerang shackles, OEM bushings, and new rear spring hangers. I read somewhere a guy used OEM hangers off a 89-94 pickup for the rear spring swap because they were cheap, like $20.00. Well that wasn't the case for me. I paid like twice that. I noticed after I ordered that TG hangers are somewhere around $30.00, but there is a problem. When I was redoing my frame, I drilled drain holes in the bottom and welded washers there. TG hangers are mostly solid metal on the bottom, and where the new spring hanger is supposed to go, there is a big ass washer in the way. This is why I'm glad I got OEM hangers. The OEM hangers are partially open on the bottom. With the new hanger 5" forward of the old one, the OEM hanger just might work with a little bit of grinding.


Last edited by Cab4you26; 02-27-2014 at 08:44 AM.
03-31-2014, 06:43 PM
#28
Registered User
Thread Starter
Join Date: Nov 2013
Posts: 83
Likes: 0
Received 0 Likes
on
0 Posts
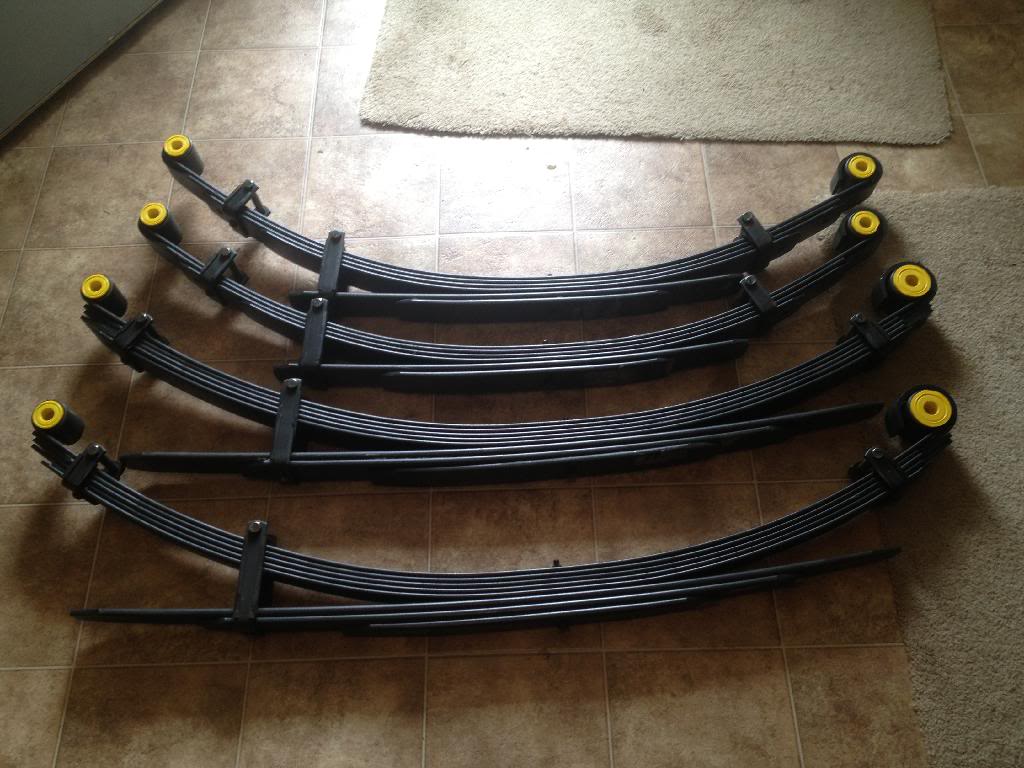
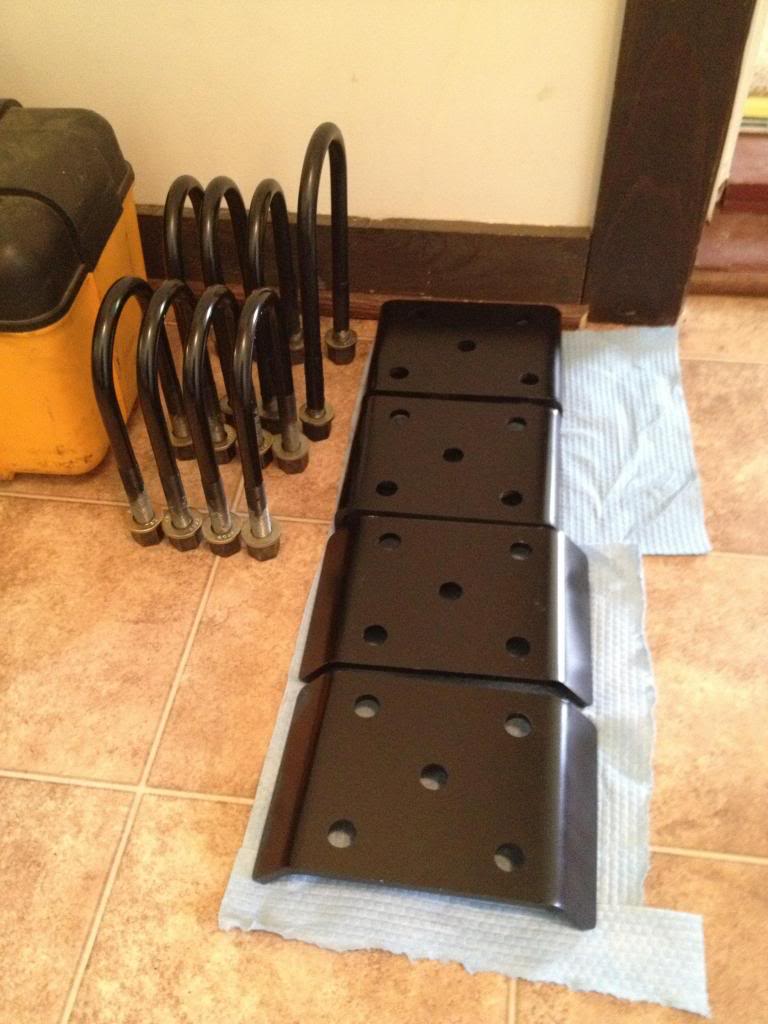
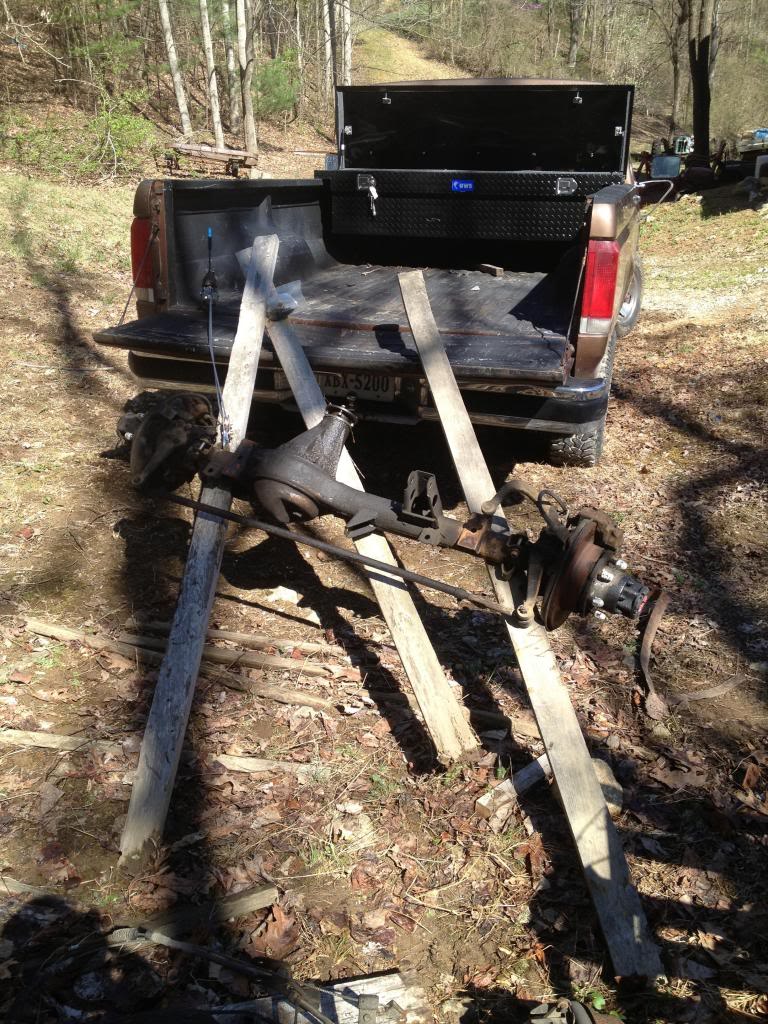
So I changed my Mazda spring plan and decided to do OME rears off of 89-94 pickups to use in the rear of my truck, which are 3 inches longer. Also will be using OME rufs for the front.
I'm not going to mess with any of the hangers yet until I have the truck most of the way back together. I couldn't reuse my old front hanger bolts because I mushroomed the threads too much when I took them out. So I beat the studs out of the rear shackle plates and made my own front hanger bolts.


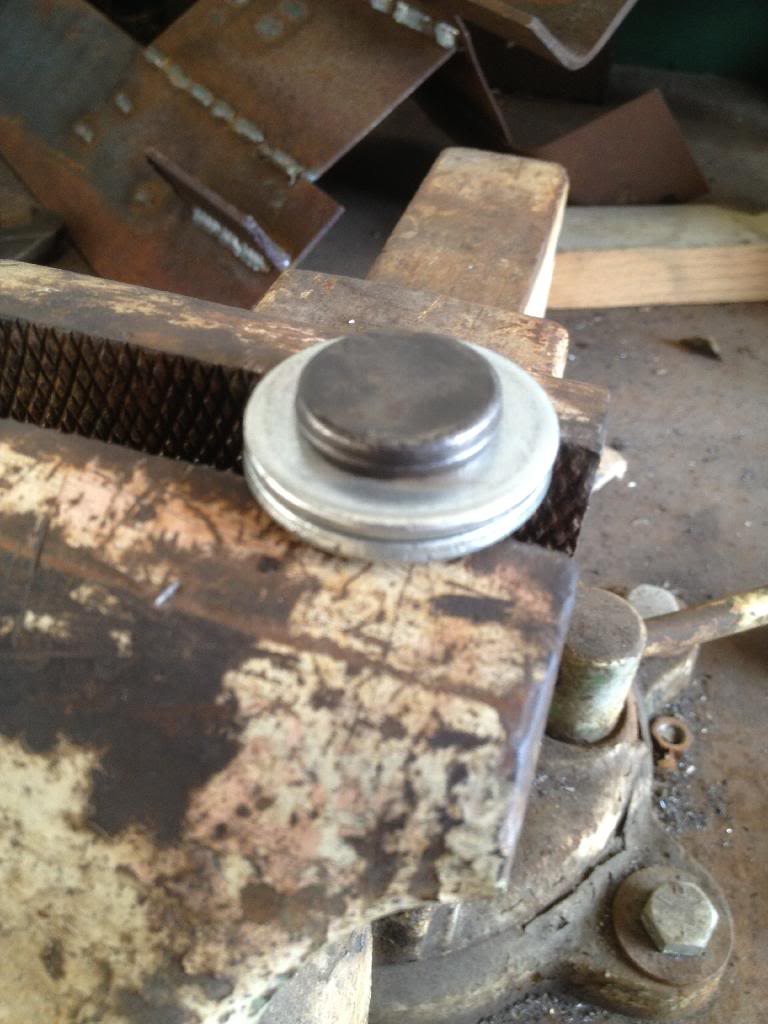
I also made greasable bolts for the rear shackles.
And I've since torn the truck most of the way down.
Sandblasted and painted some things.
It's slow progress, but I'm getting closer to having a truck!

I'm not going to mess with any of the hangers yet until I have the truck most of the way back together. I couldn't reuse my old front hanger bolts because I mushroomed the threads too much when I took them out. So I beat the studs out of the rear shackle plates and made my own front hanger bolts.


I also made greasable bolts for the rear shackles.

And I've since torn the truck most of the way down.


Sandblasted and painted some things.


It's slow progress, but I'm getting closer to having a truck!
04-13-2014, 09:09 AM
#29
Registered User
Thread Starter
Join Date: Nov 2013
Posts: 83
Likes: 0
Received 0 Likes
on
0 Posts
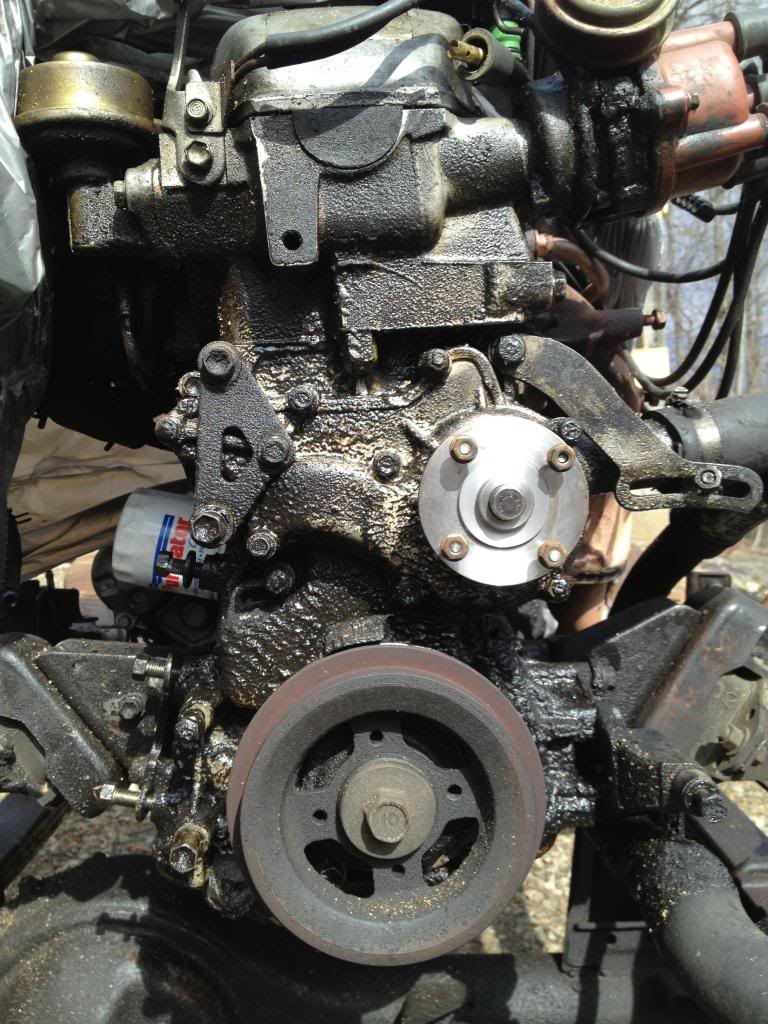
I painted up my u-bolt flip so ill be ready to mount my axles after I get the parts in for the front and get it rebuilt.
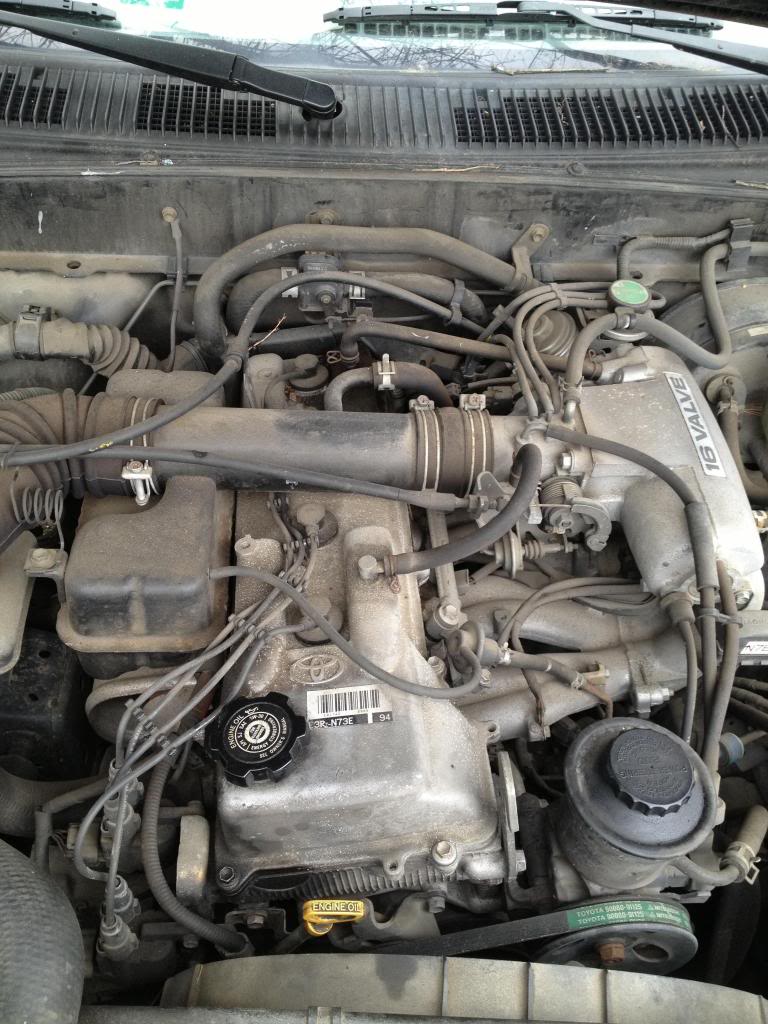
I also fixed my pressure washer and got the engine washed up. It still looks pretty crappy, though.
Before:
After:

The tranny and transfer case have a nice layer of grease and clay caked on that the pressure washer couldn't take off.
Anyway, I encountered a big setback today. I originally planned on putting all new gaskets on the engine so it had no leaks when it was all back together. I pulled the valve cover today, and this is what I found:
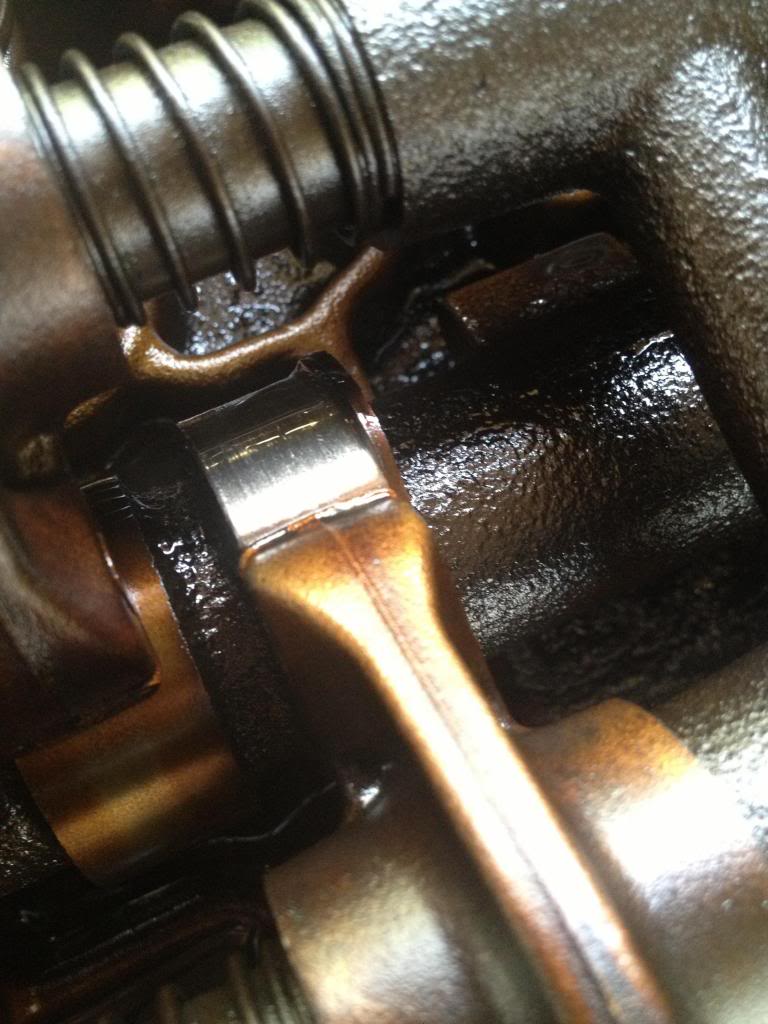
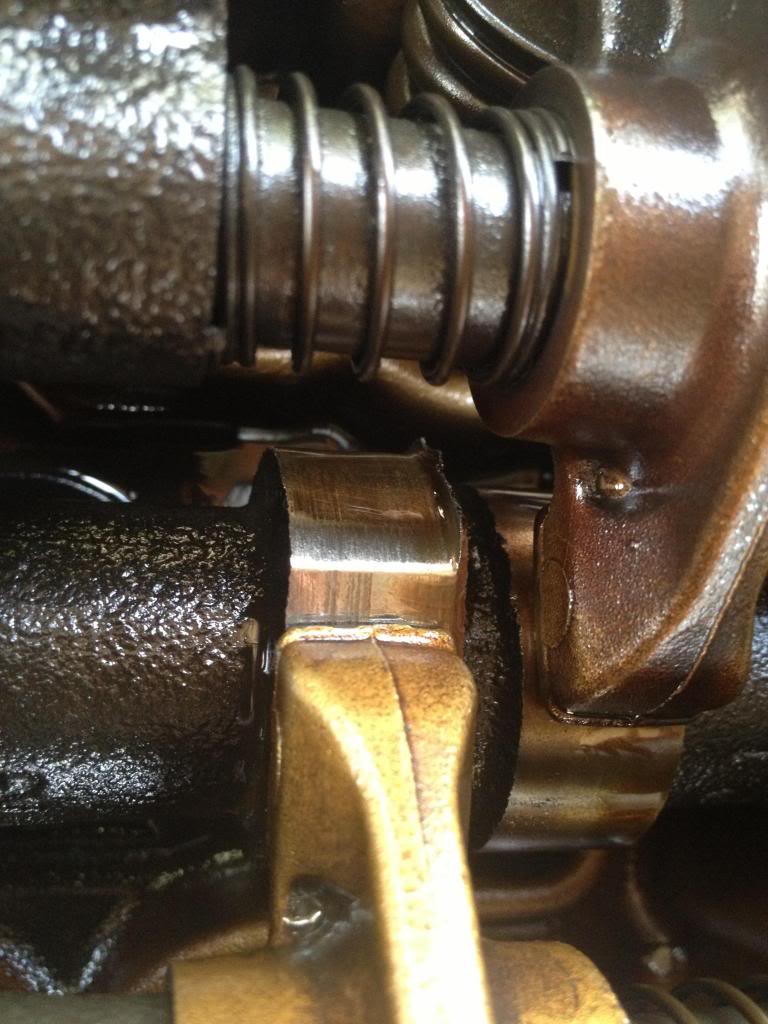
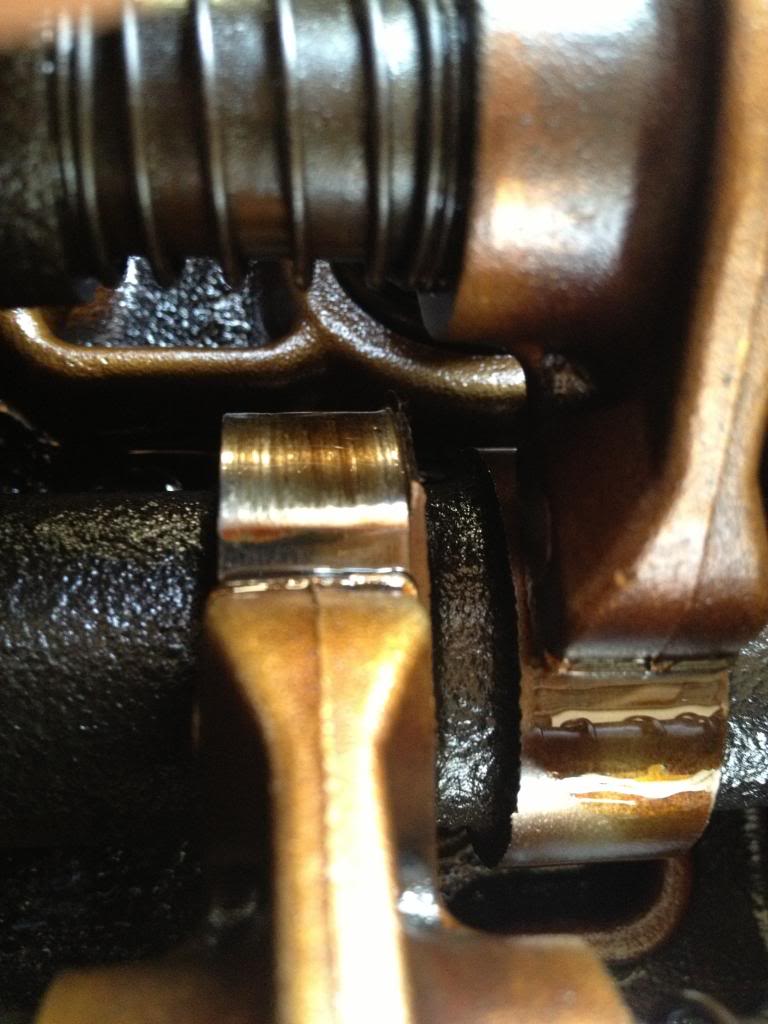
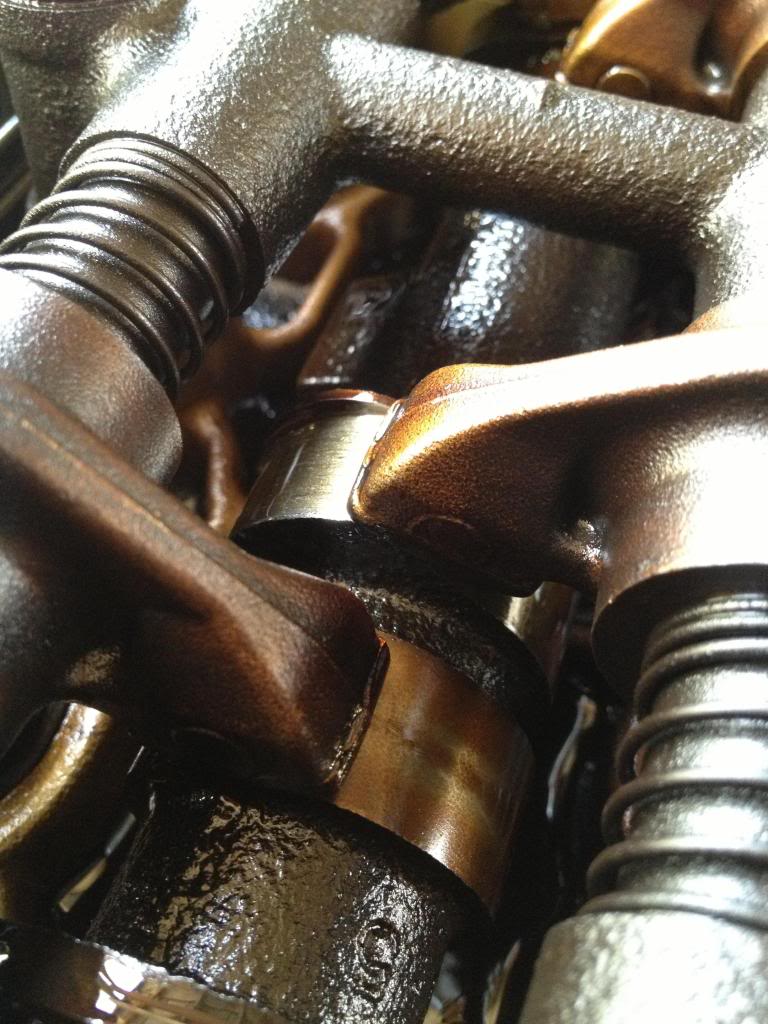
So I'm pretty bummed about my find. I hadn't planned on rebuilding this engine. When I drove this thing home, it was ridiculous how gutless it was. I'm surprised it even got me home looking at the internals on it. And the reason I don't want to rebuild it is because I'm sure it will still be pretty gutless after a rebuild. And I originally just wanted to do gaskets to hold me over until I could locate a wrecked Tacoma with a 3rz. Not only that, but by the time I spend the money to send this thing off to the machine shop, desmog, carb, exhaust, etc. I feel like I could have spent comparible money to do a 3rz swap. So I'm not sure what to do right now.

I also fixed my pressure washer and got the engine washed up. It still looks pretty crappy, though.
Before:

After:

The tranny and transfer case have a nice layer of grease and clay caked on that the pressure washer couldn't take off.
Anyway, I encountered a big setback today. I originally planned on putting all new gaskets on the engine so it had no leaks when it was all back together. I pulled the valve cover today, and this is what I found:


So I'm pretty bummed about my find. I hadn't planned on rebuilding this engine. When I drove this thing home, it was ridiculous how gutless it was. I'm surprised it even got me home looking at the internals on it. And the reason I don't want to rebuild it is because I'm sure it will still be pretty gutless after a rebuild. And I originally just wanted to do gaskets to hold me over until I could locate a wrecked Tacoma with a 3rz. Not only that, but by the time I spend the money to send this thing off to the machine shop, desmog, carb, exhaust, etc. I feel like I could have spent comparible money to do a 3rz swap. So I'm not sure what to do right now.
04-13-2014, 10:05 AM
#30
Registered User
Join Date: Feb 2014
Posts: 351
Likes: 0
Received 0 Likes
on
0 Posts
Yea 3rz is cool but a well built 22r now that's something people need to start doing again I did found really good parts at great prices I have some places written down if you want to shop around
04-14-2014, 10:01 AM
#31
Registered User
Thread Starter
Join Date: Nov 2013
Posts: 83
Likes: 0
Received 0 Likes
on
0 Posts
Update: bought a truck today minus the wheels and tires.
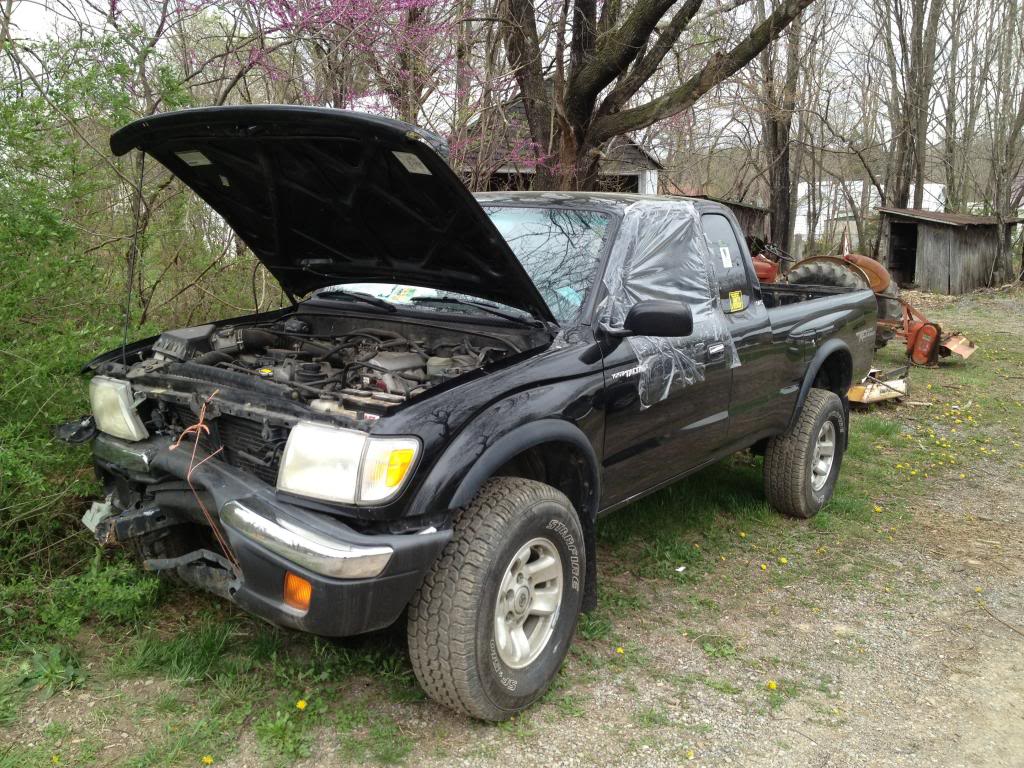
Has a running 3rz with 140k. One owner truck, and the guy claimed he changed the oil every 2k. Probably BS, but the inside of the valve cover where the oil fill cap goes looked new, so maybe not. Now I gotta figure out how to do wiring since I don't know s*** about it. Truck will be parted out besides the obvious thing I need.


Has a running 3rz with 140k. One owner truck, and the guy claimed he changed the oil every 2k. Probably BS, but the inside of the valve cover where the oil fill cap goes looked new, so maybe not. Now I gotta figure out how to do wiring since I don't know s*** about it. Truck will be parted out besides the obvious thing I need.
04-17-2014, 11:06 AM
#34
Registered User
Thread Starter
Join Date: Nov 2013
Posts: 83
Likes: 0
Received 0 Likes
on
0 Posts
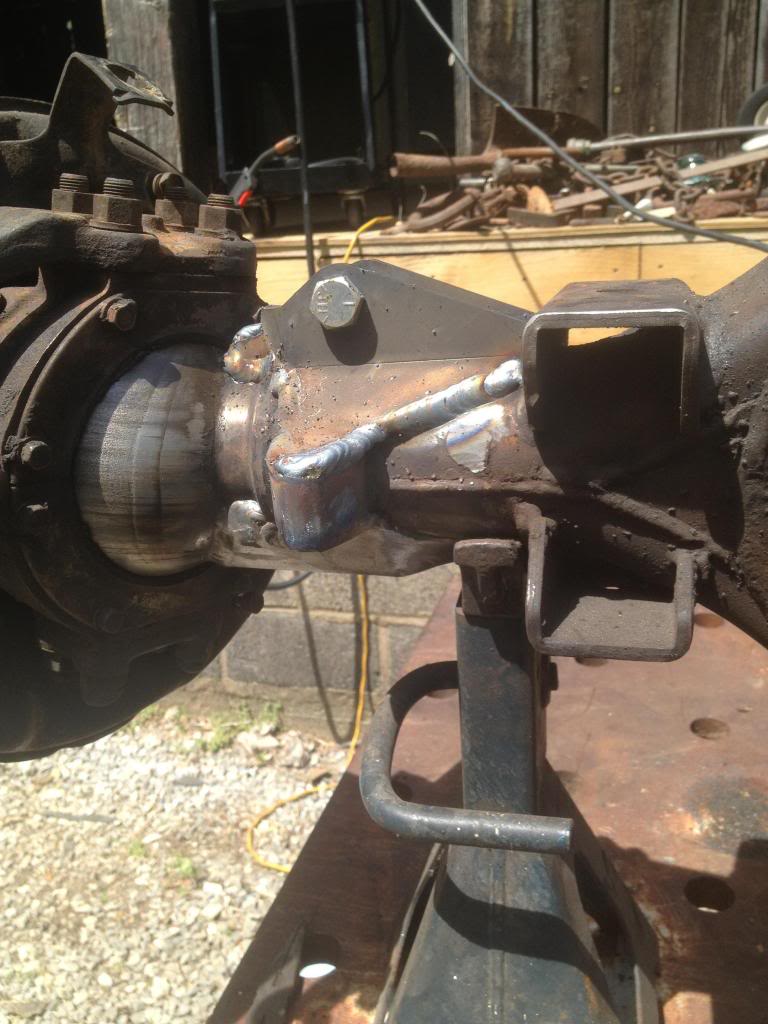
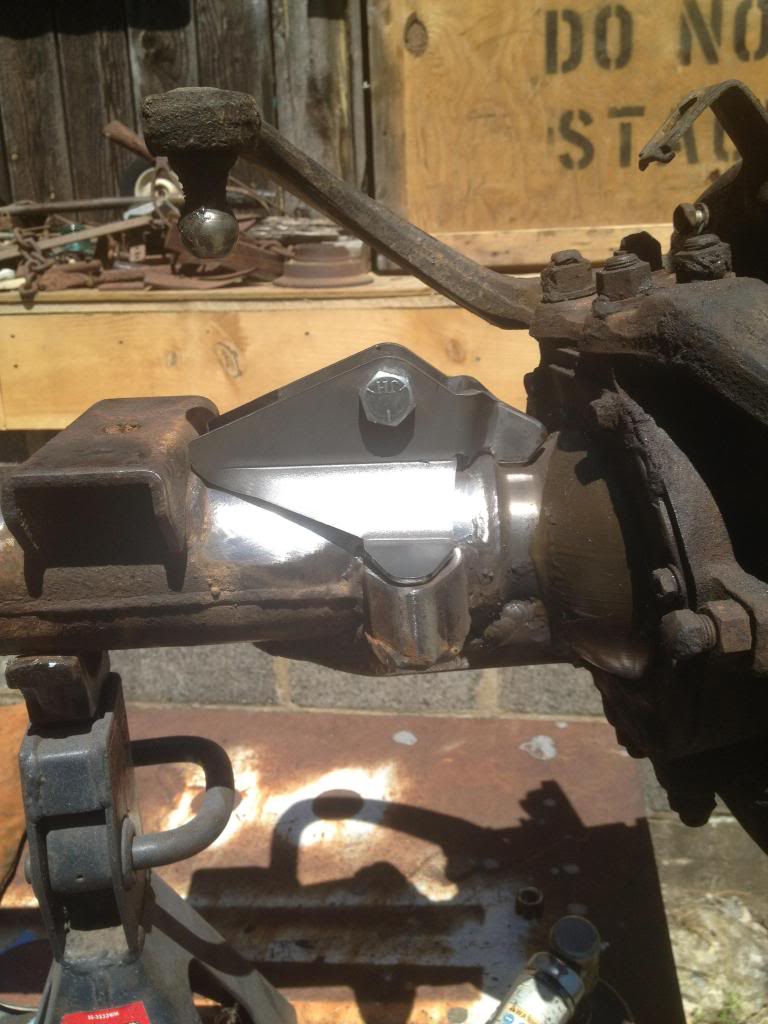
I started working on my front axle over the weekend. Didn't get a lot done mostly because I over analyzed the placement of my knuckle gussets. I went ahead and welded them up with all the old parts on, that way I know they fit when I put it all back together. I've only got the bottom gussets finished so far.
Gotta improvise when I'm riding solo
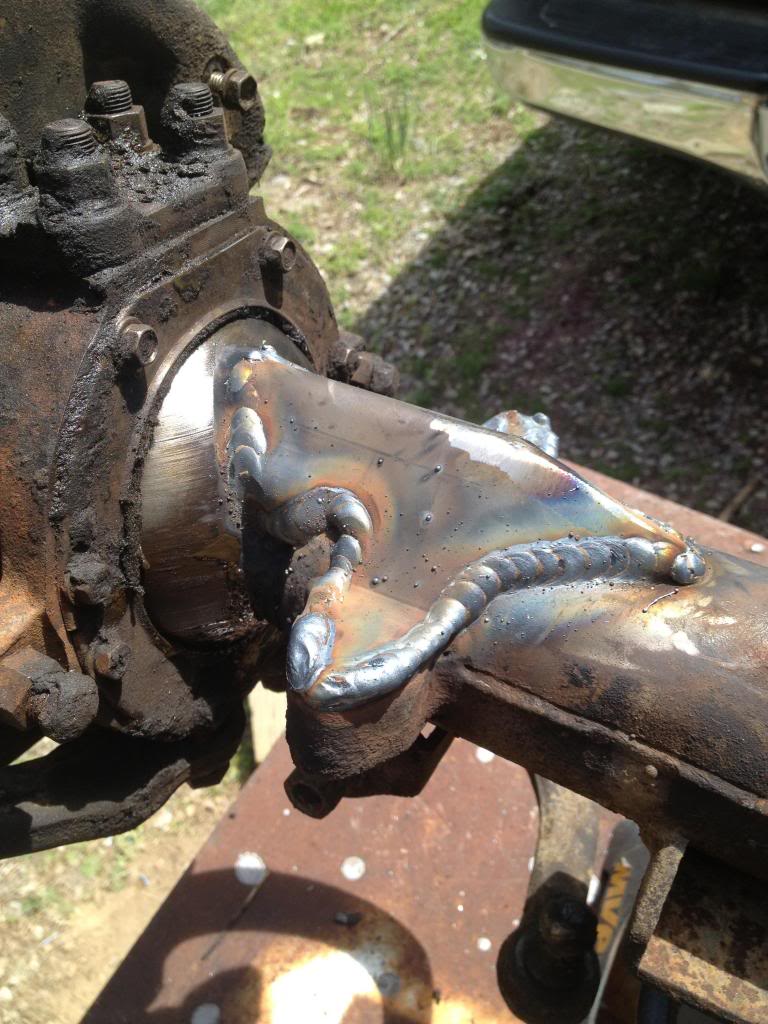
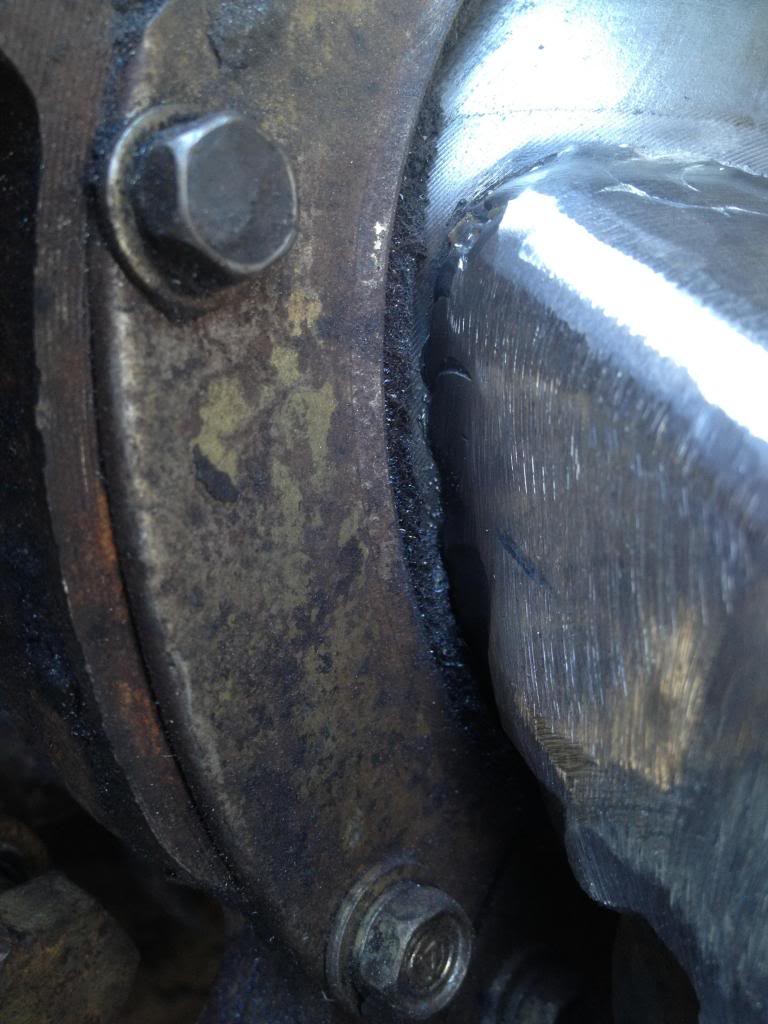
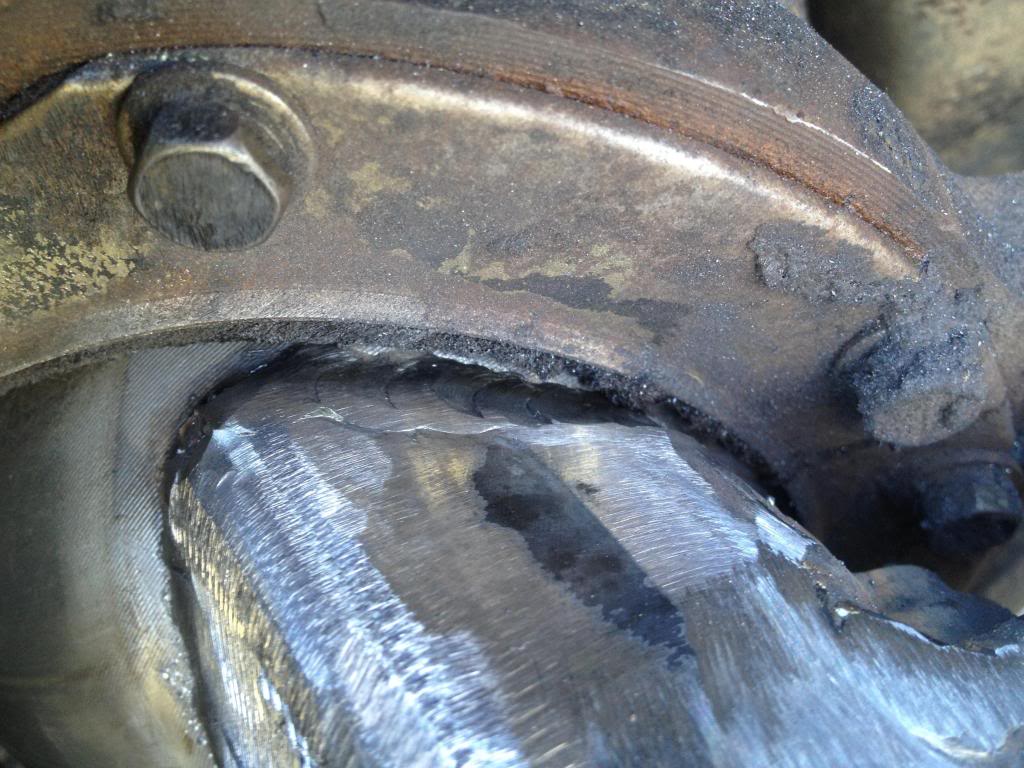
I haven't been able to find pictures of the gussets with the knuckles turned. You can see how tight of a fit it is. The metal rings clear fine, and the little scraper gaskets just barely touch the edge of the weld.
Gotta improvise when I'm riding solo


I haven't been able to find pictures of the gussets with the knuckles turned. You can see how tight of a fit it is. The metal rings clear fine, and the little scraper gaskets just barely touch the edge of the weld.
04-26-2014, 01:22 PM
#35
Registered User
Thread Starter
Join Date: Nov 2013
Posts: 83
Likes: 0
Received 0 Likes
on
0 Posts
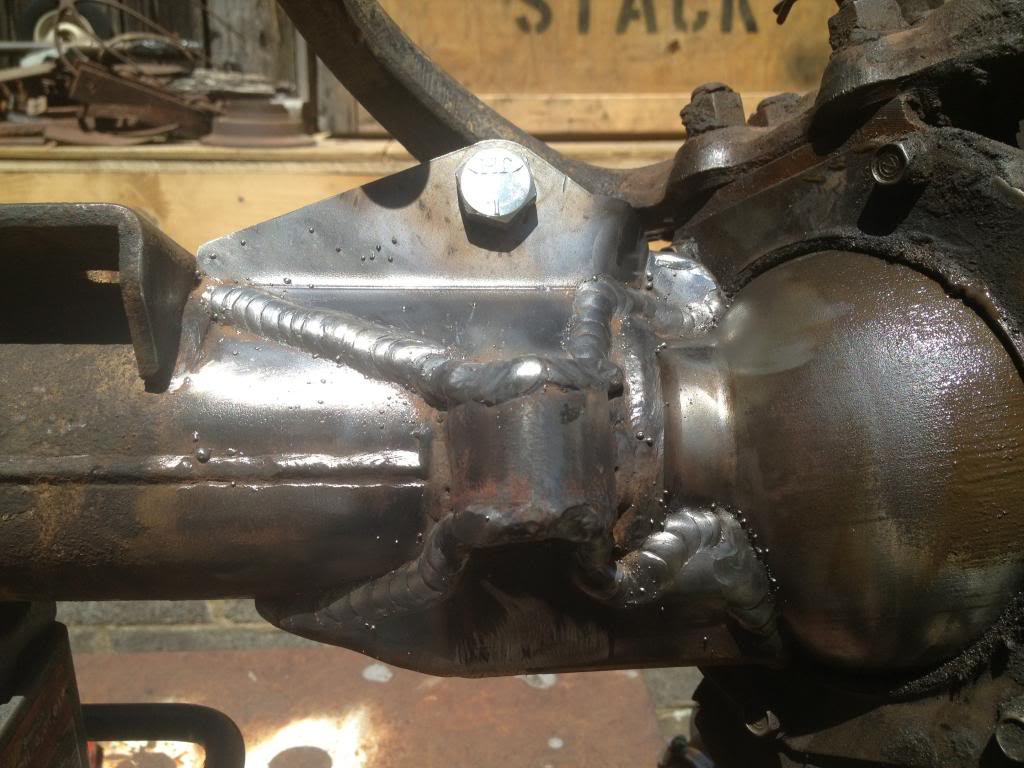
Finally finished all my knuckle gussets. It took me about 3hrs per gusset. Making sure the knuckle would clear the gusset and my welds took quite a bit of time.
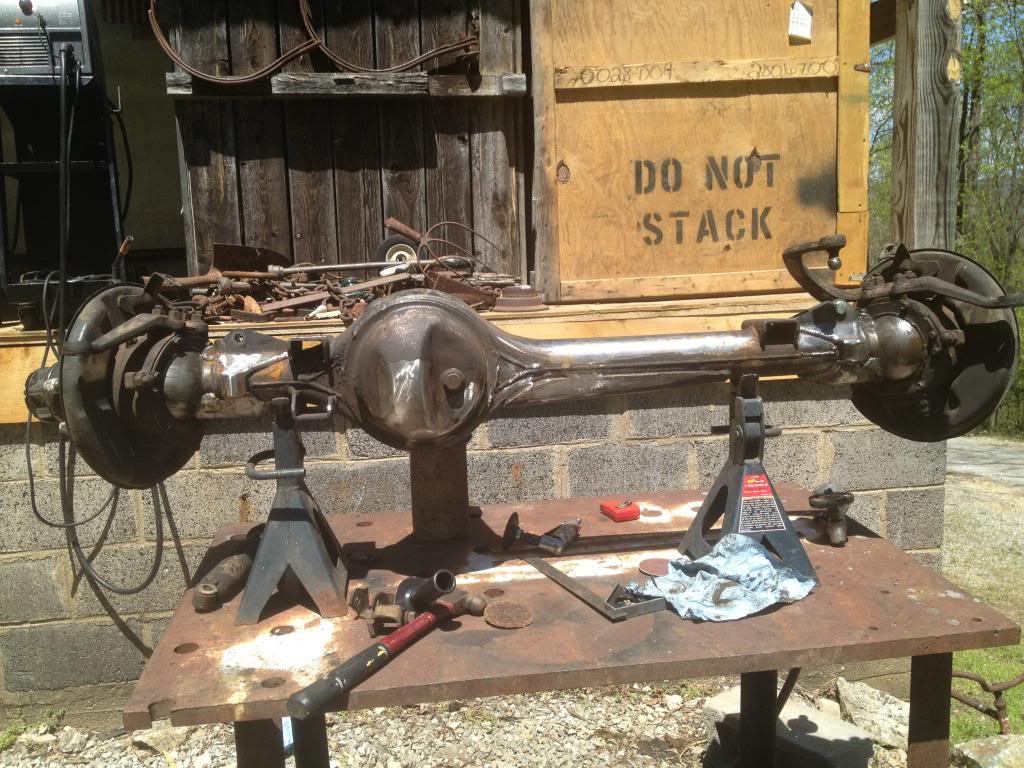
So now i'm ready to start tearing it down and do the rebuild/paint. I also started tearing apart my 83 dash in order to start on my floors and dash swap.
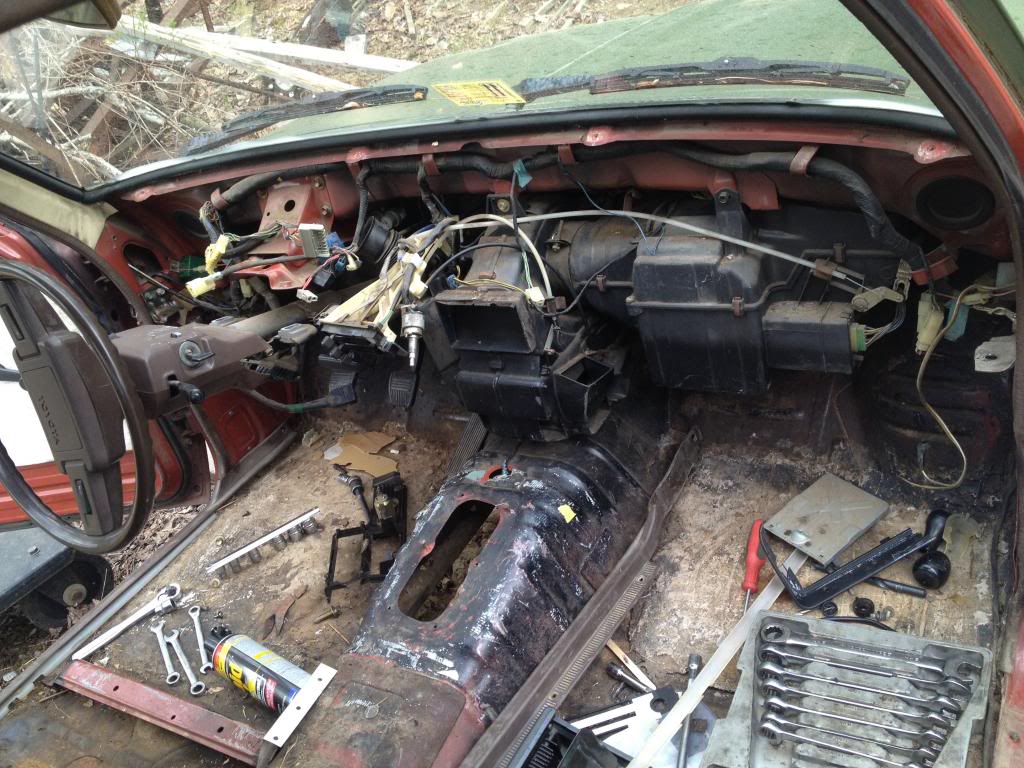


So now i'm ready to start tearing it down and do the rebuild/paint. I also started tearing apart my 83 dash in order to start on my floors and dash swap.
 04-27-2014, 11:56 AM
#38
Registered User
Thread Starter
Join Date: Nov 2013
Posts: 83
Likes: 0
Received 0 Likes
on
0 Posts
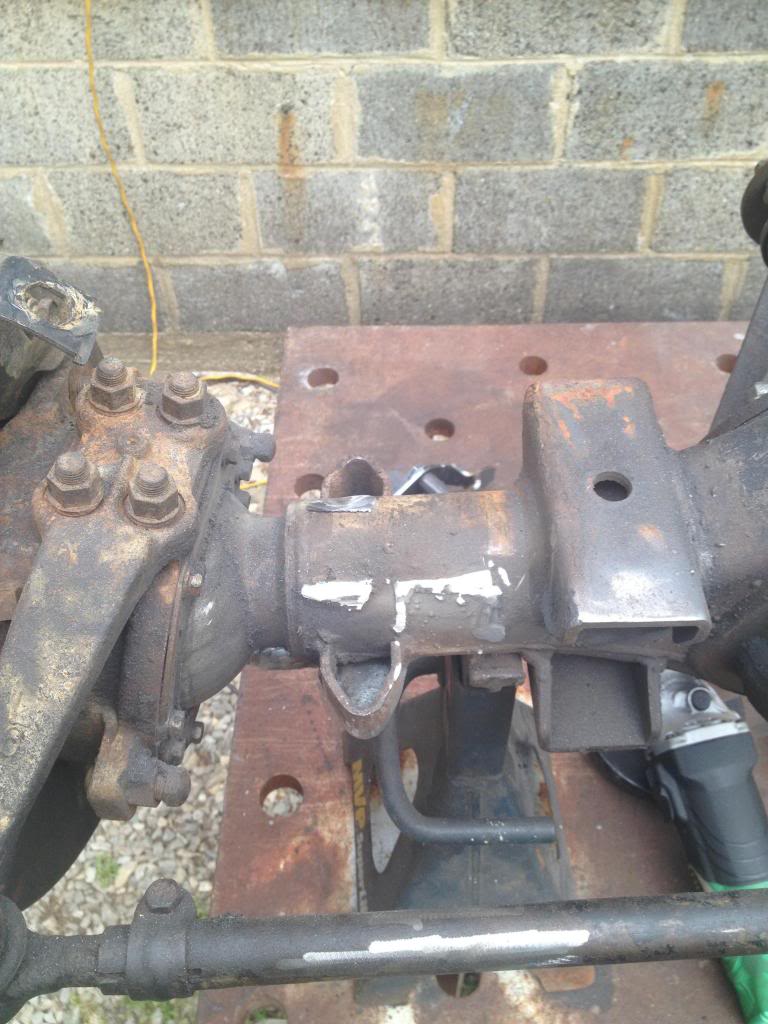
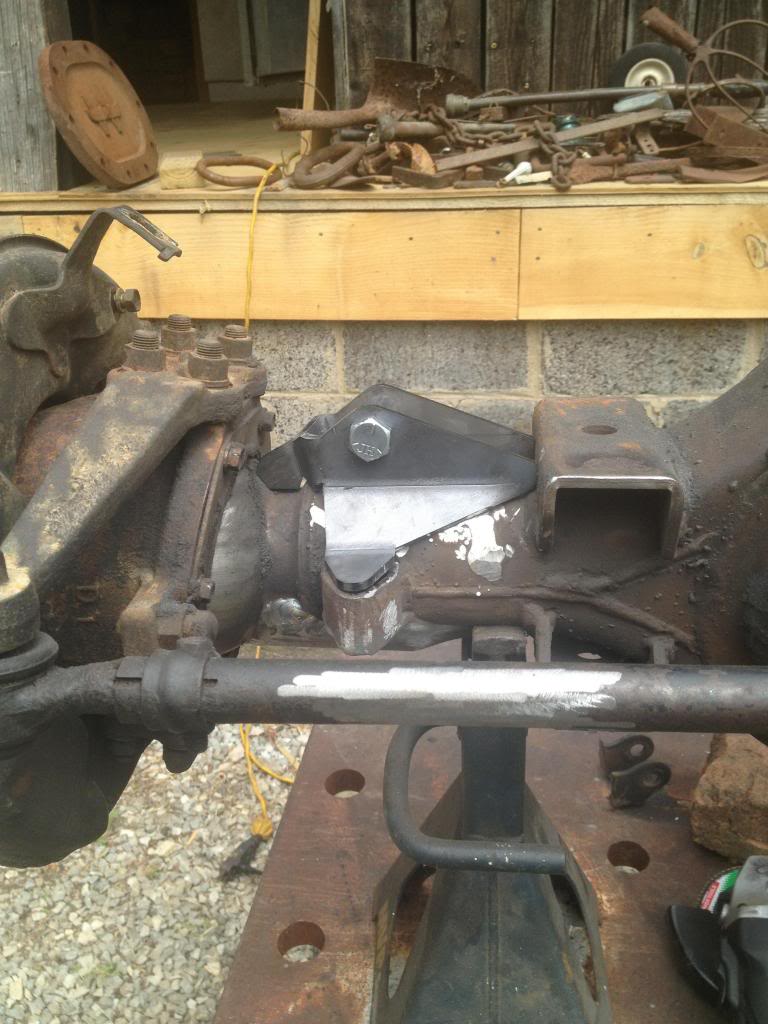
Made a little bit of progress on the front axle today. Got both sides torn down before work.
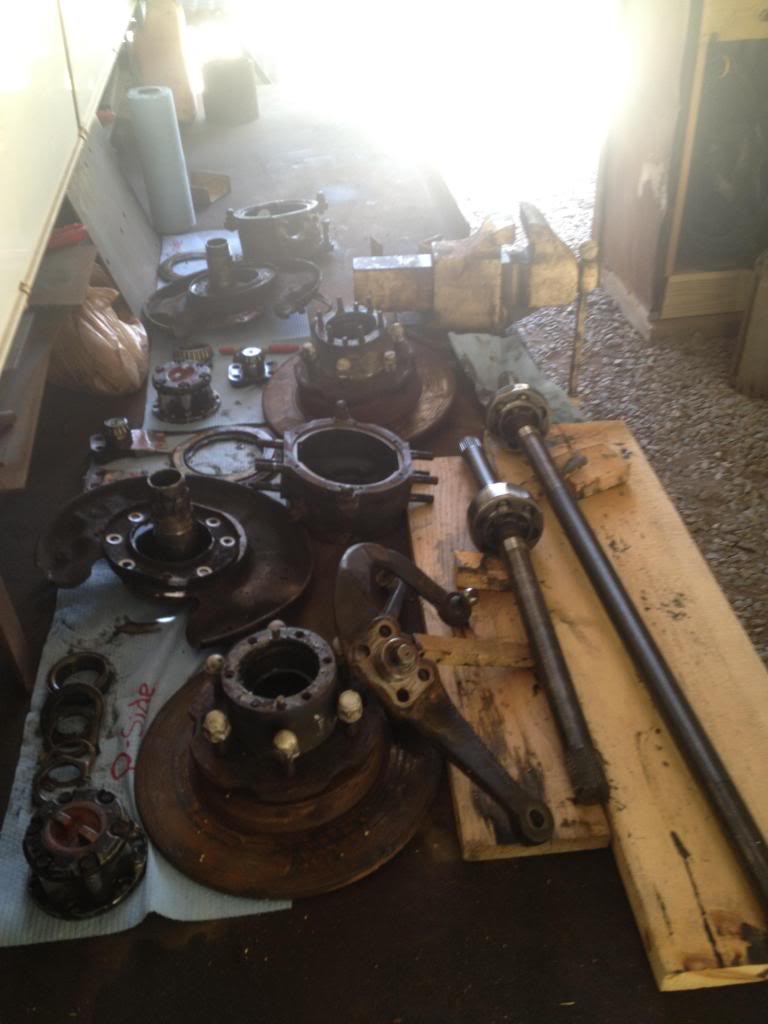
And I really hope I didn't warp my housing :/
I left the axle assembled in hopes it would help transfer the heat and to check clearances.. Hopefully everything works out okay when I put it back together.
Also, is there some sort of axle alignment tool for re-installing shafts? It seems like the inner axle seal could get damaged when putting the axle back in the housing..


And I really hope I didn't warp my housing :/


I left the axle assembled in hopes it would help transfer the heat and to check clearances.. Hopefully everything works out okay when I put it back together.
Also, is there some sort of axle alignment tool for re-installing shafts? It seems like the inner axle seal could get damaged when putting the axle back in the housing..
04-29-2014, 06:27 AM
#39
Registered User
iTrader: (1)
Join Date: Feb 2013
Location: baton rouge,louisiana
Posts: 447
Likes: 0
Received 0 Likes
on
0 Posts
Man people might say the Eastwood internal frame coating is no good but I've had mine on now for a while and it's holding up great and it covered nicely it took me 4 cans to do my long frame but good work on your build man the attention your giving it will pay off in the long run
04-29-2014, 10:23 AM
#40
Registered User
Thread Starter
Join Date: Nov 2013
Posts: 83
Likes: 0
Received 0 Likes
on
0 Posts
Man people might say the Eastwood internal frame coating is no good but I've had mine on now for a while and it's holding up great and it covered nicely it took me 4 cans to do my long frame but good work on your build man the attention your giving it will pay off in the long run


