First Generation 4runner cargo box and sleeping platform
 11-02-2016, 09:15 PM
#1
Registered User
Thread Starter

Join Date: Sep 2016
Posts: 5
Likes: 0
Received 0 Likes
on
0 Posts
First Generation 4runner cargo box and sleeping platform
I wanted to build a cargo box and sleeping platform for my 1988 4runner. I didn't see any plans online that really spoke to me. I figured I would post my build online and once I'm done I'll post all of my drawings too. This project will be split in too. The first half is the cargo box. This box will have drawers and a hatch. The box will fit in the cab while the rear seats are in place. The second half of the project will be the rest of the sleeping platform. I'm keeping my rear seats. So i still need to figure out how to mount the rest of the platform while the seats are folded down. that will come later, on to the current build.
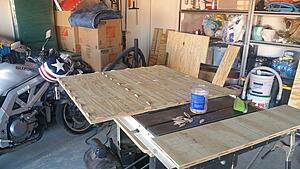
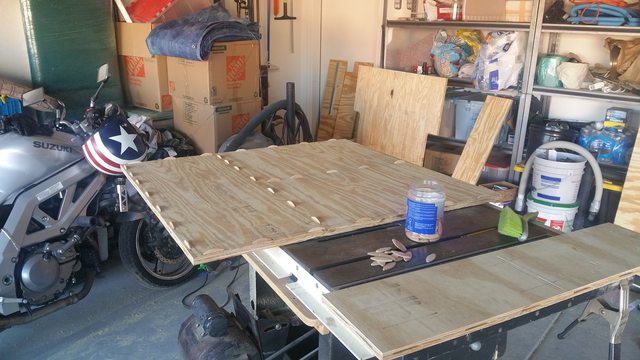
here are some quick shots of the box in its current form.
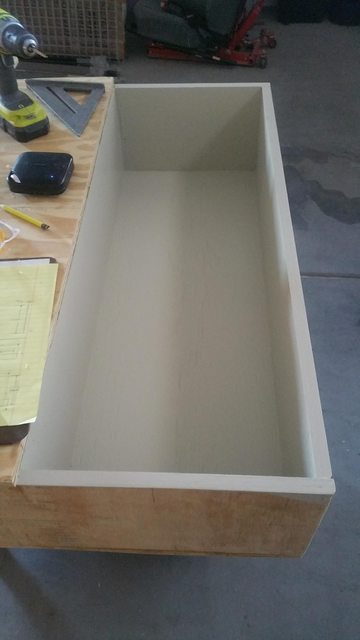
Below you can see the base of the box. Everything is 3/4" ply. I used biscuits in the hopes of making this thing sturdy.
The uprights going in. I used 22" full extension sliders. The drawers will be 24" deep. The drawer sections are 25" deep.
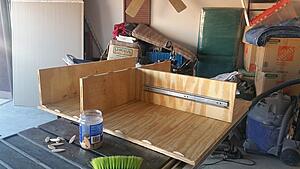
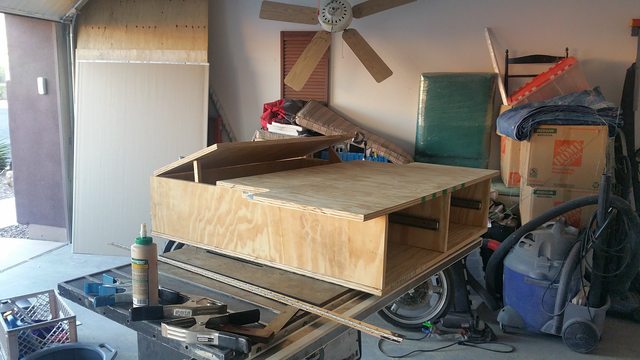
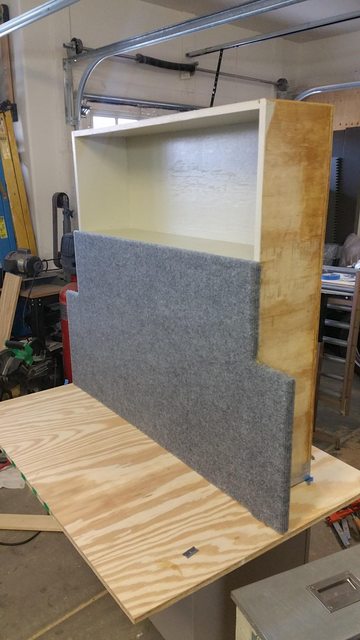
All of the uprights in place now. As you can see the rear section does not have biscuits because that portion of the lid will be hinged to reveal the storage in the front section of the box.
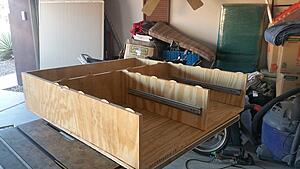
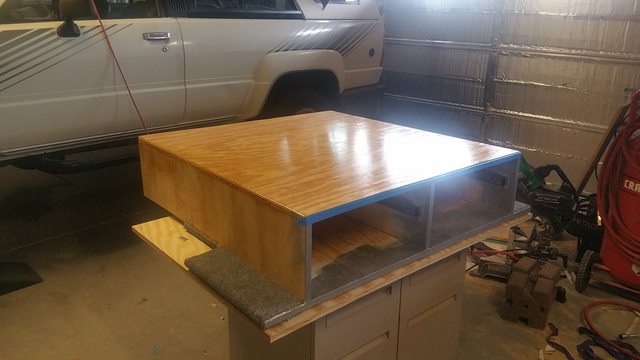
Here is a shot with the lid on. The wide section is the rear of the truck right at the tailgate.
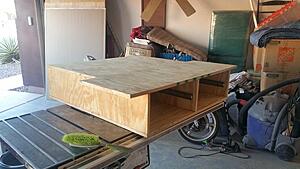
This last shot (for now) shows the front section opened up. This section will be hinged and have a flush mount handle.

All specs, sizes and drawing will be uploaded once I'm done.
here are some quick shots of the box in its current form.
Below you can see the base of the box. Everything is 3/4" ply. I used biscuits in the hopes of making this thing sturdy.
The uprights going in. I used 22" full extension sliders. The drawers will be 24" deep. The drawer sections are 25" deep.

All of the uprights in place now. As you can see the rear section does not have biscuits because that portion of the lid will be hinged to reveal the storage in the front section of the box.

Here is a shot with the lid on. The wide section is the rear of the truck right at the tailgate.

This last shot (for now) shows the front section opened up. This section will be hinged and have a flush mount handle.
All specs, sizes and drawing will be uploaded once I'm done.
 11-18-2016, 11:18 PM
#2
Registered User
Thread Starter
Join Date: Sep 2016
Posts: 5
Likes: 0
Received 0 Likes
on
0 Posts
Update! Its pretty much done.
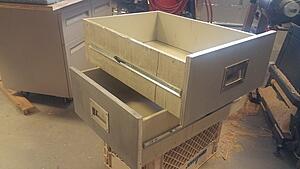
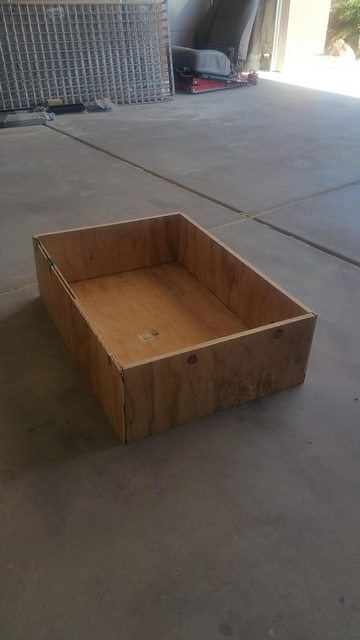
I didn't get enough photos of this process. It was a giant pain in the ass. Each drawers was custom sized to fit in one of the drawer sections of the frame. Rabbet joints and a floating bottom. This is 1/2" ply. Not very good stuff. Filled some of the voids with epoxy afterwards. If you thought Ikea was furniture was a pain, try making your own.

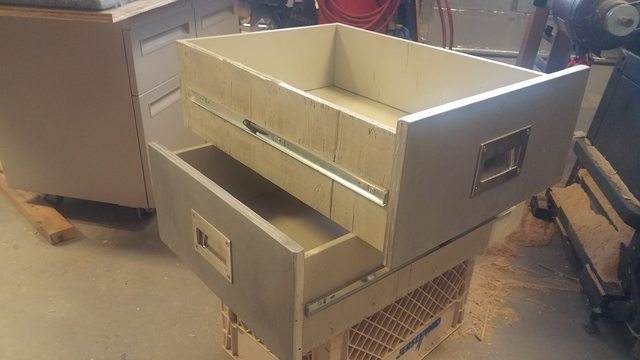
The drawers fit! After a little bit of trimming and shimming but they fit! Slide pretty well too. Each drawer should be able to hold 100lbs. I doubt ill ever have that much stuff in them.

You can see the floating bottom in this one. SS screw hold the face to the drawer. SS bolt with acorn nuts hold the handle on. Had to grind the bolts so they would fit.

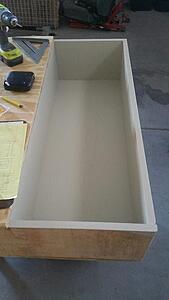
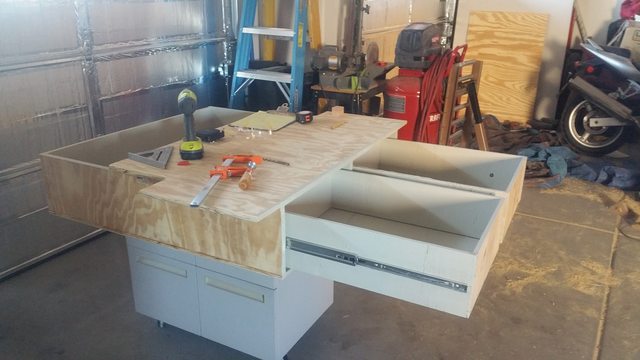
3/4" ply faces with SS recessed pulls. Sliders attached. All painted.
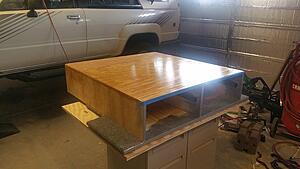
This is technically the front of the box. I decided early on to use the coordinate system of the car for the coordinate system of the box. Anyways its all painted.
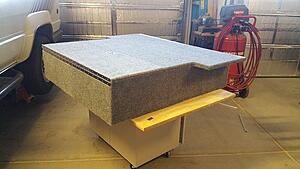
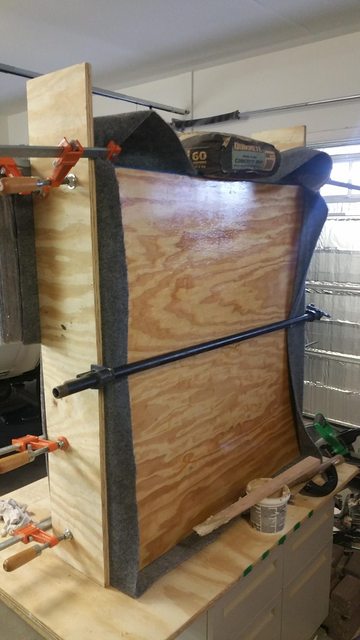
Indoor/outdoor carpet glued on. This process was mess but ultimately pretty easy. You can also see the clear coat on the bottom.

There were a few bare spots after the initial wrapping because of geometry. Those got patched later. worry not.
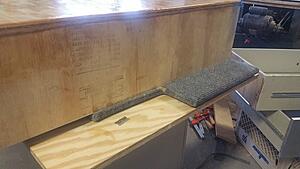
Finished the clear coat on the bottom. Just need to keep adding carpet now.
The carpet adhesive needs to be under pressure to set. That what the bucket said at least.

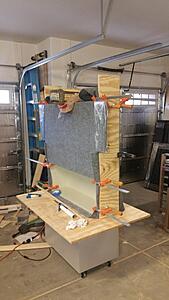
Glued the carpet on the sides. Used plastic wrap to protect the good carpet from the glue. I thought that was pretty smart.
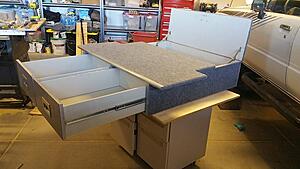
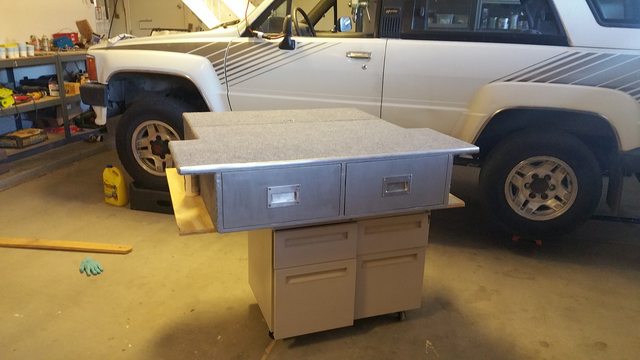
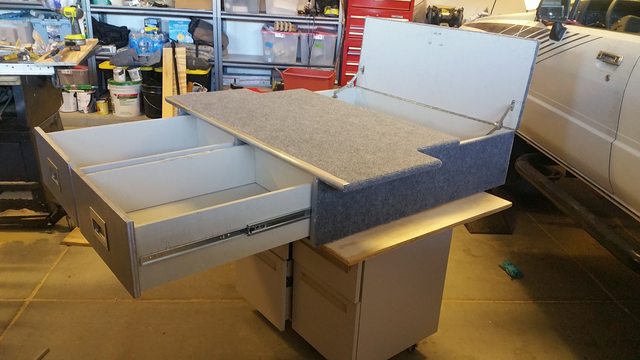
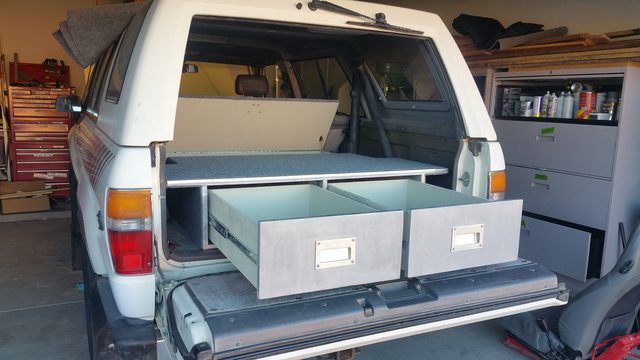
There it is. Drawers are in. Hatch is attached. Hatch lever is on. A got an aluminum guard thing on the front.

You can see the hatch support and piano hinge on the back. Everything works great.
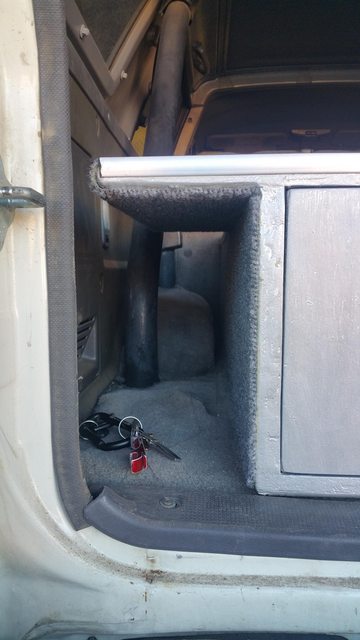
This is the end that gets pushed against the back of the seats.
There is still enough room to get into the little storage boxes on the side. You can see the guard and carpet pretty well.

I tried to make the most of the space. The width of the wide section is just small enough to make it inside the back. It narrows at the roll bar/wheel well. The rest of the platform is narrow enough to make it between the wheel wells.

Hatch open. Drawers open. Im happy with the results.
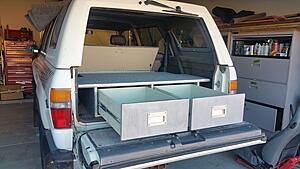
Turned out great. I need to add a ledger strip to support the hatch when it is closed. I also need to add rings to the sides to secure the box to the frame via turnbuckles. Once that is all done I'll probably put together some dimensioned drawings for the assembly and parts.


I didn't get enough photos of this process. It was a giant pain in the ass. Each drawers was custom sized to fit in one of the drawer sections of the frame. Rabbet joints and a floating bottom. This is 1/2" ply. Not very good stuff. Filled some of the voids with epoxy afterwards. If you thought Ikea was furniture was a pain, try making your own.
The drawers fit! After a little bit of trimming and shimming but they fit! Slide pretty well too. Each drawer should be able to hold 100lbs. I doubt ill ever have that much stuff in them.
You can see the floating bottom in this one. SS screw hold the face to the drawer. SS bolt with acorn nuts hold the handle on. Had to grind the bolts so they would fit.

3/4" ply faces with SS recessed pulls. Sliders attached. All painted.
This is technically the front of the box. I decided early on to use the coordinate system of the car for the coordinate system of the box. Anyways its all painted.
Indoor/outdoor carpet glued on. This process was mess but ultimately pretty easy. You can also see the clear coat on the bottom.
There were a few bare spots after the initial wrapping because of geometry. Those got patched later. worry not.

Finished the clear coat on the bottom. Just need to keep adding carpet now.
The carpet adhesive needs to be under pressure to set. That what the bucket said at least.
Glued the carpet on the sides. Used plastic wrap to protect the good carpet from the glue. I thought that was pretty smart.

There it is. Drawers are in. Hatch is attached. Hatch lever is on. A got an aluminum guard thing on the front.
You can see the hatch support and piano hinge on the back. Everything works great.
This is the end that gets pushed against the back of the seats.

There is still enough room to get into the little storage boxes on the side. You can see the guard and carpet pretty well.
I tried to make the most of the space. The width of the wide section is just small enough to make it inside the back. It narrows at the roll bar/wheel well. The rest of the platform is narrow enough to make it between the wheel wells.

Hatch open. Drawers open. Im happy with the results.
Turned out great. I need to add a ledger strip to support the hatch when it is closed. I also need to add rings to the sides to secure the box to the frame via turnbuckles. Once that is all done I'll probably put together some dimensioned drawings for the assembly and parts.


