On Board Shower System
 06-08-2011, 11:31 PM
#1
Registered User
Thread Starter

On Board Shower System
For those of you asking for a write up on my hot water shower, here it is...
I DO NOT TAKE RESPONSIBILITY FOR YOUR ACTIONS. THIS IS A GUIDE, NOT A COMPLETE INSTRUCTION MANUAL. EVERYTHING YOU DO TO YOUR TRUCK IS AT YOUR OWN RISK
Planning
So you know you want a shower, that's a given. Now the question becomes how much water do you need/can carry. This system is designed for a Toyota 4runner with the spare tire relocated from underneath to a custom bumper. This allowed me a space of 34Lx24Wx~10D. Not everyone is willing to move the spare tire, that's when you run into problems. If you have a truck or a trunk, this is not such a big deal. You truck people can simply put the tank in a “toolbox” in the bed. For you trunk people, it's easy to stash a tank at the very back of the trunk and secure it so it won't move. The other method is to add a trailer hitch cargo tray. I will be using this until my under body tank has been built. I might use it permanently depending on how I like it.
I am going to approach this build thread assuming you are going to have a cargo tray.
Building
Step 1: Acquire necessary parts. You will need the following.
1 Flat Plate Heat Exchanger (10 plates will do)
1 Jabsco Par-Max 1 Water System Pump
20ft 1/2”ID heater hose (lowes....it's red)
1 waterproof SPST switch (west marine)
5ft 5/8”ID heater hose (lowes... it's black)
2x 1/2” hose barb to 1/2” thread
2x 3/4” x 3/4” x 3/4” brass tee
2x 3/8” Air Tool Attachments (each package should contain a few male and one female connectors)
2x 10pack Hose clamps
1 Kitchen Sprayer
1 10ft extension cord
1 20w fuse and holder
2x Full thread bolts that fit in the mend plates (see next item)
2x Mend plates that fit across the FPHE
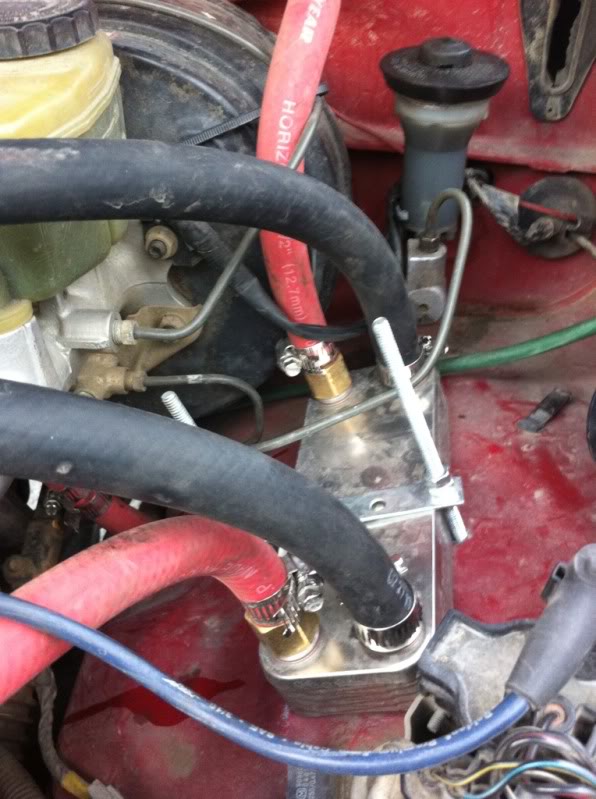
Step 2 – Install the FPHE. I chose a pretty wide open place under the hood to mount my Flat Plate Heat Exchanger. I wanted to make sure there was plenty of room to attach the hoses. Before you actually install the FPHE for the final time, make sure to install the hose barbs on the shower side, using teflon tape. This will ensure a tight fit on the threads.
Drill 2 holes for the full thread bolts. These holes should be spaced to fit on the ends of the mend plates.

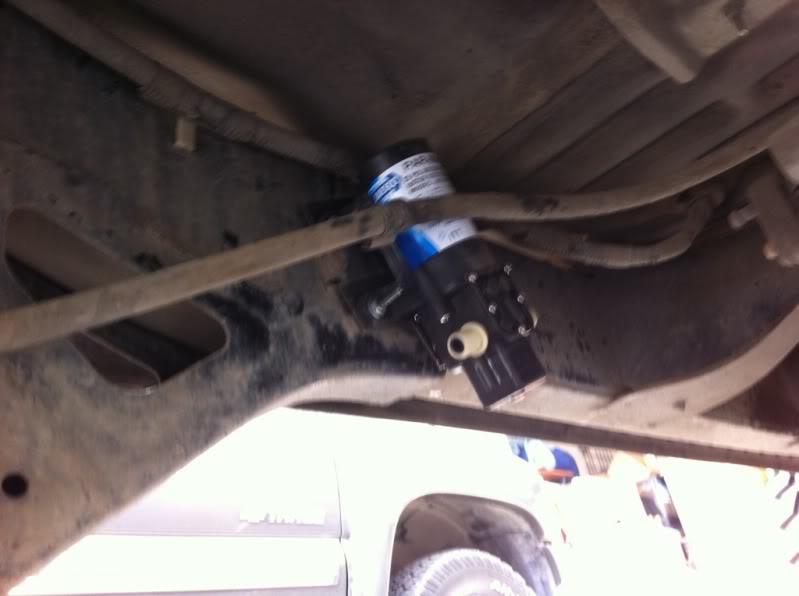
Step 3- Install the pump. There are many ways to skin this cat. I chose to make a bracket from mend plates, you may just want to drill into your frame. It's your truck, the choice is also your own. Make sure to mount the pump close to the rear of the vehicle. This pump is a diaphragm pump, it pushes water better than it pulls it, however it will pull water from a distance of about 5 vertical feet.
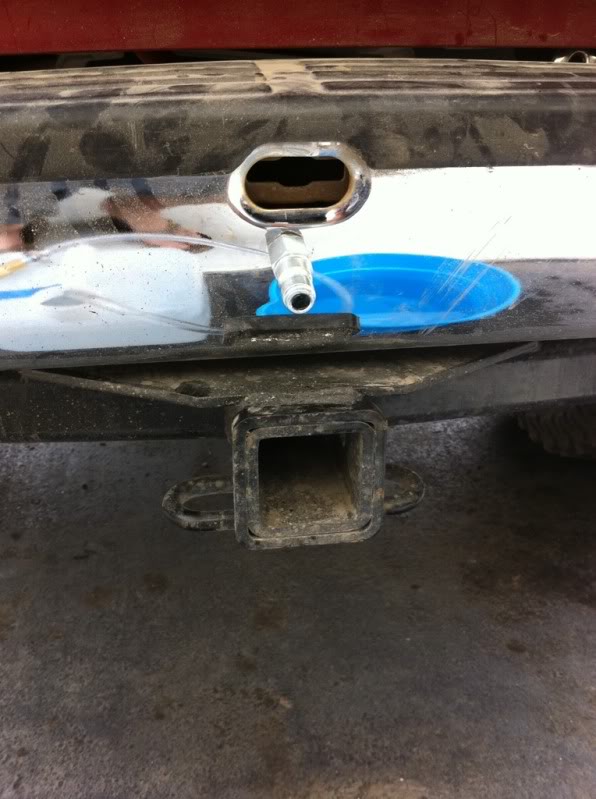
Step 4 – Connection. If you build your setup like mine, you will need to drill a hole that accommodates one of the male air hose connectors in the back bumper. You will also need a nut that fits on said air hose connector. That's harder to find than you may imagine. I actually took a female to female connector, and added a small 3/8” male to male behind it. Basically I sandwiched the bumper between the connectors. This held a tight fit for the connector.
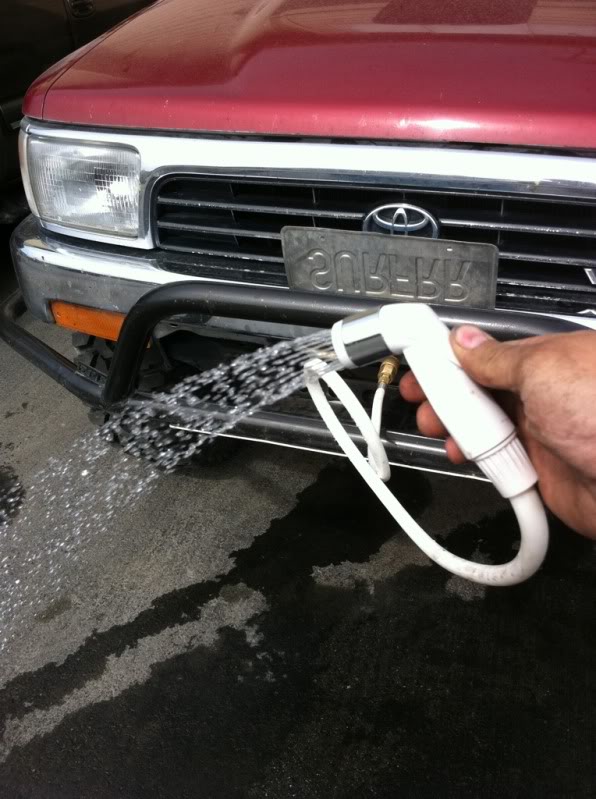
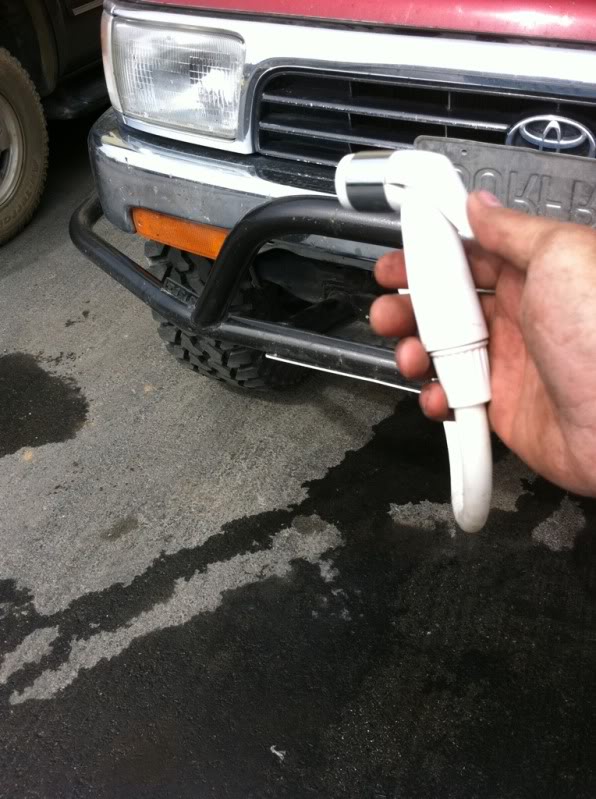
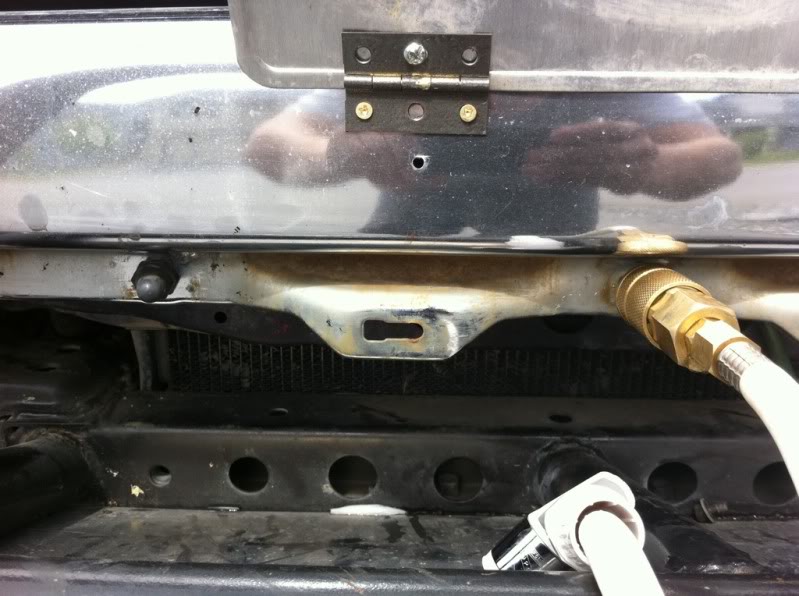
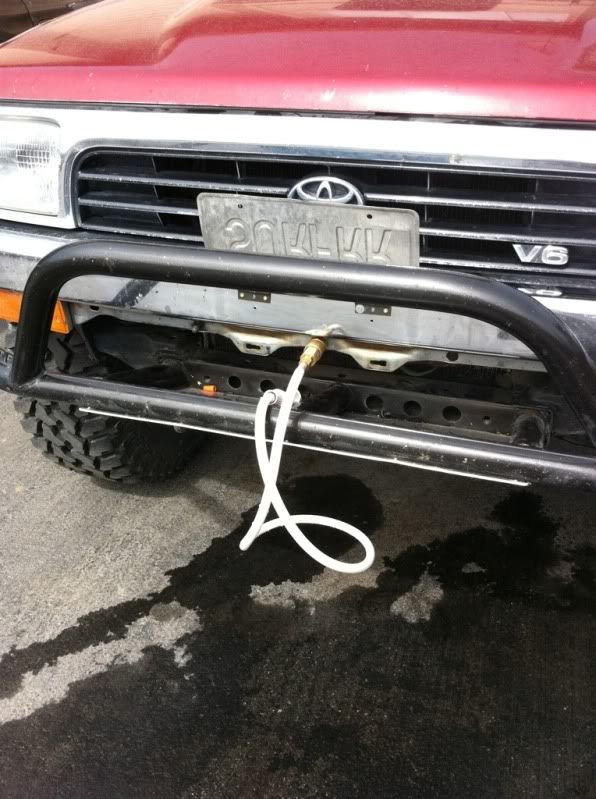
Step 5 - You will also need to find somewhere on the front bumper to mount the shower side. I chose the hole on the bumper where the valance use to go. I enlarged the hole so another male connector fit in it. I then repeated the sandwich maneuver from the back bumper. If you use the same spot I did, you'll need a flip up license plate. 2 small hinges work well for this.
Step 6 – Run the Red heater hose from the rear connector, all the way to the pump. Ensure the hose doesn't drape on the exhaust. I found it was easier to run the hose in and on the frame, zip tie as appropriate. Once you get it to the pump, you'll need to run another length to the FPHE, again keep the hose away from critical areas. I chose again to run mine in and on the frame. Zip Tie as appropriate. From the FPHE, run another length to your front shower connection. I chose to keep mine tucked in the fenderwell. Zip Tie as appropriate. Remember to use hose clamps on all connections.
(Photo coming soon.... I have one, just have to find it)
Step 7 – Electric will need to be run from the battery to the SPST switch, I chose to switch negative, not positive. I used extension cord that I chopped the ends off. It's tough, enclosed, and waterproof. Wire up the pump, tuck the wire in or on the frame. Zip tie as appropriate. Running this to the battery allows me to run the pump without having the car on. I am creating a “master” switch inside, so hoodlums can't find my switch and flip it, draining my battery.... or worse, my water supply. Make sure to add a fuse in line.
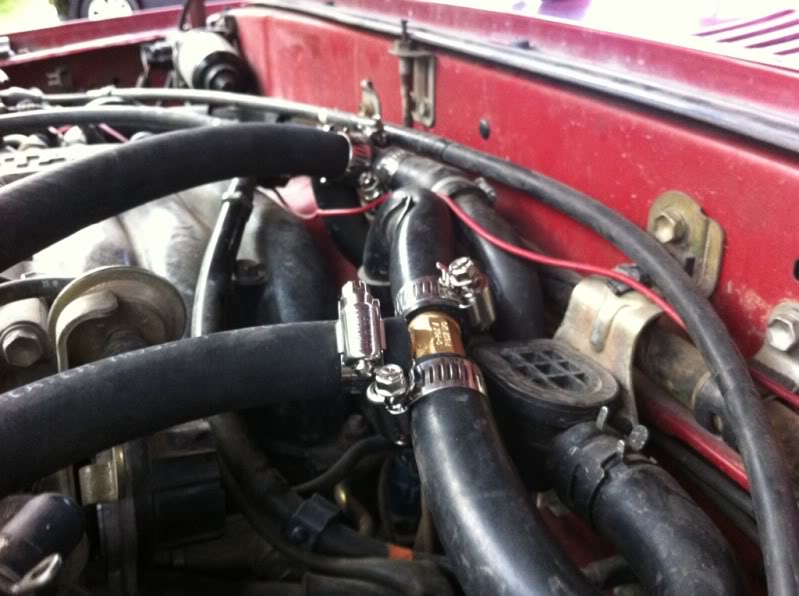
Step 8 – We need heat captain. You will be tapping into the heater hose going into the cabin. If you are not comfortable, read up on it. Find the 2 hoses going into the heater core, splice in the 3/4” tee fittings. The “tee” portion will go to the FPHE. Try to create opposite flow in the FPHE (if water goes top to bottom antifreeze should go bottom to top) Take the non tee end and hook it straight to the FPHE, it should fit over the threads, no problems. Remember, hose clamp everything.
Step 9 – Now all thats left is to add the female connection on the kitchen sprayer and on the water pick-up hose.
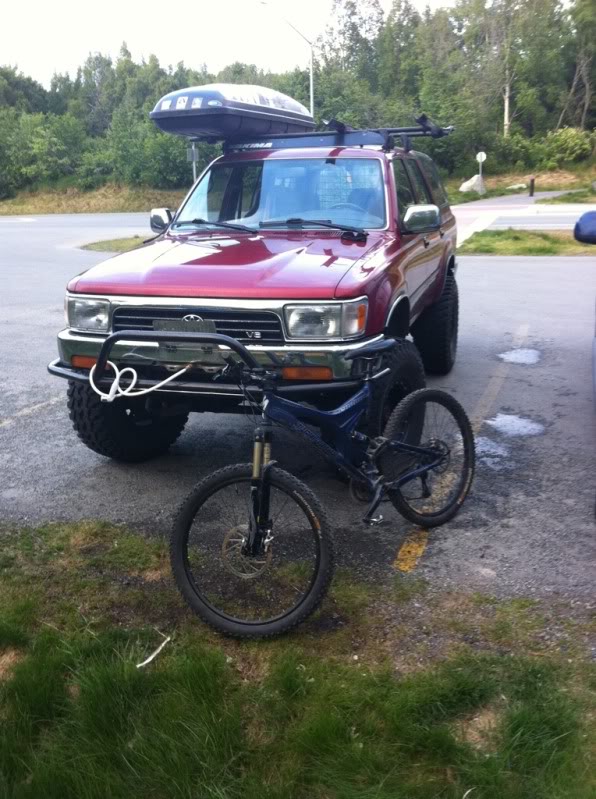
Some more random shots
Have questions that need to be answered? Go for it
I DO NOT TAKE RESPONSIBILITY FOR YOUR ACTIONS. THIS IS A GUIDE, NOT A COMPLETE INSTRUCTION MANUAL. EVERYTHING YOU DO TO YOUR TRUCK IS AT YOUR OWN RISK
Planning
So you know you want a shower, that's a given. Now the question becomes how much water do you need/can carry. This system is designed for a Toyota 4runner with the spare tire relocated from underneath to a custom bumper. This allowed me a space of 34Lx24Wx~10D. Not everyone is willing to move the spare tire, that's when you run into problems. If you have a truck or a trunk, this is not such a big deal. You truck people can simply put the tank in a “toolbox” in the bed. For you trunk people, it's easy to stash a tank at the very back of the trunk and secure it so it won't move. The other method is to add a trailer hitch cargo tray. I will be using this until my under body tank has been built. I might use it permanently depending on how I like it.
I am going to approach this build thread assuming you are going to have a cargo tray.
Building
Step 1: Acquire necessary parts. You will need the following.
1 Flat Plate Heat Exchanger (10 plates will do)
1 Jabsco Par-Max 1 Water System Pump
20ft 1/2”ID heater hose (lowes....it's red)
1 waterproof SPST switch (west marine)
5ft 5/8”ID heater hose (lowes... it's black)
2x 1/2” hose barb to 1/2” thread
2x 3/4” x 3/4” x 3/4” brass tee
2x 3/8” Air Tool Attachments (each package should contain a few male and one female connectors)
2x 10pack Hose clamps
1 Kitchen Sprayer
1 10ft extension cord
1 20w fuse and holder
2x Full thread bolts that fit in the mend plates (see next item)
2x Mend plates that fit across the FPHE
Step 2 – Install the FPHE. I chose a pretty wide open place under the hood to mount my Flat Plate Heat Exchanger. I wanted to make sure there was plenty of room to attach the hoses. Before you actually install the FPHE for the final time, make sure to install the hose barbs on the shower side, using teflon tape. This will ensure a tight fit on the threads.
Drill 2 holes for the full thread bolts. These holes should be spaced to fit on the ends of the mend plates.
Step 3- Install the pump. There are many ways to skin this cat. I chose to make a bracket from mend plates, you may just want to drill into your frame. It's your truck, the choice is also your own. Make sure to mount the pump close to the rear of the vehicle. This pump is a diaphragm pump, it pushes water better than it pulls it, however it will pull water from a distance of about 5 vertical feet.
Step 4 – Connection. If you build your setup like mine, you will need to drill a hole that accommodates one of the male air hose connectors in the back bumper. You will also need a nut that fits on said air hose connector. That's harder to find than you may imagine. I actually took a female to female connector, and added a small 3/8” male to male behind it. Basically I sandwiched the bumper between the connectors. This held a tight fit for the connector.
Step 5 - You will also need to find somewhere on the front bumper to mount the shower side. I chose the hole on the bumper where the valance use to go. I enlarged the hole so another male connector fit in it. I then repeated the sandwich maneuver from the back bumper. If you use the same spot I did, you'll need a flip up license plate. 2 small hinges work well for this.
Step 6 – Run the Red heater hose from the rear connector, all the way to the pump. Ensure the hose doesn't drape on the exhaust. I found it was easier to run the hose in and on the frame, zip tie as appropriate. Once you get it to the pump, you'll need to run another length to the FPHE, again keep the hose away from critical areas. I chose again to run mine in and on the frame. Zip Tie as appropriate. From the FPHE, run another length to your front shower connection. I chose to keep mine tucked in the fenderwell. Zip Tie as appropriate. Remember to use hose clamps on all connections.
(Photo coming soon.... I have one, just have to find it)
Step 7 – Electric will need to be run from the battery to the SPST switch, I chose to switch negative, not positive. I used extension cord that I chopped the ends off. It's tough, enclosed, and waterproof. Wire up the pump, tuck the wire in or on the frame. Zip tie as appropriate. Running this to the battery allows me to run the pump without having the car on. I am creating a “master” switch inside, so hoodlums can't find my switch and flip it, draining my battery.... or worse, my water supply. Make sure to add a fuse in line.
Step 8 – We need heat captain. You will be tapping into the heater hose going into the cabin. If you are not comfortable, read up on it. Find the 2 hoses going into the heater core, splice in the 3/4” tee fittings. The “tee” portion will go to the FPHE. Try to create opposite flow in the FPHE (if water goes top to bottom antifreeze should go bottom to top) Take the non tee end and hook it straight to the FPHE, it should fit over the threads, no problems. Remember, hose clamp everything.
Step 9 – Now all thats left is to add the female connection on the kitchen sprayer and on the water pick-up hose.
Some more random shots
Have questions that need to be answered? Go for it
Last edited by Swim; 06-13-2011 at 10:22 AM. Reason: Added photos

 06-09-2011, 10:56 AM
#5
Registered User
Thread Starter
Actually, I used it yesterday after a triathlon. Works great. Only problem I have is my E-brake is broken... so I have to chock the wheels with rocks to leave the car running. I got some VERY strange looks in the parking lot.
06-11-2011, 04:38 PM
#6
Registered User
Well after showing this to my lady she's decided that we need to do something like this. So I have a couple of questions.
1) What was the total (or approximate) cost?
2) Do you think a larger pump would be better for say pulling water out of a lake from 10 or 15 feet away? (I ask that because although I've removed my spare tire from under the rear of my 4runner I already have plans for an under carriage tool box to go there).
Thank you in advance for your replies.
06-13-2011, 09:47 AM
#7
Registered User
Thread Starter
Well after showing this to my lady she's decided that we need to do something like this. So I have a couple of questions.
1) What was the total (or approximate) cost?
2) Do you think a larger pump would be better for say pulling water out of a lake from 10 or 15 feet away? (I ask that because although I've removed my spare tire from under the rear of my 4runner I already have plans for an under carriage tool box to go there).
Thank you in advance for your replies.
1) What was the total (or approximate) cost?
2) Do you think a larger pump would be better for say pulling water out of a lake from 10 or 15 feet away? (I ask that because although I've removed my spare tire from under the rear of my 4runner I already have plans for an under carriage tool box to go there).
Thank you in advance for your replies.
I tried to see how far this pump would pull from.... I ran out of hose at 15' and it was pulling just fine. It claims to pull from 4', but that's vertical. Horizontally it pulls much further
Trending Topics
 06-15-2011, 03:25 PM
#10
Registered User
Yes indeed. I'm thinking a little float of some kind to keep the hose end off of the bottom and an inline strainer before the pump that can be take apart and cleaned. Thanks for the advice! I'm also trying to track down some soap that won't be bad for the environment since the run off will probably end up back in the lake/stream.
Last edited by Junkers88; 06-15-2011 at 03:27 PM.
 06-27-2011, 10:08 PM
#16
Registered User
Thread Starter
So I my "custom" tank for the shower came in today.... sorta.
Apparently the tank builder can't read dimensions or can't measure... not sure which. It was WAYYYYYYYYY off. So, I went the next best route and used one of his "standard" tanks. 9 gallons of water is now happily under my 4runner. Not to mention I got to use the welder, which is always a fun time.
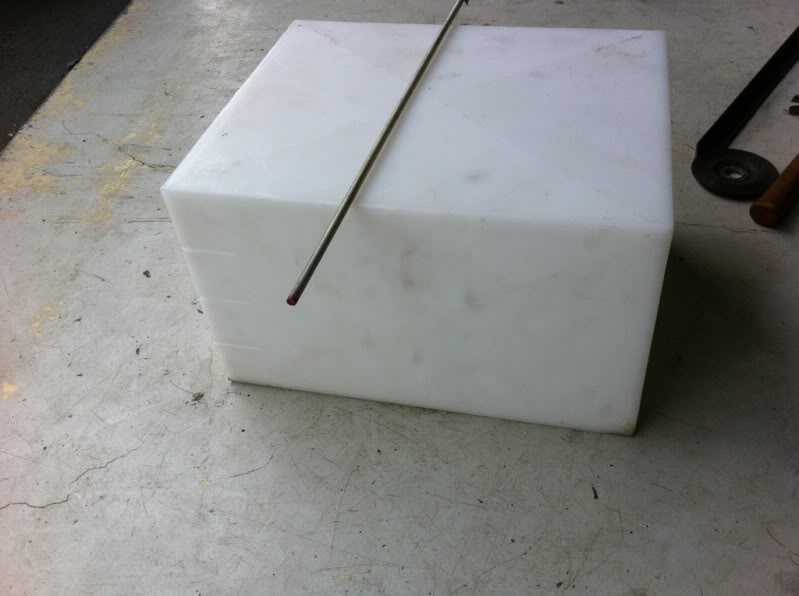
New tank!!
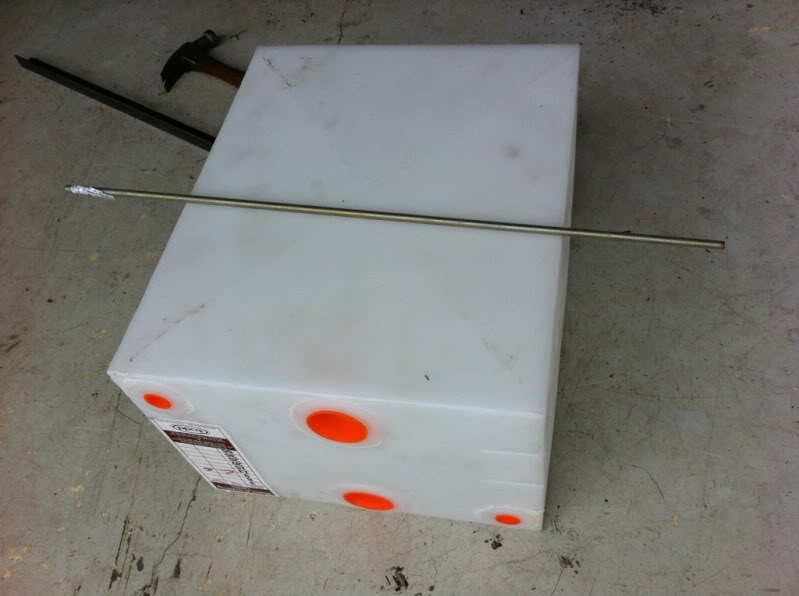
It's got holes!
Flux core sucks.... But the welds are good!! **Initiate happy dance**
I don't have a good photo after it was painted, I wanted it on the truck.
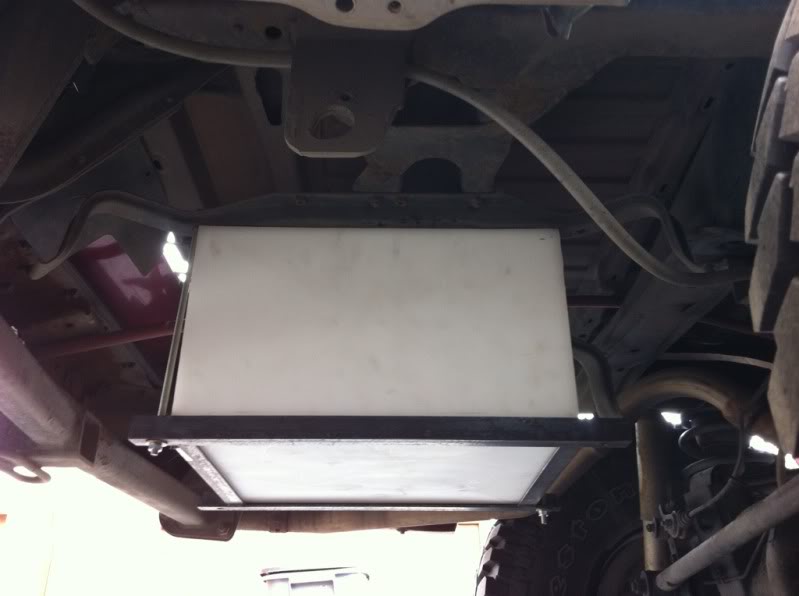
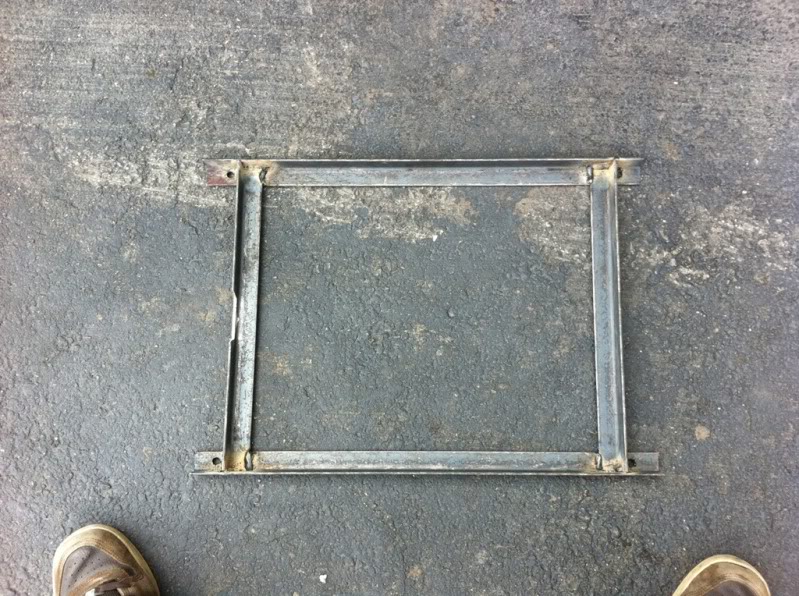
Mounted... sort of... it needed the other 2 bolts.
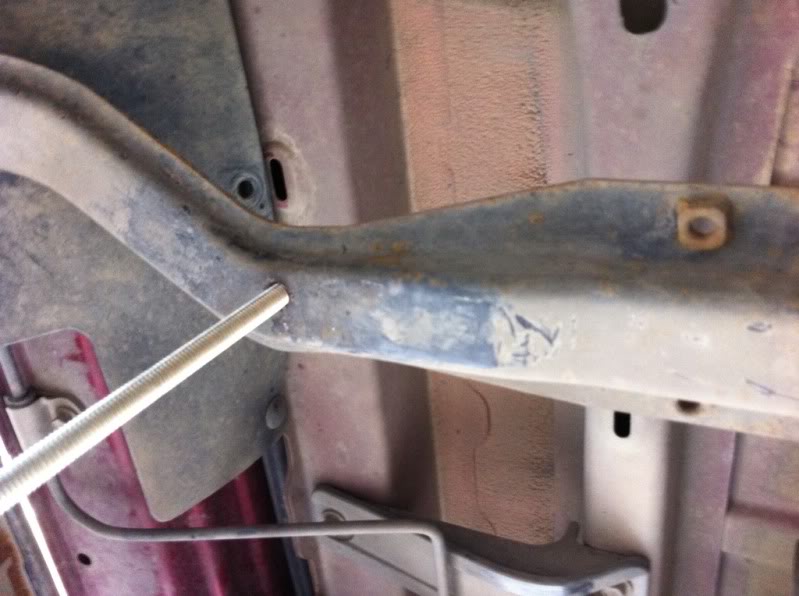
I used the stock spare tire steel for the upper mounts. They are plenty strong, and the tank weighs 72lbs full.
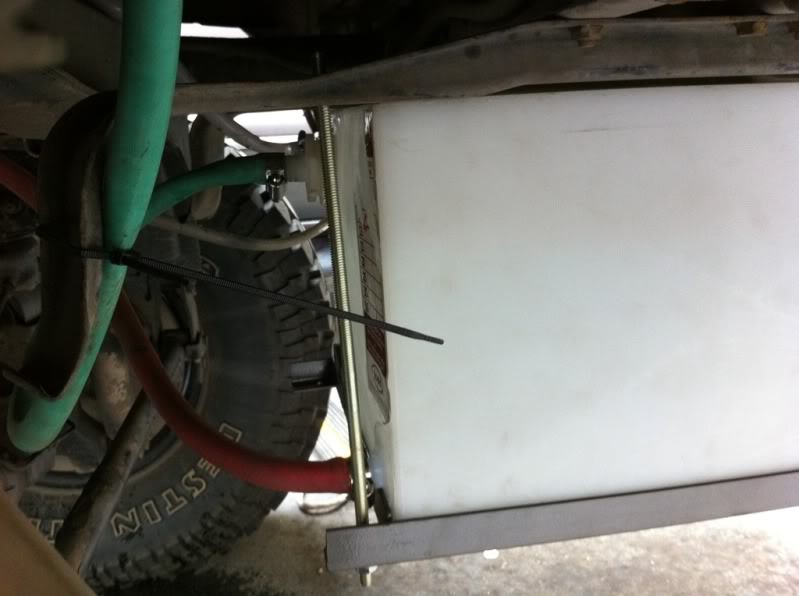
Green is FILL, Red is PUMP, and in the back you can see 2 clear lines, one is the tank vent and one is my rear diff vent.
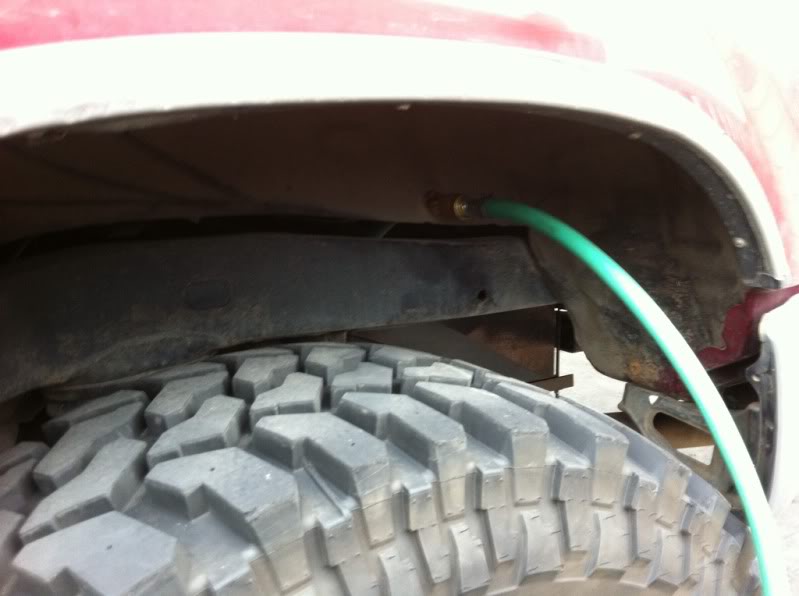
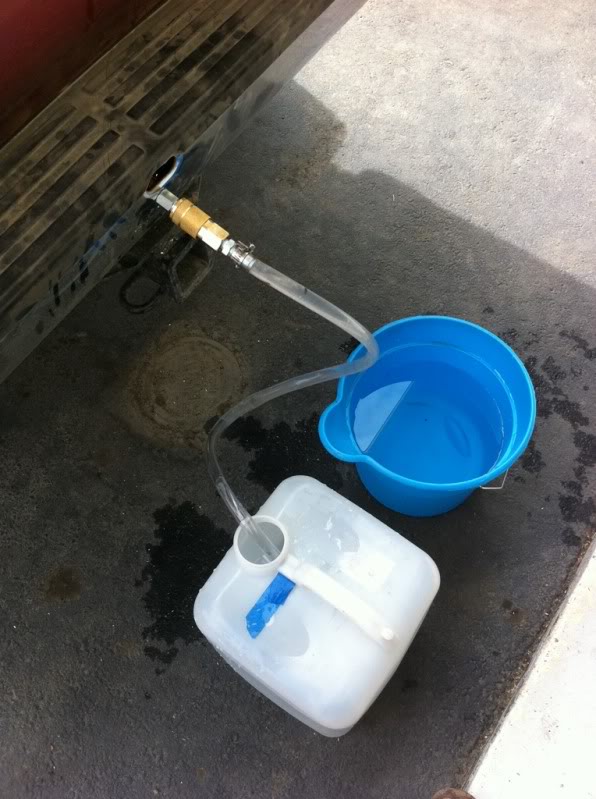
Fillin'er up.
Modified a hose with a 3/8" male air hose connector.
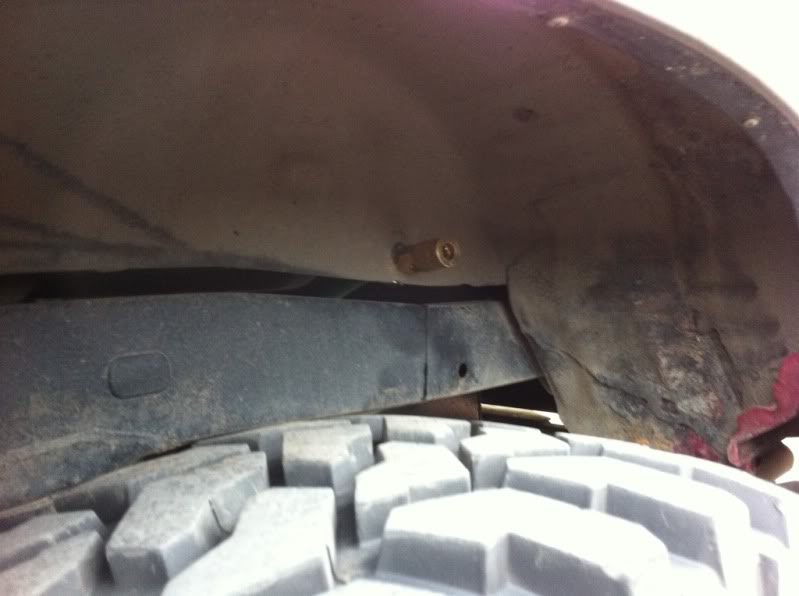
The Female side. This is when not filling.
Apparently the tank builder can't read dimensions or can't measure... not sure which. It was WAYYYYYYYYY off. So, I went the next best route and used one of his "standard" tanks. 9 gallons of water is now happily under my 4runner. Not to mention I got to use the welder, which is always a fun time.
New tank!!
It's got holes!
Flux core sucks.... But the welds are good!! **Initiate happy dance**
I don't have a good photo after it was painted, I wanted it on the truck.
Mounted... sort of... it needed the other 2 bolts.
I used the stock spare tire steel for the upper mounts. They are plenty strong, and the tank weighs 72lbs full.
Green is FILL, Red is PUMP, and in the back you can see 2 clear lines, one is the tank vent and one is my rear diff vent.
Fillin'er up.
Modified a hose with a 3/8" male air hose connector.
The Female side. This is when not filling.
 06-27-2011, 10:50 PM
#19
Registered User
Thread Starter
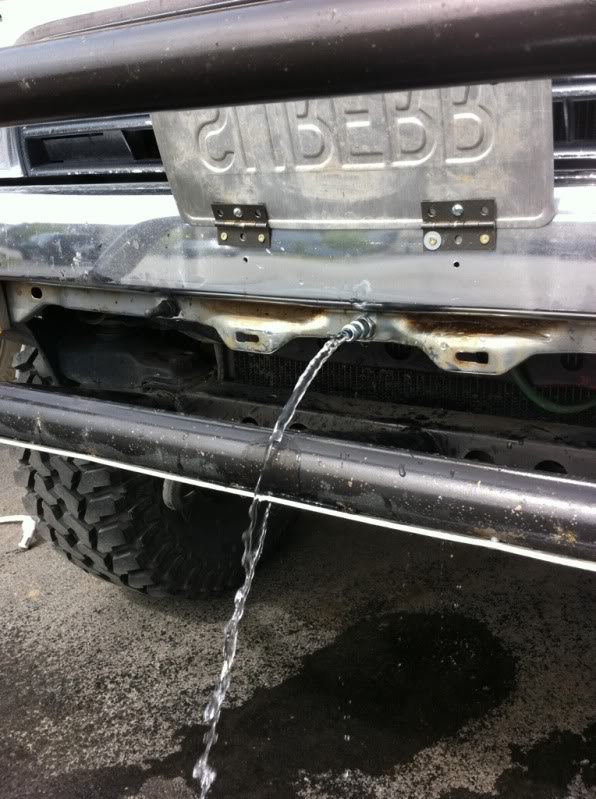
I was "testing" the system today without the sprayer when my new neighbor walked by and was like "excuse me, your truck is..... well.... it's peeing."
I about hit the floor in a fit of laughter.
I about hit the floor in a fit of laughter.


