Loose Auto Shifter Fix
 04-01-2013, 09:22 PM
#1
Registered User
Thread Starter
Join Date: Dec 2012
Location: Northern UT
Posts: 50
Likes: 0
Received 0 Likes
on
0 Posts
Loose Auto Shifter Fix
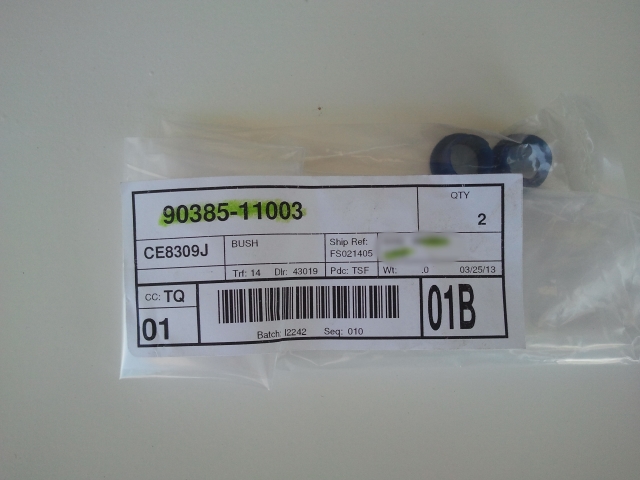
So my auto shifter lever was so loose it felt like a manual. Lots of side to side and forward back movement. Called my local dealer for a pair of shift lever bushings, none in stock, so 4 days later the order came in and I picked them up. Total cost $3.03 with tax. Total time was about 45 min including all the hand wiping and picture taking.
Tools you will need for the job:
Small screwdiver
Philips screwdriver
1/4' drive ratchet, 12mm socket, 10mm socket and long extention
Needle nose pliers
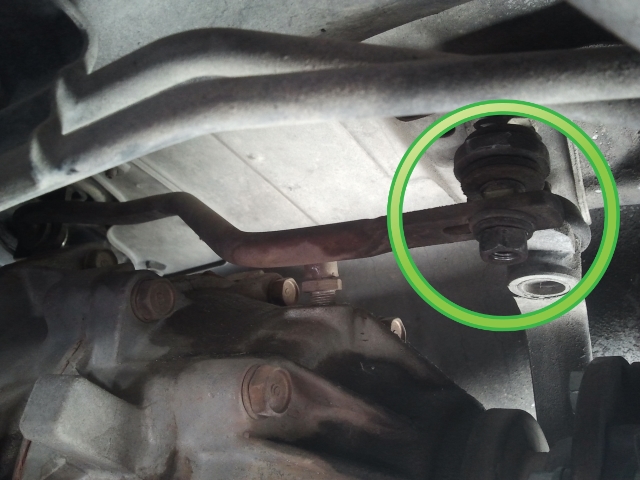
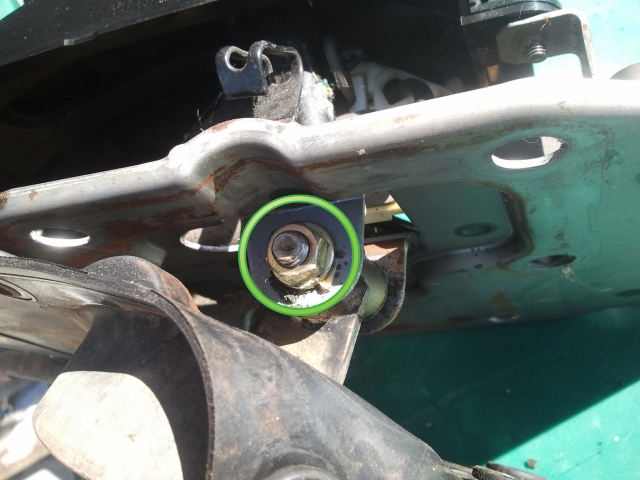
1. From under your 4runner, on the drivers side of transmission, Remove the 12mm nut,lock washer and flat washer from tranfer case shifter rod.
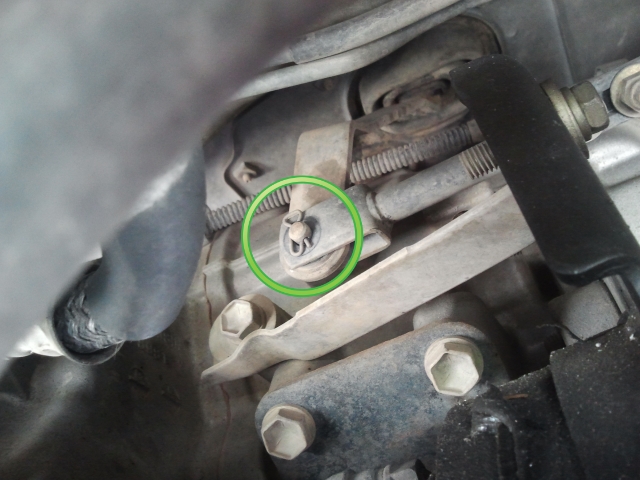
2. From under your 4runner, on the passenger side of transmission, remove the retaining clip from the trans shifter lever with needle nose pliers and remove pin.
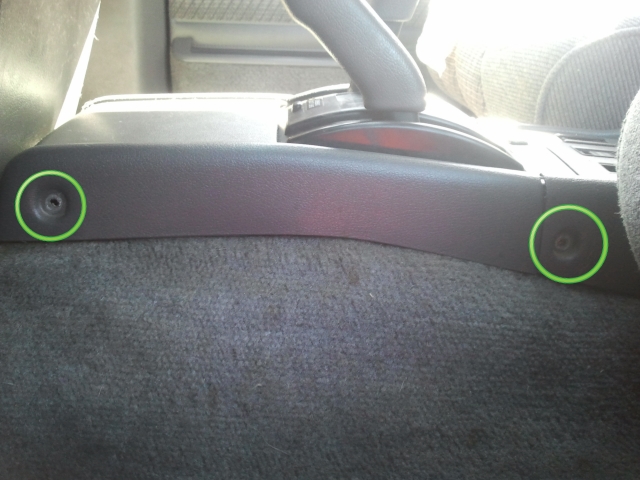
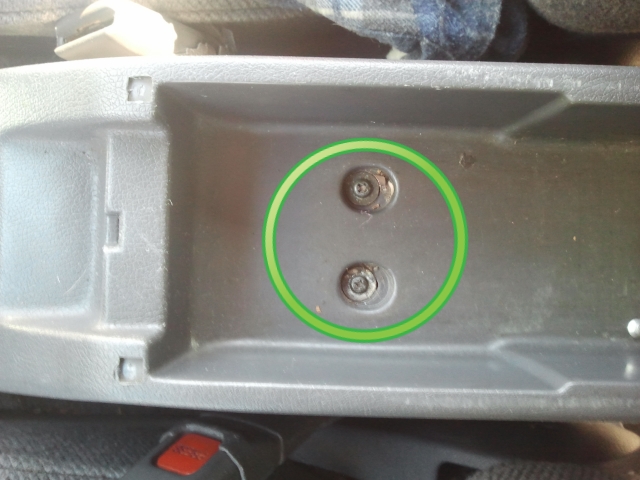
3. Remove the 6 philips screws on the center and shifter console. 2 on each side and 2 in the storage compartment.
4. Lift and slide the center console back as much as the wires allow. no need to disconnect any wires. Lift the shifter cover up and over the shift levers and lay it on the passenger floor. Still no need to disconnect any wires.
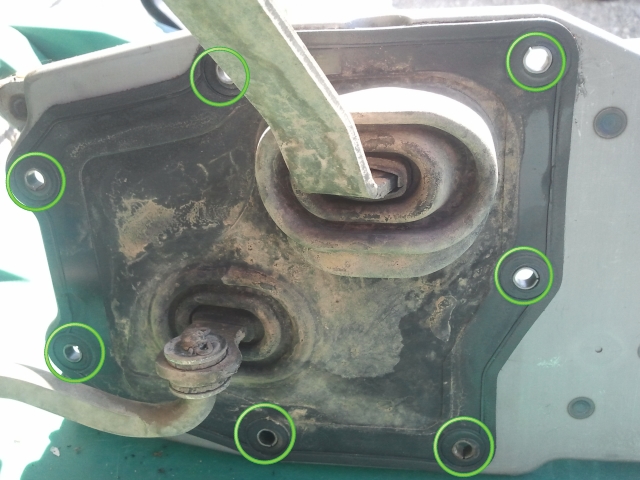
5. Using the 10mm socket and extention, remove the 7 bolts securing the shifter assembly to the floor. 2 bolts on the left, bottom, right, and one on the top.
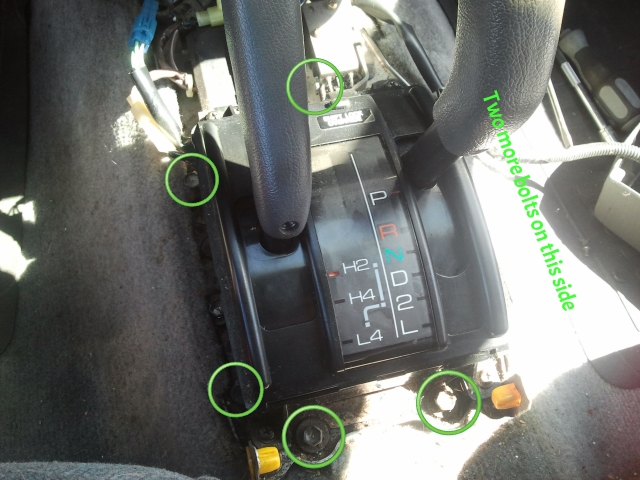
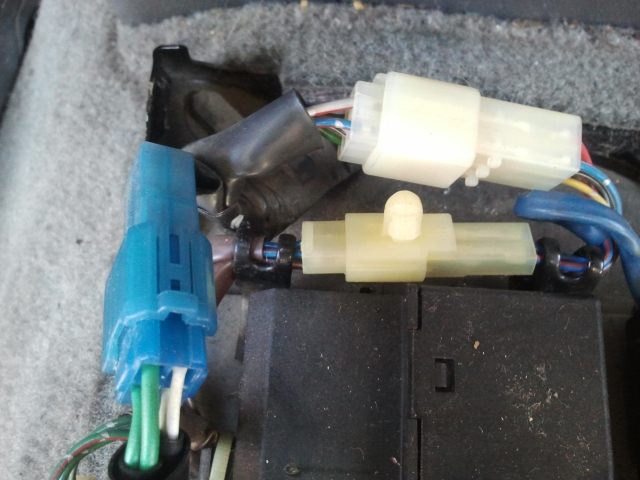
6. Carefully disconnect the large white, and the blue connectors using a small screwdriver to relaese the lock.
7. Carefully pry up the shifter assembly from the floor. It will probably want to stick a little bit. There is a rubber gasket/boot that is attatched to the bottom of the assembly. Pull the shifter assembly straight up and rotate it about 90 degrees counterclockwise in order for the shift linkages to clear the opening.
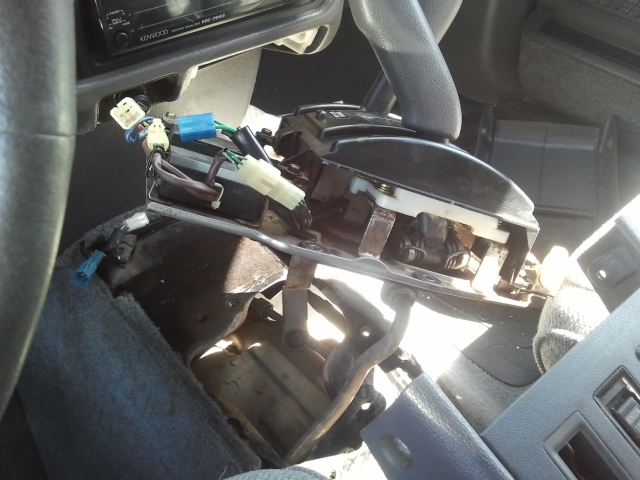
8. The shift assembly is out!
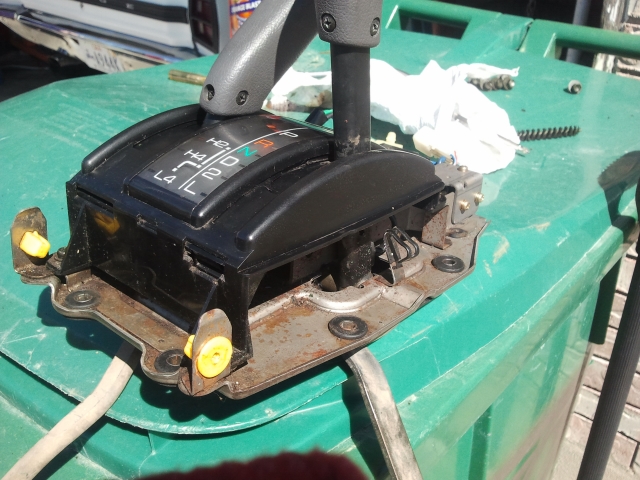
9. Turn the assembly over and push out all the metal bushings inside the holes of the rubber gasket/boot.
10. Carefully pry / push the grommet part of the gasket through the mountont holes from the top of the shifter so you can slide the gasket/boot down enough to access the pivot bolt.
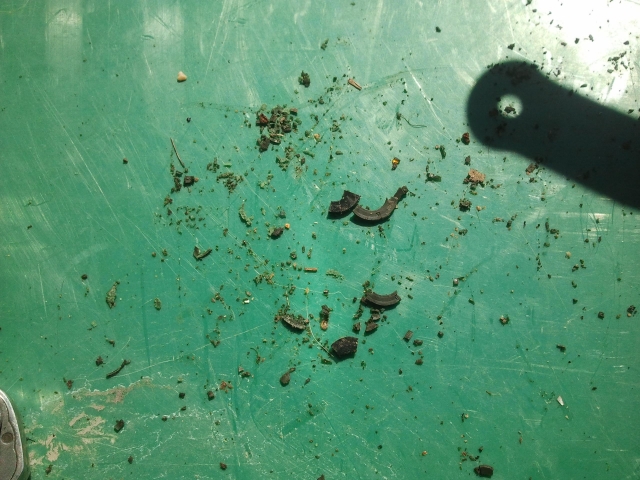
11. Remove the 12mm nut and push out the pivot bolt. Slide the shift arm out of the bracket and clean the pivot hole of whatever (if anything) is left of the old bushings.
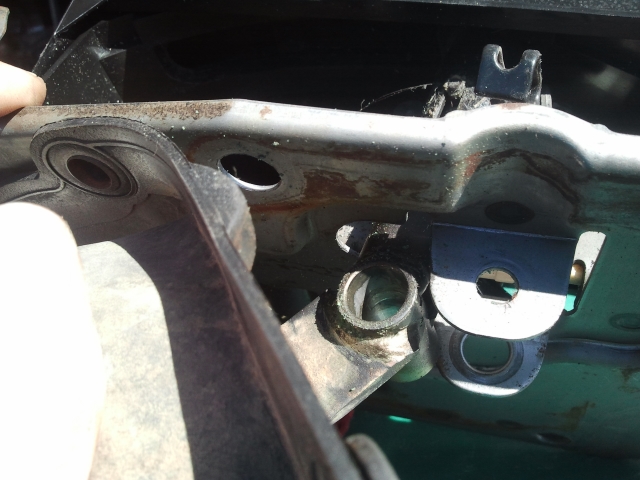
This is what was left of mine.....
New $3.03 bushings!
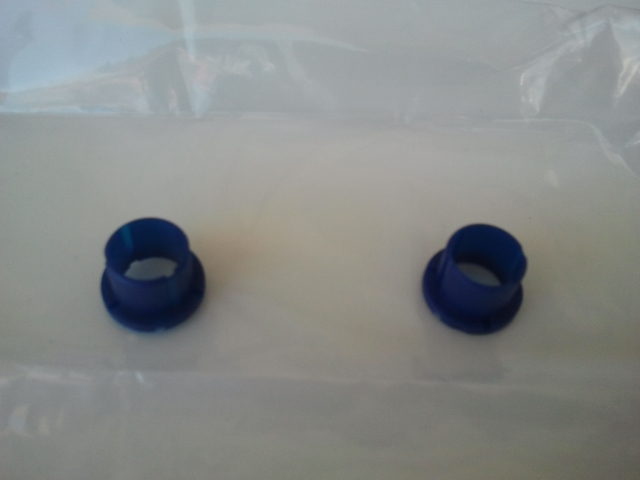
12. Push new bushings into the shift arm, slide the arm into the bracket, make sure the bushing and hole line up nice and push the pivot bolt in. Tighten the nut.

13. Reverse procedure to re install shifter, covers and linkage.
Tools you will need for the job:
Small screwdiver
Philips screwdriver
1/4' drive ratchet, 12mm socket, 10mm socket and long extention
Needle nose pliers
1. From under your 4runner, on the drivers side of transmission, Remove the 12mm nut,lock washer and flat washer from tranfer case shifter rod.
2. From under your 4runner, on the passenger side of transmission, remove the retaining clip from the trans shifter lever with needle nose pliers and remove pin.
3. Remove the 6 philips screws on the center and shifter console. 2 on each side and 2 in the storage compartment.
4. Lift and slide the center console back as much as the wires allow. no need to disconnect any wires. Lift the shifter cover up and over the shift levers and lay it on the passenger floor. Still no need to disconnect any wires.
5. Using the 10mm socket and extention, remove the 7 bolts securing the shifter assembly to the floor. 2 bolts on the left, bottom, right, and one on the top.
6. Carefully disconnect the large white, and the blue connectors using a small screwdriver to relaese the lock.
7. Carefully pry up the shifter assembly from the floor. It will probably want to stick a little bit. There is a rubber gasket/boot that is attatched to the bottom of the assembly. Pull the shifter assembly straight up and rotate it about 90 degrees counterclockwise in order for the shift linkages to clear the opening.
8. The shift assembly is out!
9. Turn the assembly over and push out all the metal bushings inside the holes of the rubber gasket/boot.
10. Carefully pry / push the grommet part of the gasket through the mountont holes from the top of the shifter so you can slide the gasket/boot down enough to access the pivot bolt.
11. Remove the 12mm nut and push out the pivot bolt. Slide the shift arm out of the bracket and clean the pivot hole of whatever (if anything) is left of the old bushings.
This is what was left of mine.....
New $3.03 bushings!
12. Push new bushings into the shift arm, slide the arm into the bracket, make sure the bushing and hole line up nice and push the pivot bolt in. Tighten the nut.
13. Reverse procedure to re install shifter, covers and linkage.


Thread
Thread Starter
Forum
Replies
Last Post
RedRunner_87
95.5-2004 Tacomas & 96-2002 4Runners (Build-Up Section)
84
06-01-2021 01:51 PM


