Project: 86 p/u sas/om617 diesel swap
 01-11-2012, 02:43 PM
#61
Registered User
Thread Starter
I got Trail Gears SAS kit. I got an IFS power steering box from Sky because my truck is NON power steering. Trail Gear told me to move my steering box 3/4" forward since I'm moving the axle forward that much, and it should be fine. I'll have to take the box off anyways to install the new one, so hopefully it's a simple procedure to move it forward. I don't mind notching the pan a LITTLE bit. If it's going to be a real pain, I'll just lower my bumpstops.
 01-11-2012, 05:24 PM
#62
Registered User
Thread Starter
Hopefully I can get more welding gas tomorrow and also get to the shop at work to use the plasma cutter to finish some things up, and then the springs will go in!
U bolt flip plates made from 9/16 steel. Gonna use a plasma cutter to widen the holes cus drill bits are too expensive and time consuming
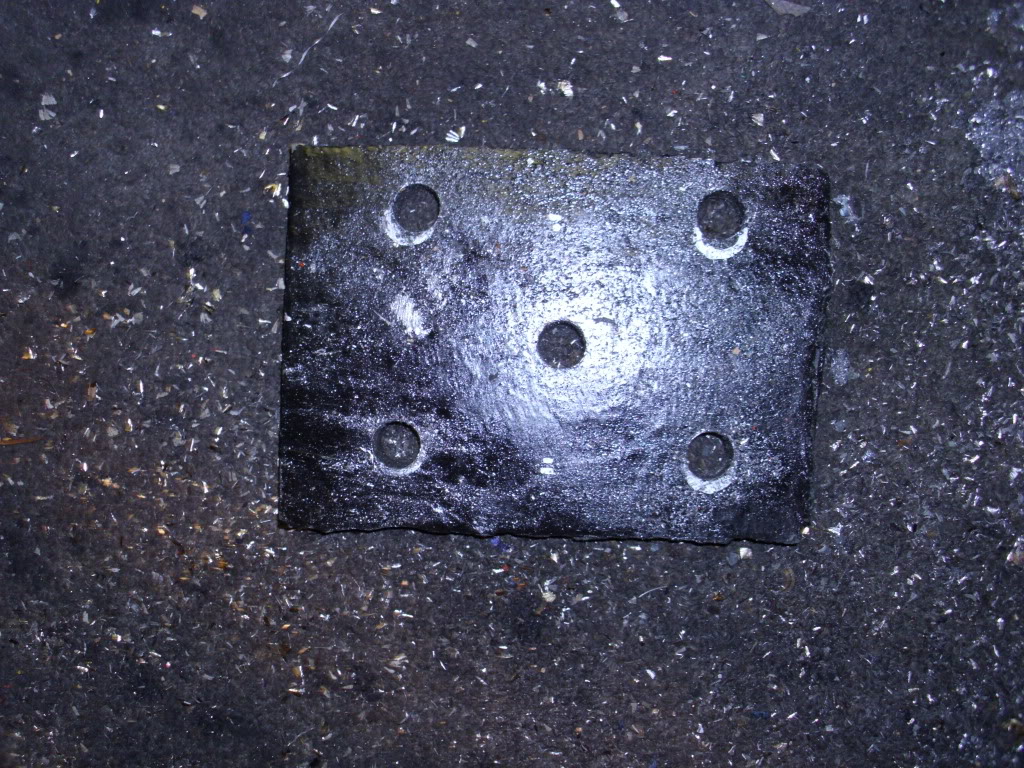
On the bottom is Trail Gear's flip plate, on the top is mine
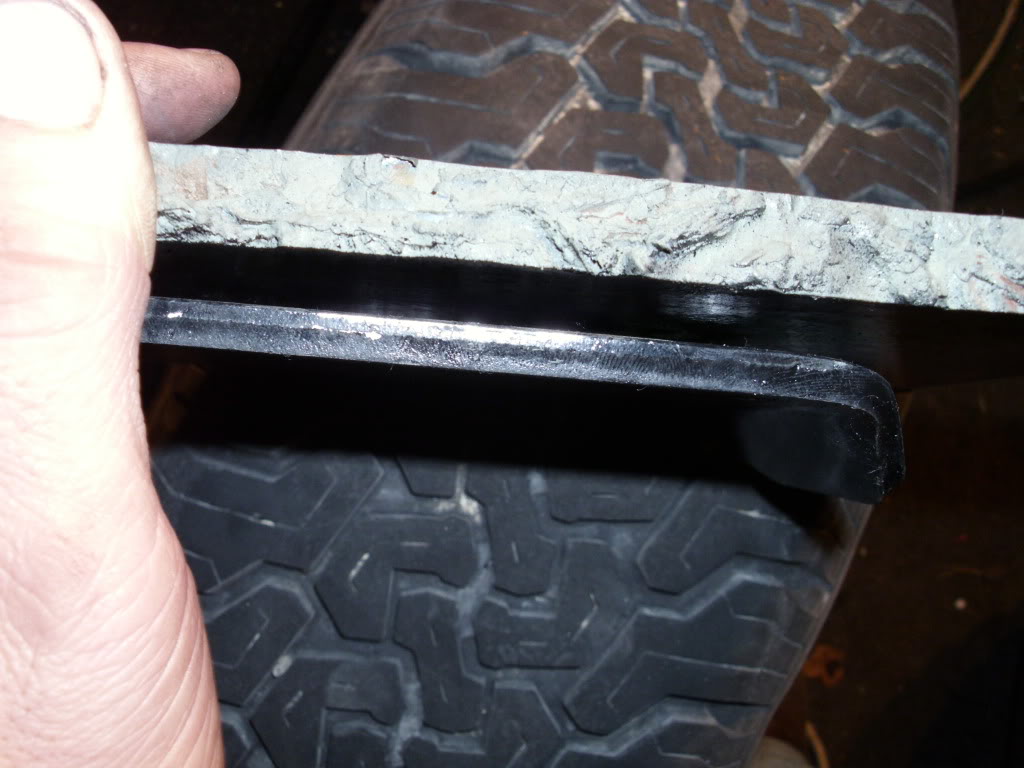
6 1/2" Shackles. I had to grind down the metal insert on the chevy bushings to get these to fit, but they're from my old lift and I wanted to use them. They should work great!
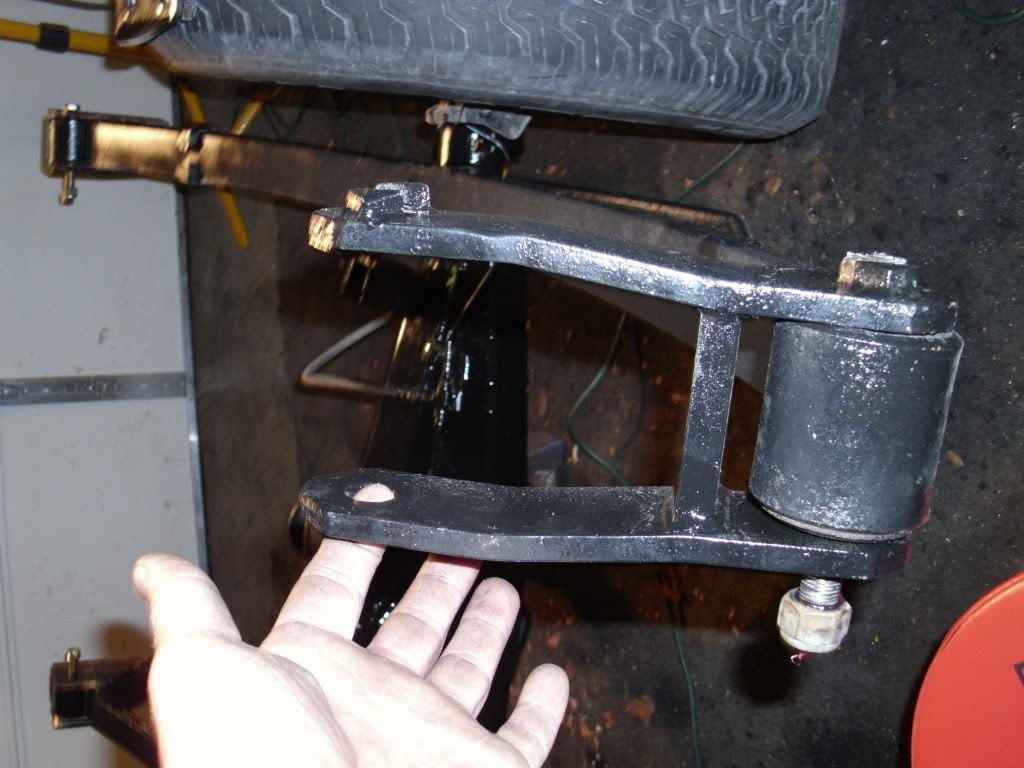
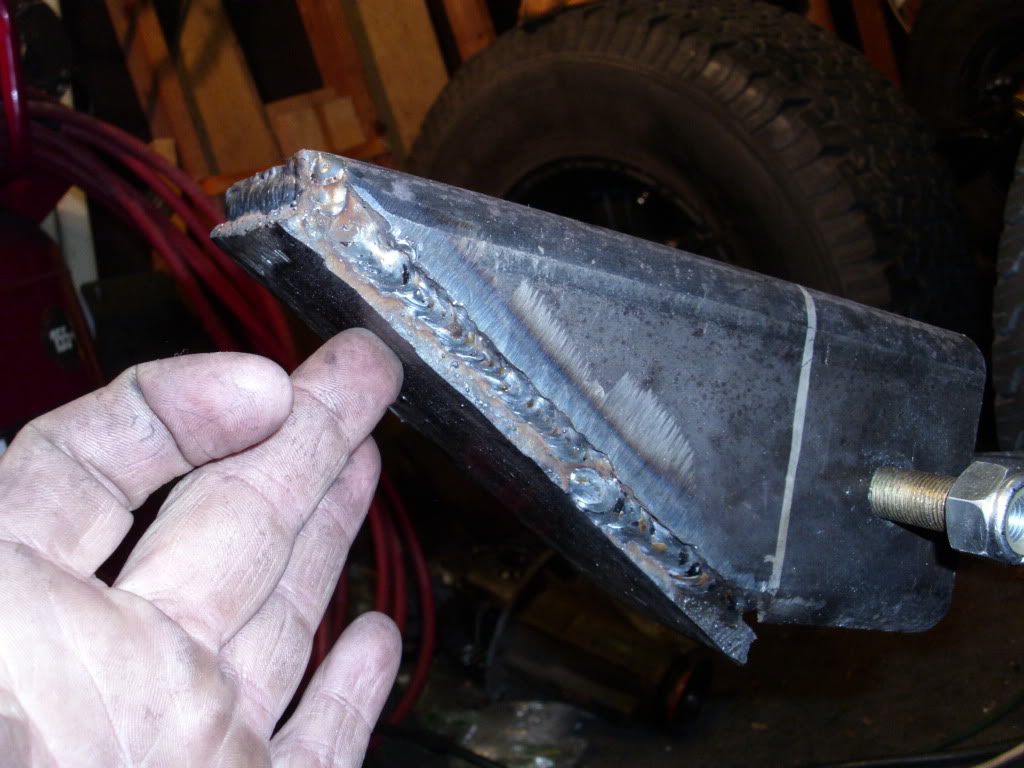
Here I have an 8" long piece of 3.5 x 3.5 x 1/4" Thick square tubing for my front hangers. Then I added on some 3/8" plate on the sloped side for rock protection.
Springs on the axle
U bolt flip plates made from 9/16 steel. Gonna use a plasma cutter to widen the holes cus drill bits are too expensive and time consuming
On the bottom is Trail Gear's flip plate, on the top is mine
6 1/2" Shackles. I had to grind down the metal insert on the chevy bushings to get these to fit, but they're from my old lift and I wanted to use them. They should work great!
Here I have an 8" long piece of 3.5 x 3.5 x 1/4" Thick square tubing for my front hangers. Then I added on some 3/8" plate on the sloped side for rock protection.
Springs on the axle
01-12-2012, 08:01 AM
#63
Registered User

Join Date: Jan 2012
Location: Frederick colorado
Posts: 7
Likes: 0
Received 0 Likes
on
0 Posts
Perfect on the steering brake!! I would put it has far forward as possible and notch the front lower rad support just a little to fit it then modify the.brake to tilt it forward to drop the pit man even more. Would make more clearance for your.pan and when you flex so you dont have.to.cut the pan as much. Just a theory im gonna try. And how you going to mount your radiator? Are you gonna hack up the support? I wonder.what ways.you can with.out.cutting the whole support??
01-12-2012, 08:34 AM
#64
Registered User
Thread Starter
I'm not too terribly worried about it. I'm going to cut it like dmarsh did, so I can get the tranny and engine in as one, then move my condensor and radiator forward, then put a piece of angle iron back over the support and bolt it on with 4 bolts and call it good enough. I'll also make sure my hood still closes
01-12-2012, 03:49 PM
#65
Registered User
Thread Starter
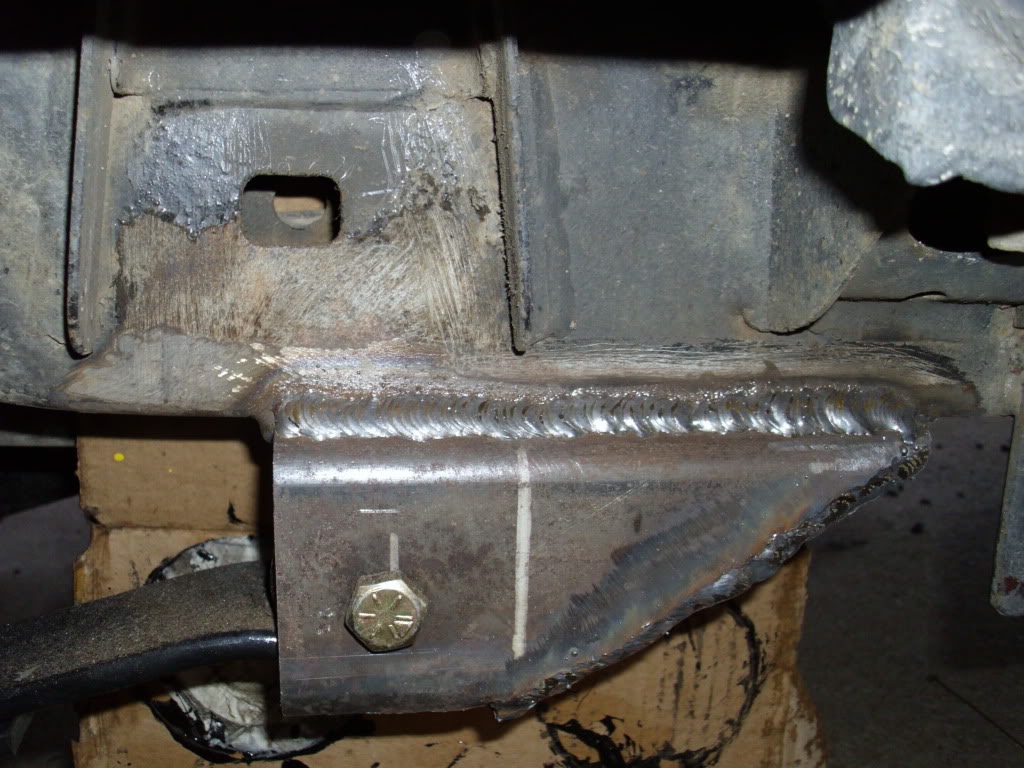
Amazing what a difference a full tank of shielding gas and a good spool of Lincoln welding wire makes. Thank GOD Linweld let me exchange my tank there today. Didn't think they would without their label on the bottle. So I went ahead and finished burning in some welds on my front spring hangers. Very satisfied with how they turned out.
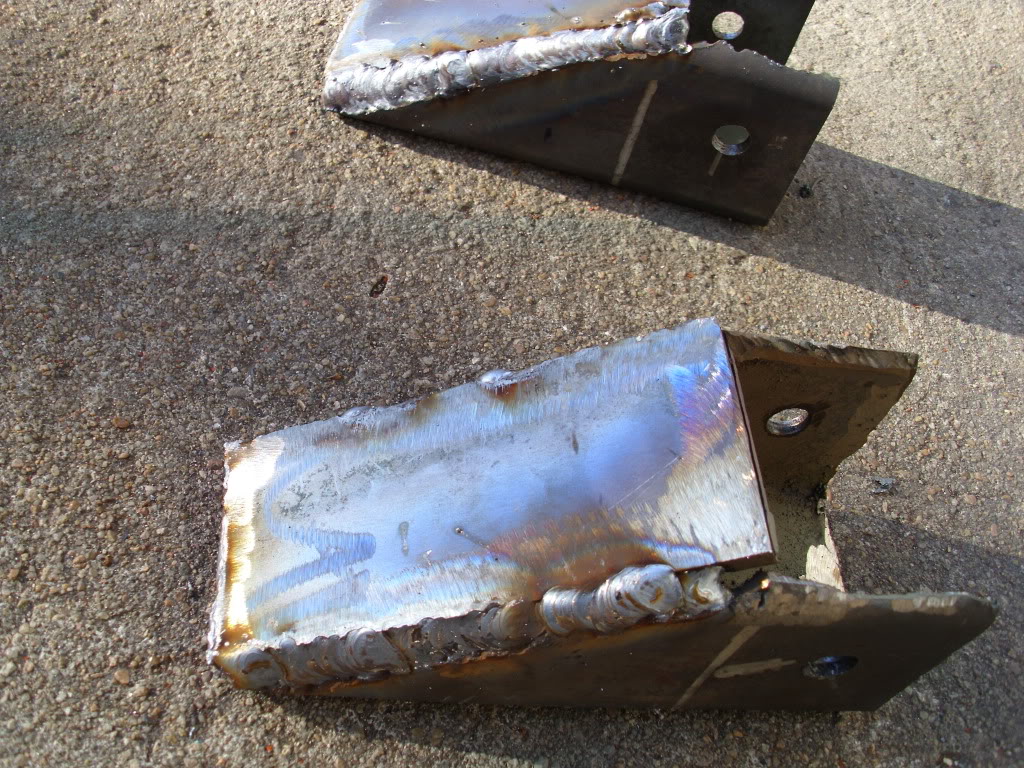
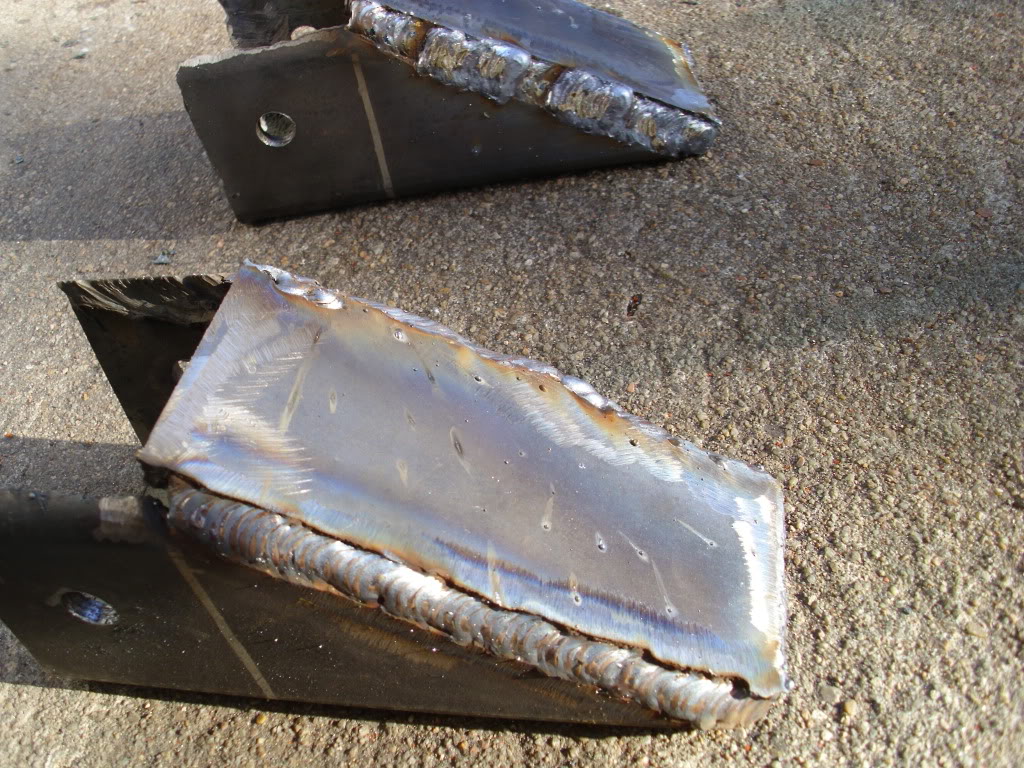
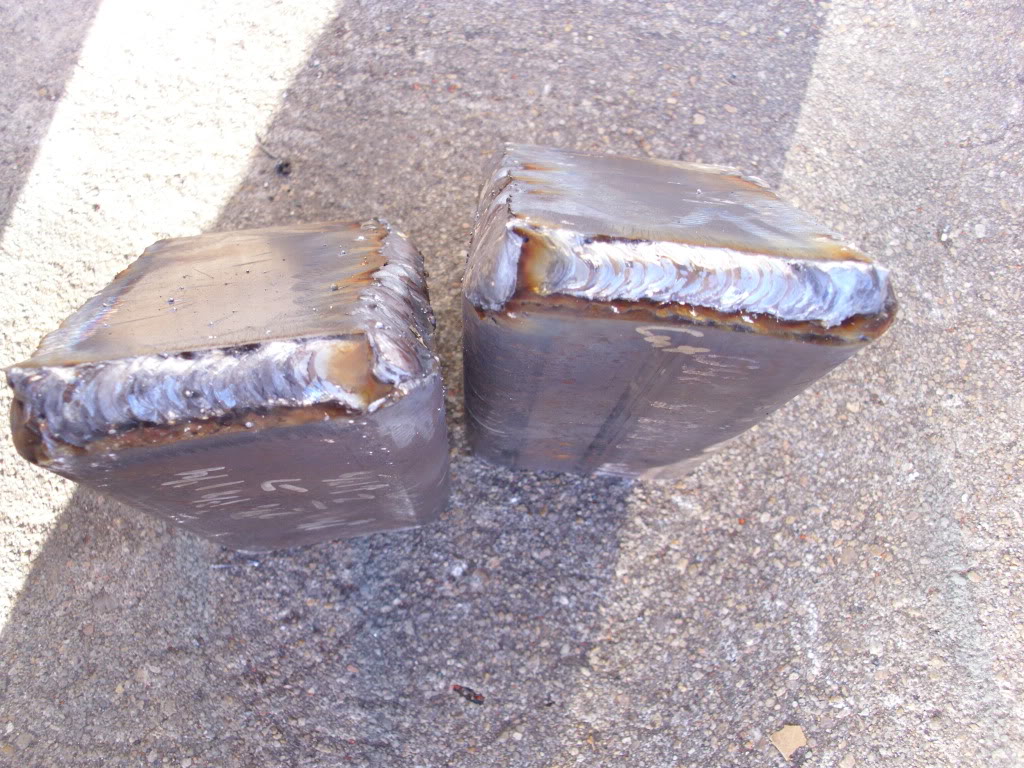
Then I got fed up with waiting for Trail Gear's stuff to come in the mail. Ordered it last Friday and it won't be here till Monday, so I went off of the stock shackle hangers bushings, 30mm O.D and 18mm I.D. and got some 1 3/4" OD DOM steel tubing at 1/4" thick. Then I called Trail Gear to track my order and verify their bushing size only to find that theirs is 1 3/4" OD according to the guy I spoke with. Hopefully that's not right. I hope he was measuring the outer flange.... Anyways, I used some 3/16 or 1/4" rectangle tubing, I belive it's like 2 1/2 x 2" IIRC. Froze my butt off, rode the motorcycle ten miles to work and used the plasma cutter cus using the angle grinder wasn't cutting it (pun intended). Hopefully I got the round tubing in straight enough to work. Fingers crossed. Then I capped the ends off with squares I cut out of a spare piece of angle iron.
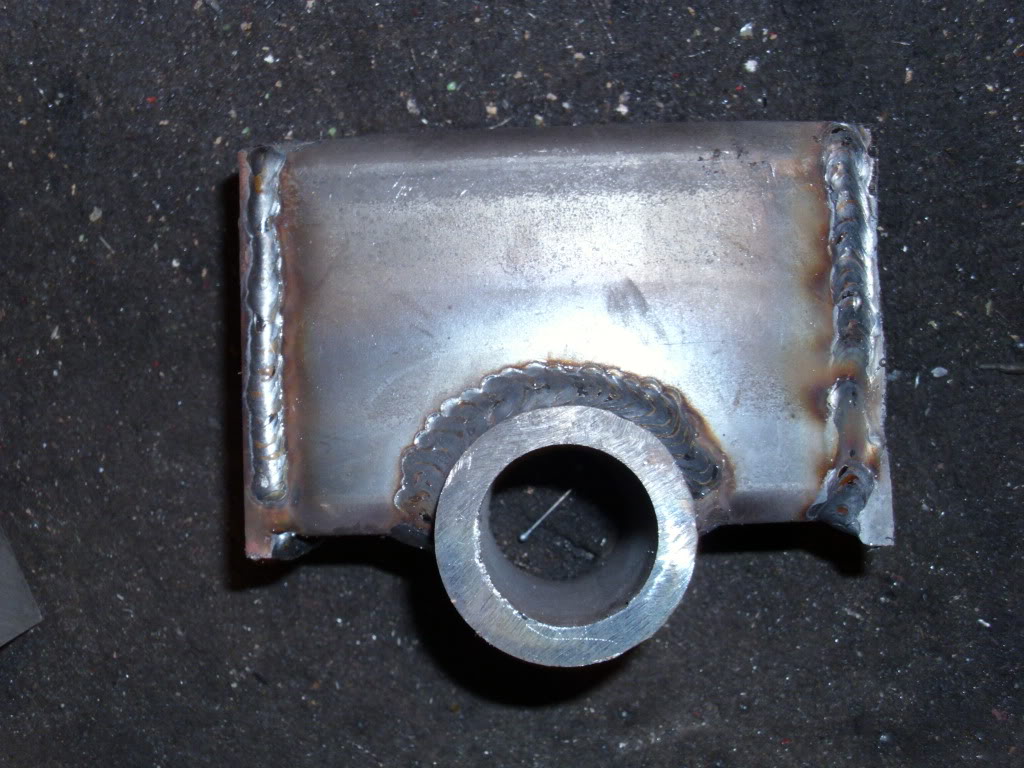
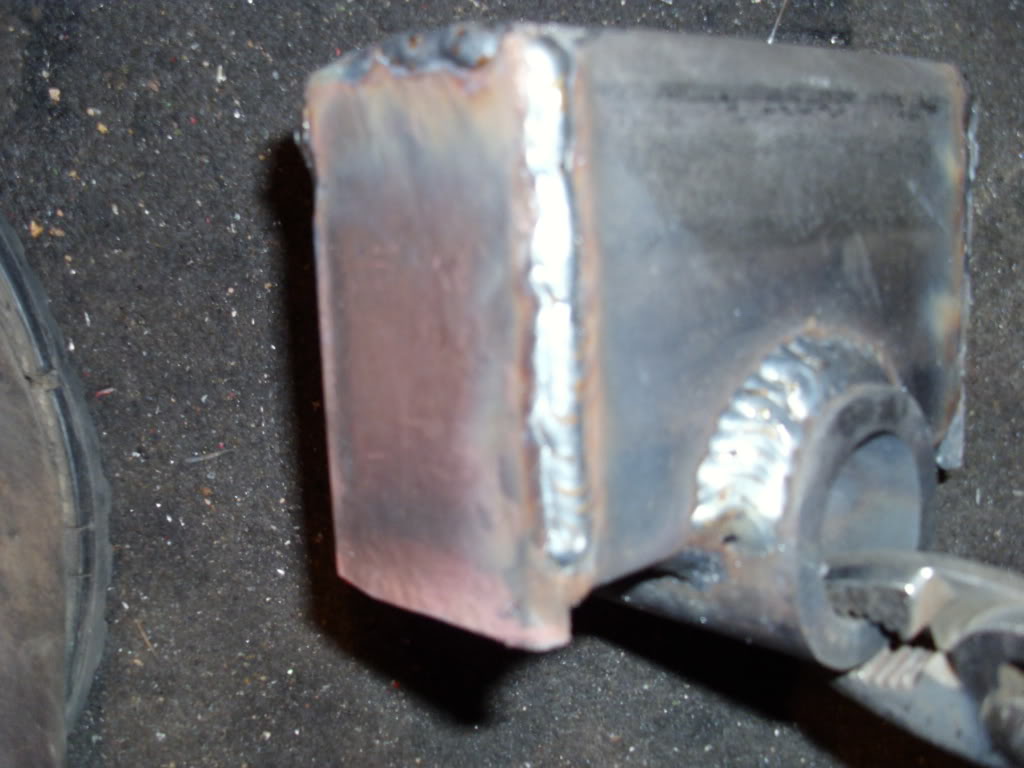
Ground the top down nice and flush
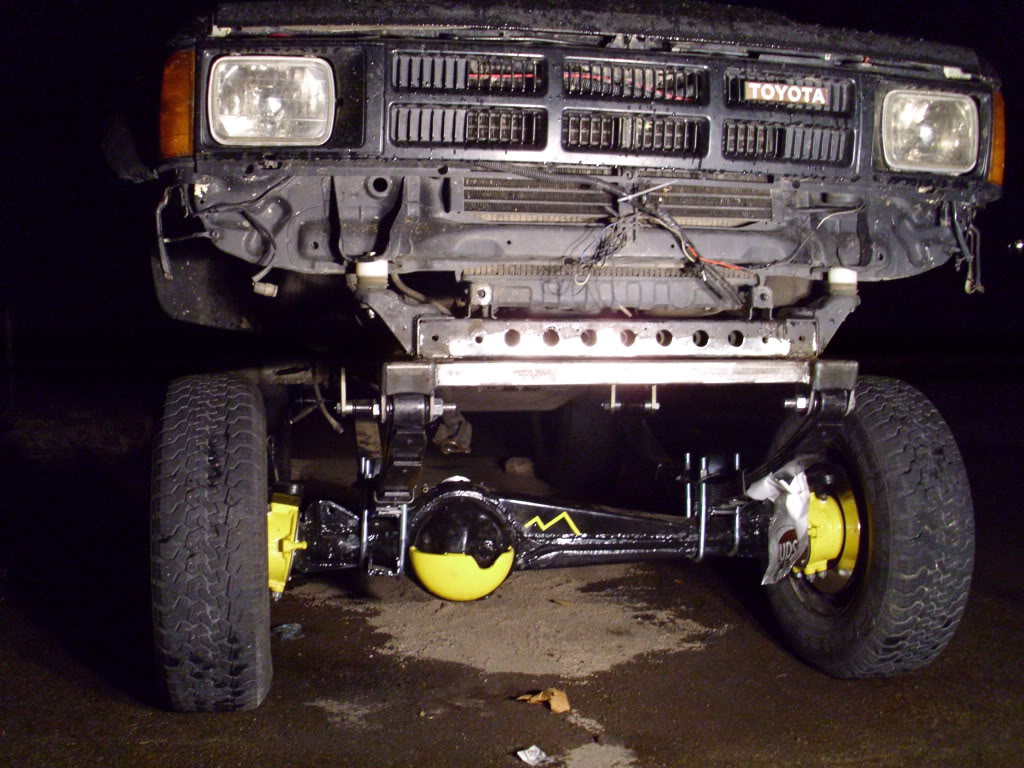
And here's a shot of the axle sitting outside. I used my Trail Gear front u-bolt plates for now to make sure I get the axle set in nice and straight, and I'll put my 9/16" plates on later, once I get the holes cut out with the plasma cutter.
Needless to say, I'm waking up at sun up and getting this sucker in!
This weekend I'll most likely be:
-Installing Dynamat and new carpet
-Rebuilding engine and firing it up!
AND I THINK I FINALLY FOUND A TRANNY!
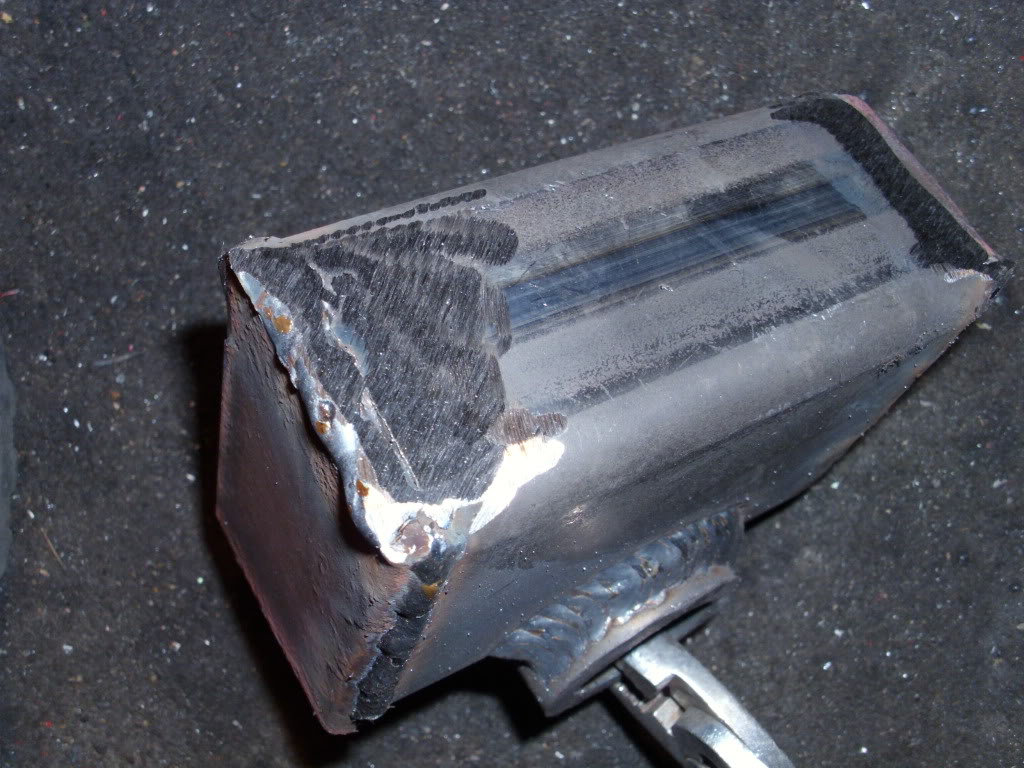
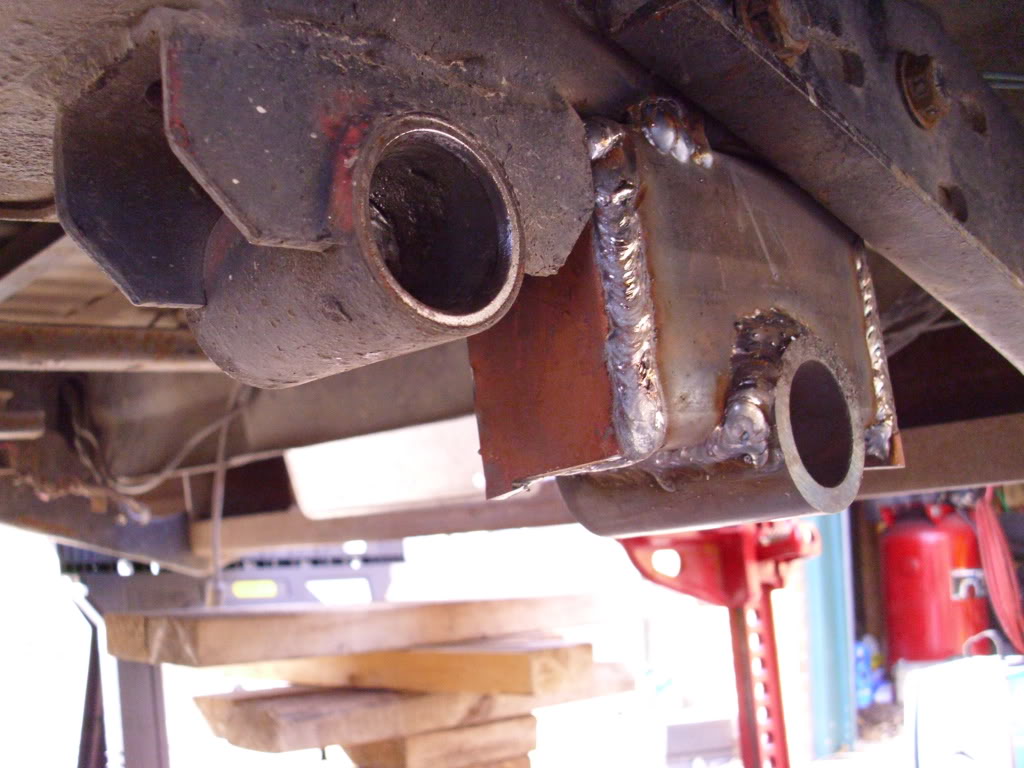
Edit: Yes, the snow melted. And if you're wondering why my rear hangers are so tall, I hope this isn't an incorrect technique, but I want 6" of rear lift, so I figured the taller the tubing, the better. And I'll probably truss them once they're on the frame.
Then I got fed up with waiting for Trail Gear's stuff to come in the mail. Ordered it last Friday and it won't be here till Monday, so I went off of the stock shackle hangers bushings, 30mm O.D and 18mm I.D. and got some 1 3/4" OD DOM steel tubing at 1/4" thick. Then I called Trail Gear to track my order and verify their bushing size only to find that theirs is 1 3/4" OD according to the guy I spoke with. Hopefully that's not right. I hope he was measuring the outer flange.... Anyways, I used some 3/16 or 1/4" rectangle tubing, I belive it's like 2 1/2 x 2" IIRC. Froze my butt off, rode the motorcycle ten miles to work and used the plasma cutter cus using the angle grinder wasn't cutting it (pun intended). Hopefully I got the round tubing in straight enough to work. Fingers crossed. Then I capped the ends off with squares I cut out of a spare piece of angle iron.
Ground the top down nice and flush
And here's a shot of the axle sitting outside. I used my Trail Gear front u-bolt plates for now to make sure I get the axle set in nice and straight, and I'll put my 9/16" plates on later, once I get the holes cut out with the plasma cutter.
Needless to say, I'm waking up at sun up and getting this sucker in!
This weekend I'll most likely be:
-Installing Dynamat and new carpet
-Rebuilding engine and firing it up!
AND I THINK I FINALLY FOUND A TRANNY!
Edit: Yes, the snow melted. And if you're wondering why my rear hangers are so tall, I hope this isn't an incorrect technique, but I want 6" of rear lift, so I figured the taller the tubing, the better. And I'll probably truss them once they're on the frame.
Last edited by pyrojoe22; 01-12-2012 at 03:58 PM.
01-12-2012, 09:39 PM
#66
Registered User
Thread Starter
Doing some late night debating, and thinking I might swap the solid axle up front before classes start next Wednesday. Only cons to this are that I'll have to continue using my non power steering box, and go without 4wd since my rear end is 4.10 and the front is 4.88 Hopefully I don't need 4wd anytime soon, but I'd like to play with the 4.10's with the om617 for a while before I throw 4.88's in the rear, unless of course I can't turn my 35's with 4.10's and the 22r lol. A pro is I'll know if I like my steering before I notch the oil pan, and I'll have room to crawl around under the truck again. My thoughts on the weather is that the seasons have shifted and right now is Fall and warm Spring weather won't come until I'm at my internship in May, with my luck. So if I go this route, the engine pry won't fire for another week
01-13-2012, 12:42 PM
#70
Registered User

Join Date: Dec 2011
Posts: 7
Likes: 0
Received 0 Likes
on
0 Posts
Hey Joe that would be great! I live 5 mi north and 10mi east of warsaw. what would be the best way to communicate with you so as not to bother this thread? Also Pyrojoe how much power loss do think i'm losing? I'm more into the vw diesels(1.6) and from what i remember the turbo on those only gained 5-6-hp-also i already have om617na-thanks for all input. i'll be away all weekend and will check back mon.
01-13-2012, 03:26 PM
#71
Registered User
Thread Starter
Dan - They already have less power, which means you won't get anything more from it than you would already have from your gasser. Although, you will probably see fuel increases. It's just a no-fun engine because you can't get power out of it like you can with a turbo'd one.
01-13-2012, 03:39 PM
#72
Registered User
Thread Starter
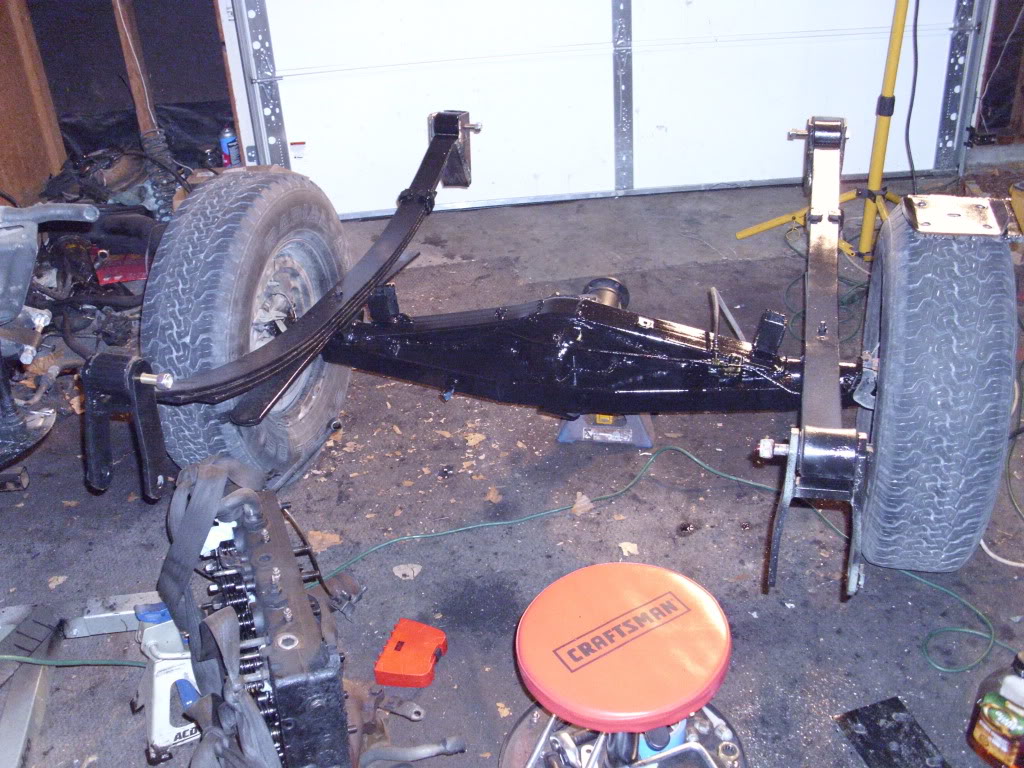
Well I'm having second guesses about doing the SAS this weekend. I'm starting to get burnt out on this project after working on it for a week straight. I believe the rear axle is in... It got dark as I was finishing bolting everything up. Still have to bleed brakes, put all the lug nuts on lol, and take the rear bumper off to finish welding, but I took it around the block tonite and WOW! It rides like a CADDY!!!! AMAZING!!!! Almost as good as when I had Air Ride helper springs. Welding by the gas tank was one of the scariest things in my life. I'll get the gas tank side welded when the gas tank gets moved. I'm hoping all my welds will suffice. My welder is being kind of weird. So here's some pics
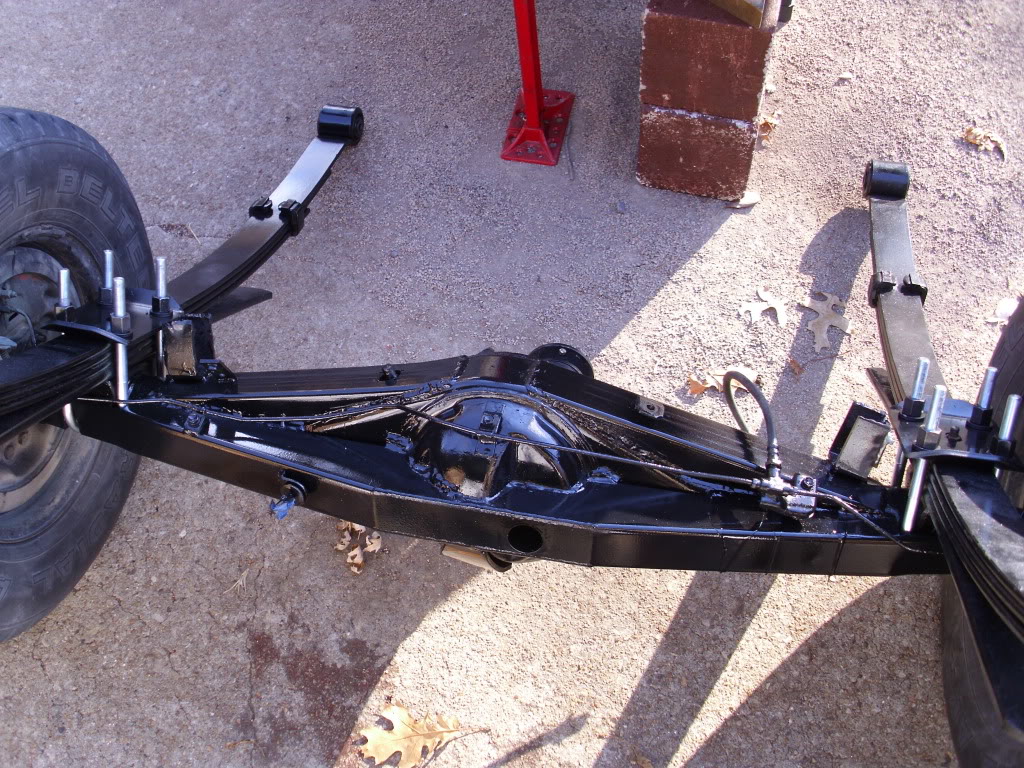
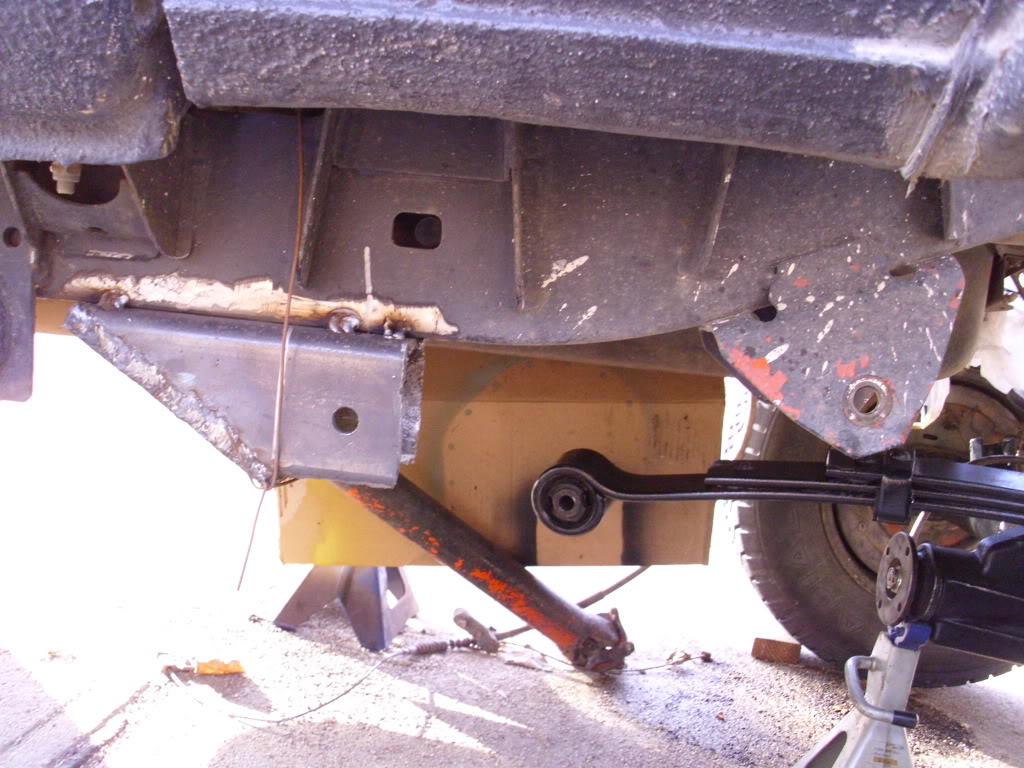
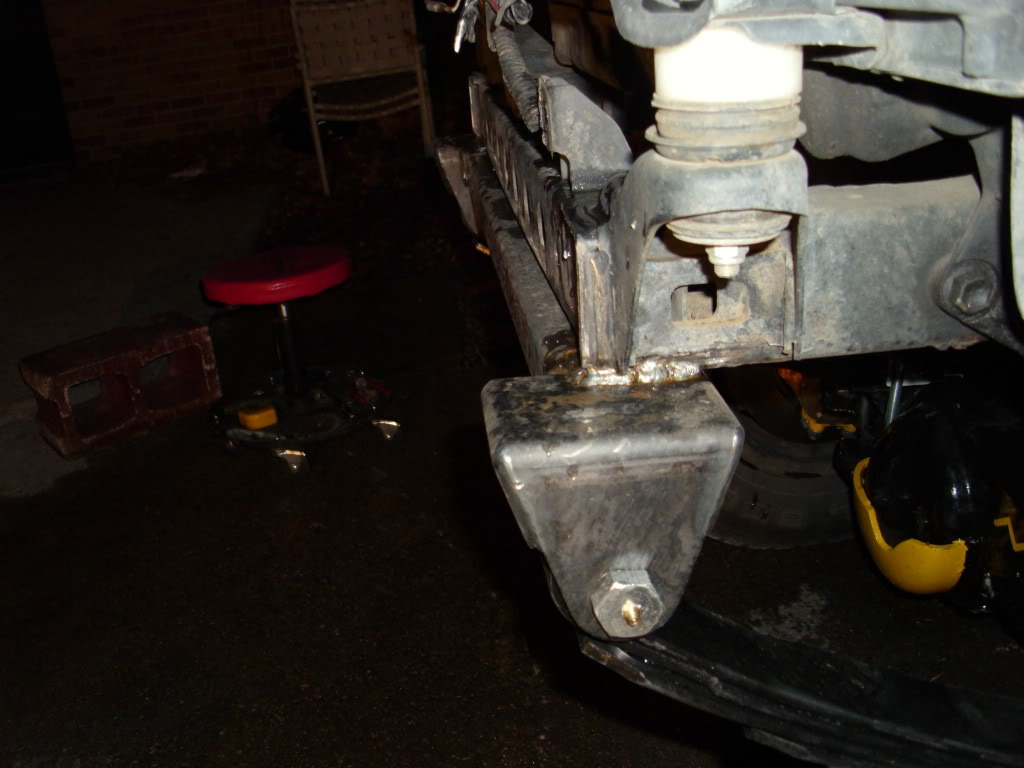
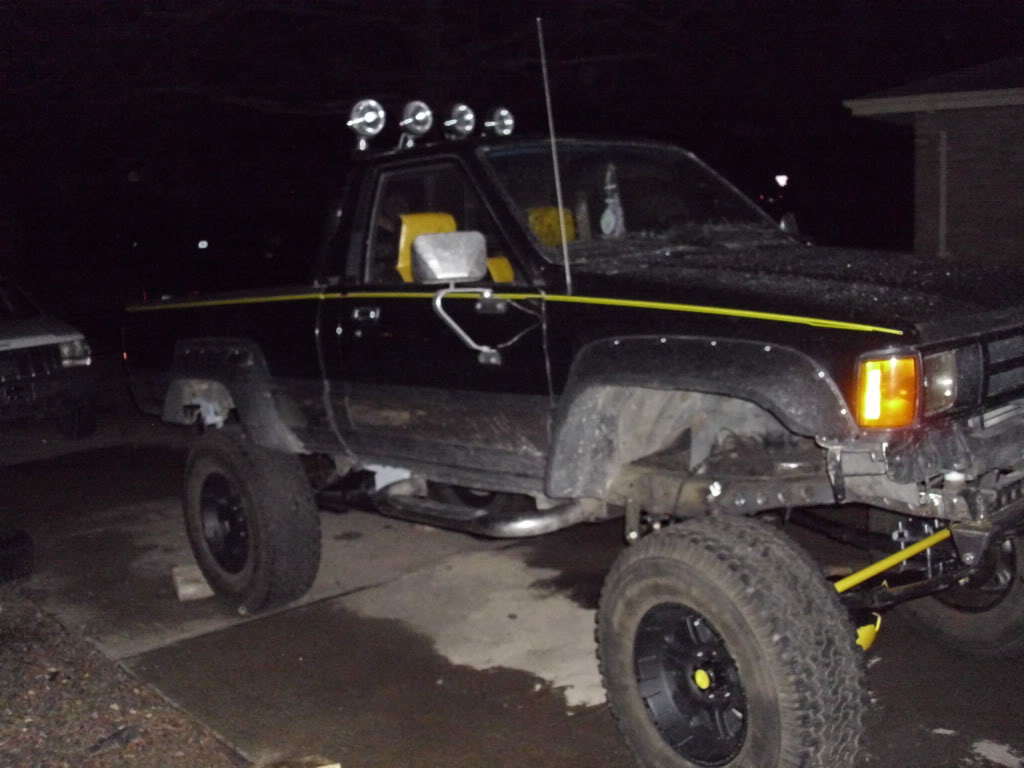
Moved the front hanger about 11" forward. No one has specified exactly how to measure the 11", from hole to hole it was about 11". I might throw some more beads on the drivers side tomorrow, but I'm gonna go to town on them when the bed comes off and I can see what I'm doing.
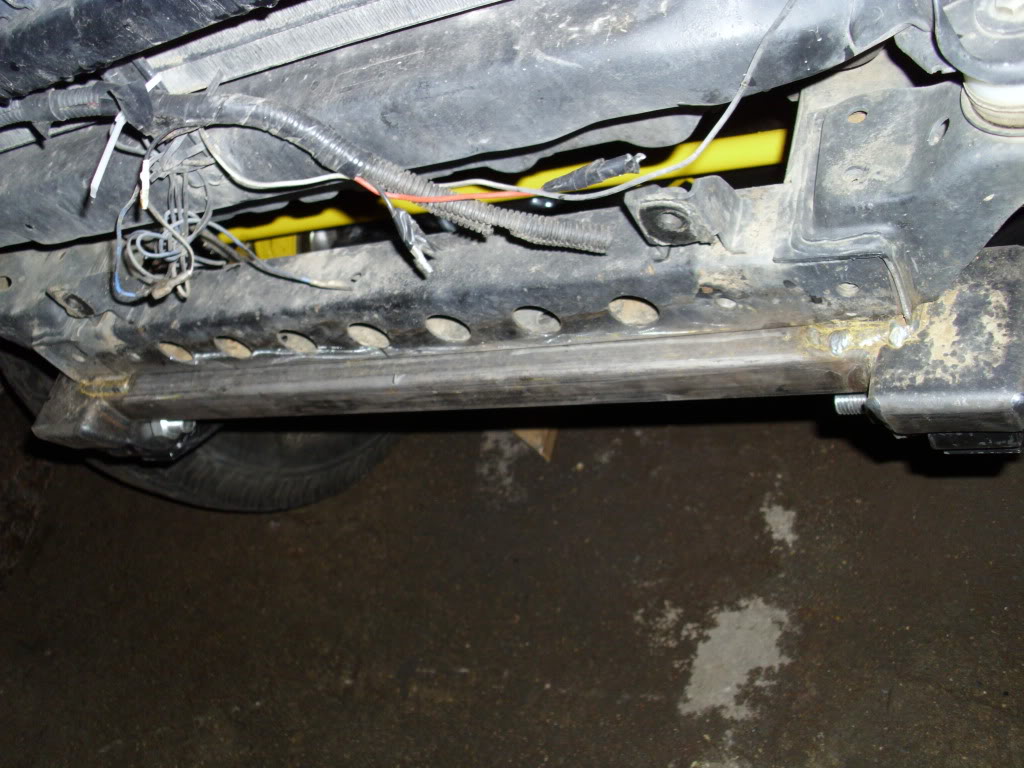
The rear hangers are approx. 5" back. Figured with a lower hanging hanger, I'd want to move it back a bit more. But in reality, I just bumped it up against the stock one, so 5" was as close to 4" as I could get.
Will someone who knows about shackle angles please critique my shackle angle and shackle set up over all? I'd like to have some peace of mind that I did it right. Shackles are at approximately 25 degrees.
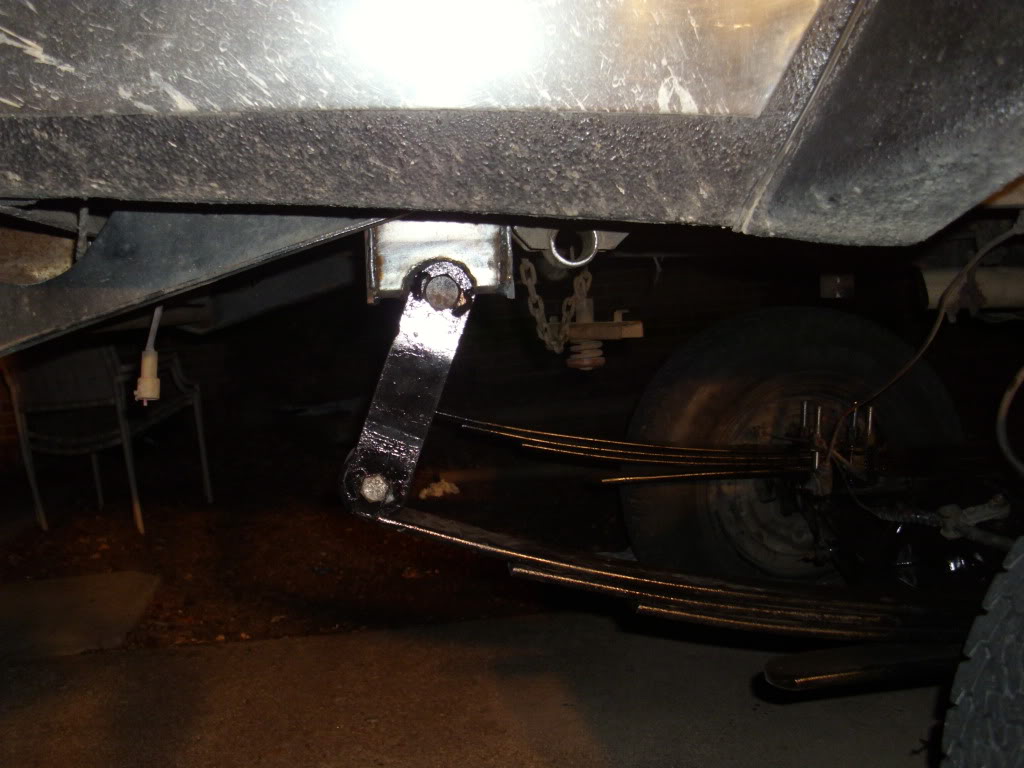
And as for the overall lift, I'm a little disappointed. Front fender measures 35" to the ground and rear now measures 39". I'm an idiot and forgot to measure it before I started, although with those coil springs in there, it was skewed anyways. Once the front is put on and the springs settle under the diesel's weight I'll have a much better idea of what I need to do to the rear. My plan is to have 4crawler build me some lift block shims, to raise it 1 or 2 more inches and correct my pinion angle.
Tomorrow will be a test and finish up day. I'll get the brakes bled and take it for a good long drive and try to tell if anythings wrong (hopefully it's not). I'd also like to get under there and weld in my upper shock tower and hang my shocks. Then I bet she'll really ride nice!
Moved the front hanger about 11" forward. No one has specified exactly how to measure the 11", from hole to hole it was about 11". I might throw some more beads on the drivers side tomorrow, but I'm gonna go to town on them when the bed comes off and I can see what I'm doing.
The rear hangers are approx. 5" back. Figured with a lower hanging hanger, I'd want to move it back a bit more. But in reality, I just bumped it up against the stock one, so 5" was as close to 4" as I could get.
Will someone who knows about shackle angles please critique my shackle angle and shackle set up over all? I'd like to have some peace of mind that I did it right. Shackles are at approximately 25 degrees.
And as for the overall lift, I'm a little disappointed. Front fender measures 35" to the ground and rear now measures 39". I'm an idiot and forgot to measure it before I started, although with those coil springs in there, it was skewed anyways. Once the front is put on and the springs settle under the diesel's weight I'll have a much better idea of what I need to do to the rear. My plan is to have 4crawler build me some lift block shims, to raise it 1 or 2 more inches and correct my pinion angle.
Tomorrow will be a test and finish up day. I'll get the brakes bled and take it for a good long drive and try to tell if anythings wrong (hopefully it's not). I'd also like to get under there and weld in my upper shock tower and hang my shocks. Then I bet she'll really ride nice!
Last edited by pyrojoe22; 01-13-2012 at 03:44 PM.
 01-15-2012, 06:17 PM
#75
Registered User
Thread Starter
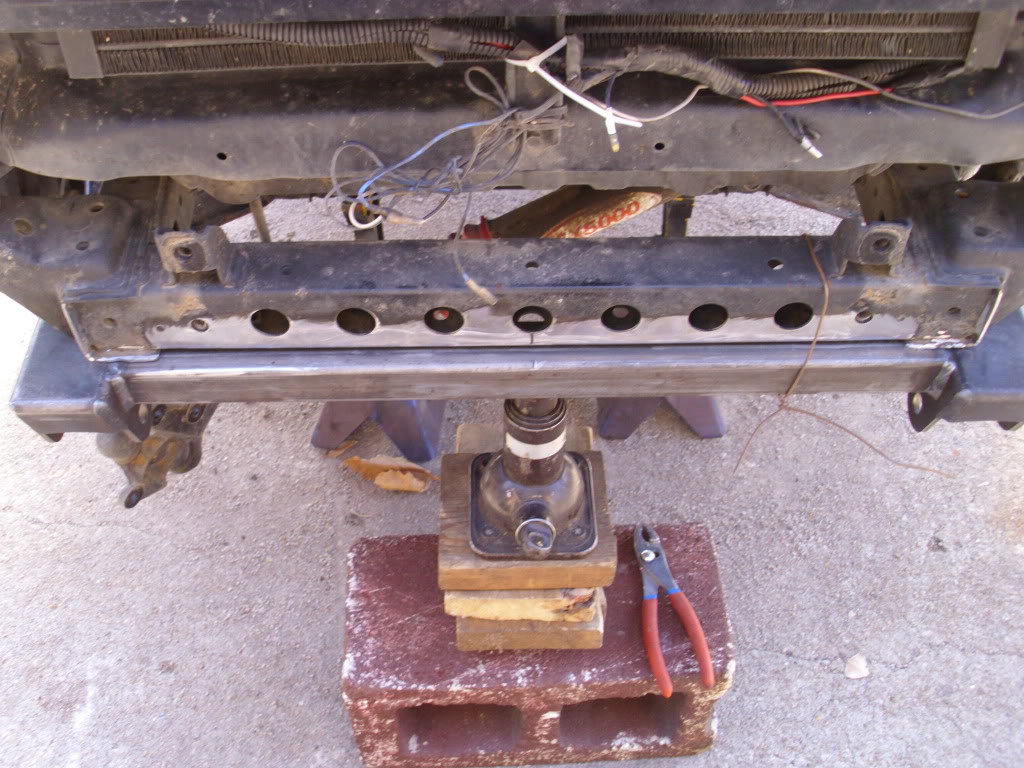
Who woulda thought I'd be doin a SAS in the middle of January?! Figured for sure I'd have to wait till at least March. Well I got half done today. Ran out of welding gas already. Somethin aint right, hopefully I can figure it out tomorrow. I think I may have a faulty flow meter. Anyways, here's all my pics I took. Pry shoulda taken more but I was trying to use every minute of this 60 degree day I could. It'll be 30 on Tuesday.
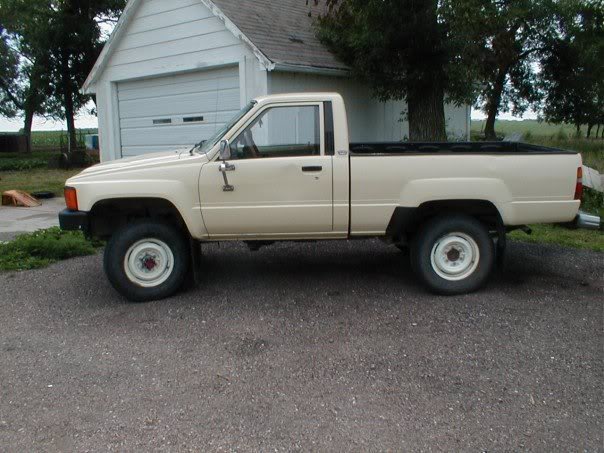
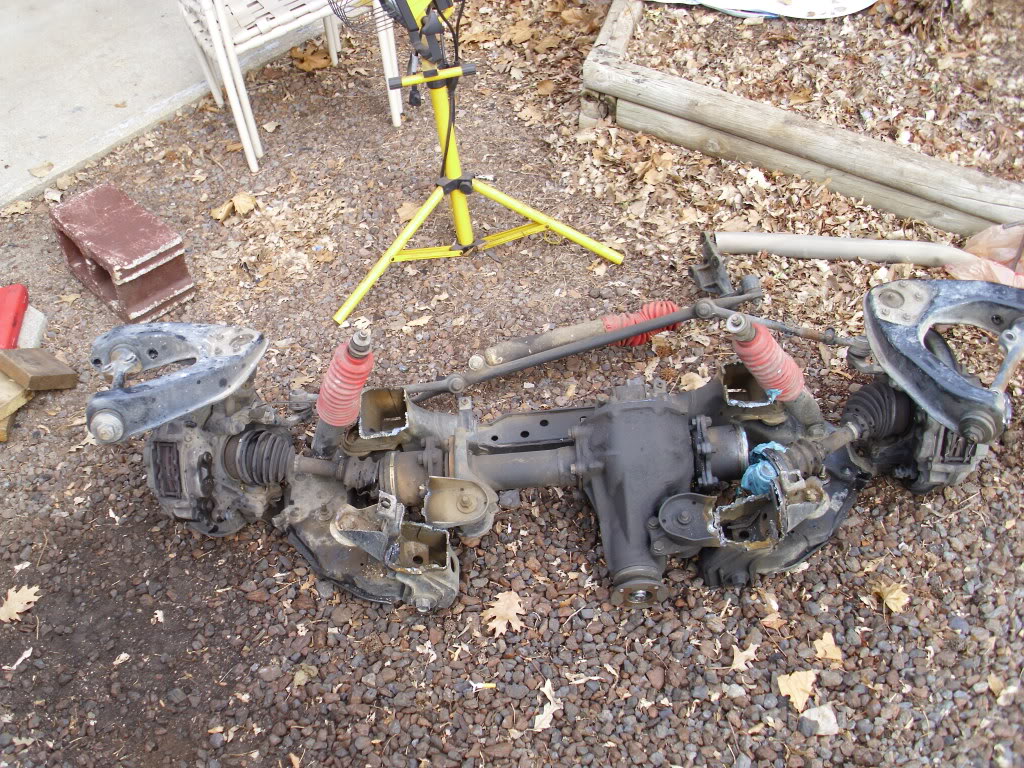
Never did I ever think I'd see BRAND NEW paint on the torsion bars! And the bolts were just as clean. I was astonished.
IFS On
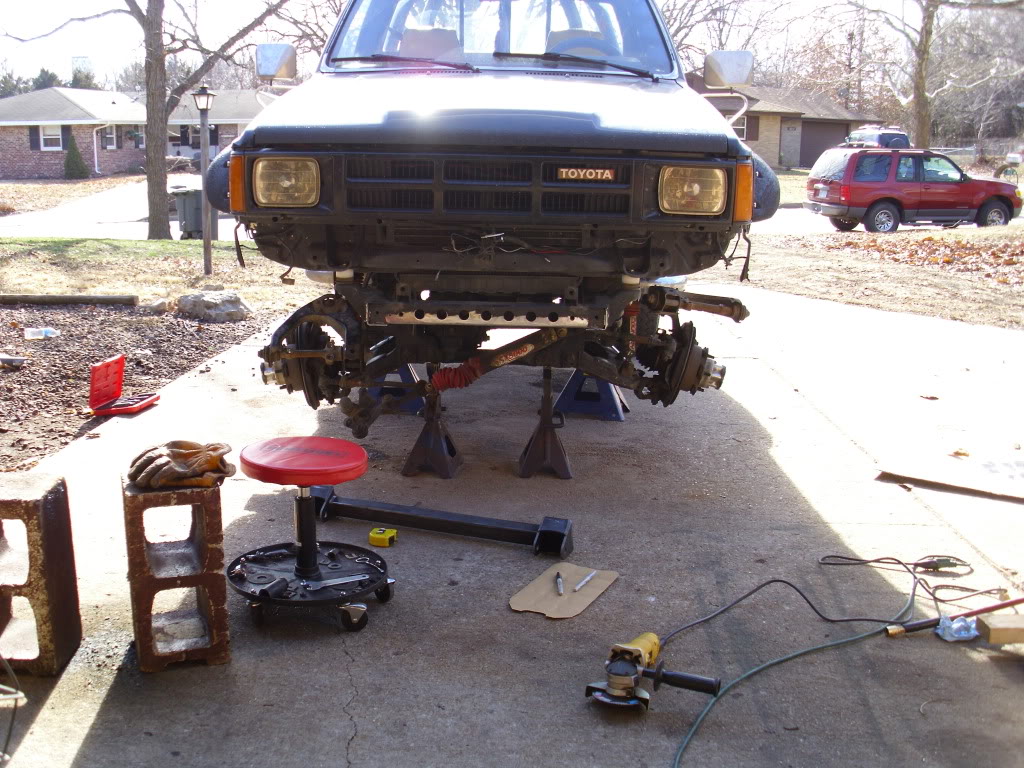
IFS Off

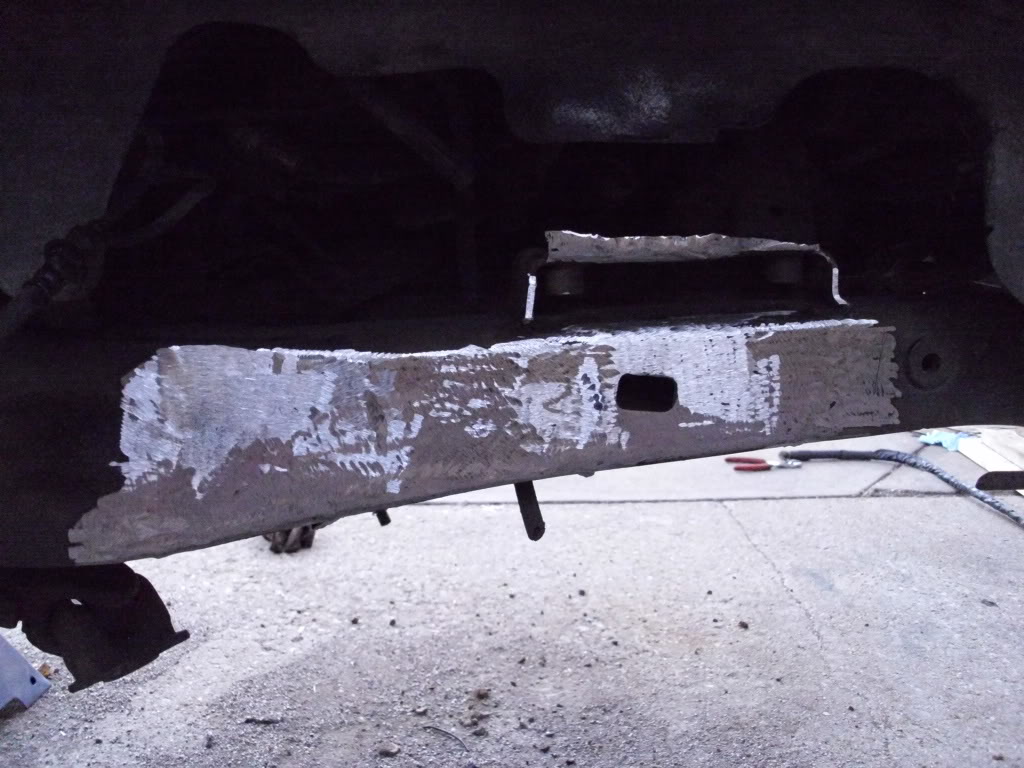
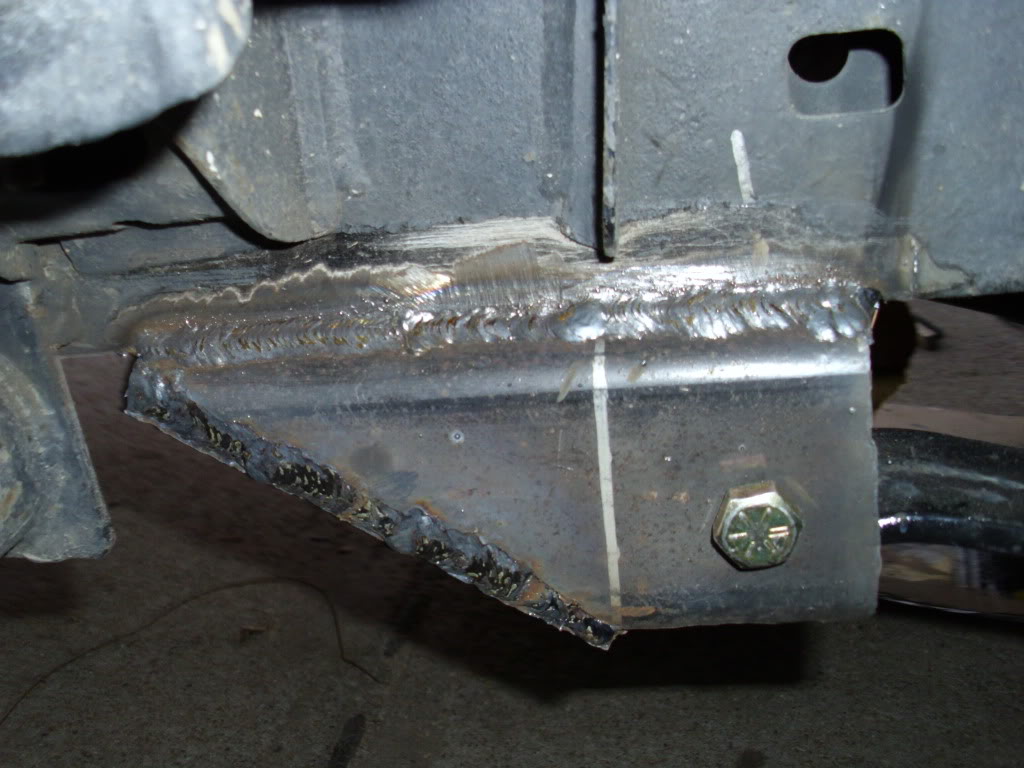
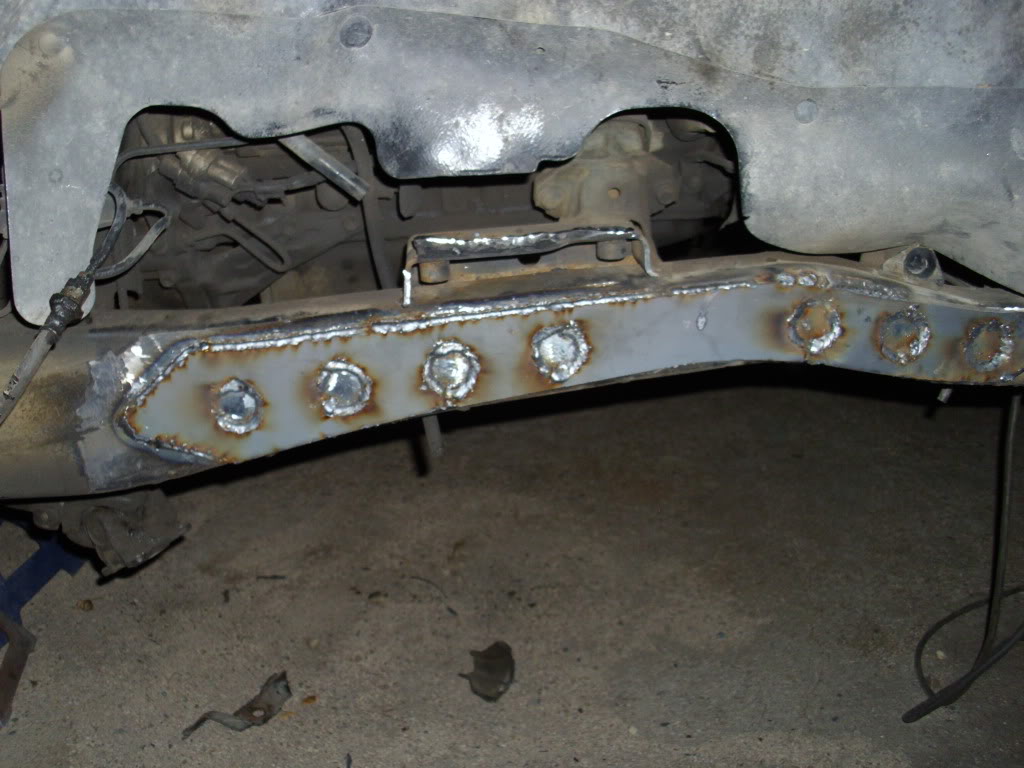
Reinforcement plate installed (Gotta finish welding it. Really sucks I ran out, my welds were going amazingly well.)
Rear shackle hanger welded in, hopefully really well

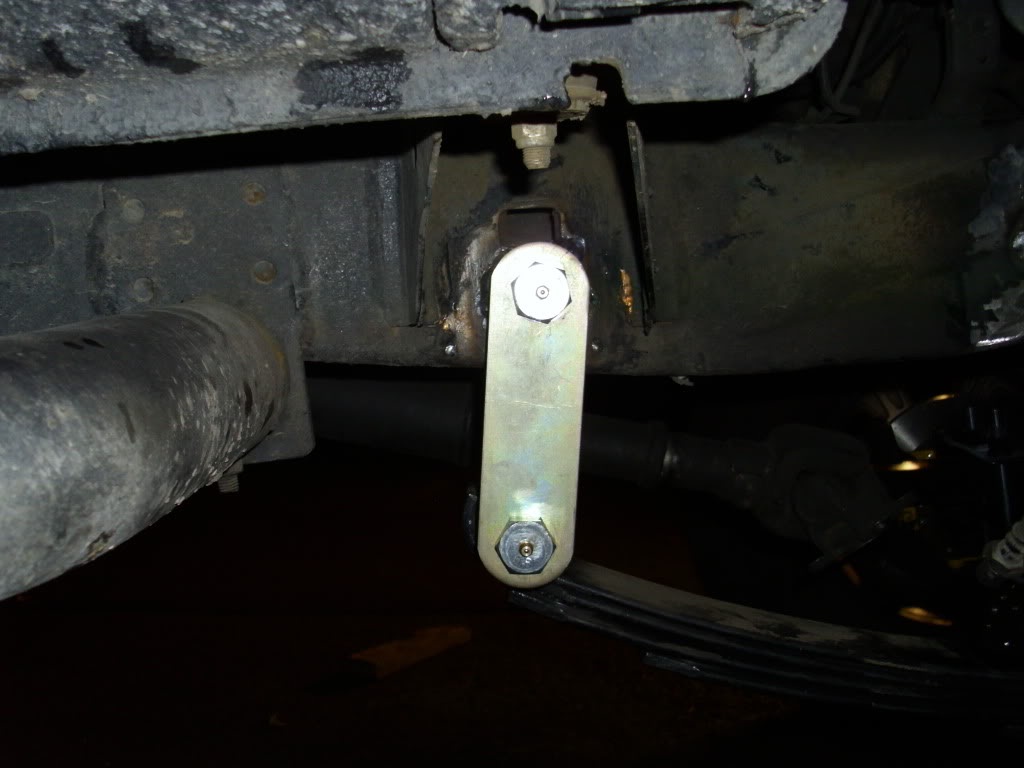
And front hanger welded on 3/4" forward
Now to try an help, I know my plan was to make a tutorial for the SAS as well since a lot are really vague, but I really didn't have the time. One thing I would like to mention, is that if you want to get this done quick and easy and you don't care about hurting your IFS crap, you can do the following:
-Unbolt driveshaft
4 14mm bolts
-Unbolt torsion bars in the back
1 22mm bolt. You'll need a breaker bar and a wrench. My impact wouldn't move it.
-Unhook brake lines and plug
-Unbolt top mount of shocks
-Unbolt sway bar
-Unbolt upper control arms
3 19mm bolts in between the upper control arm. Breaker bar to get loose (it's a tight fit) and a wrench to get them out. Then unbolt 2 17mm bolts holding the torsion bar on. Remove torsion bar, then pickup up on hub and pull the upper control arm up, and rotate it out. This one one part that no one has specified in any threads that I've read. Hope this helps someone
-Unbolt Idler Arm
3 17mm bolts
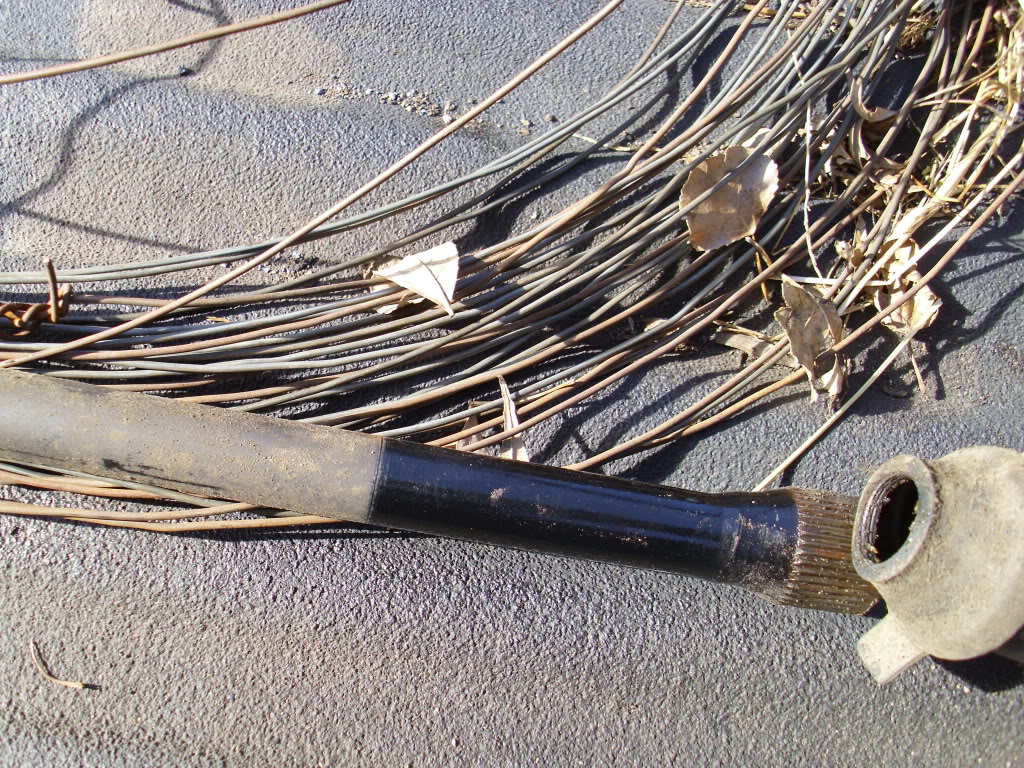
-Unbolt tie rod end from pitman arm, or unbolt pitman arm and take it off. I believe it's a 1 3/4" nut. It's huge!
-Cut off differential brackets and then get the rest. Easier to work from the inside out, and leave the easiest cuts for last, so when it falls, your arm isn't snaked in there, and you don't have to worry about breaking your arm. Cutting with the plasma cutter took me about 15-20 minutes tops.
Tomorrow I'd like to get more gas, finish welding my plates on, move my rear u-bolt plates up front and vice versa, and long story short, get it done. I'd even like to get my shocks done tomorrow, in the front at least. Rears might be a while. Using the fork lift at work would be a huge help. I'll get some flex pictures Driveshaft won't be created for a while, and won't be needed till I get a V6 4.88 rear 3rd member. I don't plan on running a steering stabilizer because I think it'll give me more headaches with oil pan clearance than benefits. From the looks right now, the front will sit higher than the rear, so I'll need to get some blocks for the rear. Rear drive shaft angle doesn't look too bad to me. I think 37's will fit no problem. I'd like to see what the biggest tire size is that I could actually run. Ultimate goal for steering is a hydro-assist set up. That's many pay checks away though, so hopefully the steering will be tolerable until then. Cheers!
Never did I ever think I'd see BRAND NEW paint on the torsion bars! And the bolts were just as clean. I was astonished.
IFS On
IFS Off
Reinforcement plate installed (Gotta finish welding it. Really sucks I ran out, my welds were going amazingly well.)
Rear shackle hanger welded in, hopefully really well
And front hanger welded on 3/4" forward
Now to try an help, I know my plan was to make a tutorial for the SAS as well since a lot are really vague, but I really didn't have the time. One thing I would like to mention, is that if you want to get this done quick and easy and you don't care about hurting your IFS crap, you can do the following:
-Unbolt driveshaft
4 14mm bolts
-Unbolt torsion bars in the back
1 22mm bolt. You'll need a breaker bar and a wrench. My impact wouldn't move it.
-Unhook brake lines and plug
-Unbolt top mount of shocks
-Unbolt sway bar
-Unbolt upper control arms
3 19mm bolts in between the upper control arm. Breaker bar to get loose (it's a tight fit) and a wrench to get them out. Then unbolt 2 17mm bolts holding the torsion bar on. Remove torsion bar, then pickup up on hub and pull the upper control arm up, and rotate it out. This one one part that no one has specified in any threads that I've read. Hope this helps someone
-Unbolt Idler Arm
3 17mm bolts
-Unbolt tie rod end from pitman arm, or unbolt pitman arm and take it off. I believe it's a 1 3/4" nut. It's huge!
-Cut off differential brackets and then get the rest. Easier to work from the inside out, and leave the easiest cuts for last, so when it falls, your arm isn't snaked in there, and you don't have to worry about breaking your arm. Cutting with the plasma cutter took me about 15-20 minutes tops.
Tomorrow I'd like to get more gas, finish welding my plates on, move my rear u-bolt plates up front and vice versa, and long story short, get it done. I'd even like to get my shocks done tomorrow, in the front at least. Rears might be a while. Using the fork lift at work would be a huge help. I'll get some flex pictures
Driveshaft won't be created for a while, and won't be needed till I get a V6 4.88 rear 3rd member. I don't plan on running a steering stabilizer because I think it'll give me more headaches with oil pan clearance than benefits. From the looks right now, the front will sit higher than the rear, so I'll need to get some blocks for the rear. Rear drive shaft angle doesn't look too bad to me. I think 37's will fit no problem. I'd like to see what the biggest tire size is that I could actually run. Ultimate goal for steering is a hydro-assist set up. That's many pay checks away though, so hopefully the steering will be tolerable until then. Cheers!
 01-16-2012, 08:41 PM
#77
Registered User
Thread Starter
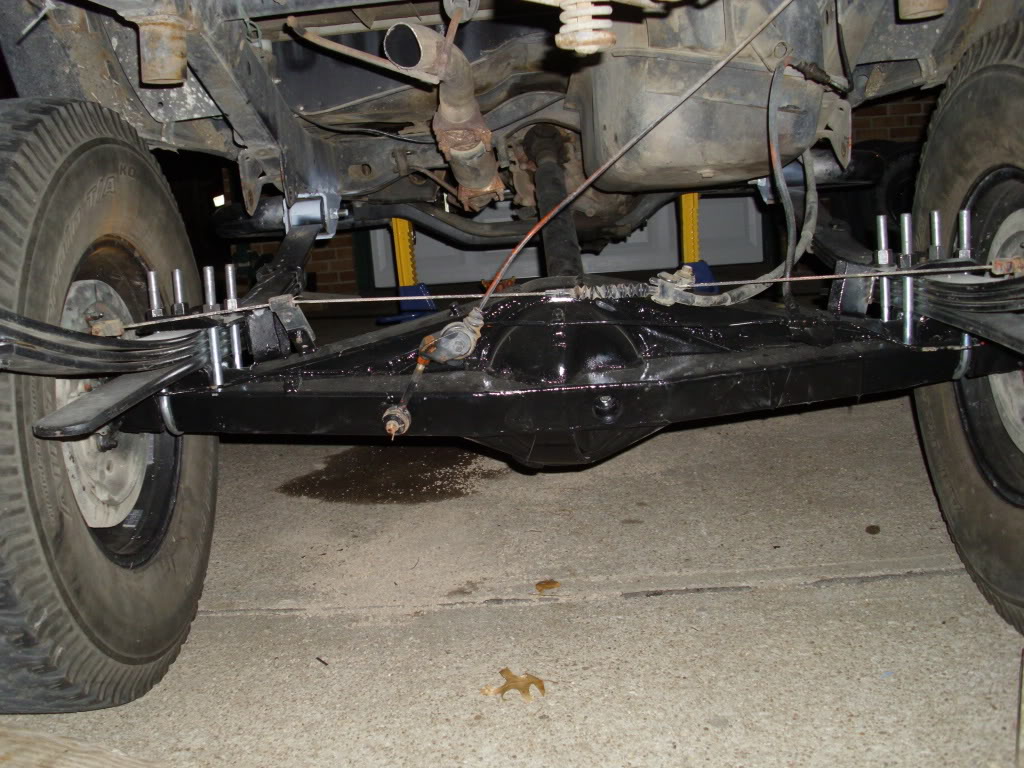
I don't know if anyone's following this thread anymore but I made as much progress today as I could until I get my new flow regulator for my welder (which was hopefully shipped out today. It's under warranty from Miller.) Slapped the springs on and got the axle under the truck. The bolts were a $(&#(& to get thru the bushings of the springs. The bolt in the frame went thru just fine. Not sure what caused them to be so tight. I had to use a sledge hammer to get them in! Got em in though. Getting the axle under the truck with my stock Toyota bottle jack was another story. It started snowing/raining as soon as I got the springs hung. I've used the bottle jack for more projects than probably anyone else.
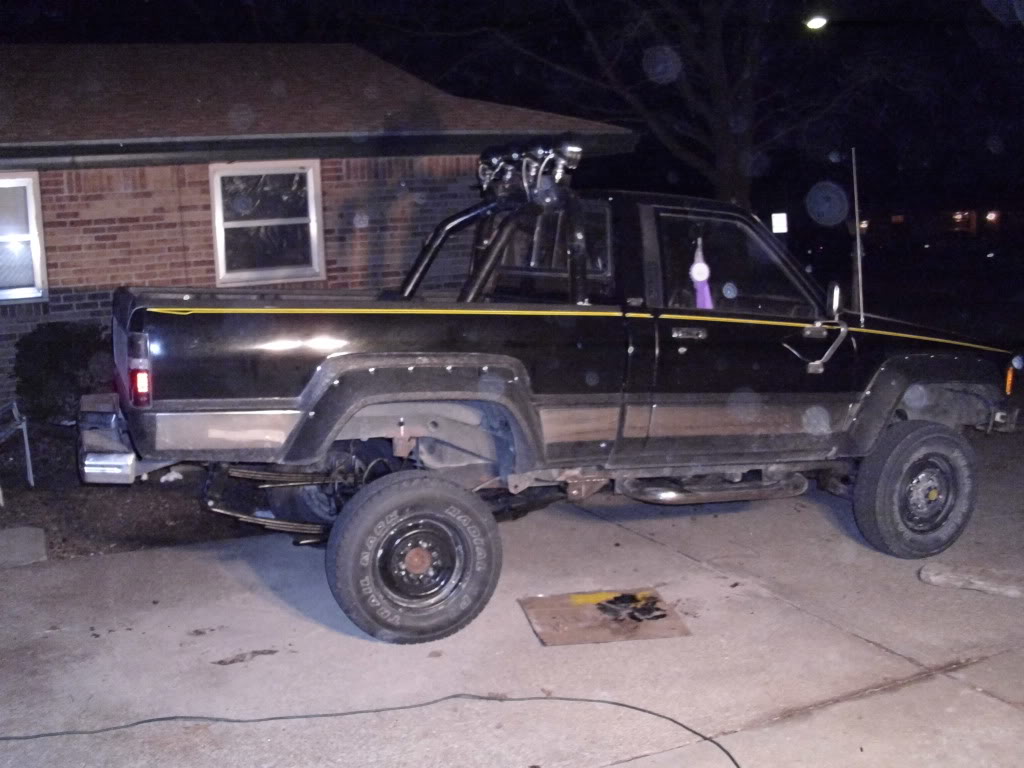
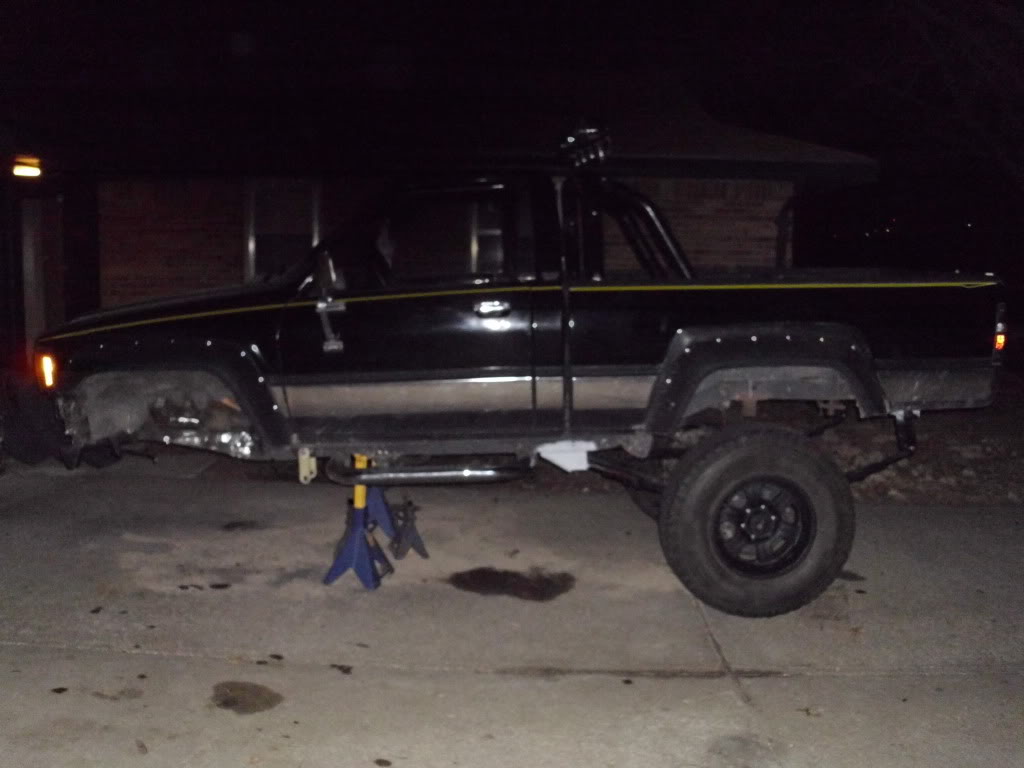
My shackle angles look crappy. I wish I would have had someone measure my axle after I got paranoid because that shim plate I put on the driver's side is NOT needed. I will have to cut if off and remove it. The new perches I welded on appear to be at exact same height. That being said, once I remove the shim, I hope my shackle angles improve. The weight of the diesel will also improve the angle, and after the springs break in it'll be a lot better. With the stock 28" tires on, and the chevy's installed, the front fender was 35" off the ground and the rear was 39" so the chevy's should be about 4" give or take. With the 35's on and the front axle installed, the front is now 48 1/2" and the rear is 42 1/2". I can't believe how high the front is. 35's look like stock tires and stock tires look like frickin caster wheels. Oh well, my boss said I can use the truck lift at the shop on Saturday if I'm not done by then, so removing that shim will be much easier. I'm done ranting now, here's pics. Enjoy!
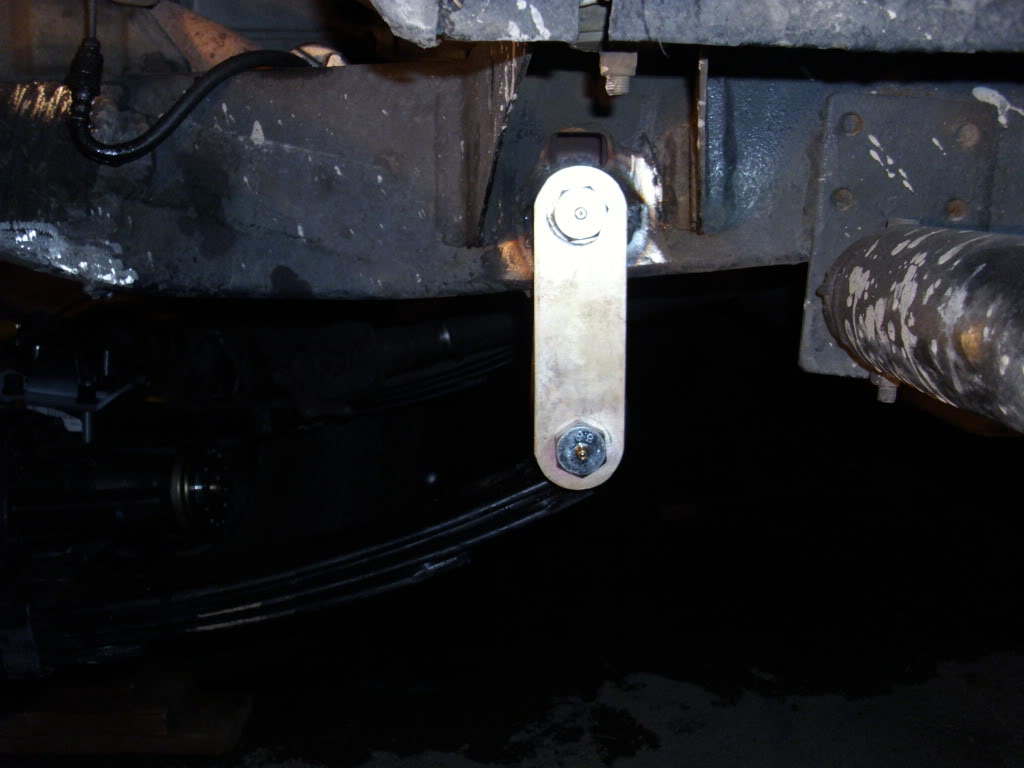
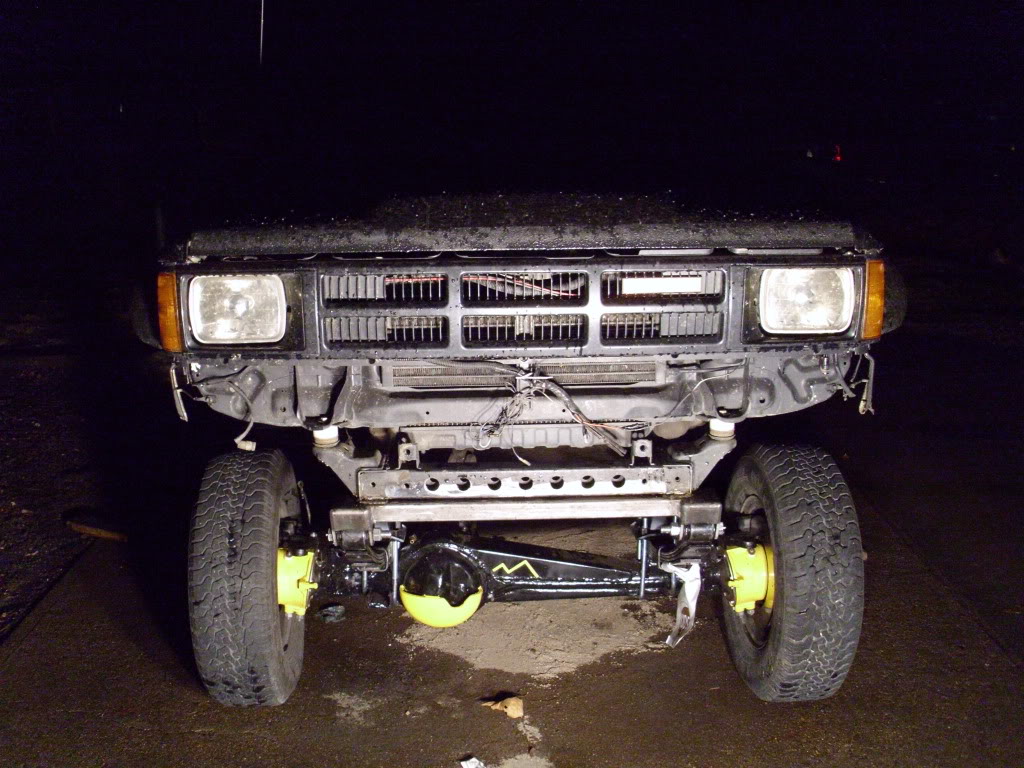
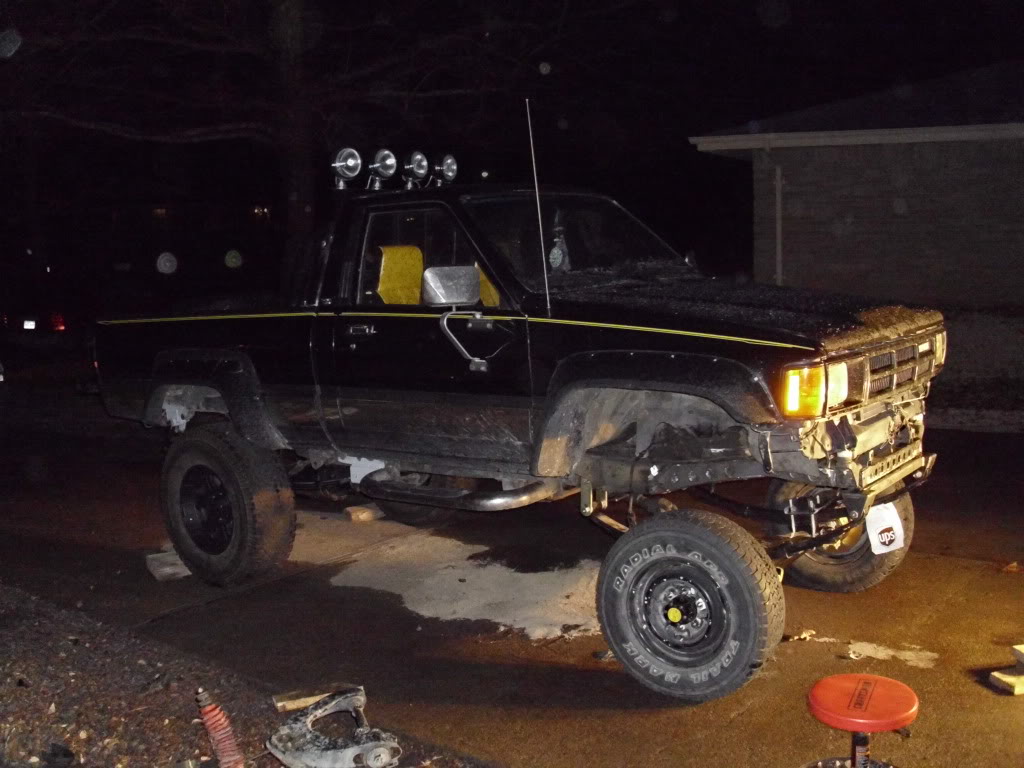
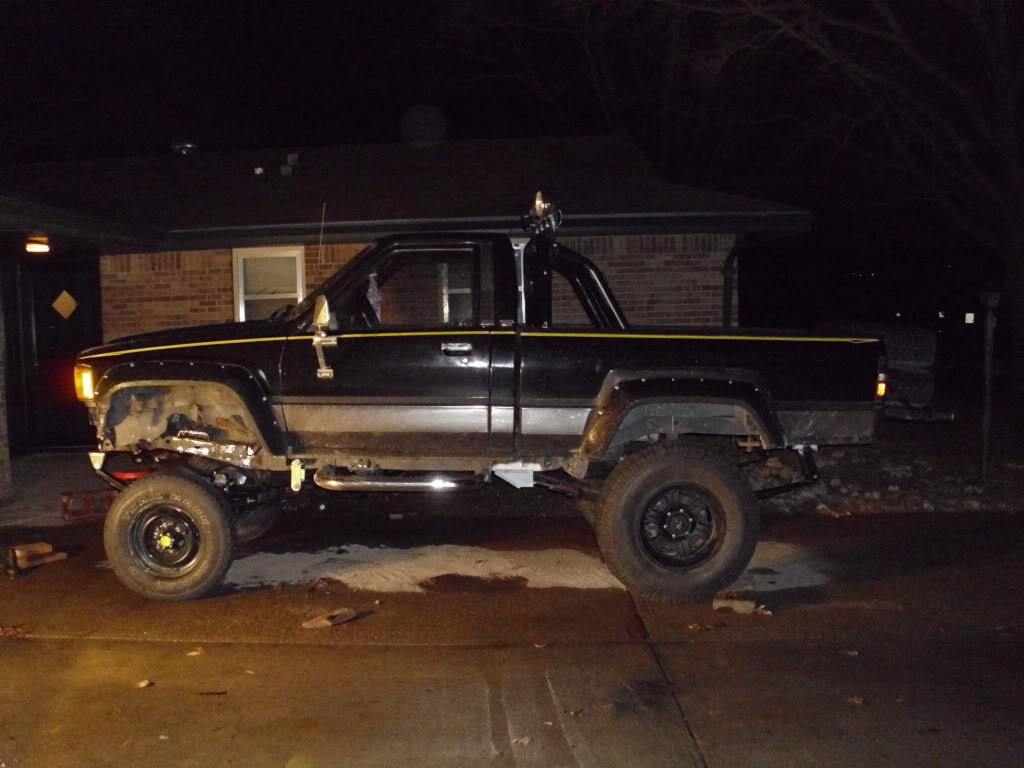
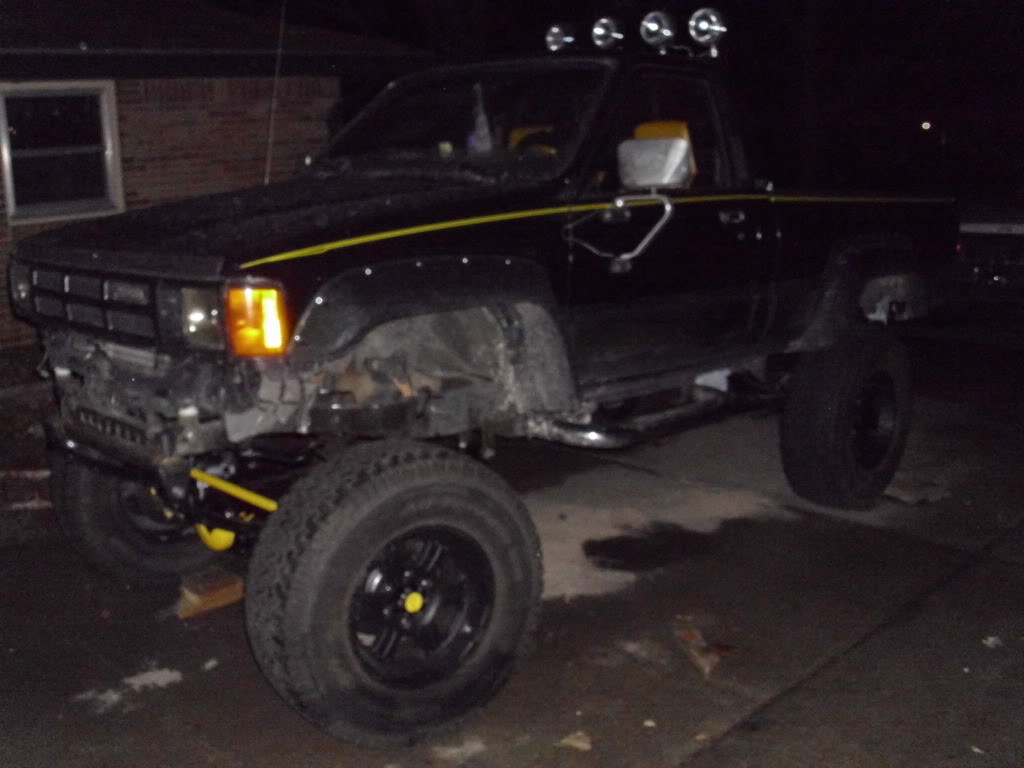
My shackle angles look crappy. I wish I would have had someone measure my axle after I got paranoid because that shim plate I put on the driver's side is NOT needed. I will have to cut if off and remove it. The new perches I welded on appear to be at exact same height. That being said, once I remove the shim, I hope my shackle angles improve. The weight of the diesel will also improve the angle, and after the springs break in it'll be a lot better. With the stock 28" tires on, and the chevy's installed, the front fender was 35" off the ground and the rear was 39" so the chevy's should be about 4" give or take. With the 35's on and the front axle installed, the front is now 48 1/2" and the rear is 42 1/2". I can't believe how high the front is. 35's look like stock tires and stock tires look like frickin caster wheels. Oh well, my boss said I can use the truck lift at the shop on Saturday if I'm not done by then, so removing that shim will be much easier. I'm done ranting now, here's pics. Enjoy!
Last edited by pyrojoe22; 01-16-2012 at 09:13 PM.
01-17-2012, 04:01 AM
#79
Registered User
Join Date: Jul 2009
Location: Eastern NC
Posts: 832
Likes: 0
Received 0 Likes
on
0 Posts
Yep we're all still here. I know all the set backs get frustrating sometimes. But you'll get it done.
Your front spring hanger doesn't look to be fully welded on. If your not happy with the shackle angle up front, you cold cut it off and slide it back a little bit. Probably only take about an hour with a grinder and cut off wheel.
Your front spring hanger doesn't look to be fully welded on. If your not happy with the shackle angle up front, you cold cut it off and slide it back a little bit. Probably only take about an hour with a grinder and cut off wheel.
01-17-2012, 10:02 AM
#80
Registered User
Thread Starter
Well thanks guys. I needed some encouragement. Never thought I'd say this but I think I'm tired of working on my truck lol. Guess 13 straight days of it will do that to ya.
As for the shackles, I started another thread in the SAS section and they said it should be fine. With the factors of diesel weight, front custom bumper, winch, and springs settling, the springs should come down a lot and the angle should improve. I'm taking out my shim plate. And hopefully after it's at final height, 37's will still fit. I could pry fit 44's in there right now lol
As for the shackles, I started another thread in the SAS section and they said it should be fine. With the factors of diesel weight, front custom bumper, winch, and springs settling, the springs should come down a lot and the angle should improve. I'm taking out my shim plate. And hopefully after it's at final height, 37's will still fit. I could pry fit 44's in there right now lol


