Dmarsh4X4's OM617 swap to 1988 4Runner
 06-05-2012, 03:42 AM
#81
Registered User
Thread Starter

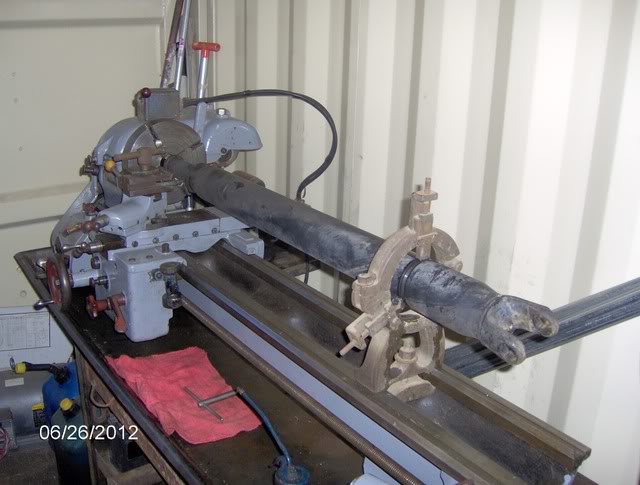
Well I finally found a little time to work on my swap, Started modifying front drive shaft, it needs to be lengthened 3 3/4 inches
Cutting it apart in lathe

Cut apart
Cutting it apart in lathe
Cut apart
Last edited by dmarsh4x4; 07-02-2012 at 08:08 PM.
 06-26-2012, 05:29 PM
#82
Registered User
Thread Starter
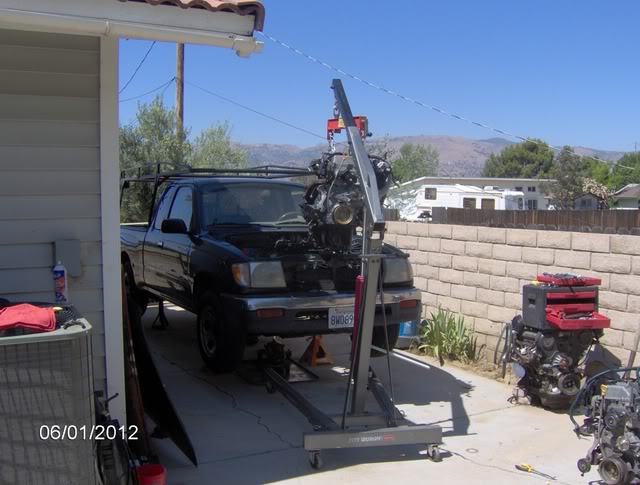
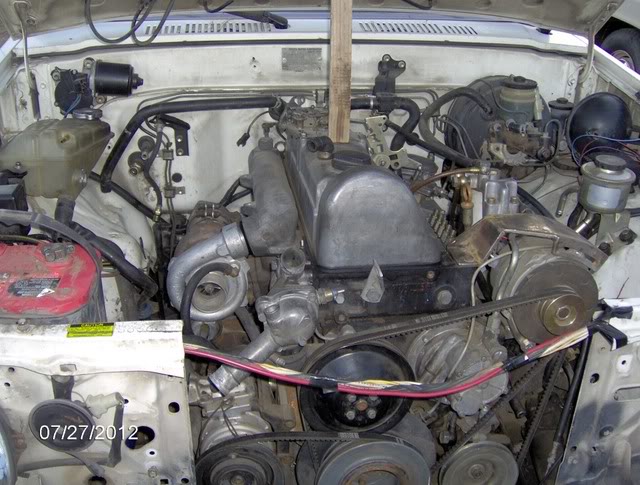
Well it has been a while I had to drop a used motor in my Tacoma, 295,000 miles with the last 5,000 running on three cylinders, I guess it was time. here are some photos
I like how high this sets, I think I know what my next project is
here is the retubed front shaft for the 4Runner it was done with heavy wall tubing,
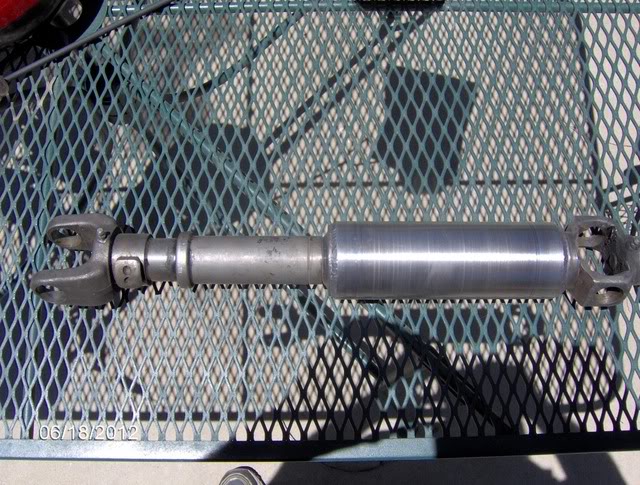
Next, I will shorten the rear shaft, with an adapter to go from the yoke to the large tube size so it will not need to be retubed
I like how high this sets, I think I know what my next project is
here is the retubed front shaft for the 4Runner it was done with heavy wall tubing,
Next, I will shorten the rear shaft, with an adapter to go from the yoke to the large tube size so it will not need to be retubed
07-02-2012, 08:14 PM
#83
Registered User
Thread Starter
Started on the rear shaft here is a couple of photos, I should have it finished up in a couple of days.
Setting it up to cut it apart
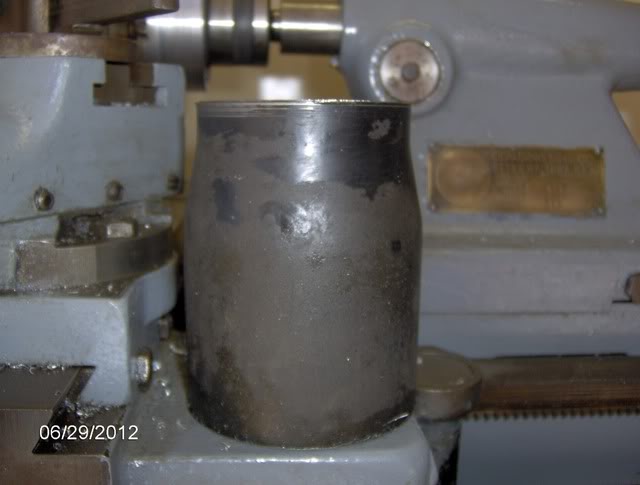
Cleaning up the splined end for adapter
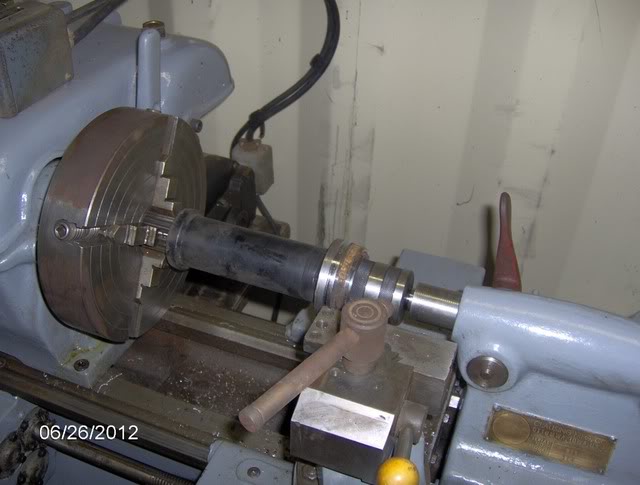
Setting it up to cut it apart
Cleaning up the splined end for adapter
07-05-2012, 08:41 PM
#84
Registered User
Thread Starter
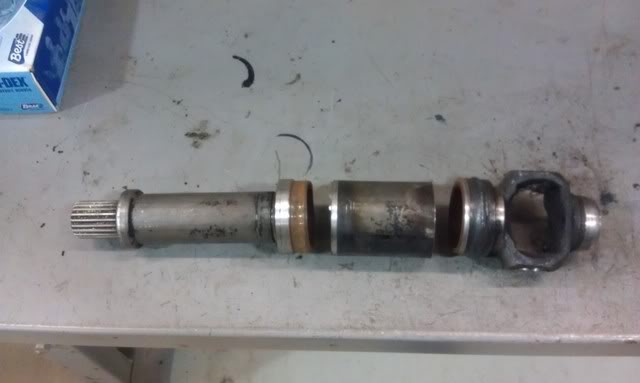
Up date on rear drive shaft, this is why you can not just shorten a Toyta drive shaft
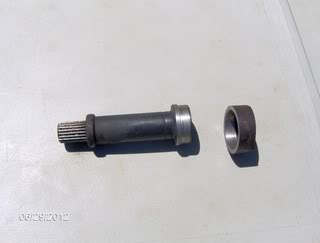
Drive shaft reduces in size at yokes
So you can make an adapter to increase the size of the yoke
Adapter welded on, and machining to match drive shaft ID
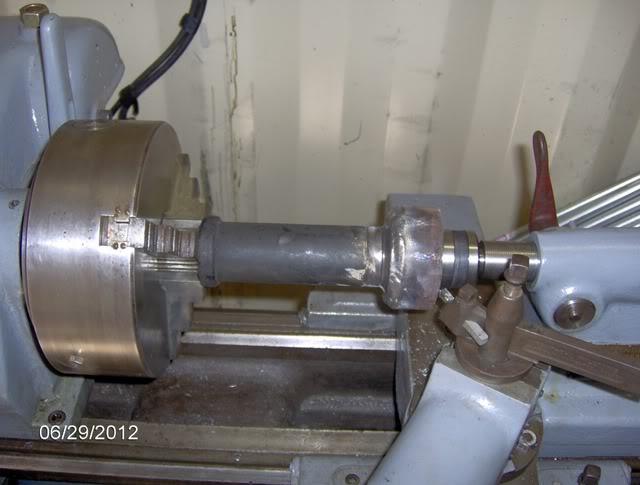
Press into shaft and check run out

Weld up, and you have a finished shortend drive shaft, and a couple hundred extra dollars in your walet.

If you do not have a lathe you can have a shop machine the adapter for you and still weld it up your self.
Drive shaft reduces in size at yokes
So you can make an adapter to increase the size of the yoke
Adapter welded on, and machining to match drive shaft ID
Press into shaft and check run out
Weld up, and you have a finished shortend drive shaft, and a couple hundred extra dollars in your walet.
If you do not have a lathe you can have a shop machine the adapter for you and still weld it up your self.
08-03-2012, 08:04 PM
#85
Registered User
Thread Starter
Ok a couple of pictures to catch up on progress, I pulled the tank to remove the fuel pump and it was worse off than I thought it would be
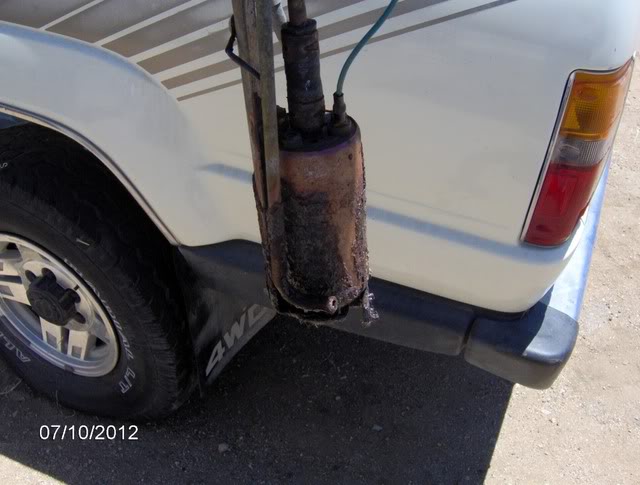
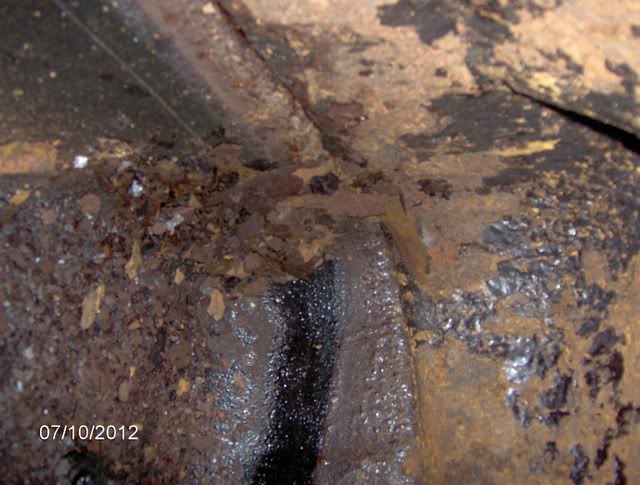
That is what is left of the pump after cleaning with pool acid and water, below is inside of tank
Anyways I was planing on a two tank system for WVO, and I would like to not have the stock tank hanging down in front of the rear tire, so I think I will fab up a tank to go where the spare tire is, it looks like I can go about 33X24X8 which will be about 27 gal. hope to start on that next week.
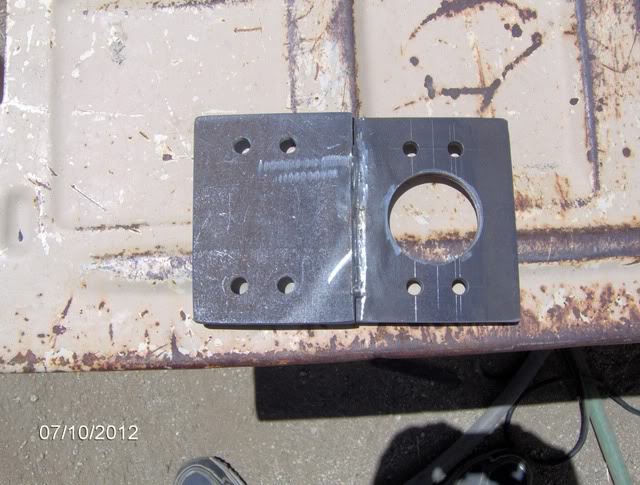
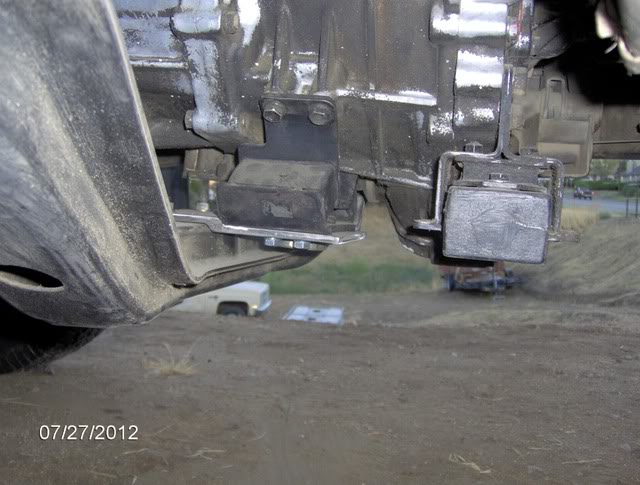
Here is a shot of what I did for trasfer case mount this should work for now, I did not want to get fancy here as it will be replaced and new cross member when I go to dual cases.
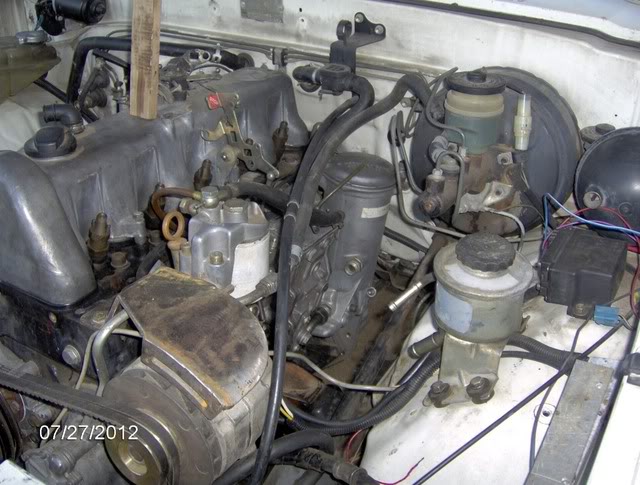
Other things I have been working on, wiring and mounting accessories and hoses, started on exhaust, here are a coupl of shots

That is what is left of the pump after cleaning with pool acid and water, below is inside of tank
Anyways I was planing on a two tank system for WVO, and I would like to not have the stock tank hanging down in front of the rear tire, so I think I will fab up a tank to go where the spare tire is, it looks like I can go about 33X24X8 which will be about 27 gal. hope to start on that next week.
Here is a shot of what I did for trasfer case mount this should work for now, I did not want to get fancy here as it will be replaced and new cross member when I go to dual cases.
Other things I have been working on, wiring and mounting accessories and hoses, started on exhaust, here are a coupl of shots

 08-19-2012, 06:52 PM
#87
Registered User
Thread Starter
OK here is a small update, I started on fuel tank, no pictures yet, did a lot of researching on in tank heater for WVO, I think I have decided how I am going to do it, I will post picts as I progress on the tank and heater.
Here are a couple of pictures of my throttle and cable setup
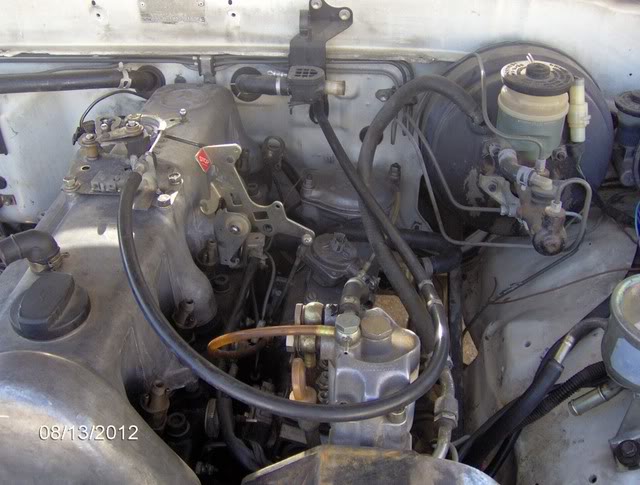
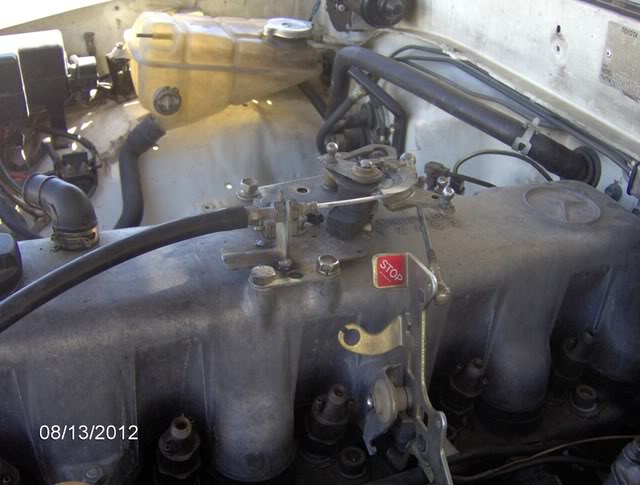
Here are a couple of pictures of my throttle and cable setup
 08-20-2012, 06:39 PM
#89
Registered User
Thread Starter
That is what comes on OM617, I added the bracket to hold the throttle cable and the 1/4 circle cable guide from the old Toyota motor. Using the stock 617 linkage allows the manual stop and vacuum stop to work correctly.
 09-01-2012, 06:47 PM
#93
Registered User
Thread Starter
Awesome work man. I enjoy your creativity in accomplishing this swap.
Jmorris430, my adapter is 1/2" thick 6061 aluminum and it was 17" X 17" to start with
09-19-2012, 05:40 PM
#94
Registered User

Join Date: Jan 2012
Location: Plant City, FL
Posts: 9
Likes: 0
Received 0 Likes
on
0 Posts
Dmarsh when you relocated your cross member back 4" to move the tranny and tcase, besides shortening your rear DS and lengthening the front, how did you make room for your shifter setup? What about your slave cylinder lines? Any other adjustments?
09-19-2012, 06:15 PM
#95
Registered User
Thread Starter
I opened up the shifter hole in the floor and put a piece of sheet metal to cover the old hole and ditched the center console, for the clutch slave I ran a new hard line to clear the exhaust
09-19-2012, 06:19 PM
#96
Registered User
Join Date: Jan 2012
Location: Plant City, FL
Posts: 9
Likes: 0
Received 0 Likes
on
0 Posts
Ok gotcha that's what I was thinking, any other changes with using the r150 tranny that you can think of? I'm doing the swap in a 91' Standard cab. Thanks in advance
09-20-2012, 03:49 AM
#97
Registered User
Join Date: Jan 2012
Location: Plant City, FL
Posts: 9
Likes: 0
Received 0 Likes
on
0 Posts
One more question Dmarsh, also meant to ask about your flywheel bushing adapter, would you happen to have your dimensions on that, I got some from someone else but they used the W56 tranny and flywheel and I'm not sure they will be the same. I need these so that I can be precise when trying to explain to the machine shop. I appreciate your help, just want to make sure I have everything in line before I pull the trigger.
09-20-2012, 03:03 PM
#98
Registered User
Are you going to keep the merc oil filter, or swap to a remote oil filter and cooler? The reason I ask is Im doing a 617 conversion in my wifes 95!! I think im going to do a remote system, just out of ease of parts and mounting an aftermarket oil cooler!!
Justin
Justin
09-20-2012, 03:41 PM
#99
Registered User
Thread Starter
JKGen813, I will look for my drawing I used for my pilot bushing I think it was real close to the one you have a drawing for
Justin, I am using the stock oil filter and maybe the stock cooler, if you go with a remote filter it needs to have a thermostat for the oil, i think it needs to runs about 215 deg.
Justin, I am using the stock oil filter and maybe the stock cooler, if you go with a remote filter it needs to have a thermostat for the oil, i think it needs to runs about 215 deg.
09-21-2012, 05:17 AM
#100
Registered User
Join Date: Jan 2012
Location: Plant City, FL
Posts: 9
Likes: 0
Received 0 Likes
on
0 Posts
Thanks DMarsh, I spoke with Luke at 4x4 Labs and he confirmed that the pilot bearing adapter in both his kits for the w56 and r150f transmissions are the same size, he's going to sell me one for a fifty spot I think it's worth it for the precision and piece of mind alone.
Justin, I'm also going to use the stock oil cooler and have some new SS braided lines made at a local custom hose shop, for the exact reason DMarsh mentions above.
Thanks
Justin, I'm also going to use the stock oil cooler and have some new SS braided lines made at a local custom hose shop, for the exact reason DMarsh mentions above.
Thanks


