When you click on links to various merchants on this site and make a purchase, this can result in this site earning a commission. Affiliate programs and affiliations include, but are not limited to, the eBay Partner Network.
Long time reader, first time poster. Thought I'd share a few pics of my 1UZ 4runner. I got alot of inspiration, ideas & technical information from this forum reading posts like this so hopefully I can pay it all forward
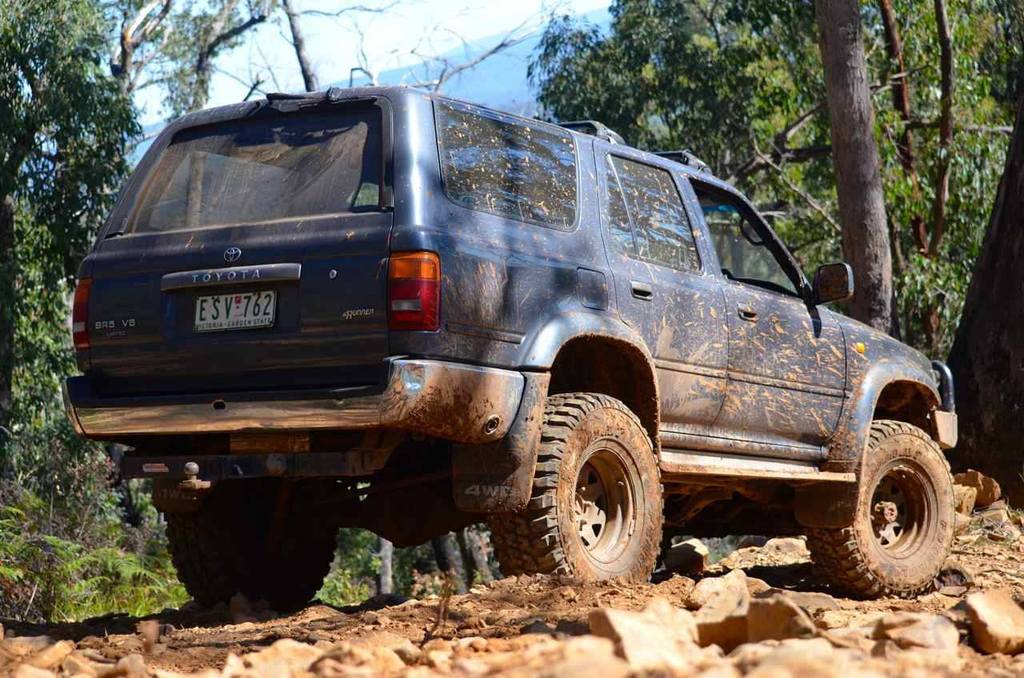
Won this thing on eBay for 2 grand years ago. 1992 4Runner SR5. Full electrics, factory flares etc etc. Originally 3VZ which I didn't really care about, more wanted a straight & tidy body and a clean interior. Car had only done 160,000k's and was very tidy. Rear diff was pretty stuffed, so put a reco LSD centre in it. Rest of the driveline was perfect. Drove it for about 6 months and was always on eggshells as I knew the 3VZ was prone to doing headgaskets. Motor eventually did a headgasket after a few bush outings so decided to find something better than the asthmatic V6. Looked at a few different engine options but really couldn't go past a 1UZ. After reading all the success from Twistys 4unner & Nemesis 4runner I was sold. Strong motor, sounds good, and can buy replacement engines for cheap!
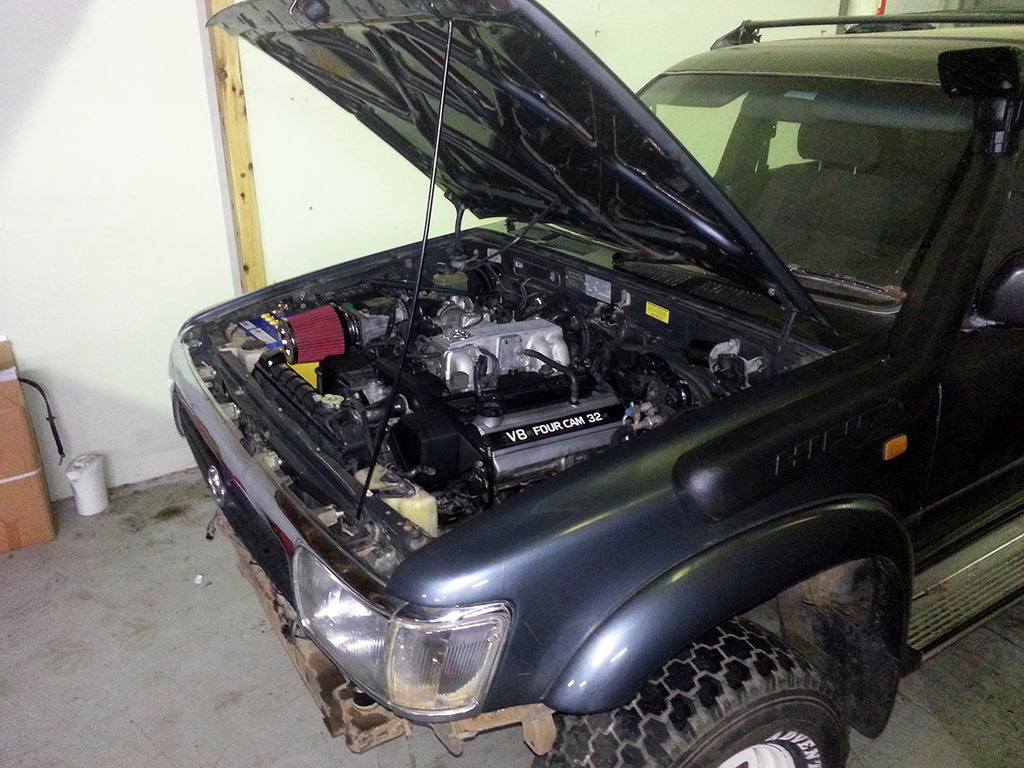
Picked up a whole donor Toyota Celsior for $1k with 90,000k's on it and got to work. Did the lot myself so saved heaps of cash. Total spend on the conversion was just over $5k. Countless hours were spent researching on different ways people had done this conversion, what parts were needed and all the issues people has had during their swaps. Ended up being a pretty straight forward conversion and has been reliably running without issues for just over 2 years now. Hasn't missed a beat. Running the standard R150f 5 speed with Dellow bellhousing and Exedy heavy duty V6 clutch assembly. No slip and keeps the pedal nice and light. Custom made engine mount brackets utilizing the standard V6 4runner engine mounts. Easy to pickup new mounts if needed from Repco etc, although I am still yet to break one. Radiator is a Diesel Hilux 3 Core with a 16" Davies Craig pusher fan. Never had any cooling issues with this setup. Restricted for space, I had to find some crown 'log' exhaust manifolds, which make me cry everytime I look at them. From the manifolds back its twin 2 1/4" straight through exhausts, all stainless, mandrel bends & tig welded. Rear section is flanged past the back wheels so I can quickly bolt in a separate twin muffler section I had made extra if I want to keep her quiet. Otherwise it's two straight pipes. Great sounding system. Not droney & still sounds like a V8.
Car already had 2" of suspension lift when I bought it, just put the 2" body lift in so the motor fitted nicely. I scrapped the Monroe shocks that were in it and fitted Tough dog adjustable rear shocks, Tough Dog front shocks & a Tough Dog adjustable panhard rod. It's sitting on 33x12.5x15 Federal Couragia M/T's. Rims are Mickey Thompson Classic II. Front bars are wound up a little to sit it flat. Only get a little bit of scrubbing from the fronts at full lock and heavy articulation, but its only from the inner guard so no biggie. TJM front bullbar modded for body lift. Have been very happy with the performance of the Federal Muddies. For a cheaper tyre they have lasted quite a while (2 years now with about 70% tread left), highly recommended for people wanting to save some cash but still want a good mud tyre. Has a full recaro interior out of SSRG Surf which I scored for a bargain of $300. Happy about that.
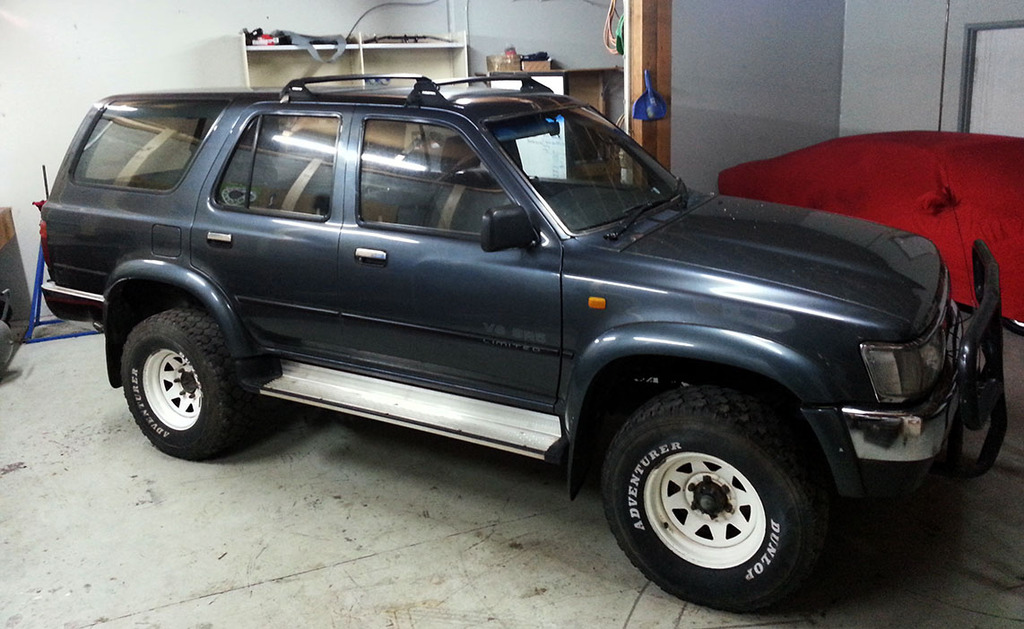
Delivery day! This is how the car started. Won for 2 grand off eBay, with rego, V6 SR5 manual, 160,000ks, with suspension lift. Bargain
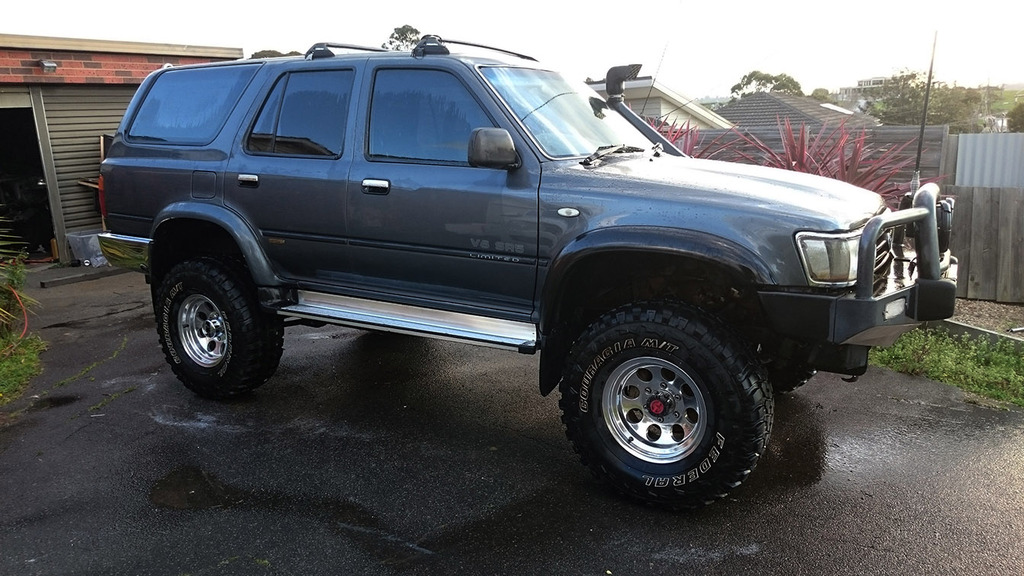
How it sits now
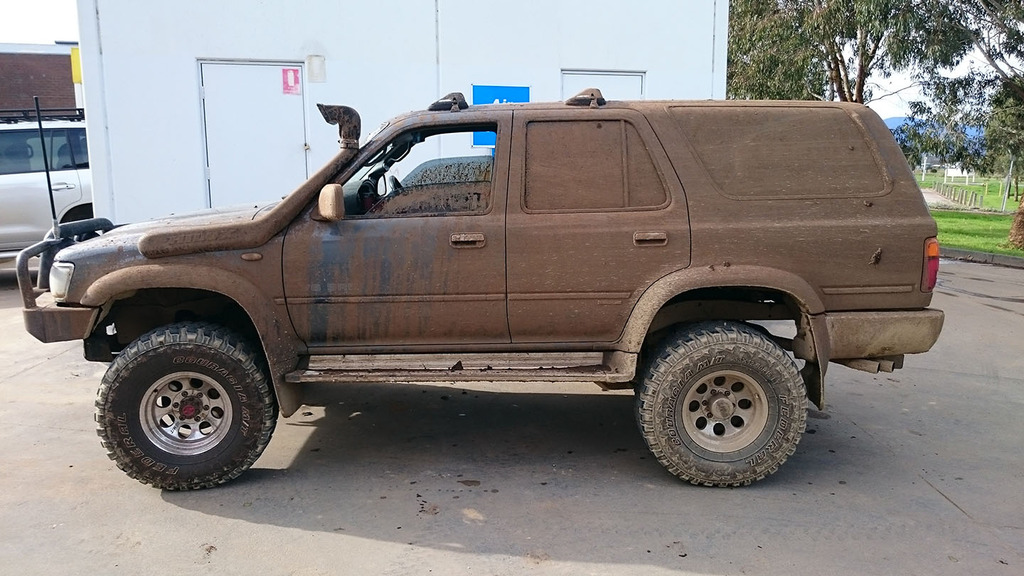
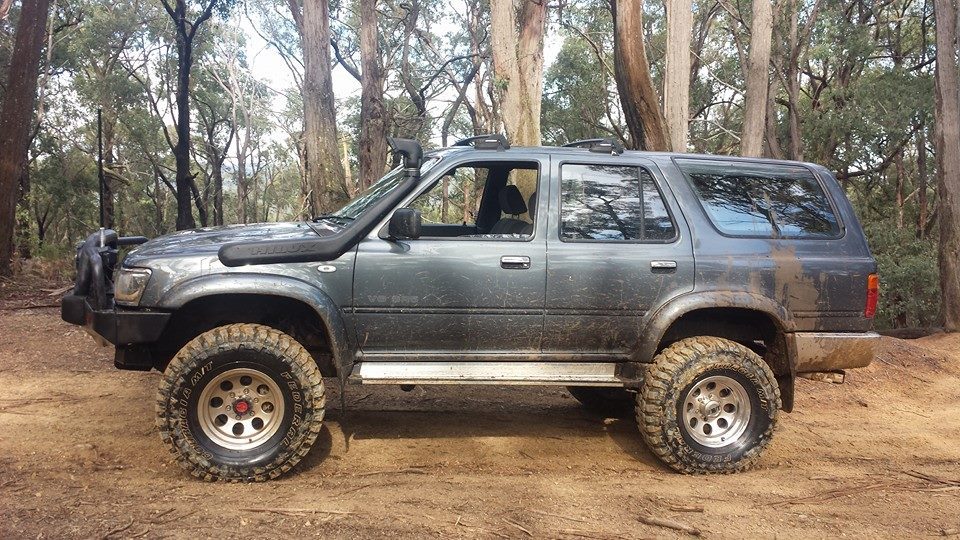
After some fun in the bush
Before tinted windows & Recaro interior went in
Before the Mickey Thompson Classic II's went on, just had black sunraysias
Engine conversion done & running. Tight fit. 1UZ's are a wide engine.
Really enjoy this car and the 1UZ conversion. Have given it a fair hiding in the bush and it's still going strong. Comfy on long trips too! Albeit a bit thirsty on the fuel, but hey, its a V8!
Cheers guys, look forward to posting more as she progresses. Happy to answer any questions about the conversion and give my 2c.
G'day Dropzone.. I have a 3" pipe now that routes over the engine to an inline airbox, then to the snorkel. That pic was just after the conversion was done so it was very early in the piece.
85toyman, Sorry for the delayed reply, hadn't check my emails in a while! I've actually since gone a different route and fitted an M90 supercharger onto the 1UZ. So my intake piping is very different now (throttle body is now on the opposite side). I think I've still got some pics of how the NA motor was piped up, i'll have a sort through all my stuff and see if i can find it for you.
Funny story how this whole supercharger thing happened, was gearing up to go on a big 4x4 trip just before last Christmas, spent days getting the car ready, replacing heaps of stuff. Went to start it up the night before and the starter motor crapped itself (was not impressed), lucky I was able to ride bitch with another mate who went on the trip, but the 4runner had to stay home. Being in the wonderful location that Toyota decided to put it, had to remove all the intake manifold to swap it out. Had a few too many beers while doing it and decided it would be a good idea if it was supercharged. So I committed to the project.
Picked up an M90 blower from a locally made Holden Commodore (Factory V6 with M90). This particular blower had an upgraded billet snout fitted (Yella Terra), which has easily swappable pulleys. Only cost me AUD$500 . Got the intake manifold from Bullet performance here in Australia and got to work fitting the thing.
My biggest concern over the whole exercise was that I wanted to run low boost with the factory ECU. Some people had success , some not. My engine was from a 1989 UCF10 Celsior (the one with the upside down plug on the ECU), and nobody had any info on this ECU. Worth a shot I thought.
Customized the water bridge to come out sideways instead of straight out. Made a few custom idler brackets, fitted the throttle body off the Commodore V6 engine (which I modified to accept the Toyota TPS) and changed the blower pulley to 6psi. Got the throttle cable off the Commodore V6 and modified the pedal end to suit the Toyota pedal. Had to do some quick wiring extensions to move all the AFM, ISCV & TPS wiring to the opposite side. Remote mounted the ISCV so still have OEM idle control. Flicked the key and hey presto, it ran perfectly.
End result, looks good!! Had to look into making an airbox to reconnect the snorkel.
I had put a wideband oxygen sensor kit in so I could measure the AFR's nice and closely. Drove it down to a mates Dyno and ran it up to get more of an idea on how it was running. Out of the box without anything it made 147rwkw with 33" mud tyres. It was starting to lean out mid rpm, so we replaced the OEM pressure reg with a rising rate pressure reg and wound the base fuel pressure up a bit. Ended up getting 163rwkw with the 33" tyres. It started to ping up near the redline, but I was happy to just not rev it that hard, no detonation below 6500rpm. Believe me, 6 psi changes a 1UZ completely.
After looking at different airboxes to fit in, I decided on a diesel 4runner airbox. The intake piping was tiny, so chopped all that off and opened it up with 3" piping, bolts into factory location, and flows a bucket tonne of air. Have a K&N drop in filter for normal driving/easy 4x4ing, and a paper element for the dusty stuff. Has since been all powdercoated in a satin black so it looks OEM .
As I have a spare fresh 1UZ lying around, I was interested to see how far I could push this ECU and this engine. I swapped the 6psi pulley for an 8psi pulley a few weeks back. Quick squirt down the road and was amazed at what an extra 2 psi does. AFR's started to drop a little bit at wide open and mid/high revs so gave it a little bit more base pressure on the fuel and got my full load AFR's to sit in the safe zone/slightly rich. These ECU's are pretty amazing, and even with the high base pressure, the ECU can still pull out enough fuel keep idle and cruise AFR's in the target zone (still idles smooth at 550rpm). About to ditch the crown log manifolds for some Castle Block Hugger headers, then its back on the dyno and see what we have gotten.
Been running this setup for 8 months now, no issues whatsoever. Been on plenty of long trips, and racked up a heap of miles. It's actually more fuel efficient now, was averaging 14.5 litres/100ks and with the blower (if i'm not driving like an idiot) I can average 12.4 litres/100ks on a trip.. It's totally transformed the feel of the motor, much nicer to drive as you can just pick any gear and run with it. All in all a cheap power upgrade for me - total cost was just under AUD$2,500.00 .. I think I was lucky with the early Celsior ECU as I know people have had real trouble getting this setup to work on a SC400 ECU.
Sweet build, Thanks for doing the wright up, it answered a lot of questions that I had about doing this myself. Got any pictures of where you put the IAC? or any pictures of the Pully idler setup you did, maybe a belt part number? I am in the states so I will have to make up my own lower intake to make this work, but good to know it makes decent power without a lot of computer work.
 10-13-2015, 11:12 PM