Can't wait for BOOST! egesledder's 7mgte swap
 07-11-2012, 10:38 AM
#1
Registered User
Thread Starter
Join Date: Aug 2008
Location: Boulder, CO
Posts: 145
Likes: 0
Received 0 Likes
on
0 Posts
Can't wait for BOOST! egesledder's 7mgte swap
EDIT: I'm in the process of going through and switching all the photos over from Photobucket after they went and screwed all their users over. If stuff isn't showing up right, that's why.
So I'm finally getting around to posting up my 7mgte swap. I'm about 2 months into it, but I'd been planning the swap for about a year now. I definitely wanted to stay Toyota, but I had kept debating with myself whether to go 3.4, try a diesel swap, Lexus 1uz V8, or supra. At first, I was set on a standard 3.4 swap, but well, everyone was doing that. Also, I live at 8k feet in Colorado and regularly drive up and down mountain passes up to 12k feet. I know for a fact that the 3.4 struggles with a load at higher elevations without a supercharger, and I plan on towing dirtbikes/hauling camping gear quite often. Most of the people I know with supercharged 3.4's get around 13mpg at best unless they are driving in elderly grandmother mode, so those reasons turned me off of the 3.4 idea.
A turbo diesel would probably work really well for what I needed, but in order to stay Toyota, it gets expensive quick. Also, I plan to do several trips to Mexico, and diesel is usually MUCH harder to find than gasoline, so it would require carrying much more fuel. Toyota pickups are small... so space is valuable and taking it up with lots of extra fuel is not desirable.
A 1uz swap would also probably have worked and the more I look into it, the more I think the next swap I do will be 1uz. The few reasons I didn't choose this option are: I wanted a straight 6 for the smoothness, lots more low end torque to break things with a v8, and lack of research on my part at the time.
The supra 7mgte ended up winning the debate due in a large part to the coolness factor of a straight 6 turbo and the challenge it presented. There are a ton of old mkIII supras in the Denver metro area, so parts are actually really easy to come by for me. Also, this video and truck pretty much sealed the deal for me:
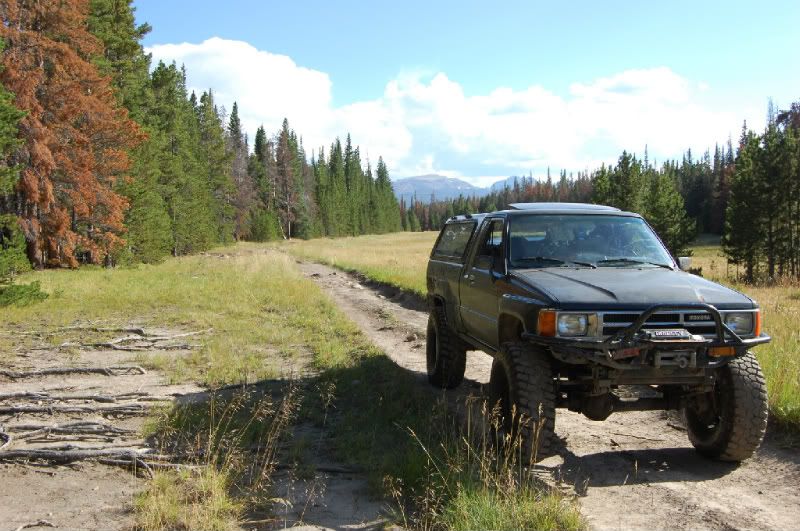
The truck its going into is my 1985 SR5 pickup with all the options that came in '85, so its the perfect candidate for an engine swap. Its got 346,000 miles on it, but the interior is complete and unmolested, the body is in good shape, and I've rebuilt most of the drive train. I still have most of the original paperwork, manuals, etc. I even still have the 15' work light that plugs in underneath the driver's side dash (super rare option).
So, my end goals of this project are:
-Able to drive up to the Eisenhower tunnel hauling camping gear, pulling a 3-rail dirtbike trailer, and be PASSING people without issues
-Reliable enough to make cross-country trips
-Drivetrain to handle ~250hp to the wheels
-Keep at least current offroad ability (which is pretty awesome)
-Keep Cruise Control
-Keep A/C
-Keep interior intact and stock looking
-Built strong enough to handle any future power ideas
-NO HOOD PINS!
I broke that up into 2 phases:
PHASE 1: Engine in and running well
PHASE 2: Transmission/axle/suspension upgrades
Basically, I'm putting the motor in right now with the W56 transmission and stock axles (4.88 gears) and running that until I get the motor working well. Then I'll be upgrading to an R-series transmission, V6 diff w/ supra limited slip carrier, full-float axle kit w/disk brakes, and a better spring pack up front/better shock valving all around. This will help with the money flow and hopefully not allow me to get too overwhelmed.
[size="5"]PHASE 1[/size]
So, I started out by buying a running '87 turbo supra in decent shape. I actually ended up paying WAY too much for it because I was told the engine was rebuilt in the last 3k miles. I won't go into that story for now, but long story short, it was rebuilt, but I'm fairly certain it was done by toddlers in the backyard sandbox. It was put together dirty so all bearing surfaces were trashed by the time I bought it. It ended up spinning a rod bearing before I even got it home. After many threatening phone calls and visits, I just kind of gave up on the whole thing and decided it wasn't worth it. Terrible experience and was a lesson in why you should never believe anyone's word when buying something in a shady side of town.
Luckily, I parked it as soon as I started hearing knocking sounds and had a friend trailer it the rest of the way to my house. Eventually pulled the motor:
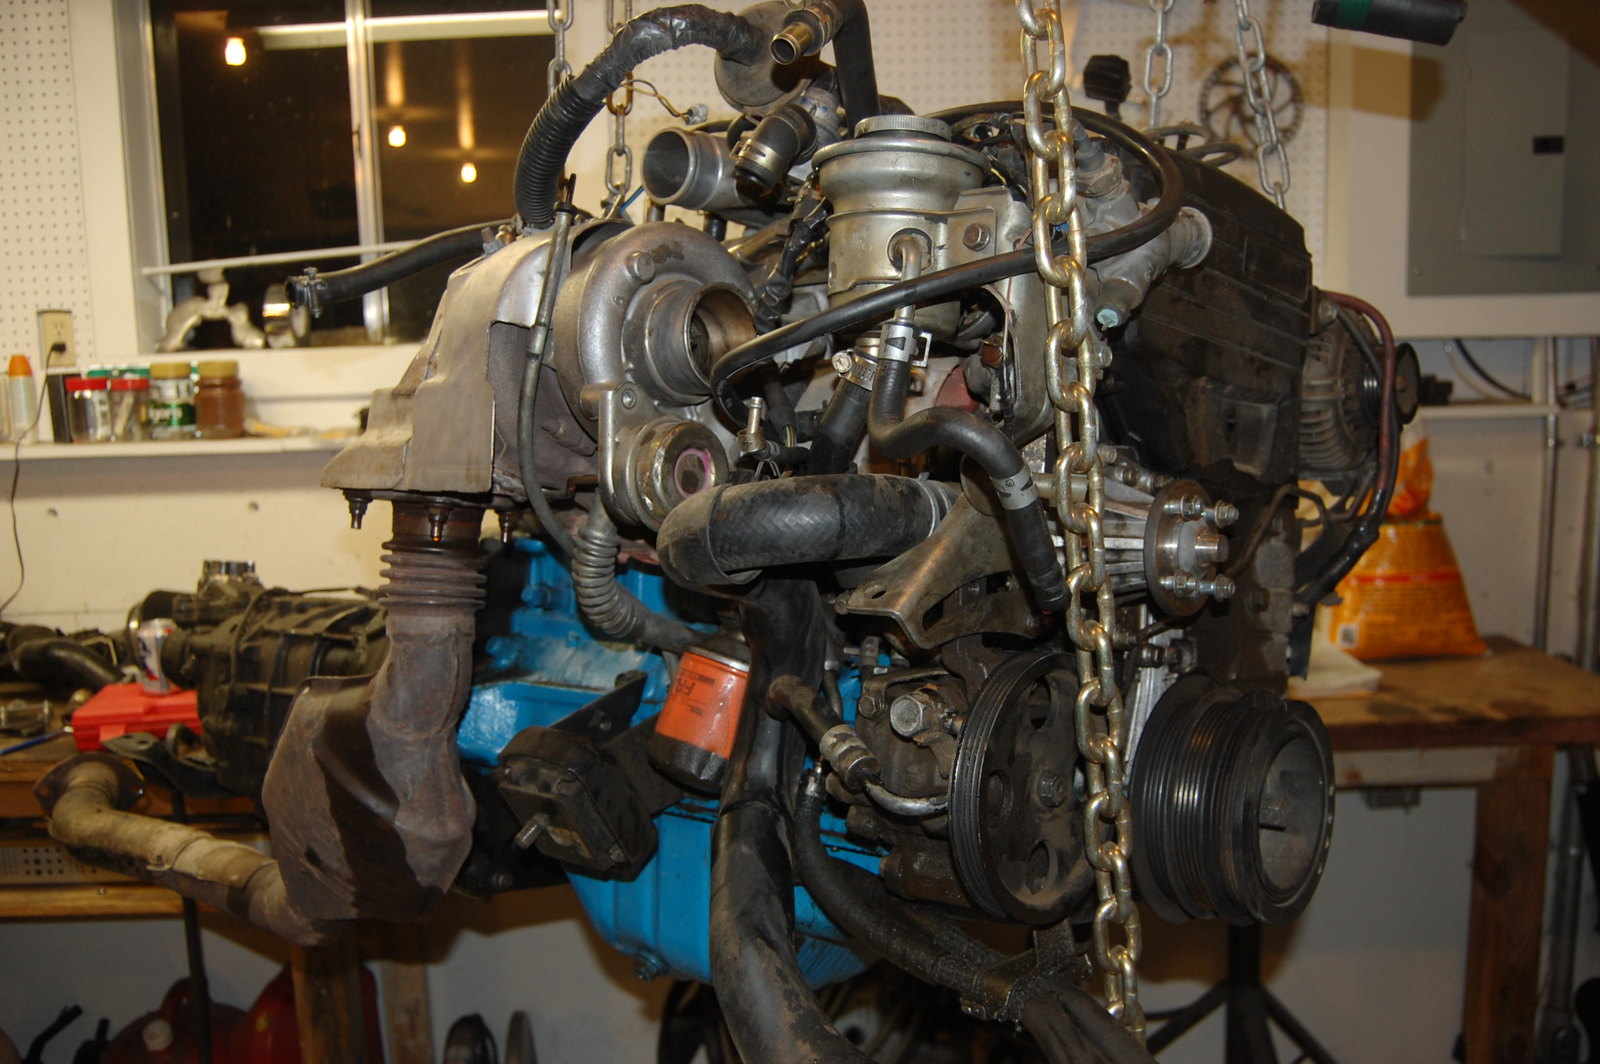
Started disassembling it:
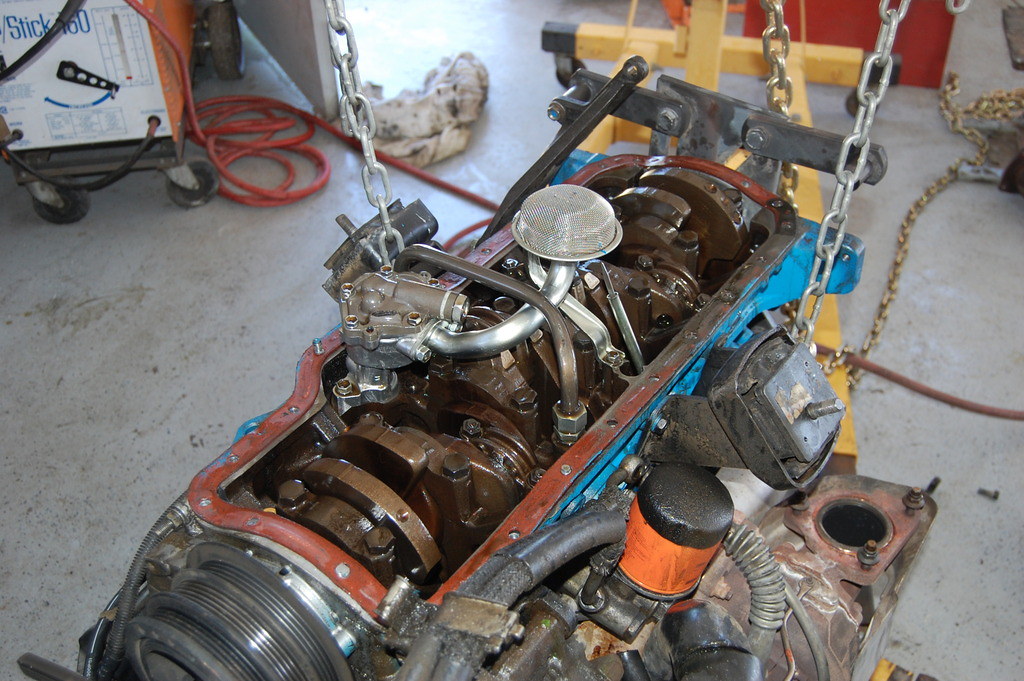
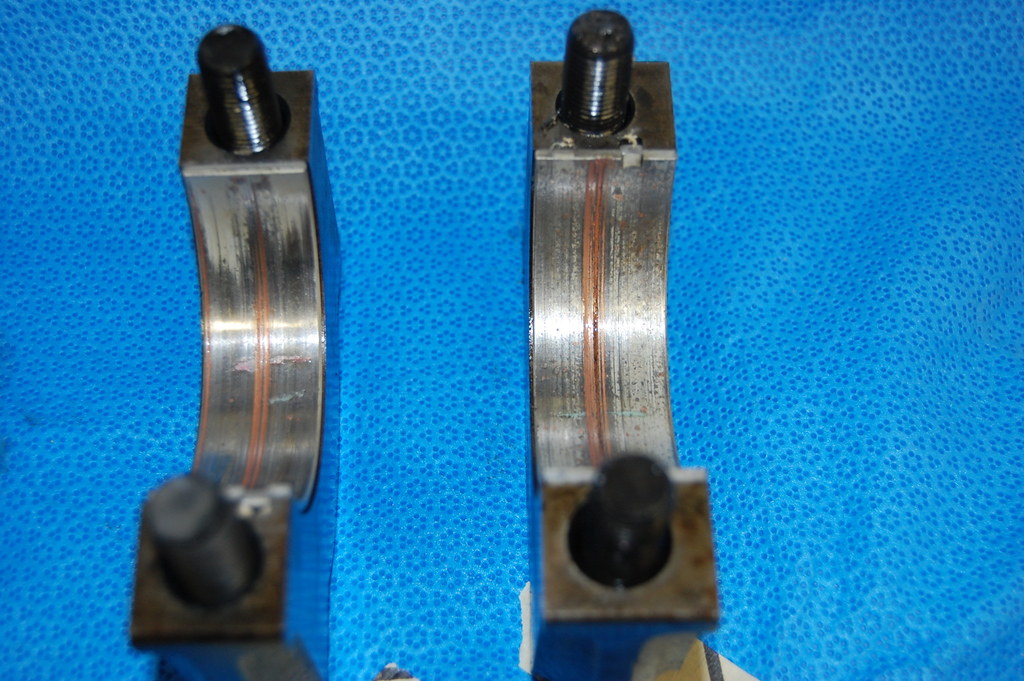
And found this:

The bearing had spun and welded itself to the crank journal. The rest of the bearings looked more or less like this:
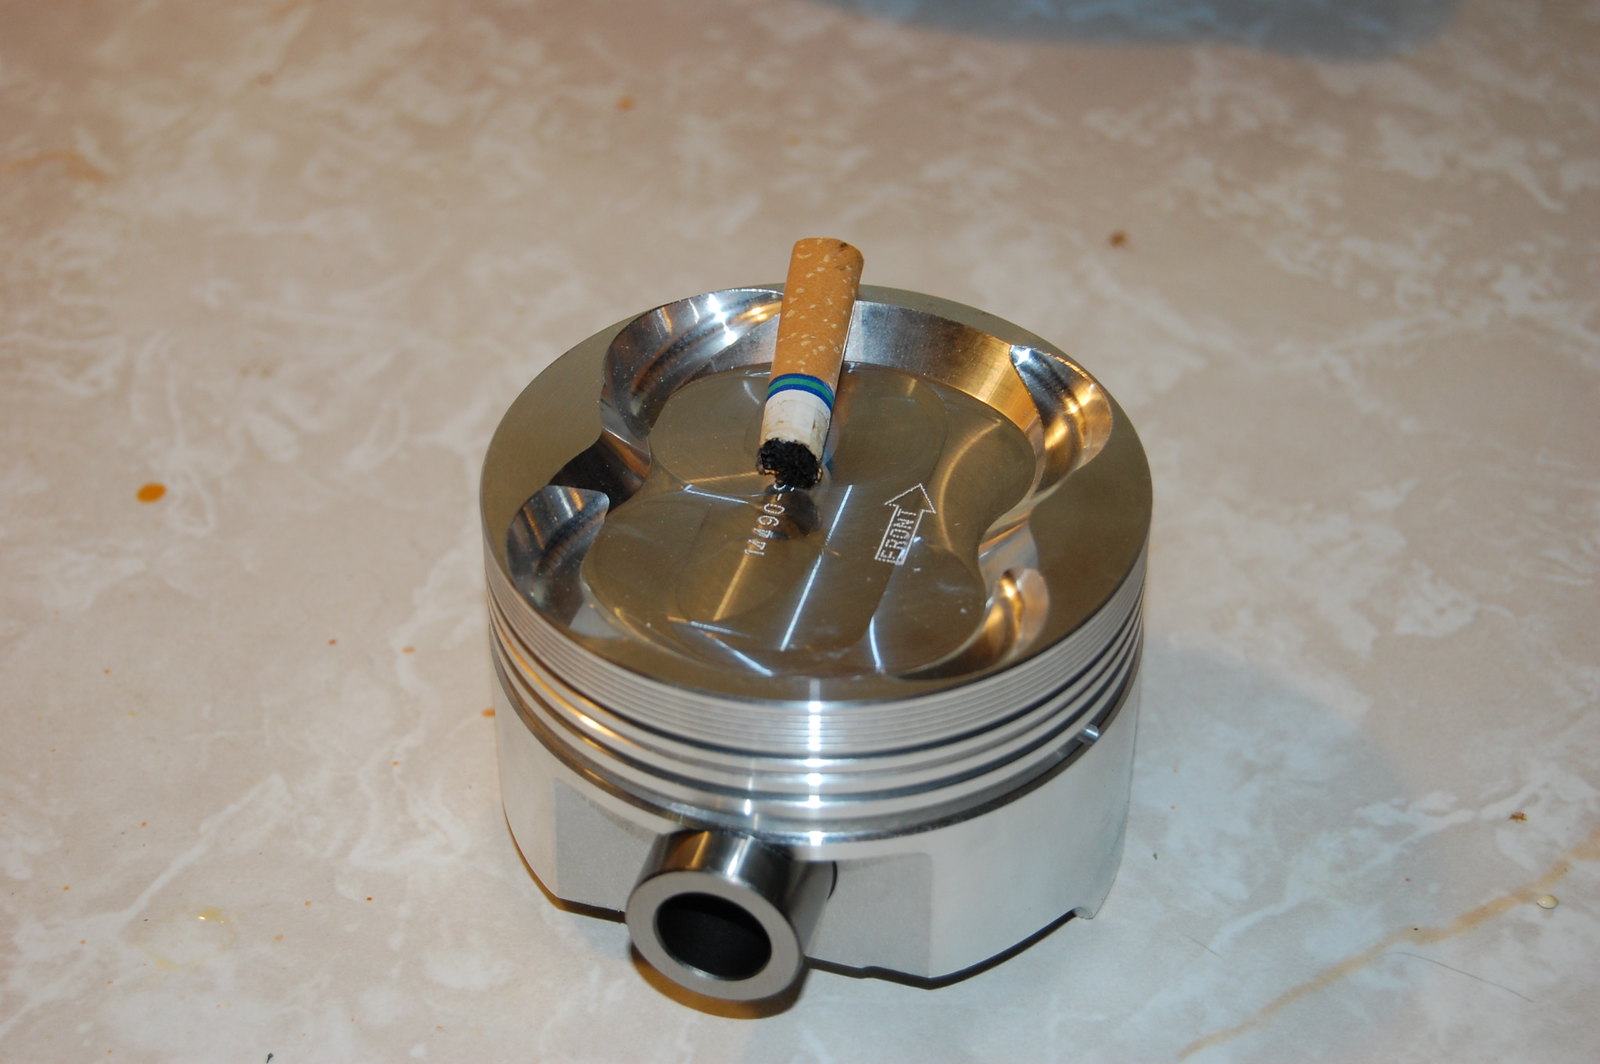
So after seeing this, I knew the motor needed to be completely rebuilt. I disassembled it completely and took the block and crank to Western Engine Supply, a local engine machine shop who has done really good work for a lot of people I know in the past. They machined the crank, bored the block, decked the block surface, and fitted new forged pistons and ARP studs on the rods. They ended up taking .040" off the crank rod journals, but the machinist said he was positive it would be fine if I got it balanced and had good bearings. I had the entire rotating assembly balanced; crank/rods/pistons/crank pulley, everything. Hopefully it will run SUPER smooth...
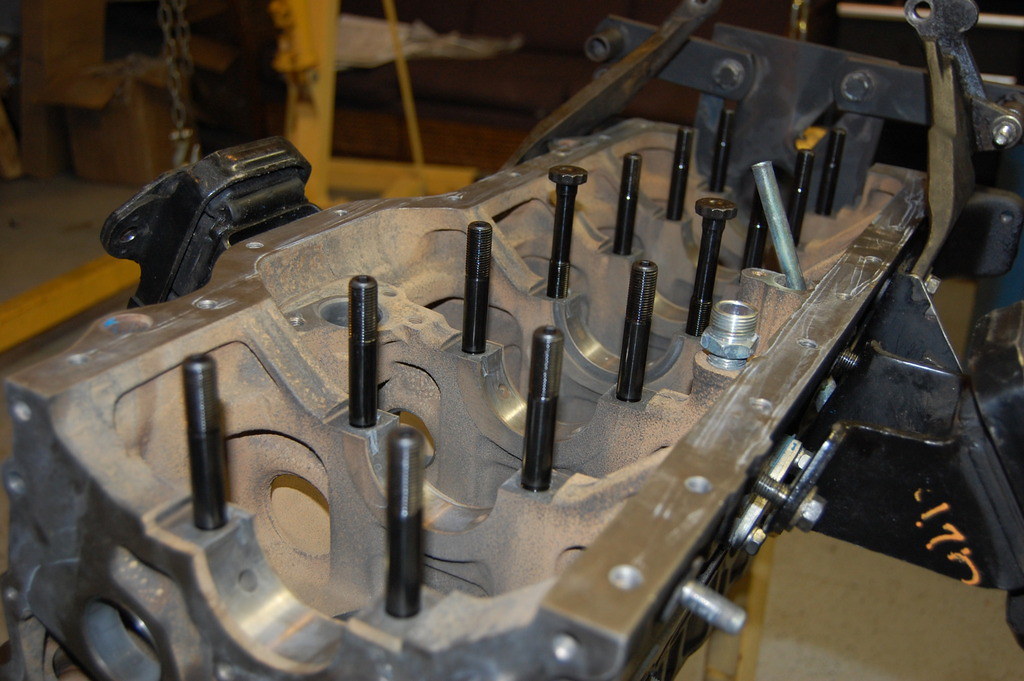
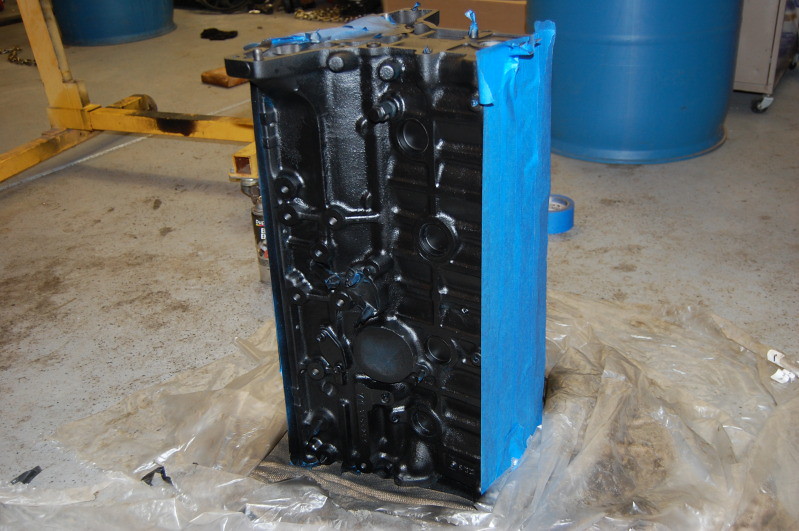
Finished block painted:
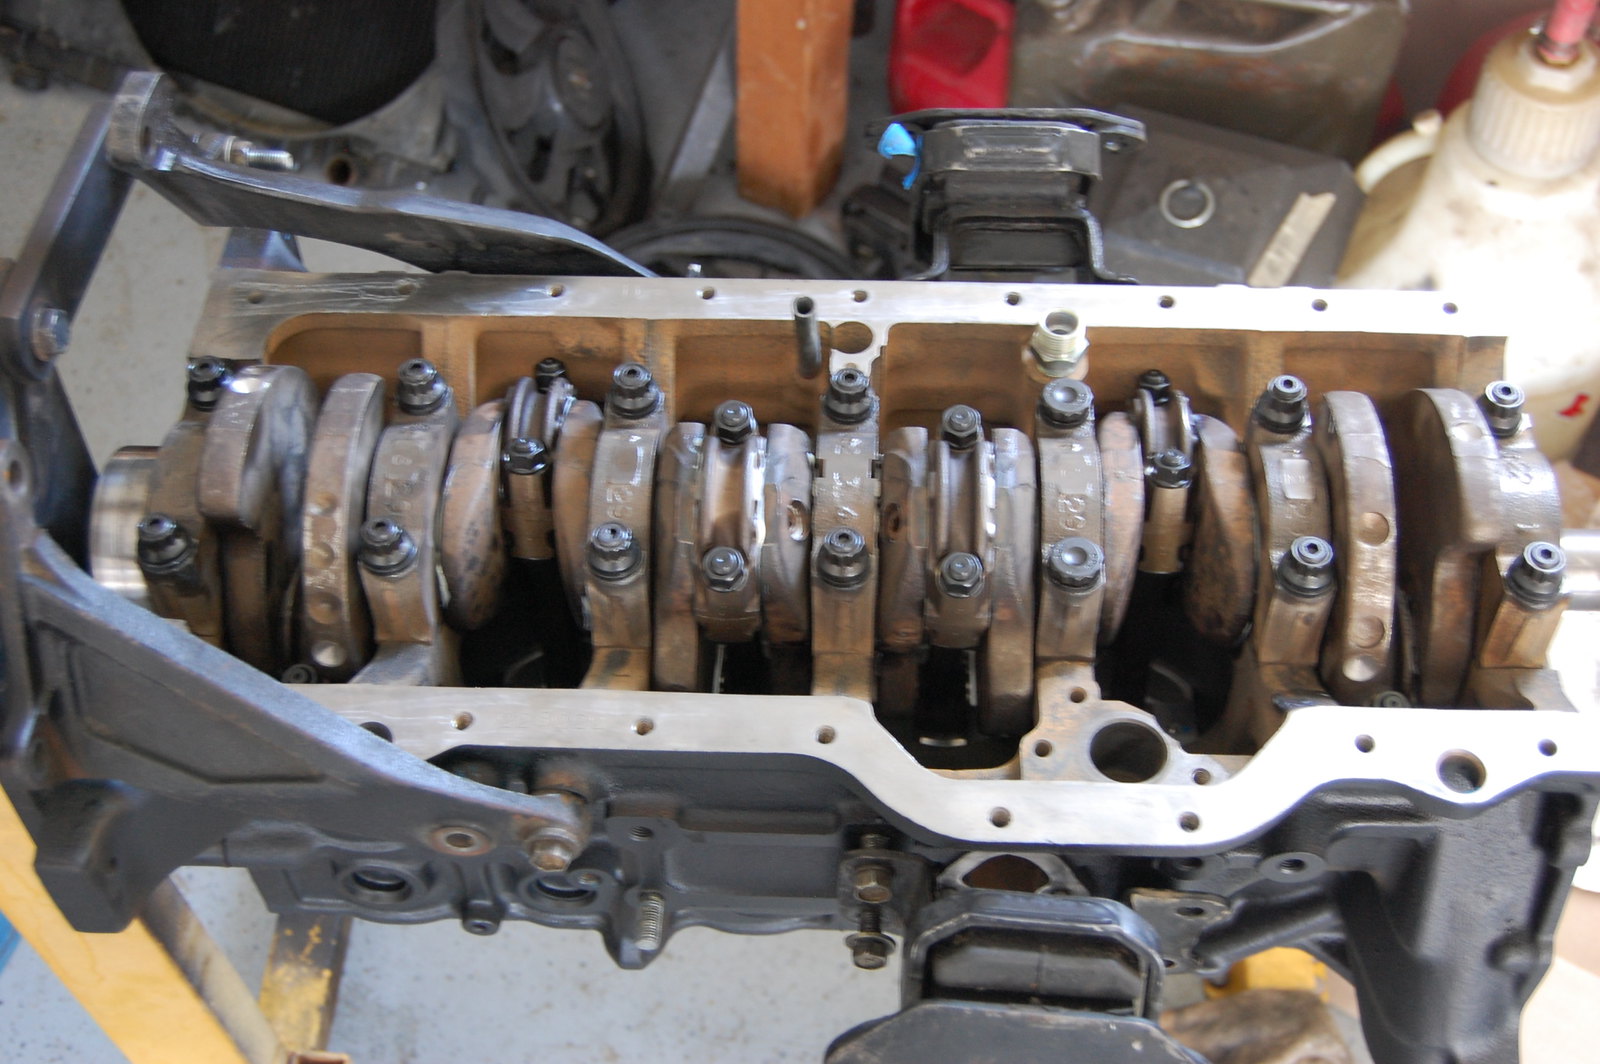
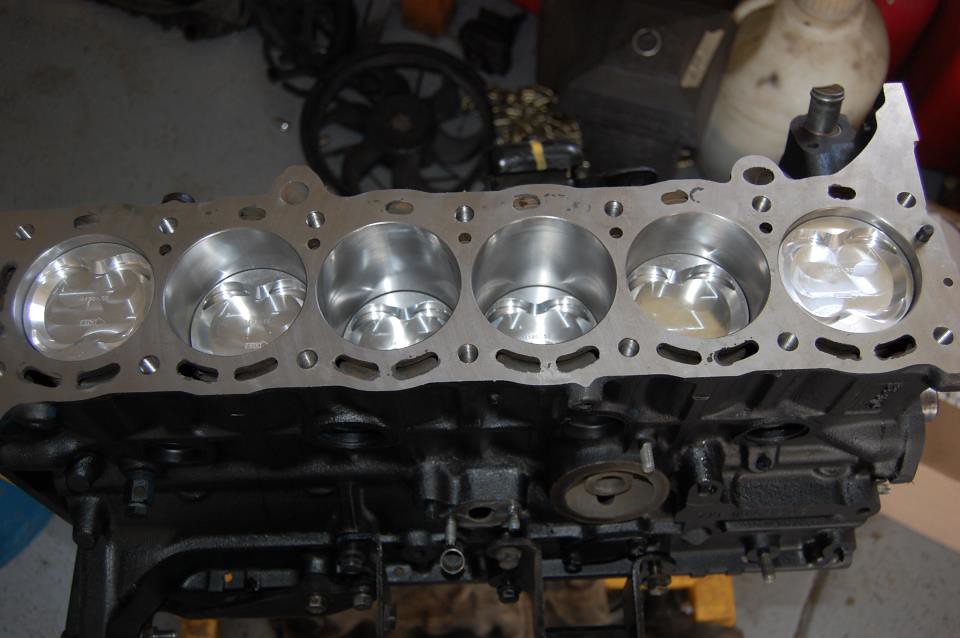
Assembling with new ARP main studs and rod studs. I checked all clearances with both bore gauge/micrometer as well as plastigauge once it was assembled. I also installed new oil squirters to help with oil pressure:
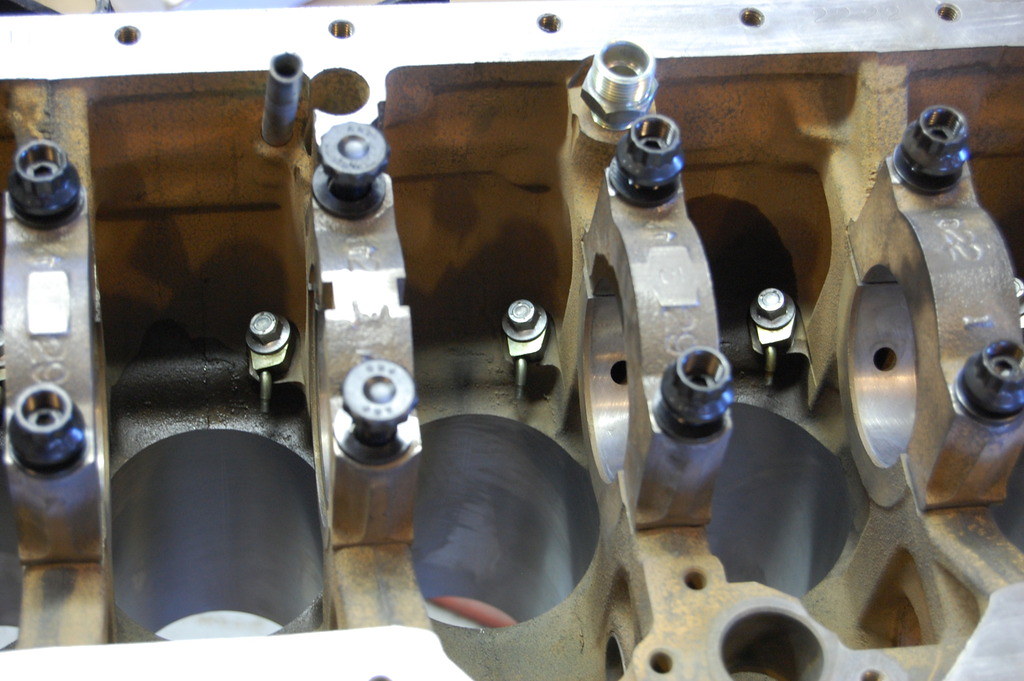
Oooooo.... Shiny....
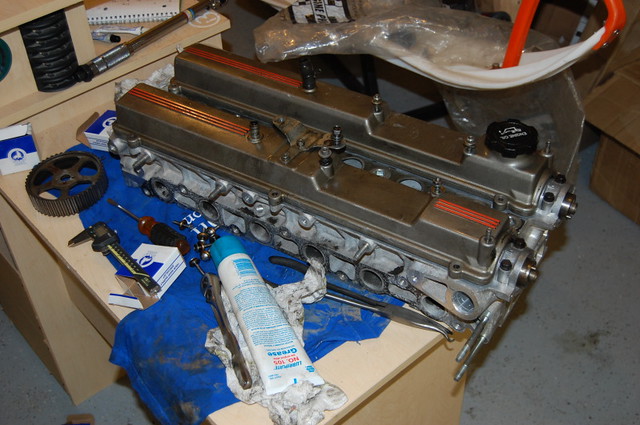
After finding the camshaft jounals to be in about as good of shape as the lower end, I picked up another head on craigslist locally that was in much better shape than mine. I took it to the machinist and had it cleaned and resurfaced. I then hand lapped all the valves and shimmed all the valve clearances. It was installed with a multi-layer steel headgasket and ARP studs. I chased all the threads and torqued to ARP's spec, so hopefully I never have any issues with the common 7m blown headgasket problem.

Completed Head:
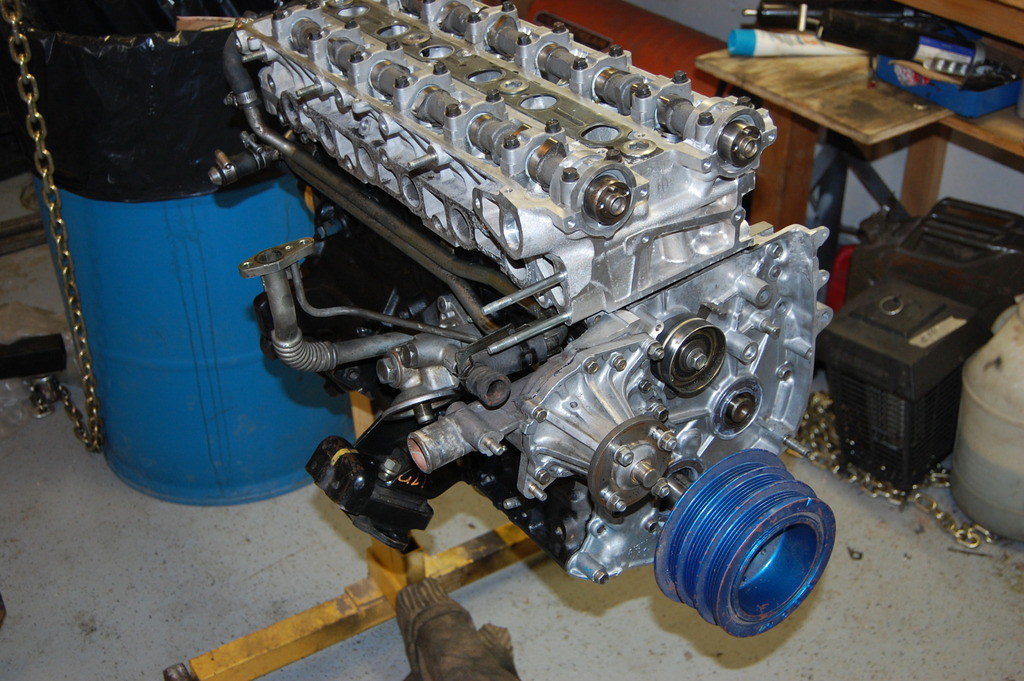
Mounted on motor:
I also picked up a wiring harness from an auto turbo supra that was in much better shape for $30 from the junkyard and proceeded to create one good harness. I soldered and heat-shrank all connections and then re-wrapped the whole harness with new housing.
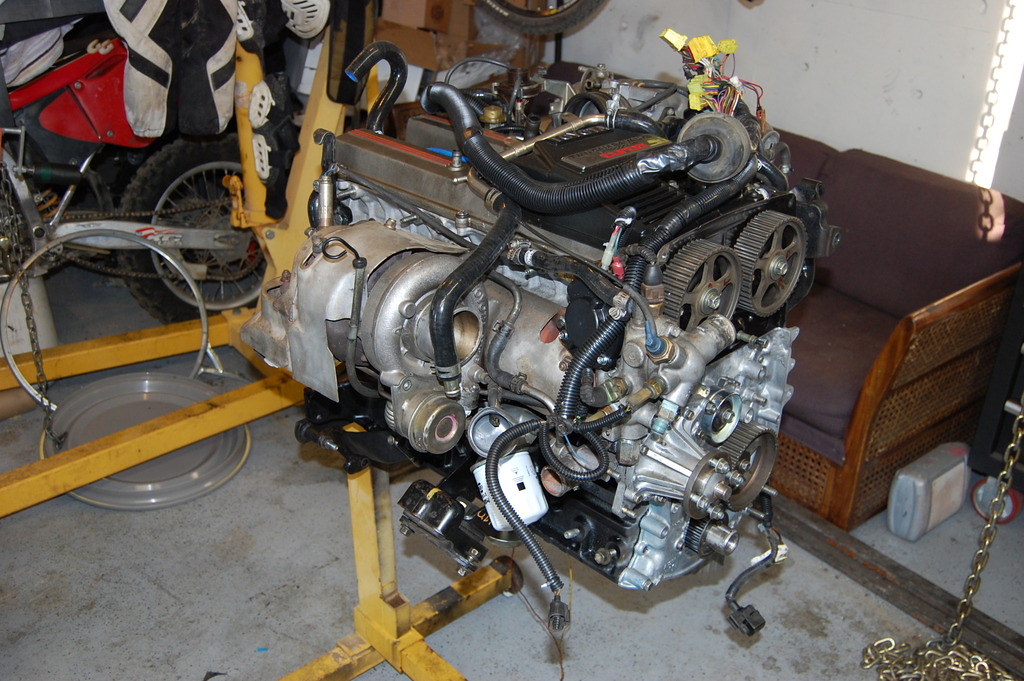
Motor getting close to completely assembled:
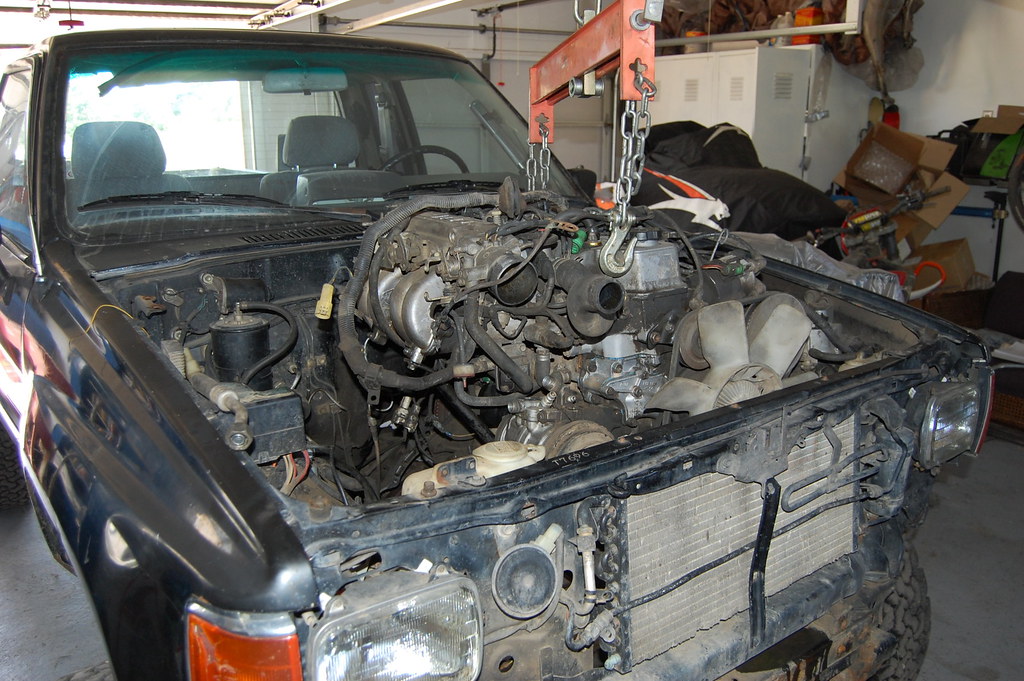
Pulled the slowness out and sold it the same day:
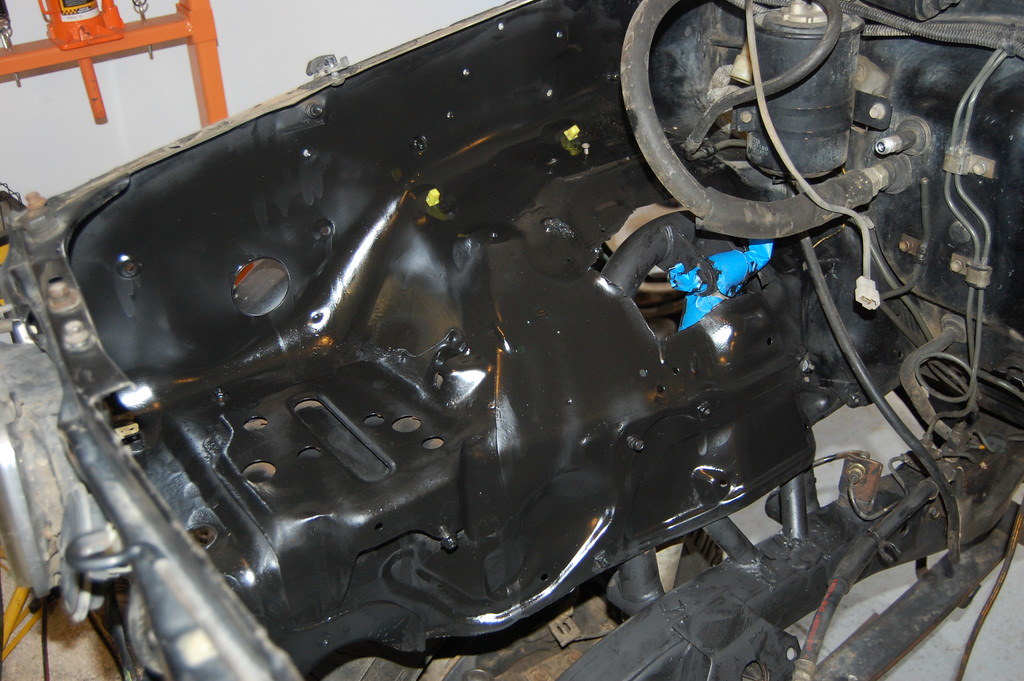
Started to Clean up and paint the engine bay:
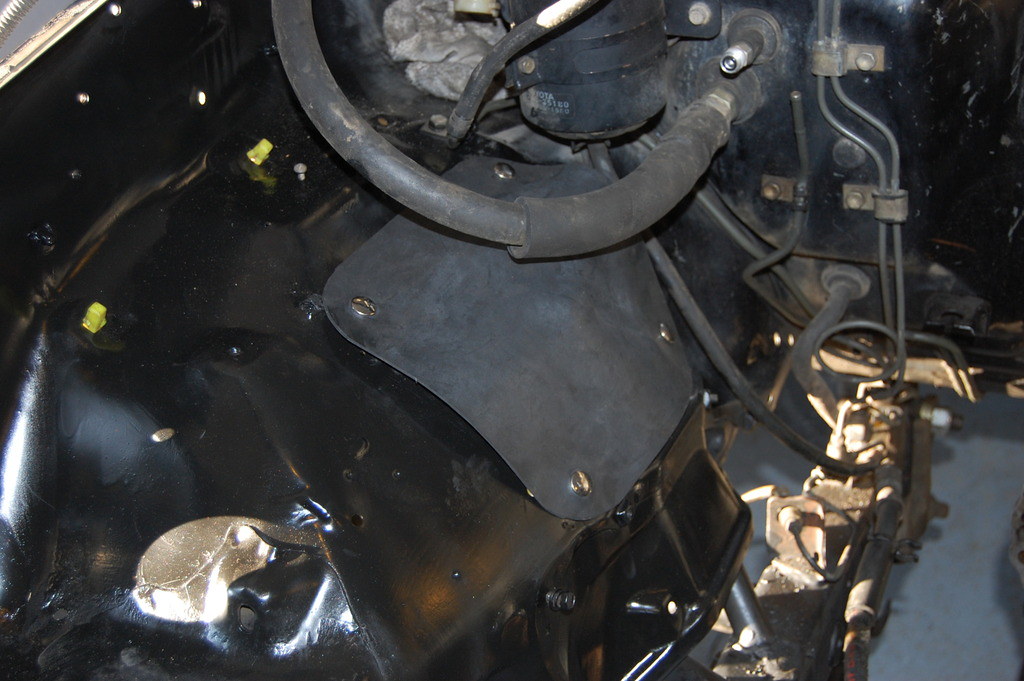
Made some snap-on covers for my shock hoops out of some McMaster-Carr parts:
Issues I'm working on/plans going forward:
[size="4"]OILING:[/size]
I know that most people have not reported any oiling issues 4-wheeling with this motor, but like everything else, I want to make absolutely sure. The oil pump that came with the motor was put in new at the last "rebuild", (probably the only good thing they did), so that won't need replaced, just cleaned. I shimmed with relief valve spring in the pump with a 4mm nut I carefully "machined" to fit. I then shimmed the oil cooler spring with around 10mm of spacers as that spring was not new and was a little worn out. I'll also be building a deep rear sump oil pan and an extended pickup for it in the next couple days
[size="4"]COOLING[/size]
I picked up a full silicone hose kit to replace all the 25 year old rubber hoses that were just bound to fail. I'll be running an aluminum 2-core radiator from an '86 celica turbo. It has the same width and thickness as the stock supra radiator, but its 1.5" shorter. I was having problems getting the stock supra radiator to sit low enough with my IFS steering box in the way. I didn't want to do a body lift and I liked the way it mounted. I'll be running a couple Taurus SHO fans, or possibly the Volvo version that I need to do some research on. A hood scoop is also in order to try and get rid of underhood heat.
[size="4"]FUEL[/size]
The stock 22re fuel pump is not going to be enough for my fuel demands, so I'm putting in a new mk4 supra fuel pump that I bought off of some guy on a forum. Its supposed to flow a lot more, operate much quieter, and be more reliable than a Walbro 255. I also don't like the way the fuel lines run so close to the exhaust header now that the exhaust is on the opposite side, so I'm running new 8mm stainless fuel line up the driver's side frame rail for both the delivery and return lines. A stock size fuel filter, even for the 22re, flows WAY more than I'll ever need, so that will remain stock.
[size="4"]Exhaust[/size]
The stock elbow and downpipe are super restrictive and they are the easiest power upgrade in the book, so I'll be putting in a 3" elbow and downpipe. The exhaust will go above the transfer case crossmember and cross right behind it. It will be 3" all the way back, which should make for good sound! I don't have plans for a cat right now because my truck is registered in Indiana, but I can always add one in later. There will be plenty of heat shielding going on, I don't want that heat coming into the cab of the truck.
[size="4"]A/C[/size]
I've got to squeeze the condenser in between the intercooler and radiator and still maintain function of the hood latch. I've already started on this and I'm positive that there is room with a little bit of modification. I'll be running the supra A/C pump, but will most likely need some custom lines made up. The circuit otherwise will work the same as it did with the original motor.
[size="4"]CRUISE CONTROL[/size]
I've already started this and have worked it out. I studied both wiring diagrams from both vehicles and learned that they were set up almost identical, minus a couple differences. The Supra system had a vacuum pump to compensate for boost and the controls were a bit different. I wanted to use the stock truck controls, so I did a little figurin'. For the truck controls, "accel/decel" was controlled by closing different loops. The supra controls were run on one wire and had different resistances for "accel/decel". This was an easy fix, just solder in the correct resistors to the truck harness and reroute some wires.
[size="4"]WIRING[/size]
I don't think this will be that difficult. I won't be tackling it until the motor is in, so we'll see. I've got a new 22re oil pressure sensor to run the SR5 gauge with. I haven't checked yet, but I'm fairly certain there is a potentiometer wired into the tach to adjust with. If there is not, I'll solder one in.
More to come.......
So I'm finally getting around to posting up my 7mgte swap. I'm about 2 months into it, but I'd been planning the swap for about a year now. I definitely wanted to stay Toyota, but I had kept debating with myself whether to go 3.4, try a diesel swap, Lexus 1uz V8, or supra. At first, I was set on a standard 3.4 swap, but well, everyone was doing that. Also, I live at 8k feet in Colorado and regularly drive up and down mountain passes up to 12k feet. I know for a fact that the 3.4 struggles with a load at higher elevations without a supercharger, and I plan on towing dirtbikes/hauling camping gear quite often. Most of the people I know with supercharged 3.4's get around 13mpg at best unless they are driving in elderly grandmother mode, so those reasons turned me off of the 3.4 idea.
A turbo diesel would probably work really well for what I needed, but in order to stay Toyota, it gets expensive quick. Also, I plan to do several trips to Mexico, and diesel is usually MUCH harder to find than gasoline, so it would require carrying much more fuel. Toyota pickups are small... so space is valuable and taking it up with lots of extra fuel is not desirable.
A 1uz swap would also probably have worked and the more I look into it, the more I think the next swap I do will be 1uz. The few reasons I didn't choose this option are: I wanted a straight 6 for the smoothness, lots more low end torque to break things with a v8, and lack of research on my part at the time.
The supra 7mgte ended up winning the debate due in a large part to the coolness factor of a straight 6 turbo and the challenge it presented. There are a ton of old mkIII supras in the Denver metro area, so parts are actually really easy to come by for me. Also, this video and truck pretty much sealed the deal for me:
The truck its going into is my 1985 SR5 pickup with all the options that came in '85, so its the perfect candidate for an engine swap. Its got 346,000 miles on it, but the interior is complete and unmolested, the body is in good shape, and I've rebuilt most of the drive train. I still have most of the original paperwork, manuals, etc. I even still have the 15' work light that plugs in underneath the driver's side dash (super rare option).
So, my end goals of this project are:
-Able to drive up to the Eisenhower tunnel hauling camping gear, pulling a 3-rail dirtbike trailer, and be PASSING people without issues
-Reliable enough to make cross-country trips
-Drivetrain to handle ~250hp to the wheels
-Keep at least current offroad ability (which is pretty awesome)
-Keep Cruise Control
-Keep A/C
-Keep interior intact and stock looking
-Built strong enough to handle any future power ideas
-NO HOOD PINS!
I broke that up into 2 phases:
PHASE 1: Engine in and running well
PHASE 2: Transmission/axle/suspension upgrades
Basically, I'm putting the motor in right now with the W56 transmission and stock axles (4.88 gears) and running that until I get the motor working well. Then I'll be upgrading to an R-series transmission, V6 diff w/ supra limited slip carrier, full-float axle kit w/disk brakes, and a better spring pack up front/better shock valving all around. This will help with the money flow and hopefully not allow me to get too overwhelmed.
[size="5"]PHASE 1[/size]
So, I started out by buying a running '87 turbo supra in decent shape. I actually ended up paying WAY too much for it because I was told the engine was rebuilt in the last 3k miles. I won't go into that story for now, but long story short, it was rebuilt, but I'm fairly certain it was done by toddlers in the backyard sandbox. It was put together dirty so all bearing surfaces were trashed by the time I bought it. It ended up spinning a rod bearing before I even got it home. After many threatening phone calls and visits, I just kind of gave up on the whole thing and decided it wasn't worth it. Terrible experience and was a lesson in why you should never believe anyone's word when buying something in a shady side of town.
Luckily, I parked it as soon as I started hearing knocking sounds and had a friend trailer it the rest of the way to my house. Eventually pulled the motor:
Started disassembling it:
And found this:
The bearing had spun and welded itself to the crank journal. The rest of the bearings looked more or less like this:
So after seeing this, I knew the motor needed to be completely rebuilt. I disassembled it completely and took the block and crank to Western Engine Supply, a local engine machine shop who has done really good work for a lot of people I know in the past. They machined the crank, bored the block, decked the block surface, and fitted new forged pistons and ARP studs on the rods. They ended up taking .040" off the crank rod journals, but the machinist said he was positive it would be fine if I got it balanced and had good bearings. I had the entire rotating assembly balanced; crank/rods/pistons/crank pulley, everything. Hopefully it will run SUPER smooth...
Finished block painted:
Assembling with new ARP main studs and rod studs. I checked all clearances with both bore gauge/micrometer as well as plastigauge once it was assembled. I also installed new oil squirters to help with oil pressure:
Oooooo.... Shiny....
After finding the camshaft jounals to be in about as good of shape as the lower end, I picked up another head on craigslist locally that was in much better shape than mine. I took it to the machinist and had it cleaned and resurfaced. I then hand lapped all the valves and shimmed all the valve clearances. It was installed with a multi-layer steel headgasket and ARP studs. I chased all the threads and torqued to ARP's spec, so hopefully I never have any issues with the common 7m blown headgasket problem.
Completed Head:
Mounted on motor:
I also picked up a wiring harness from an auto turbo supra that was in much better shape for $30 from the junkyard and proceeded to create one good harness. I soldered and heat-shrank all connections and then re-wrapped the whole harness with new housing.
Motor getting close to completely assembled:
Pulled the slowness out and sold it the same day:
Started to Clean up and paint the engine bay:
Made some snap-on covers for my shock hoops out of some McMaster-Carr parts:
Issues I'm working on/plans going forward:
[size="4"]OILING:[/size]
I know that most people have not reported any oiling issues 4-wheeling with this motor, but like everything else, I want to make absolutely sure. The oil pump that came with the motor was put in new at the last "rebuild", (probably the only good thing they did), so that won't need replaced, just cleaned. I shimmed with relief valve spring in the pump with a 4mm nut I carefully "machined" to fit. I then shimmed the oil cooler spring with around 10mm of spacers as that spring was not new and was a little worn out. I'll also be building a deep rear sump oil pan and an extended pickup for it in the next couple days
[size="4"]COOLING[/size]
I picked up a full silicone hose kit to replace all the 25 year old rubber hoses that were just bound to fail. I'll be running an aluminum 2-core radiator from an '86 celica turbo. It has the same width and thickness as the stock supra radiator, but its 1.5" shorter. I was having problems getting the stock supra radiator to sit low enough with my IFS steering box in the way. I didn't want to do a body lift and I liked the way it mounted. I'll be running a couple Taurus SHO fans, or possibly the Volvo version that I need to do some research on. A hood scoop is also in order to try and get rid of underhood heat.
[size="4"]FUEL[/size]
The stock 22re fuel pump is not going to be enough for my fuel demands, so I'm putting in a new mk4 supra fuel pump that I bought off of some guy on a forum. Its supposed to flow a lot more, operate much quieter, and be more reliable than a Walbro 255. I also don't like the way the fuel lines run so close to the exhaust header now that the exhaust is on the opposite side, so I'm running new 8mm stainless fuel line up the driver's side frame rail for both the delivery and return lines. A stock size fuel filter, even for the 22re, flows WAY more than I'll ever need, so that will remain stock.
[size="4"]Exhaust[/size]
The stock elbow and downpipe are super restrictive and they are the easiest power upgrade in the book, so I'll be putting in a 3" elbow and downpipe. The exhaust will go above the transfer case crossmember and cross right behind it. It will be 3" all the way back, which should make for good sound! I don't have plans for a cat right now because my truck is registered in Indiana, but I can always add one in later. There will be plenty of heat shielding going on, I don't want that heat coming into the cab of the truck.
[size="4"]A/C[/size]
I've got to squeeze the condenser in between the intercooler and radiator and still maintain function of the hood latch. I've already started on this and I'm positive that there is room with a little bit of modification. I'll be running the supra A/C pump, but will most likely need some custom lines made up. The circuit otherwise will work the same as it did with the original motor.
[size="4"]CRUISE CONTROL[/size]
I've already started this and have worked it out. I studied both wiring diagrams from both vehicles and learned that they were set up almost identical, minus a couple differences. The Supra system had a vacuum pump to compensate for boost and the controls were a bit different. I wanted to use the stock truck controls, so I did a little figurin'. For the truck controls, "accel/decel" was controlled by closing different loops. The supra controls were run on one wire and had different resistances for "accel/decel". This was an easy fix, just solder in the correct resistors to the truck harness and reroute some wires.
[size="4"]WIRING[/size]
I don't think this will be that difficult. I won't be tackling it until the motor is in, so we'll see. I've got a new 22re oil pressure sensor to run the SR5 gauge with. I haven't checked yet, but I'm fairly certain there is a potentiometer wired into the tach to adjust with. If there is not, I'll solder one in.
More to come.......
Last edited by egesledder; 01-31-2018 at 12:59 PM.
 07-11-2012, 08:00 PM
#2
Registered User
Join Date: May 2011
Location: Colorado Springs, CO
Posts: 53
Likes: 0
Received 0 Likes
on
0 Posts
Sub'ed.
If I started this swap all over again I would definitely get the complete motor like this! Tracking down every single bracket, sensor, etc... sucks.
Too bad you got hosed but in the long run it's good having piece of mind that it was done right the first time.
If I started this swap all over again I would definitely get the complete motor like this! Tracking down every single bracket, sensor, etc... sucks.
Too bad you got hosed but in the long run it's good having piece of mind that it was done right the first time.
07-18-2012, 06:26 AM
#3
Registered User
Thread Starter
Join Date: Aug 2008
Location: Boulder, CO
Posts: 145
Likes: 0
Received 0 Likes
on
0 Posts
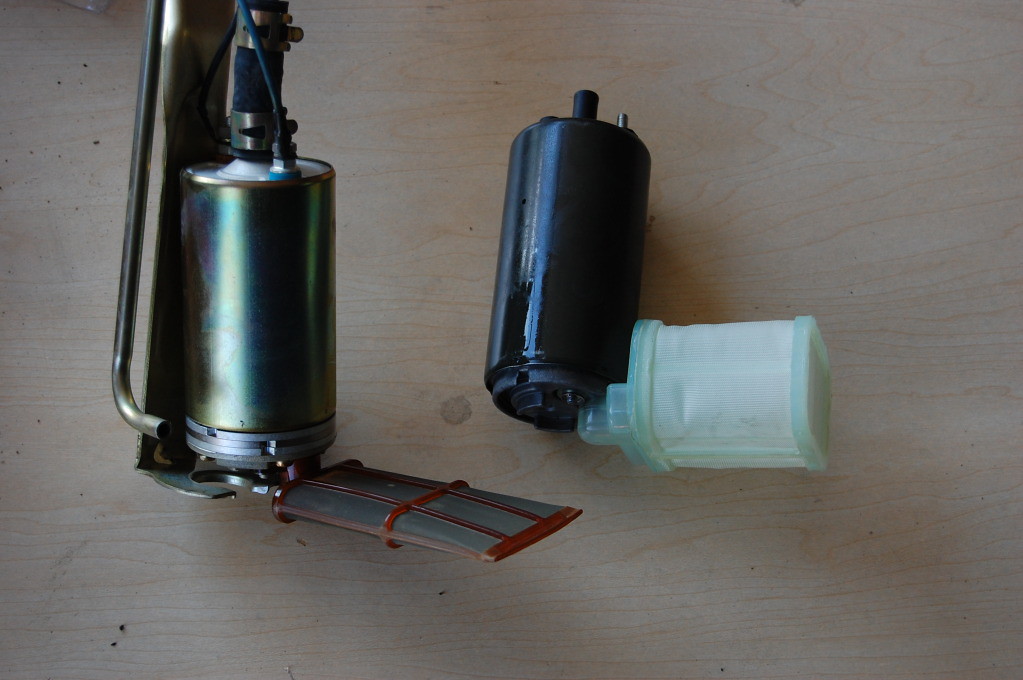
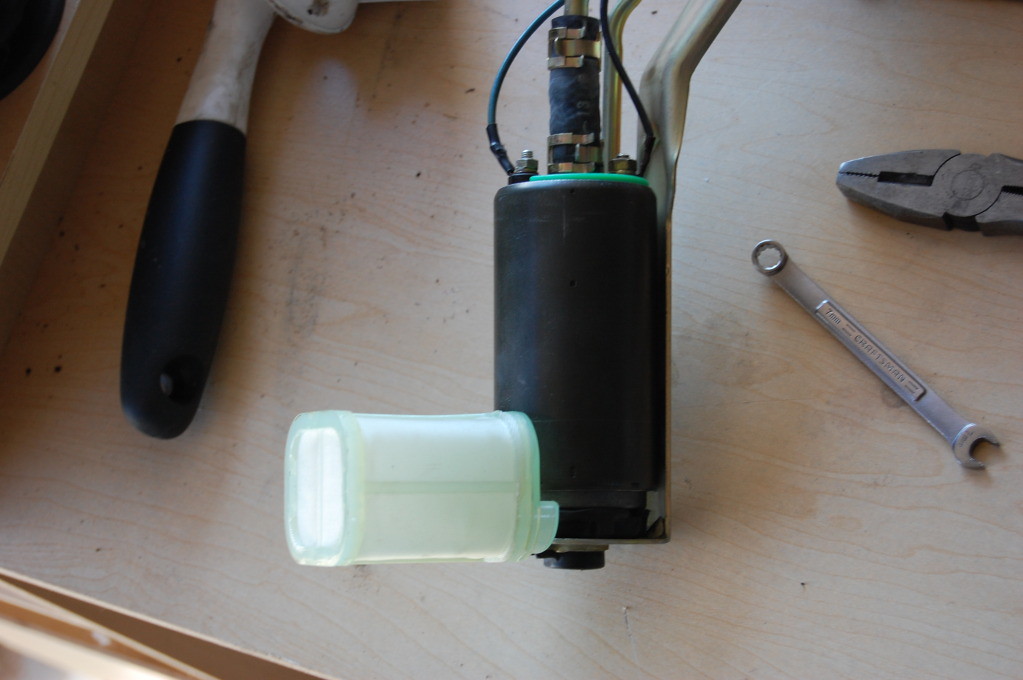
Mark IV Supra fuel pump came in. It looks like its almost identical in size as my stock pump, but like I said before, its supposed to flow close to 300 lph. The nice thing though is that it mounts directly onto the stock pickup fuel hanger:
Also got the Celica 2.0 Turbo radiator in, looks like it should work well. Keep in mind that this is an aftermarket 2-row radiator, the stock one for that car was a single row. Note that this one has the same width, thickness, and mounting features but is one inch shorter than the stock Supra radiator. This will solve the hood clearance issues I was having:


Also got the Celica 2.0 Turbo radiator in, looks like it should work well. Keep in mind that this is an aftermarket 2-row radiator, the stock one for that car was a single row. Note that this one has the same width, thickness, and mounting features but is one inch shorter than the stock Supra radiator. This will solve the hood clearance issues I was having:
Last edited by egesledder; 07-12-2017 at 11:54 AM.
07-23-2012, 06:53 AM
#4
Registered User
Thread Starter
Join Date: Aug 2008
Location: Boulder, CO
Posts: 145
Likes: 0
Received 0 Likes
on
0 Posts
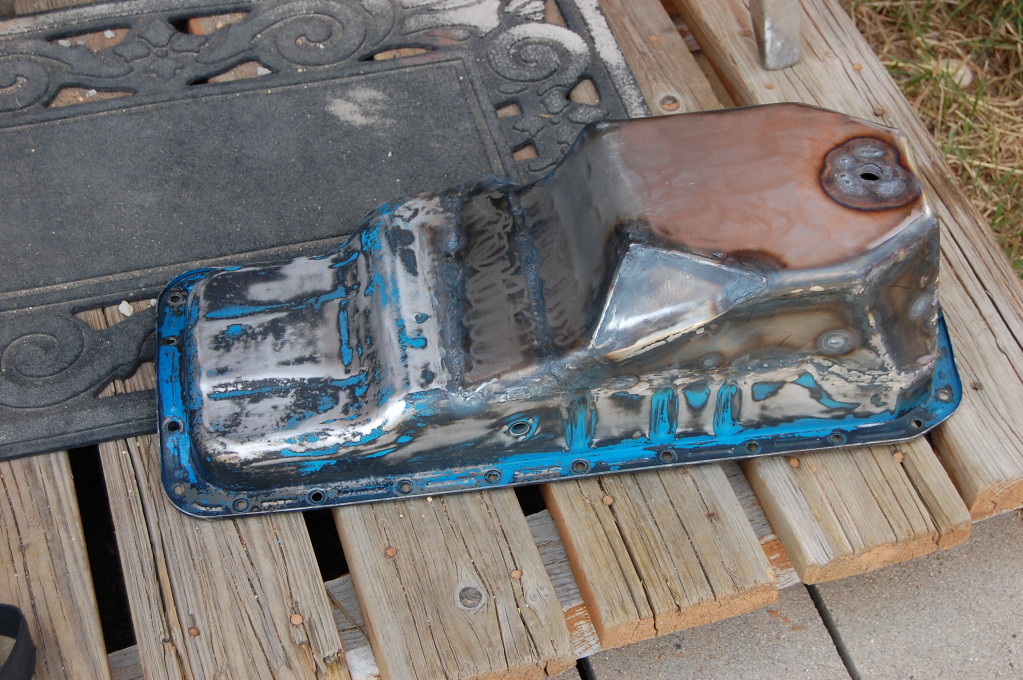
Finally finished the oil pan, took a little longer than I expected. It was my first TIG welding experience, so I kind of taught myself as I went along and the welds slowly got better and better. First welds did not look good, haha, but they are solid.
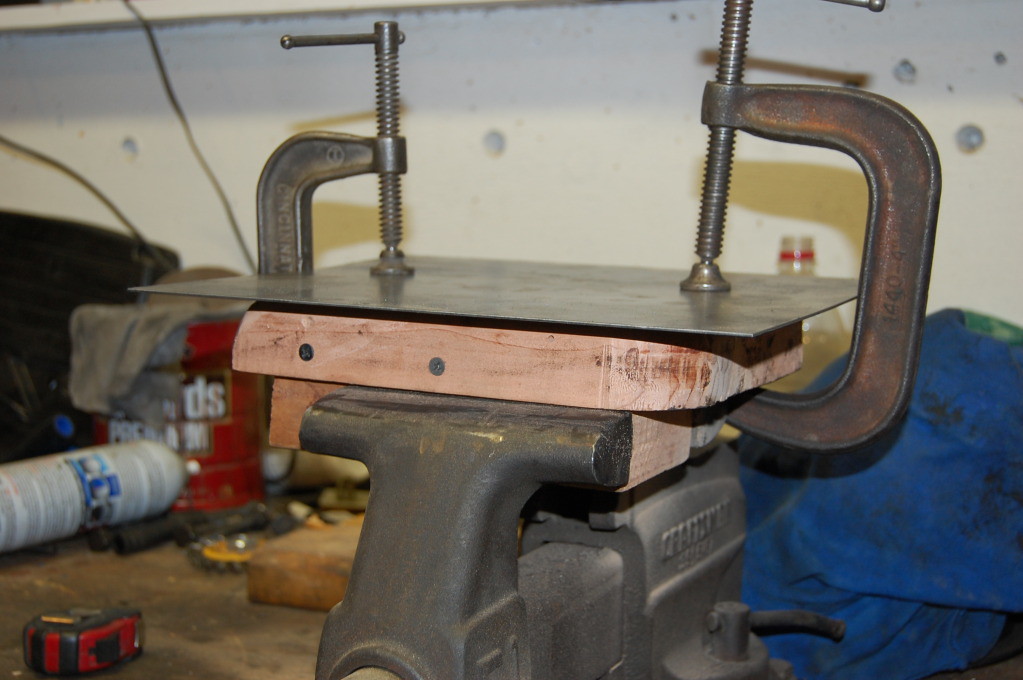
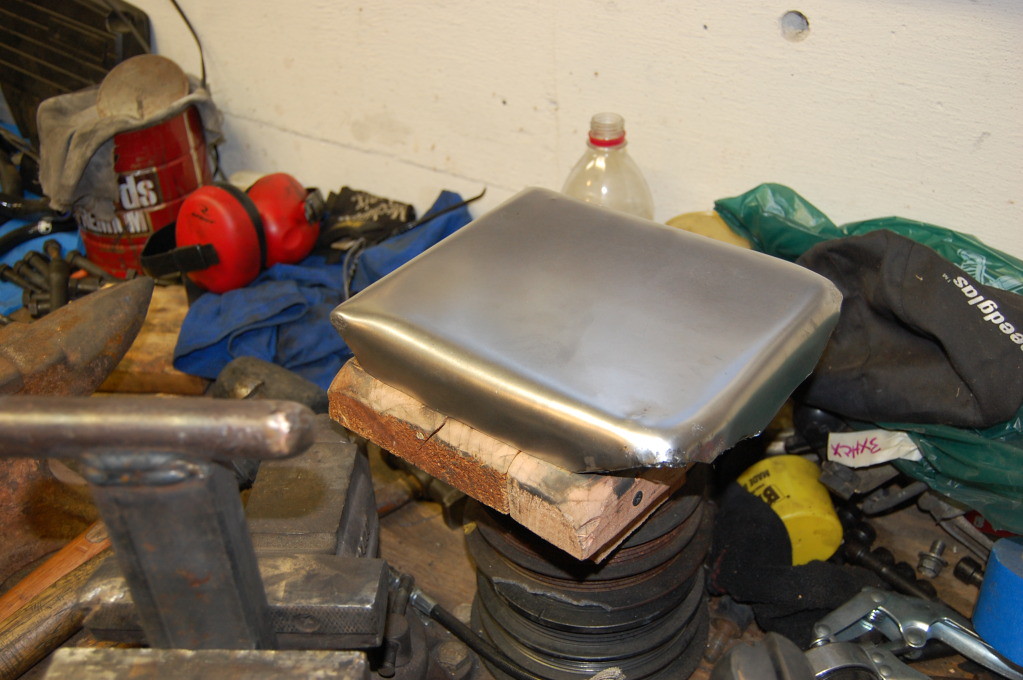
Started off making the bottom of the pan on a hammerform. Hammerform was made using 2x8 and router table:
T-Dolly made to help form corners and edges:
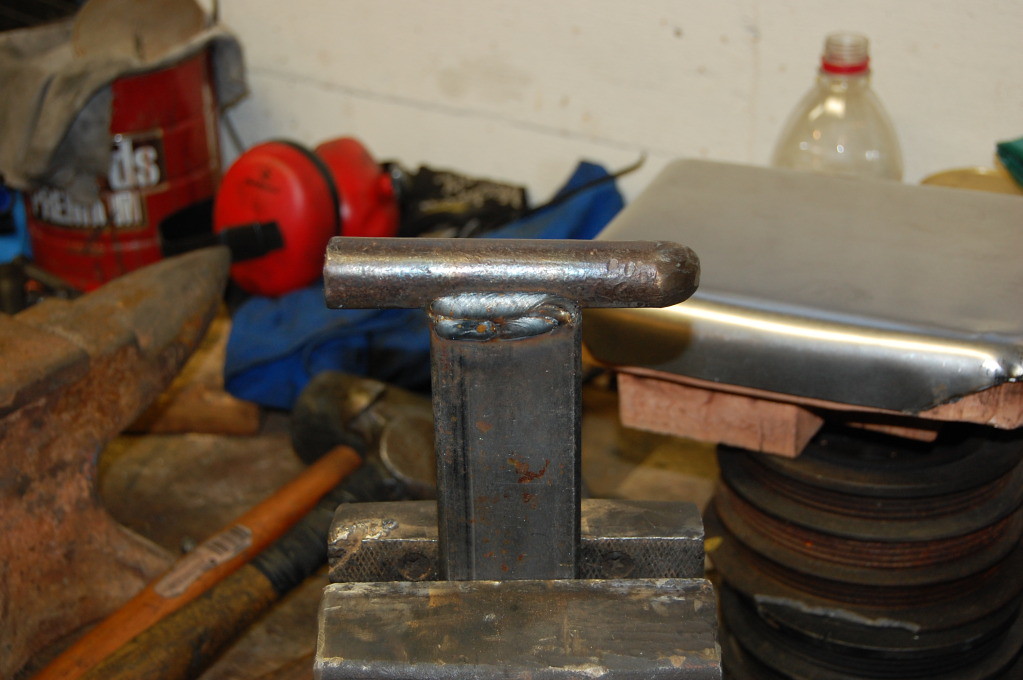
Almost finished pan bottom. You may notice that this does not look like the finished pan, and well, its not. I had to remake the bottom in a different shape later on after finding it didn't fit correctly:
Fully welded and water-tight pan:
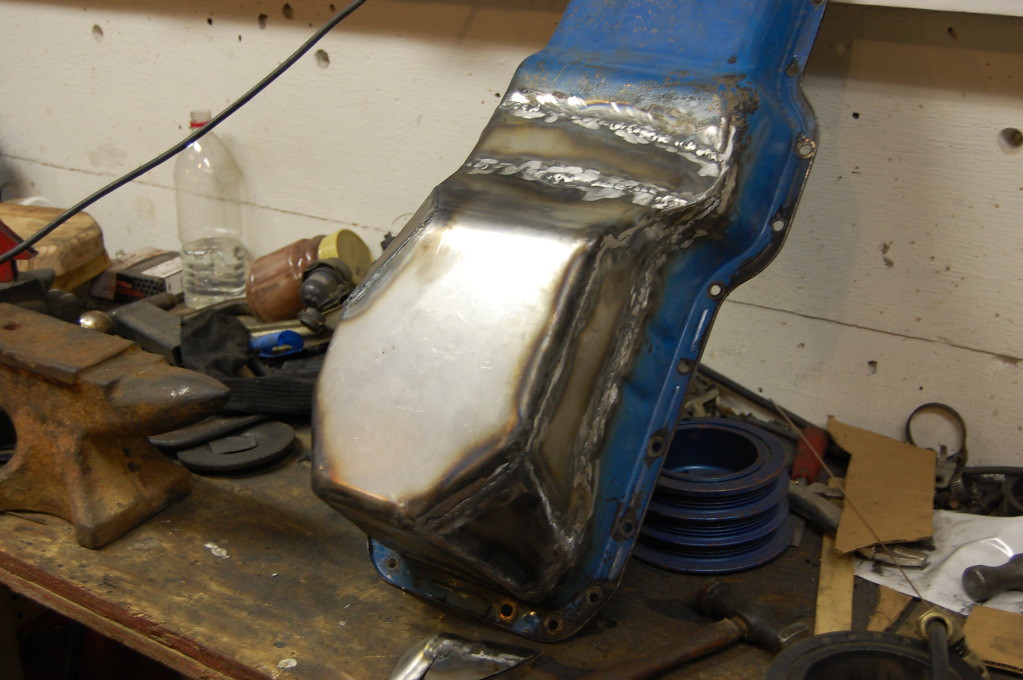
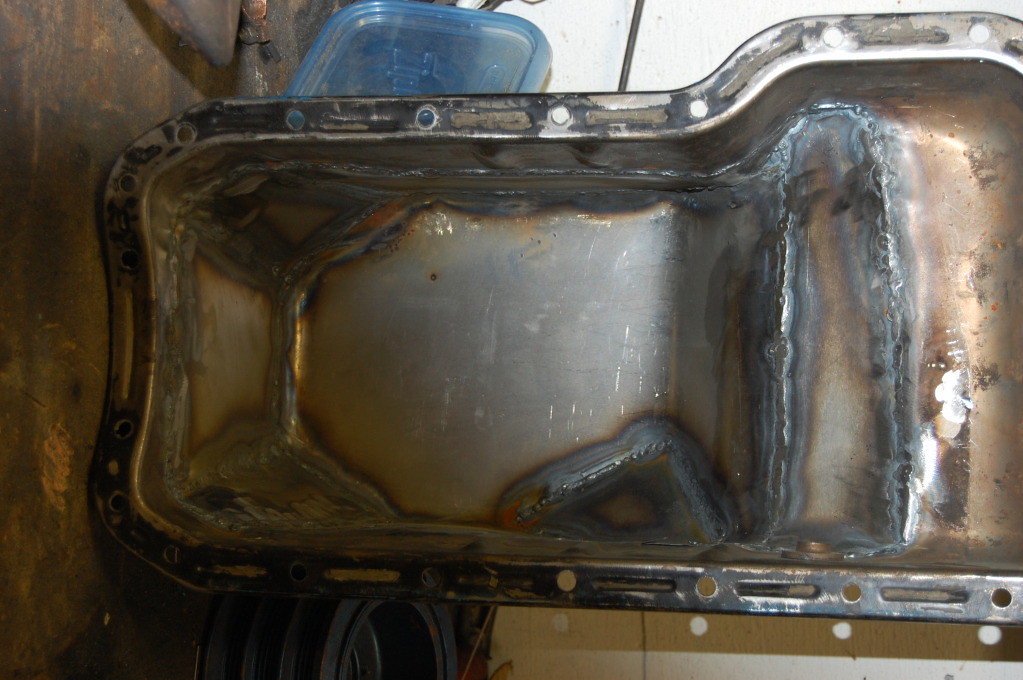
I also added a drain plug and internal baffles, but I forgot to take a picture of the baffling:
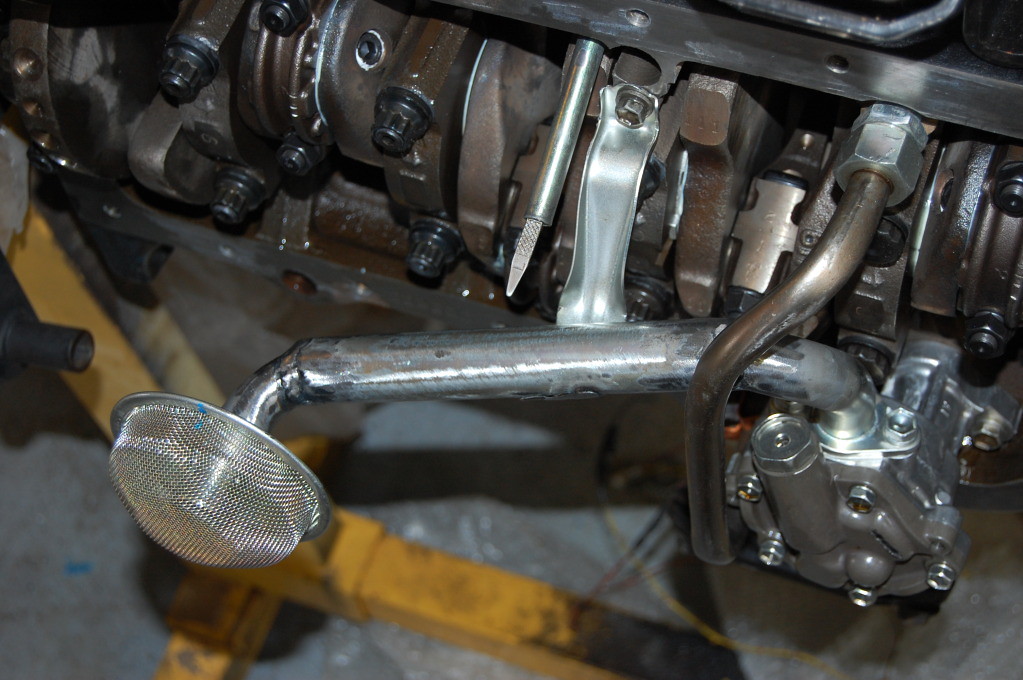
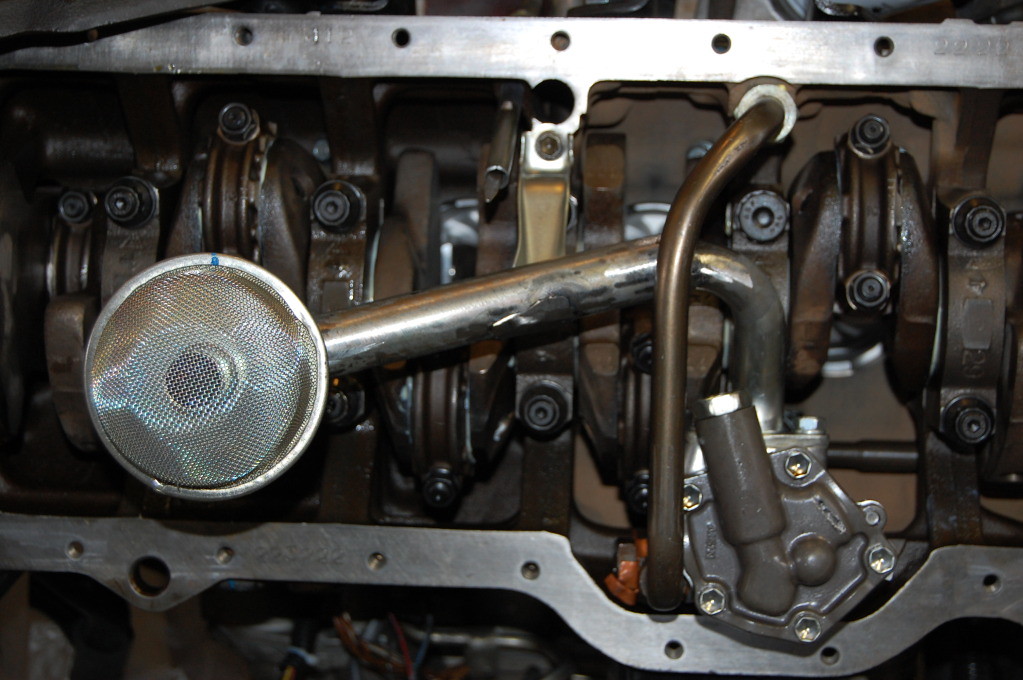
Extended oil pickup tube:
Painted and installed:
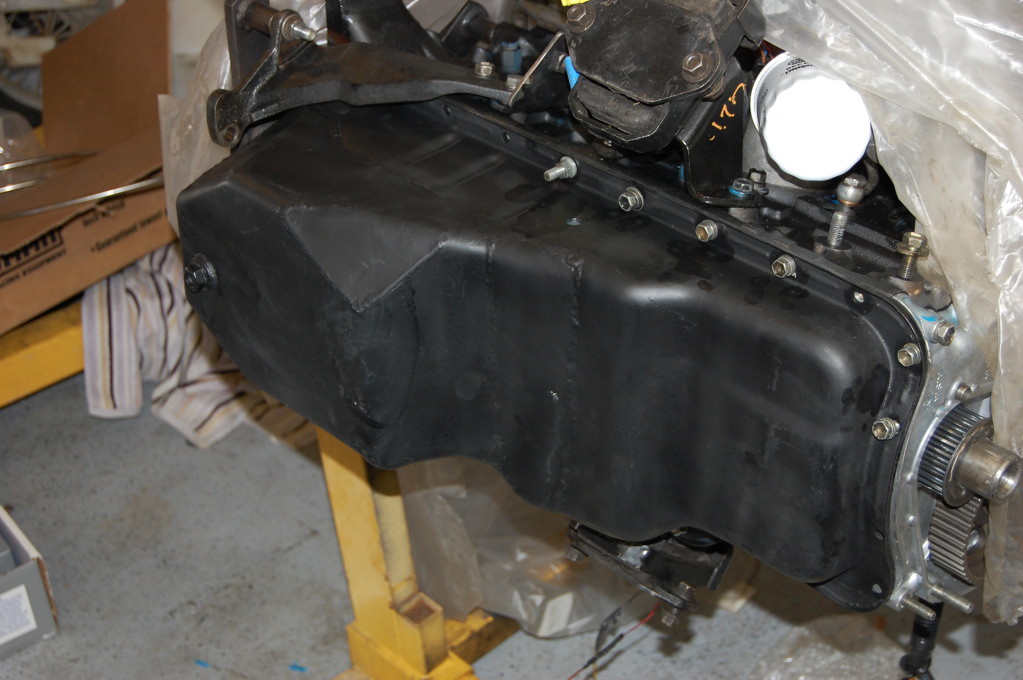
The pan now sits behind the axle; the bottom of the pan is 1.5" deeper and the oil pickup tube also sits 1.5" deeper. It looks like the pan should hold around 8 quarts of oil now too. This combined with good internal baffling should help eliminate an oiling issues.
Started off making the bottom of the pan on a hammerform. Hammerform was made using 2x8 and router table:
T-Dolly made to help form corners and edges:
Almost finished pan bottom. You may notice that this does not look like the finished pan, and well, its not. I had to remake the bottom in a different shape later on after finding it didn't fit correctly:
Fully welded and water-tight pan:
I also added a drain plug and internal baffles, but I forgot to take a picture of the baffling:
Extended oil pickup tube:
Painted and installed:
The pan now sits behind the axle; the bottom of the pan is 1.5" deeper and the oil pickup tube also sits 1.5" deeper. It looks like the pan should hold around 8 quarts of oil now too. This combined with good internal baffling should help eliminate an oiling issues.
Last edited by egesledder; 07-12-2017 at 11:59 AM.
07-23-2012, 08:46 AM
#5
holy crap this is awesome! subscribed!
...wipes drool from face....
beautiful motor and looks like you're doing a solid swap, good work; can only imagine the look on people's face as they watch you pull past them up a mountain pass fully loaded, hahaa!
...wipes drool from face....
beautiful motor and looks like you're doing a solid swap, good work; can only imagine the look on people's face as they watch you pull past them up a mountain pass fully loaded, hahaa!
07-23-2012, 10:54 AM
#7
Registered User
wow very impressive, found a 7mge block behind my shop yesturday but it was too far gone, wish i could find a complete car to start my swap, mines going in a first gen ive got behind the house, how bad do you intend the wiring to be? and are you going to be rebuilding the transmission? i hear alot of people blow theres up shortly after this swap trying to pull up a hill in 5th
Trending Topics
07-23-2012, 01:18 PM
#8
Registered User
Thread Starter
Join Date: Aug 2008
Location: Boulder, CO
Posts: 145
Likes: 0
Received 0 Likes
on
0 Posts
I'm not really worried about the wiring. I've got full wiring diagrams for both the supra and truck, and I can solder wires. To me, wiring is one of the simpler parts of a swap once you map out what wire needs to go where. After that its just soldering wire "A" to wire "B". The 7m motors have pretty much every sensor wired into the engine harness, so it makes swaps fairly simple.
I've also gone completely through my harness and replaced broken plugs/wires, tested everything for continuity, and put all new wire housing on it; so that has helped me to learn exactly what sensors are where and what they do. I'm more worried at this point about how to make it all look stock and be reliable (no pinch points, stretched wires, exposed solder joints, etc).
I've also gone completely through my harness and replaced broken plugs/wires, tested everything for continuity, and put all new wire housing on it; so that has helped me to learn exactly what sensors are where and what they do. I'm more worried at this point about how to make it all look stock and be reliable (no pinch points, stretched wires, exposed solder joints, etc).
07-23-2012, 02:53 PM
#9
Registered User
wiring gets me, i can understand wire A to wire B but its all inbetween that i dont understand, will the supra engine talk to the 85 ecu? or will you have to change ecus out? getting a feeler for mine as im looking for a motor on the other webpage im on 
07-25-2012, 06:14 AM
#11
Registered User
Thread Starter
Join Date: Aug 2008
Location: Boulder, CO
Posts: 145
Likes: 0
Received 0 Likes
on
0 Posts
@westjohns: If you haven't already, check out supracharged.com. Its a good place to get all the baseline knowledge on the swap, and then from there just start reading through peoples' build threads.
Test Fit!! Its definitely going to require some "tasteful bashing", but otherwise it fits. It will be coming back out so I can work on moving the radiator further forward and get my new fuel lines mounted.
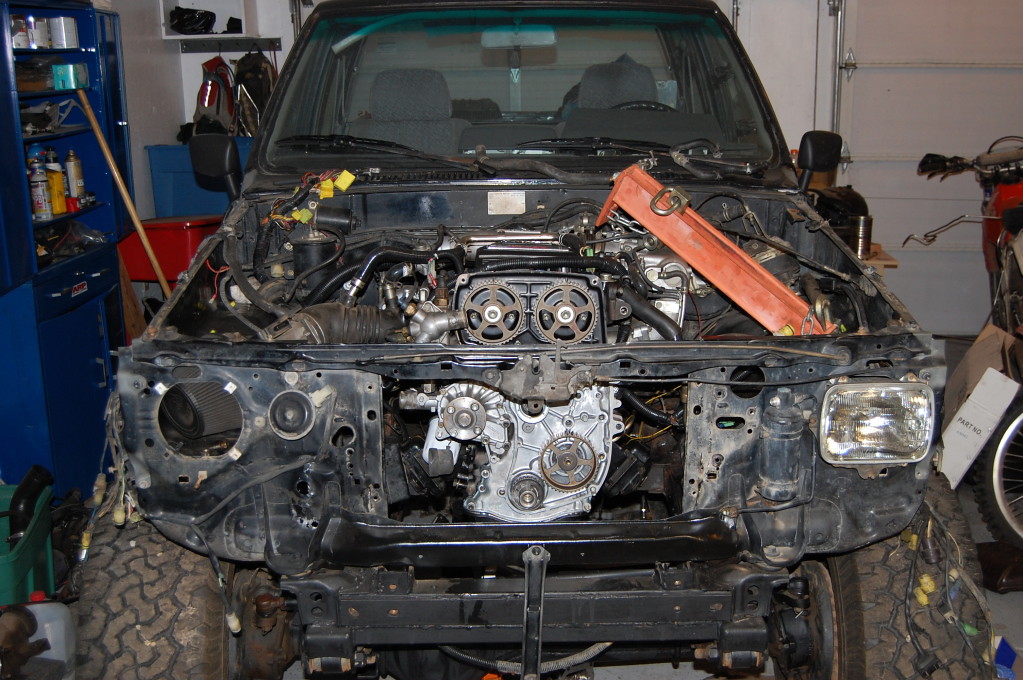
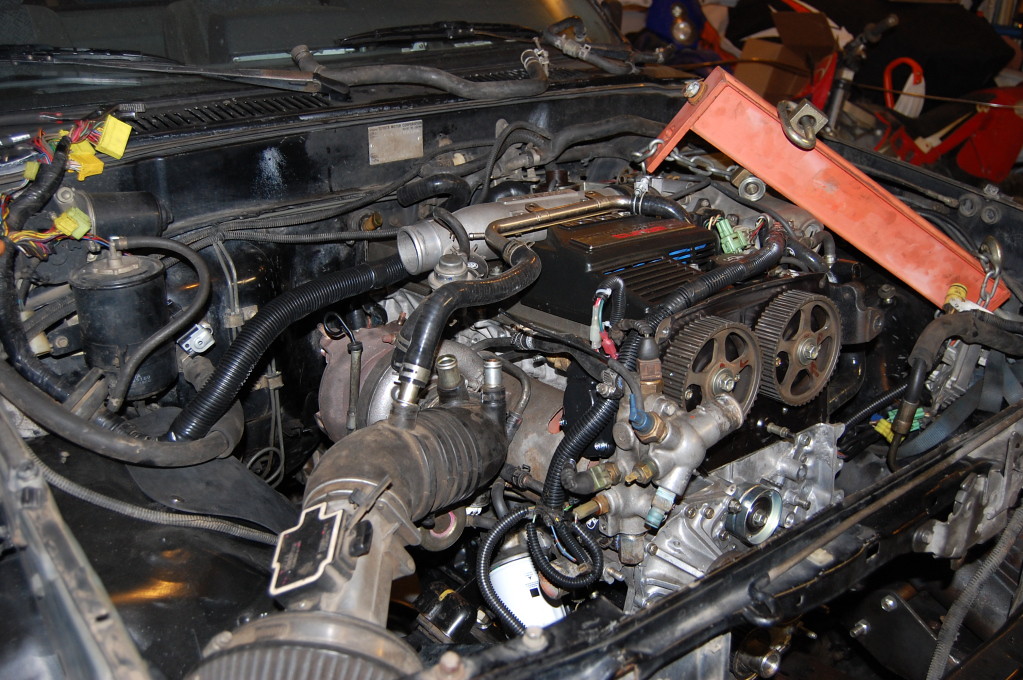
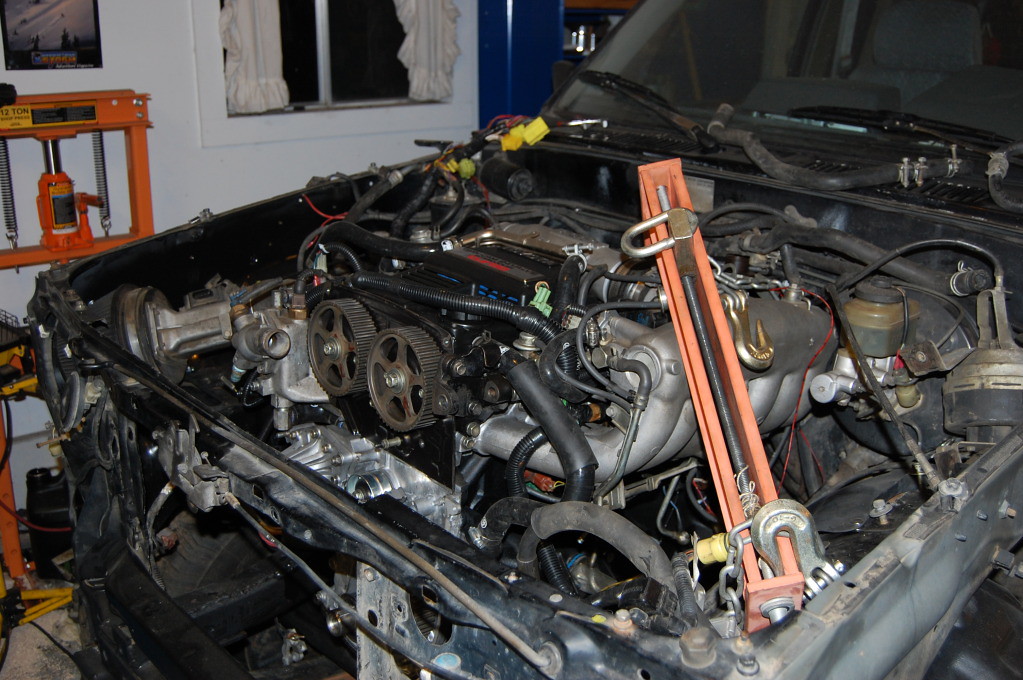
Also got my new 3" turbo elbow/down pipe combo. You can't really tell from the pictures, but this thing looks massive compared to the stock down pipe, and just silly big in the mini truck engine bay.
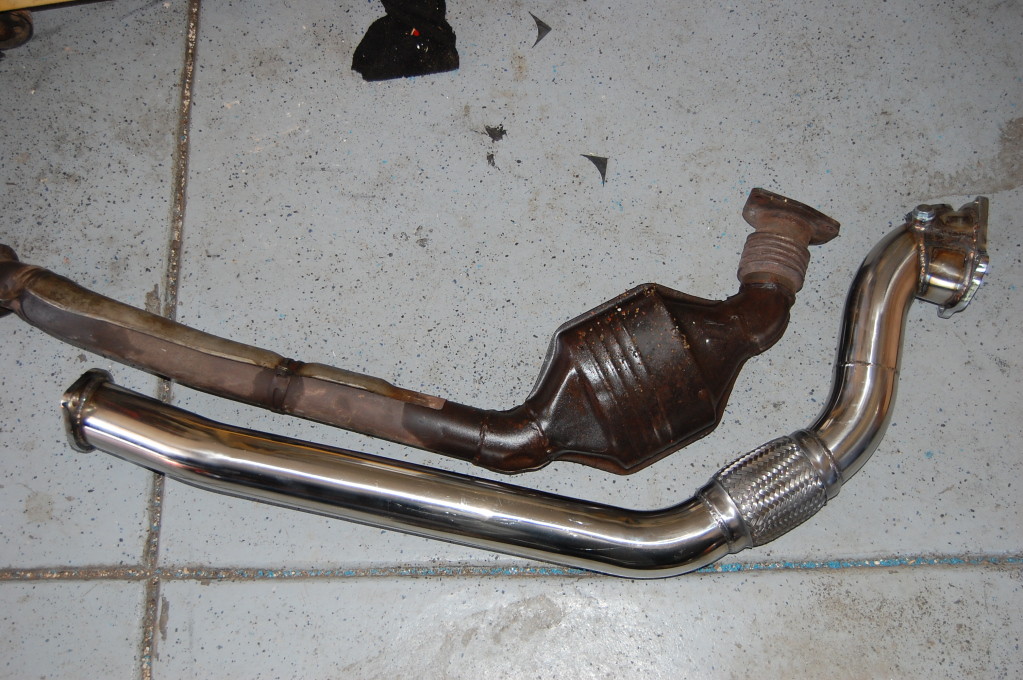
Test Fit!! Its definitely going to require some "tasteful bashing", but otherwise it fits. It will be coming back out so I can work on moving the radiator further forward and get my new fuel lines mounted.
Also got my new 3" turbo elbow/down pipe combo. You can't really tell from the pictures, but this thing looks massive compared to the stock down pipe, and just silly big in the mini truck engine bay.
Last edited by egesledder; 07-12-2017 at 12:03 PM.
08-13-2012, 07:09 AM
#13
Registered User
Thread Starter
Join Date: Aug 2008
Location: Boulder, CO
Posts: 145
Likes: 0
Received 0 Likes
on
0 Posts
Update:
New stainless fuel lines haven been bent and fitted for the feed and return lines. I routed them up the driver side to keep them as far from the exhaust as possible. I also took the factory heat shielding from both the truck and supra and modified them to fit under the passenger side floor to keep some of the heat out of the cab.
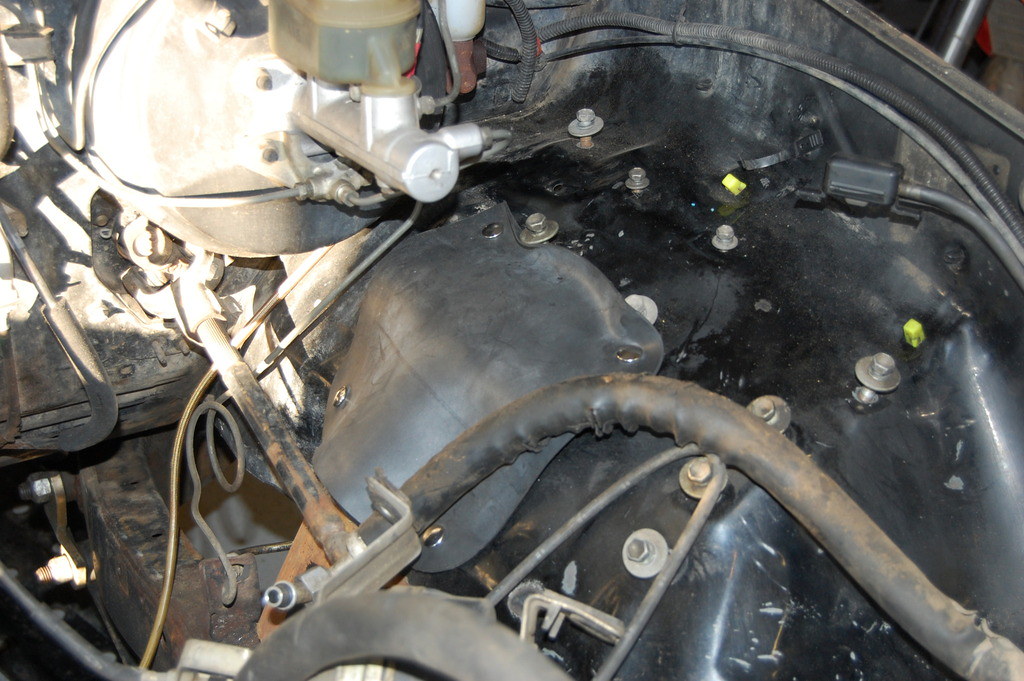
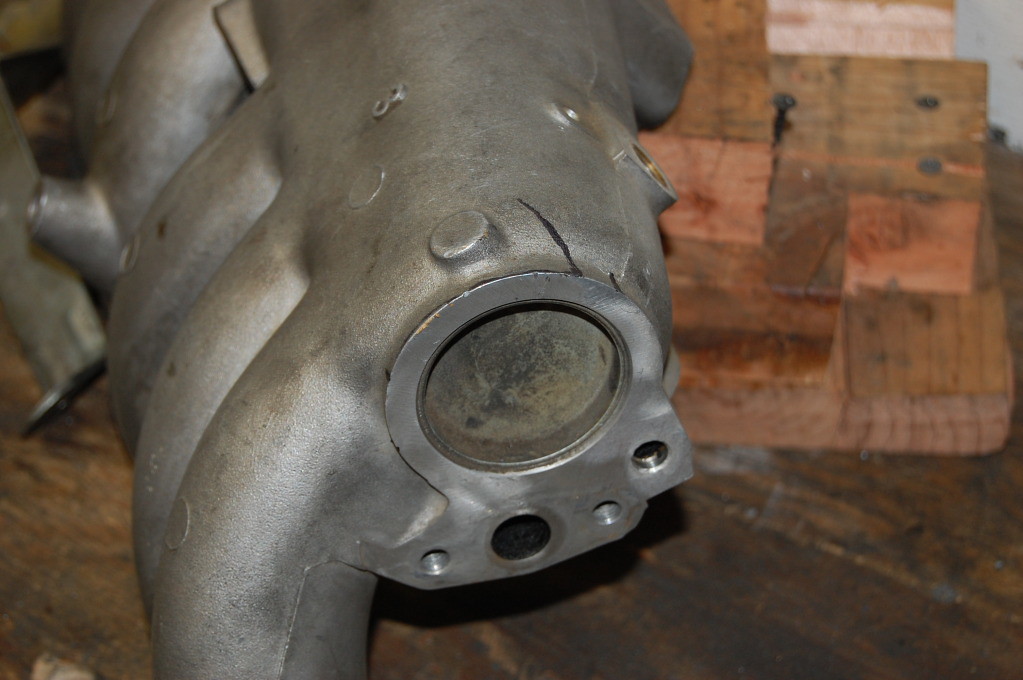
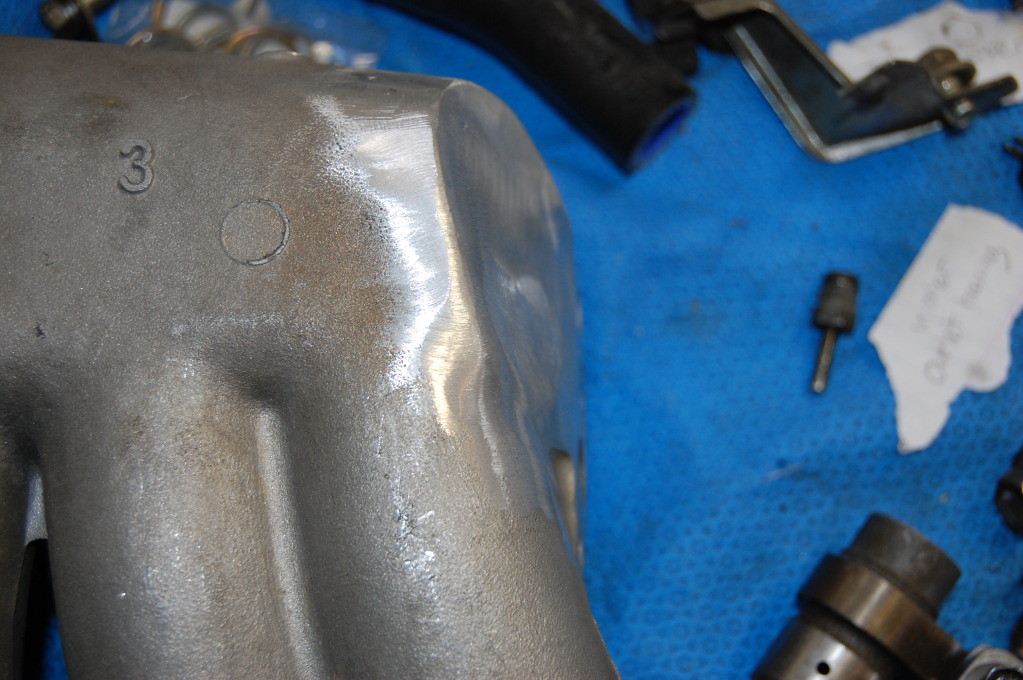
After test fitting the engine, it was obvious that the brake booster was going to hit the intake manifold. I've got a large dual diaphragm booster in there from a newer 4runner and I really like the way my brakes work currently, so I didn't want to compromise that in any way. I also want to be able to easily replace the booster in the future without having to modify it if it goes bad. Looking at the manifold, most of the material that was contacting the booster was just there more for the casting process than for fluid flow through the manifold. I decided to cut and re-weld the manifold back a little bit. I was able to do this without impeding and airflow into the intake runner and it actually turned out really well. I think it will also help if I ever need to take the manifold off while its still in the truck.
Before cutting:
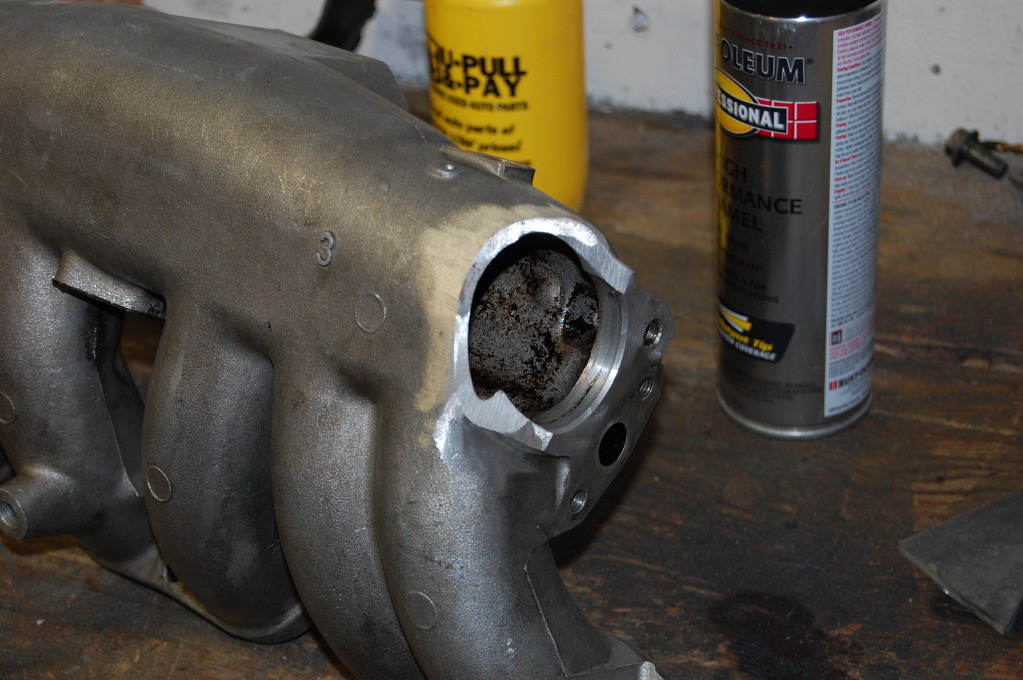
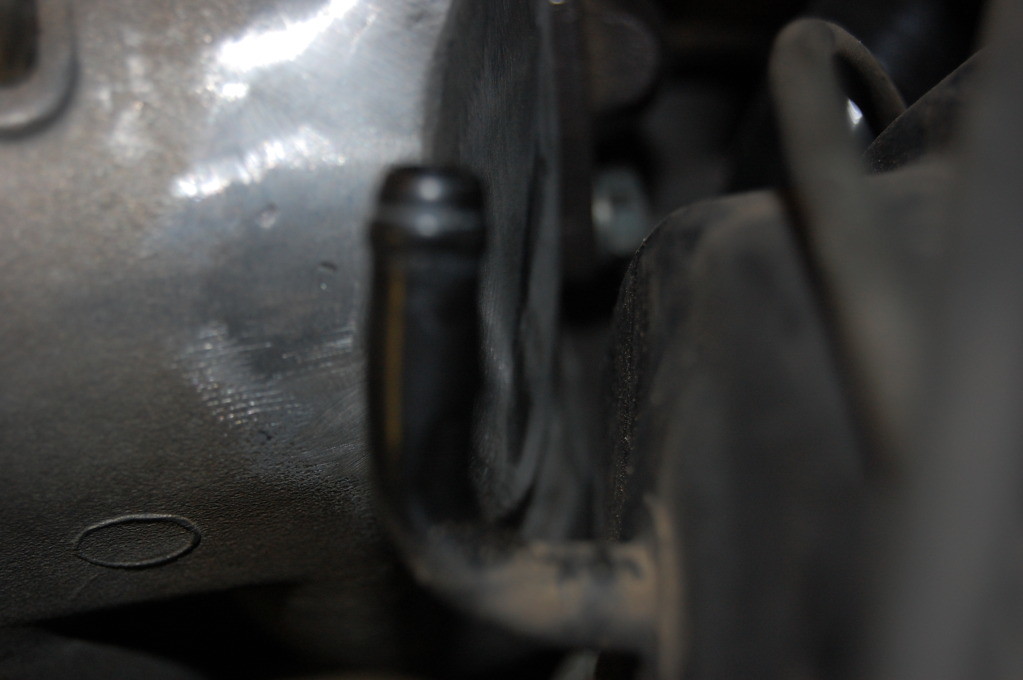
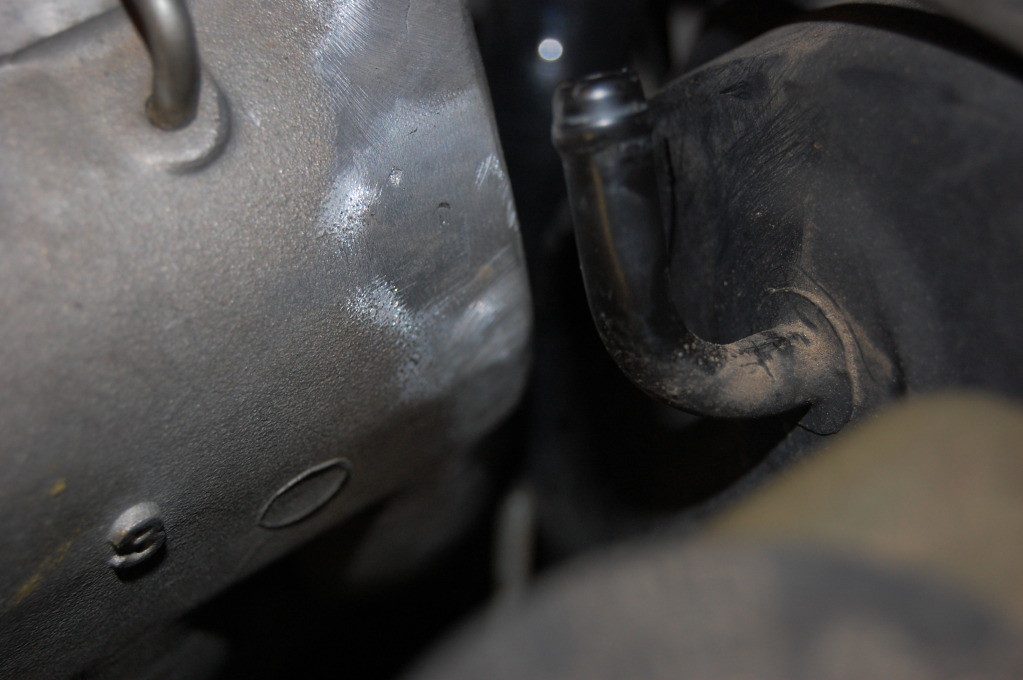
Cut:
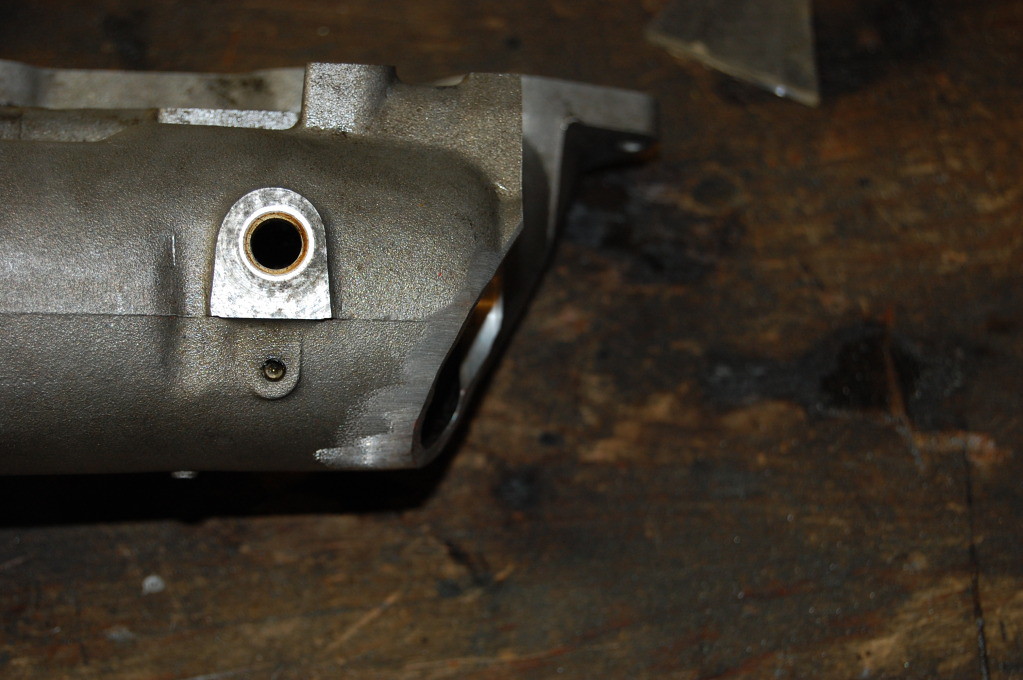
Welded:
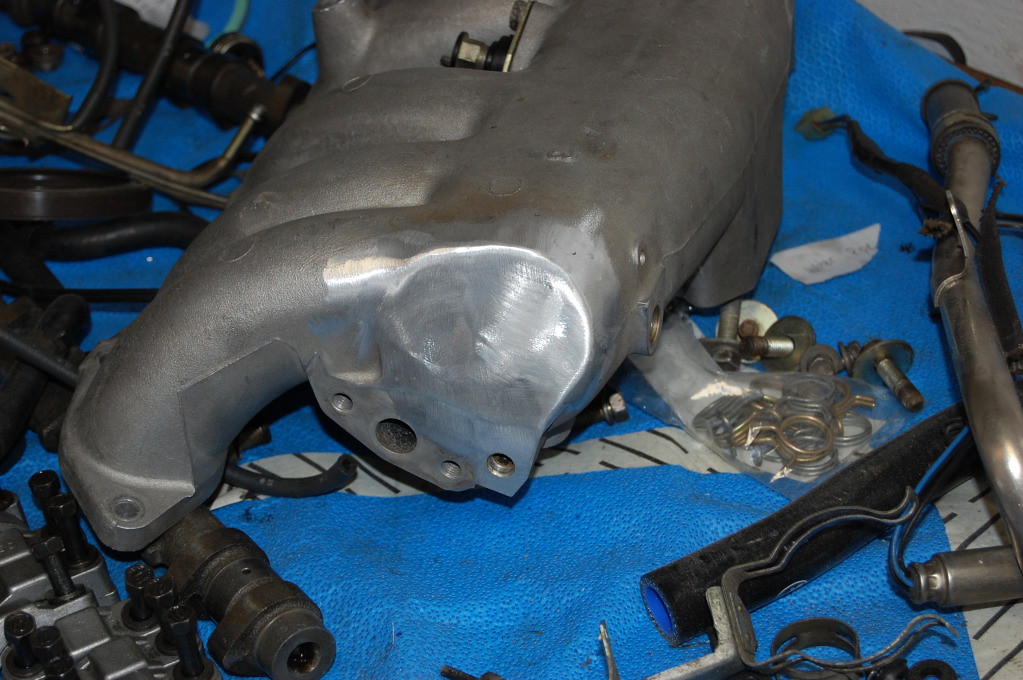
Fit:

The motor is in permanently now, so I'll be working on wiring/cooling/intercooling now. I'll be making a short conversion harness out of supra and truck plugs so I won't have to solder a ton of wires while under the dash and it will be more of a "plug and play" operation. Almost there!
New stainless fuel lines haven been bent and fitted for the feed and return lines. I routed them up the driver side to keep them as far from the exhaust as possible. I also took the factory heat shielding from both the truck and supra and modified them to fit under the passenger side floor to keep some of the heat out of the cab.
After test fitting the engine, it was obvious that the brake booster was going to hit the intake manifold. I've got a large dual diaphragm booster in there from a newer 4runner and I really like the way my brakes work currently, so I didn't want to compromise that in any way. I also want to be able to easily replace the booster in the future without having to modify it if it goes bad. Looking at the manifold, most of the material that was contacting the booster was just there more for the casting process than for fluid flow through the manifold. I decided to cut and re-weld the manifold back a little bit. I was able to do this without impeding and airflow into the intake runner and it actually turned out really well. I think it will also help if I ever need to take the manifold off while its still in the truck.
Before cutting:
Cut:
Welded:
Fit:
The motor is in permanently now, so I'll be working on wiring/cooling/intercooling now. I'll be making a short conversion harness out of supra and truck plugs so I won't have to solder a ton of wires while under the dash and it will be more of a "plug and play" operation. Almost there!
Last edited by egesledder; 07-14-2017 at 07:40 AM.
08-14-2012, 06:26 AM
#15
Registered User
Thread Starter
Join Date: Aug 2008
Location: Boulder, CO
Posts: 145
Likes: 0
Received 0 Likes
on
0 Posts
It is an ebay special. Quality of the hoses themselves seems to be pretty good. They have pretty thick walls and seem tough. The fitment on the smaller hoses is poor at best though. I was able to make them all work though. For $180 shipped for 21 preformed silicone hoses, its hard to complain. Most places sell just the 2 radiator hoses for $80-$100.
Picture of the hoses next to the ones they will replace:
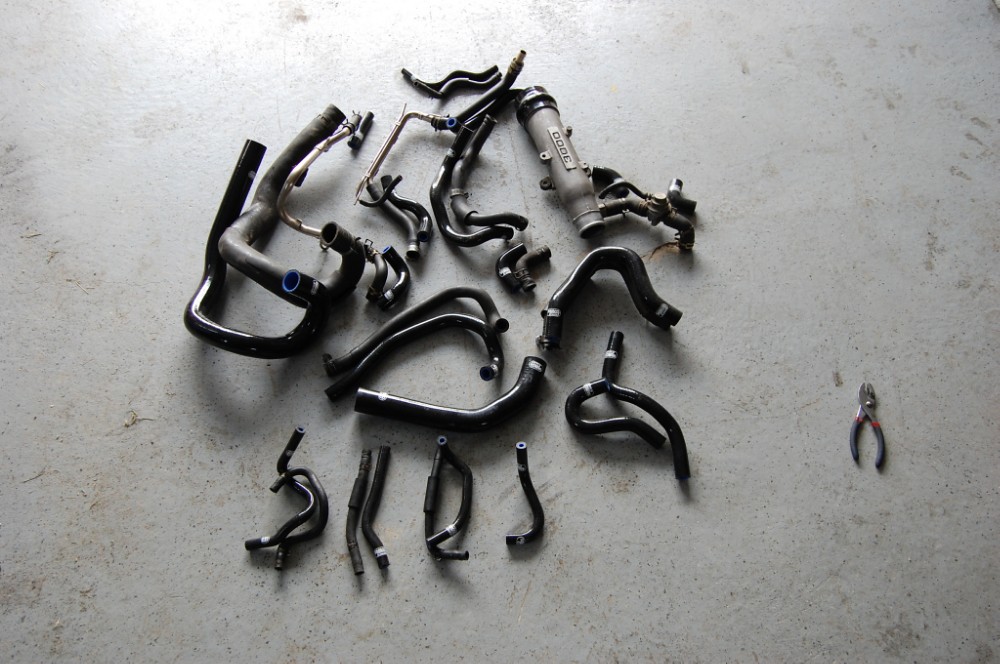
I kind of think they could have modeled the smaller hoses off of a N/A 7mge and sold them saying they were for a turbo, but I don't have a way to find out. You can see how badly some of the smaller hoses fit:

Picture of the hoses next to the ones they will replace:
I kind of think they could have modeled the smaller hoses off of a N/A 7mge and sold them saying they were for a turbo, but I don't have a way to find out. You can see how badly some of the smaller hoses fit:
Last edited by egesledder; 07-14-2017 at 07:41 AM.
09-06-2012, 11:12 AM
#16
Registered User
Join Date: Jul 2012
Location: SC
Posts: 53
Likes: 0
Received 0 Likes
on
0 Posts
Amazing thread. Subscribed! I just picked up an 89 Supra with the 7m-gte in it and really appreciate the great info and all the detailed pics. Keep em coming. Awesome build! So is she up and running yet? Any more updates? Two big thumbs up! 
Last edited by Rinker; 09-06-2012 at 11:17 AM.
09-06-2012, 01:02 PM
#18
Registered User
Thread Starter
Join Date: Aug 2008
Location: Boulder, CO
Posts: 145
Likes: 0
Received 0 Likes
on
0 Posts
I'll have a picture update here soon. I've been working on it pretty much every day since my last update. Wiring has been completed, radiator/fan combo sorted and mounted/wired, A/C condenser mounted, power steering lines temporarily mounted, fuel lines/filter completed.
I'll be finishing the intercooler and plumbing in the next few days and I'm hoping to have it running and driving by next week. It won't be complete by any means, but running and driving.
These things just take a while when you do them all yourself...
I'm so close now I can almost hear the boost!
09-07-2012, 12:03 PM
#19
Registered User
Join Date: Jul 2012
Location: SC
Posts: 53
Likes: 0
Received 0 Likes
on
0 Posts
Excellent! All good things to those who wait egesledder and this one is going to be REALLY GOOD! I know it's been covered several times and I've read a ton of stuff on this swap over at supercharged.com but let us know what were the most difficult areas of this surgery and any pit tips as well. Thanks in advance and good luck with wrapping her up!


