When you click on links to various merchants on this site and make a purchase, this can result in this site earning a commission. Affiliate programs and affiliations include, but are not limited to, the eBay Partner Network.
MODS: can you change my title to 3vze instead of 3vz3? Thanks!
So, Prior to doing my swap i thought i had a straight forward swap on my hands, turns out there are two different 7mgte swaps. one is 22re --> 7mgte and 3vze --> 7mgte...one of these is easy, the other is not. This information was not abundantly clear to me prior to buying my truck. Thus i figured i would make this post that hopefully will come up in future searches for people like me.
22re --> 7mgte is much easier as you can bolt up to the W58 transmission easily. I'm pretty sure all you need is the 7mge bell housing and clutch. Engine mounts from 5mge and it fits (dont quote me on that). Anyway, it is not a lot of modification and works fine but the w58 transmission and 7mge clutch really have their work cut out for them with the 7mgte power and reading threads it sounds that poor w58 doesnt last too long in these conditions. This is as far as i go talking about this swap. keep searching if you want more info on this swap.
3vze-->7mgte
Why am i doing this swap? Well...I wanted a transmission that i can count on. I also am not into off roading, mudding, or rock crawling. Just logging roads if i go off road. I also need a good reliable truck that gets good mileage, cheap and easy to work on, and fun to drive. I also will need to tow with this truck. This swap should get you in the high teens to low 20's gas mileage. I also have heard that this truck is as fast, or faster, than WRX STI's...if that is your thing...lol. I have ridden in a truck with this swap..and it is ˟˟˟˟˟ING FAST.
The 3vze runs an R150f transmission. It is basically a replica of the R154 transmission that is normally placed behind the 7mgte in 1986-1992 Supras. Notable differences is the input shaft, output shaft, and gear ratios. Also the speedometer gear is on the output shaft on R154 where it is on the transfer case on R150f. The 7mgte bell housing (r154) will bolt up to the 3vze (r150f) transmission. However, the input shaft is too short. This can be remedied a couple different ways. Buy a modified 7mgte bell housing. I'm told they exist, they are cut in half to remove i think an inch and a half. I do not know what clutch you use in these situations. OR you can pull the transmission apart using a press and put the gearing of the R154 and input shaft into the R150f transmission with R150f output shaft. There is a third option i have heard of and it involves a Jeep transmission input shaft which keeps the R150f gearing. Another option is the 22re turbo transmission from i think 1985-1986 which is the R151. Good luck finding that. Last, you can do a post 1996 Tacoma transmission, still called R150f. However, you need the transfer case with that transmission and will need a new front differential as the front axle goes down the driver side instead of passenger.
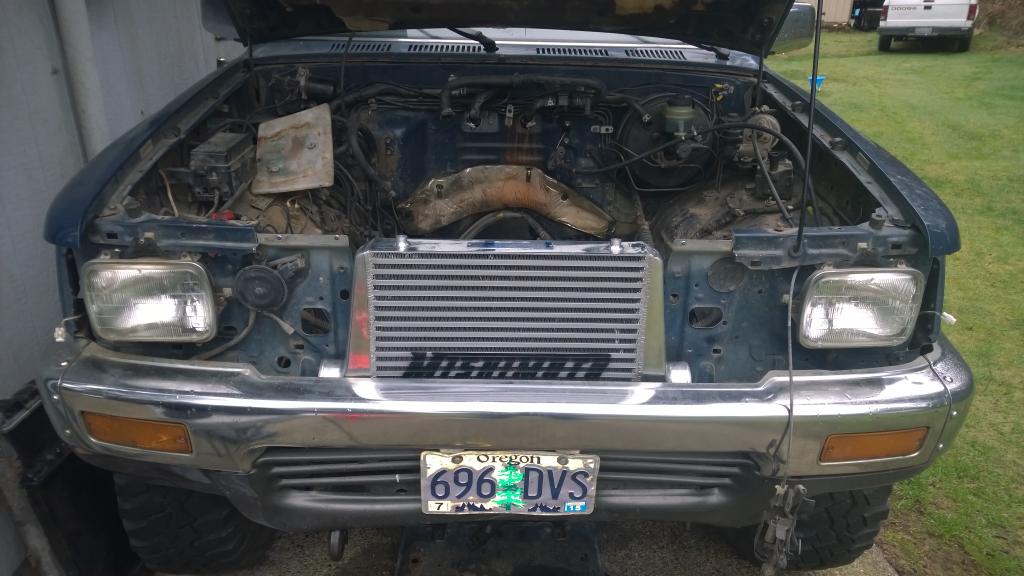
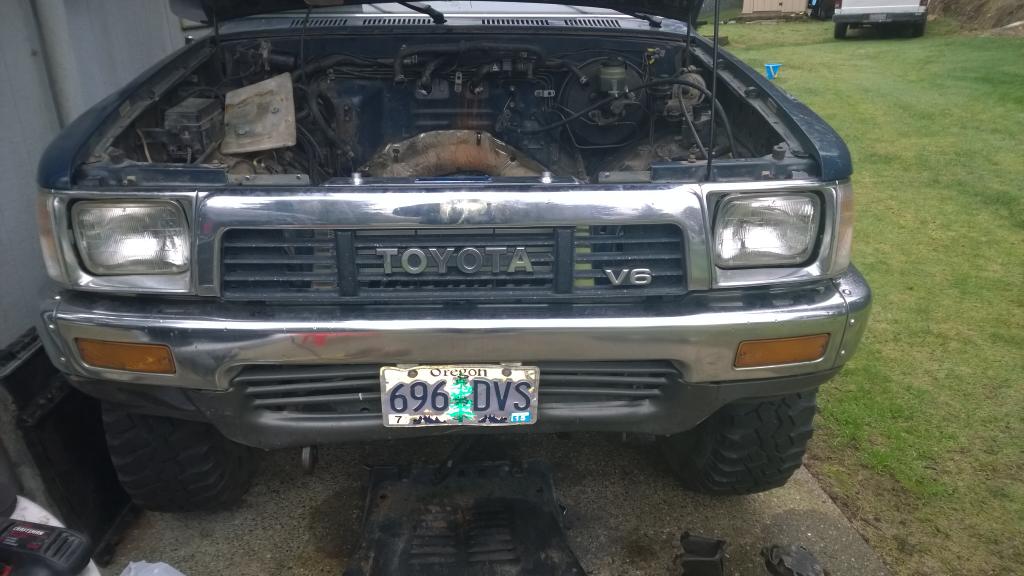
OK...we got the transmission figured out. next...the 7mgte, being an I6 engine, is a fair bit longer than the 3vze (and 22re). The simple fix is to just bolt it in and modify the radiator area to accommodate the front of the engine. This often results in the front grill being cut and also presents clearance issues with the hood, requiring a body lift of an inch or two. I understand it is possible to use the stock engine mounts or the 5mge mounts to bolt the engine in place (don't quote me on that). The alternative is to make your own engine mounts! If you go through the trouble of doing a 3vze swap, you are probably going this route...Making engine mounts allows the engine to sit further back in the engine bay thus keeping your truck looking like a stock slow ass 3vze. It also pushes your transmission back a few inches. GUESS WHAT! now you need to cut out the floor of your cab to accommodate the new gear shift location. YOU ALSO get to have your drive lines re-sized! such fun. And your transmission needs a mount built. I am just going to weld a 1/"4 plate with supporting bracing that extends back from the stock mount. Lastly, your 7mgte has a massive intake...your brake booster takes up some of that precious space at the rear of your engine compartment. It has to get bashed in a little, or cut a corner of your intake. (I am going bashing route). I said lastly, but i was wrong..you have to modify your oil pan and oil intake to fit around the front differential, there are no rear sump 7mgte oil pans. there might be front sump but i wasn't able to confirm that.
Now, at this point, the engine and transmission are in your truck. If you go the R154 internals in the R150f transmission, custom engine mounts, custom drive lines, custom transmission mount, modified oil pan and brake booster, keep reading cause that is the route i went. If you have differed at some point, this post is probably going to be less and less relevant to you.
Now, some of this you will want to do before getting the engine in the truck.
You need the supra throttle cable, do this before putting the engine in. It is quite easy and dont fret. Run fuel lines as the fuel lines on 7mgte are on driver side while 3vze is passenger. Run clutch hydraulic line. Put supra engine management parts in the engine bay. You will have to put the battery on the driver side. 7mgte intake for TURBO is right where the battery for 3vze sits. Figure out where to put ECU and read up on how to wire it to work for the engine and truck (I have done some research and this part actually sounds pretty easy and uncomplicated). Get a radiator fan set up, use the truck radiator, universal radiator hoses as the truck radiator doesnt match up with the 7mgte hoses.
Make a new exhaust. You will need to make it from the turbo on back. I am not here yet but i will order prebent 3" pipe. On a regular cab truck you pretty much have to run the exhaust under the transmission and out the driver side. I am going to attempt to run mine out the passenger side just prior to the gas tank. Since i have an Xcab I have a lot more room to make this work.
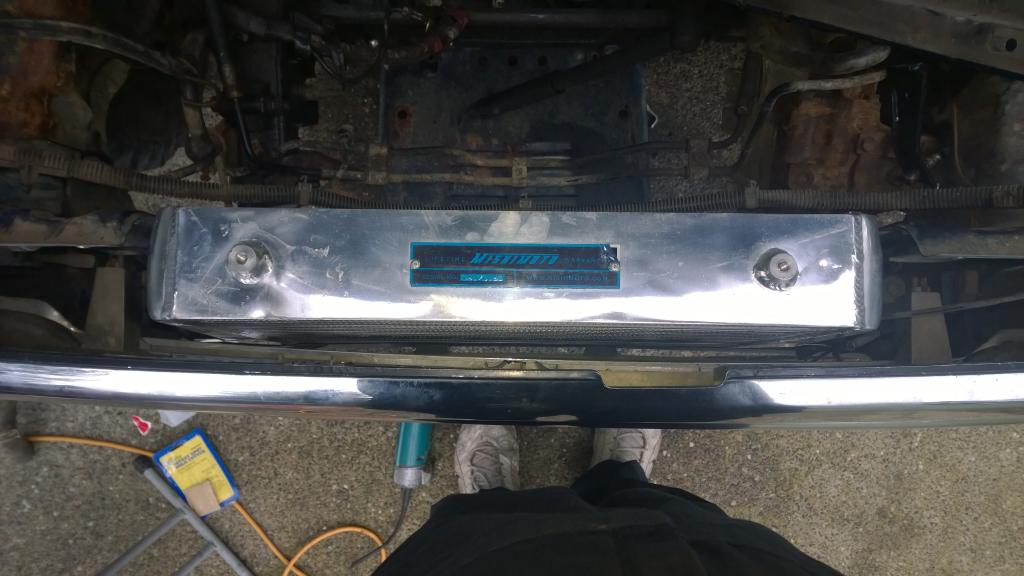
Intercooler can be done a lot of different ways. I am doing front mount, in front of the radiator but behind the grill.
I will be adding to this as i get farther in my build. You can find that build by checking out my signature.
Thanks! Hope this helps!
one last thing, GET A COMPLETE DONOR CAR FOR THIS. Just do it. it makes no logical sense to try and do this swap without a donor car. you will make good money on parts you wont use or need. ALSO, you can put the Limited slip differential from the supra (turbo supras only, not the 7mge ones) into your differential.
Cool swap. I've been down this road before so feel free to ask any questions as you're going through the build.
Also, I'm running the post '96 Taco transmission with an adapter to my stock transfer case, so you don't HAVE to run the tacoma transfer case if you go that route.
Also also, it won't ever be as fast as a stock wrx sti unless you dump way too much money into the motor, turbo, fuel controller, axles, etc, etc. However, with a stock setup, it will be the fastest toyota truck around by far.
Thanks!
I already read your thread and was very inspiring. My buddy did put a lot of money in his engine, I think it will run forever. His truck is also standard cab so it weighs a bit less. I dont actually think my truck will be as fast as a 2015 WRX sti but it will haul ass, and garbage to the dump every month!
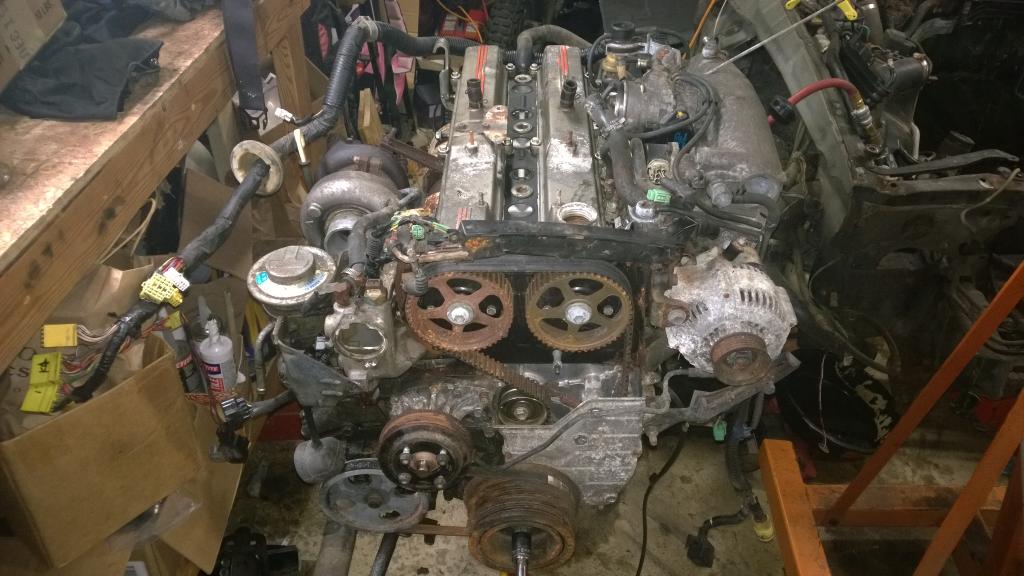
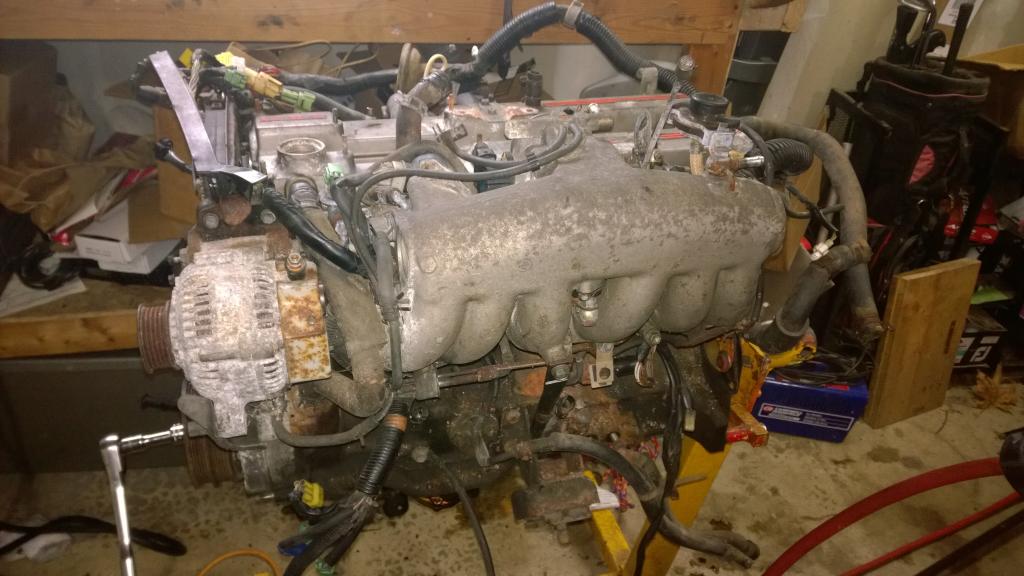
Your wiring harness looks nice and it looks like all your sensors are there. What's the plan with the motor?
Since you have it out and on a stand, I'd go ahead and put a new oem headgasket in maybe some head studs as well. With the known headgasket issues these motors have and the fact that the head is near impossible to remove once the motor is in the truck, its probably a good idea.
I also removed the egr stuff on mine. My egr valve touched the firewall when the motor torqued under accel/deccel and worked itself loose, creating a boost leak. Its super crammed in there, so I just decided to remove mine altogether and made a couple block-off plates. Its been running like that for 15k+ miles now.
plan is to put the motor in my truck. Check out my build thread (link in signature). loads more info there. I made this thread to cover just the swap details.
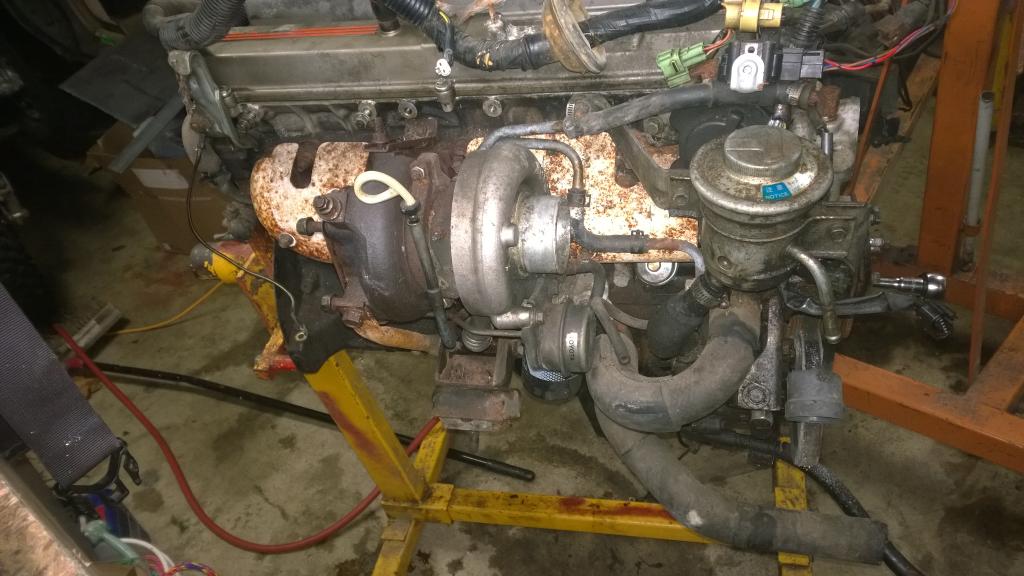
Short answer is, I bought 3 toyota supras in a group buy. This engine came from the wrecked one
and the supra is still in my garage.
Sold the other two supras to get my money back, so i basically ended up with this wrecked supra for free.
So while the engine is complete and i'm told it runs, last started about 3-5 years ago, the crash happened in 1999 or 2000 as that is what the last time the tabs were renewed on the car. Since it was front end collision, the hood was all messed up and this engine was swimming in moisture for 15 years. I have no doubt it will run, but with all the corrosion it has, I am sure gremlins are just waiting to peak out.
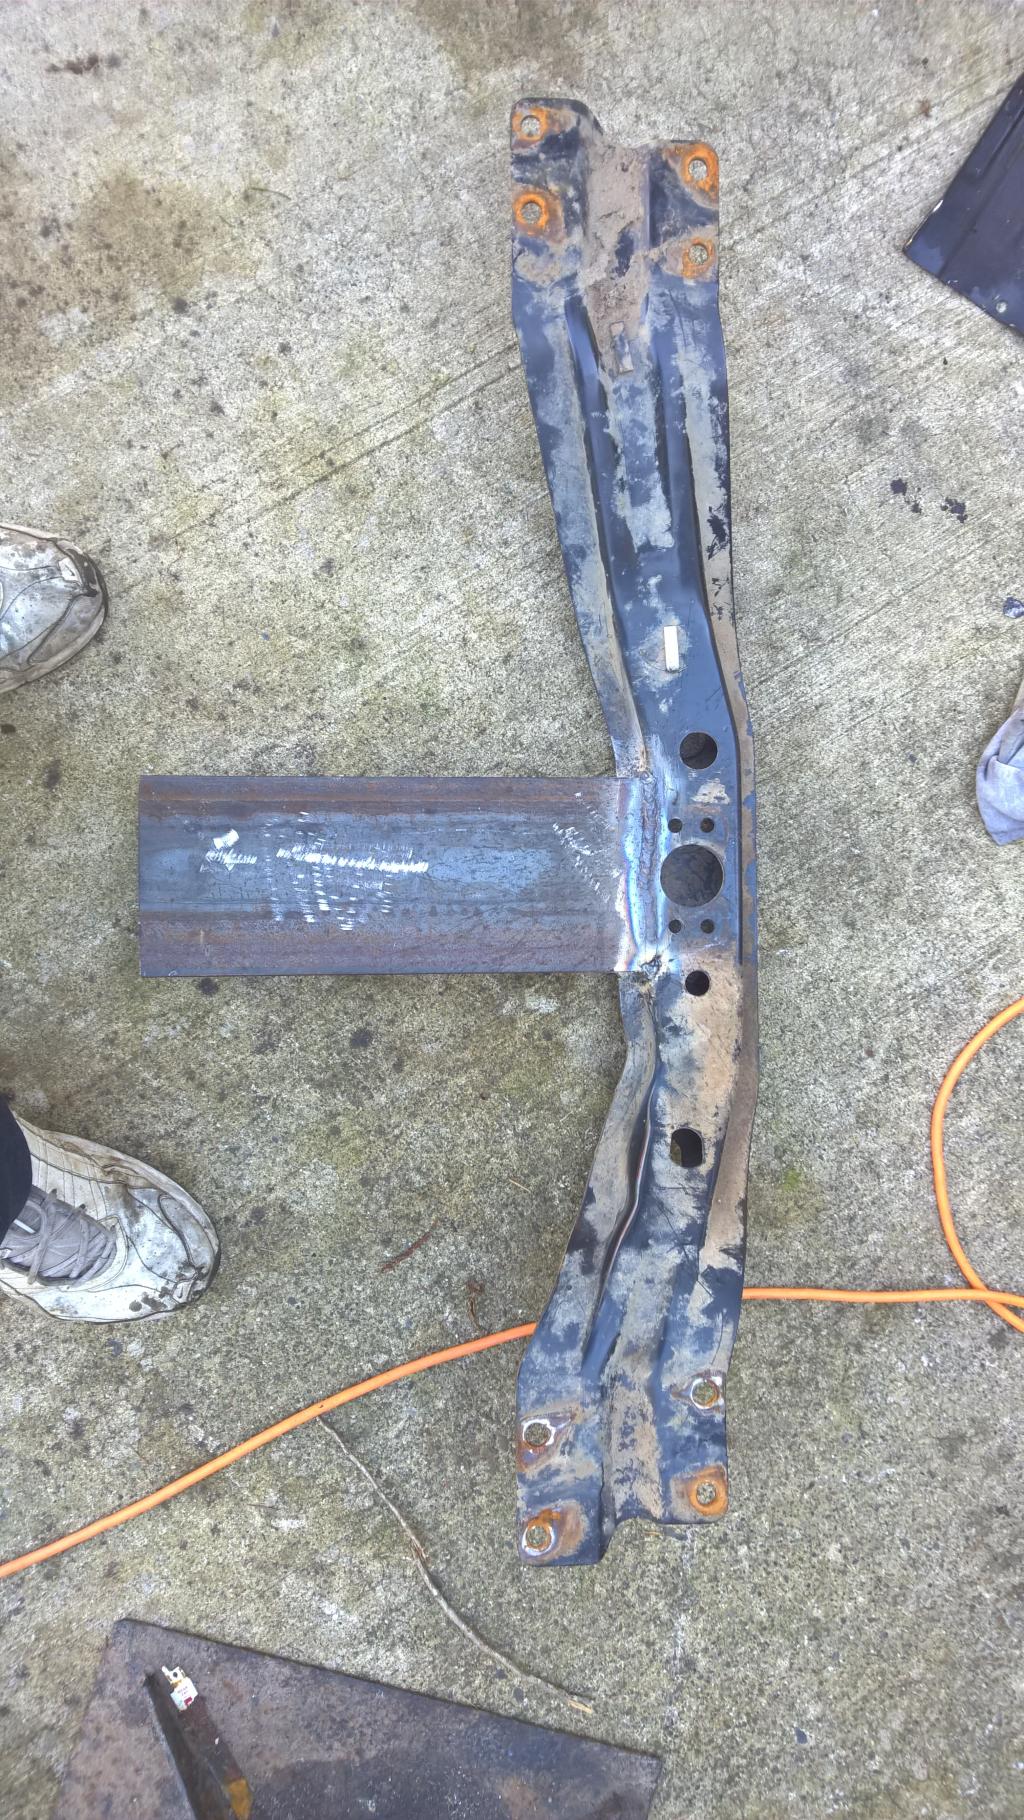
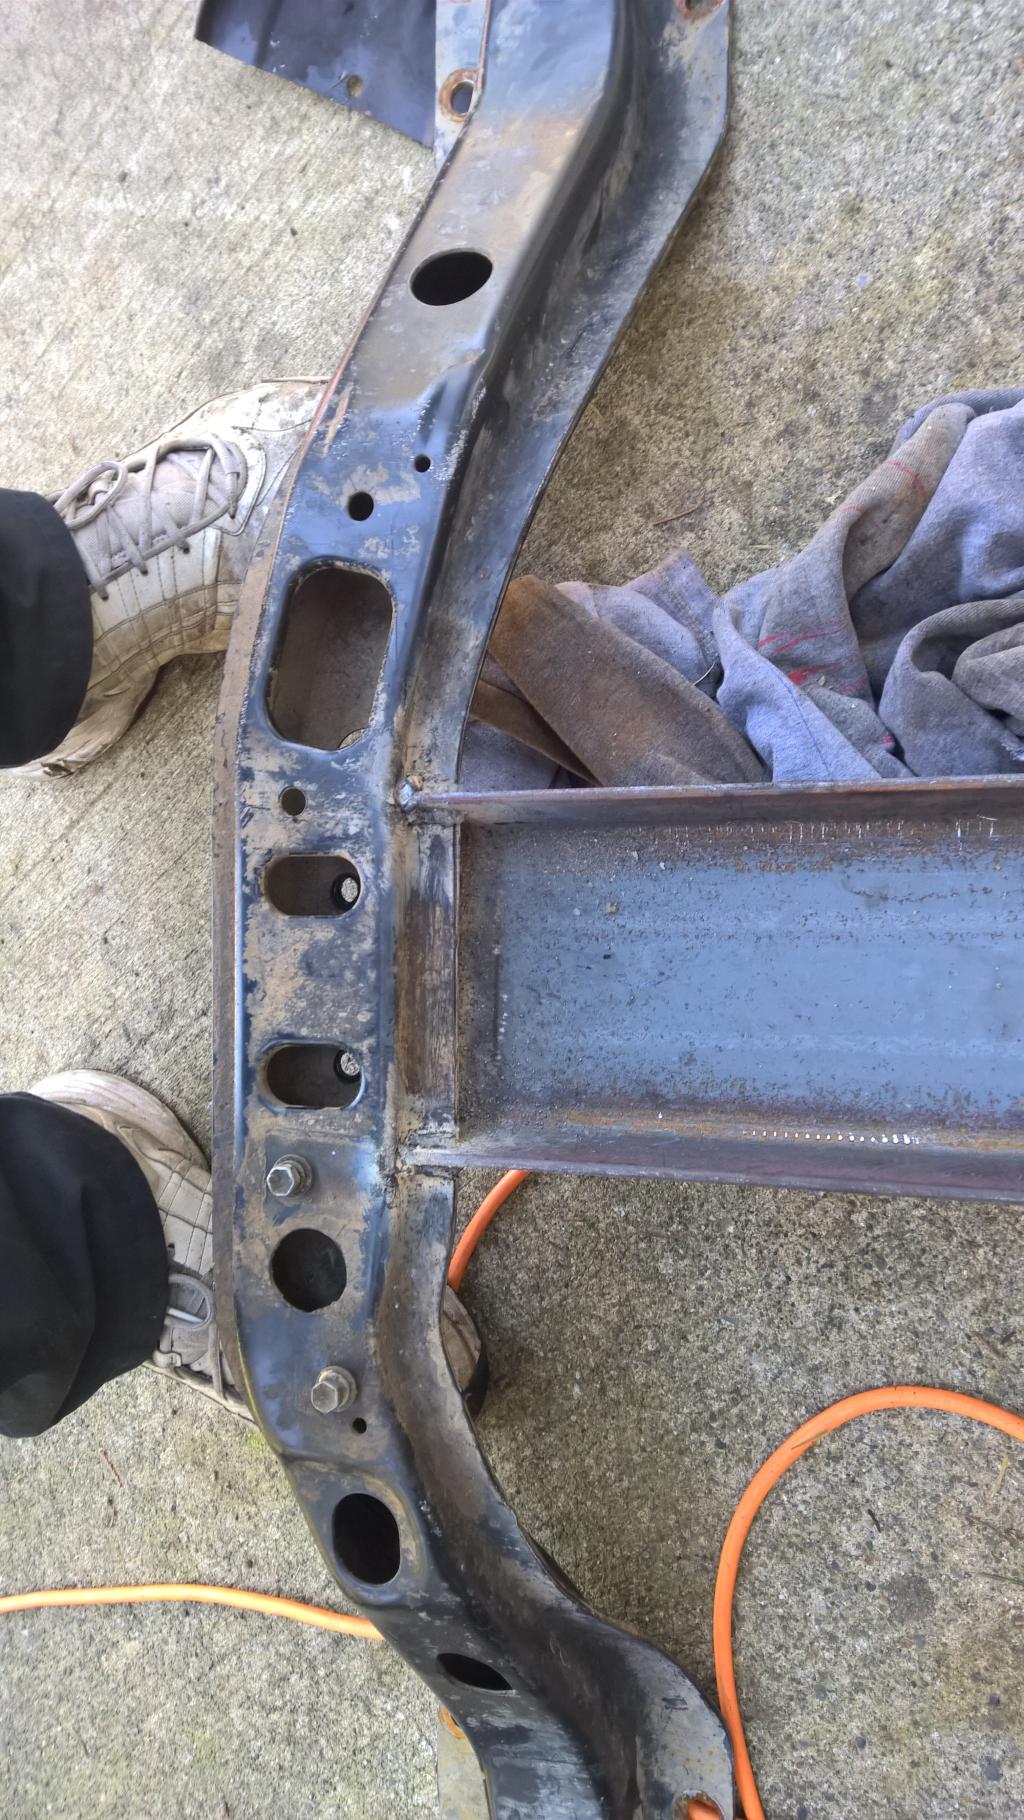
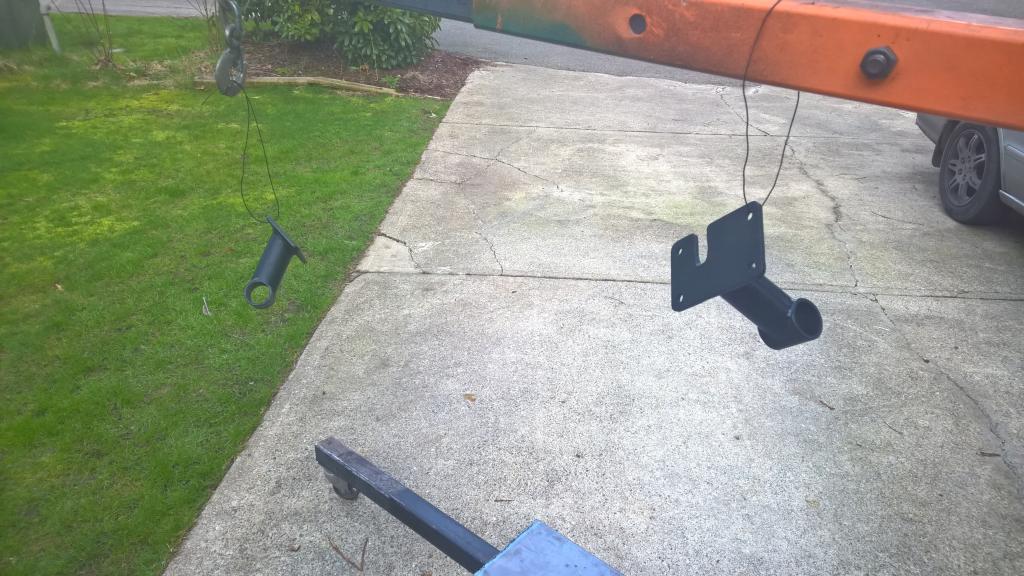
My friend, who has done this exact swap on his truck, figured out all the hard stuff and shortcuts. Most notably, cutting the upper radiator support off and bolt it in place (doesn't actually support the radiator, just easiest way to name it).
Before:
After:
This SIGNIFICANTLY makes working on the engine, removing and installing super easy. This was done by using a $2 spot weld cutter from harbor freight and a cutting disk. I'm told you can remove the engine in as little as an hour to an hour and a half, by yourself with this modification done.
I have not given up entirely on this engine, if it runs really well then i will fix it, like do the timing belt, head gasket, and other cleaning up kind of stuff. Since i removed it from the car, I have all the little parts, sensors, and stuff that i need to do the swap with as little problems as possible.
This is the short version. My build thread has more details on the big picture...
Last edited by wagigknp; 02-11-2015 at 12:13 PM.
Reason: wrong picture linked
Did more work over the 3 day weekend.
Blocked off the EGR system. Straight forward. I just cut some steel and grounded it into place.
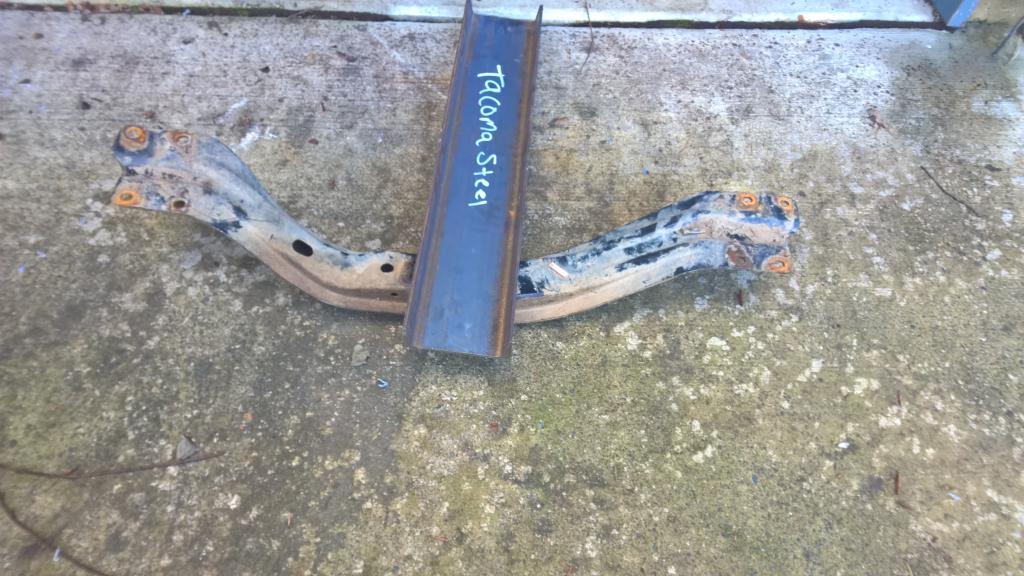
I bought some scrap metal to do my transmission mount and other things.
Ended up going with this piece of U shaped Iron to make my transmission mount.
Pics do the explaining...
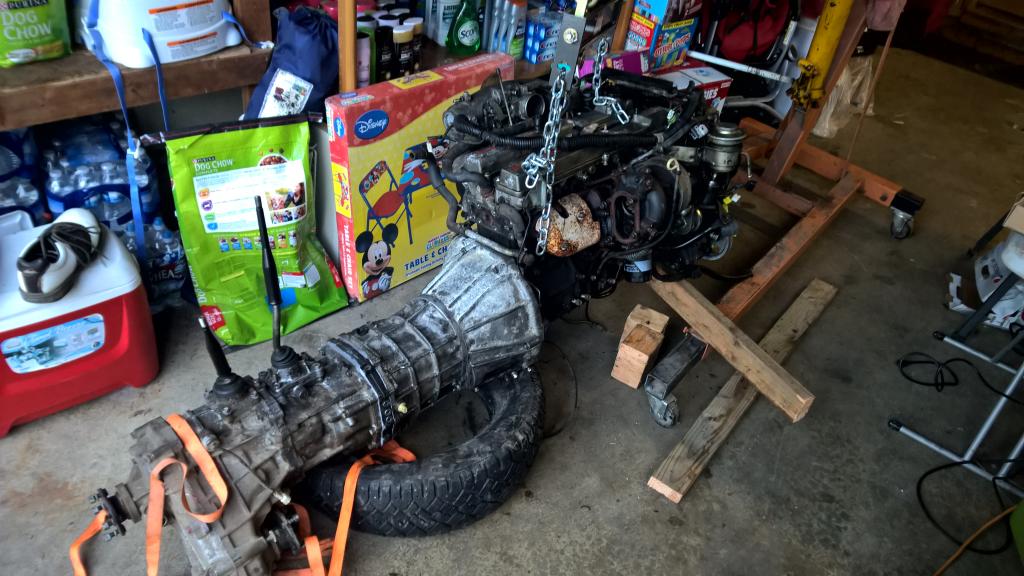
Put the clutch on the engine, used a clutch alignment tool (cheap, like $6) and had no issues.
Dropping engine in the truck
Couple things to note, My friend has made a bar out of 1" square pipe that sits on each frame rail and fits nicely between the crank on #1 across both sides of the block. This puts the engine at the exact height it needs to be. I will take a picture of it when i am done using it. It is shaped like --__--
This allowed us to put a jack under the transmission and set the engine on this bar in the front and we could move it around in there without the engine lift being attached. It made making the engine mounts, Way...Too....easy...
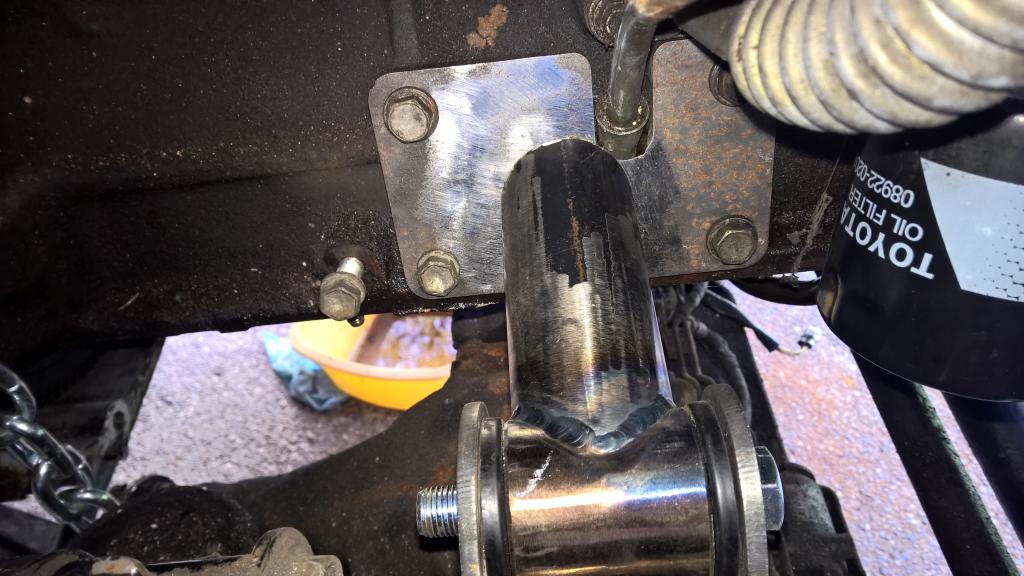
We used the standard pipe and bushing type of mount.
The tabs that we welded to the frame and the mounting plates on the engine were pre cut on his plasma table. (Let me know if anyone wants to order these, I dont think he would mind making a few $$ cutting these out.) The pipe is your standard pipe, Not sure on the size as that was all him. (engine mount bushing part #, ENS-9-9489G) Initially the pipe was almost 12" long, It ended up being like 4.5" on one side and 3.5" on the other. Lots of putting in, taking out, cutting, putting back in, taking out, grind some more, put back in...etc...
Once i got it in, I tacked it to the engine mount plate, then unbolted and removed it and welded it together
Now i have two engine mounts all done that will work perfectly!
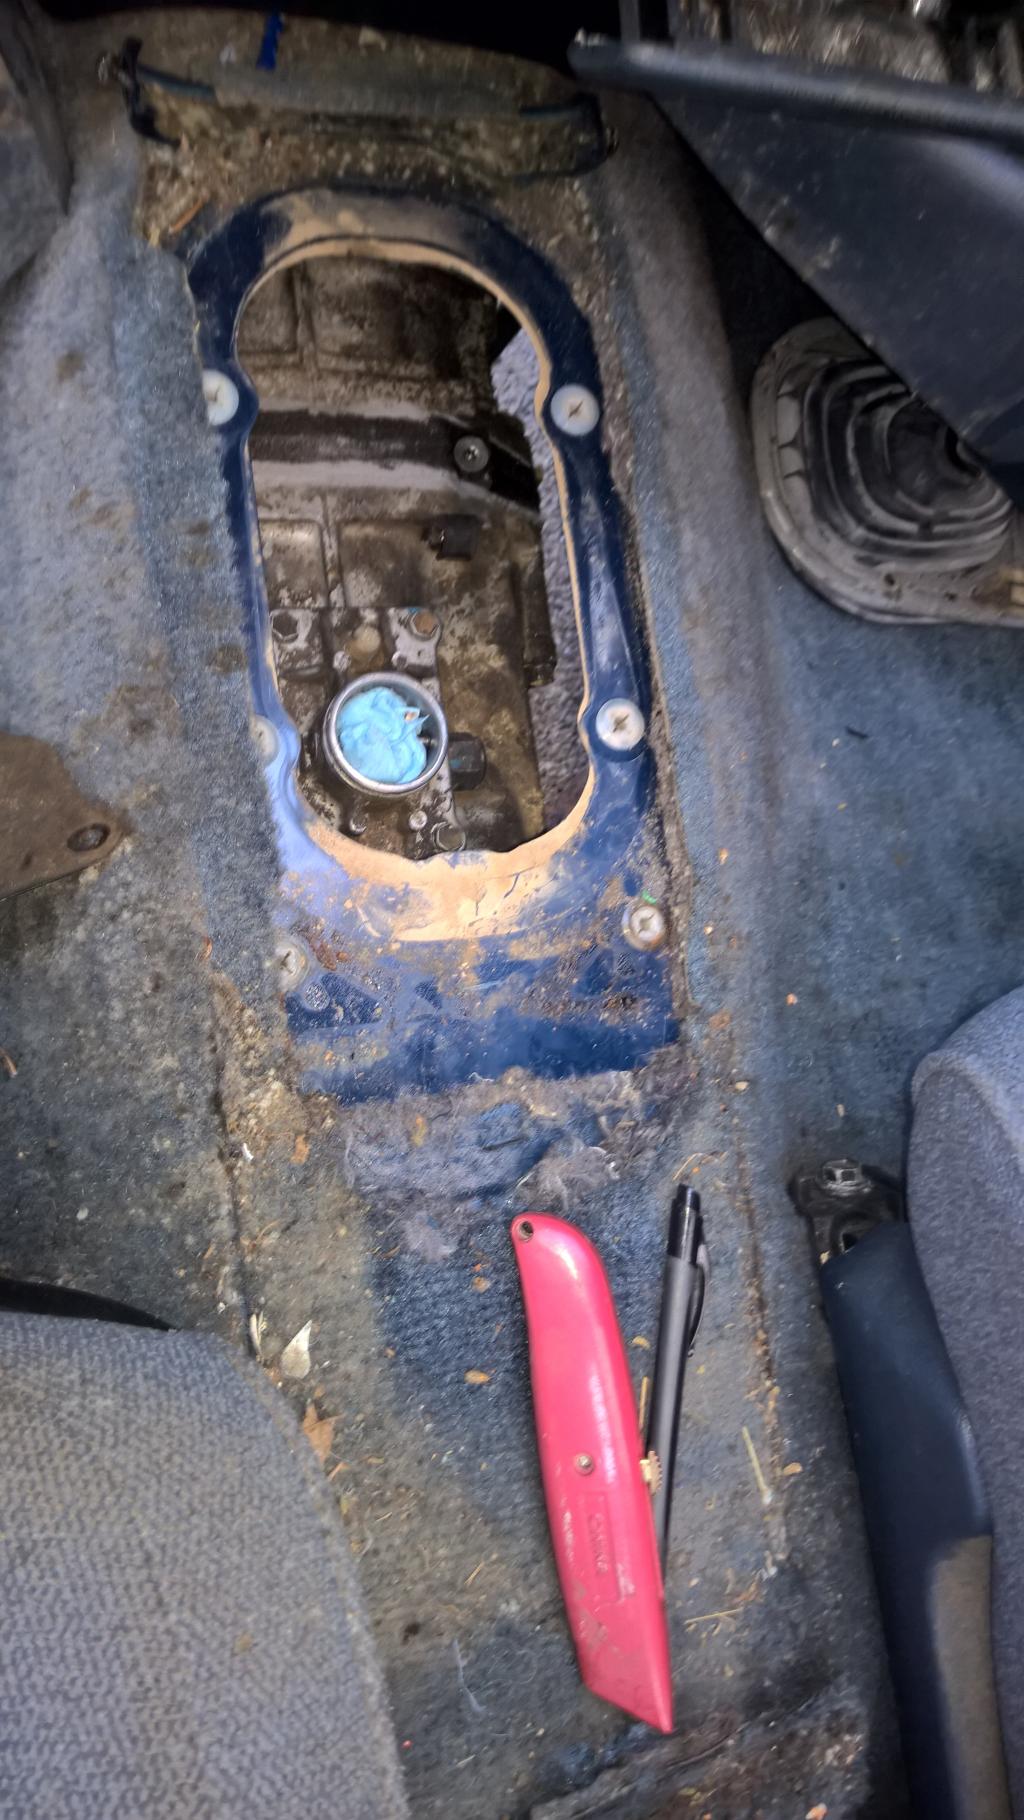
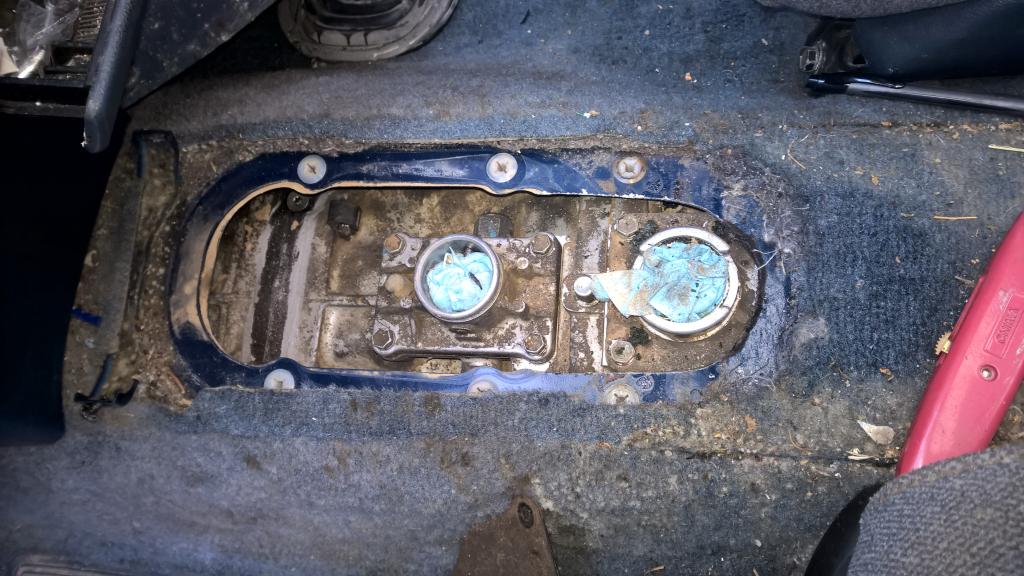
The transmission was pushed back a good 4-6" so this is waht it looked like in the cab.
a quick cut with a sawzall
and ready for action
(Note, we bent the shifter to make it more straight, stock is bent backward a good amount which when pushing the transmission back, would put the shifter at your elbow vicinity, hard to shift like that.)
Biggest pain in the ass was the brake booster - intake manifold clearance. I knew we would need to bash it in, but i did not expect it to be so difficult to hammer in, nor how much was needed. We also ground the intake manifold down as much as we dared to get every last bit of clearance we could. There are a couple brake lines in the way, we just bent one up and one down.
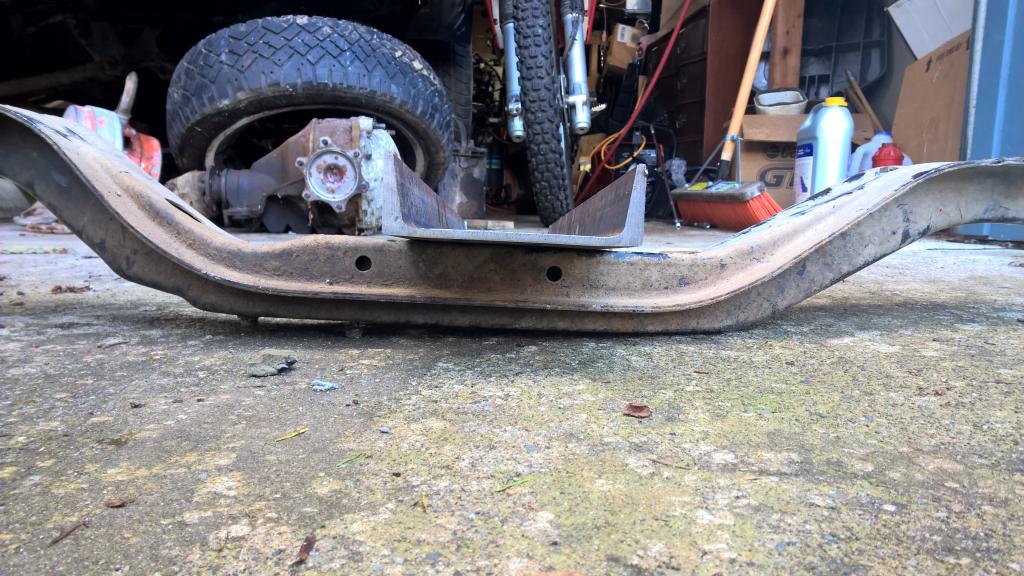
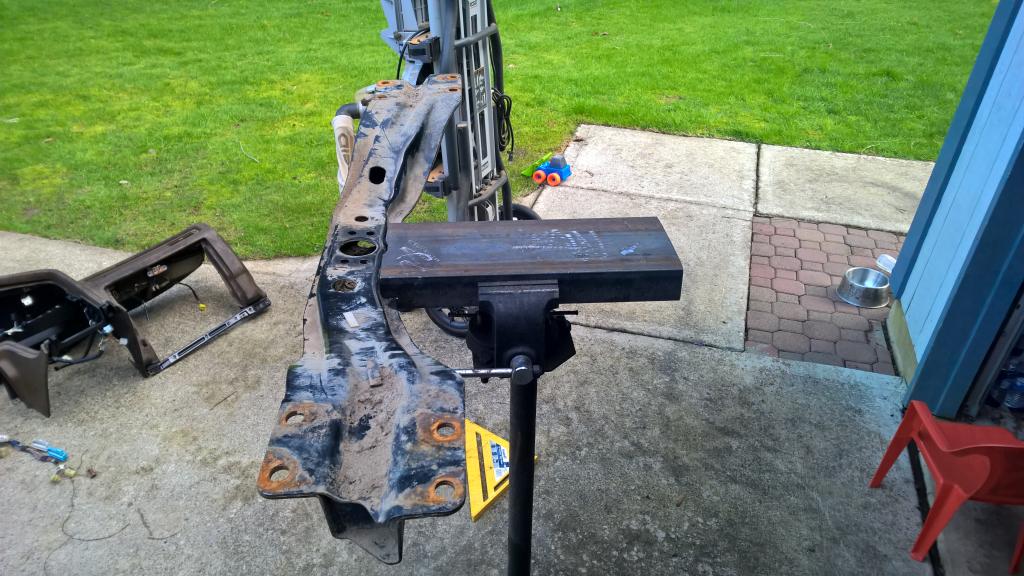
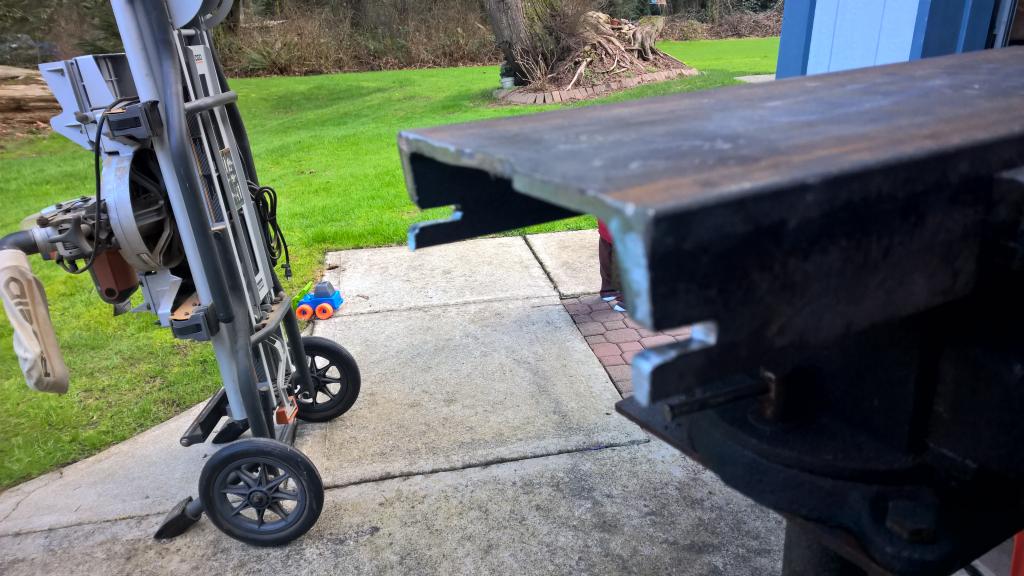
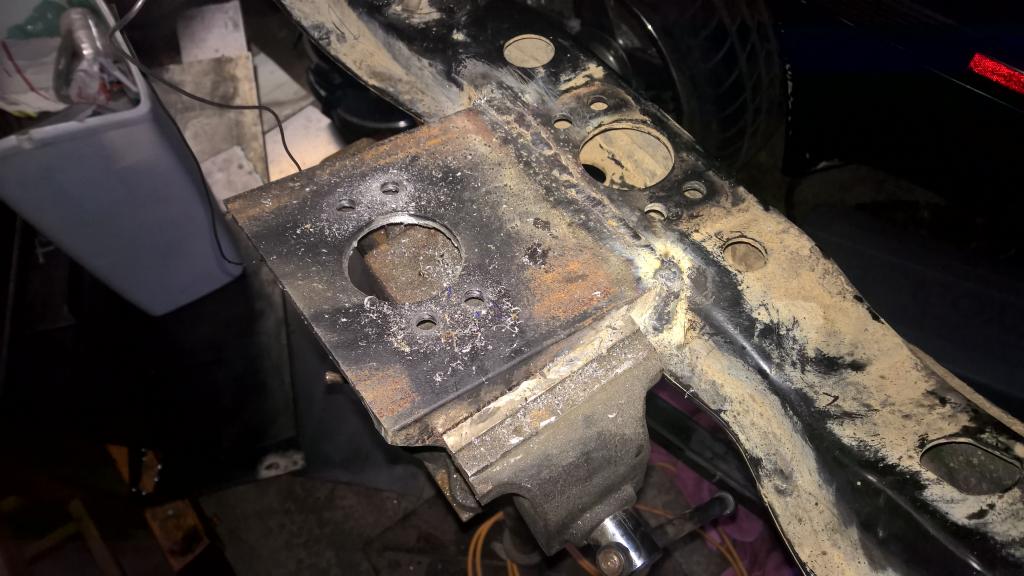
Bolt up the engine mounts and make sure your transmission is centered. I bolted up the transmission crossmember so the bottom round thing was flat on the support. Then i used some spray paint to mark its location. unbolt the crossmember and set in vice for cutting/drilling.
Note, My hole saw bit got bent while driling because it just happened teh thickness of material and the distance between the tip of the drill bit and saw part were identical, in wood that's no problem but in this case it made the drill bit snag and bent it out of alignment. Had to use a different drill bit to finish the pilot hole before continuing...after trying to bend the bit back in alignment, I went for it. instead of a 2 1/8" hole i think i ended up with more of a 2 1/4" inch...anyway. dont make my mistake, pre-drill the pilot hole.
for reference, here is a before shot
I also cut off the excess support that i no longer needed. (wasnt a square cut but no one will see it under the truck, unless i end up upside down. On second thought, maybe i should square that up....)
I have been updating my build thread but neglecting this one but no longer!
New timing belt installed, new water pump, fixed the thermostat housing, installed new clutch slave, re-routed the clutch line from the master and took the flexible clutch line off the supra, and figured out how to run my fuel lines.
What i will end up doing is taking the fittings into a hose shop and have them make me a fuel line. Luckily, the supra fittings are the same as the trucks so it is as simple as bringing in the flange fitting and threaded fitting into the shop and they put it on a high pressure line and i walk out the door.
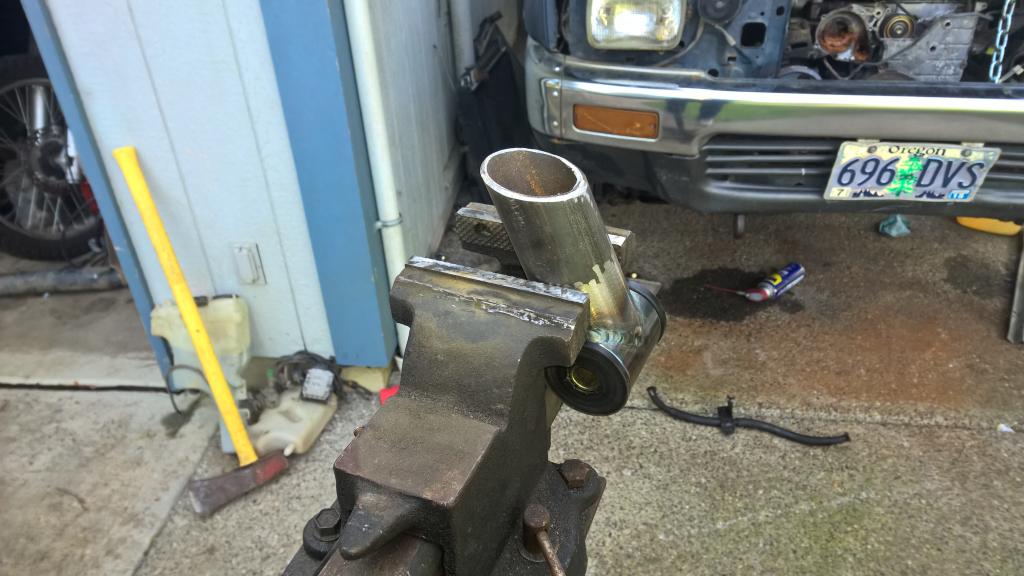
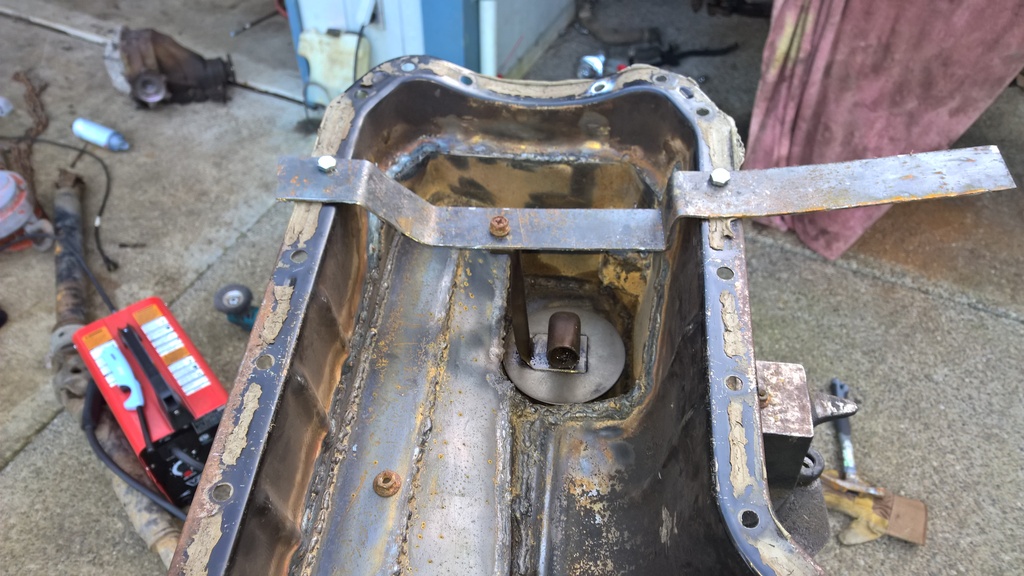
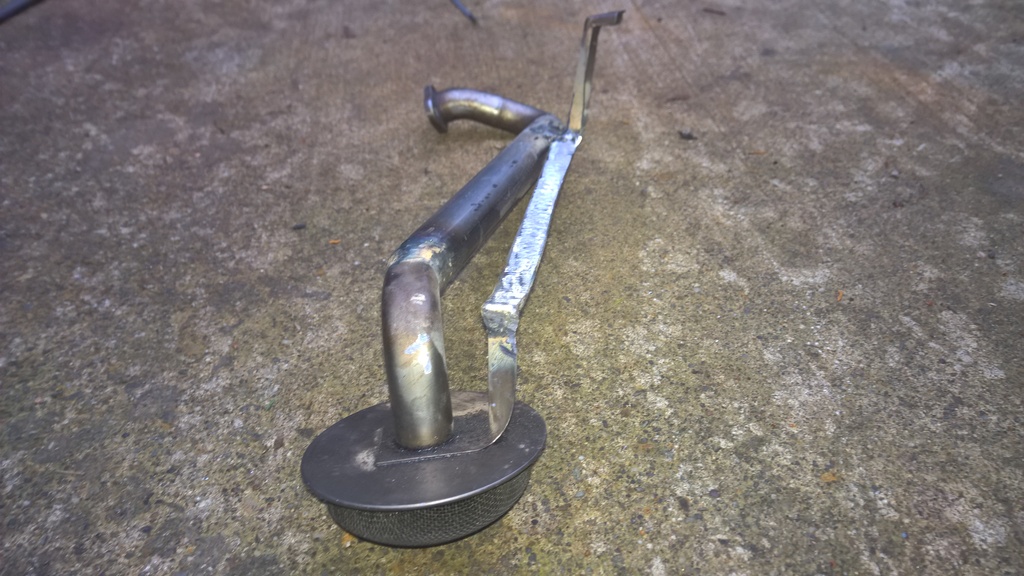
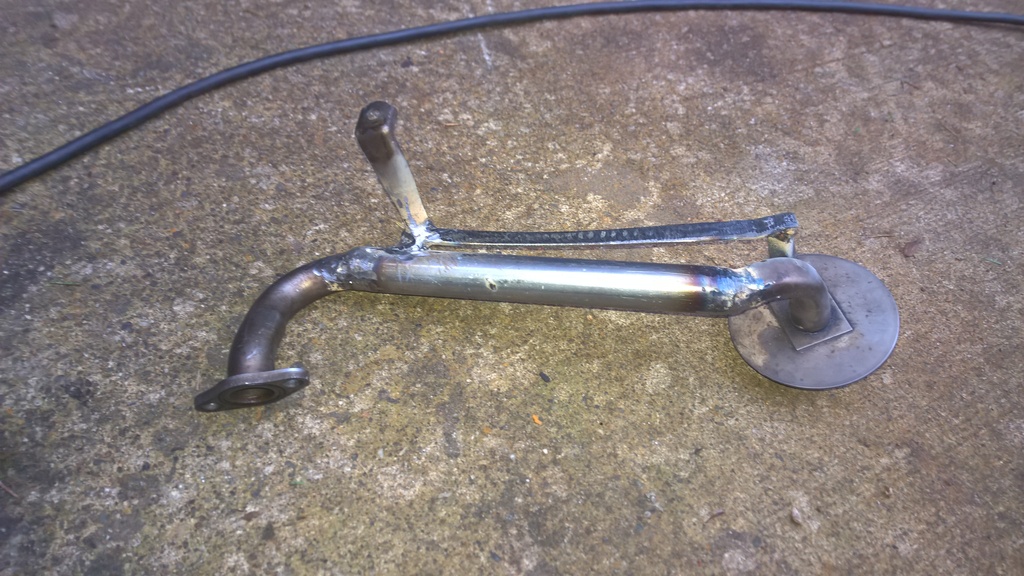
My oil pan was horrible. It leaked and i met my match. I ended up taking it to a local welder and they had to go over every single weld with a TIG to get it water tight. I had to make the oil pickup which was pretty easy actually. I use scrap metal to make a bracket that i could bolt to the oil pan which i could then bolt the oil pickup to where i wanted it to be.
Then i bolted the bracket to the corresponding bolt holes on the block so the pickup would still be located in the right place. I cut the pickup tube in half so i could bolt the one half to the oil pump and the pickup side to the bracket. Then cut a tube to weld in between.
Then remove the bracket and built a support to bolt into the stock support location.
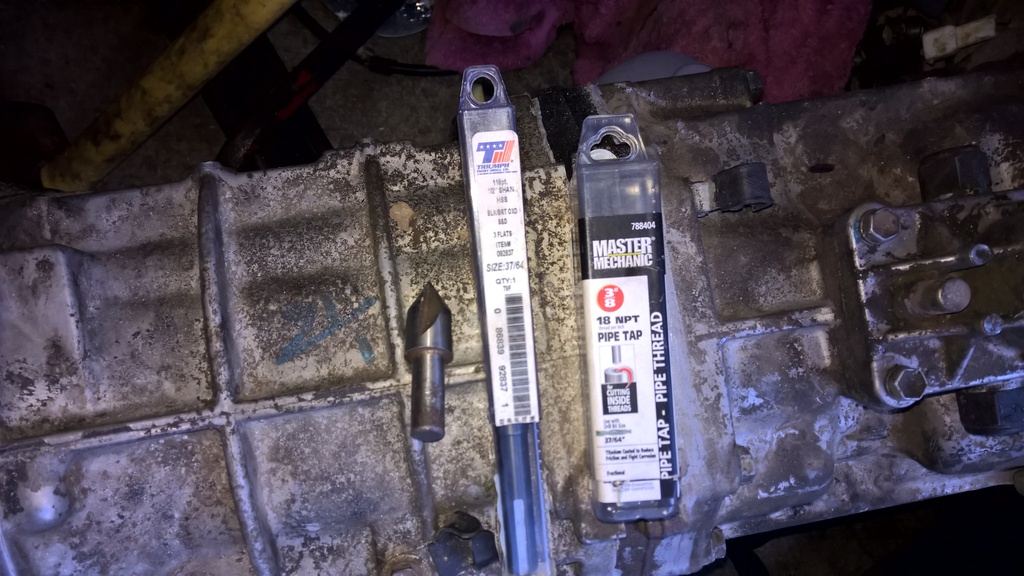
I also finished the EGR delete by drilling out the exhaust hole, putting 3/8" threads in it and screwing in a 3/8" aluminum plug
Needed these tools
Getting oil pan today and should be bolting it up to the engine later this week.
Engine is in truck and has been started. Here is what has happened since March.
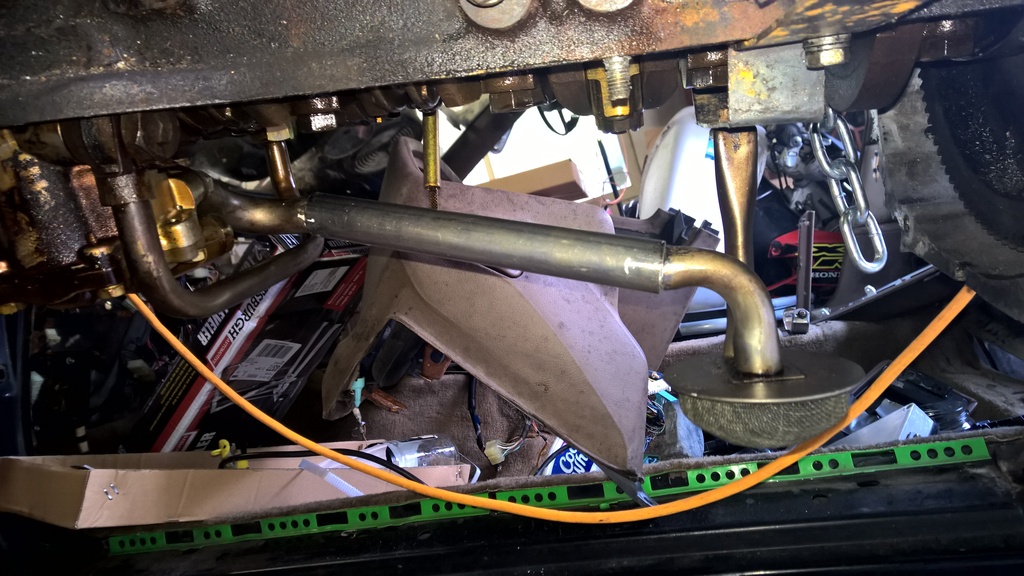
Oil pan...Take the time to do this right. Bolt in the engine to the truck with oil pan. Cut oil pan so that Differential fits. (best to remove CV axles so this is a 1 person job). Use heavy poster board and tape to make your template for the oil pan. Then you can remove the differential and the oil pan. The oil pan is removable from the engine with the engine installed! You just have to unbolt the differential cross member and one bolt from the steering bracket. Now weld up your oil pan. DO NOT USE FLUX CORE WELDING WIRE. just dont even bother, If it is all you got (IE, ME) just use it to tack everything in place and hand it over to a professional to make water tight.
Now you can have your engine installed with oil pan and bolt up your front differential.
Route your intercooler. I am bolting my intercooler in front of the radiator. This requires making a new radiator support crossmember. It also will require hood pins as the latch mechanism is now displaced by the intercooler.
Luckily i was given a radiator that had the input/output holes moved to whre they work with the 7mgte engine. You can use the stock truck radiator but you have to get creative with hose routing.
Now on to electrical. You need to either know someone who can read diagrams or learn. This is different depending on the years of the engine or truck and it seems there are mid model year changes to wiring that are not well reported. My truck is a 1989 and i found a 1988 and a 1993 service diagrams and they both were wrong. So far my wiring is not complete but we did get it close enough to start the truck. The fuel pump only runs if the key is in the start position so this video is taken with the starter still engaged.
Another tidbit, make sure you get the battery tray from the donor car and weld it into place on the drivers side of the truck. I had to buy a new battery that was no more than 7" tall for it to fit. Les Schwab had one for $125 out the door.
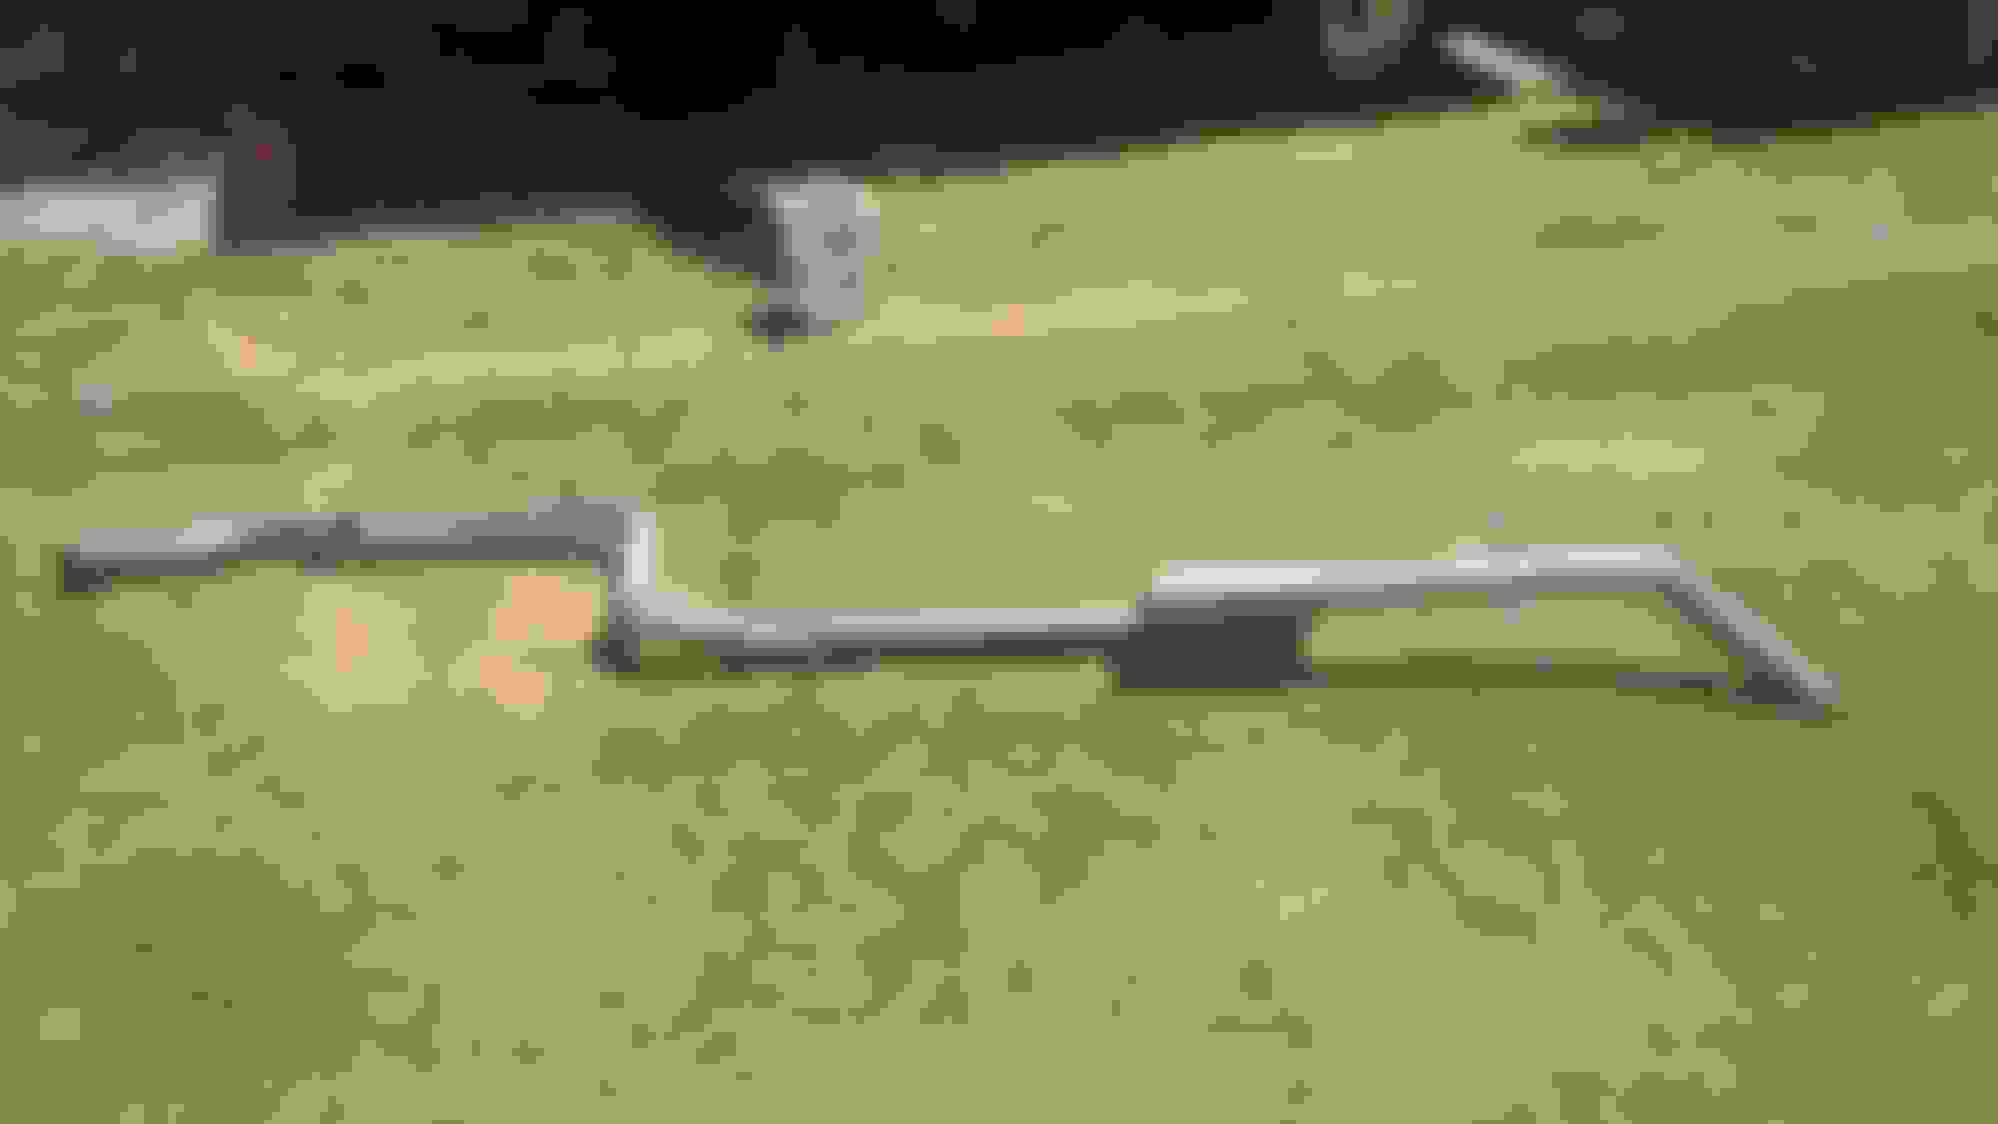
Made the exhaust. Going to weld it up this weekend. (it is tacked only right now.)
I also finished up the radiator cross member. Have a long list of things to accomplish but they are small like putting hose clamps on, fluids, and other misc projects that should take 10-20 min each. It all adds up but there is very little fab work remaining.
This looks like a fun but interesting build and would love to see it in action but why the 7m-gte? I think that a 2jz would have more power and it would be a turbo. Although I do see how a 2jz would be a little longer and have even more clearance issues than what you have now. Keep on going with the thread!
Another big update but sadly no pictures....but nothing really has changed in the looks department that i have already posted up.
Things done since last update
Exhaust welded and installed
drivelines made and installed $340 total
Topped off transmission and transfer case with oil
tightened intercooler piping
Painted radiator crossmember
Installed intercooler and radiator
Hooked up and flushed clutch line
Started and ran engine
There were other things i am sure but these are the main things. Engine fired right up but it is idling at like 3k rpm. I think i have it narrowed down to the idle air control. i have it routed from post turbo intercooler piping. I think the turbo is producing too much boost at idle that it over powers the IAC valve causing the high idle. I will route it to a pre-turbo, metered air, as that is how it is stock (I went post turbo because it would not leak boost under load where as the stock setup will). I am also getting a lot of smoke off the exhaust manifold which i am hoping is just residual oil burning off. Otherwise, all that remains is putting the front tires on and going for a drive, once the idle is figured out.
Also, I have to install a radiator fan. I will wire in a relay and manual switch for now, Down the road i will make it an auto turn on switch. Oh, and I need to put in a coolant overflow container, I think a soda bottle will do the trick...
Originally Posted by ccraig1984
This looks like a fun but interesting build and would love to see it in action but why the 7m-gte? I think that a 2jz would have more power and it would be a turbo. Although I do see how a 2jz would be a little longer and have even more clearance issues than what you have now. Keep on going with the thread!
ccraig1984 asked why 7mgte and not 2jz? Well that is an easy answer, for me anyways. first let me say, I want to do a 2jz in the future. That being said it just makes sense to do a 7mgte, at least initially. There are so many parts beyond the engine that are needed to do this swap (throttle cable, clutch lines, transmission, bell housing, clutch, lsd, and lots of other small parts help as well). On top of that the 7mgte and 3vze were being made at the same time so a lot of parts are the same making it easy. The 7mgte is an old but plentiful engine that getting parts for is easy and cheap. This is not true for the 2jzgte since there was only one toyota in the US that got this engine, that being the MKIV supra (to my knowledge)...Thus everything 2jz is expensive! Once i get everything situated for the 7mgte, It will be a nearly drop in swap to go to a 2jzgte (will bolt right up to bell housing). If i went 2jz from the start it would have been easily 4x more expensive. So far i am easily under 2k for this swap...probably closer to 1k or less counting the money i got on parting out my parts car. Lastly, The 7mgte is plenty of power for this little toyota...Especially with the huge intercooler i am running, with 3" exhaust and intake...It will be a fun little truck that hopefully will end up being toyota reliable.
OK that actually makes sense. I've just always heard of a 2jz or BB swap rather than the 7 mgte which, being relatively new to Toyotas, I've never heard of. I do appreciate the explanation.
So, I have completed the Swap. The project will always continue but the swap part is complete!
I didnt mention this before but i was pouring oil out the back of the engine in the bellhousing. I thought it was the rear main seal. I decided to pull the engine (and transmission together cause its easier). That was fun. Anyway it ended up being the oil pan was too warped to seat on the block so i had to remove the oil pan, put the engine on the engine stand and pound the oil pan into mostly straight. It doesnt leak anymore, but what a pain the ass...
My high idle was the Idle Air Control Valve (IAC) being stuck open. I took it apart and cleaned it up. It is now stuck closed...oh well. It doesnt idle worth crap but i can drive it.
I took it for a drive and wow. What an amazing feeling. Engine sounded great. BOV worked flawlessly and i was having a grand time. This was 10 at night. Instead of just getting gas and straight home i decided to keep driving...well, I was doing a 3rd gear pull. Boost building up then boooom! I pulled over and checked the engine. Sounded like an intercooler pipe came off. Ended up being the case but i couldnt see it in the dark. What was concerning was the turbo and down pipe was bright red!!! That cannot be normal! I got it started right away, it would run in low rpms...I wanted to keep oil and coolant flowing in the turbo to try and save the bearing. I think I was successful.
At home, under lights i got the intercooler piping hooked up and drove it to work the next day. IT ran like crap and when i would check the engine it looked/felt like the turbo was running wayyy too hot. It felt like there was no low/midrange power and lots of backfiring and almost stalling. I have a number of things to check but i am worried that the engine was running rich/lean and something got broken. Turbo sounds fine but it seems like boost is leaking or something. Hope to get it figured out on Sunday.
I'd get an O2 sensor on there soon so you can see what is actually going on. Is there a check engine light on? Is the timing for both the cam and ignition correct? Boost leak? You can get really high egt's due to fuel burning in the exhaust, meaning rich condition or bad timing.
I'd get an O2 sensor on there soon so you can see what is actually going on. Is there a check engine light on? Is the timing for both the cam and ignition correct? Boost leak? You can get really high egt's due to fuel burning in the exhaust, meaning rich condition or bad timing.
I cannot afford a wideband o2 sensor right now. I found a few boost leaks and an exhaust leak. Once I get that fixed it will be back to the diagnosis...
I'm guessing a boost leak could cause the glowing exhaust. The computer thinks the motor is sucking a ton of air so it over-fuels, then all that fuel burns in the exhaust. Get those leaks fixed and I bet that will solve it.
FYI, you can get an AEM setup for around $150 complete and ready to go, no computer or anything necessary. Its the best tuning device you'll ever have, and you can move it around to any vehicle.
So I got it figured out with some help. Truck has been down on power and still running hot. I did a head gasket replacement (4 out of 6 cylinders failed), little help. I found one wire on the ecu that was disconnected that helped but it still wasnt running very well.
I finally got to spend some time with my expert buddy who did this swap on his truck. He got his timing light out and turns out i was 20degrees advanced/off. I was blowing fuel/combustion straight into the exhaust! Thats why it was running so hot! Turns out the previous owner had installed the cam position sensor 180 degrees off TDC. The engine still ran because it is a waste spark setup (google it, i had to). It was just close enough to be within the realm of running but very poorly. We got that put in correctly and it is a whole new beast! Runs like a top! We also put on a new BOV that recirculates the air so it runs really smooth with no issues at all. A total pleasure to drive!
Now its on to cosmetic and organization stuff. I also plan on building a front facing intake manifold. At some point i will do a conclusion post here and continue posting in my buildup thread. i want to get some video and pictures up as well.
 02-04-2015, 01:58 PM