Yet another 3.4 Swap...trying to complete under $2K
 04-09-2008, 09:04 PM
#41
Registered User
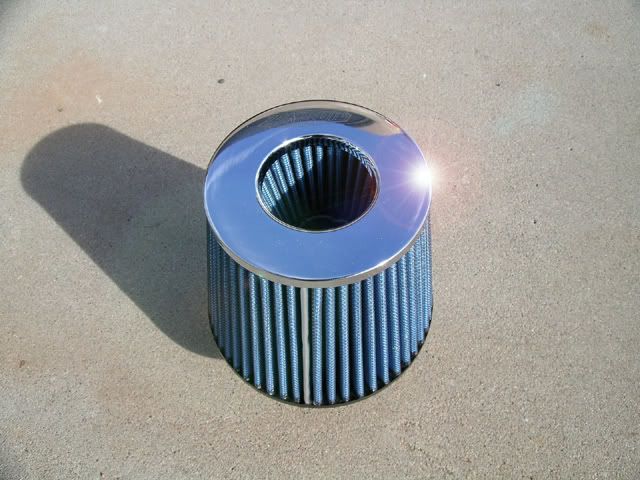
But you wanted cheap, so you could try http://cgi.ebay.ca/High-Flow-Cotton-...QQcmdZViewItem
 04-09-2008, 10:22 PM
#42
Contributing Member
I currently can't get the website to come up...
Part number I went with: EAAU3051
Cost: $47.70 plus about $15 in AutoZone parts.
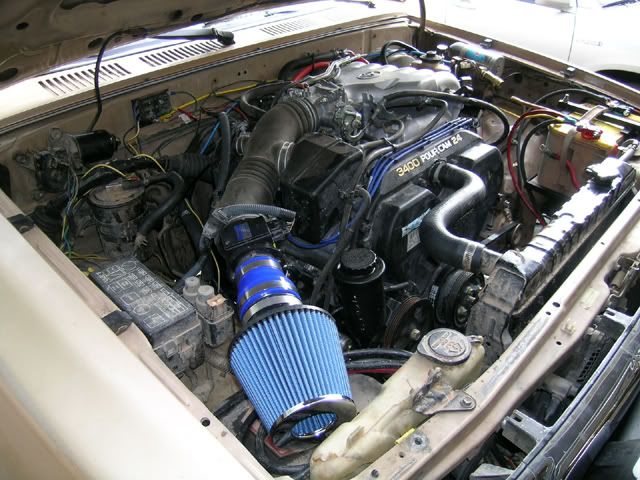
You'll see on the MAF that there are 2 ridges on the filter side designed for the last hose going to the OEM box to fasten on to. I sanded those ridges down slightly, and then got a coupler for the ricer section of AutoZone. That fit the MAF prefectly, and then I added a short section of chrome intake pipe (ricer section) and then the new EA filter. I built a suppot to tie the whole thing to the fender well. Works great.

 04-10-2008, 03:28 AM
#43
Contributing Member
That's what I'd get too, if I was going to use a cone type filter. I'm using the stock 5VZ filter and box, breathing from inside the fender. I wish Amsoil made a EA filter for the stock box.
Last edited by mt_goat; 04-10-2008 at 03:29 AM.
04-13-2008, 09:21 PM
#44
Registered User
Thread Starter
Well worked on the motor a bunch today. Spent about 5 hours tearing apart the new motor. Pulled all the old cut hoses (realized the cut the fuel supply line...gonna have to buy that now), pulled the 3.4 motor mounts, punched out the oil dipstick and guide, punched out the pre-drilled oil dipstick hole plug, pulled the oil pan, re-routed the fuel return line, pulled the timing belt, water pump, oil pressure sender, obviously all belts and accesiories (PS pump, AC compressor, Alternator).
Still need to:
Tap and plug the old oil dipstick hole, install the new oil dipstick, figure out how to get the bolt loose on the fuel rail so I can replace and reroute the fuel supply line, swap out the oil pickup from the 3.0, install the flywheel, pressure plate, pilot bearing and clutch, install the new timing belt, water pump, crankshaft seal, cam seal, and then reassemble all the accesories that will go on before the motor goes into the bay.
Gonna pull the 3.0 on tuesday night...depending how I feel after working nightshift on monday.
All in all I got a lot accomplished today. Putting it back together is gonna be fun, considering this is my first timing belt. I have the manuals to remove and install, and it's scary that I could really mess something up if I don't have everything aligned properly.
Question:
How do I break free the bolt that secures the fuel supply line without breaking the fuel rail? I don't want to put to much strain on the fuel rail.... Suggestions? That sucker is really on there and the fuel rail moves a little bit when I start to torque on it.
04-13-2008, 10:01 PM
#45
Registered User
Dude, wish I could help you with that. I spliced my cut line from the 3.4 to the cut line on my 3.0 using high pressure connectors.
I'm not sure who has removed the fuel line in order to do the swap. Anyone?
I'm not sure who has removed the fuel line in order to do the swap. Anyone?
04-14-2008, 01:19 AM
#46
Contributing Member
Question:
How do I break free the bolt that secures the fuel supply line without breaking the fuel rail? I don't want to put to much strain on the fuel rail.... Suggestions? That sucker is really on there and the fuel rail moves a little bit when I start to torque on it.
How do I break free the bolt that secures the fuel supply line without breaking the fuel rail? I don't want to put to much strain on the fuel rail.... Suggestions? That sucker is really on there and the fuel rail moves a little bit when I start to torque on it.
04-14-2008, 06:05 AM
#47
Registered User
I used an impact wrench to break it loose. No problem. If you don't have one I'm not sure what you can do though.
You still think you'll do this for under two grand? If it works out please post up cause I just can't figure out how people do this swap so cheap. I'm way over 2 grand already and still have a ways to go. Good luck witht the fuel line.
You still think you'll do this for under two grand? If it works out please post up cause I just can't figure out how people do this swap so cheap. I'm way over 2 grand already and still have a ways to go. Good luck witht the fuel line.
04-14-2008, 11:12 AM
#48
Registered User
Thread Starter
I used an impact wrench to break it loose. No problem. If you don't have one I'm not sure what you can do though.
You still think you'll do this for under two grand? If it works out please post up cause I just can't figure out how people do this swap so cheap. I'm way over 2 grand already and still have a ways to go. Good luck witht the fuel line.
You still think you'll do this for under two grand? If it works out please post up cause I just can't figure out how people do this swap so cheap. I'm way over 2 grand already and still have a ways to go. Good luck witht the fuel line.
I am going to try and use the impact wrench to break it free today. I will be headed out there as soon as UPS arrives at my house with all my toyota parts. Then I'm gonna maybe pull the 3.0 tonight as well. We will see how ambitious I feel after putting together the 3.4L. If I don't tear out the 3.0 tonight it will be done tomorrow evening.
Greg is gonna have my harness done today or tomorrow and then I should have it by thursday or friday, about perfect timing for me to have everything buttoned up and ready to turn the key.
I bought the M10x1.5mx3/4inch plug for the old oil pan hole.
Question:
Anyone have pictures of or the manuals from TIS for the 3.4L crankshaft seal, cam seal, rear oil seal removal and installation? For some reason I forgot to get those during my day period on TIS.
04-14-2008, 11:28 AM
#49
Contributing Member
04-14-2008, 12:51 PM
#50
Registered User
Thread Starter
Extremely helpful! Thanks
04-14-2008, 04:01 PM
#51
Registered User
Well you're still way ahead of me. I figure I'll have $6000 into mine by the time it's all said and done. However, I'm also not trying to do it cheap. Good luck. Looking forward to hearing how it turns out.
04-14-2008, 04:12 PM
#52
Contributing Member
Yeah that's more like my costs too, not counting the supercharger and all the extra stuff for that. I did get a very low mileage donor truck though (27,000 miles).
04-14-2008, 07:51 PM
#53
Registered User
Thread Starter
wow, you guys really make me feel a lot better about my swap. I could have taken my truck to ORS and had them do it for a little bit more than $6000.
UPS showed up late, I didn't go to work tonight, and didn't work on the 3.4 either...so I plan on prepping the 3.4 tomorrow morning and then pulling the 3.0 tomorrow evening. I guess we will see where I get. Hoping it won't take me to terribly long to prep the motor.
UPS showed up late, I didn't go to work tonight, and didn't work on the 3.4 either...so I plan on prepping the 3.4 tomorrow morning and then pulling the 3.0 tomorrow evening. I guess we will see where I get. Hoping it won't take me to terribly long to prep the motor.
04-15-2008, 12:24 PM
#55
Registered User
Thread Starter
Ok Questions:
I removed the timing belt without making sure everything was at TDC. Now I'm having the issue of making sure the timing is right. I am going to hook up a compression tester to cylinder NO.1 and turn the crankshaft till I have a pressure reading and the notch is at TDC.
I am having trouble getting the passenger side (RH) cam to TDC. The drivers side (LH) just drops right in place or bumps as I like to say. I can get the RH cam to TDC, however it doesn't bump into place like the LH cam does. Is this ok?
Also, does anyone know what size the 6 bolts are that bolt the pressure plate to the flywheel? I think they are M7 with a pitch of 1.25...the length is what I'm not sure about. I was thinking about 3/4 inch - 7/8 inch long. I just don't know. Please help....
I got the front and rear crankshaft oil seal replaced, water pump installed, pilot bearing installed, flywheel installed, clutch plate aligned, was having trouble getting the cam oil seals out...any suggestions to doing this without having to pull the valve cover?
Considering pulling the 3.slow tonight and getting all the prep work done on the new motor, so I can drop in the 3.4 tomorrow.
Oh one more question...The union is installed, I pulled the old seal off of the old oil dipstick guide and installed it on the new on... my issue is that when I stick the new guide into the union, it isn't very secure. I wrapped the new guide with some teflon tape to creat a more snug fit, any suggestions on how to make it more secure in the union?
The plug was very easy to do...it was the easiest tap I have ever done. Tapped it like elvota did... 10x1.50 then added some RVT and screwed in the plug.
04-15-2008, 12:36 PM
#56
Registered User
Join Date: Nov 2007
Location: Dillsburg, PA
Posts: 954
Likes: 0
Received 0 Likes
on
0 Posts
Ok Questions:
I removed the timing belt without making sure everything was at TDC. Now I'm having the issue of making sure the timing is right. I am going to hook up a compression tester to cylinder NO.1 and turn the crankshaft till I have a pressure reading and the notch is at TDC.
I am having trouble getting the passenger side (RH) cam to TDC. The drivers side (LH) just drops right in place or bumps as I like to say. I can get the RH cam to TDC, however it doesn't bump into place like the LH cam does. Is this ok?
I got the front and rear crankshaft oil seal replaced, water pump installed, pilot bearing installed, flywheel installed, clutch plate aligned, was having trouble getting the cam oil seals out...any suggestions to doing this without having to pull the valve cover?
According to the FSM, the timing marks for the cams are on the cams, under the valve cover, but they are also on the cam gears. But, you'll need to remove the valve covers to replace the cam seals.
Last edited by Cyberman; 04-15-2008 at 12:46 PM.
04-15-2008, 01:08 PM
#57
Registered User
Thread Starter
I have been told there are other ways to remove the seals, you just have to be careful not to score the cam or the outside area where the seal sits. Any help though on the other questions and timing stuff?
04-15-2008, 01:18 PM
#58
Registered User
Thread Starter
Oh....one more question. How do I manage to keep my A/C charged. Which parts do I pull off the AC to keep it charged in the vehicle?
Pictures would be helpful...I have never worked with AC before but would prefer to keep it since I have all the parts and what not.
Pictures would be helpful...I have never worked with AC before but would prefer to keep it since I have all the parts and what not.
04-15-2008, 02:13 PM
#59
Registered User
Join Date: Nov 2007
Location: Dillsburg, PA
Posts: 954
Likes: 0
Received 0 Likes
on
0 Posts
 04-15-2008, 09:06 PM
#60
Contributing Member
Join Date: Jan 2006
Location: Summit County, Colorado
Posts: 899
Likes: 0
Received 0 Likes
on
0 Posts
As stated above, you just need to remove the A/C compressor from the 3.0 and secure it out of the way ( a bit of a PITA, but doable). Since you'll be using your 3.0 motor mounts, the brackets should be OK - it should all bolt together fine.
The only issue that you will likely have is that you will need to swap out the compressor pully to the 3.4 version, since the 3.4 uses different belts than the 3.0.
The only issue that you will likely have is that you will need to swap out the compressor pully to the 3.4 version, since the 3.4 uses different belts than the 3.0.


