swap 94 3.0 to 96 3.4 SC keeping 340h auto
 06-22-2012, 03:17 PM
#21
Registered User
This was a HUGE pain!!! I pulled the harness off the motor, then carefully started cutting/unwrapping the old electrical tape then unclipped all the plastic raceways. I don't know how Toyota assembled the harnesses, but every single wire ended up being wrapped around every single other wire in my harness. I worked one connector at a time, trying to untangle as I went, but eventually wound up cutting the connector off, pulling the loose wires through then resoldering the connector back onto the correct wire. Then reassembled the main part of the harness with the plastic raceways and wrapped liberally with electrical tape.
Do not cut the O2 signal wires! There are 4 wires that go to the O2 connector, you can cut 3 of the 4, but do not cut the shielded wire (the one with a ground wire wrapped around it...it is the larger diameter wire) as it is a sensitive signal wire (enough so that the Toyota engineers decided to shield it, just adding a soldered splice connection could be enough to alter the signal and cause the ECU to think there's a problem). The other wires are just power/ground/switch closure signals and can (should be able to) handle solder splices.
They now exit the main wire loom right above the passenger side valve cover and drop straight down and run down to the transmission/transfer case/O2 sensors. I wrapped the bundle with plastic split loom and electrical tape, and went ahead and wrapped some reflective heat shielding tape around the bundle where it gets close to the exhaust manifold.
I haven't seen anyone else do this or even mention it, and my swap isn't running yet, so I don't know about reliability, proper functionality, or any of that other fun stuff, but at this point I'm not worried about it.
 06-22-2012, 03:50 PM
#22
Registered User
I guess I should have been more specific. I have read a lot of information, I was clarifying info about the expansion valve, I am using the 3.4 compressor with 3.0 top plate, just trying to clarify. Thanks for the direction though.
So I got the 3.4 just about ready to go, had to order a few more parts a spark plug wire kit from dealer, will probably have it all ready tomorrow afternoon.
The wire harness is different from the 3.0, trans and o2 wires drop on L side instead of R. I took a few more pics and wanted to get opinions on wires and routing because I am putting this together blindly, hard to be sure things are going in the right place.
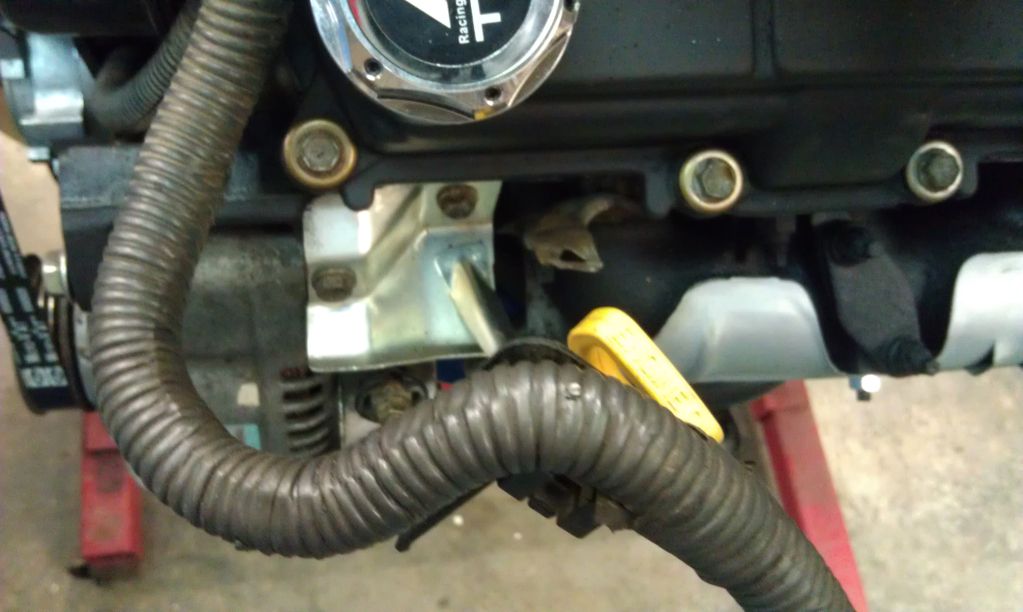
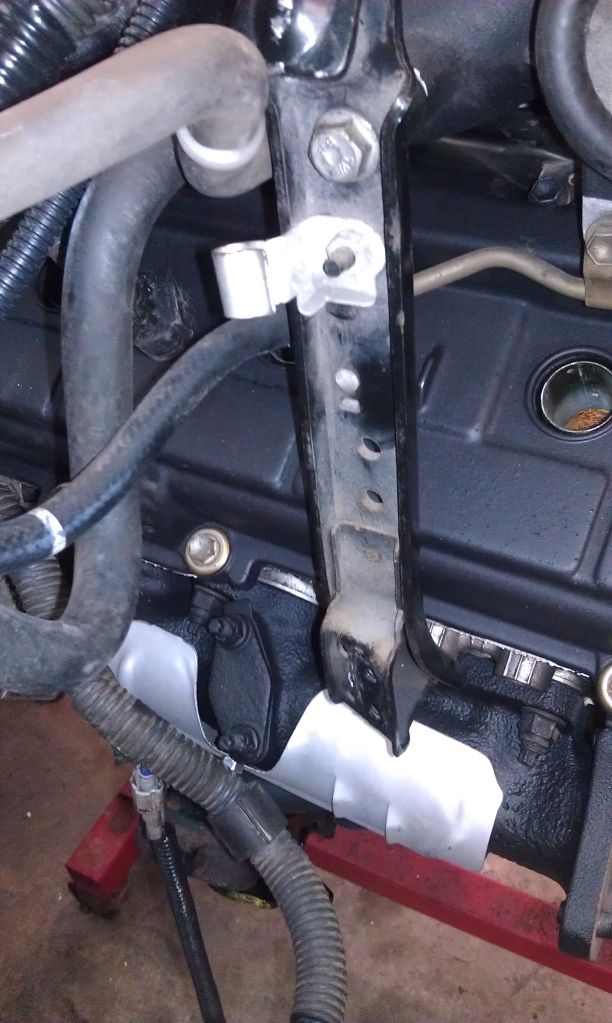
Is the second image of the brace supposed to support wiring? In the first image, im concerned about bracing the harness away from the exhaust, can anyone offer input? I will post a few more images later, I will need help routing vacuum and heater hoses with the s/c, any good sources for diagrams? I think that bracket supports the throttle cable, I ordered the missing clamp, but I'm concerned about routing the harness and preventing it from burning with the exhaust right there.
Another thing that concerns me is the two connections on the throttle body pictured here.
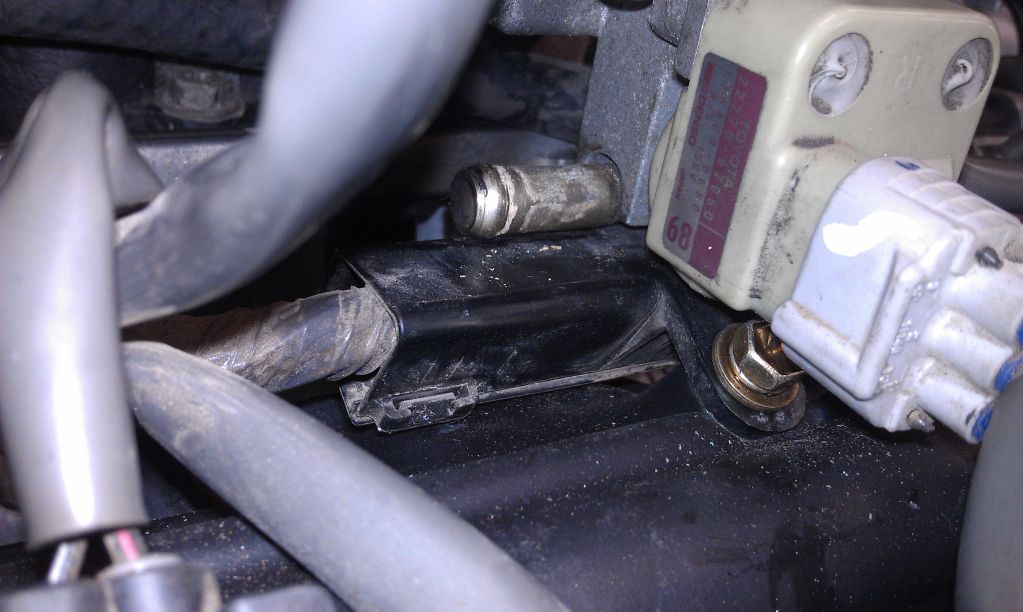
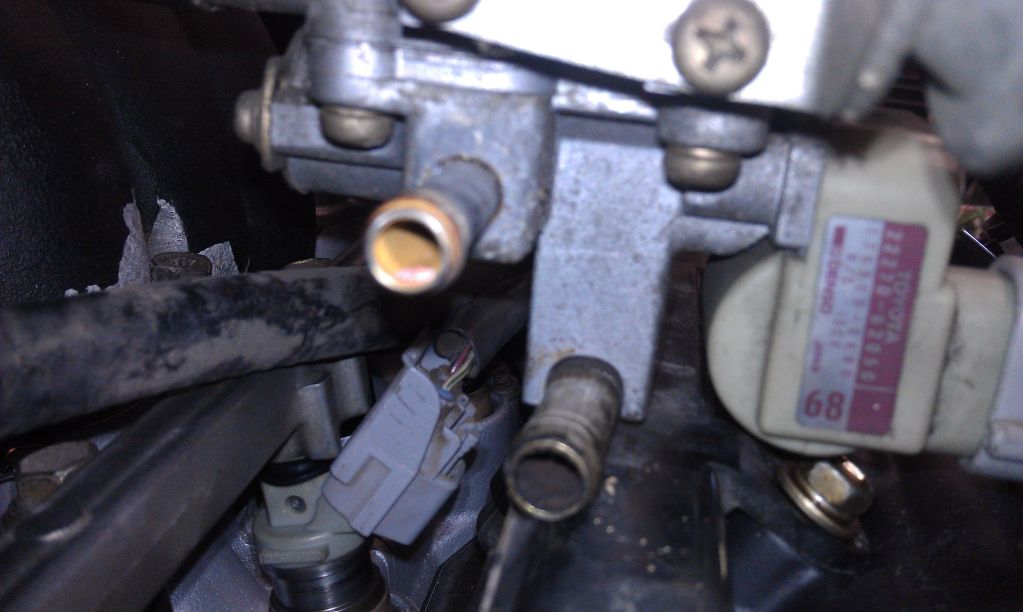
It looks like that piece is rubbing on the injector harness casing, is that typical? I can't recall if the 96 4runner harness did that, this harness is from 98t100.
I have to remake some vacuum lines and get the rest of the engine prepped and then start working on the trucks fuel and evap lines, change a few brake lines and then start piecing it together.
Should be interesting!
So I got the 3.4 just about ready to go, had to order a few more parts a spark plug wire kit from dealer, will probably have it all ready tomorrow afternoon.
The wire harness is different from the 3.0, trans and o2 wires drop on L side instead of R. I took a few more pics and wanted to get opinions on wires and routing because I am putting this together blindly, hard to be sure things are going in the right place.
Is the second image of the brace supposed to support wiring? In the first image, im concerned about bracing the harness away from the exhaust, can anyone offer input? I will post a few more images later, I will need help routing vacuum and heater hoses with the s/c, any good sources for diagrams? I think that bracket supports the throttle cable, I ordered the missing clamp, but I'm concerned about routing the harness and preventing it from burning with the exhaust right there.
Another thing that concerns me is the two connections on the throttle body pictured here.
It looks like that piece is rubbing on the injector harness casing, is that typical? I can't recall if the 96 4runner harness did that, this harness is from 98t100.
I have to remake some vacuum lines and get the rest of the engine prepped and then start working on the trucks fuel and evap lines, change a few brake lines and then start piecing it together.
Should be interesting!
12-18-2012, 07:19 AM
#23
Registered User
Thread Starter
iTrader: (1)

Join Date: Apr 2010
Location: Binghamton, NY
Posts: 60
Likes: 0
Received 0 Likes
on
0 Posts
Hello everyone (who cares to read this)..
It's been a while since I've posted, so I thought I would throw in an update. Things are going great, and I am just about complete with the swap. I had the wrong torque converter from my trans guy, an ordering error, picked up the correct one Friday afternoon and had the two mounted together by 8pm.
I purchased one of those aluminum radiators from eBay a couple of months back, and when installed it fit slightly different then my OEM replacement with plastic tanks, but I finally found a lower radiator hose that works off the hose shelf at advance auto parts. I don't have the number in front of me, but I wrote it down for documentation sake so if I ever need to replace it or share it with anyone here. I also pieced together the puzzle of rear heater hoses with the rear heater lines in tact. The only thing I have left to do with the engine is sort out and install vacuum lines, the VSV's with the 3.0 tank, and then plug in the harness on the drivers side. Found a nice thread on that information and it should really help me out. (evap puzzle thread)I have the wiring to the relocated battery completed from the 80 amp alt fuse. The 3.4 101 thread was an immense help to me getting this thing near completion.
Since I am going to be S/C'd, I did get a 7th injector kit from URD last spring. I am going to be wiring this in next week and hopefully starting the truck up then. I haven't done much research, but hoping that anyone with URD 7th injector experience could give me some pointers on the best place for mounting, and any tips or tricks to make the job easier would be awesome. Going to tackle this next week and get the exhaust set in place and post a video of the startup and some pics I have been taking.
This has been a long battle, but this truck will be pretty solid with all new brake and fuel lines, hopefully for a long time to come.
12-18-2012, 09:05 AM
#24
I have nothing to add other than to say you're going to have one very nice rig when you're finished. The only thing I didn't like about my 2nd gen was the power/gas mileage, both should have been higher for the kind of 'economy' it had. I'm loving my TRD/URD SC'd 3rd gen though, and having it cleanly installed in a 2nd gen chassis is just awesome.
Regarding the URD setup, it's pretty straight forward. Does yours have the pre-installed URD maps? Mine did. I just installed the piggyback, made the wiring connections, cut the fuel line and added the 7th injector, did the fuel pump upgrade and changed the fuel filter for good measure and it runs well. I have since done a little tuning via wideband, but the URD pre-installed fuel map was a half-way decent place to start. I'm still getting 20-21 MPG highway with a 5-speed manual trans. My 2nd gen 3.0 topped out at 18 mpg with 1/2 the power. That said, the 3.0 was a very good engine for me.
Regarding the URD setup, it's pretty straight forward. Does yours have the pre-installed URD maps? Mine did. I just installed the piggyback, made the wiring connections, cut the fuel line and added the 7th injector, did the fuel pump upgrade and changed the fuel filter for good measure and it runs well. I have since done a little tuning via wideband, but the URD pre-installed fuel map was a half-way decent place to start. I'm still getting 20-21 MPG highway with a 5-speed manual trans. My 2nd gen 3.0 topped out at 18 mpg with 1/2 the power. That said, the 3.0 was a very good engine for me.
12-18-2012, 04:52 PM
#26
Registered User
Thread Starter
iTrader: (1)
Join Date: Apr 2010
Location: Binghamton, NY
Posts: 60
Likes: 0
Received 0 Likes
on
0 Posts
I'm really more worried about the transfer case than the trans, but who knows. I will be running a second trans cooler after the radiator cooler, so I'm hoping that the trans temps will be low enough to help keep this thing running for a while. The guy that rebuilt it went through it pretty well, he added clutch plates to improve its ability to handle the torque, mentioned that he drilled holes to improve pressure, and also sourced a higher pressure shift solenoid for it so it will definitely shift harder. I'm going to be easy on it at first... hopefully I can keep my foot off the floor.
So in short, that makes 2 of us. It's easy enough to drop the trans out of it, but I'm hoping, at least for a while, that it holds up.
So in short, that makes 2 of us. It's easy enough to drop the trans out of it, but I'm hoping, at least for a while, that it holds up.
12-22-2012, 02:34 AM
#27
Registered User
After looking at it for a while and not really liking any option for routing those wires down the driver's side and having to deal with the exhaust cross-over, I decided to open up the harness and re-route them down the passenger side. And of course I do not have any pictures of it.
This was a HUGE pain!!! I pulled the harness off the motor, then carefully started cutting/unwrapping the old electrical tape then unclipped all the plastic raceways. I don't know how Toyota assembled the harnesses, but every single wire ended up being wrapped around every single other wire in my harness. I worked one connector at a time, trying to untangle as I went, but eventually wound up cutting the connector off, pulling the loose wires through then resoldering the connector back onto the correct wire. Then reassembled the main part of the harness with the plastic raceways and wrapped liberally with electrical tape.
Do not cut the O2 signal wires! There are 4 wires that go to the O2 connector, you can cut 3 of the 4, but do not cut the shielded wire (the one with a ground wire wrapped around it...it is the larger diameter wire) as it is a sensitive signal wire (enough so that the Toyota engineers decided to shield it, just adding a soldered splice connection could be enough to alter the signal and cause the ECU to think there's a problem). The other wires are just power/ground/switch closure signals and can (should be able to) handle solder splices.
They now exit the main wire loom right above the passenger side valve cover and drop straight down and run down to the transmission/transfer case/O2 sensors. I wrapped the bundle with plastic split loom and electrical tape, and went ahead and wrapped some reflective heat shielding tape around the bundle where it gets close to the exhaust manifold.
I haven't seen anyone else do this or even mention it, and my swap isn't running yet, so I don't know about reliability, proper functionality, or any of that other fun stuff, but at this point I'm not worried about it.
I got a 3.4 swapped 95 runner and after having it a few days found out it had bad millage due to no o2 sensors
Crawled under it and found out the wires had been cut including the shielded wire to the front o2
I bought an o2 sensor and connector soldered everything back but have had a wierd lurching problem
Might have been from the guy cuting the shielded wire? Is there anything I can do or am I screwed?
12-22-2012, 07:58 AM
#29
Registered User
12-22-2012, 11:59 AM
#31
Registered User
01-03-2013, 06:18 PM
#32
Registered User
Thread Starter
iTrader: (1)
Join Date: Apr 2010
Location: Binghamton, NY
Posts: 60
Likes: 0
Received 0 Likes
on
0 Posts
ok I want to post a few things tonight.. first off is it's alive, I started her up the other day and it runs good, considering no exhaust and one O2 sensor is not plugged in, let alone installed. I have to finish the evap setup next week, and get the exhaust fabbed up. I am likely going to keep the 3.0 cat installed, just move it forward, and then relocate the rear O2 sensor/bung after the cat. I got a couple of junkyard sensors and hopefully they will do the job. I have everything I need at this point to finish the job for the most part.. going to take it to a friends shop to put it on his lift and get the exhaust finished.. hopefully drive it home from there.
I have the electronic cruise, I hooked up the motor with the 3.4 cable, will that setup work without any further modification? I am using a 98 T100 harness/ECU.
I 2 images I took that hopefully someone can help me with. It's been so long since I disassembled the vacuum lines. I have been putting this thing together without knowing how it came apart as I bought the engine already pulled
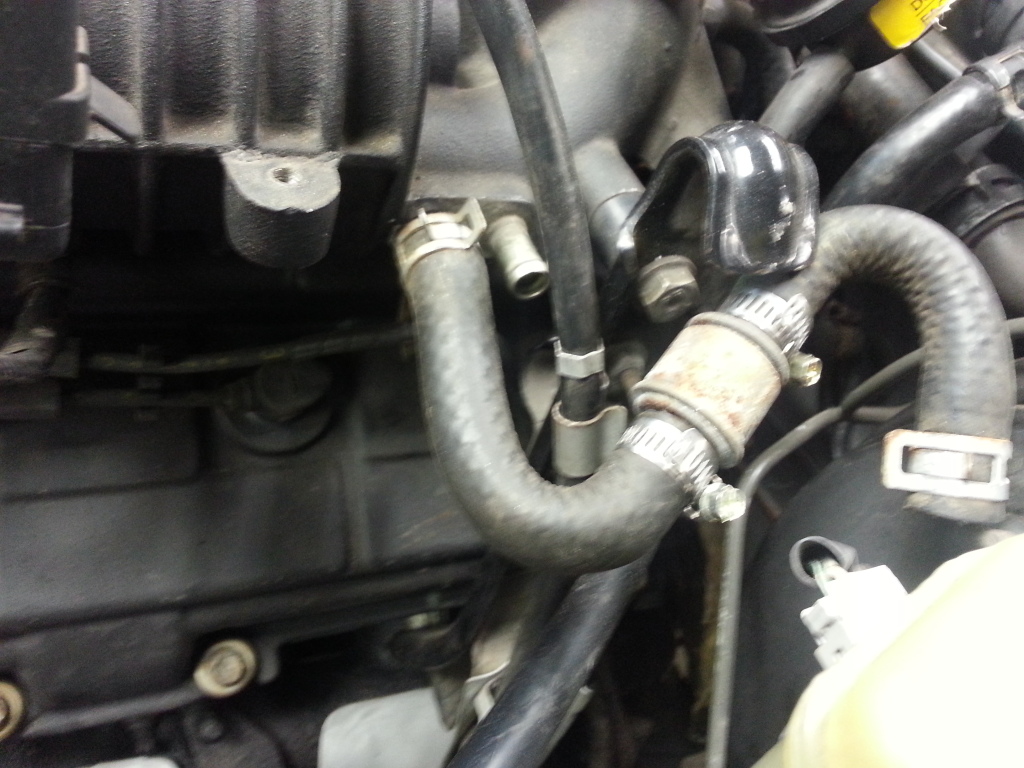
The second vacuum port next to where the booster hooks up, since my evap is coming from the drivers side, and I will be using the ports on the throttle body, can I just cap that line, or does it serve another purpose? The vacuum line that sits on the drivers side rocker arm cover runs to the port on the intake line, I think?
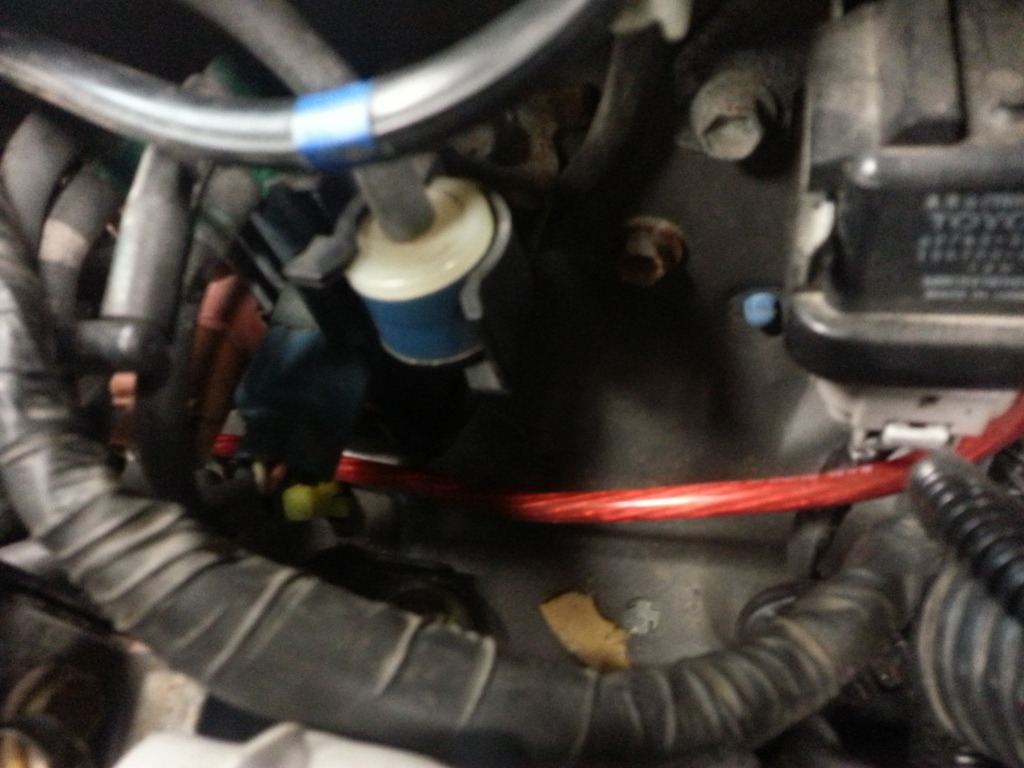
and this blue/white check valve.. I need to know what this connects to. I'm embarrassed to admit I can't remember how this hooked up, that mess of lines that was there was a lot to handle 5 minutes after taking it apart, it's been almost a year since the 3.0 came out. Can anyone help me here? IIRC when tracing it's source it comes from a vacuum ball under the pass side fender.
Everything else is hooked up except for the rear driveshaft. I'm going to tow dolly it to the shop on Wednesday, hoping to drive it home later that day.
It's so loud, and despite a few vacuum leaks and a loose coolant hose clamp, everything appears dry and in order.
really excited to get it out and drive it
I have the electronic cruise, I hooked up the motor with the 3.4 cable, will that setup work without any further modification? I am using a 98 T100 harness/ECU.
I 2 images I took that hopefully someone can help me with. It's been so long since I disassembled the vacuum lines. I have been putting this thing together without knowing how it came apart as I bought the engine already pulled
The second vacuum port next to where the booster hooks up, since my evap is coming from the drivers side, and I will be using the ports on the throttle body, can I just cap that line, or does it serve another purpose? The vacuum line that sits on the drivers side rocker arm cover runs to the port on the intake line, I think?
and this blue/white check valve.. I need to know what this connects to. I'm embarrassed to admit I can't remember how this hooked up, that mess of lines that was there was a lot to handle 5 minutes after taking it apart, it's been almost a year since the 3.0 came out. Can anyone help me here? IIRC when tracing it's source it comes from a vacuum ball under the pass side fender.
Everything else is hooked up except for the rear driveshaft. I'm going to tow dolly it to the shop on Wednesday, hoping to drive it home later that day.
It's so loud, and despite a few vacuum leaks and a loose coolant hose clamp, everything appears dry and in order.
really excited to get it out and drive it
01-05-2013, 11:10 AM
#33
Registered User
Join Date: Apr 2011
Location: Dearborn, MI
Posts: 47
Likes: 0
Received 0 Likes
on
0 Posts
Can't help you on the port by the brake booster as I don't have a SC, but the blue valve I believe is for the 4wd or ADD system IIRC. On my 3.0 there was a vacuum line that went from the bottom of the valve to a T fitting and then to the black two pronged fitting on the intake. So if I remember right I just put a T fitting on a vacuum line from the 3.4 intake and ran it to the valve. Glad to hear you got it started its going to be one sweet 4runner.
01-05-2013, 04:23 PM
#34
Registered User
Thread Starter
iTrader: (1)
Join Date: Apr 2010
Location: Binghamton, NY
Posts: 60
Likes: 0
Received 0 Likes
on
0 Posts
Can't help you on the port by the brake booster as I don't have a SC, but the blue valve I believe is for the 4wd or ADD system IIRC. On my 3.0 there was a vacuum line that went from the bottom of the valve to a T fitting and then to the black two pronged fitting on the intake. So if I remember right I just put a T fitting on a vacuum line from the 3.4 intake and ran it to the valve. Glad to hear you got it started its going to be one sweet 4runner.
As far as that blue/white check valve goes, it is connected back to the solenoids for the front diff, but I'm wondering if the bottom of that valve connects to something, maybe its a vacuum source for the canister in the fender? It is a one way valve, I can pull air through it, but I cant push any in. I will have to do a junkyard run to see if I can find one still assembled.
Also, on the intake, there is a curved line that did connect to a nipple on the front of the top section of the 3.4 intake manifold. There are a few ports on the intake silencers and the intake box that need connections or caps. Can anyone guide me to a diagram for those lines, or provide me a few pics of a properly set up vacuum setup on this s/c? Who knows if it was ever really installed properly at all.
01-19-2013, 03:33 PM
#35
Registered User
Thread Starter
iTrader: (1)
Join Date: Apr 2010
Location: Binghamton, NY
Posts: 60
Likes: 0
Received 0 Likes
on
0 Posts
exhaust is fabbed up, still have yet to run the speed sensor harness down so it threw a code for that, but so far I have not seen any engine complications. Idle was high after I finished the vacuum and evap, so I took apart the TB and cleaned the IAC valve, removed the coolant salts and then cleaned and oiled the adjuster inside the sensor. After this I realized that the throttle cable was pulling slightly, so I ended up cutting the bracket and moved the kick down portion back and the throttle portion forward and tacked them together, and the result is a nice smooth ~900 rpm idle.
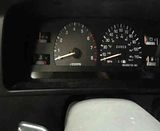
I have noticed also that as soon as I turn on the key, the tach moves to about 500 with the ENGINE OFF. As soon as there is power, it moves up. Reading the idle information from my ODBII scanner gives confirms this. So I need to either replace or adjust the tach. The needle sits properly on its resting point when off, so there is something out of whack. I heard about the potential for adjusting a potentiometer on the tach, can anyone share information about this process?
I am having a hard time getting the brakes bled properly, is there a special method to this? The FSM I have is missing some information, I'm reading I start in the rear, then the LSPV, moving to the front from there. All of the wheels are stopping and are engaging, but I basically have to stand on the pedal to get the brakes to work, and that is barely doing it. Not safe to drive it yet, so this week I will tackle that task.
Is there a method for bleeding the master cylinder? The rear lines were changed and open for several months during the process, and I'm pretty sure I got the air out but you never know. I will do a search but any tips would be appreciated. Let me see if I can post a video of her running.
hoping to get it out on the road and drive it around next week with the URD module installed and get it back together. The hood will close, but sits high on the drivers side and has a small dent now from where the snout hits the s/c housing. No problem because I have a scoop ready to install soon, just need to get the time to accomplish some of these things.
let me know if that video link doesnt work
01-19-2013, 03:35 PM
#36
Registered User
Thread Starter
iTrader: (1)
Join Date: Apr 2010
Location: Binghamton, NY
Posts: 60
Likes: 0
Received 0 Likes
on
0 Posts
forgot to add that the kickdown exhaust pipe I snagged from the j/y was cut just behind the first O2 sensor, so the exhaust shop just ran a straight piece back to the stock cat. The rear O2 wiring harness was not long enough, but I picked a rear sensor out of an 04 Tacoma at the j/y with about a 3 ft harness on it, it worked perfectly and so far no codes, but I need to really get it out and drive it to test that theory out.
05-10-2014, 03:01 AM
#37
Registered User
Thread Starter
iTrader: (1)
Join Date: Apr 2010
Location: Binghamton, NY
Posts: 60
Likes: 0
Received 0 Likes
on
0 Posts
17k and counting.. Fluid bright red and not a single slip noticed with the minor mods added during the rebuild. Just wanted to update as the truck is running pretty great for me, glad I decided on the swap. This motor is solid, leaks nothing burns nothing but gas, and actually gets close to 18 mpg hwy. couldn't be happier with a 20 year old truck.
Now if I could just keep it rust free... Haha
Now if I could just keep it rust free... Haha
06-07-2014, 05:02 AM
#39
Registered User
Thread Starter
iTrader: (1)
Join Date: Apr 2010
Location: Binghamton, NY
Posts: 60
Likes: 0
Received 0 Likes
on
0 Posts
Are you running meth injection? I almost dyno'd mine last year and may this summer, I have heard good things about removing the 7th injector and just spraying meth instead. That's a lot of power man, please share your secrets hahah.

Thread
Thread Starter
Forum
Replies
Last Post
RedRunner_87
95.5-2004 Tacomas & 96-2002 4Runners (Build-Up Section)
84
06-01-2021 01:51 PM
skoti89
Offroad Tech
3
07-08-2015 12:05 AM


