superchiem's Toyota RV 5vz Swap
 10-17-2011, 09:59 PM
#1
Registered User
Thread Starter
iTrader: (1)
Join Date: Jan 2004
Location: Anaheim, California
Posts: 212
Likes: 0
Received 0 Likes
on
0 Posts
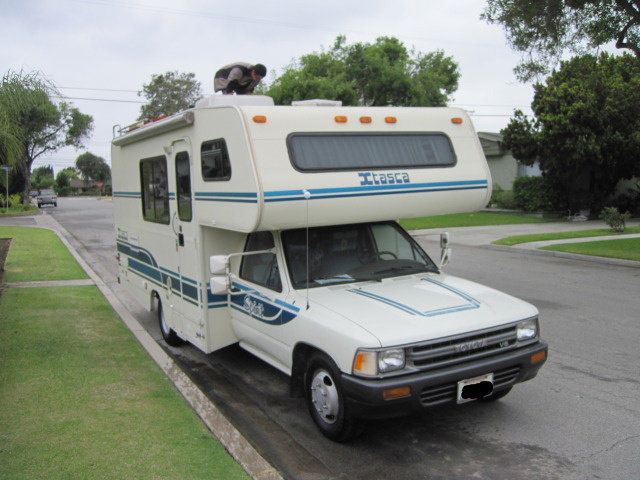
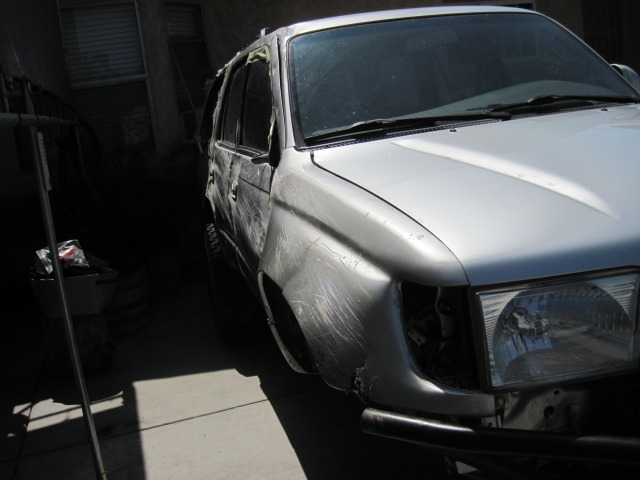
Here is my 1991 Toyota Itasca:
Here is the donor:
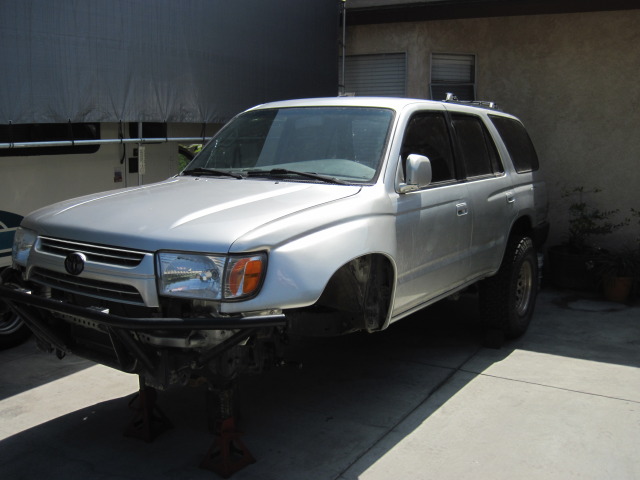
I wanted a newer engine with lower miles so I went with an 02 2wd 4runner. I'm still up in the air about using the newer dash harness and splicing in the accessories. I think that would take care of my main concern, which is having the motor running. Then I can worry about the AC, lights, signals, and such later.
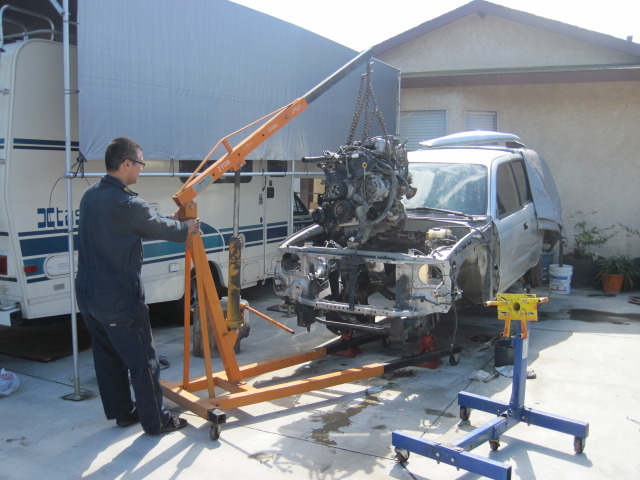
Pulling the motor:
I first pulled the tranny and the next day pulled the motor. Pulling the motor was fairly easy. I just wrapped chains around each motor mount and started pumping. I would give it a couple pumps and check for snags. I eventually needed my brothers help to keep it from smashing into things.
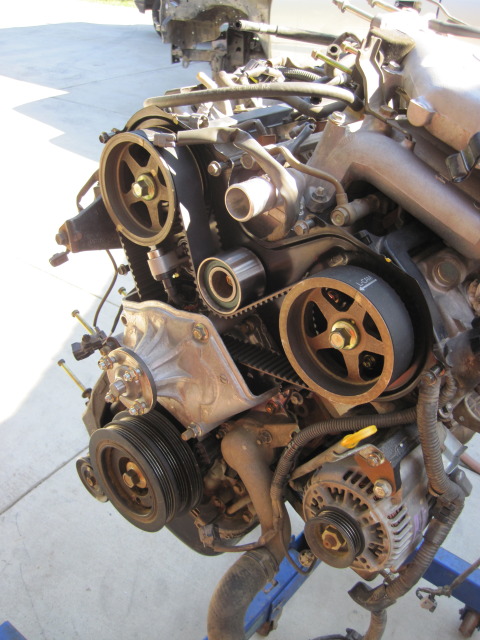
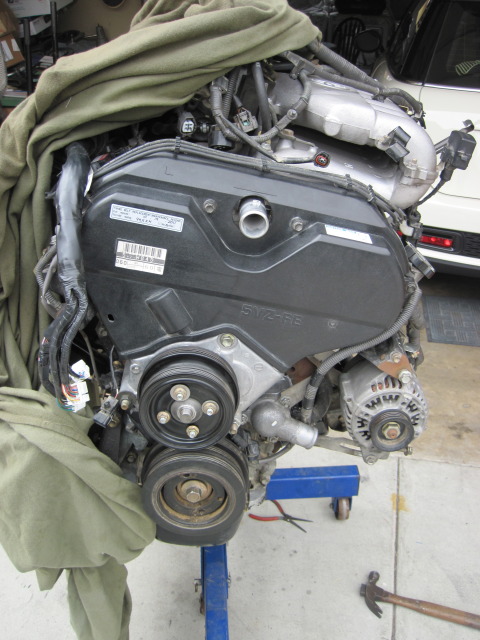
Tune up and routine maintenance
I changed the timing belt and water pump, while the motor was out. Breaking the crankshaft bolt loose was the most timing consuming during maintenance work. I had to make my own pulley holder and chain it to the stand. It took about 240 ft-lbs to finally break it loose.
Cooling, heating and air condition systems:
Looks like I'm going to be using the old A/C pump. It seems to have the best success. That way I can keep it intact.
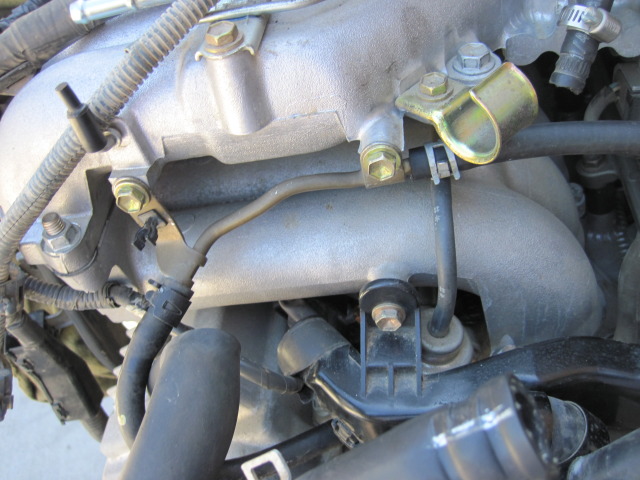
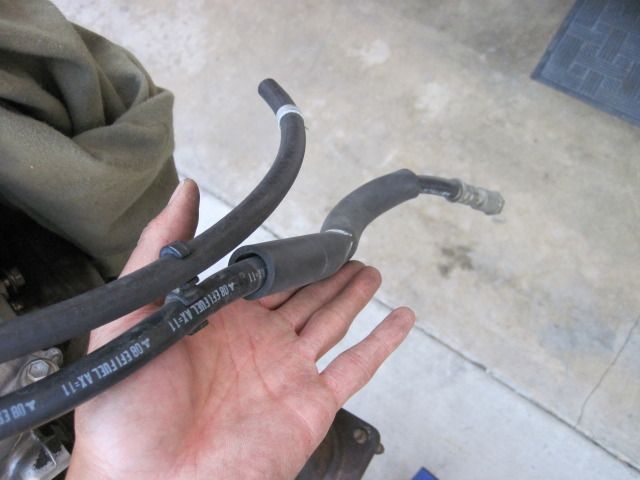
Fuel and exhaust systems:
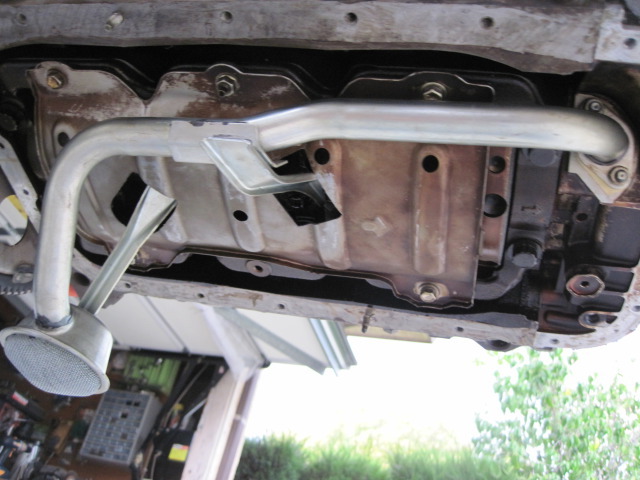
I already rotated the high pressure fuel line. Using existing holes I mounted the return line. I bought 2 feet of fuel line and also extended the return line.
Tomorrow I hope I can pull the oil pan and drill a new dip stick hole. Any ideas on drill bit size? I've read 3/8", but seems there's conflicting info out there.
I would also like to modify the alternator bracket. Anybody know how much I need to cut off and reweld?
Here is the donor:
I wanted a newer engine with lower miles so I went with an 02 2wd 4runner. I'm still up in the air about using the newer dash harness and splicing in the accessories. I think that would take care of my main concern, which is having the motor running. Then I can worry about the AC, lights, signals, and such later.
Pulling the motor:
I first pulled the tranny and the next day pulled the motor. Pulling the motor was fairly easy. I just wrapped chains around each motor mount and started pumping. I would give it a couple pumps and check for snags. I eventually needed my brothers help to keep it from smashing into things.
Tune up and routine maintenance
I changed the timing belt and water pump, while the motor was out. Breaking the crankshaft bolt loose was the most timing consuming during maintenance work. I had to make my own pulley holder and chain it to the stand. It took about 240 ft-lbs to finally break it loose.
Cooling, heating and air condition systems:
Looks like I'm going to be using the old A/C pump. It seems to have the best success. That way I can keep it intact.
Fuel and exhaust systems:
I already rotated the high pressure fuel line. Using existing holes I mounted the return line. I bought 2 feet of fuel line and also extended the return line.
Tomorrow I hope I can pull the oil pan and drill a new dip stick hole. Any ideas on drill bit size? I've read 3/8", but seems there's conflicting info out there.
I would also like to modify the alternator bracket. Anybody know how much I need to cut off and reweld?
 10-18-2011, 06:45 AM
#2
Registered User
Join Date: Mar 2010
Location: Vista
Posts: 24
Likes: 0
Received 0 Likes
on
0 Posts
I drilled 3/8 and it was a little sloppy. I would choose size U (.368) for a slight interference fit. I believe ORS used to recommend this drill size as well.
Was anything even wrong with the donor?
Good Luck
Was anything even wrong with the donor?
Good Luck
 10-18-2011, 09:04 AM
#4
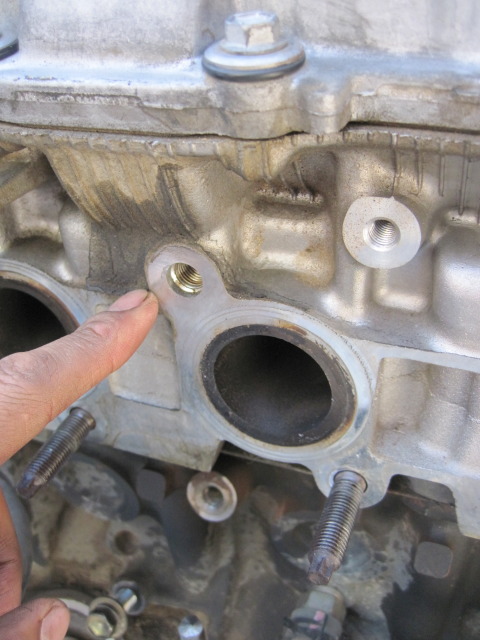
Just be sure when pressing the union in not to hammer it in too far... my buddy gave mine 1 too many whacks and the side of the block cracked off!

I had to use some good ole JB Weld to put it back in place!
10-18-2011, 04:16 PM
#5
Registered User
Thread Starter
iTrader: (1)
Join Date: Jan 2004
Location: Anaheim, California
Posts: 212
Likes: 0
Received 0 Likes
on
0 Posts
The toyota dealer near my house doesn't have the union. So I'm going to hold off on the drilling until the 3vz is out. That way I can weld up a drill guide just like ORS'.
Also there is no point in cutting the alternator bracket with out knowing how much I need to cut anyways. So that will have to wait.
Today I pulled the 3.0 radiator, fan, fan clutch, intake box, intake tube, alternator and battery.
Engine Electrical System
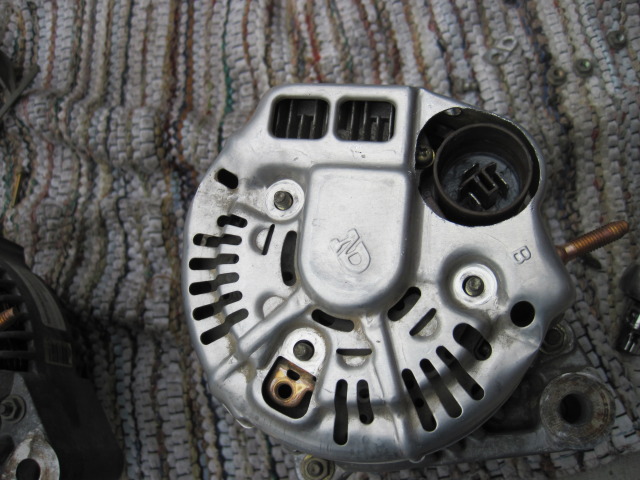
I needed to do something today so I thought I would get the alternator ready for the swap. Instead of splicing in a new connector I just swap voltage regulators.
Here is the 60 amp 3vze alt (left) and 80 amp 5vze alt (right)
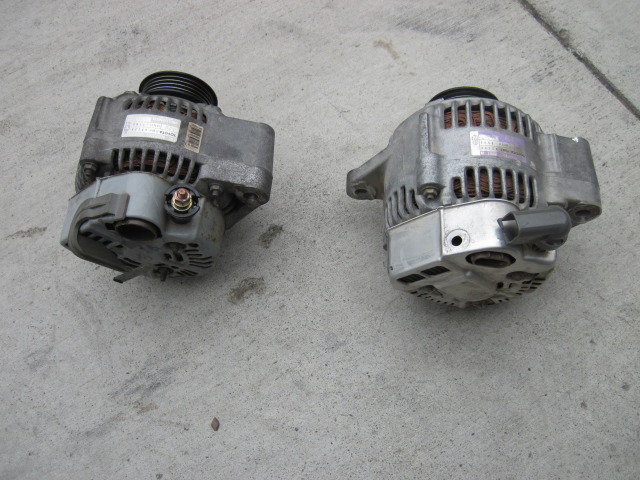
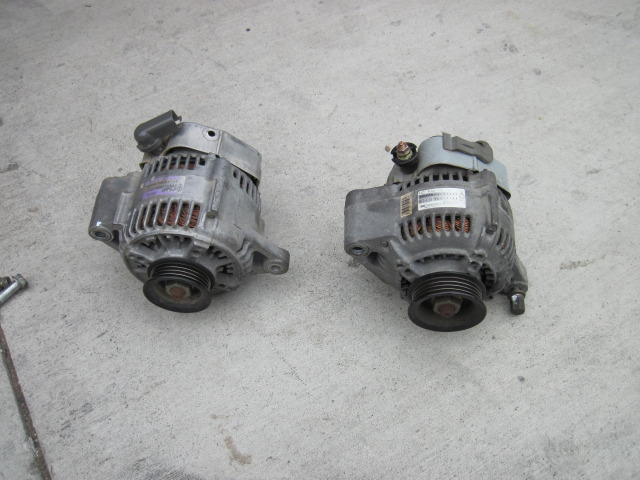
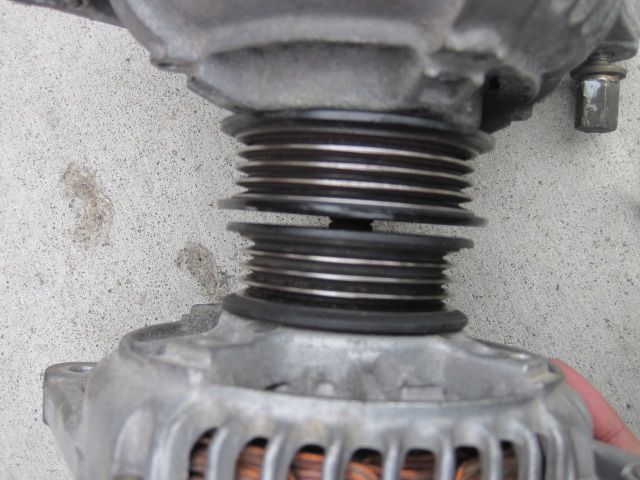
They have the same type of pulley. The 3vze's is a little bigger.
Unbolt 3 bolts on the back the alternator holding the case.
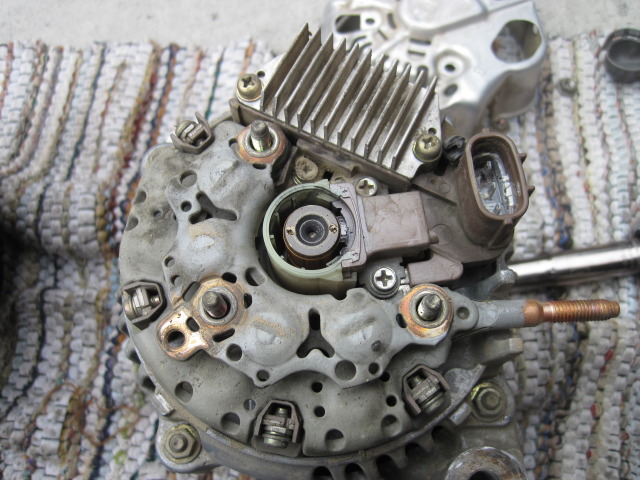
Remove the 5 screws holding the voltage regulator.
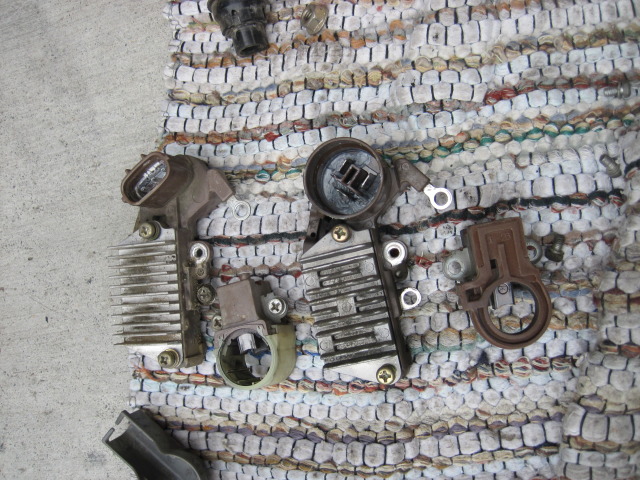
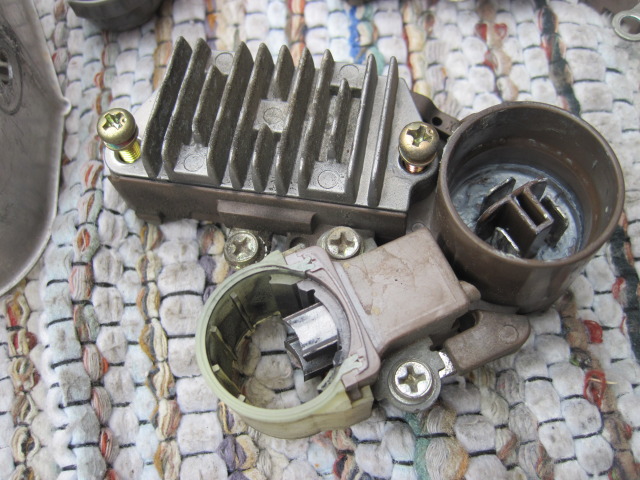
The case has some differences. So you can't just swap alternator cases.
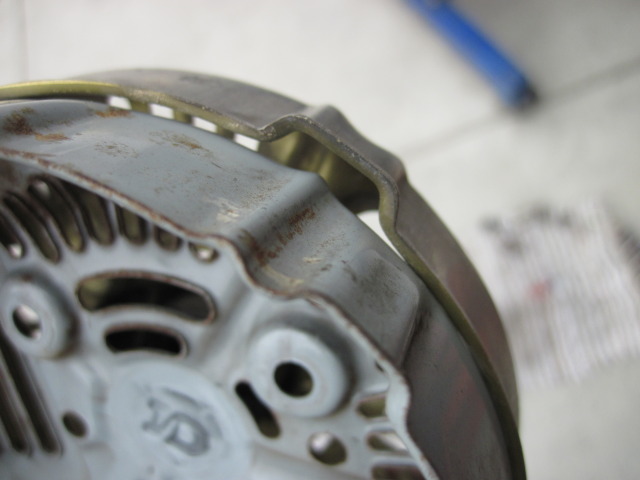
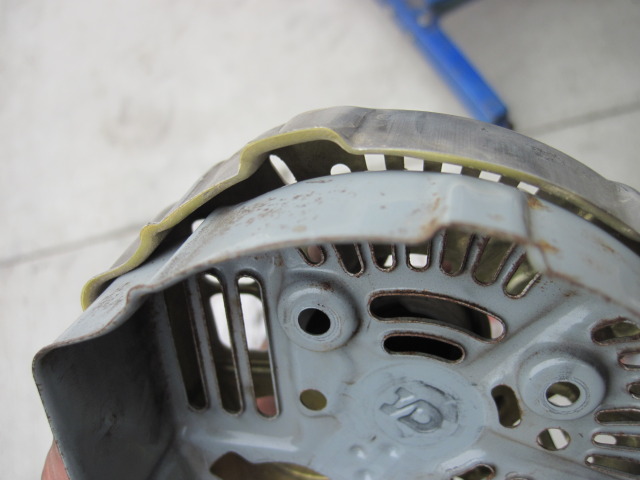
Had to grind out the newer case that way the connector from the 3vze can fit into the alternator connector.
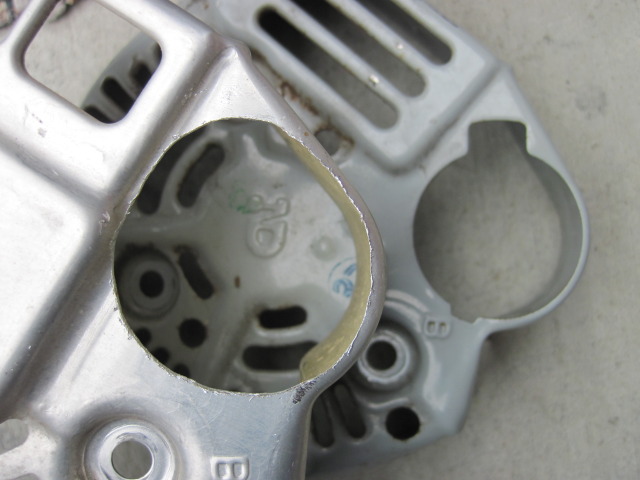
Installed and ready for the swap. I also installed the 3vze coolant outlet.
 10-21-2011, 06:03 PM
#7
Registered User
Thread Starter
iTrader: (1)
Join Date: Jan 2004
Location: Anaheim, California
Posts: 212
Likes: 0
Received 0 Likes
on
0 Posts
Pulling the motor part 2:
What a day! I asked my future brother in laws to come over and help me pull the tranny out.
We couldn't get the tranny out because the RV doesn't have a removal tranny crossmember. The member is welded in place. So I had to lift the 3vze up alittle and the tranny came right out with all the atf from the torque converter. So since I already unbolted the motor mounts we went to town and decided to pull the whole engine.
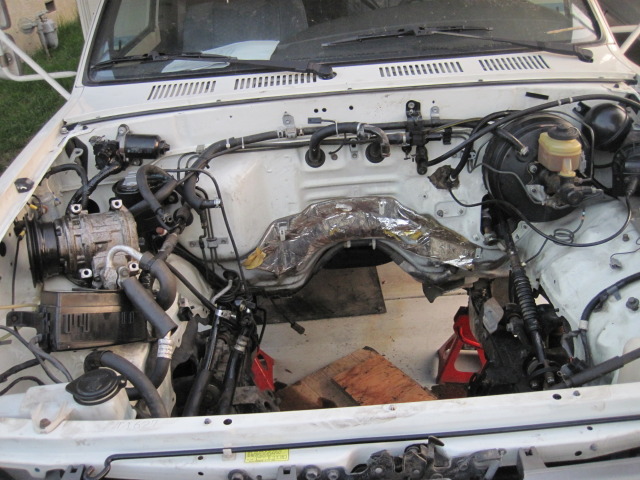
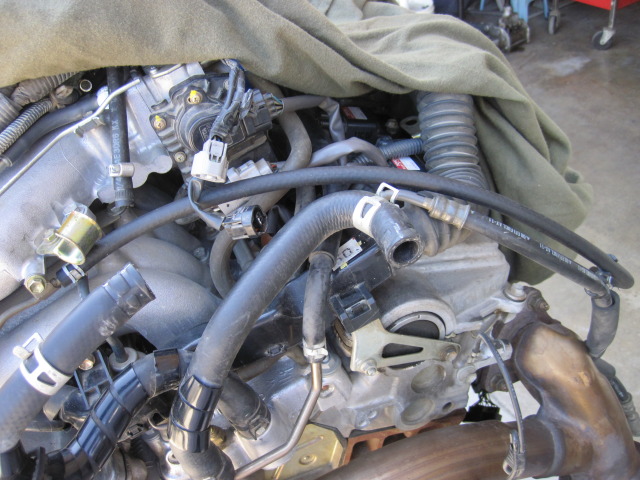
It was rough trying to keep the a/c lines intact, but we did it. I wanted to keep the vacuum lines intact for the future buyers, but it wasn't going to happen.
Looks like I have to swap pans, drill the dip stick hole, swap motor mounts, notch the motor mounts, clean up the engine bay, wire wheel rust, paint rusty areas, relocate the battery and then I should be ready to put the 5vze in there.
What a day! I asked my future brother in laws to come over and help me pull the tranny out.
We couldn't get the tranny out because the RV doesn't have a removal tranny crossmember. The member is welded in place. So I had to lift the 3vze up alittle and the tranny came right out with all the atf from the torque converter. So since I already unbolted the motor mounts we went to town and decided to pull the whole engine.
It was rough trying to keep the a/c lines intact, but we did it. I wanted to keep the vacuum lines intact for the future buyers, but it wasn't going to happen.
Looks like I have to swap pans, drill the dip stick hole, swap motor mounts, notch the motor mounts, clean up the engine bay, wire wheel rust, paint rusty areas, relocate the battery and then I should be ready to put the 5vze in there.
Trending Topics
10-21-2011, 11:16 PM
#8
Registered User
Thread Starter
iTrader: (1)
Join Date: Jan 2004
Location: Anaheim, California
Posts: 212
Likes: 0
Received 0 Likes
on
0 Posts
I know we are able to use either 3vz or 5vz steering pump, but which one is more reliable? I have a 5vz in my tacoma and the steering pump is about done on it. If the 3vz is know for problems then I'll throw on the 5vz steering pump.
What do you guys think?
What do you guys think?
10-24-2011, 06:29 PM
#10
Registered User
Thread Starter
iTrader: (1)
Join Date: Jan 2004
Location: Anaheim, California
Posts: 212
Likes: 0
Received 0 Likes
on
0 Posts
Well got some work done today.
Drilling the block part 1:
I decided to make a drill guide because I am cursed. They might as well change murphy's law to chiem's law it seems like sometimes. So I didn't want to take a chance.
I bought a tube with an I.D. of 3/8 and cut about 1 inch off the 48 inch piece. Trust me I looked and that was the shortest I could find it.
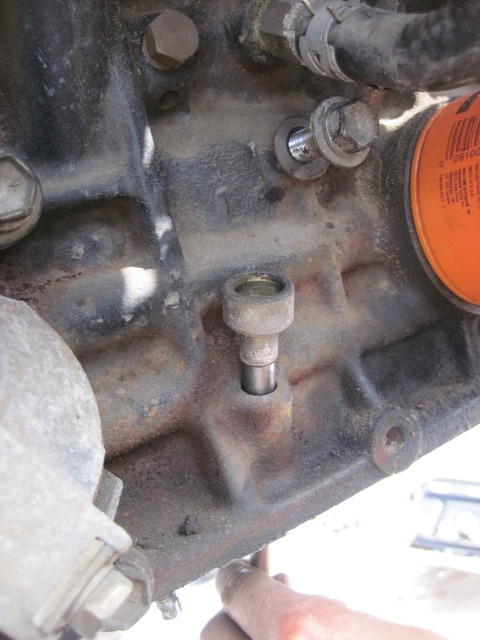
First I hammered the old union out of the 3vz:
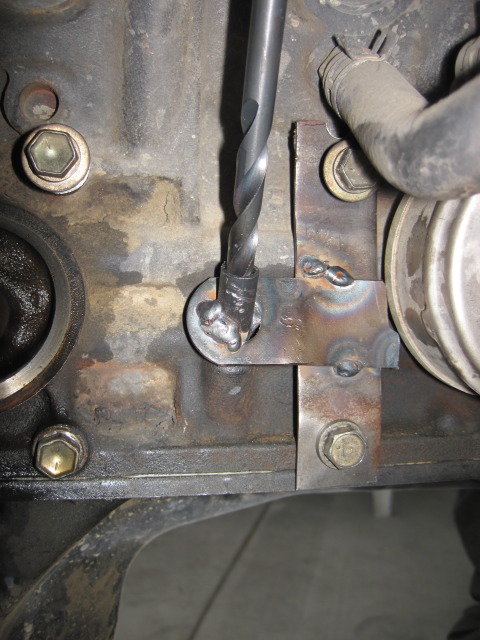
Here is the pipe I cut with the U size bit inside of it:
I wanted to build it like ORS, but didn't have large enough scrap metal. So I just used what I could find.
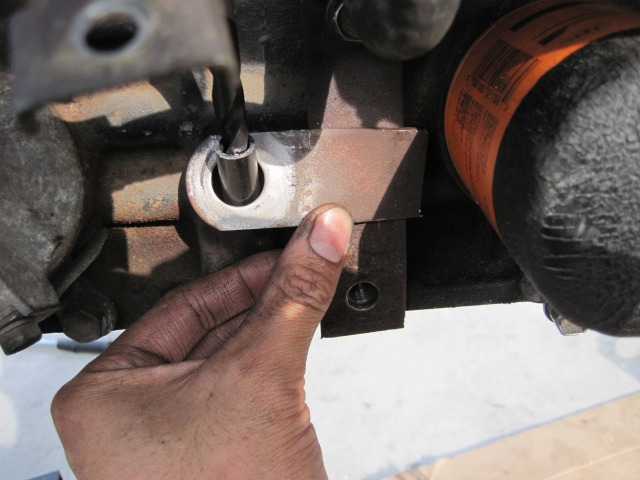
Here it is tacked up:
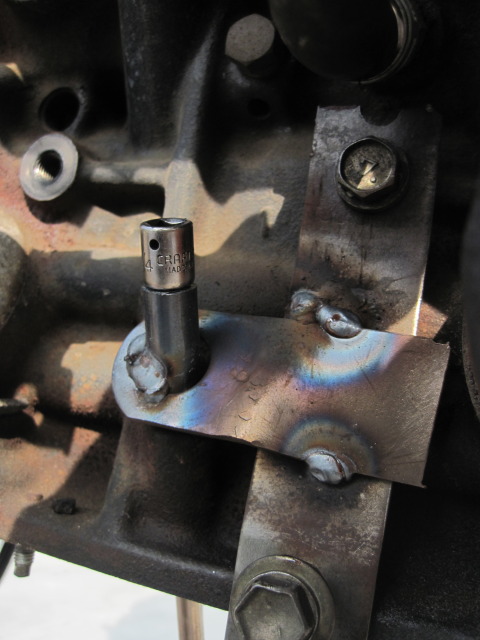
Had to grind a some off when I test fitted onto the 5vz:
Did you guys remove the exhaust manifold to drill this thing?
10-24-2011, 06:36 PM
#11
Registered User
Thread Starter
iTrader: (1)
Join Date: Jan 2004
Location: Anaheim, California
Posts: 212
Likes: 0
Received 0 Likes
on
0 Posts
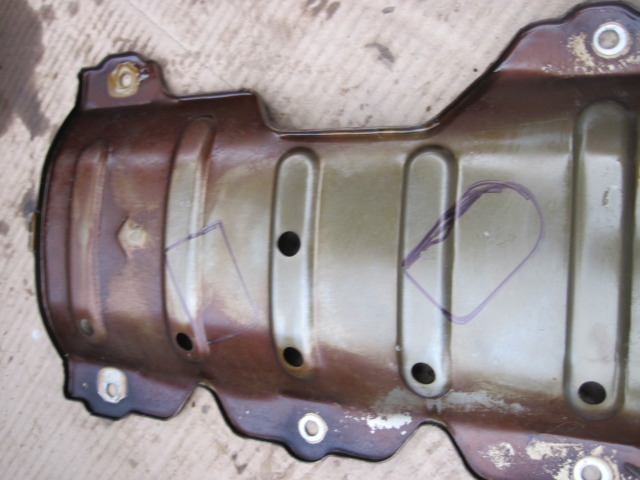
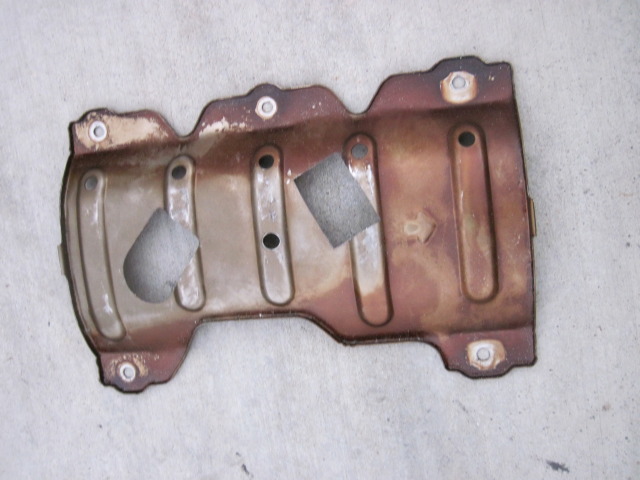
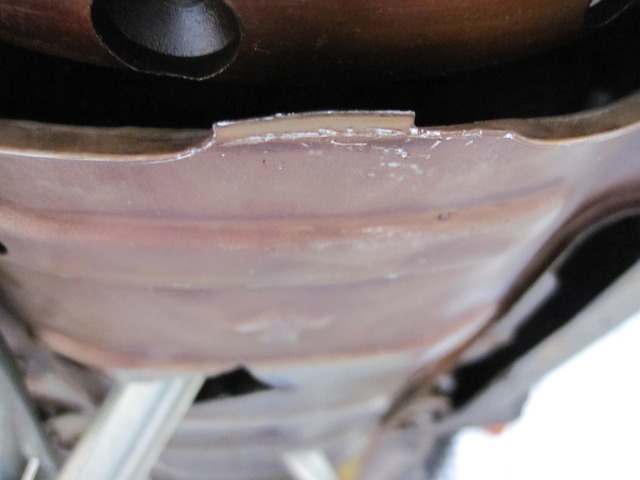
Modifying the 5vz Baffle:
I tried to measure up the 3vz holes with the 5vz holes. Using the ribs, but ended up about 2 jigsaw blades off. Kind of frustrating, but it went on when I tried installing the pickup tube with baffle at the same time. I may try to fix it tomorrow morning, but we'll see how the day unfolds.
I tried to measure up the 3vz holes with the 5vz holes. Using the ribs, but ended up about 2 jigsaw blades off. Kind of frustrating, but it went on when I tried installing the pickup tube with baffle at the same time. I may try to fix it tomorrow morning, but we'll see how the day unfolds.
10-25-2011, 07:12 AM
#12
Registered User
Join Date: Mar 2010
Location: Vista
Posts: 24
Likes: 0
Received 0 Likes
on
0 Posts
Regarding drilling the dipstick hole, I had the exhaust manifold/studs off AND used a 90 degree drill adapter and I was still right up next to the cylinder head using the ORS drill guide...
For future reference you can get short lengths of tube (12") from Aircraft Spruce and other online suppliers in under 2 days. I would have got a piece with an ID less than your U size, drilled it out, then made the drill guide. That would produce the best bore.
Did you stick a pair of calipers on the OD of that dipstick union by chance?
Nice job
10-25-2011, 01:24 PM
#13
Registered User
Thread Starter
iTrader: (1)
Join Date: Jan 2004
Location: Anaheim, California
Posts: 212
Likes: 0
Received 0 Likes
on
0 Posts
Regarding drilling the dipstick hole, I had the exhaust manifold/studs off AND used a 90 degree drill adapter and I was still right up next to the cylinder head using the ORS drill guide...
For future reference you can get short lengths of tube (12") from Aircraft Spruce and other online suppliers in under 2 days. I would have got a piece with an ID less than your U size, drilled it out, then made the drill guide. That would produce the best bore.
Did you stick a pair of calipers on the OD of that dipstick union by chance?
Nice job
For future reference you can get short lengths of tube (12") from Aircraft Spruce and other online suppliers in under 2 days. I would have got a piece with an ID less than your U size, drilled it out, then made the drill guide. That would produce the best bore.
Did you stick a pair of calipers on the OD of that dipstick union by chance?
Nice job
I didn't measure the OD of the dipstick union. Sorry...
Thanks for the help!
Navy
10-25-2011, 05:28 PM
#14
Registered User
Thread Starter
iTrader: (1)
Join Date: Jan 2004
Location: Anaheim, California
Posts: 212
Likes: 0
Received 0 Likes
on
0 Posts
Well didn't have much time, but was able to cut a little more out of the baffle plate and installed the baffle and oil sump.
There's also a small tab in front of the baffle. This tab needs to be bent up about 90 degrees and the oil pan should fit perfect.
Still need to get a right angle drill adapter to drill into the block. Don't want to dish out that cash though.
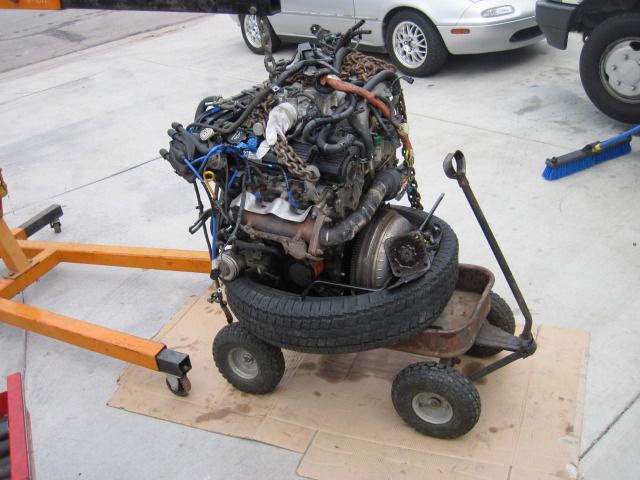
Also if you guys were wondering if radio flyer can take the weight of a 3vz. Well it can!
There's also a small tab in front of the baffle. This tab needs to be bent up about 90 degrees and the oil pan should fit perfect.
Still need to get a right angle drill adapter to drill into the block. Don't want to dish out that cash though.
Also if you guys were wondering if radio flyer can take the weight of a 3vz. Well it can!
10-26-2011, 03:29 PM
#18
Registered User
Thread Starter
iTrader: (1)
Join Date: Jan 2004
Location: Anaheim, California
Posts: 212
Likes: 0
Received 0 Likes
on
0 Posts
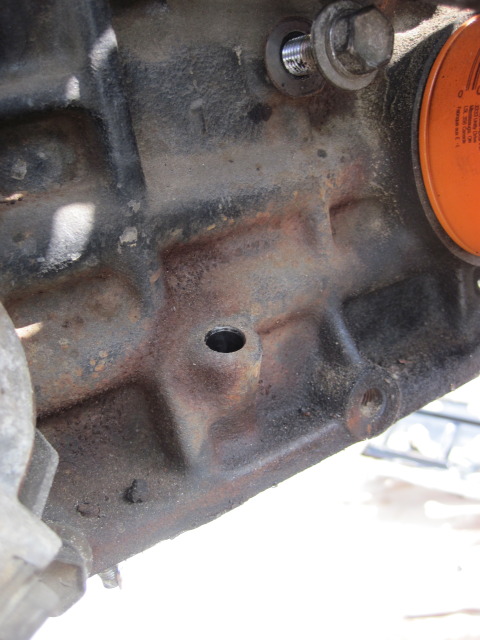
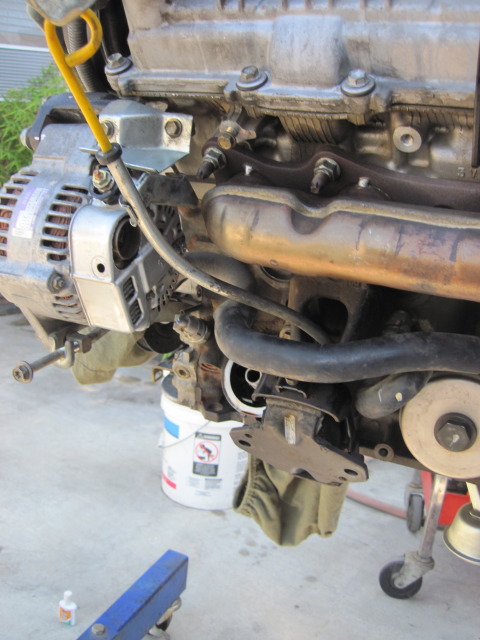
Today went pretty smooth. I had a few hours to spare and finally drilled a hole into the block.
Drilling the dip stick hole Part 2:
I first had to remove the exhaust manifold. Then had to remove the top middle stud. You can use a 8mm socket wrench to get it out I think.
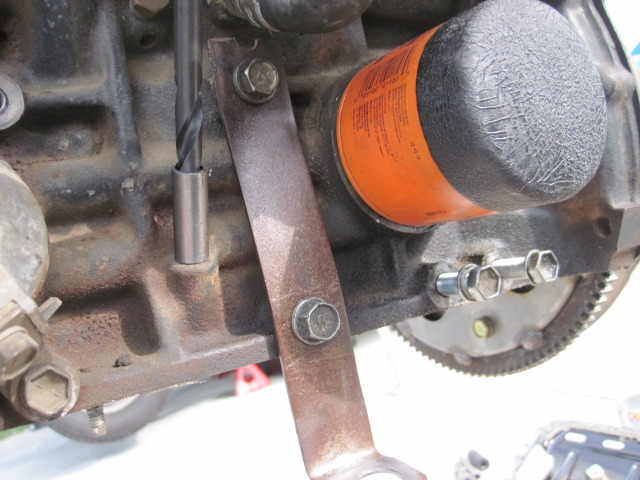
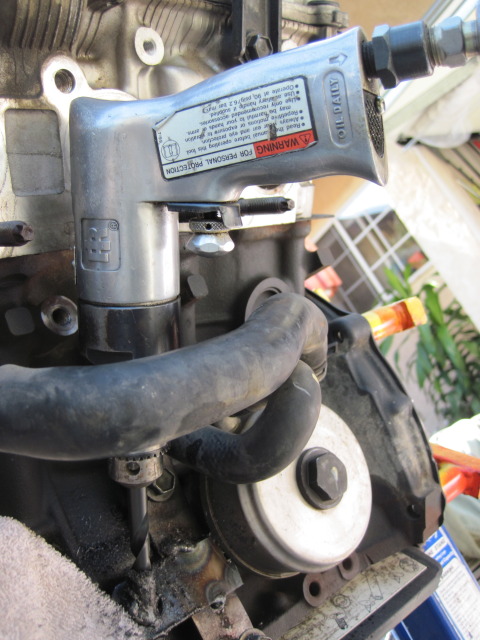
I dug around in my parents garage and remember we had a air powered drill.
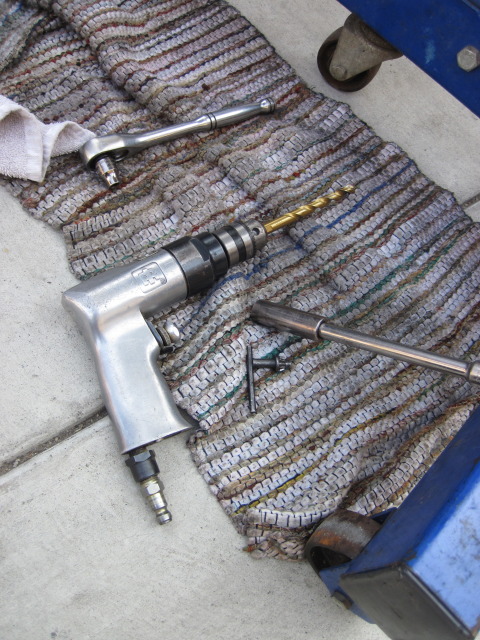
The drill fit perfect with a little room to spare.
I used a 3/8 drill to start a hole then switched to the U size bit. That way I had the exact center that I wanted.
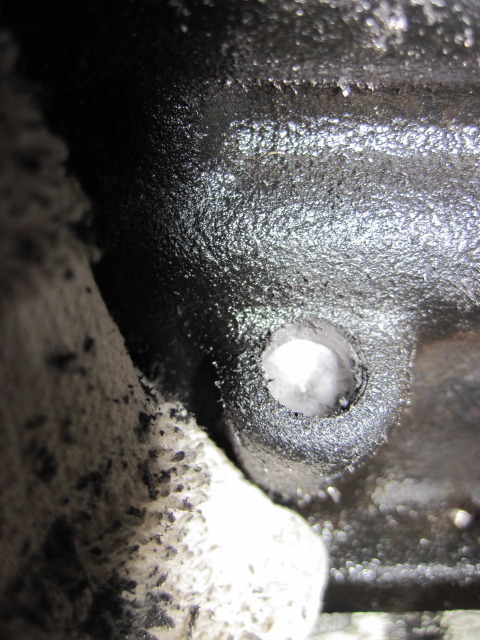
Then went all the way with the U size bit.
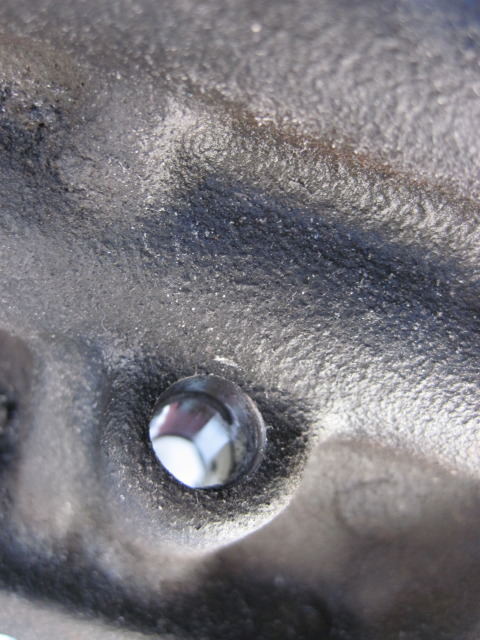
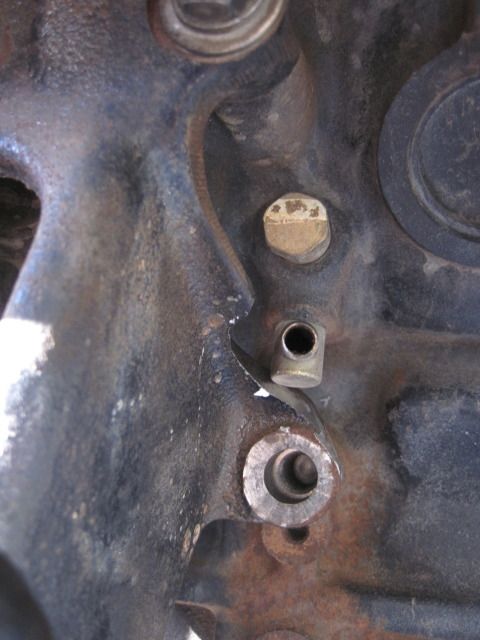
Took the union out of the fridge and tapped it in using a socket.
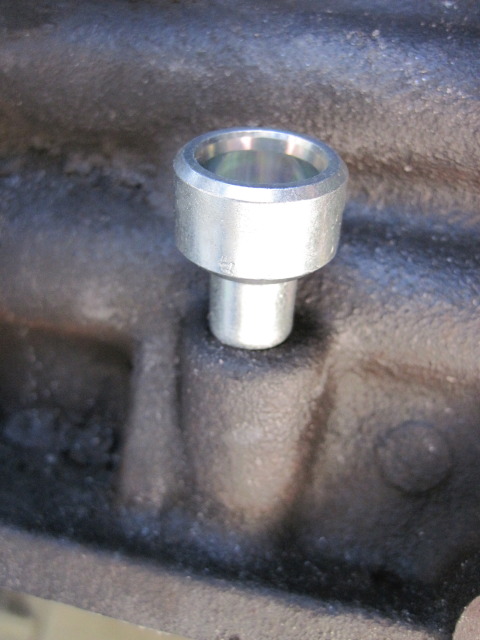

Also tapped and used a allen screw and a o-ring to plug the old dipstick hole.
It sticks out a little bit, but the pan clears.
Just need to mount the new dipstick.
Notching the passenger side motor mount:
Made some marks with some white out and went to town with grinder.
Drilling the dip stick hole Part 2:
I first had to remove the exhaust manifold. Then had to remove the top middle stud. You can use a 8mm socket wrench to get it out I think.
I dug around in my parents garage and remember we had a air powered drill.
The drill fit perfect with a little room to spare.
I used a 3/8 drill to start a hole then switched to the U size bit. That way I had the exact center that I wanted.
Then went all the way with the U size bit.
Took the union out of the fridge and tapped it in using a socket.
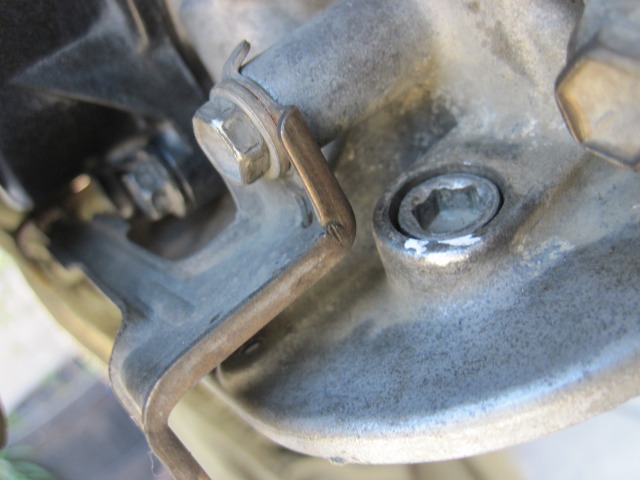
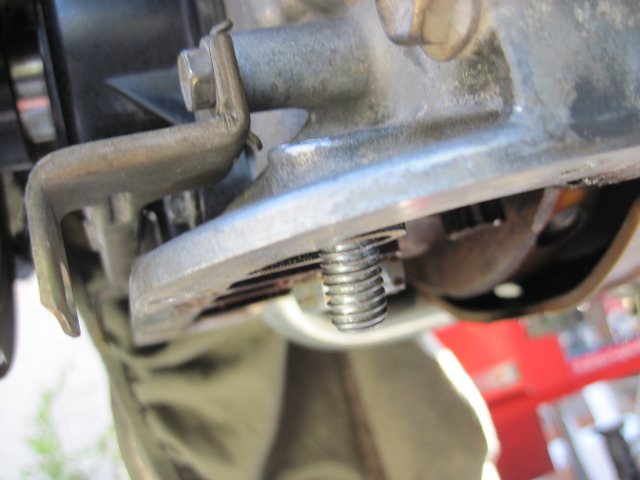
Also tapped and used a allen screw and a o-ring to plug the old dipstick hole.
It sticks out a little bit, but the pan clears.
Just need to mount the new dipstick.
Notching the passenger side motor mount:
Made some marks with some white out and went to town with grinder.
Last edited by superchiem; 10-26-2011 at 03:34 PM.


