Etravoda's 97 Auto 3.4 Swap into 95/3.0/Auto
 12-26-2011, 08:39 AM
#1
Registered User
Thread Starter
Join Date: Jan 2009
Posts: 40
Likes: 0
Received 0 Likes
on
0 Posts
Etravoda's 97 Auto 3.4 Swap into 95/3.0/Auto
I finished a 3.4 swap earlier this year and have put around 1500 miles on it. I found a lot of information online and wanted to condense it into a build-up thread for all the other 3.4 swap people. I went with a 97 3.4 a340f transmission and bolted it to a Inchworm "Tacoma Adapter" and gear-driven t-case with chromoly 23 spline input gear.
This hopefully will help the "Auto swappers." I know there is not as much information on Autos and there are many shortcuts that can be taken that many people are unaware of. I did a lot of researched on keeping the 3.0 tranny and talked to "thefatkid" about his luck with it. He shared that he had issues with the 3.0 tranny slipping. I believe you can get the a340h to work if you use a t100 ECU but I didn't want to fiddle with it and I'm glad I went the way I did. My swap probably cost more but I knew what I was doing, I knew that the transmission would work properly, and I now have the stronger gear driven t-case (and the easier expansion for dual cases if that ever comes up)
Here's what it went in:

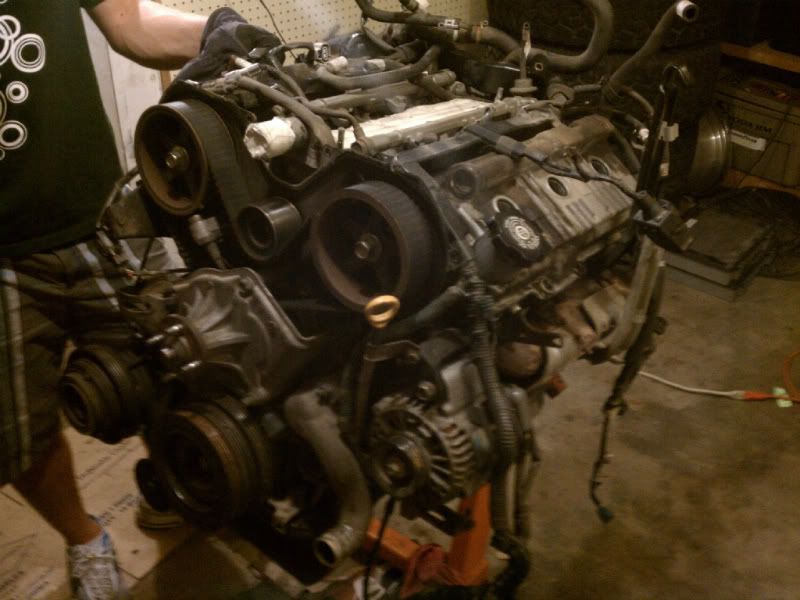
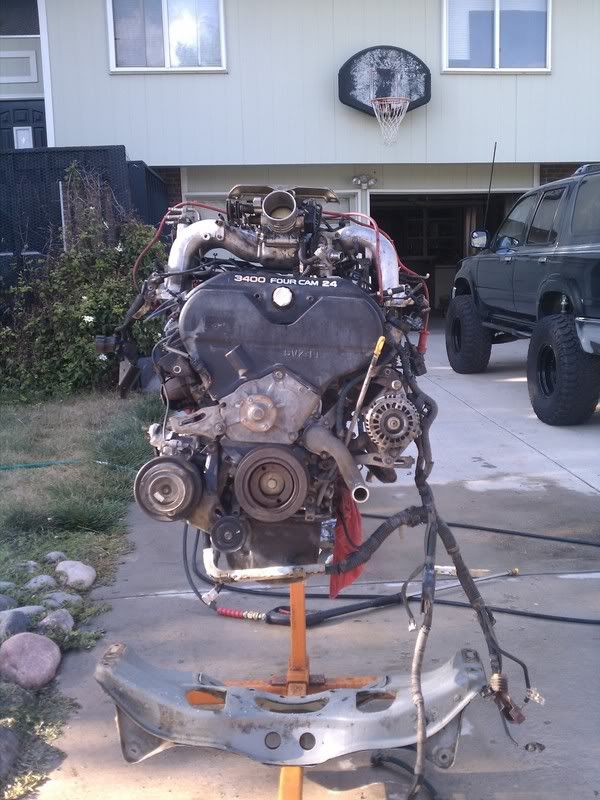
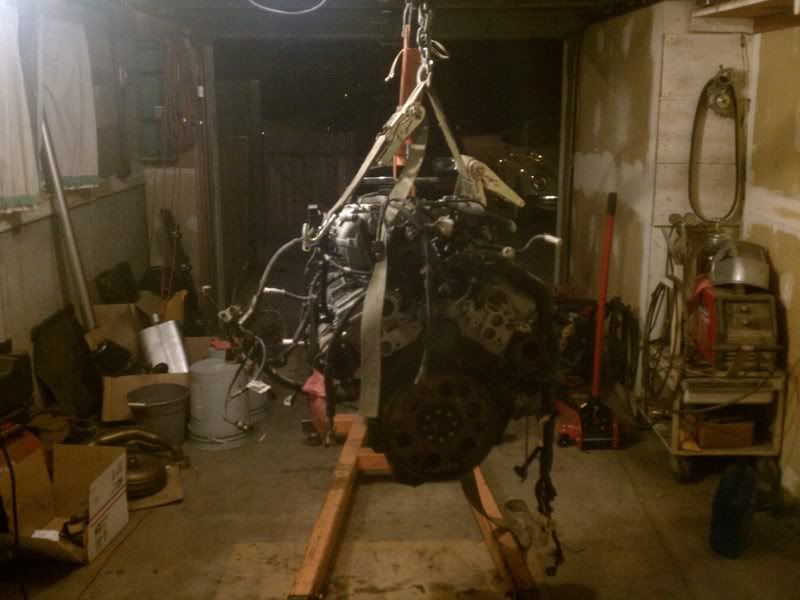
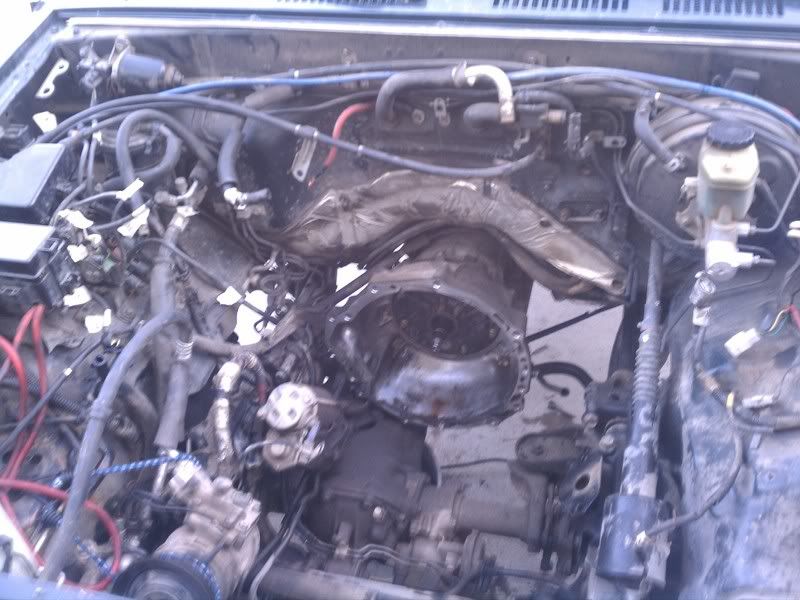
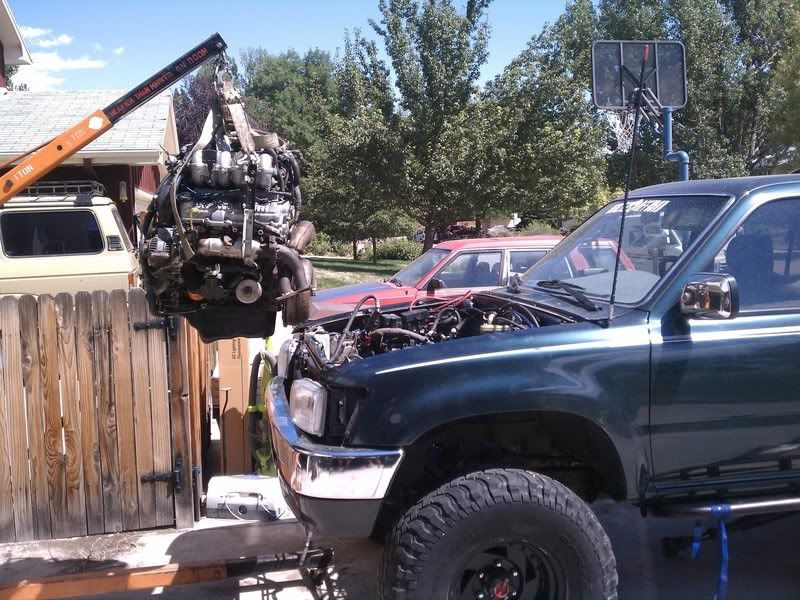
Picked up a 97 4Runner Auto for a donor. Engine has 220k miles on it but compression tested fine and ran great.
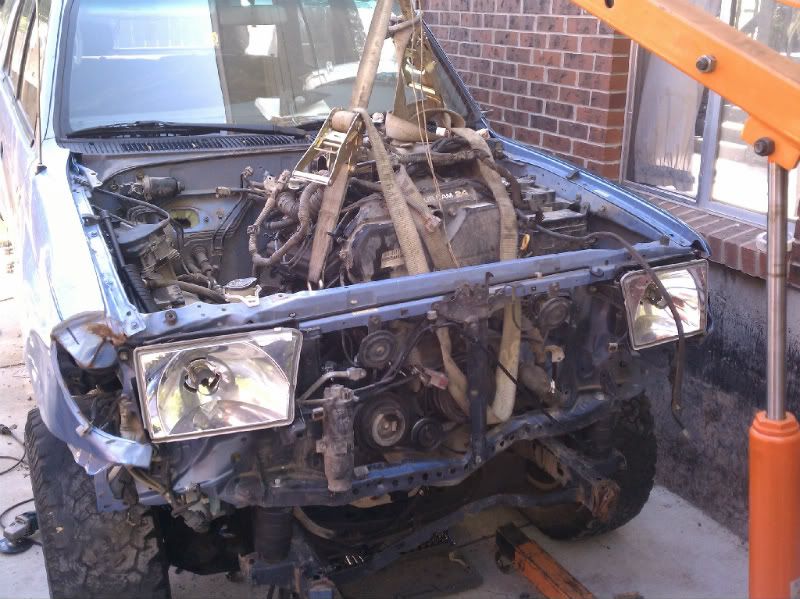
Engine out and ready to begin preliminary work. When pulling it out we found a broken motor mount (one bolt still in block, another bolt sheared off in block, and the last bolt taking a part of the block with it!)
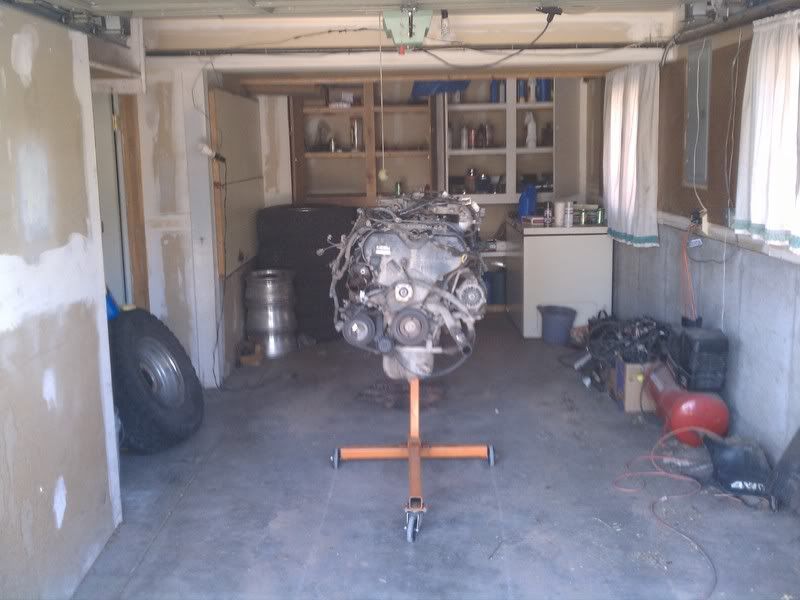
I had a lot of help from several buddies along the way. We worked on the 3.4 for around a month off and on to replace seals, crank bearings, fix motor mount, spark plugs, etc.
This hopefully will help the "Auto swappers." I know there is not as much information on Autos and there are many shortcuts that can be taken that many people are unaware of. I did a lot of researched on keeping the 3.0 tranny and talked to "thefatkid" about his luck with it. He shared that he had issues with the 3.0 tranny slipping. I believe you can get the a340h to work if you use a t100 ECU but I didn't want to fiddle with it and I'm glad I went the way I did. My swap probably cost more but I knew what I was doing, I knew that the transmission would work properly, and I now have the stronger gear driven t-case (and the easier expansion for dual cases if that ever comes up)
Here's what it went in:
Picked up a 97 4Runner Auto for a donor. Engine has 220k miles on it but compression tested fine and ran great.
Engine out and ready to begin preliminary work. When pulling it out we found a broken motor mount (one bolt still in block, another bolt sheared off in block, and the last bolt taking a part of the block with it!)
I had a lot of help from several buddies along the way. We worked on the 3.4 for around a month off and on to replace seals, crank bearings, fix motor mount, spark plugs, etc.
Last edited by Etravoda; 06-20-2013 at 03:02 PM.
 12-26-2011, 08:27 PM
#4
Registered User
Thread Starter
Join Date: Jan 2009
Posts: 40
Likes: 0
Received 0 Likes
on
0 Posts
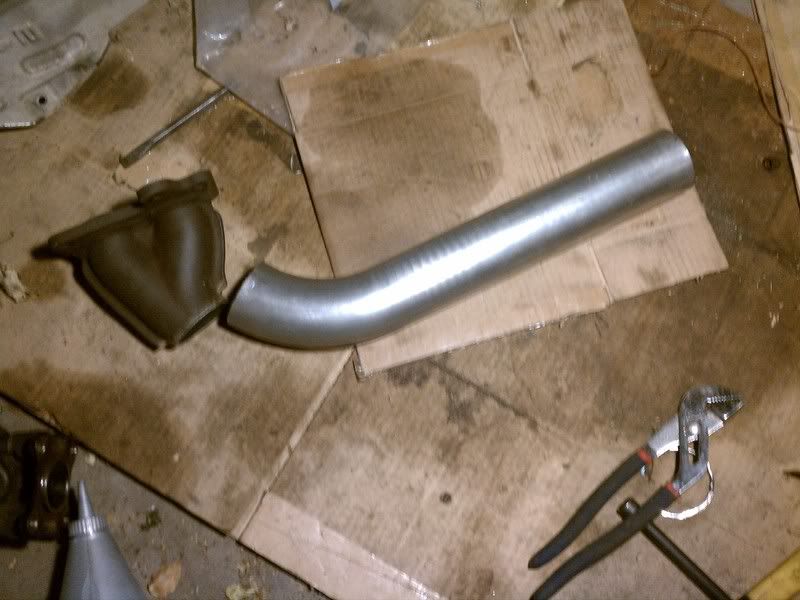
Stock exhaust (crossover running down passenger side)
Followed this posting on making your own crossover
https://www.yotatech.com/forums/f160...r-pipe-138902/
Used the stock crossover and roughly a 3" piece of pipe to make the new driver side crossover. I had an exhaust shop stretch the 3" piece for me just slightly so that it would sleeve over the stock pipe.
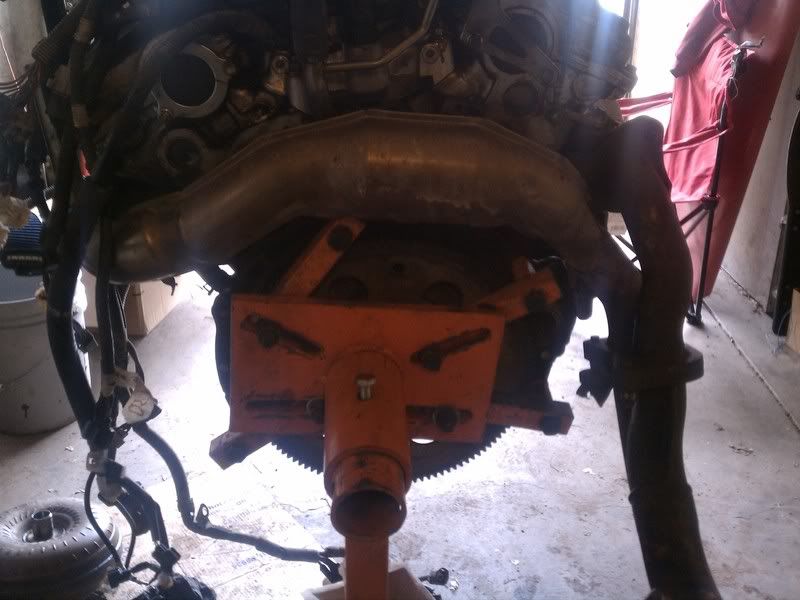
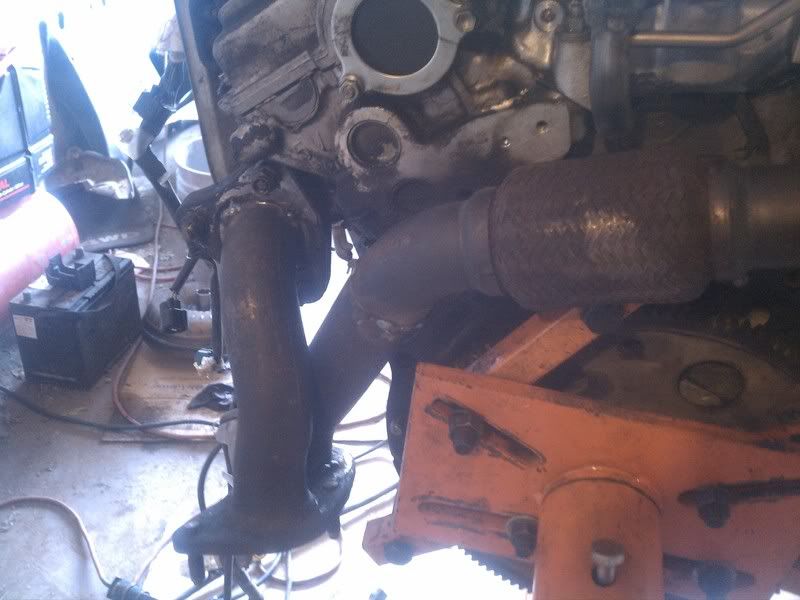

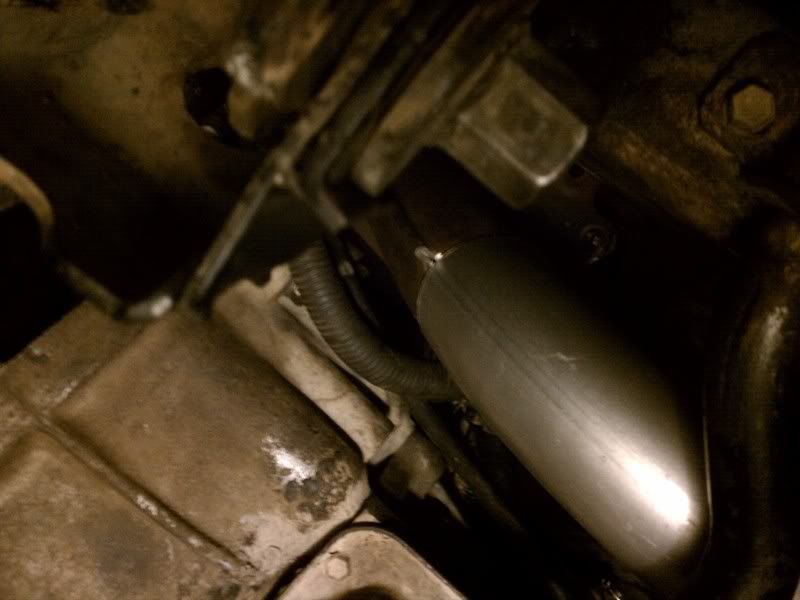
I was able to trim about 1"-2" off of either end of the heat shielding and re-use that. My crossover pipe ended up fitting PERFECTLY. I couldn't have asked for a better fit even if I had built it in the truck. My recommendation would be to eyeball down the bellhousing bolt holes "parallel" with the engine. If you shoot to have roughly around a 1/2" gap to where the bellhousing will come out, you should get the crossover pipe in a great position to fit around frame, torsion bars, and bellhousing.
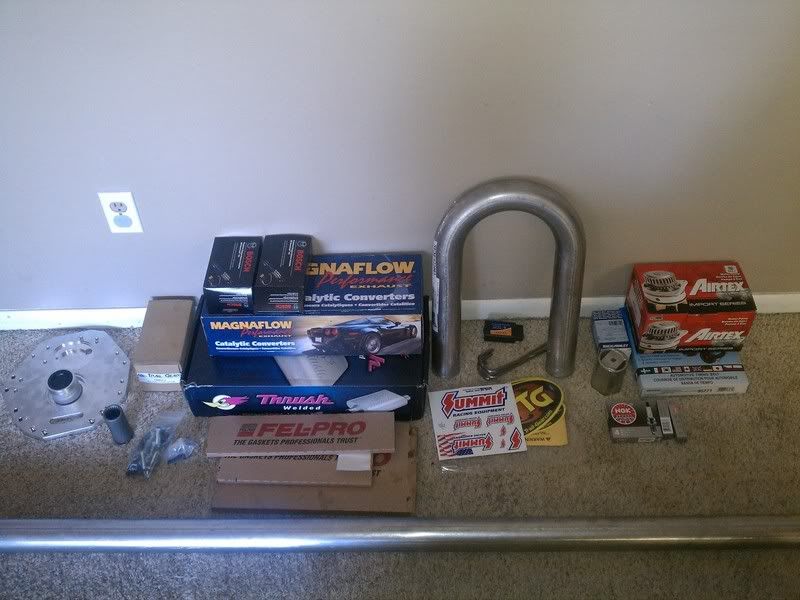
I talked to Scotty over at Addicted Offroad and he ordered parts from Inchworm and Trail-Gear for me. I bought other parts from Amazon and Summit Racing to build a 2.5" mandrel bent exhaust from the "downpipe" to the rear axle
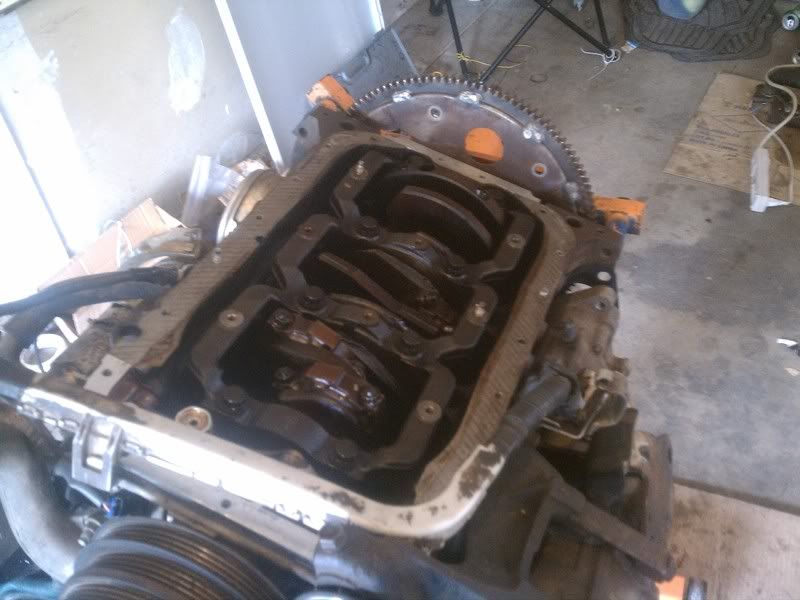
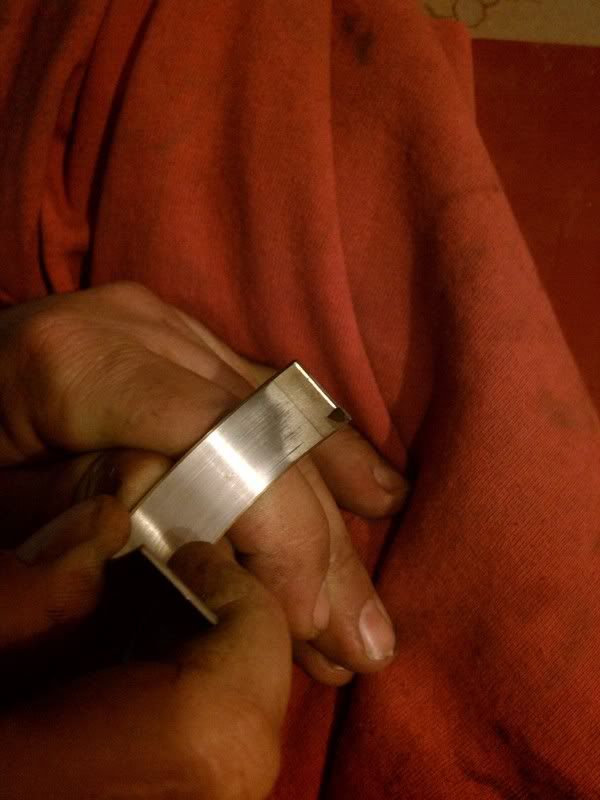
Replaced crank bearings while I had it on a stand. This was my first engine "internals" experience but based on what I heard from outside inputs, this looks like standard wear. There were no gouges or cuts in the bearings. (Yaaaa 3.4!!)
Followed this posting on making your own crossover
https://www.yotatech.com/forums/f160...r-pipe-138902/
Used the stock crossover and roughly a 3" piece of pipe to make the new driver side crossover. I had an exhaust shop stretch the 3" piece for me just slightly so that it would sleeve over the stock pipe.
I was able to trim about 1"-2" off of either end of the heat shielding and re-use that. My crossover pipe ended up fitting PERFECTLY. I couldn't have asked for a better fit even if I had built it in the truck. My recommendation would be to eyeball down the bellhousing bolt holes "parallel" with the engine. If you shoot to have roughly around a 1/2" gap to where the bellhousing will come out, you should get the crossover pipe in a great position to fit around frame, torsion bars, and bellhousing.
I talked to Scotty over at Addicted Offroad and he ordered parts from Inchworm and Trail-Gear for me. I bought other parts from Amazon and Summit Racing to build a 2.5" mandrel bent exhaust from the "downpipe" to the rear axle
Replaced crank bearings while I had it on a stand. This was my first engine "internals" experience but based on what I heard from outside inputs, this looks like standard wear. There were no gouges or cuts in the bearings. (Yaaaa 3.4!!)
Last edited by Etravoda; 01-27-2012 at 10:17 AM.
12-26-2011, 08:32 PM
#5
Registered User
Thread Starter
Join Date: Jan 2009
Posts: 40
Likes: 0
Received 0 Likes
on
0 Posts
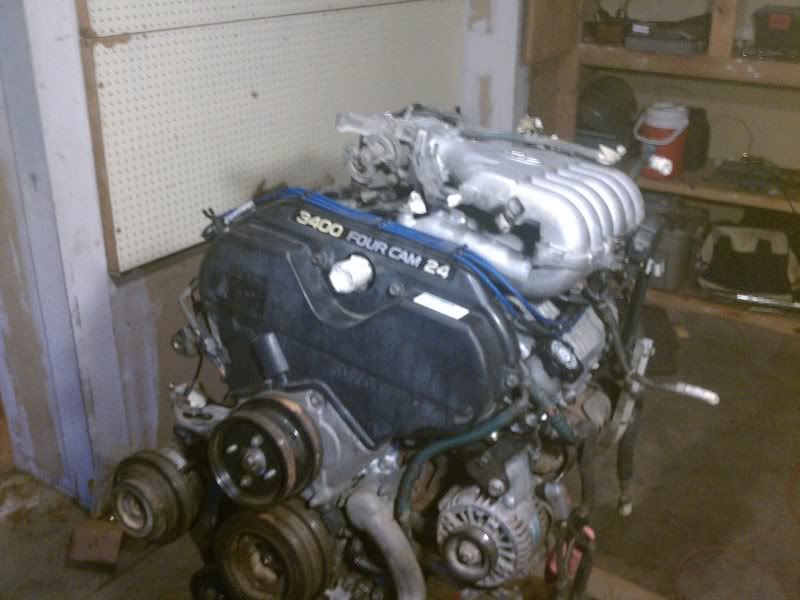
Another thing I would HIGHLY recommend is Purple Power. Spray that stuff on everything and power wash it down. I power washed the engine roughly three times before it ended up going in the truck.
Here's what happens when your Subaru buddy comes over to help and has spare intake manifolds sitting around. Rather unique looking
Tapped and plugged the old dipstick hole
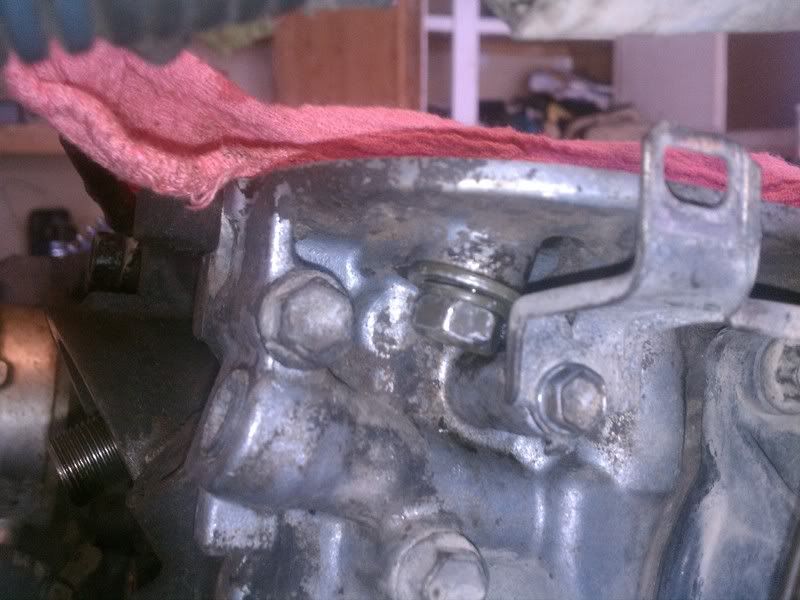
As per Elvota's advice, loosen the hard fuel line banjo bolt on the rear of the engine and you can flip it around to be the perfect length. IF a 3.0 recipient, this means NO CUSTOM FUEL HOSES.
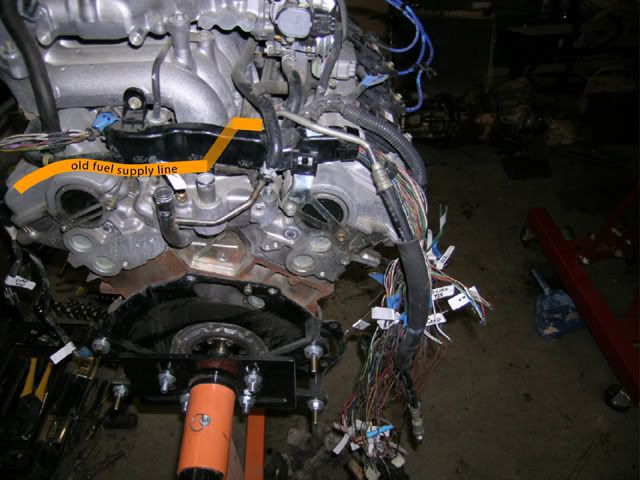
Also remove the hard lined part for the return fuel line while the engine is out. (Something I didn't learn until it was in the truck and still want to fix)
Both pictures from: https://www.yotatech.com/forums/f160...85/index3.html
Doing rear main
All-in-all I changed:
Timing Belt
Water Pump
Crank Bearings
Spark Plugs (Tested wires and they came out well under spec)
Intake Seals
Rear Main
Valve Cover Gaskets
...and cleaned a lot to make her look nice
... and started pulling the 3.0!! Had several guys working on this late one night. Thanks to Chris for all the help with vacuum hoses and Ben for help with everything else!
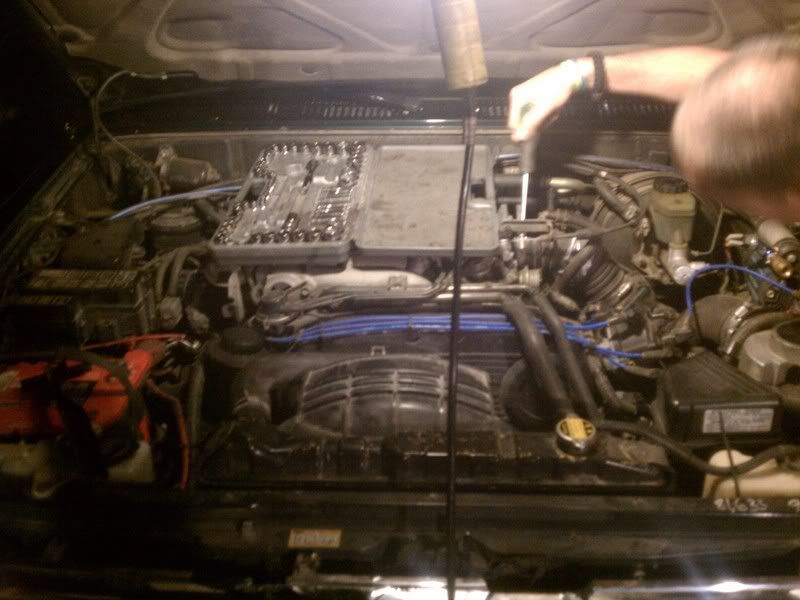
Pulled the 3.0 on a nice warm Sat thanks to help from Jared
Here's what happens when your Subaru buddy comes over to help and has spare intake manifolds sitting around. Rather unique looking
Tapped and plugged the old dipstick hole
As per Elvota's advice, loosen the hard fuel line banjo bolt on the rear of the engine and you can flip it around to be the perfect length. IF a 3.0 recipient, this means NO CUSTOM FUEL HOSES.
Also remove the hard lined part for the return fuel line while the engine is out. (Something I didn't learn until it was in the truck and still want to fix)
Both pictures from: https://www.yotatech.com/forums/f160...85/index3.html
Doing rear main
All-in-all I changed:
Timing Belt
Water Pump
Crank Bearings
Spark Plugs (Tested wires and they came out well under spec)
Intake Seals
Rear Main
Valve Cover Gaskets
...and cleaned a lot to make her look nice
... and started pulling the 3.0!! Had several guys working on this late one night. Thanks to Chris for all the help with vacuum hoses and Ben for help with everything else!
Pulled the 3.0 on a nice warm Sat thanks to help from Jared
Last edited by Etravoda; 01-27-2012 at 10:20 AM.
12-26-2011, 09:16 PM
#6
Registered User
Thread Starter
Join Date: Jan 2009
Posts: 40
Likes: 0
Received 0 Likes
on
0 Posts
I was able to leave the 3.0 AC compressor still attached to the body and bungee cord it to the side. The compressor bolts right to the 3.4 and only requires changing over the clutch/pulley. As of 12/26/11 I have not gotten the AC wired in the wiring harness.
12-26-2011, 09:28 PM
#7
If I may inquire, why did you leave the stock 3.0 vacuum nightmare in there? Using a stock 97 Evap box is 100x cleaner, way less vacuum mess.
Also, what did you do for your heater? I took my heater valve out when I did this swap on my crawler, but I am now swapping another into an 89 and I want it to be super clean looking when I am done.
Also, what did you do for your heater? I took my heater valve out when I did this swap on my crawler, but I am now swapping another into an 89 and I want it to be super clean looking when I am done.
Trending Topics
12-26-2011, 09:34 PM
#8
Registered User
Thread Starter
Join Date: Jan 2009
Posts: 40
Likes: 0
Received 0 Likes
on
0 Posts
If I may inquire, why did you leave the stock 3.0 vacuum nightmare in there? Using a stock 97 Evap box is 100x cleaner, way less vacuum mess.
Also, what did you do for your heater? I took my heater valve out when I did this swap on my crawler, but I am now swapping another into an 89 and I want it to be super clean looking when I am done.
Also, what did you do for your heater? I took my heater valve out when I did this swap on my crawler, but I am now swapping another into an 89 and I want it to be super clean looking when I am done.
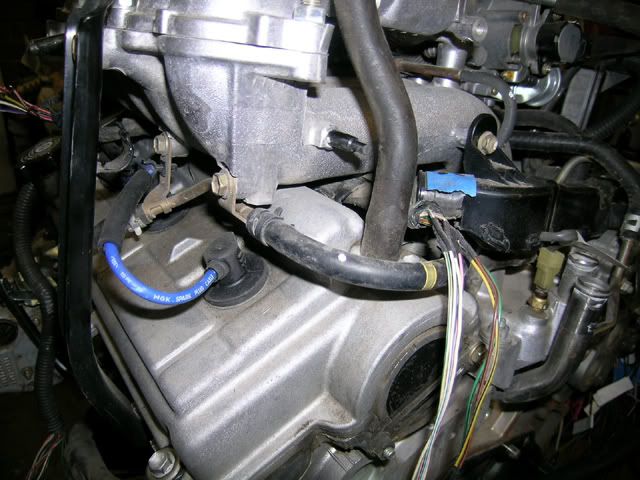
For the heater valve I just left the stock 3.0 and went through the combination of hoses I had to get them to fit.
01-10-2012, 07:24 AM
#9
Registered User
01-27-2012, 10:28 AM
#11
Registered User
Thread Starter
Join Date: Jan 2009
Posts: 40
Likes: 0
Received 0 Likes
on
0 Posts
Made a custom mount for the 3.0 dipstick tube to run through the motor mount (similar to the 3.0 design) and painted it with a fresh coat of black
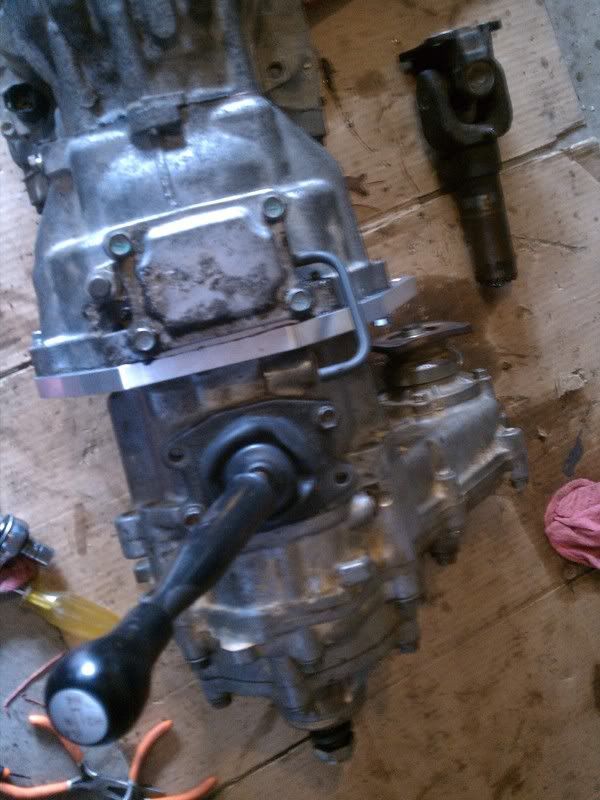
I purchased the 23 Spline Chromoly input shaft for the t-case from Trail Gear. I pulled the front third of the t-case apart to swap the input shaft over.
Here's the $400 Inchworm Tacoma Adapter. I went with a 0* clocking angle because I didn't want to mess with complex mounts.
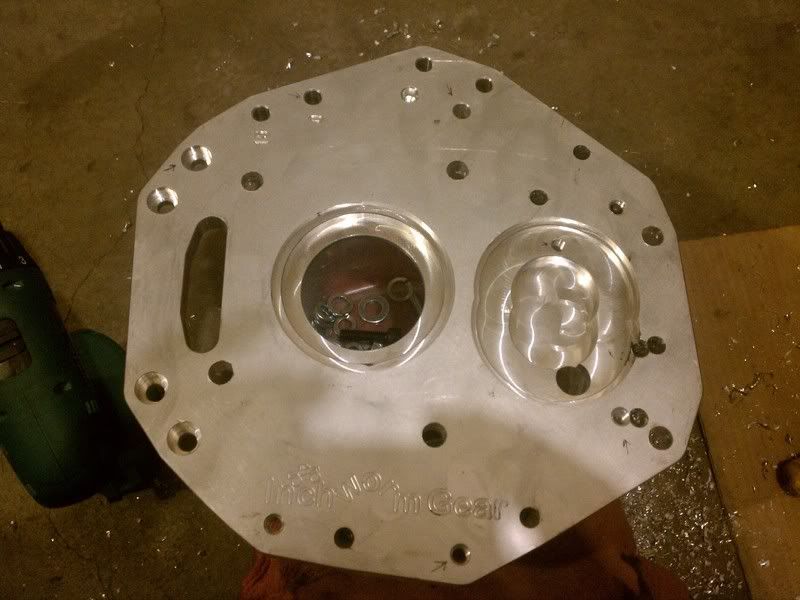
And assembled
I purchased the 23 Spline Chromoly input shaft for the t-case from Trail Gear. I pulled the front third of the t-case apart to swap the input shaft over.
Here's the $400 Inchworm Tacoma Adapter. I went with a 0* clocking angle because I didn't want to mess with complex mounts.
And assembled

 01-27-2012, 10:44 AM
#13
Registered User
Thread Starter
Join Date: Jan 2009
Posts: 40
Likes: 0
Received 0 Likes
on
0 Posts
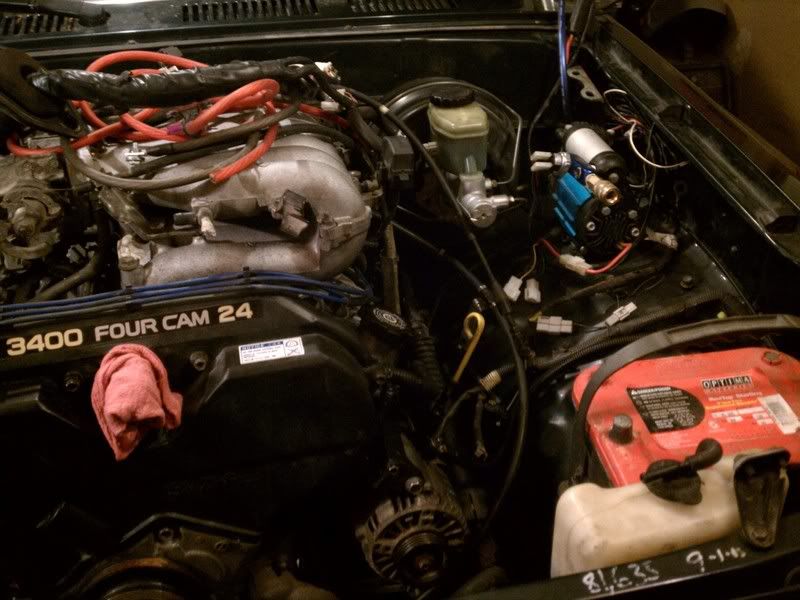
Beginning to come together. Make a custom intake bracket that bolts to the MAF and runs down to the fender. Also ran 4ga wire from the fuse box to the driver side and tied it to the alternator. From the alternator I ran another fused 4ga wire to the battery. This provides a heavier gauge wire for the circuit as well as having a good fused location to prevent fires.
I built in the Big 3 upgrade with the engine swap. 4ga wire from battery-body, engine-body, and battery-alternator.

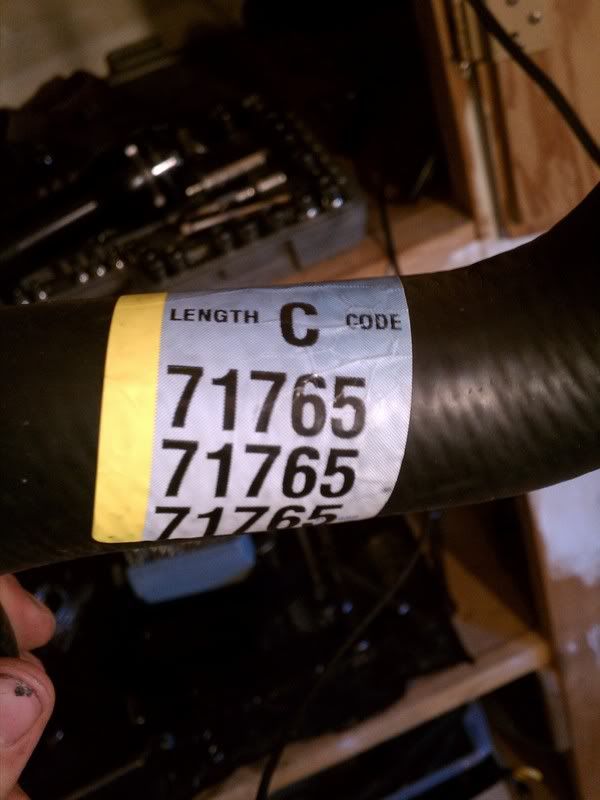
The upper radiator hose will remain the same as the 3.0 and after a few trips to Advance Auto Parts with a tape measure I found the ideal hose for the lower. Part# 71765 is the perfect height and only 1" has to be cut off of the end.
 01-27-2012, 11:02 AM
#14
Registered User
Thread Starter
Join Date: Jan 2009
Posts: 40
Likes: 0
Received 0 Likes
on
0 Posts
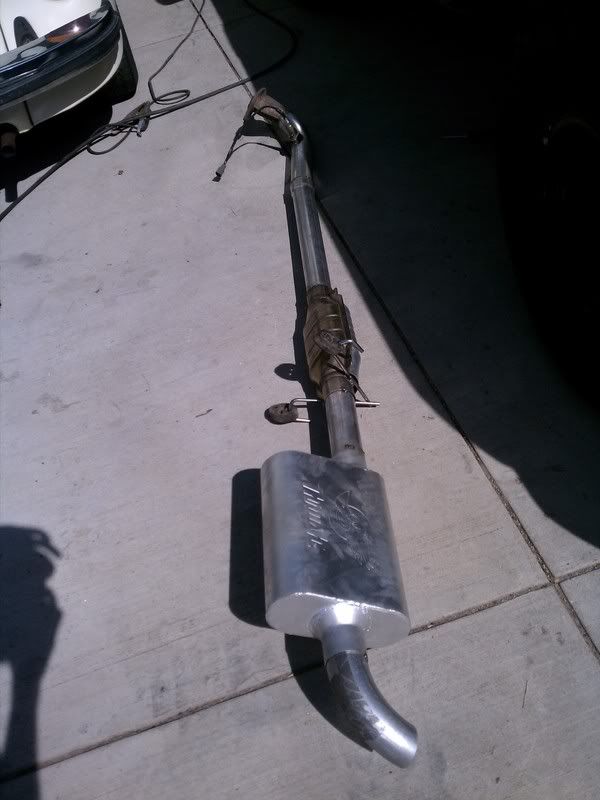
Ran 2.5" exhaust from the "downpipe" back. I cut the bend to get the best flow that I could.
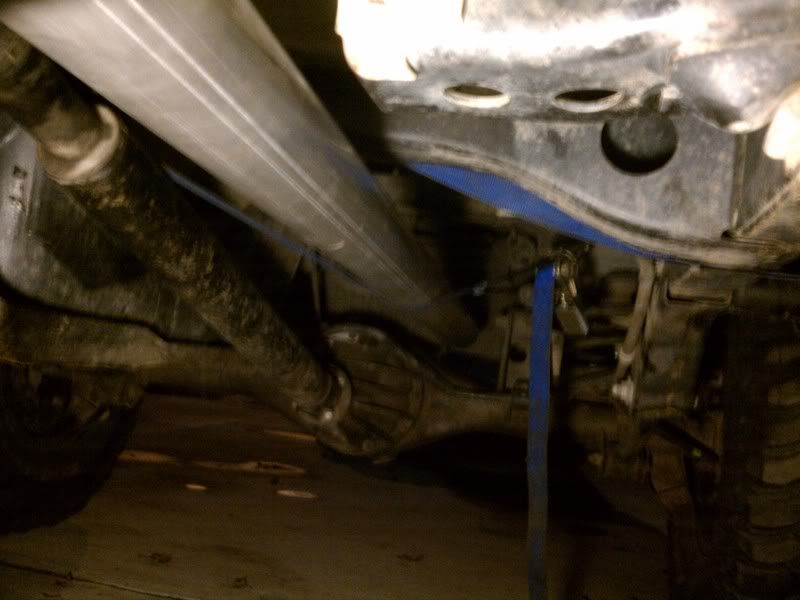
I ran the exhaust straight back into a Magnaflow Cat and a Thrush Welded muffler. The exhaust dumps right before the axle. Eventually I want to buy a few more mandrel bent pieces and make an axle over to shoot out the side behind the tire.
I ran the exhaust straight back into a Magnaflow Cat and a Thrush Welded muffler. The exhaust dumps right before the axle. Eventually I want to buy a few more mandrel bent pieces and make an axle over to shoot out the side behind the tire.
 01-28-2012, 10:22 AM
#19
Registered User
Thread Starter
Join Date: Jan 2009
Posts: 40
Likes: 0
Received 0 Likes
on
0 Posts
Haha yep my build is done, just going back for the write-up now.
Adapter install was very easy. If you follow Inchworm's directions step-by-step it is very easy.
One thing I still need to cover is the body lift. I cut roughly 6" of bracing out of the hood and did a 1/2" body lift. The hood closes beautifully with no rubbing.
Adapter install was very easy. If you follow Inchworm's directions step-by-step it is very easy.
One thing I still need to cover is the body lift. I cut roughly 6" of bracing out of the hood and did a 1/2" body lift. The hood closes beautifully with no rubbing.
Last edited by Etravoda; 01-28-2012 at 10:28 AM.


