Dave's 92 Toyota Pickup 3.4 Swap
 11-08-2014, 10:31 AM
#1
Registered User
Thread Starter
Join Date: Aug 2014
Location: Pacific Northwest
Posts: 67
Likes: 0
Received 0 Likes
on
0 Posts
Dave's 92 Toyota Pickup 3.4 Swap
Hey guys, I plan on swapping a 99 3.4 4Runner engine into a 92 Toyota Pickup v6 that has a solid axle swap already. Person I bought the 3.4 from told me it has only 40k miles on the whole engine. I believe it there is very little rust, road grime/oil, or signs of use on the engine. It came with most of the accessories, such as wiring harness, ecu, a/c compressor, etc. One thing I did read about is 1999 engines have the machined hole with a removable plug for the dipstick, mine has no provision, which is suppose to be on 2000> 3.4 engines. Something I have been scratching my head on. Luckily the wiring between the two years are the same.
But I have heard the 1999-2000 are the BEST 4runner years to do the 3.4 swap with. Toyota introduced larger injectors in 99, also no EGR, and no drive by throttle wire.
I have already been doing months of countless research, it is amazing how everyday I seem to keep finding little details that will help do this swap. So I will try to keep questions to a minimum and post progress done. I probably won't pull the 3.0 in it now for another month, as the sucker keeps running good for my needs. Has 208k miles as of now, but leaks oil and has seen better days. Also since I have the 3.4 out i will be doing a timing belt and water pump job just so I won't need to do it for years to come. Possible valve adjustment check, and valve cover gasket replacement(one cover gasket looks to be leaking a little oil) I also plan to buy headers and install before I put the 3.4 in. I cant wait to feel how the 3.4 runs
How the truck looks currently:
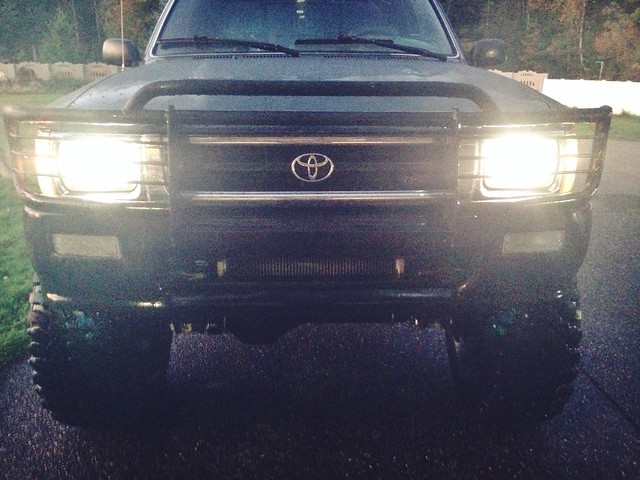
I plan to post LOADS of information, as I hope the knowledge can be passed down to other future swaps.
So first things first, I plan to keep my truck a manual. The ECU it came with is made for an auto transmission. It took me a few months of hunting but I was able to find a manual transmission ECU a few days ago, that works with my year.(1999-2000)
The original A/T ECU- Part #89666-35140 (08/1999-12/1999) 4x4 Fed. Spec.
The new M/T ECU- Part #89666-35160 (08/1999-07/2000) 4x4 Cali Spec.
Information found at -www.toyodiy.com/parts
So the manual ECU is california spec. not federal like the auto ECU, luckily only difference between cali. vs fed., is the front o2 sensor has a different connector on it. Plug configurations and pin outs are the same. And the auto/manual harness are no different from each other for the year, so I believe I picked up the right ECU I need.
I still have lots of parts I need to buy for the conversion and the tune up parts for the 3.4. So right now I am saving up $$$. I get paid next friday so you guys should see an update by then. I will try to upload some pics of the motor later on as well, expect to see tear down pics
But I have heard the 1999-2000 are the BEST 4runner years to do the 3.4 swap with. Toyota introduced larger injectors in 99, also no EGR, and no drive by throttle wire.
I have already been doing months of countless research, it is amazing how everyday I seem to keep finding little details that will help do this swap. So I will try to keep questions to a minimum and post progress done. I probably won't pull the 3.0 in it now for another month, as the sucker keeps running good for my needs. Has 208k miles as of now, but leaks oil and has seen better days. Also since I have the 3.4 out i will be doing a timing belt and water pump job just so I won't need to do it for years to come. Possible valve adjustment check, and valve cover gasket replacement(one cover gasket looks to be leaking a little oil) I also plan to buy headers and install before I put the 3.4 in. I cant wait to feel how the 3.4 runs
How the truck looks currently:
I plan to post LOADS of information, as I hope the knowledge can be passed down to other future swaps.
So first things first, I plan to keep my truck a manual. The ECU it came with is made for an auto transmission. It took me a few months of hunting but I was able to find a manual transmission ECU a few days ago, that works with my year.(1999-2000)
The original A/T ECU- Part #89666-35140 (08/1999-12/1999) 4x4 Fed. Spec.
The new M/T ECU- Part #89666-35160 (08/1999-07/2000) 4x4 Cali Spec.
Information found at -www.toyodiy.com/parts
So the manual ECU is california spec. not federal like the auto ECU, luckily only difference between cali. vs fed., is the front o2 sensor has a different connector on it. Plug configurations and pin outs are the same. And the auto/manual harness are no different from each other for the year, so I believe I picked up the right ECU I need.
I still have lots of parts I need to buy for the conversion and the tune up parts for the 3.4. So right now I am saving up $$$. I get paid next friday so you guys should see an update by then. I will try to upload some pics of the motor later on as well, expect to see tear down pics
 04-11-2015, 12:32 PM
#2
Registered User
Thread Starter
Join Date: Aug 2014
Location: Pacific Northwest
Posts: 67
Likes: 0
Received 0 Likes
on
0 Posts
Im bringing this back from the dead! Sorry guys i ended up getting laid off work from a 2 year job, but im collecting unemployment and now have PLENTY of time to wrench on the yote. But money is nowhere near where id like it to be, so slow progress is the name of the game here.
One question i cannot upload any more attachments, i got loads of pics, how can i delete previous attachments? Im on the yotatech app. I got some pictures to ask about. Found missing bolts, broken connectors, no gaskets for the intake.
I managed to remove all the wiring from the motor, get it mounted, and giving it a good clean. Ive been learning a lot bout the electrical stuff and downloaded all my EWDs and literally everything in the manual.
I realized the cost vs power ratio to mod the 3.4 just isnt worth it to me. So no headers, no supercharger in its future. Just a stock 3.4 to get me around. If i still keep the yota for another few years i plan to change the motor again.
Still debating on manual ECU. I have a cali spec but if i can find a federal spec one for the same year i will get it, though ive had no luck or people are asking over $500 for one.
04-11-2015, 12:50 PM
#3
Registered User
iTrader: (1)

Join Date: Mar 2013
Location: Mobile, Alabama
Posts: 2,121
Likes: 0
Received 0 Likes
on
0 Posts
Unless you need the correct ECU for emissions I'd just use what came with it seeing your strapped for cash. I done my 3.4 swap unemployed so I know how it is.
04-11-2015, 04:39 PM
#4
Registered User
I just got mine running and working out some minor kinks in it now. No codes. I'm not saying I know a whole lot, but with a swap under my belt, perhaps I can help.
If I read it correctly, you were asking about photo downloads and posting. I used Photobucket. After it is downloaded just click on the IMG HTML in the box and it will copy it, then just paste it in your message.
In looking back now I made a couple mistakes. First off, I over thought everything. My problems were all so very simple. Having never done anything of this caliber, I could see why that would be the case though. I just used the site to keep my notes and a place to "think out loud".
So, it originally came with an Auto ECU? So then is it an Auto harness and Auto engine? If it is, and you want it to work with your MT ECU, then you might know you have to convert the Auto harness to manual plugs for the ECU. I know the problems this can cause.
Take your time, go slow and have fun man. I'll keep on eye on your posts.

Last edited by Oregon'sLoneWolf; 04-11-2015 at 05:05 PM.
04-11-2015, 04:43 PM
#5
Registered User
Buy yeah, if you have one already, just use it and save the coin. You might need it. Or look at it this way, you now have funds available for timing belts water pump, HP power steering line, coolant etc etc. And if your really want to spend the money and want to save some heartache, spend $400 to get a wiring harness from ToyOnlySwaps. I was new two reading EWDs and it didn't finally click until half way through the swap. And still I don't have the confidence to build one. But if you do try it, good luck.
BTW, I'm in Oregon. When I get all minor problems fixed and road tested for about 200 miles, I might be able to lend a hand. I"m a disabled vet with nothing but time on my hands too.
Last edited by Oregon'sLoneWolf; 04-11-2015 at 04:57 PM.
04-12-2015, 03:13 AM
#6
Registered User
Thread Starter
Join Date: Aug 2014
Location: Pacific Northwest
Posts: 67
Likes: 0
Received 0 Likes
on
0 Posts
Hey thanks guys for the kind words and advice!
Jason, im thinking your right im going to make the manual cali spec. ECU work. Ive been hunting through the EWDs and reading on forums to find the differences that set the cali spec apart from the federal spec. So far looks like the front o2 sensor connector is the only difference. But since i have a non-cali wiring harness i should just have the normal connector and hopefully i can just hook it up and cross my fingers that it will run right.
LoneWolf, i appreciate the help. This is an interesting motor to tell you the truth. Its from a 4runner 1999. It came with a clutch and flywheel when i bought it but an auto ecu and harness. The wiring is spliced in a few parts and labeled with functions on each wire. I honestly think this was from a previous 3.4 swap.
The motor was originally an auto with auto harness, but connectors stay the same between auto and manual for the 4runner and year i have (doesn't apply to Tacoma's). I managed to buy a manual ECU for the same year, only downfall is its cali spec. Yeah the wiring looks like a quick way to get confused. From hearing others that did the wiring themselves it sounds very tedious and time consuming, but a skill worth learning. But if im only doing this once might as well make it easy on myself. Good to know toyonlyswaps charges $400 for a conversion harness i will definitely look into them, offroadsolutions wants $700 to do a conversion harness. The price makes me cringe considering i can refresh a lot of gaskets, bearings and belts with that money.
Going to upload pictures to my flickr account of the motor, will be posted shortly.
Sent from my iPhone using YotaTech
04-12-2015, 06:46 AM
#7
Registered User
iTrader: (1)
Join Date: Mar 2013
Location: Mobile, Alabama
Posts: 2,121
Likes: 0
Received 0 Likes
on
0 Posts
I decided to save the money and make my own harness, the tricky part on yours is you said some of the wiring looks to be tampered with. I made my harness in two weeks working on it when I could, the wait time to have one made at that time was 6-8 weeks so I came out ahead. Plus even with the harness being sent off to be made you still have to do some additional wiring once you get it back.
Trending Topics
04-12-2015, 02:36 PM
#8
Registered User
The motor was originally an auto with auto harness, but connectors stay the same between auto and manual for the 4runner and year i have (doesn't apply to Tacoma's). I managed to buy a manual ECU for the same year, only downfall is its cali spec. Yeah the wiring looks like a quick way to get confused. From hearing others that did the wiring themselves it sounds very tedious and time consuming, but a skill worth learning. But if im only doing this once might as well make it easy on myself. Good to know toyonlyswaps charges $400 for a conversion harness i will definitely look into them, offroadsolutions wants $700 to do a conversion harness. The price makes me cringe considering i can refresh a lot of gaskets, bearings and belts with that money.
YotaTech
Don't let all of the info make your head spin as it did mine. I over thought almost everything. Dsdads Swap 101, Elvoltas, SacRunner's swap, (for your ADD etc) and a Big 3 wiring write up will be all you will really need to pull it off. The most time consuming part will really be waiting for parts you don't have.and the possibility of them being the wrong or faulty parts if getting something from a yard. Consider Off Road Solutions for your HP Power steering hose (Yes it is spendy) .and diptube if needed. If you don't have one, don't get your igniter from a yard and an engine that doesn't have a hood. Trouble shooting that took me 4 hours and another week lost as I had to order on from Cali. If you don't have the MAF, remember there are two styles. One might need to be wired different. If you do have to get parts from a yard on EBAY, consider only those that come with a 30 day warranty. I'm out 80 bucks for this mistake.
Here are some links to odds and ends that might be helpful:
http://www.tacomaworld.com/forum/1st...lley-tool.html
http://www.racecomposites.com/mustangbolt.htm
http://www.toyota-4runner.org/3rd-ge...unner-how.html
I would be skeptical of the alleged mileage on the engine. Consider taking a peek at the timing belt ect. Also, it might be something to think about to run the engine for 5 min with a half quart of ATF and 5.5 quarts of oil to clean things out then changing it. Mine was jet black after I did that. Just a thought.
Last edited by Oregon'sLoneWolf; 04-12-2015 at 03:44 PM.
04-12-2015, 05:02 PM
#9
Registered User
Thread Starter
Join Date: Aug 2014
Location: Pacific Northwest
Posts: 67
Likes: 0
Received 0 Likes
on
0 Posts
Pictures of the motor as promised
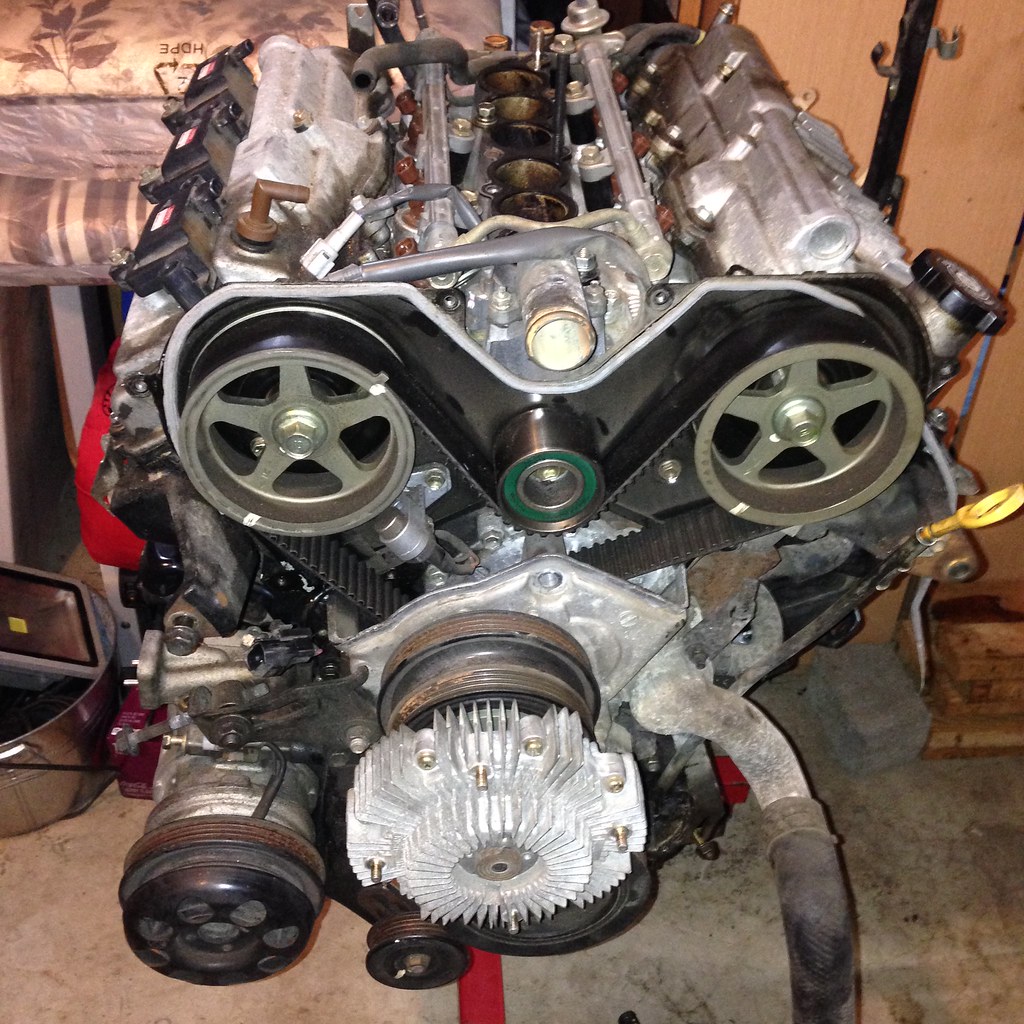
Timing belt cover removed, has an AISIN waterpump. Timing belt has small cracks in it, so it is old. If this motor does have the mileage I was told than this is all original parts from factory still.
 IMG_2265 by TrailBlazer69, on Flickr
This is the broken connector right by the oil filter.
 IMG_2309 by TrailBlazer69, on Flickr
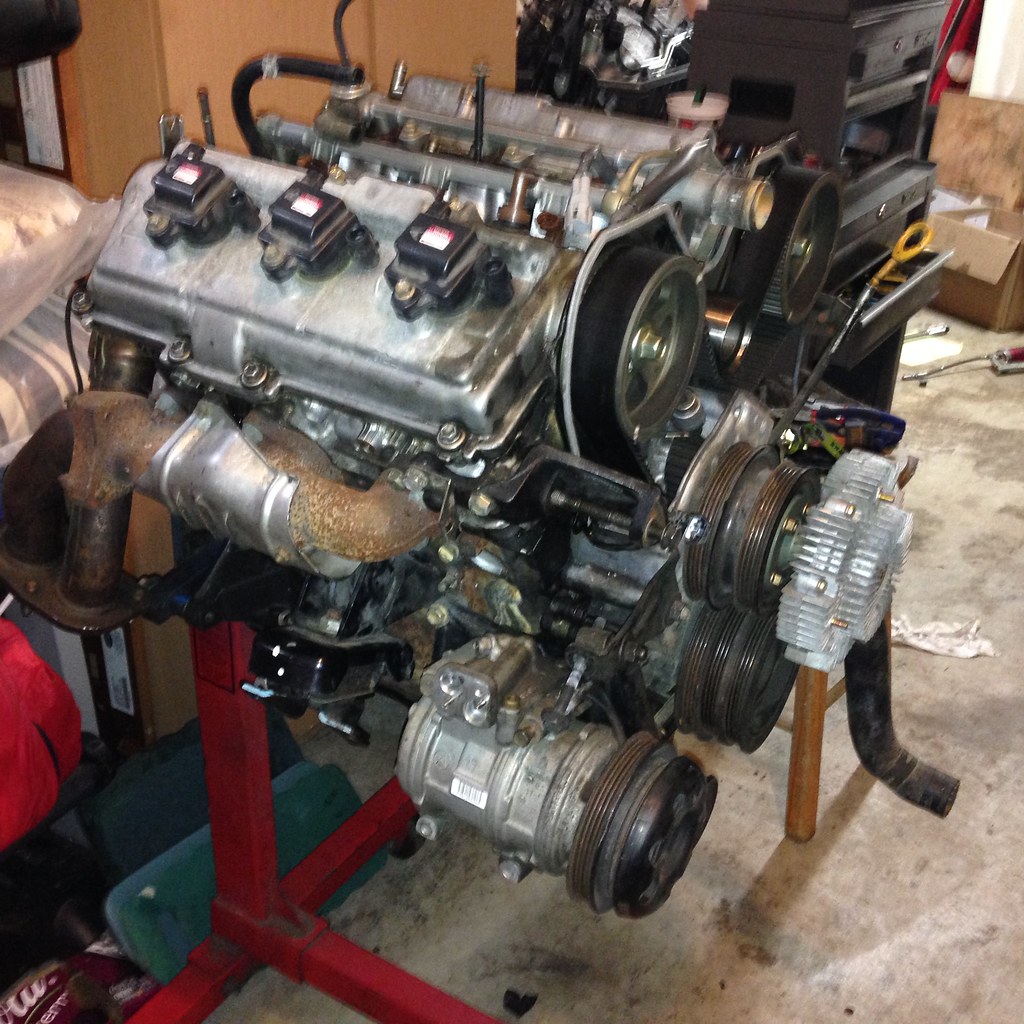
Labels are my best friend, I will be labeling every function, power, ground wire on the harness just to make it easier on myself. You can see the valve covers are leaky!
 IMG_2264 by TrailBlazer69, on Flickr
Close up of the timing cover to show the cracks
 IMG_2333 by TrailBlazer69, on Flickr
How the motor sits currently
 IMG_2266 by TrailBlazer69, on Flickr
Since the 3.0 is still running in my truck, I will be still driving that till it decides to get hasty with me and I have to pull it, or if I can finish the 3.4 and have it prepped to drop in before that happens then I will pull out the 3.0 then.
Im going to order gaskets for the intake, valve covers and paint the valve covers as well. Get that job done, and once another check comes in then Ill be dealing with the bottom end converting the oil pan to a 2WD oil pan, since my truck has a solid axle in the front. And painting the block as well.
Timing belt cover removed, has an AISIN waterpump. Timing belt has small cracks in it, so it is old. If this motor does have the mileage I was told than this is all original parts from factory still.
IMG_2265 by TrailBlazer69, on FlickrThis is the broken connector right by the oil filter.
IMG_2309 by TrailBlazer69, on FlickrLabels are my best friend, I will be labeling every function, power, ground wire on the harness just to make it easier on myself. You can see the valve covers are leaky!
IMG_2264 by TrailBlazer69, on FlickrClose up of the timing cover to show the cracks
IMG_2333 by TrailBlazer69, on FlickrHow the motor sits currently
IMG_2266 by TrailBlazer69, on FlickrSince the 3.0 is still running in my truck, I will be still driving that till it decides to get hasty with me and I have to pull it, or if I can finish the 3.4 and have it prepped to drop in before that happens then I will pull out the 3.0 then.
Im going to order gaskets for the intake, valve covers and paint the valve covers as well. Get that job done, and once another check comes in then Ill be dealing with the bottom end converting the oil pan to a 2WD oil pan, since my truck has a solid axle in the front. And painting the block as well.
04-12-2015, 06:24 PM
#10
Registered User
[QUOTE=DavidLovesToyotas;52267334/QUOTE]
I'm happy you decided to break into it man. I think we have all done the preventative maintenance before installing it. If you plan on doing the belt, consider the water pump too. Tearing into it premature to the new timing belt going out would be a drag.
No worries about the oil sensor, (the part with the broken wire) you can take that off as the 3.0 oil sensor will go in the same place when it is time. Toss it. You will find out what wire to use to hook it up if you look at your 3.0 oil sending unit. And where that gap is in the alt bracket to the block, get a hold of 4 washers as the bracket will need to stick out some, like it is for the 3.0 alt to fit if you don't have the 3.4
You are in the same spot I was as my truck ran as I gathered parts and did the timing stuff and valve adjustment.
Purple Power cleaner will be your friend.......scrub a dub dub.
Last edited by Oregon'sLoneWolf; 04-12-2015 at 06:35 PM.
04-14-2015, 05:14 AM
#11
I may be the fool, but I didn't change the timing belt/water pump before I did mine. I wanted to make sure I could get it running before I spent that money. I had no idea what I was doing at that time. Of course I changed it all out a few thousand after that fact because it's reasonably easy. Good luck and remember we are all very simple and like pretty pictures
04-14-2015, 11:05 AM
#12
Registered User
Thread Starter
Join Date: Aug 2014
Location: Pacific Northwest
Posts: 67
Likes: 0
Received 0 Likes
on
0 Posts
Yeah luckily i did a timing belt/water pump job on the 3.0 before so im pretty confident in getting it done on the 3.4 without messing much up.
Hey Lonewolf when you did your valve adjustment was anything out of whack? Or was it still in spec? How long did it take to do? Debating whether i should if im going to tear off the valve covers anyways. Just for a peace of mind. Thanks for the tip on the alternators and oil sending units! Will probably reuse the 3.0 parts for both.
Sent from my iPhone using YotaTech
04-15-2015, 04:01 PM
#13
Registered User
Thread Starter
Join Date: Aug 2014
Location: Pacific Northwest
Posts: 67
Likes: 0
Received 0 Likes
on
0 Posts
Update for you guys:
Removed both valve covers, to take a peak under while I wait for gaskets and seals.
Here is how I like to keep my bolts organized, simple outline of where they are removed to help me when I put it back together.
 IMG_2448 by TrailBlazer69, on Flickr
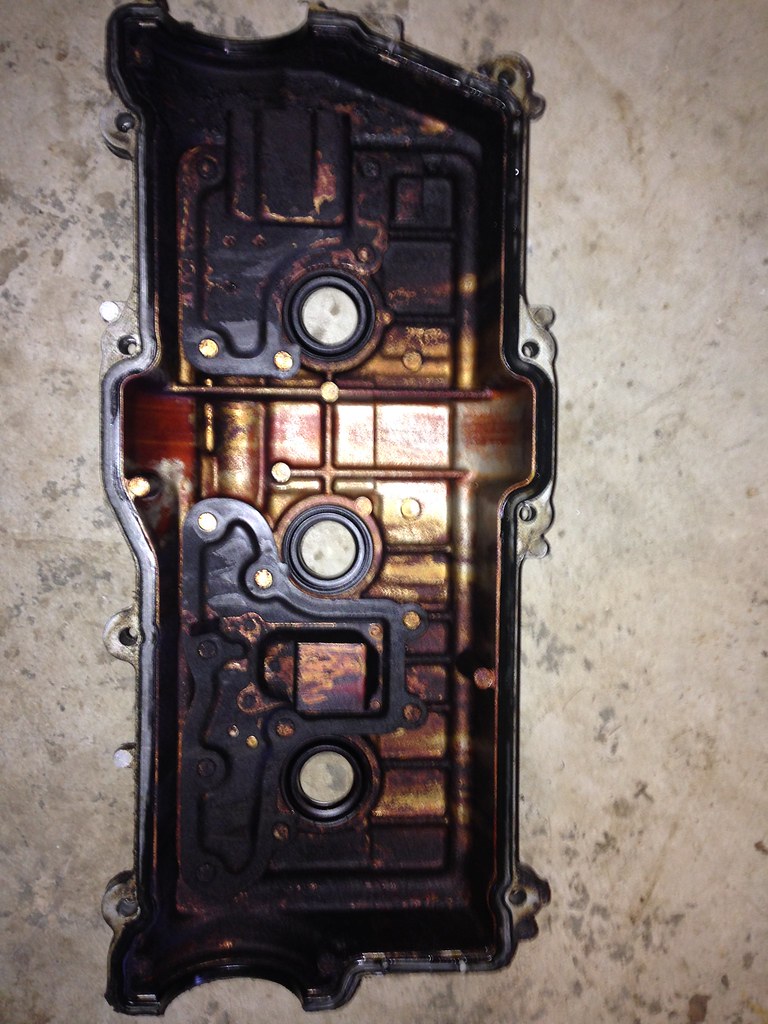
Here is how the bottom of one valve cover looked like, the left side if looking from the front of the engine. Pretty dirty looking. Had some oil seeping out the valve cover gaskets and the bolts were not even hand tight for most of them. Found I am missing a bolt and looks like a washer or two. (The little things drive me crazy)
 IMG_2431 by TrailBlazer69, on Flickr
Here is a picture of how the valve cover for cylinders 1,3,5 looked like. Left side if looking from front of engine.
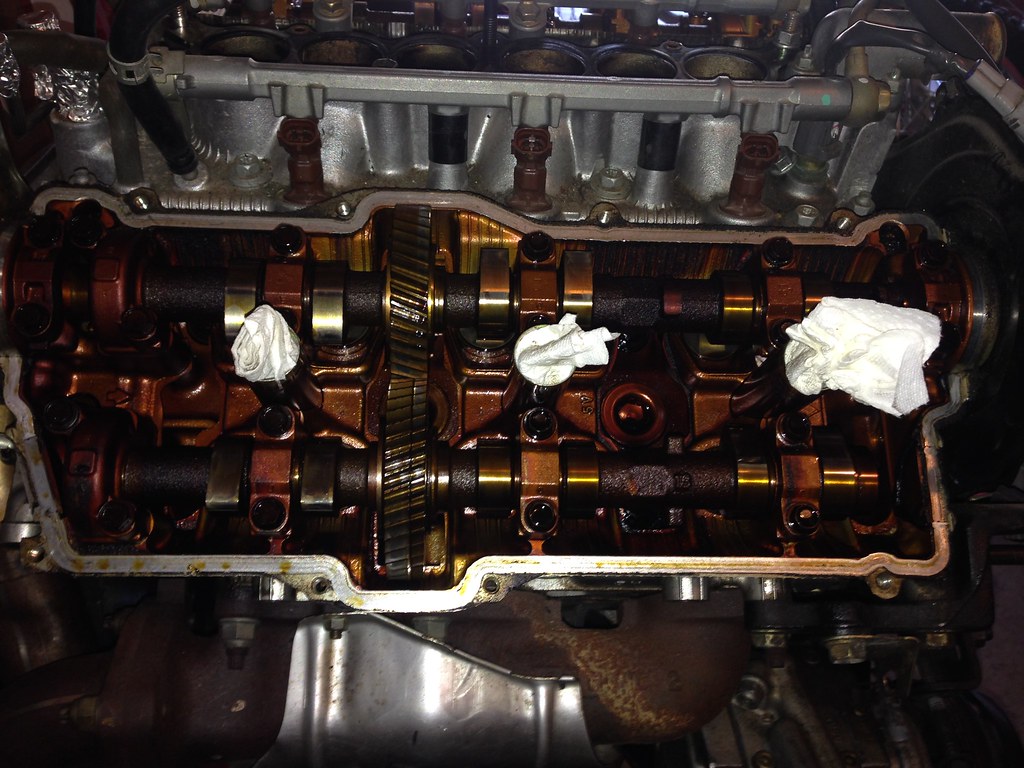 IMG_2447 by TrailBlazer69, on Flickr
And here is the other side, cylinders 2,4,6. Right side if looking from front. This side the metal has a lighter color to it than the other side. More like a gold color, while the other side is more of a bronze.
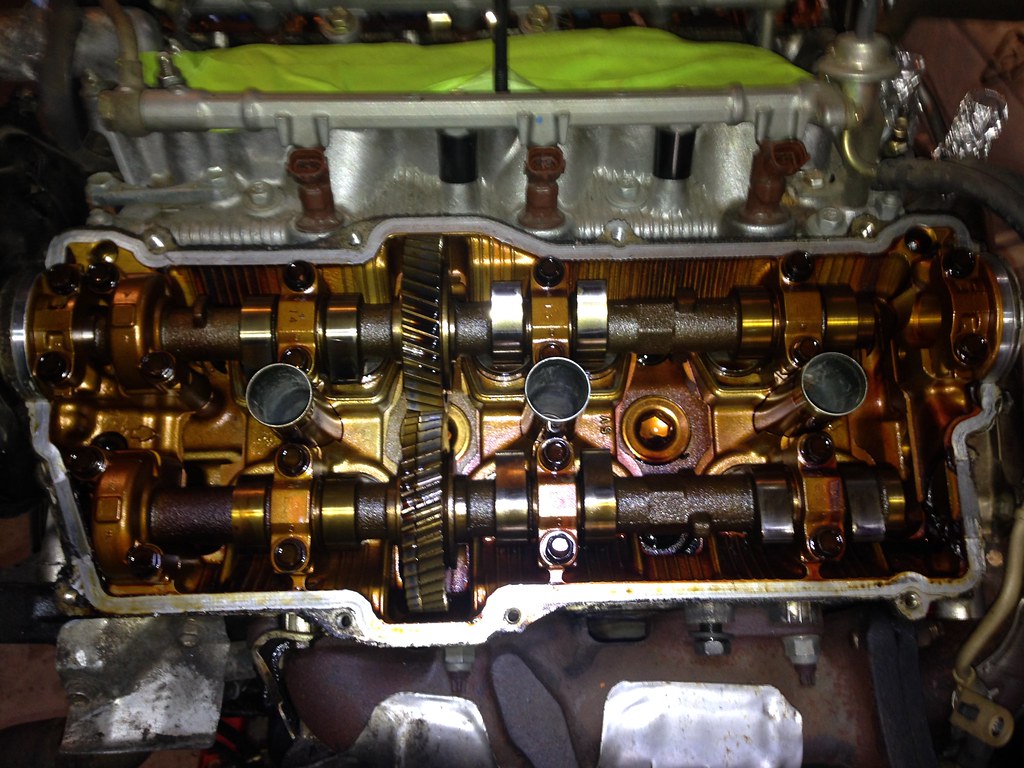 IMG_2453 by TrailBlazer69, on Flickr
So quick question for anyone else who has looked under the valve covers, is the valve train suppose to be that color? One side(left) is bronze very dark color looking, the other side(right) is noticeably lighter looking, more like a gold color. I'm thinking its just the oil it had running in it before was dirty. Might still have the oil in the block, honestly haven't tried draining it yet
On to cleaning the valve covers and getting them prepped for spray paint. Going with a cherry red color for the valve covers.
Removed both valve covers, to take a peak under while I wait for gaskets and seals.
Here is how I like to keep my bolts organized, simple outline of where they are removed to help me when I put it back together.
IMG_2448 by TrailBlazer69, on FlickrHere is how the bottom of one valve cover looked like, the left side if looking from the front of the engine. Pretty dirty looking. Had some oil seeping out the valve cover gaskets and the bolts were not even hand tight for most of them. Found I am missing a bolt and looks like a washer or two.
(The little things drive me crazy)IMG_2431 by TrailBlazer69, on FlickrHere is a picture of how the valve cover for cylinders 1,3,5 looked like. Left side if looking from front of engine.
IMG_2447 by TrailBlazer69, on FlickrAnd here is the other side, cylinders 2,4,6. Right side if looking from front. This side the metal has a lighter color to it than the other side. More like a gold color, while the other side is more of a bronze.
IMG_2453 by TrailBlazer69, on FlickrSo quick question for anyone else who has looked under the valve covers, is the valve train suppose to be that color? One side(left) is bronze very dark color looking, the other side(right) is noticeably lighter looking, more like a gold color. I'm thinking its just the oil it had running in it before was dirty. Might still have the oil in the block, honestly haven't tried draining it yet
On to cleaning the valve covers and getting them prepped for spray paint. Going with a cherry red color for the valve covers.
Last edited by DavidLovesToyotas; 04-15-2015 at 04:04 PM.
04-15-2015, 10:04 PM
#16
Registered User
Yeah luckily i did a timing belt/water pump job on the 3.0 before so im pretty confident in getting it done on the 3.4 without messing much up.
Hey Lonewolf when you did your valve adjustment was anything out of whack? Or was it still in spec? How long did it take to do? Debating whether i should if im going to tear off the valve covers anyways. Just for a peace of mind. Thanks for the tip on the alternators and oil sending units! Will probably reuse the 3.0 parts for both.
Sent from my iPhone using YotaTech
Hey Lonewolf when you did your valve adjustment was anything out of whack? Or was it still in spec? How long did it take to do? Debating whether i should if im going to tear off the valve covers anyways. Just for a peace of mind. Thanks for the tip on the alternators and oil sending units! Will probably reuse the 3.0 parts for both.
Sent from my iPhone using YotaTech
To get the cams out, you will have to use a pry bar. DON"T forget to use one of your valve cover screws in the threaded hole to hold the double sprockets before you take out the cam. They are pre loaded.
You will be rotating the crank as you measure the gaps. Just keep in mind that you set your timing marks on the cams at Compression TDC at the #1 cylinder when you put the exhaust cams back in. In looking back, the best way to find exact TDC is to get it to your compression stroke then use your timing marks on your cam sprockets using the dots to find exact TDC.........then mark your cam and plate. I suggest you do your valve adjustment first then your timing belt change as it will be set to exact TDC. Each cam will have one and 2 timing marks (dots). The one dot on BOTH cams are to line up when you install them. Use the FSM to find the correct shim based on your measurement. I think my how to has an equation for figuring it out too.
All of the info for the adjustment is here as well as a place to get the shims for cheap. It must have worked well as I don't hear any lifter tick at ALL. My total cost was $30 dollars I think for the shims. I needed two sizes. Took about 4 hours. It will take you about an hour if you just focus on the exhaust. This is how a shop saves time and charges the full shop time rate. Intakes are hardly out of wack as they don't have as much heat exposure. I suggest it now as you have it all apart man. Just go slow and double check everything. Chances are good it wasn't ever done as it's a pretty expensive operation.
https://www.yotatech.com/forums/f120...ksheet-272769/
Last edited by Oregon'sLoneWolf; 04-16-2015 at 12:42 AM.
04-15-2015, 10:25 PM
#17
Registered User
With the way you organize your bolts. I would trust you with an engine rebuild. Those head bolts can be a stinker. Your attention to detail will make your swap a success.
Regarding your other parts. You will need a PS pump and lower mounting bracket if your engine didn't come with one. I had to order the lower bracket for $15 bucks from toyota as my PS pump didn't come with one. I lost a week waiting on the part and a total of a month all together waiting on shipping for other things.
Regarding your other parts. You will need a PS pump and lower mounting bracket if your engine didn't come with one. I had to order the lower bracket for $15 bucks from toyota as my PS pump didn't come with one. I lost a week waiting on the part and a total of a month all together waiting on shipping for other things.
Last edited by Oregon'sLoneWolf; 04-16-2015 at 12:51 AM.
04-16-2015, 08:01 AM
#18
Registered User
Thread Starter
Join Date: Aug 2014
Location: Pacific Northwest
Posts: 67
Likes: 0
Received 0 Likes
on
0 Posts
When I got the engine the yard informed me that it had a tick. So, I assumed that it must have been a lifter tick. It turned out that one exhaust valve was very off spec and two others were getting close. I changed a total of 3 I believe. Anything new to me is a challenge at first, but it really wasn't that bad. I did a write up on it that might be helpful. The only ones that will need adjustment are going to be the exhaust cams. They are on the outside bank and only these two will need to come out. The shims can be popped out with a screwdriver and or magnet. To get the cams out, you will have to use a pry bar. DON"T forget to use one of your valve cover screws in the threaded hole to hold the double sprockets before you take out the cam. They are pre loaded. You will be rotating the crank as you measure the gaps. Just keep in mind that you set your timing marks on the cams at Compression TDC at the #1 cylinder when you put the exhaust cams back in. In looking back, the best way to find exact TDC is to get it to your compression stroke then use your timing marks on your cam sprockets using the dots to find exact TDC.........then mark your cam and plate. I suggest you do your valve adjustment first then your timing belt change as it will be set to exact TDC. Each cam will have one and 2 timing marks (dots). The one dot on BOTH cams are to line up when you install them. Use the FSM to find the correct shim based on your measurement. I think my how to has an equation for figuring it out too. All of the info for the adjustment is here as well as a place to get the shims for cheap. It must have worked well as I don't hear any lifter tick at ALL. My total cost was $30 dollars I think for the shims. I needed two sizes. Took about 4 hours. It will take you about an hour if you just focus on the exhaust. This is how a shop saves time and charges the full shop time rate. Intakes are hardly out of wack as they don't have as much heat exposure. I suggest it now as you have it all apart man. Just go slow and double check everything. Chances are good it wasn't ever done as it's a pretty expensive operation. https://www.yotatech.com/forums/f120...ksheet-272769/
Sent from my iPhone using YotaTech
04-16-2015, 08:09 AM
#19
Registered User
Thread Starter
Join Date: Aug 2014
Location: Pacific Northwest
Posts: 67
Likes: 0
Received 0 Likes
on
0 Posts
With the way you organize your bolts. I would trust you with an engine rebuild. Those head bolts can be a stinker. Your attention to detail will make your swap a success. Regarding your other parts. You will need a PS pump and lower mounting bracket if your engine didn't come with one. I had to order the lower bracket for $15 bucks from toyota as my PS pump didn't come with one. I lost a week waiting on the part and a total of a month all together waiting on shipping for other things.
Sent from my iPhone using YotaTech
05-08-2015, 10:23 AM
#20
Registered User
Thread Starter
Join Date: Aug 2014
Location: Pacific Northwest
Posts: 67
Likes: 0
Received 0 Likes
on
0 Posts
I've been hesitant to get any updates posted on the 3.4. I've got the valve covers painted. They came out looking great, ill throw up some pics soon. Ended up just going with a low gloss black on them. Might decide to paint the block lime green or plump purple. If not black will do, got plenty of it.
Ended up having to order parts for the 3.slow to keep it running smooth for at least another few months, ordered valve cover gaskets, cam plugs, pcv valve, rear main seal, oil cooler seals and going to check the valves all this weekend. Getting tired of having to buy and put in a quart of oil every week to keep it happy.
Then if I still have time Im taking the 3.4 clutch that came off the donor motor and putting it on the 3.0 with a resurfaced 3.4 flywheel. My old clutch has so much oil on it from leaks i can slip it whenever i press more than halfway on the pedal. Also have a different transmission to replace the one I have in the truck right now and new throwout bearing and pilot bearing.
I figure once the 3.4 drops in, I will have money to drop on a Marlin clutch kit, something nice.


