When you click on links to various merchants on this site and make a purchase, this can result in this site earning a commission. Affiliate programs and affiliations include, but are not limited to, the eBay Partner Network.
EDIT OCTOBER 2022: Truck is running better than ever, and I've put over 100,000 miles on it since the swap.
END EDIT--------------------------------------------------------------------------------------------------------------------------------------------------------------------------------------------------------------------------
Sorry for the first few posts in this thread, I should have saved them for a separate build thread. I was new when I made this. Skip the first couple to get to the 3.4 Swap
Ok so this is my first thread after spending every waking hour doing research on this site and building up my runner.
I'll start with where it's at now, what I've done (general, not a specific build thread) and post some pics.
Purchased summer 2011
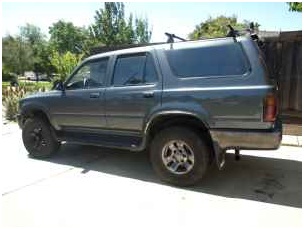
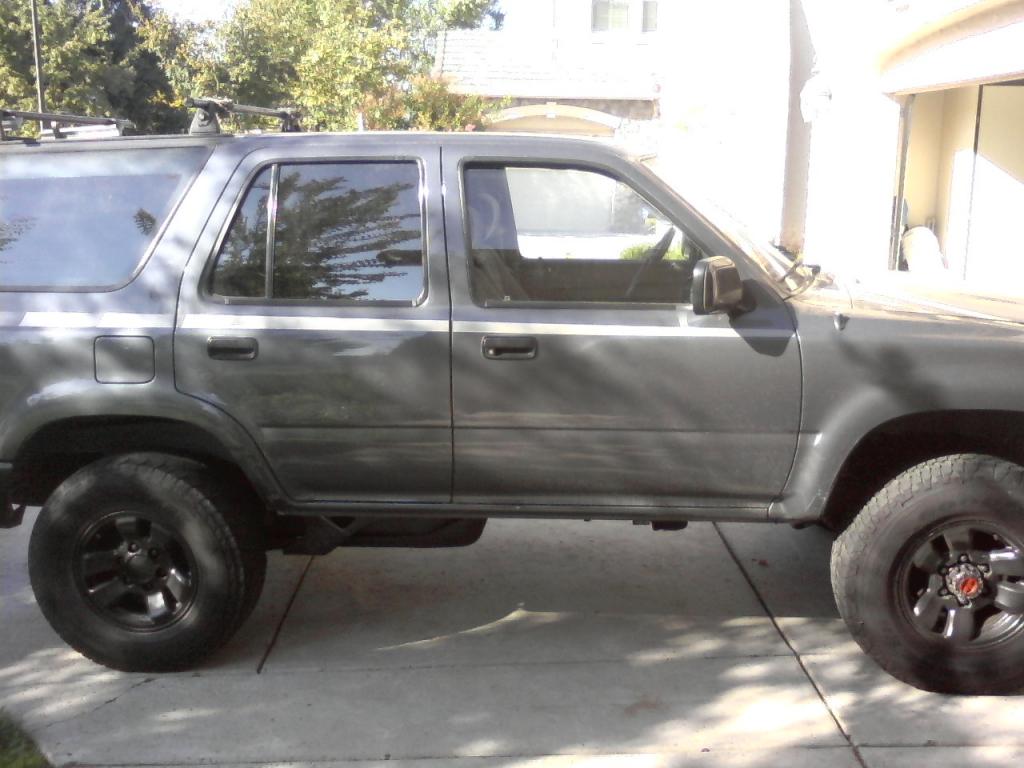
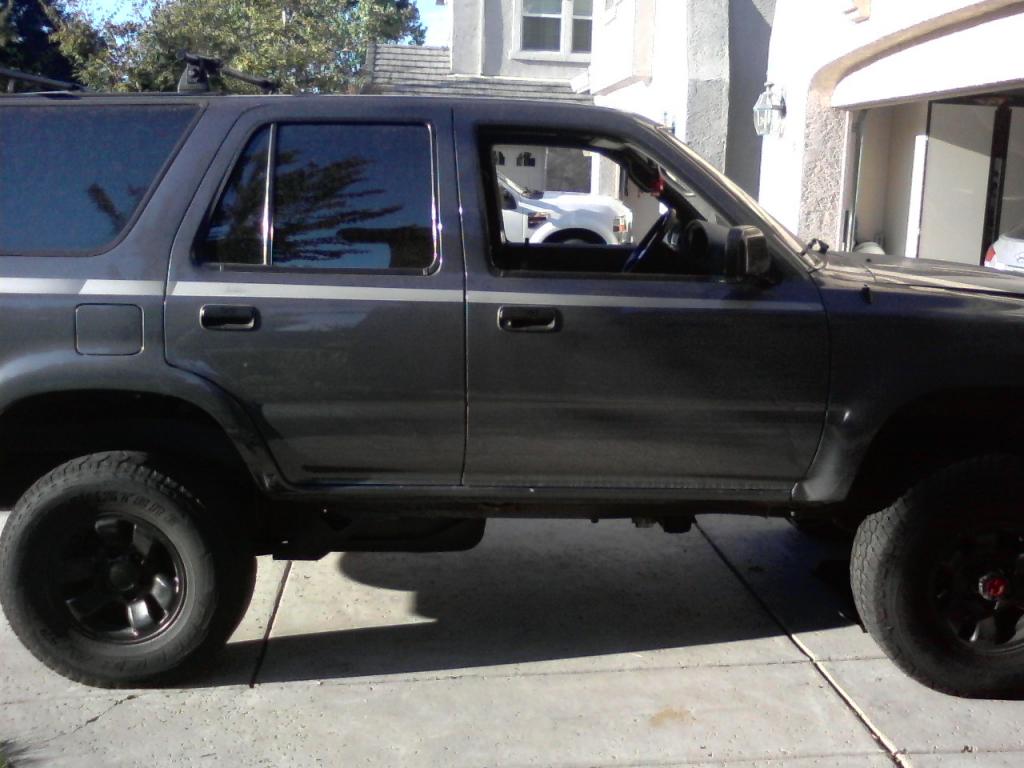
1992 4runner 5spd 4x4 3.0 soon to be 3.4
When I bought the truck, the transmission had been rebuilt, the rear diff gears had been replaced, and manual hubs had already been put in, and a heavy duty sway bar installed. Everything else pretty much stock.
First thing I did was take off the running boards, mud flaps, and got the windows tinted to 5%
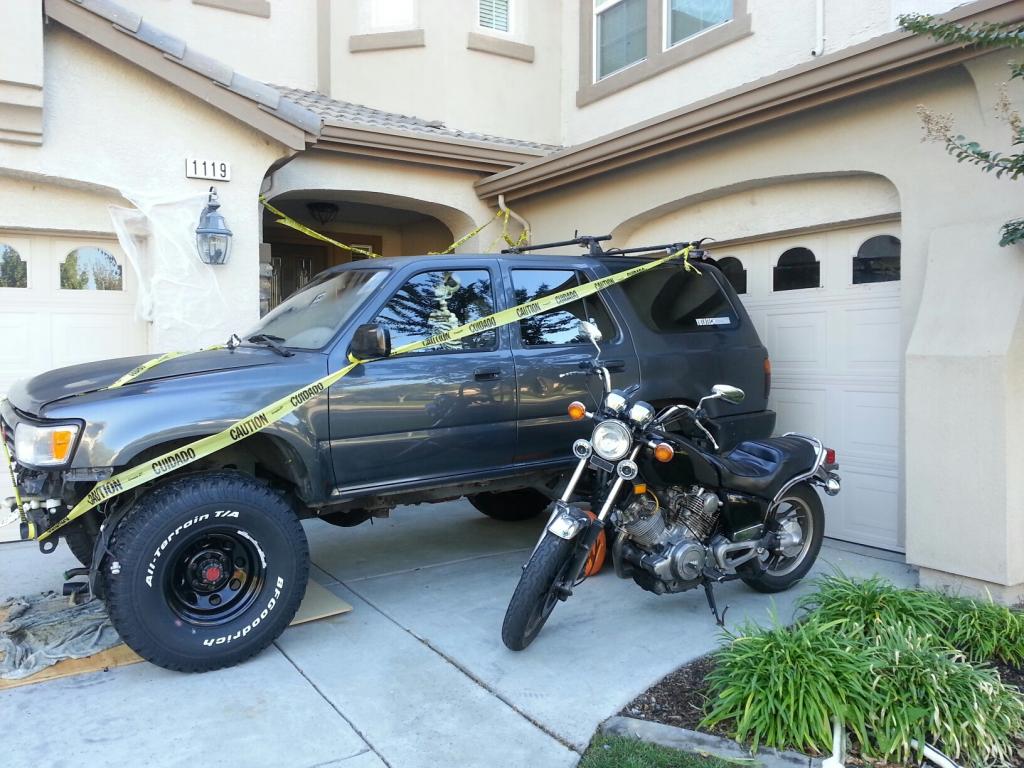
It now has a 2" body lift courtesy of 4crawler
2" suspension lift courtesy of WabFab; Bj spacers, OME coils and ProComp 9000s
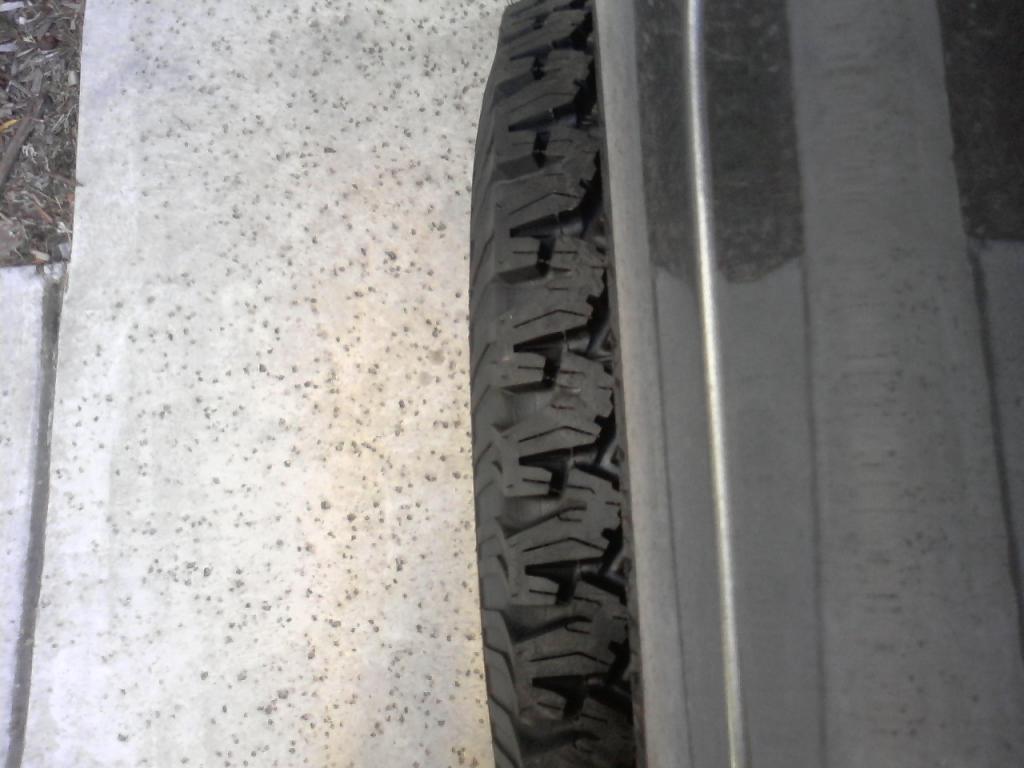
BFG all terrain 33x1250R15 on 15x8 Steelies bs 3.75"
In the middle of a 3.4 swap, engine being provided by ToyOnlySwaps.
Although I cut a hole in my hood on my old truck, I decided to go with a body lift as to provide some extra room for bigger tires.
Also makes working on the truck MUCH easier with the lift.
Purchased the 2" kit from 4crawler's site with the front bumper bracket.
Was a very easy install and managed to do it all myself.
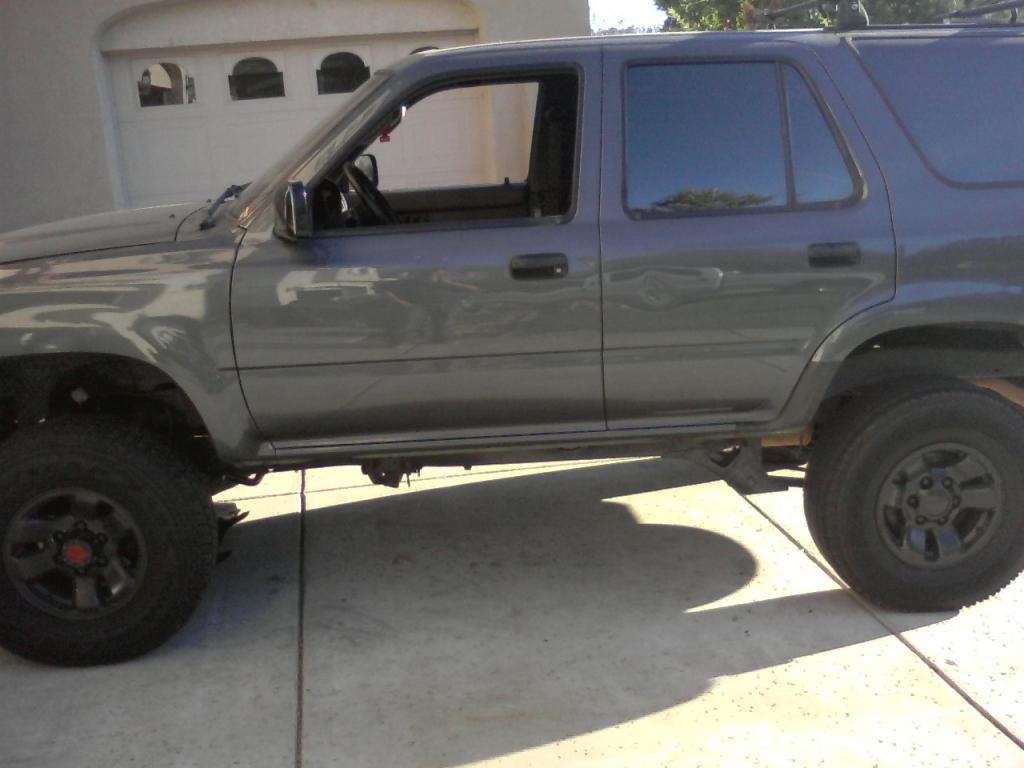
As it sits before the lift:
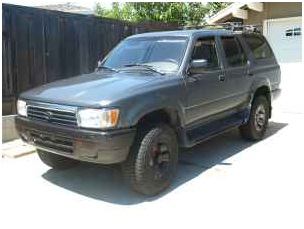
After the lift:
Didn't stretch anything too bad.
Will buy or make some gap guards soon.
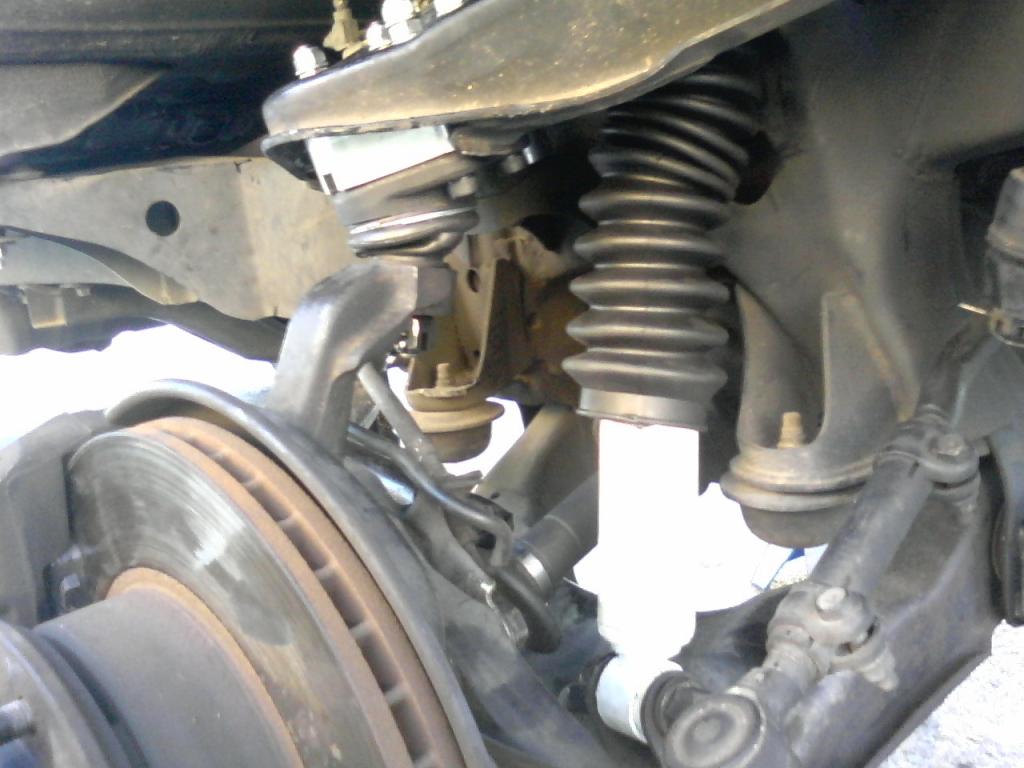
Since I had planned on doing a lift eventually, I decided to go ahead and buy a 2" kit from WabFab, including:
OME lift coils
BJ spacers
ProComp 9000 shocks
Panhard drop kit
LSPV bracket
Sway bar drop kit
Diff Drop (not installed)
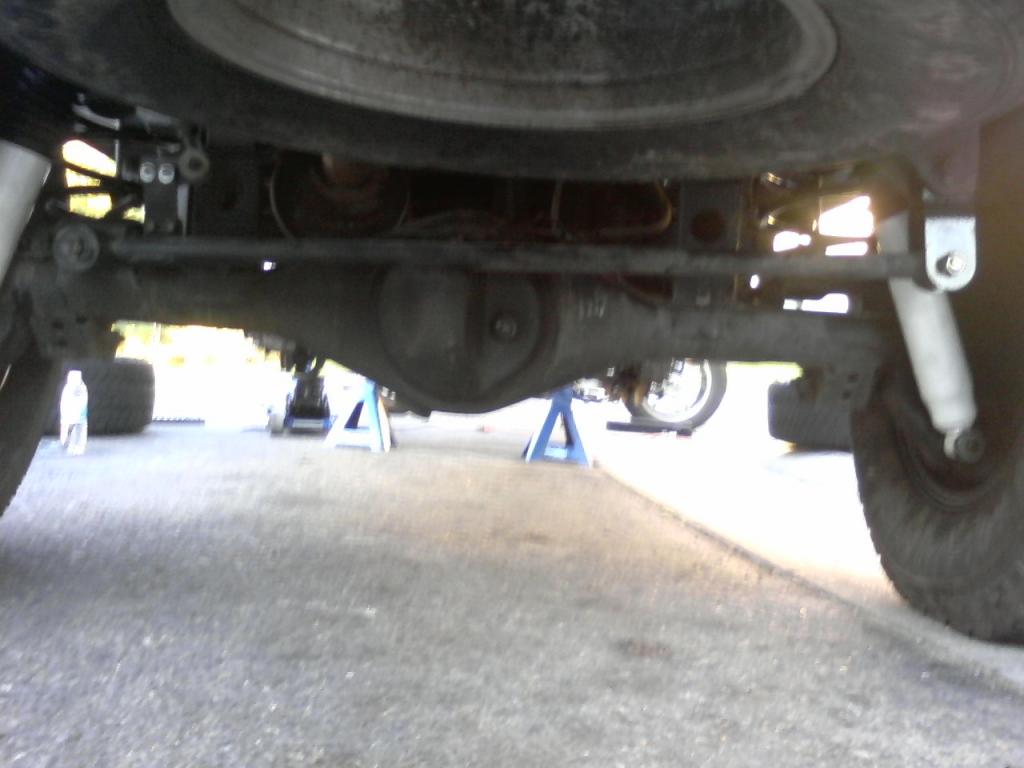
Rear axle after complete lift with brackets:
And i have also removed my spare from underneath the car since then.
Some wrenching pics:
However after all the trouble of installing the BJ spacers and new ball joints, I find that they do NOT FIT WITH THE STOCK RIMS.
Of course I managed to not read that somehow while reading threads....
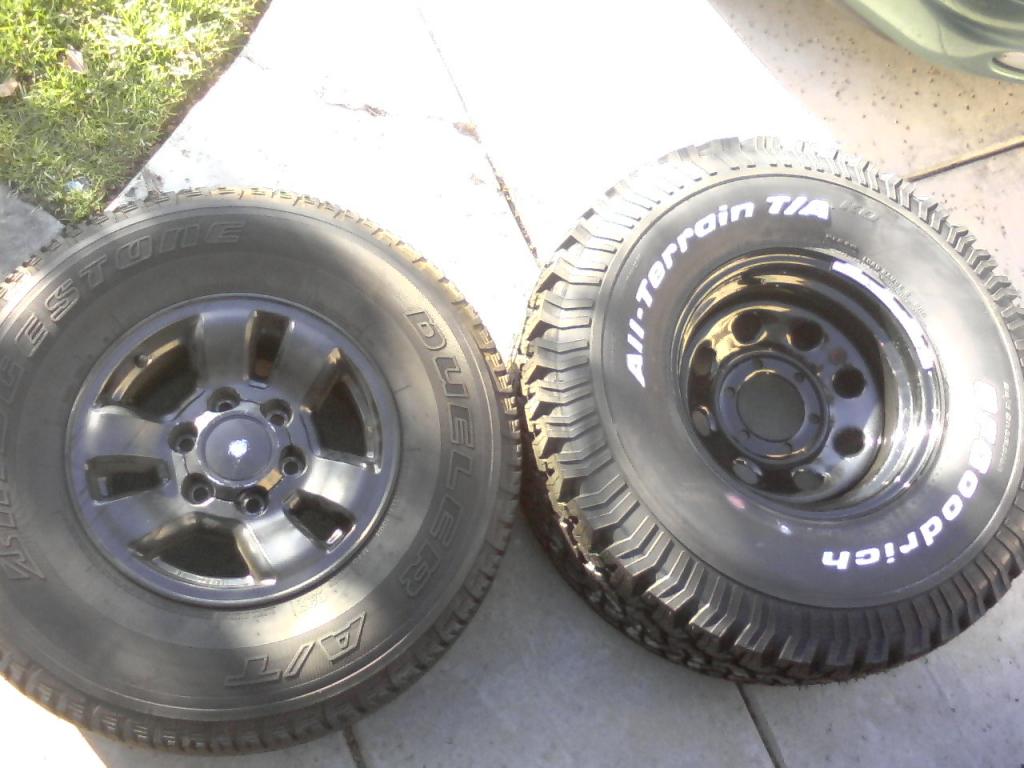
So since I was gonna do it eventually.... I bought some ProComp Series 97 Rims 15x8 bs 3.75" compared to stock 4.75" bs
Also got the BFG 33x1250 once the rims came in the mail.
Still haven't put the BJ spacers in since I got the new rims/tires. But it will only take an hour or so to do so.
Been busy with engine swap preperation
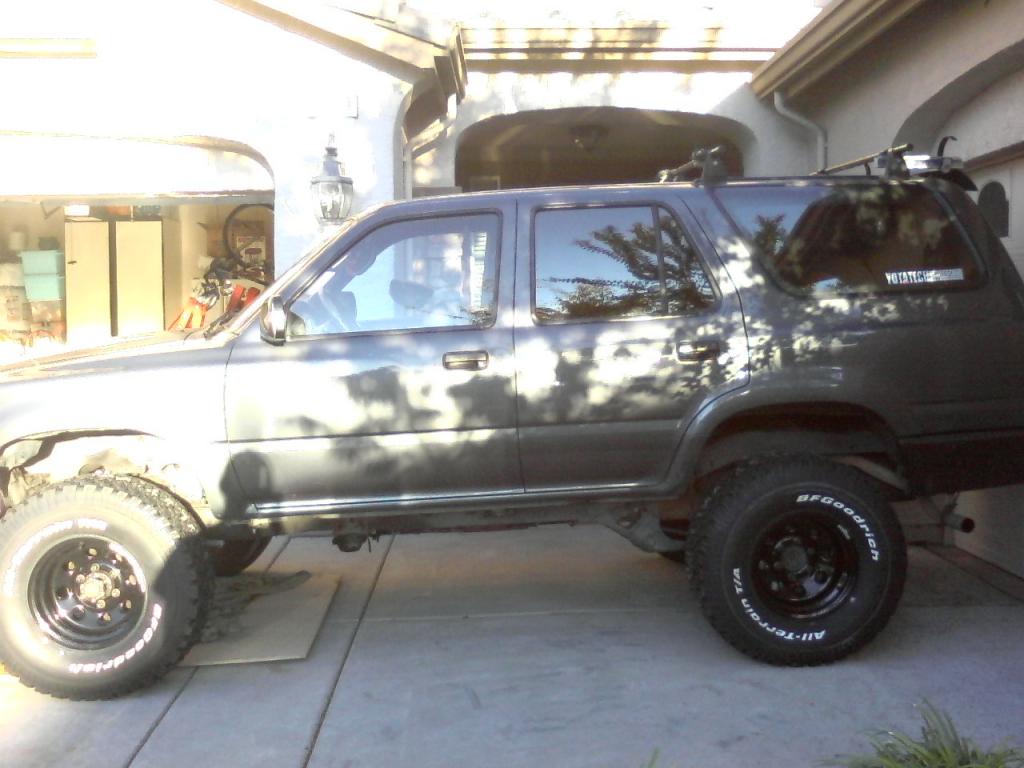
Here's a quick post on the sexy new shoes I got for the Yota after finding out the BJ spacers didn't fit and I was gonna do it after the swap anyway...
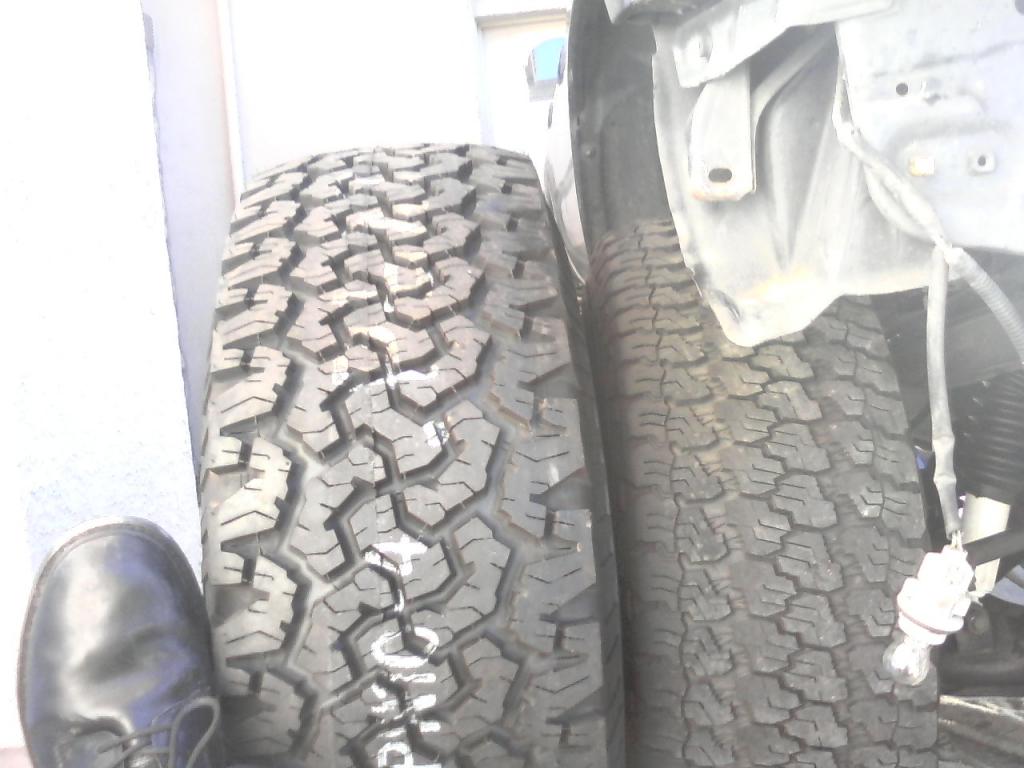
Some comparison shots:
Before/After, sticks out about 2" from the fender now, which used to be flush
Both my toys (ignore the Halloween decorations)
Praise Yotatech! I've learned a lot from this site. Thanks you guys!
So although the engine had been rebuilt before I bought the truck, and only had about 30k on it (he had receipts to prove it) something happened and one of the valves blew up.
While on a camping trip in Sanoma County, I had to get gas, and was out in the middle of nowhere, so I stopped by a mom and pop gas station.
At first the pumps would not pump gas, eventually they did, and I think I got some bad gas, because immediately after that, it started running like crap.
Before this it had run great, and I had actually just had it tuned up before the trip.
So by the time I got it back to Sacramento, driving a couple hundred miles on it not knowing the valve was blown, I took it to Midas and they said the piston was damaged as well.
Perfect candidate for a 3.4 swap!
So here we are now.
As of today I have already mailed the required parts to ToyOnlySwaps to do the complicated conversion stuff, like the wiring harness, etc.
And have also payed the down payment.
Simply waiting for the engine to be shipped to me.
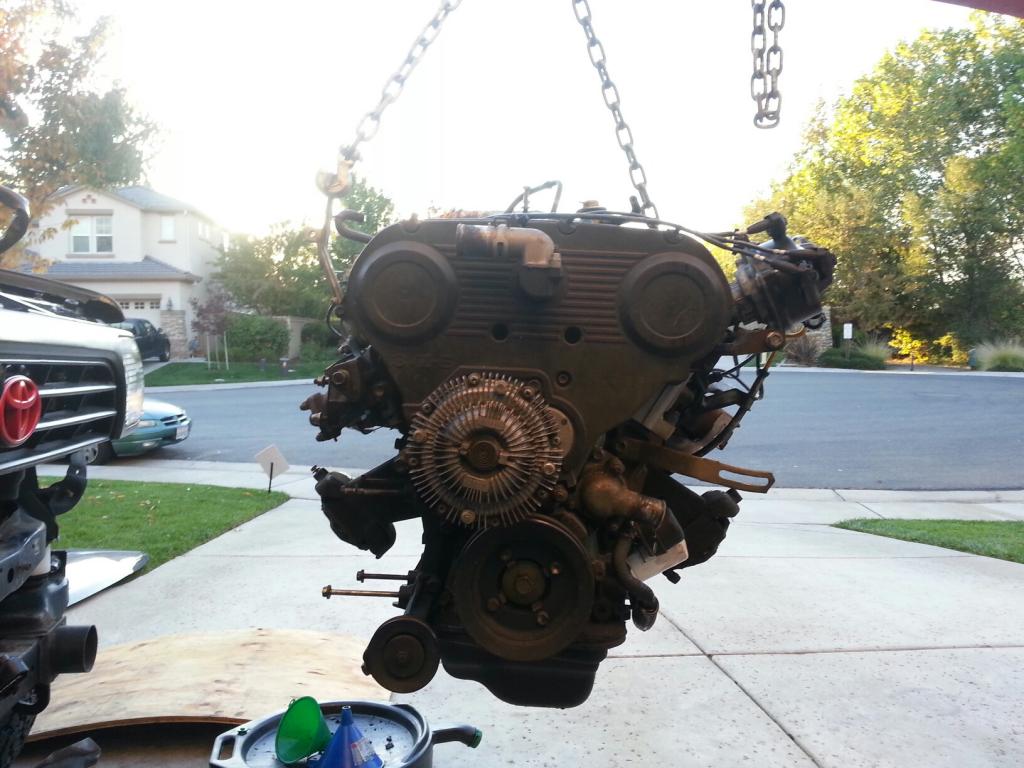
Ok enough of the talk, here's some pics then I'll further explain what my plans are.
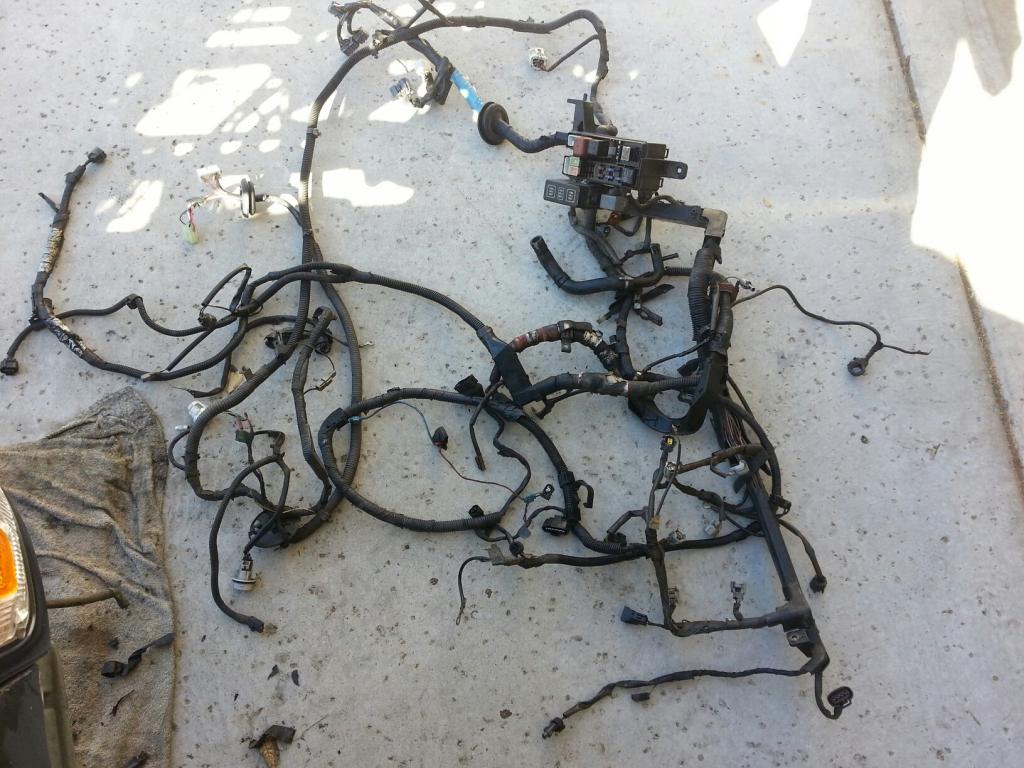
After tearing apart the dash further than I needed to, and fighting a ton of connectors, I got the wiring harness out to ship the them (seriously the hardest part of the project so far, pulling the engine was easy)
DO NOT pull the dash apart as far as I did. I was not unaware of what exactly I was trying to do... All that needed to be done was to pull the gauge cluster.
As this is the section for 3.4 swaps, I may start other threads on the lifts at a later date with details involved.
So far I have spent hours doing research on the 3.4 swaps and have read all the great swaps on this site.
I'll skip most of the details on pulling the 3.0 and get to the details on the plans for installing the 3.4 (may update later with details/pics).
Although I would consider myself experienced enough to do this swap, I simply do not have all the time/resources/knowledge to complete the swap using only ORS and trying to find a donor, etc, so I figured a ToyOnlySwaps bolt in conversion was my best bet. I am also a college student and working.
Ok so I know I'll be missing some things that I'll add in later.
3.4 engine from TOS comes with:
-everything necessary for a bolt in conversion, including fluids!
-PS pump
-Alternator
-A/C compressor mod
-Fan clutch, fan (or I will use them off the 3.0)
-Installed dipstick
-COMPLETE wiring harness and ECU
--Including OBDII Port
-Clutch, pressure plate, flywheel, pilot bearing
-Crossover pipe
-Factory air box
-CA smog equipment
--Evap box
-swapped parts including:
---modded speedo cluster
---oil pan, baffle, pickup
---oil pressure sending unit
---thermostat housing, lower radiator hose
---motor mounts
---cruise control cable
I am using 3.0 parts including
-Manual transmission
-Stock clutch hydraulics
-Radiator
-Throw out bearing
-A/C compressor
-Starter
I will use 3.0 heater lines and mix match lines for the heater
If TOS includes fuel lines I will use those (I believe they do) or I will reroute them to the other side.
I will need to buy or make a new battery tray.
I will drill to mount air box.
As well as for the EVAP box
I may need to do work for the idle up...
My goal is to keep this as clean and as factory looking as possible.
Everything should work out as to where I can get it CA smogged, my only concern after reading CADMAN's thread is the exhaust.
It looks like you've done your homework and know what you're getting into.
I would suggest that you "upgrade" to a 3.4 flywheel, clutch, and pressure plate as they're a little bigger than the 3.0's; use the 3.0 throwout bearing, the pilot bearing is the same between 3.0 and 3.4, and you'll need to use a 3.4 starter (the starter needs to match the flywheel).
I'm a bit surprised that TOS needed the entire dash harness from your 4Runner rather than just the couple connectors from your 3.0 engine harness that connect to the dash harness; I haven't touched my dash harness at all.
As for the exhaust, don't worry about the TOS crossover, there have been some changes since Cadman's and dntsdad's experiences such that they are allowing the exhaust to be rerouted as needed provided that the 02 sensors and cats are in the same relative locations. Call the hotline (1-800-622-7733), leave a message with the receptionist and the ref will call you back in 2-3 days and he has been extremely helpful to me telling me about all the usual pitfalls and things to be aware of before going in for the inspection.
Any idea what the donor engine/electronics is/are from?
And let me know if you ever have questions, need help, or just want to see a swapped 4Runner in person; I'm up in Auburn/Grass Valley most of the time but my 4Runner's been down in Orangevale during my swap.
I'm a bit surprised that TOS needed the entire dash harness from your 4Runner rather than just the couple connectors from your 3.0 engine harness that connect to the dash harness; I haven't touched my dash harness at all.
.
SacRunner: Thanks for the info! especially on the smog stuff, will be doing more research with that up and coming.
As for the harness, I didn't pull the Dash harness (originally thought I would need to..), Just the engine harness sent to them.
They are sourcing an engine right now and will email me the year/model/VIN once they find one.
I believe they are sending me the complete clutch compenents from a 3.4, but need to double check. I will now look into a 3.4 starter as well.
If I really get stuck with something I'll send you a PM with what's going on.
VasinVictor: Thanks for the compliment! Can't wait to get it running again.
I would suggest that you "upgrade" to a 3.4 flywheel, clutch, and pressure plate as they're a little bigger than the 3.0's; use the 3.0 throwout bearing, the pilot bearing is the same between 3.0 and 3.4, and you'll need to use a 3.4 starter (the starter needs to match the flywheel).
I might be mistaken about this specific per different applications but on my 3.4 swap i re-used my 3.0 starter...7000 miles later and still starts
Finally got around to installing my BJ spacers today (again) now that I have the new rims/tires on. Definitely a noticeable difference in height. (sorry no pics). Once I get the swap done I'll adjust torsion bars and get an alignment.
Also found a praying mantis chillin underneath the truck, that's good luck right?
It's the third time I've seen him near the rig the past couple weeks!
I don't know if you really need to take apart your dash that much. I think I just did it enough to remove the instrument cluster. .....
Keep going. Your mods looks similar to what I started....
I don't know if you really need to take apart your dash that much. I think I just did it enough to remove the instrument cluster. .....
Keep going. Your mods looks similar to what I started....
Haha yeah I didn't realize it at the time.
And thanks for posting I'll be using your 3.4 threads for reference once I get to that point.
So I just talked to Cliff from TOS and they found a Ca engine from an 01 Tacoma prerunner. Just over 130k on it. The engine is coming from a 2wd automatic. They had lower mileage ones but I prefer the Ca one because it will be easier to smog I'm assuming.
Does anyone know if they smog based on the engine I'm putting in? Or the ECU?
Also will it make a big difference that it's coming from a 2wd automatic into a 4wd manual?
Thanks
Does anyone know if they smog based on the engine I'm putting in? Or the ECU?
Also will it make a big difference that it's coming from a 2wd automatic into a 4wd manual?
Thanks
The ref I had talked to while I was looking, told me that I need to conform to the smog requirements of either the ECU or the motor; but considering the motors were pretty much the same from year to year while the electronics changed occasionally and that the ECU that actually controls everything I'm taking the approach of letting the ECU determine the new make/model/year of my swap.
I'm not even sure how you could base the emissions off the motor itself, to me it just makes sense to base it off the ECU (or maybe I have way over thought this).
As for the 2WD vs 4WD, you may lose the 4WD signal that controls the ADD (if you have it) and the dash light; but really it all depends on how TOS handles it. The 2WD harness will not have the wires that go back to the transfer case, but they could be added (I would imagine it'd be a pain) and tied into the conversion harness, but that's a conversation that you should probably have with them.
And of course if you don't have ADD and don't care if the 4WD dash light never turns on when in 4WD, it becomes a non-issue.
Awesome thank you. I kinda figured it should be based off the ECU. And I will give the smog ref a call later this week now that I know what my donor is.
As for the dash light and harness I believe TOS will be taking care of that for me. I will be calling them again tomorrow with a few more questions.
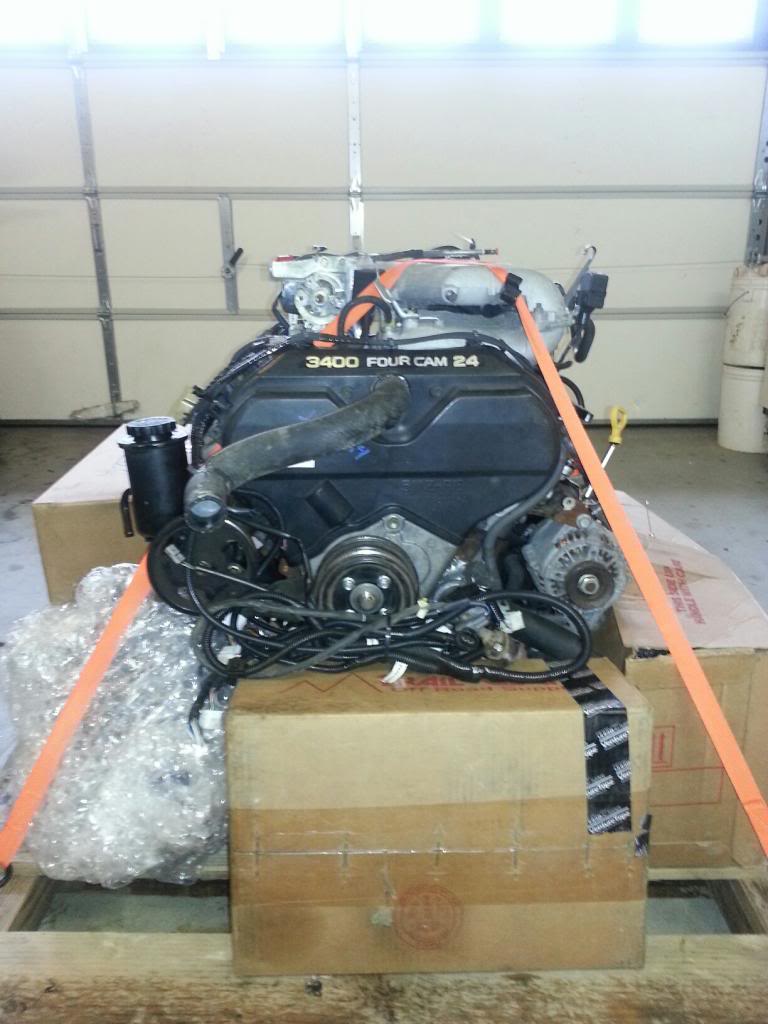
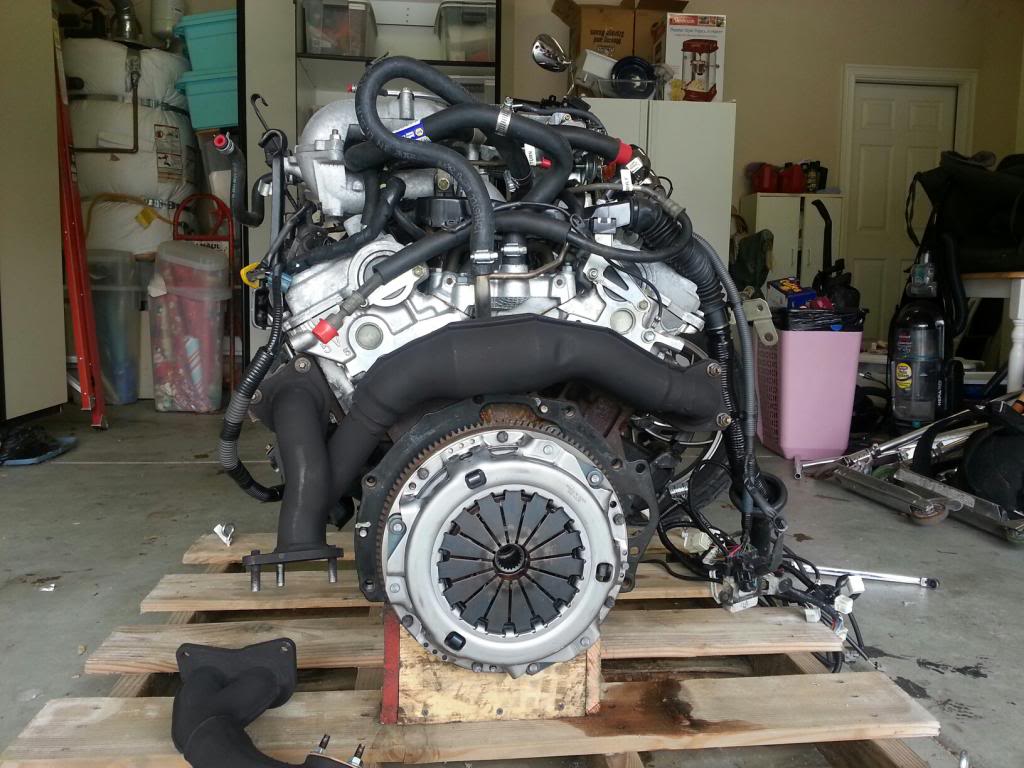
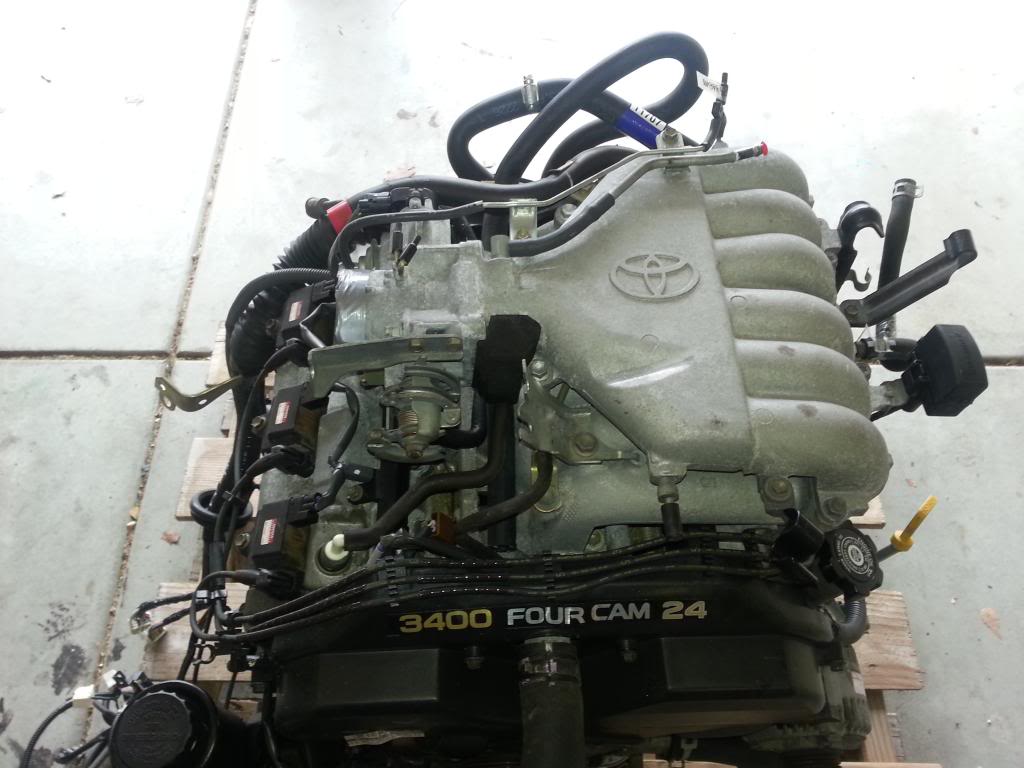
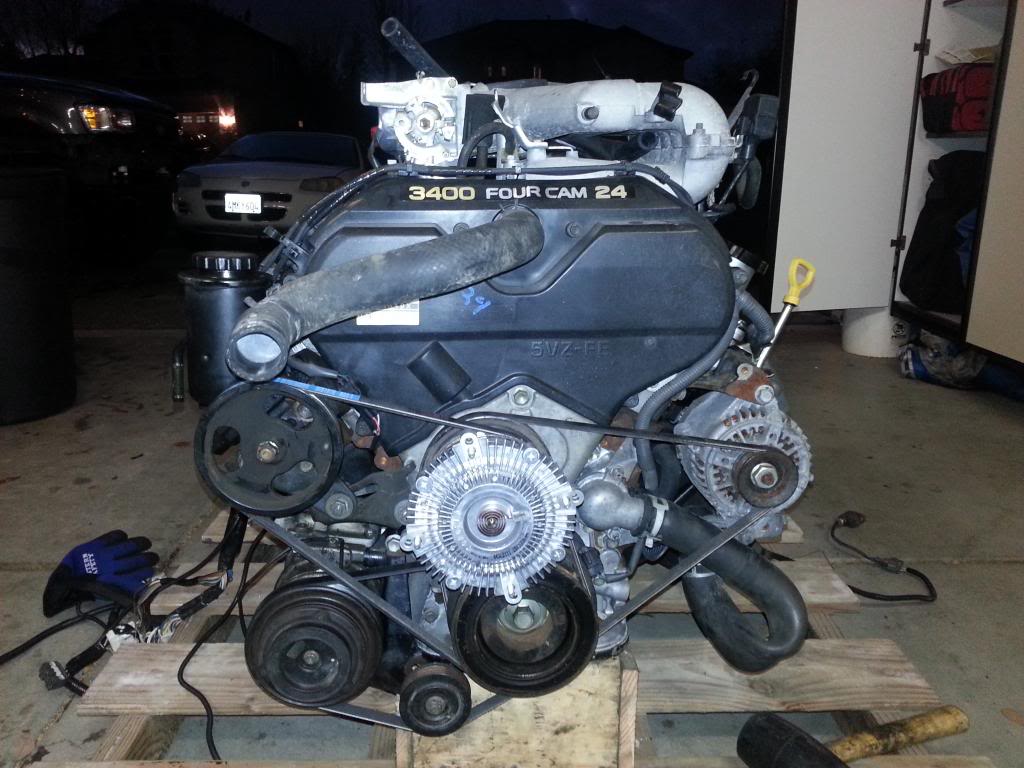
Was dropped off at 11:00 this morning
It was packaged very nicely and I think it is very clean.
All vacuum lines, wires, etc clearly labeled.
Also came with a battery tray, factory air box, evap box, fluids, and a new throw out bearing.
Today I replaced the throw out bearing, replaced the A/C compressor pulley with the one provided, installed the fan clutch and serpentine belts, started putting the dashboard back together, and bought $25 worth of hardware to replace the stuff I accidentally discarded when I sold the 3.0
It looks like from this point it will be a fairly simple install.
I need to:
-drop in engine
-bolt up transmission
-bolt up exhaust
-install starter
-connect power steering lines
-connect A/C system
-connect fuel lines
-connect heater hoses
-connect radiator
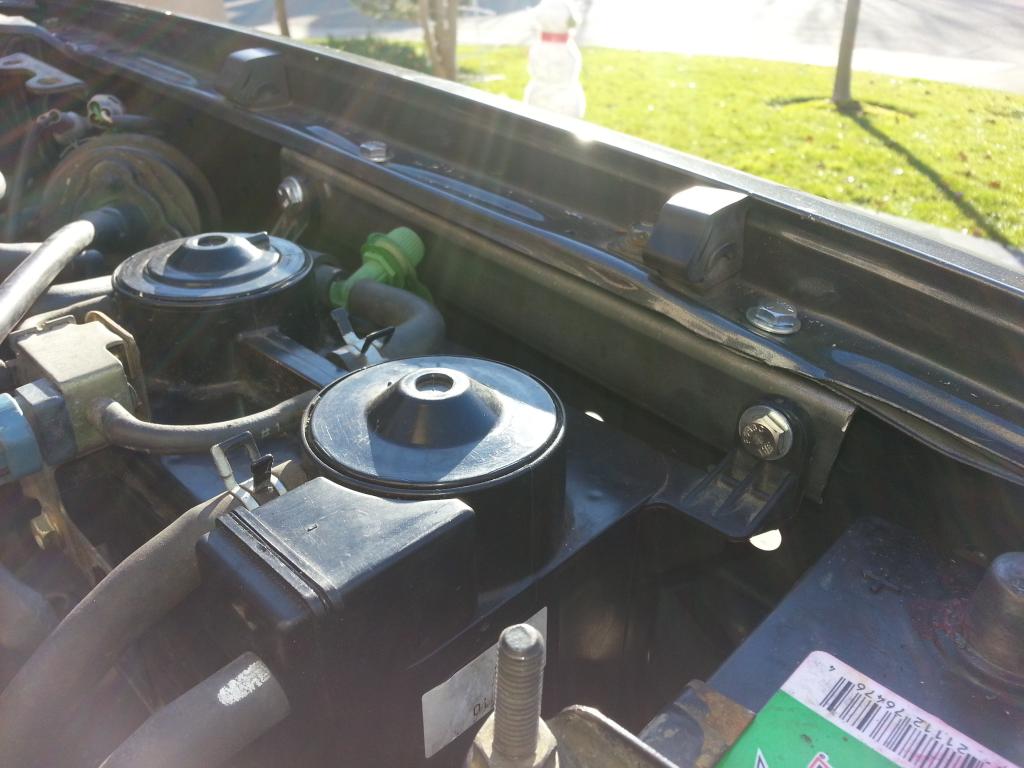
-relocate coolant reservoir
-mount airbox
-mount evap box
-mount battery tray
-mount fuse box
-plug in engine harness
-double check everything and start her up!
I will be working on it constantly this week and will have more time this month as it is the end of the fall semester.
My goal is to drop the engine in within the next few days but I need to find someone who has time to help with that.
If I forgot to add anything I will update this week.
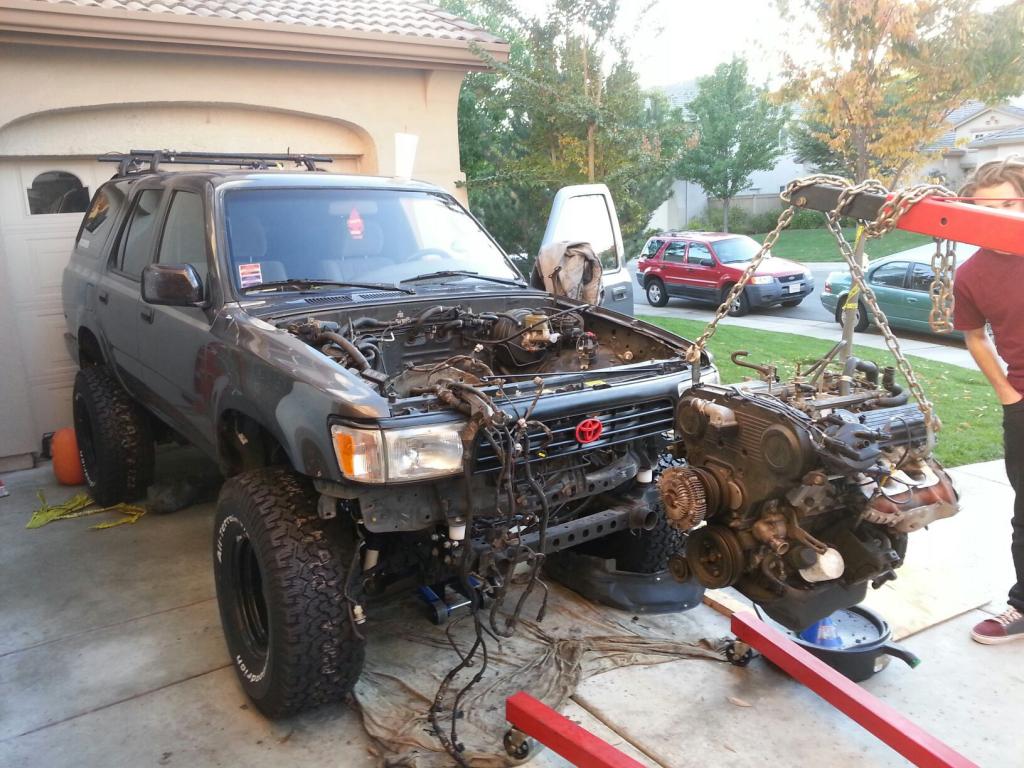
Well today was a rather unsuccessful day
I didn't find any help, so I decided to tackle dropping the engine in on my own. Working the cherry picker and handling the engine all at once wasn't that bad, but also probably wasn't the safest thing to do. I managed to get the engine almost all the way in, with the alternator and ac compressor constantly getting in the way, but couldn't get the damn transmission to line up. I tried maneuvering the engine, jacking up the transmission, rotating the crank pulley to see if the splines would line up. No luck. I also had to grind down part of the crossover flange to get it to pass the uca/torsion bar. After wrestling with the damn thing for almost two hours, trying everything I could think of, I threw in the towel and I'll be back at it tomorrow.
However this time I will first remove the ac compressor and alternator. I also need to clean up the grind on the crossover flange. Hopefully then I'll have some more room and the input shaft will do what it needs to do.
It hasn't been this hard to find the hole since high school
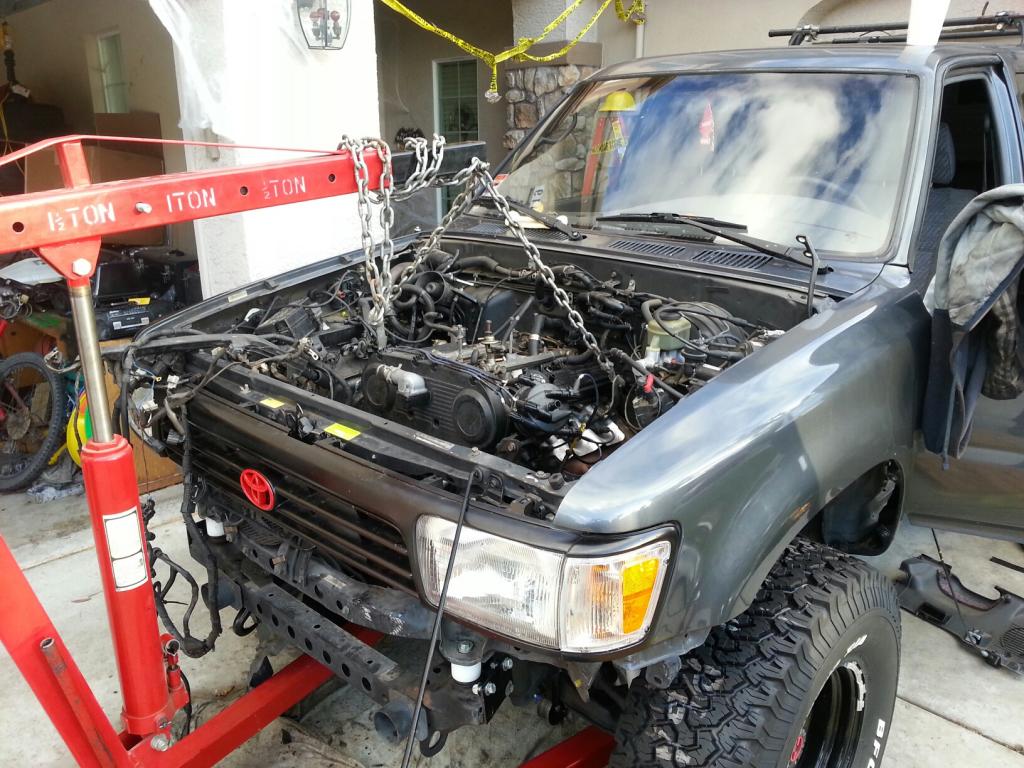
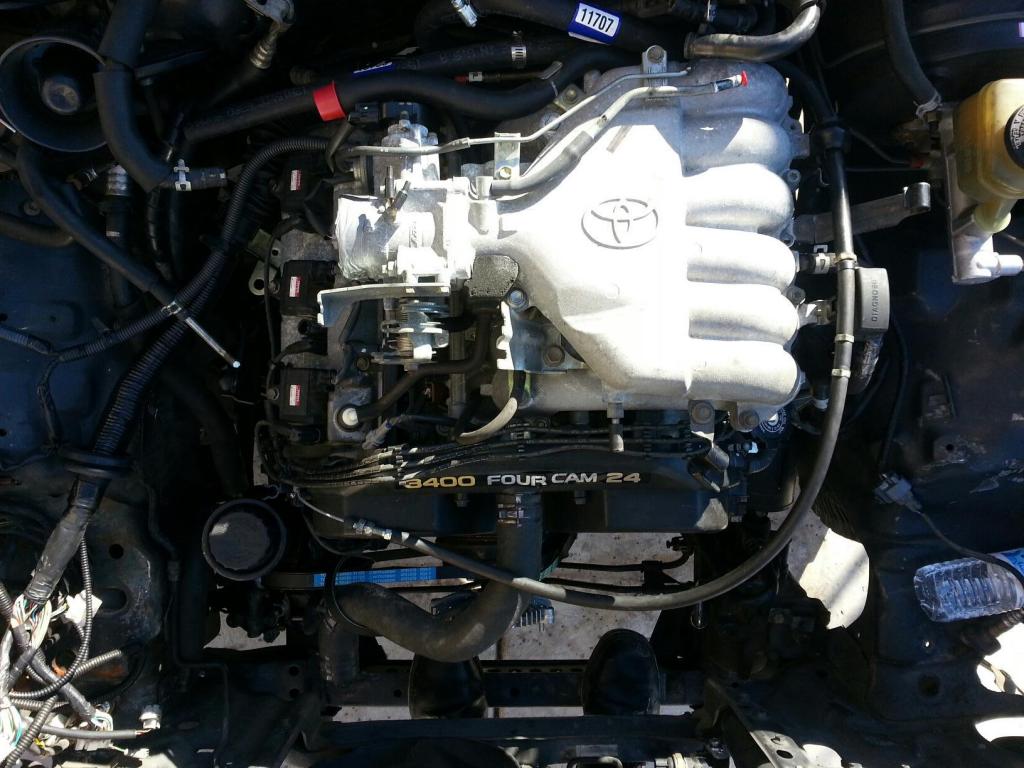
Well I had a much better day today than yesterday!
With some help from my brother and our friend we managed to manhandle the engine into the bay and onto the transmission. It definitely would not have fit if I had left the alternator and ac compressor on. As it sits now, the ac compressor has room, but it is an extremely tight fit between the alternator bracket and steering column.
After I got the trans and motor mounts bolted up I also installed the starter, alternator, ac compressor, hooked up all ac lines (had to bend them slightly), one of the power steering lines (couldn't get the other to fit yet), cruise control cable, and part of the exhaust.
I think I need to buy the radiator drop kit from 4crawler because I did not do so originally when I bought my body lift (the lower radiator hose contacts the lines coming from the steering box).
I work this weekend but will try to get the air box, battery tray, evap box, etc mounted in the bay.
Also need to hook up fuel lines and heater hoses as well as other stuff.
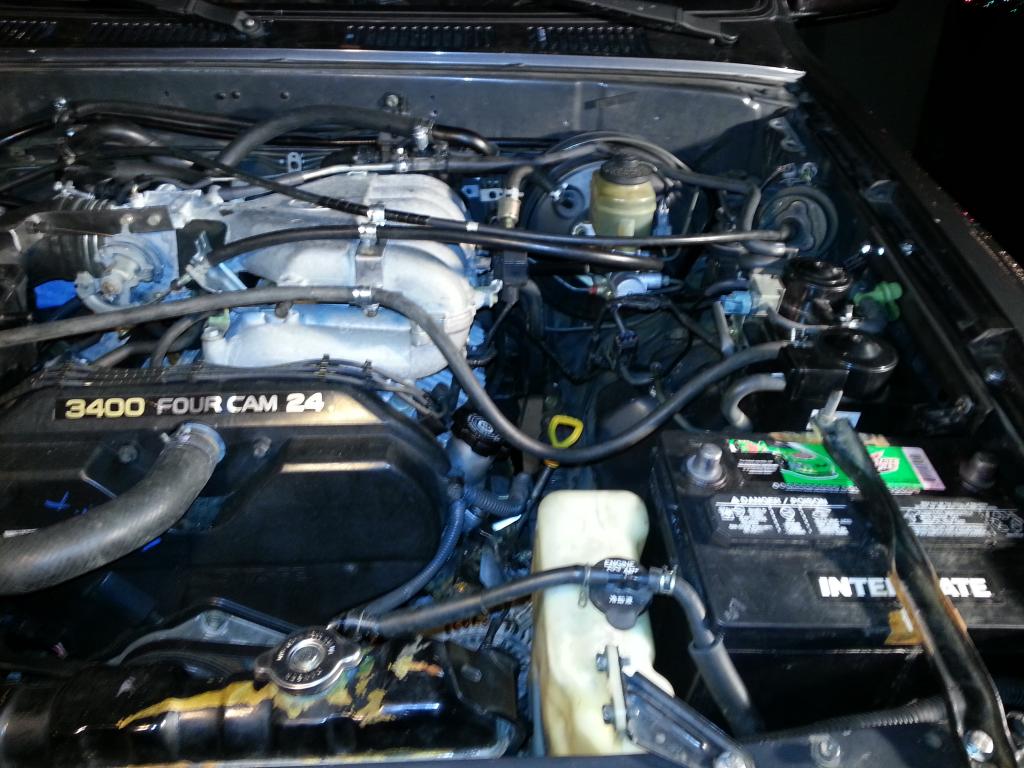
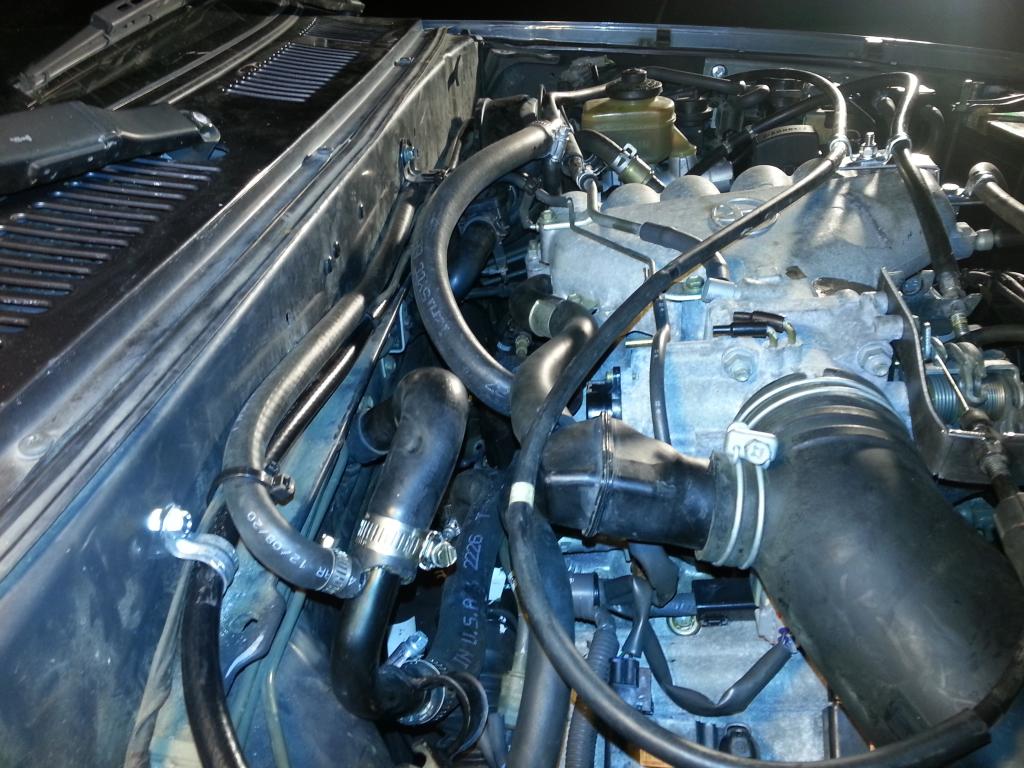
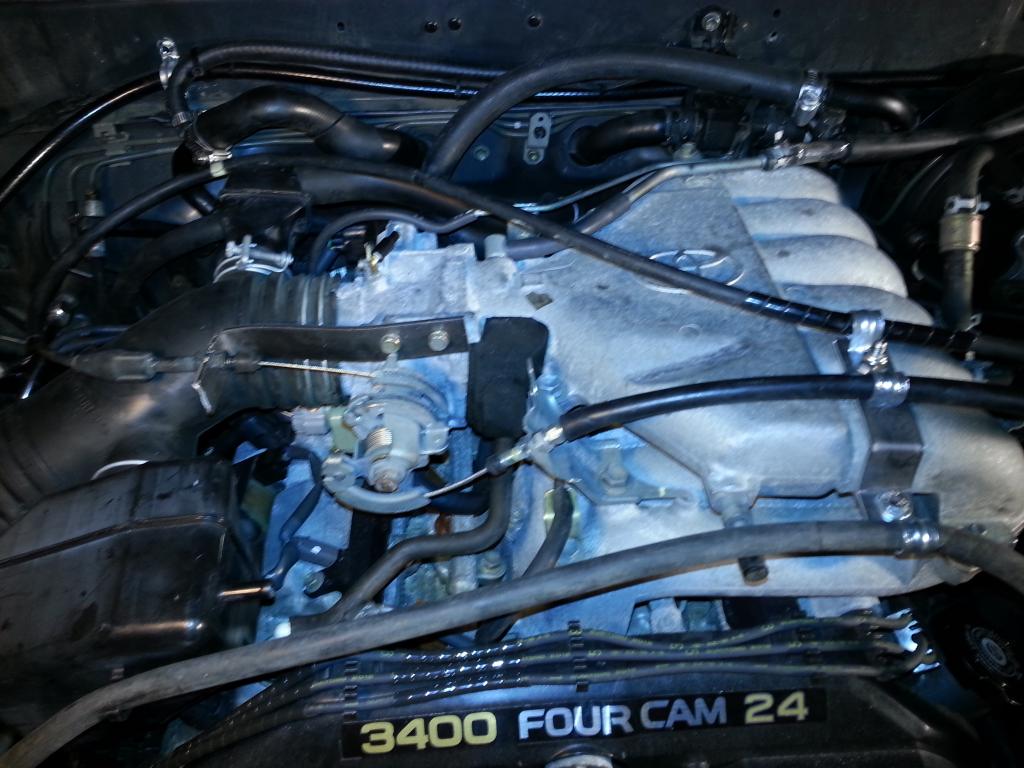
Here's some pics of right after I bolted the engine up.
Haven't posted in awhile due to being extremely busy with work and family stuff. I have however gotten a lot done, my mechanic friend came over the other day and we busted some stuff out, I've also been working on it any chance I get.Hope everyone had a Merry Christmas! I got a dremel set as a gift and it has been very useful
Pretty much everything is hooked up and hopefully I can start it up next weekend when my mechanic comes over again.
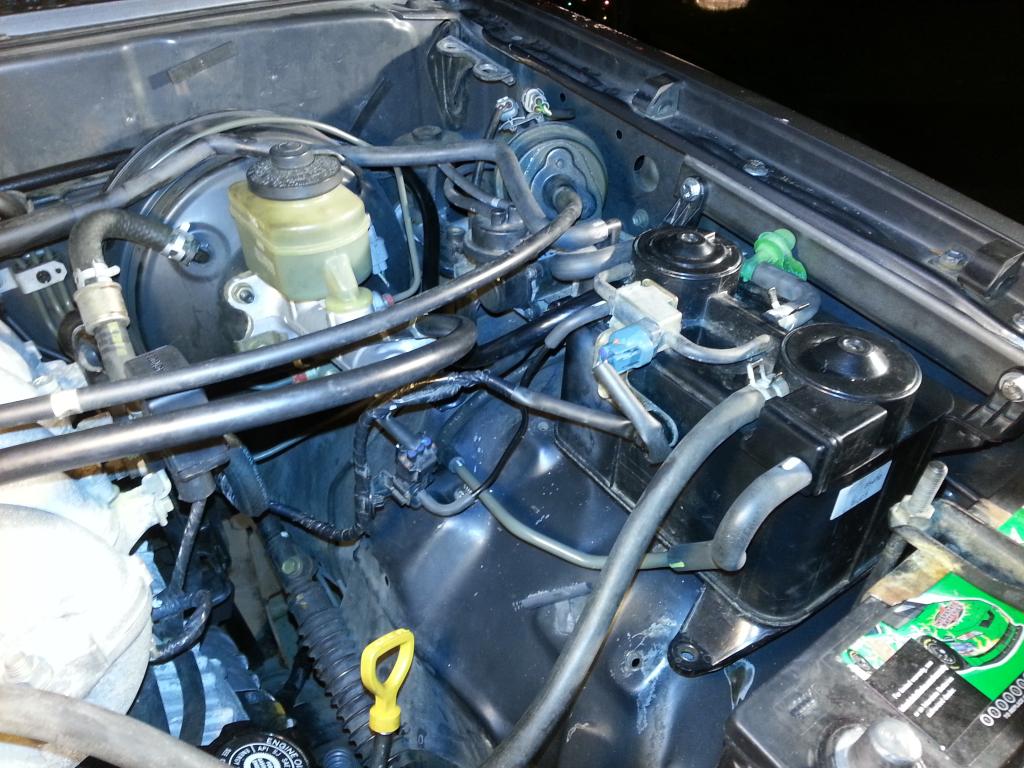
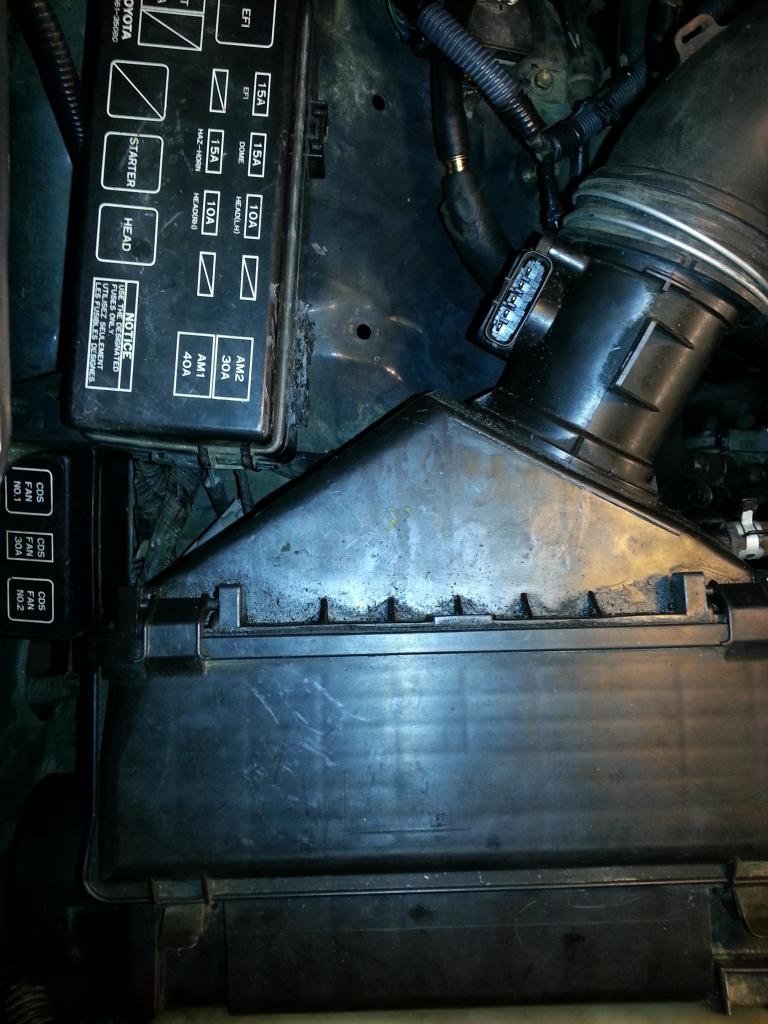
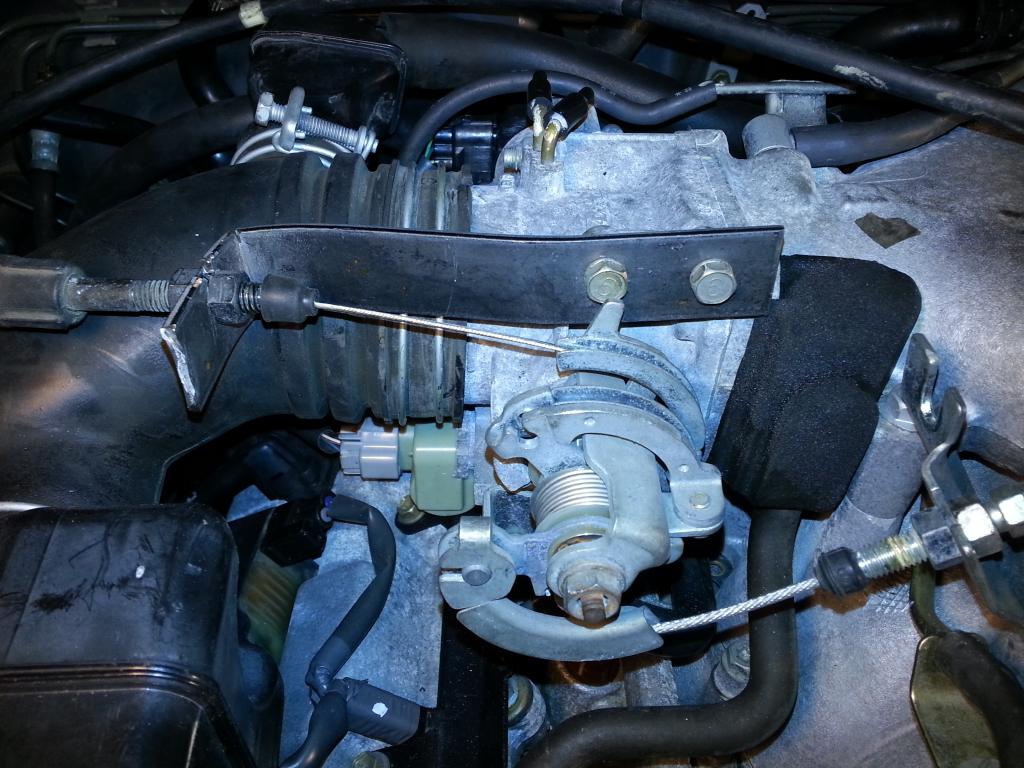
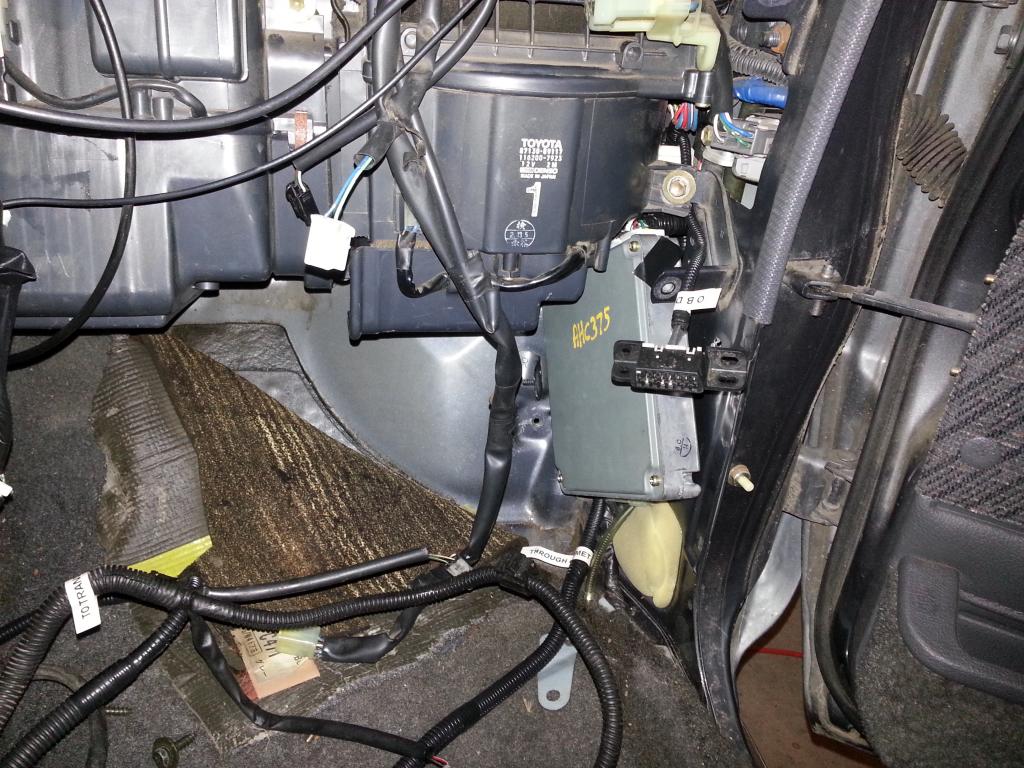
I had to make some brackets for the evap box and throttle cable, as well as the cruise control cable, and will be drilling through the bottom of the air box to mount it. Heater hoses weren't as bad as I thought they would be. I also cleaned up all the loose wires and hoses that I was done with. The evap box was easy to plumb and install. Fuel lines, power steering, A/C is also all connected. I got the fuse box mounted in the stock location and hid the smaller box behind the air box(see pic).
There's a lot more I did but this thread isn't very detailed as ya'll can probably tell Does anyone know if I will need the 3.0 charcoal canister as well as the 3.4 evap box?
Can someone tell me if I have the cruise control cable hooked up correctly?
What's left to do:
-Mount Air Box
-Install Cooling Fan
-Hook up Battery Cables
-Cut a hole/install a grommet in the floor for trans wires
-Put the Dash back together
-Fix exhaust/ Install O2 sensors
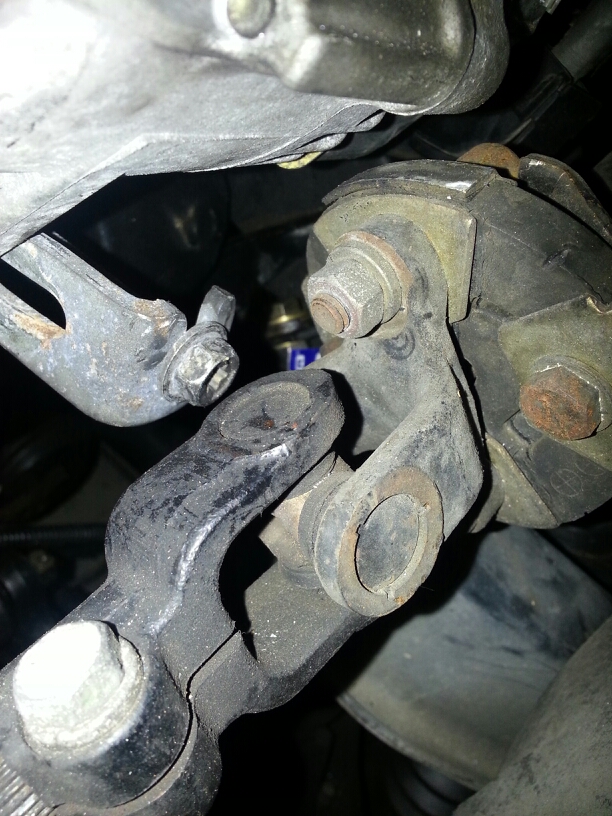
-Do something about the steering shaft
----Anyone know how to fix clearance issue between alternator/steering shaft?(see pic) I was thinking a 1/4" plate between the frame and box to space it out, as well as a new tensioner bracket for the alternator
Here's some pics
Fuse Box Location
Is this the correct location? or is it the middle one..? (also not the prettiest bracket, but it's functional)
EVAP Bracket
ECU Mounted
Alternator Clearance Issue
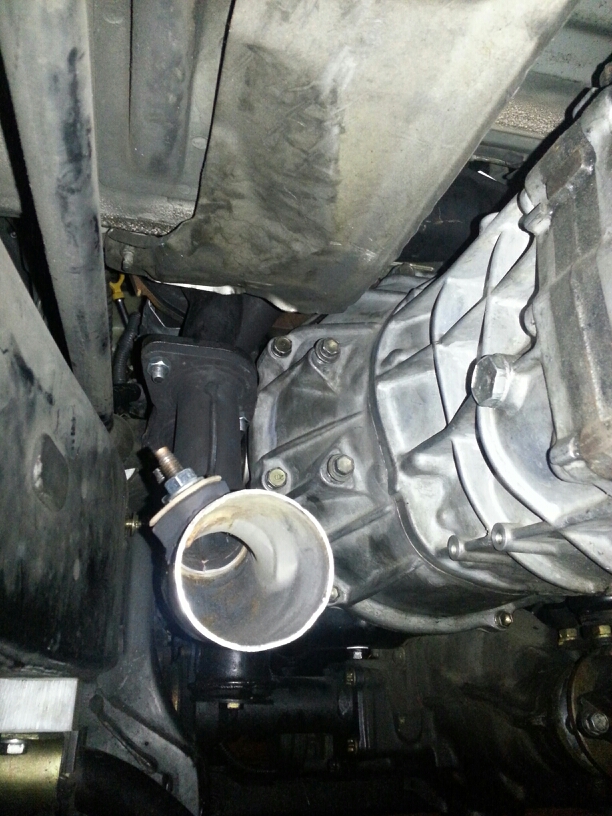
Exhaust Clearance Issue (but I MADE it fit)
Incomplete Exhaust
 11-09-2012, 04:31 PM