22r to 5vz swap
 10-05-2007, 04:39 PM
#1
Registered User
Thread Starter
Join Date: Jul 2006
Posts: 268
Likes: 0
Received 0 Likes
on
0 Posts
22r to 5vz swap
Well, earlier this year I decided to start the swap on my truck. I had a 22r that I had bored out, new pistons, rings, arp head studs, lunati cam, steel timing chain guides and stainless o/s valves. Wasnt enough to keep me happy still. I came across a guy that had just bought a 92 truck, ext cab, 22r, manual trans that needed a motor (same as mine) and told him that I would install mine into his truck for 1,000. He did that and so I started my swap...
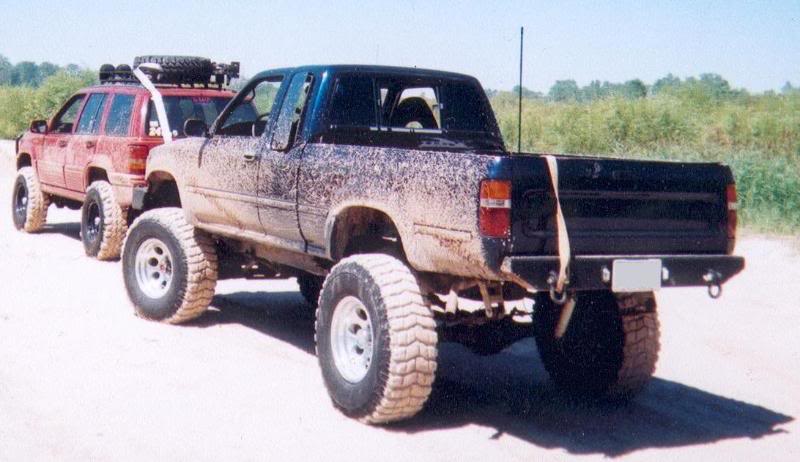
This is my truck
Started with taking the old motor mounts off (after I took the upper control arms off of course)

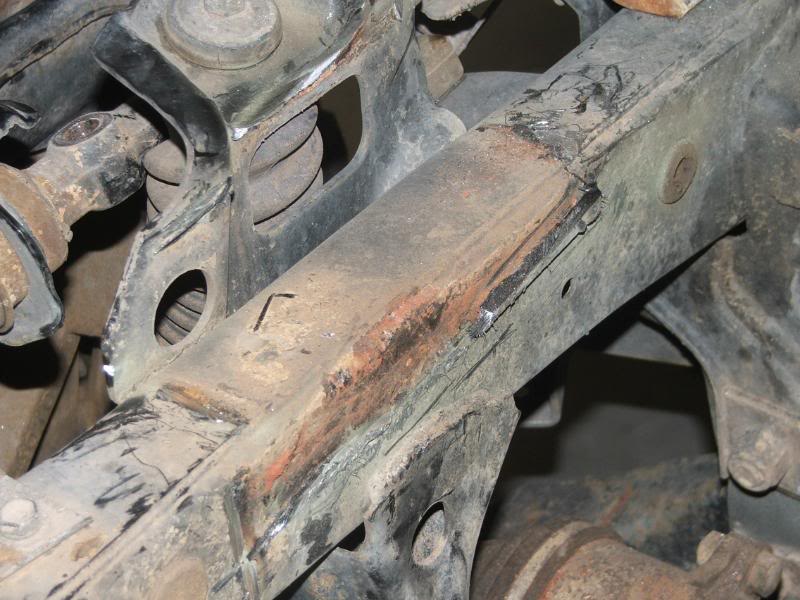
Cleaned up the frame and sprayed this "weld through" primer
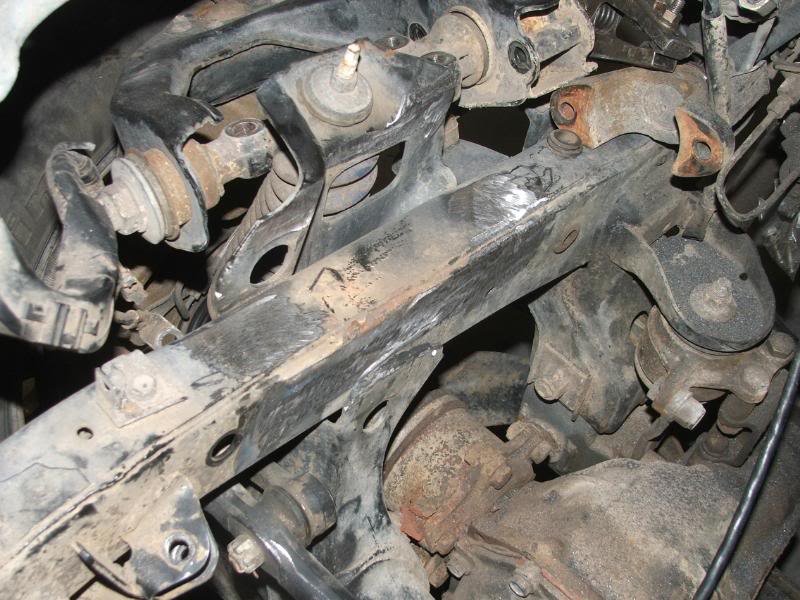
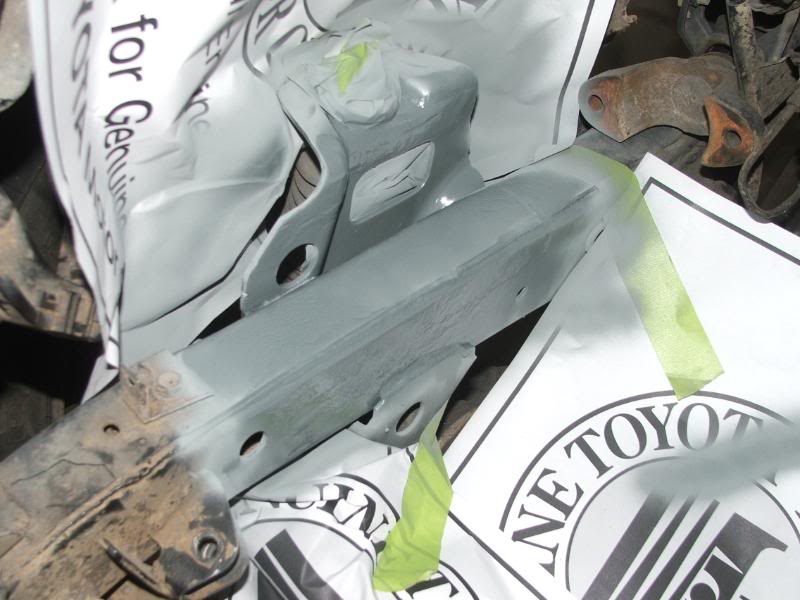
Then welded it up
I decided that I didnt like how the welding went with the primer and welded the driver side w/o it. I did however prime it after it was done.

These are the part numbers that I used for my frame engine mounts
51047-35030
51048-35030
This is my truck
Started with taking the old motor mounts off (after I took the upper control arms off of course)
Cleaned up the frame and sprayed this "weld through" primer
Then welded it up
I decided that I didnt like how the welding went with the primer and welded the driver side w/o it. I did however prime it after it was done.
These are the part numbers that I used for my frame engine mounts
51047-35030
51048-35030
Last edited by jasond; 05-25-2008 at 10:25 AM.
 10-05-2007, 05:03 PM
#2
Registered User
Sweet its nice to see a thread like this. I havent seen to many 22re to 3.4 threads so this should be real cool. Any motor upgrades? sc? sas anytime? where did you get weld through primer ive never heard of that? Good luck
Last edited by fillsrunner4; 10-05-2007 at 05:05 PM.
10-05-2007, 07:26 PM
#3
Registered User
Thread Starter
Join Date: Jul 2006
Posts: 268
Likes: 0
Received 0 Likes
on
0 Posts
Nah, the motor is stock right now, got a trd supercharger sitting in the garage. Wanted to get my rig goin and work out all the kinks before i put it on. I also have a solid axle sitting in the garage just waiting, but that will be later on also. Got the weld through primer at ace hardware, but like I said, I didnt like it-that was the first time that I had used it.
 What did you do for a crossover? Yeah I never heard of weld through primer either.
  10-05-2007, 07:39 PM
#5
Registered User
Thread Starter
Join Date: Jul 2006
Posts: 268
Likes: 0
Received 0 Likes
on
0 Posts
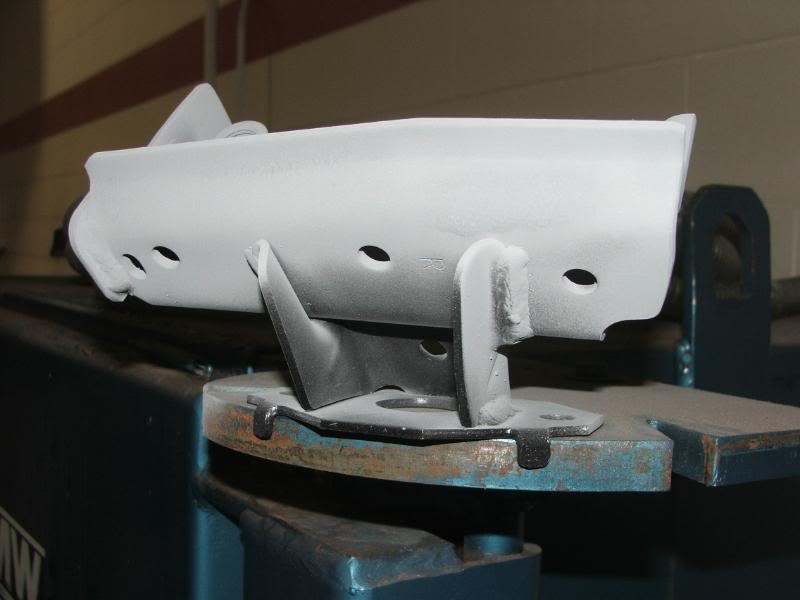
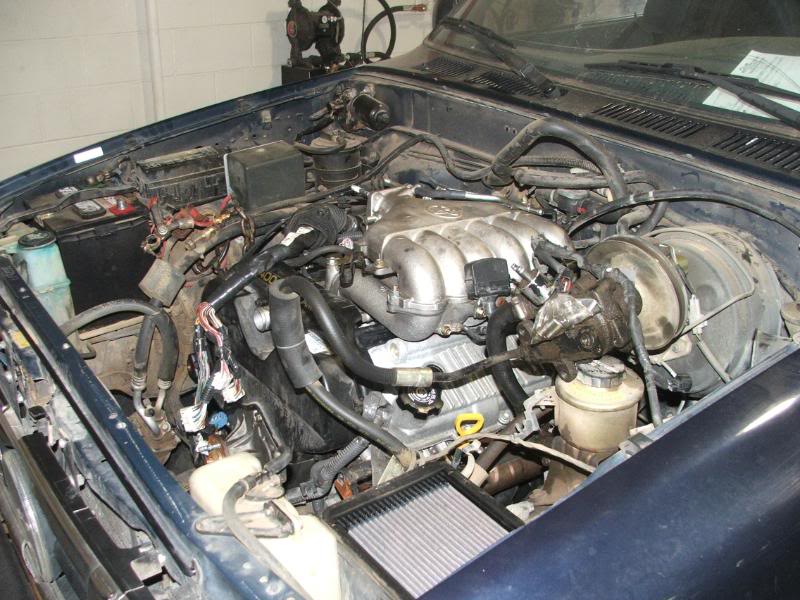
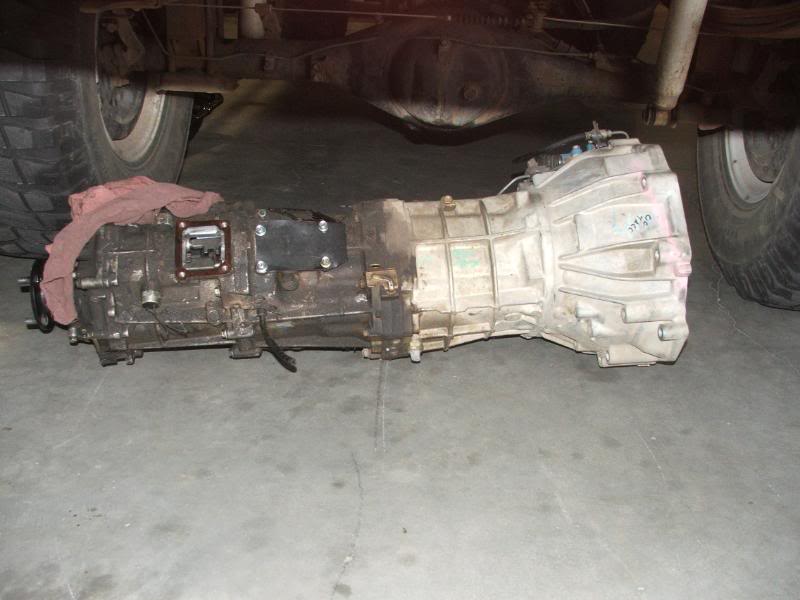
At that point I dropped the 5vz in
and started on the transfer cases, I decided since I was this far that I would double up the t-cases and put them behind the 00 taco R150 that I got

Once I got to that point and got the trans/transfer case stabed in the truck I had a "little" bit of surgery and was out for about a month

I had some real bad headaches and found out thru an MRI that I had a syst behind my left eye that was leaking and needed to be removed. The bruise around my left eye is from the surgery.
and started on the transfer cases, I decided since I was this far that I would double up the t-cases and put them behind the 00 taco R150 that I got
Once I got to that point and got the trans/transfer case stabed in the truck I had a "little" bit of surgery and was out for about a month
I had some real bad headaches and found out thru an MRI that I had a syst behind my left eye that was leaking and needed to be removed. The bruise around my left eye is from the surgery.
Last edited by jasond; 10-14-2007 at 06:17 PM.
10-05-2007, 07:40 PM
#6
Registered User
Thread Starter
Join Date: Jul 2006
Posts: 268
Likes: 0
Received 0 Likes
on
0 Posts
Trending Topics
10-06-2007, 12:50 PM
#9
Registered User
Thread Starter
Join Date: Jul 2006
Posts: 268
Likes: 0
Received 0 Likes
on
0 Posts
Took a picture of the primer for you guys
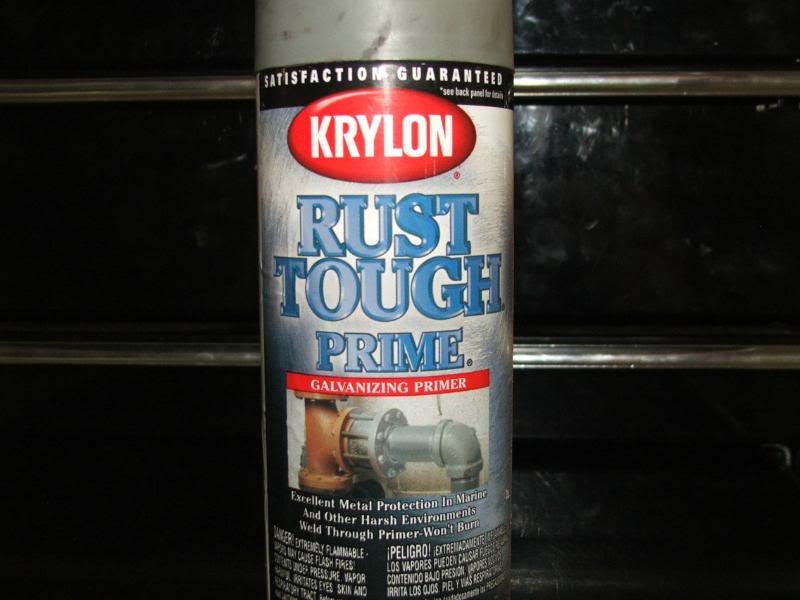
On the bottom in the smaller print it says "Weld through primer - wont burn"
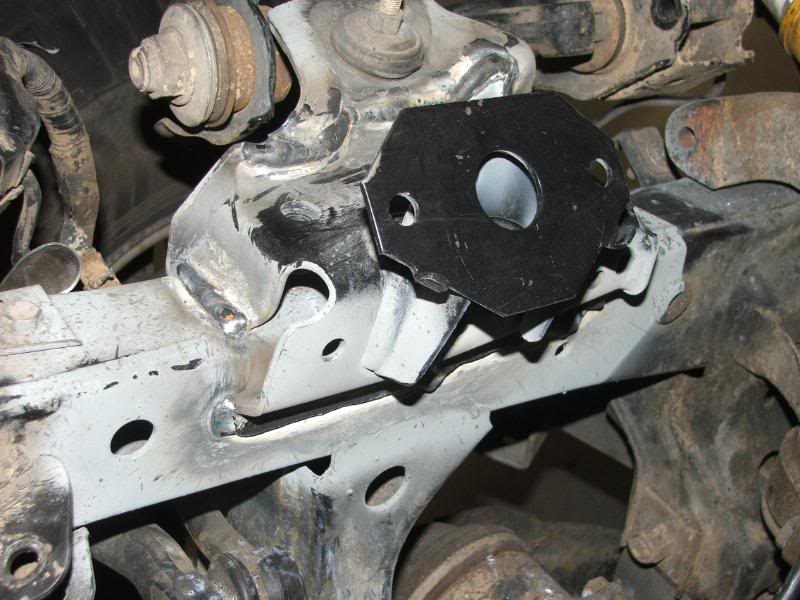
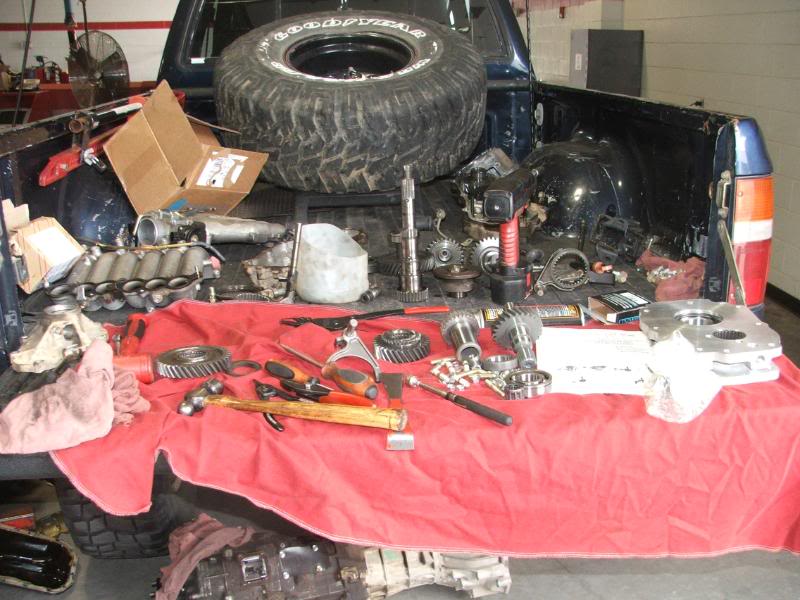
Once I recovered from the surgery it was time to try and get my truck goin again. I got under my truck and just looked at the transmsission and transfer cases for awhile before I finally decided how I was going to mount them
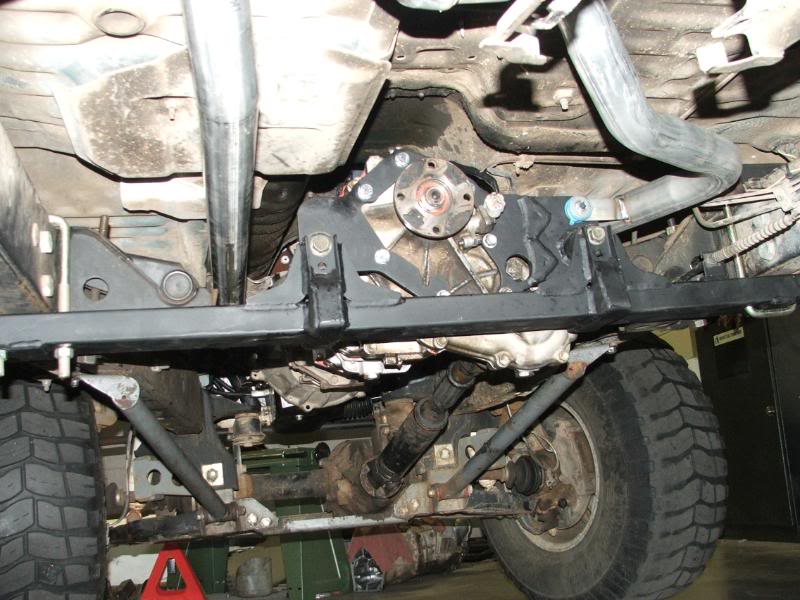
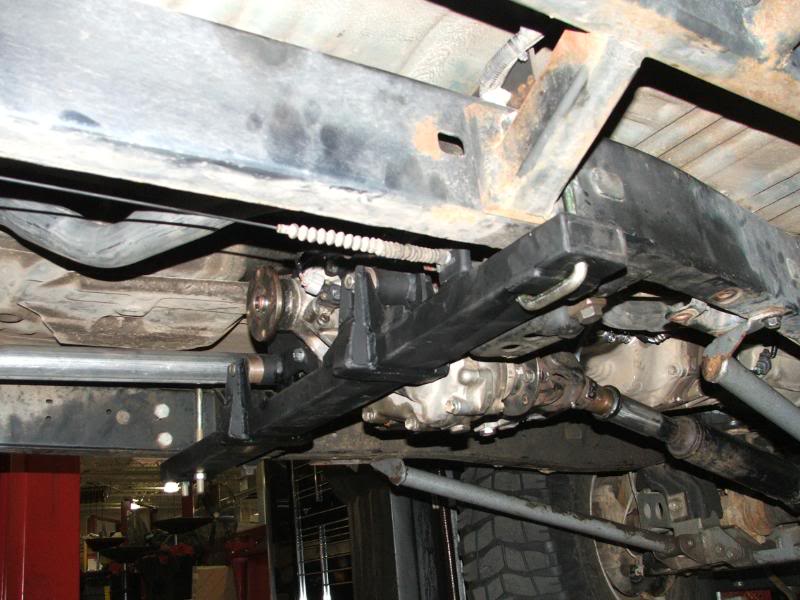
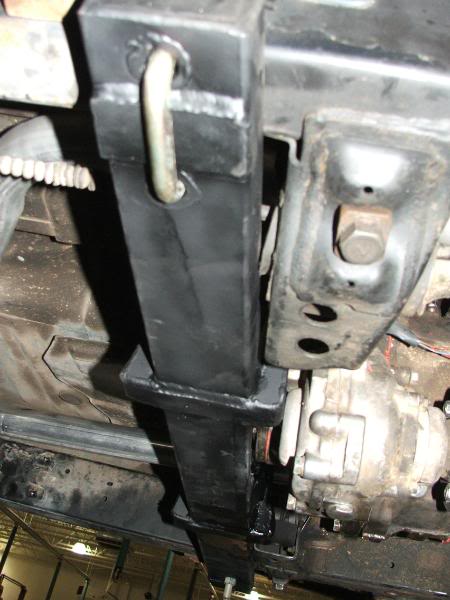
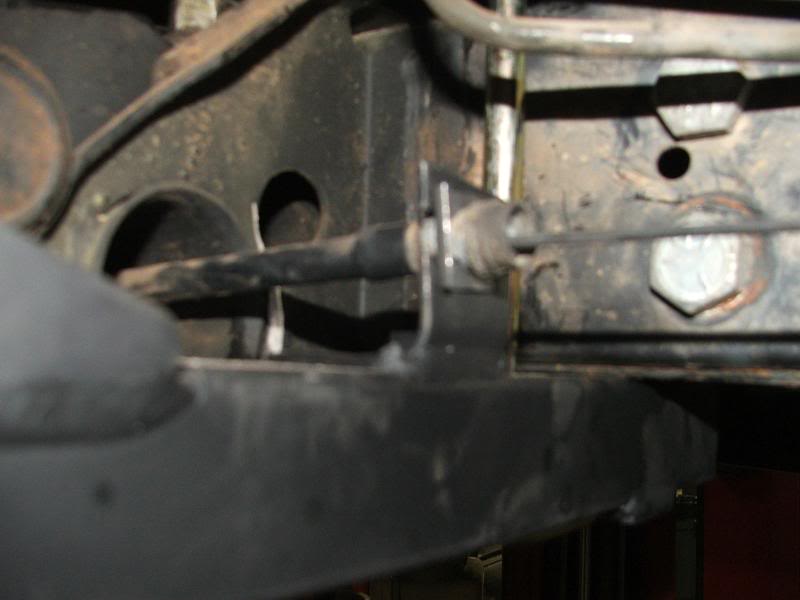
I used a piece of 3"x1 1/2" rectangular tubing for the crossmember and decided to mount it to the frame using u-bolts. I originally was going to use the u-bolts pointing down, but decided that would probably get hung up to much so I fliped them to point up (havent done the driver side yet) and welded a piece of 1 1/2" flat plate on the crossmember to help distribute the load.
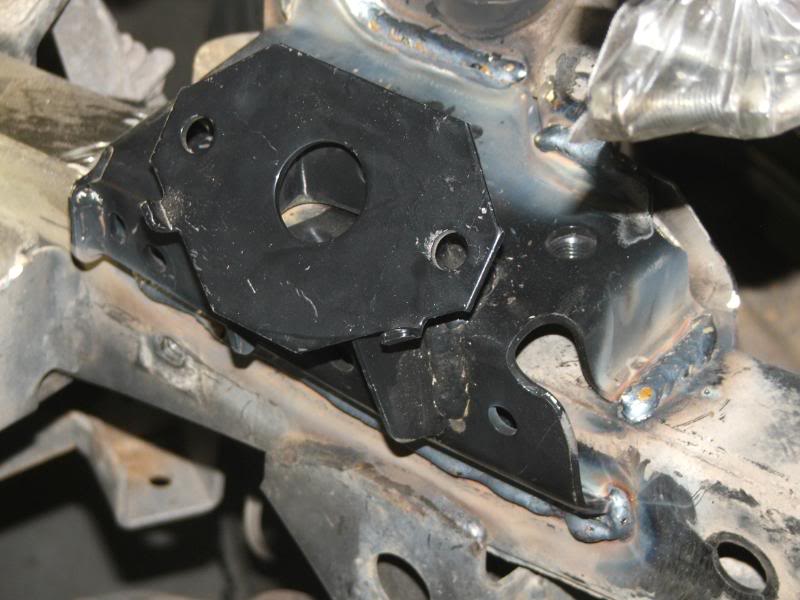
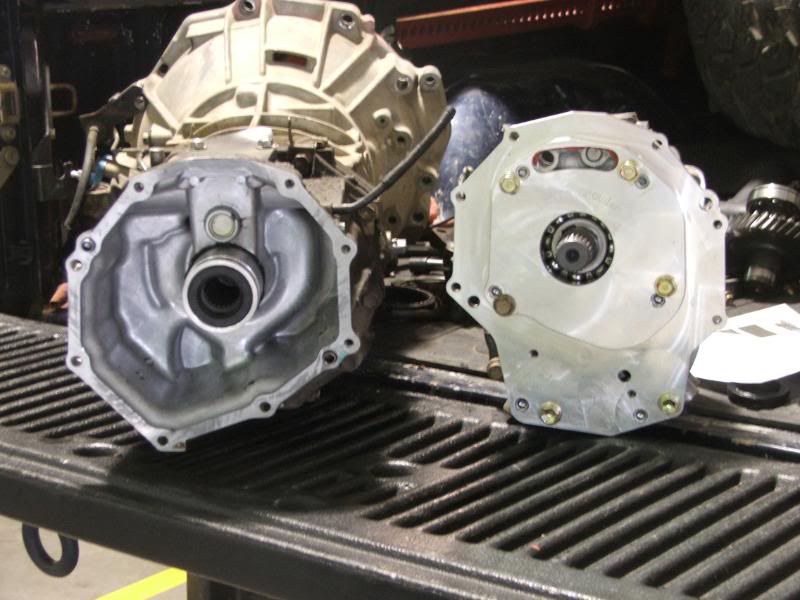
I used a fror style mount on the t-case. I found on pirate4x4.com the plans for one and I had a guy that I was talking to online that had access to a water jet machine cut one up for me. When I got it the plate did not have enough material on the passenger side to weld on a tube for the mount, so I butt welded a piece of steel to it and added the scabs on top of the butt weld to help the strength (the triangle pieces - gussets layed flat)
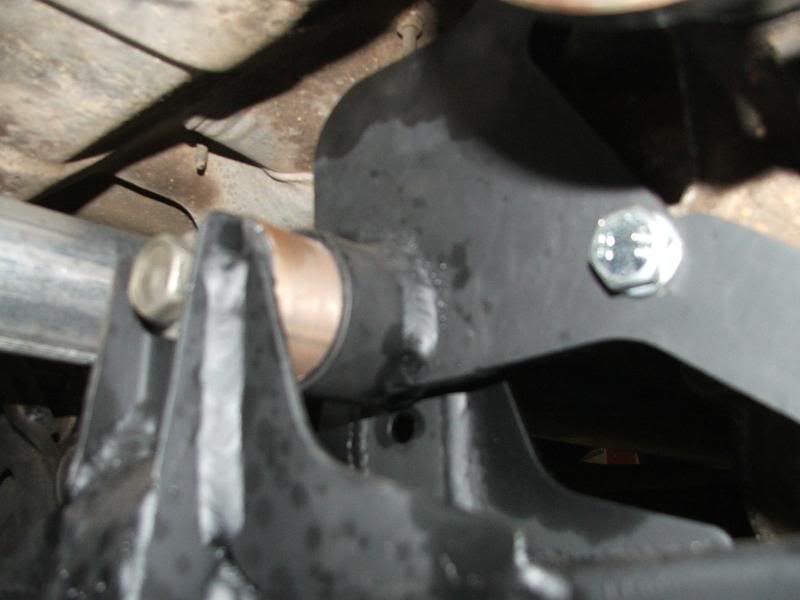
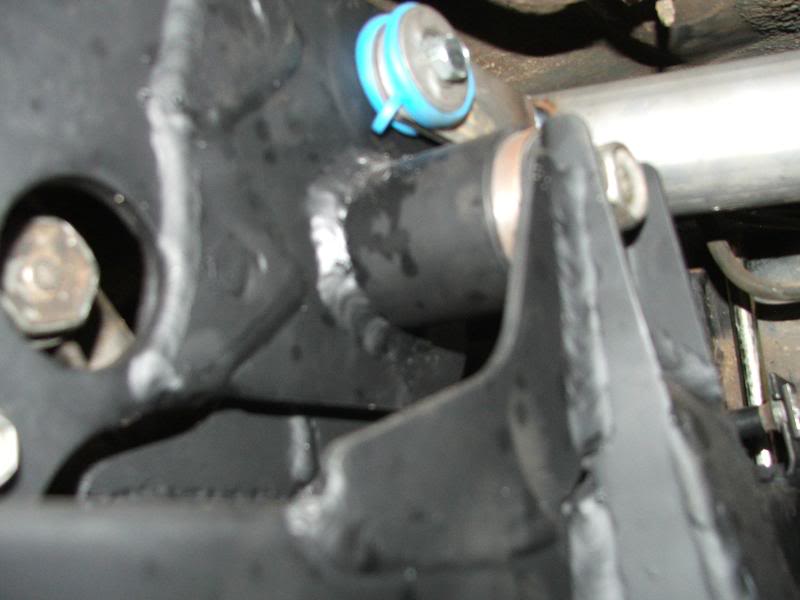
I found out that if you use 1 3/4" dom tubing with a .120 wall that yj spring bushings are a nice and tight press fit. On the crossmemeber itself, I went to the local race shop and found some brackets that were about 3 3/4" tall that I welded to the sides of the crossmember and then reinforced them with gussets.
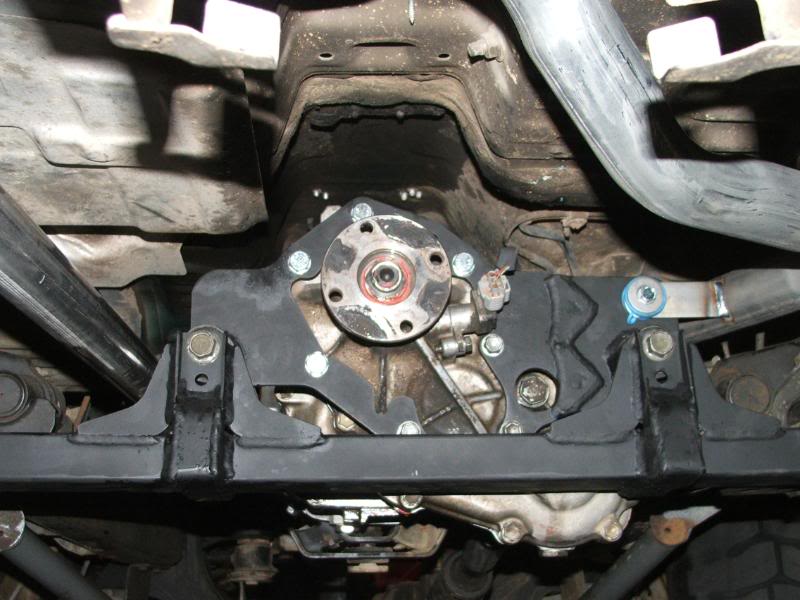
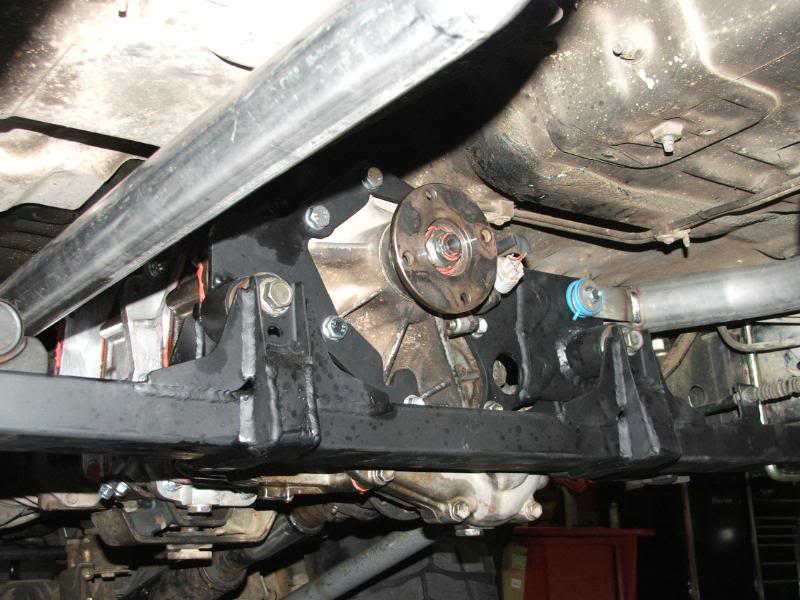
I know that the old t-case mount is still on it in those pics, it was just on there for temporary purposes while I was mocking up this mount.
The e-brake was real easy, I just cut the old mount off of the frame and used that to weld on to my new crossmember.
(sorry for the fuzzy pic)
On the bottom in the smaller print it says "Weld through primer - wont burn"
Once I recovered from the surgery it was time to try and get my truck goin again. I got under my truck and just looked at the transmsission and transfer cases for awhile before I finally decided how I was going to mount them
I used a piece of 3"x1 1/2" rectangular tubing for the crossmember and decided to mount it to the frame using u-bolts. I originally was going to use the u-bolts pointing down, but decided that would probably get hung up to much so I fliped them to point up (havent done the driver side yet) and welded a piece of 1 1/2" flat plate on the crossmember to help distribute the load.
I used a fror style mount on the t-case. I found on pirate4x4.com the plans for one and I had a guy that I was talking to online that had access to a water jet machine cut one up for me. When I got it the plate did not have enough material on the passenger side to weld on a tube for the mount, so I butt welded a piece of steel to it and added the scabs on top of the butt weld to help the strength (the triangle pieces - gussets layed flat)
I found out that if you use 1 3/4" dom tubing with a .120 wall that yj spring bushings are a nice and tight press fit. On the crossmemeber itself, I went to the local race shop and found some brackets that were about 3 3/4" tall that I welded to the sides of the crossmember and then reinforced them with gussets.
I know that the old t-case mount is still on it in those pics, it was just on there for temporary purposes while I was mocking up this mount.
The e-brake was real easy, I just cut the old mount off of the frame and used that to weld on to my new crossmember.
(sorry for the fuzzy pic)
Last edited by jasond; 10-22-2007 at 05:44 PM.
10-06-2007, 01:13 PM
#10
Registered User
Thread Starter
Join Date: Jul 2006
Posts: 268
Likes: 0
Received 0 Likes
on
0 Posts
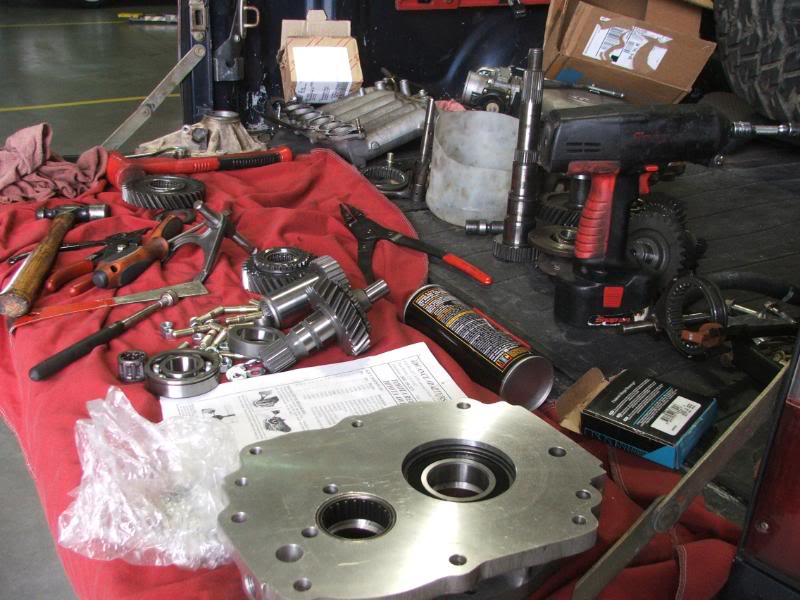
Understand that I am a cheap-skate, so I decided to make the front driveshaft myself. I had an old one out of who knows what that was a little to long so I chopped off the end and found a good way to shorten it on pirate4x4.com. There is a guy on that board that used his spare parts from a double t-case to make this mount so that you can check the runout of your driveshaft when you are trying to do it yourself
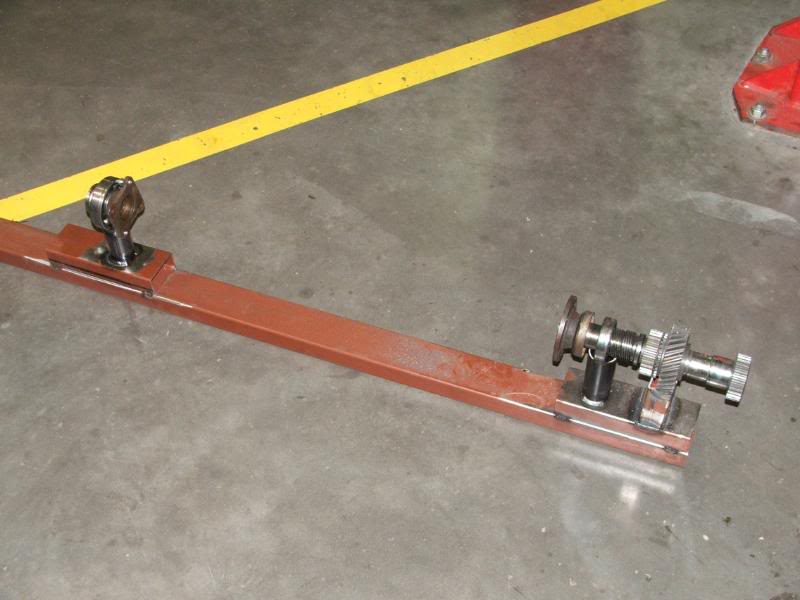
So I copied what he had done and made my own, chucked up the drive shaft in it, and did it myself. They were also saying in that thread that I was reading to not make one continous bead all the way around or you will warp the d-shaft, so I made several 1" beads until it was completed.
Now the rear is a different story, I am still going to drive this on the street and dont want it to vibrate my teeth out, so I am going to have some pro do that one for me.
Also under the cheap-skate umbrella is the wiring harness. ORS makes a great harness and backs it up with superior customer support, but I can read EWD's and decided to make it myself. It really wasnt that hard, but it was time consuming. It worked first try and I didnt have to change anything yet.
I have posted this on another board, but thought that I would put it in this also:
Below you will find the part numbers for the plugs (c1 & c2 in the ewd) that fit into the dash harness on my 92 yota so that you dont have to cut up the 22r harness to use them...
90980-10811
90980-10881
These are empty plugs that you will have to supply the wires for, if you cant find any to use, use these part numbers, (these are per wire btw)...warning, doing it this way (ordering each wire) can get expensive in a hurry...
82998-12340 - small wire (majority of these two plugs)
82998-12380 - larger wire (only 4 of these needed in this application)
Also it seems people have had trouble in locating the plug for the body harness that plugs into the 3.4 ecu. Below you will find 4runner part numbers, I dont know for sure, but I think that the taco's p/n are the same.
96 - plug E8 90980-11392
(Manual Trans)
plug E12 90980-11218
(Auto Trans)
97/98 - plug E12 90980-11218
99/00 - plug E12 90980-11637
plug E14 90980-11638
96/97 T100 - plug E4 90980-11392
(manual trans)
I ended up using a 97 Tacoma ecu with a 98 4runner AUTOMATIC harness. For those that tell others that you cant use an auto harness with a 5 speed trans, try again. The only difference is the wires on the trans end, just snip off the auto crap and solder on some 5-spd ends. Not a big deal at all. You do need to use a 5-spd computer. It may not be necessary, I thought of using an auto computer and just fooling it by telling it that I'm in park all the time. But I figured that it would throw codes when it started seeing a load on the engine while still in park.
Since I wrote this the first time, I have found out that the first few years of the 5vz there was a difference in the auto/5spd ecu plugs, as in the auto plugs will not plug into a 5 spd ecu. I did not have this trouble on the harness that I used, but check on this if you are planing on using an auto harness with a 5 spd ecu like i did.
Last edited by jasond; 05-16-2008 at 07:58 PM.
 10-06-2007, 06:42 PM
#13
Registered User
That would be cool if those plug numbers were for a 96 2wd t100 ecu. I could use that to get rid of my plug i had to make up also if toyota could have gotten me the pugs for that ecu it would have saved a few hundred cause i took the chopped harness and redid it all but when i went to get the plugs i didnt know how neither did toyota. oh well a new harness always looks nicer nanyway. great work so far
10-14-2007, 12:38 PM
#16
Contributing Member
10-14-2007, 01:00 PM
#17
Registered User
Join Date: Sep 2007
Location: Richmond , Va / Henrico Co.
Posts: 1,059
Likes: 0
Received 0 Likes
on
0 Posts
Can't see these pic's :(
PS - Edit some burning eye's in that goat pic

Last edited by n4ynu1010; 10-14-2007 at 01:02 PM.
10-14-2007, 01:14 PM
#18
Registered User
Join Date: Sep 2007
Location: Richmond , Va / Henrico Co.
Posts: 1,059
Likes: 0
Received 0 Likes
on
0 Posts
Can't see these pic's :(
 .
.My cookies are deleted every time my browser is shut down and other software takes care of the rest of them commie cookies/files ...........Muhahahahahahahaha.
10-14-2007, 05:06 PM
#19
Registered User
Thread Starter
Join Date: Jul 2006
Posts: 268
Likes: 0
Received 0 Likes
on
0 Posts
Dont know what happened to the pics, guess that I will have to put them on another site.
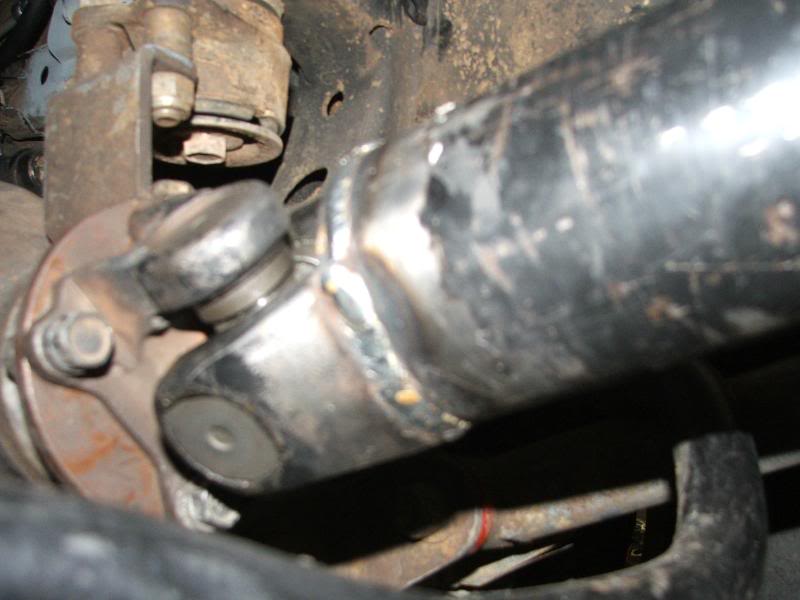
I cut the ends off of the old exhaust crossover pipe and had the exhaust guy bring it down either side of the trans and join them into a single muffler. From there i just dumped the exhaust. I did 2" on the singles down either side into a 3" muffler, and it sounds kind-of raspy for my taste. But on the other hand I didnt want to under-size it because I have a supercharger waiting to be installed on it.
I cut the ends off of the old exhaust crossover pipe and had the exhaust guy bring it down either side of the trans and join them into a single muffler. From there i just dumped the exhaust. I did 2" on the singles down either side into a 3" muffler, and it sounds kind-of raspy for my taste. But on the other hand I didnt want to under-size it because I have a supercharger waiting to be installed on it.
Last edited by jasond; 12-18-2007 at 05:11 AM.
10-14-2007, 05:25 PM
#20
Registered User
Join Date: Sep 2007
Location: Richmond , Va / Henrico Co.
Posts: 1,059
Likes: 0
Received 0 Likes
on
0 Posts
[quote=jasond;50639635]Dont know what happened to the pics, guess that I will have to put them on another site.
Its Ok man , you don't have to reload pics for me to see
Its Ok man , you don't have to reload pics for me to see


