85 4runner VW 1.9 AFN M-TDI swap
 07-11-2011, 12:14 AM
#21
Registered User
Thread Starter
Join Date: Jun 2009
Location: spokane, wa
Posts: 124
Likes: 0
Received 0 Likes
on
0 Posts
This particular pulley is the wrong one.. before this thread is finished ill be making a list of parts and parts numbers to reflect the correct parts.
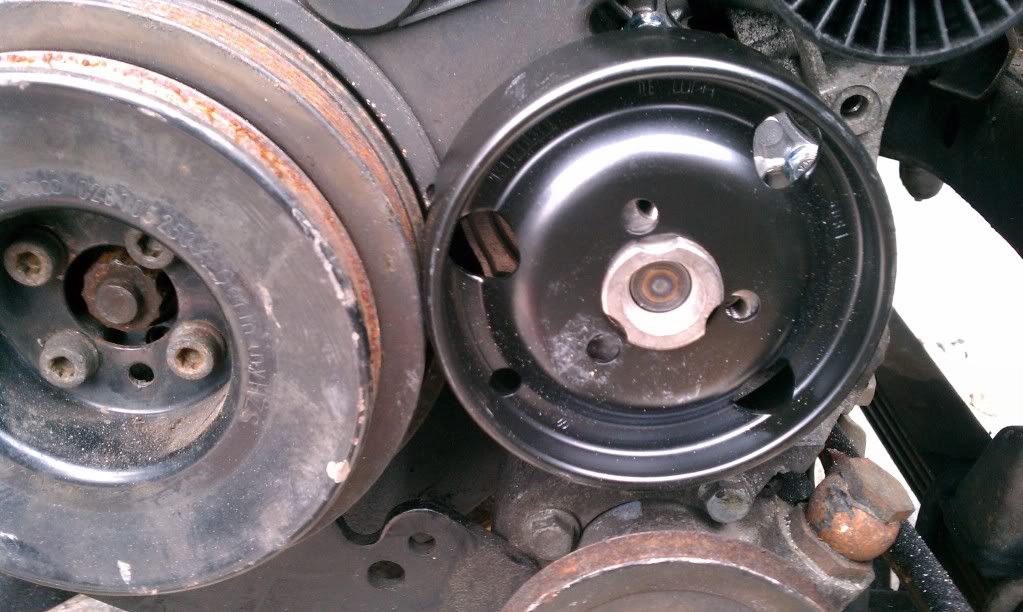
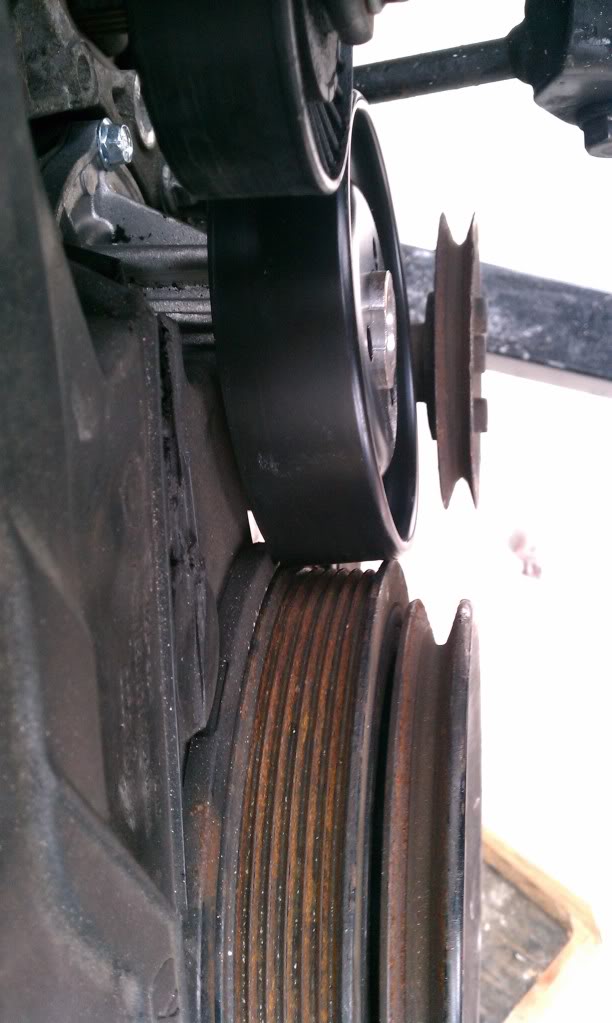
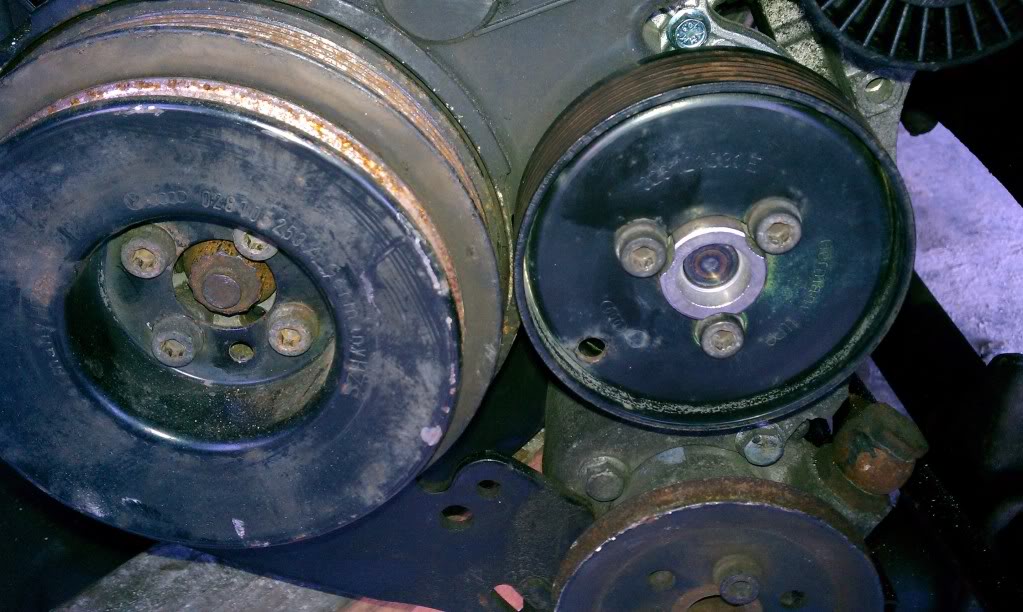
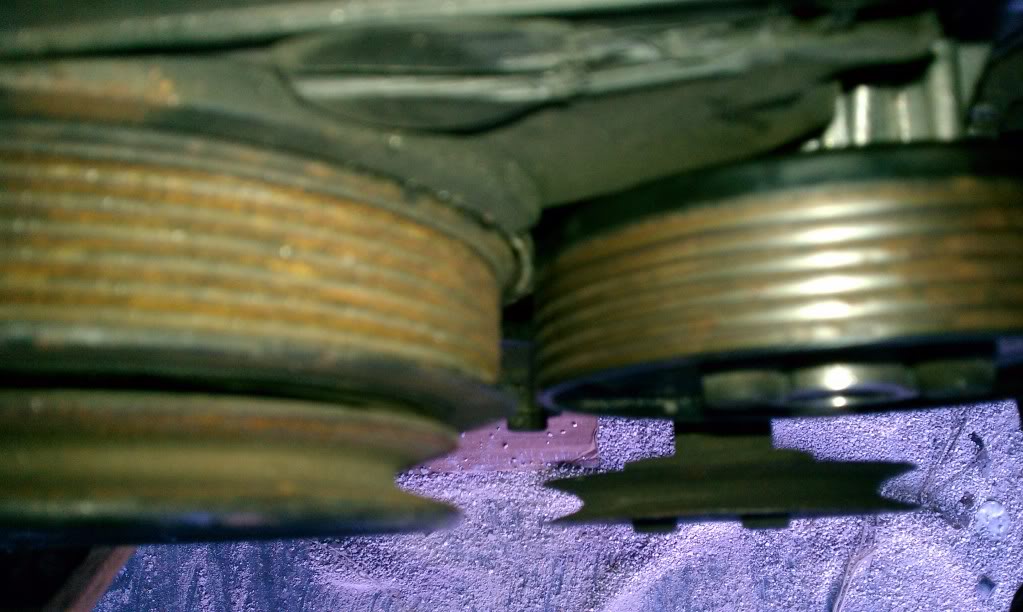
Heres the correct one
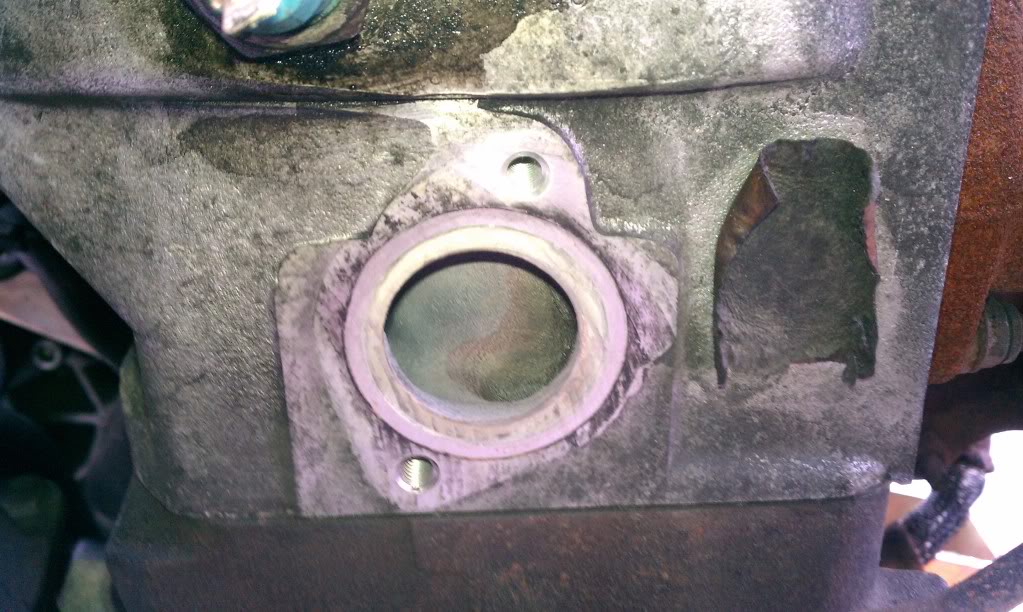
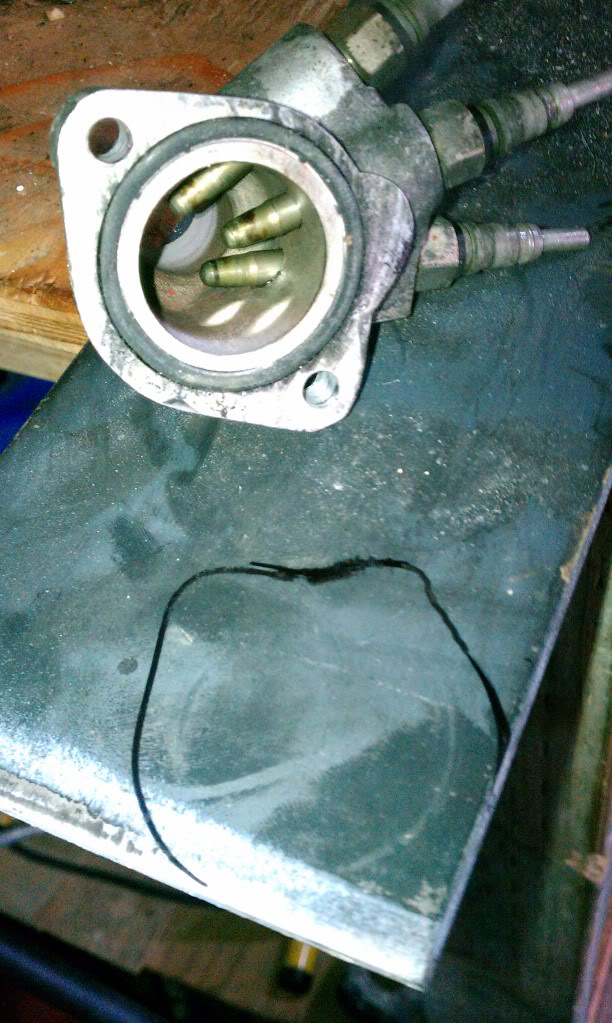
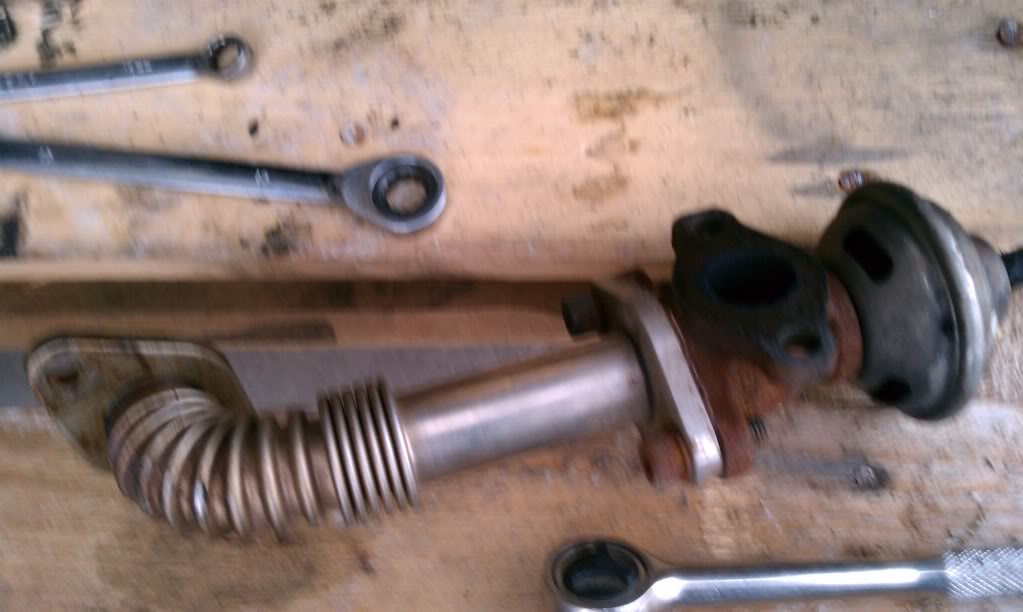
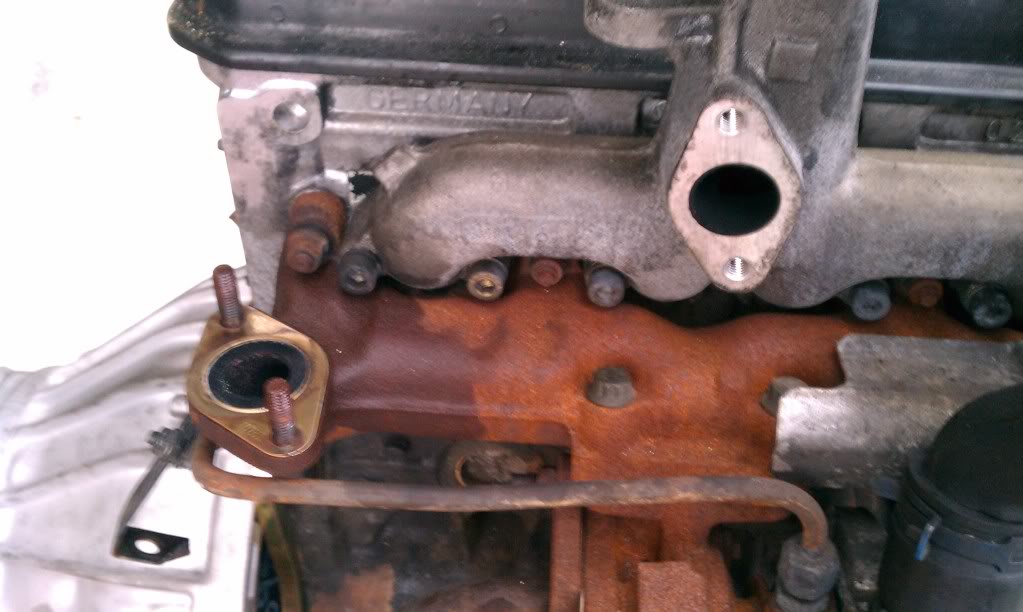
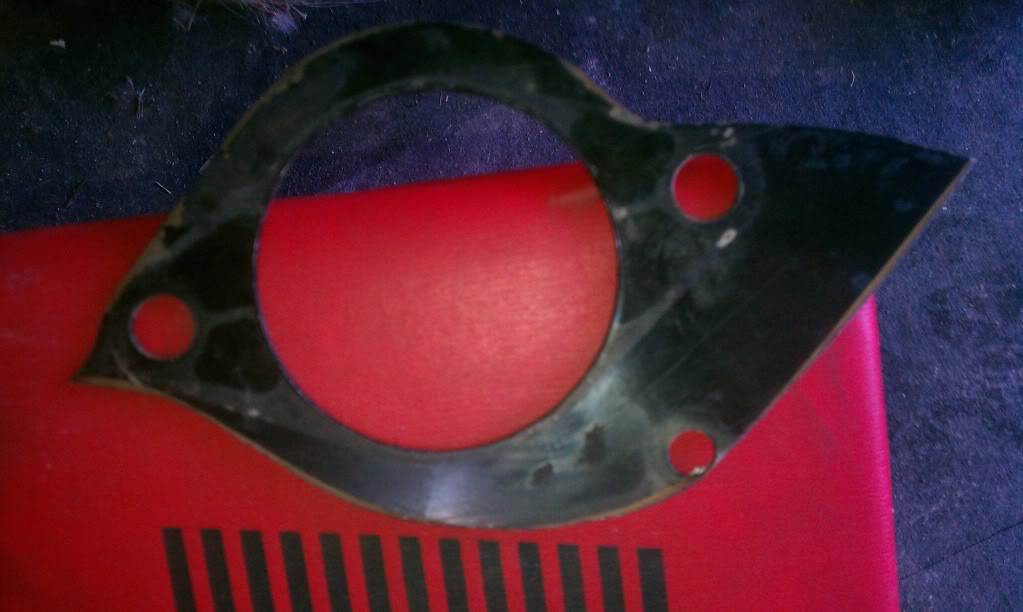
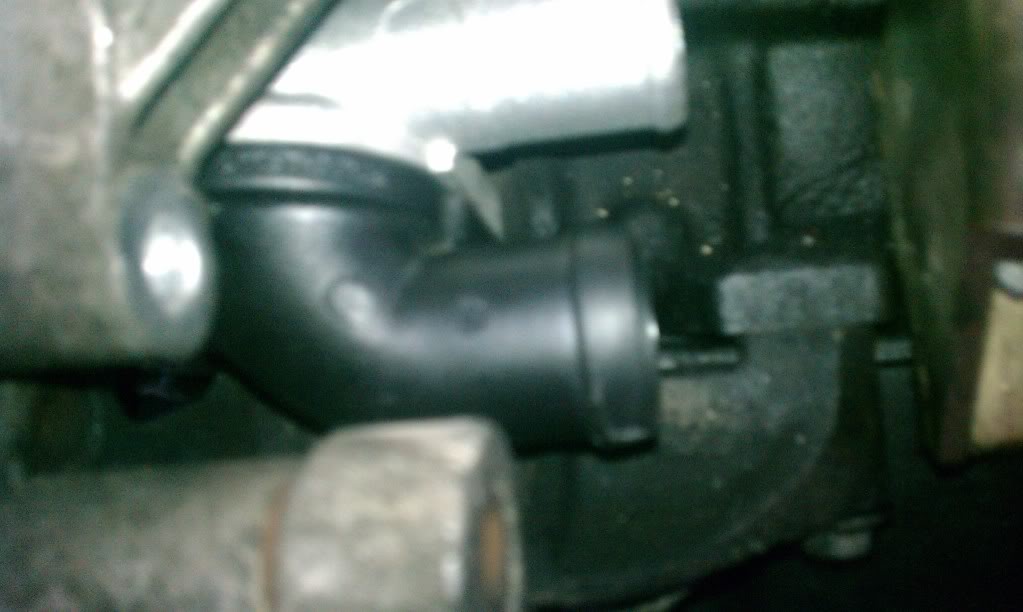
This was a glowplug port for the radiator line. It took up too much space and inhibited me from using the stock transfer case crossmember, and from what I can gather its un-necessary so I am deleting it.
got rid of the egr too
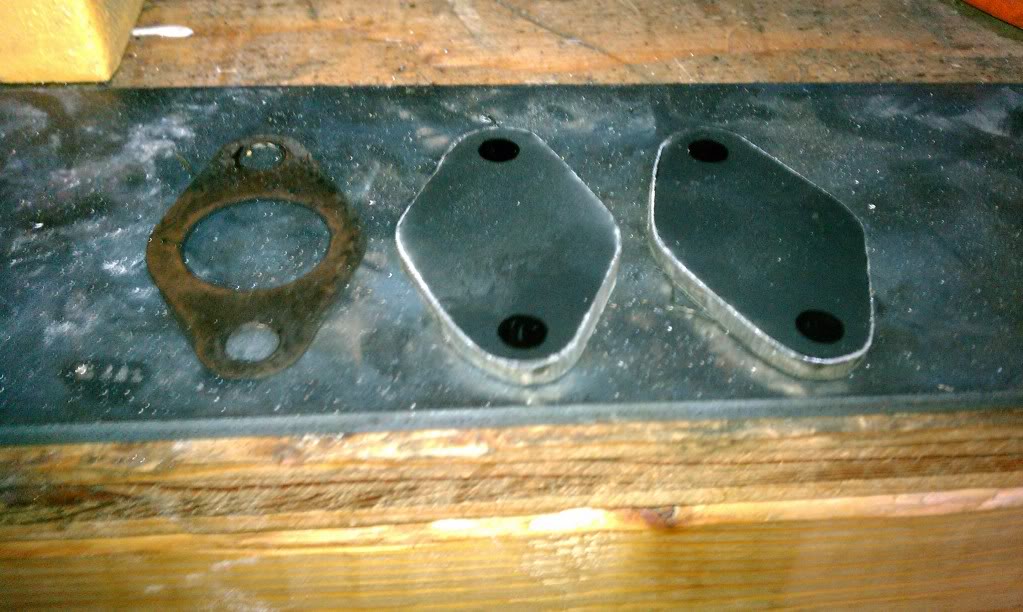
Hah I was bolting my new egr covers on and dropped a bolt into the exhaust, had to tip the engine over and fish it out with a magnet

all bolted on

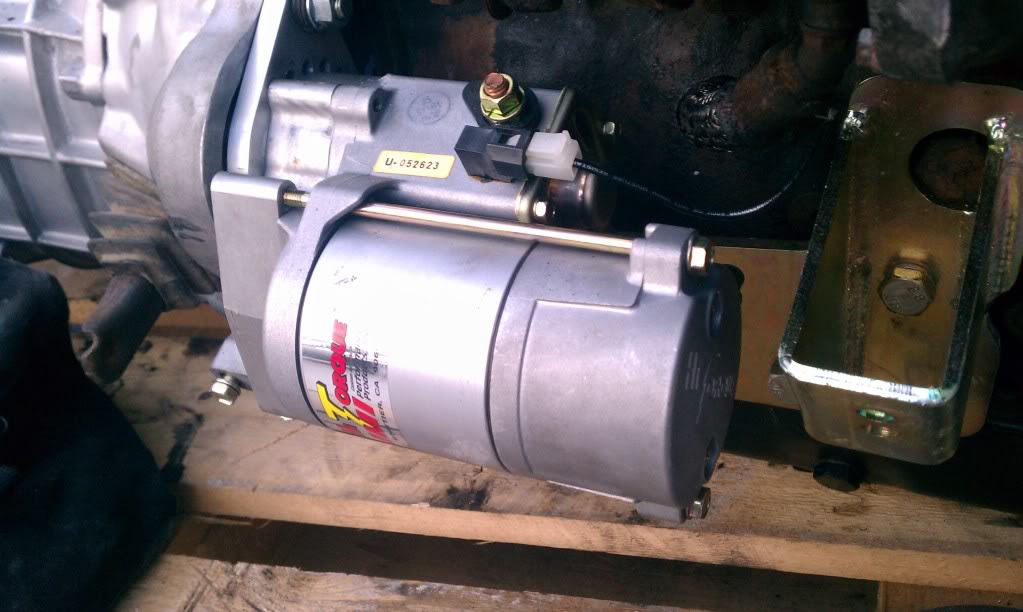
New gear reduction starter and spacer cut from the original toyota spacer
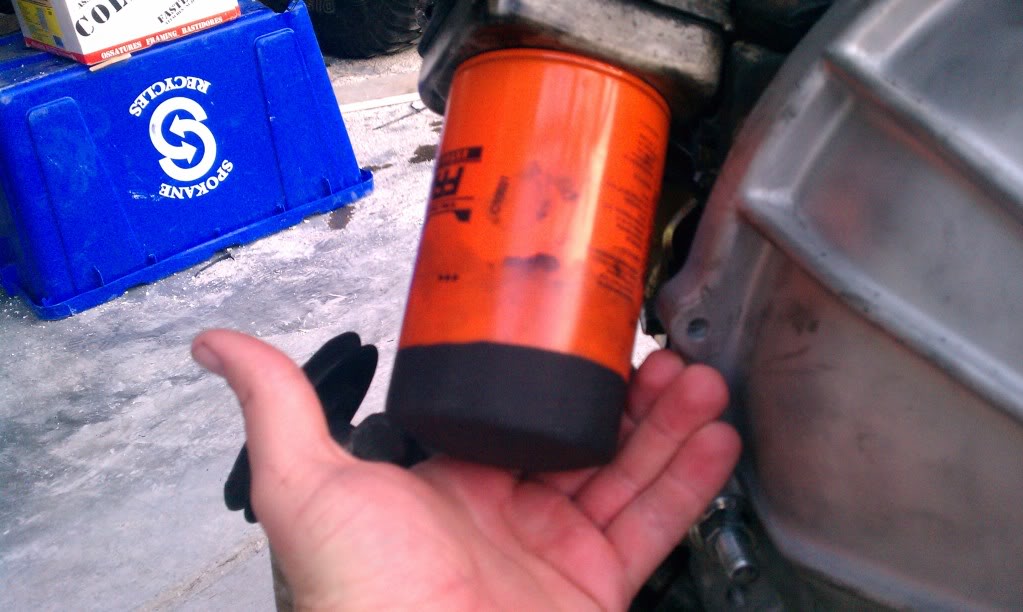
couldnt use the stock oil filter, had to get a skinner one so that it would clear the transmission
This radiator fluid hose coming out of the bottom of the water pump would not fit with the new motor mounts and needed to be replaced with an older version that uses a soft elbow
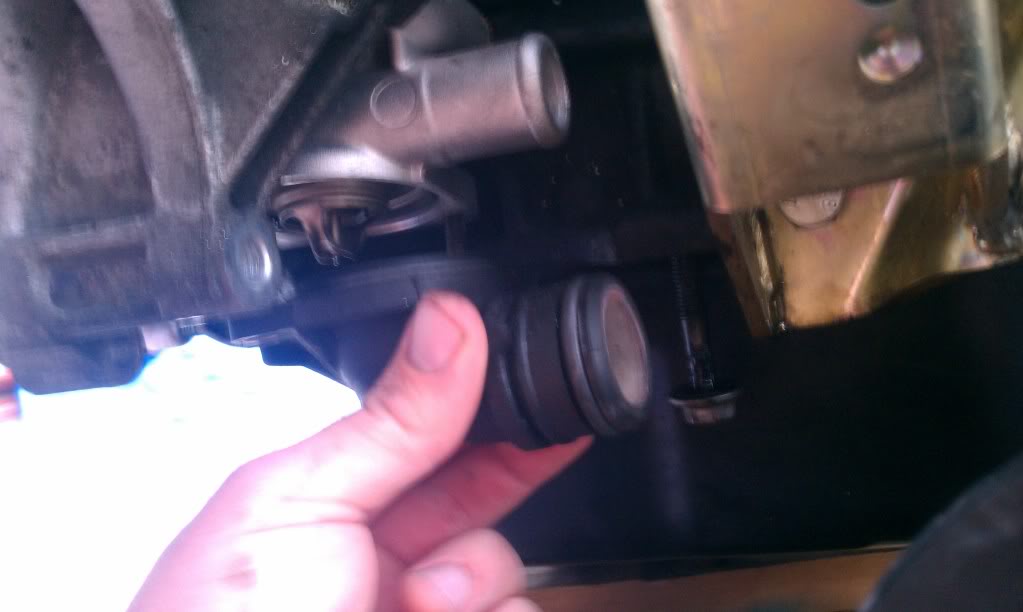
I can attach a soft hose onto this one with a bend so I can clear the motot mount
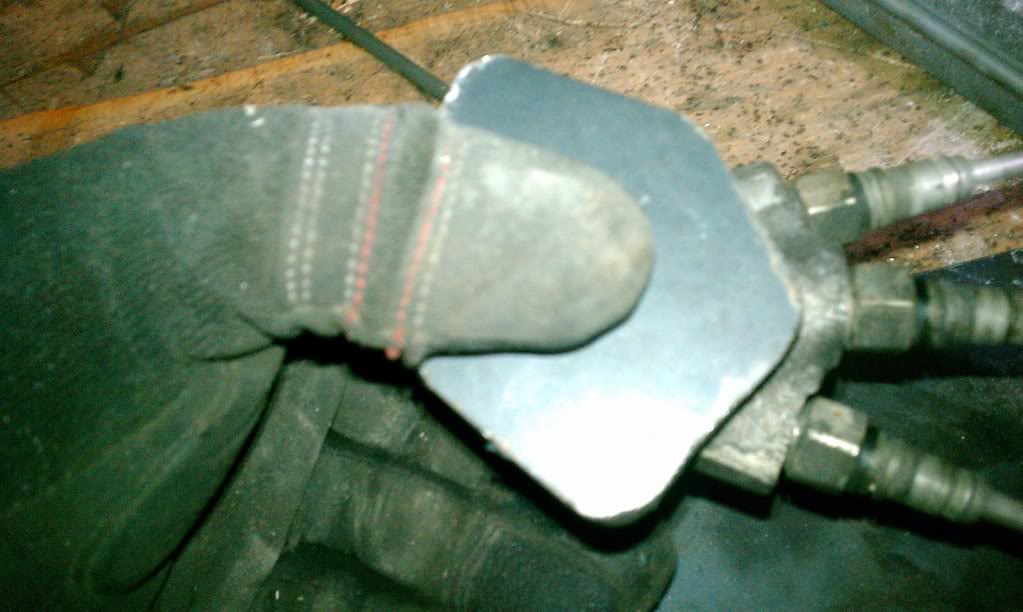
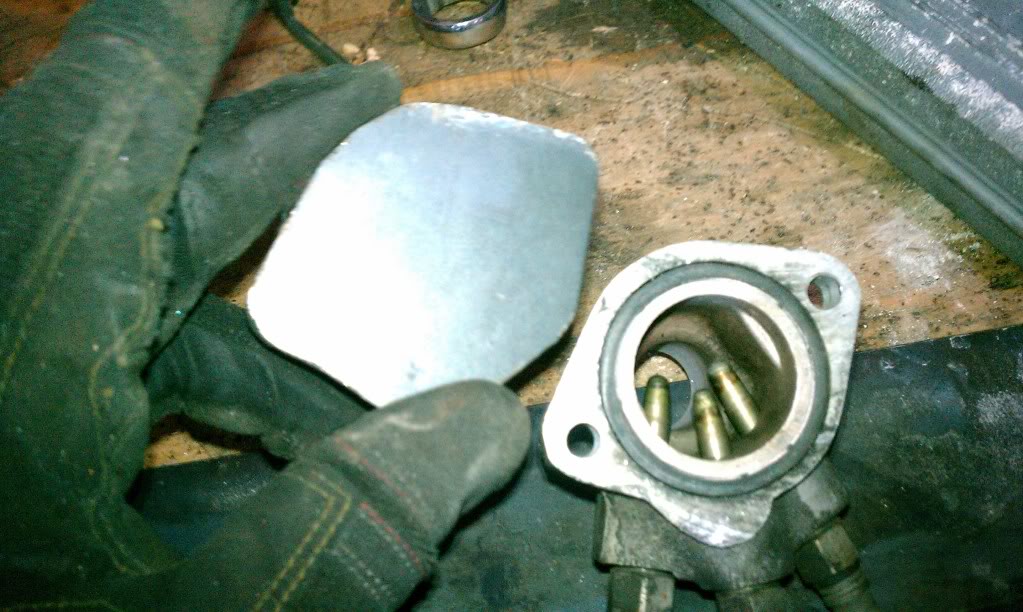
Here is the cover for the underside of the transmission, cut from the original toyota spacer. I wish I had the foresight to make the tdc mark on the flywheel align somewhere down here... next time I take the engine out I will be transfering it.

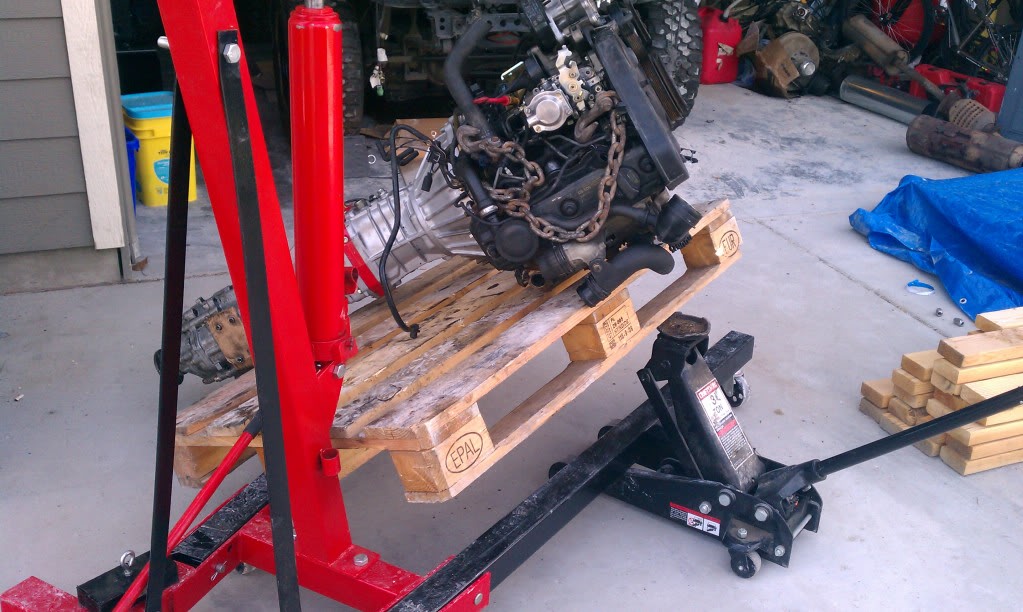
I have the motor mounts all fabbed up, burned on. The motor is in place, but there is a clearance issue with the steering arm and the alternator. I will be putting a u-joint into the steering arm so that it will clear. I still need to setup the radiator, intercooler, throttle cable, new injectors, re-time the injector pump, and run the fuel lines. I have just about every part I need sitting here, time to get busy so I can bring this baby to Naches.
Heres the correct one
This was a glowplug port for the radiator line. It took up too much space and inhibited me from using the stock transfer case crossmember, and from what I can gather its un-necessary so I am deleting it.
got rid of the egr too
Hah I was bolting my new egr covers on and dropped a bolt into the exhaust, had to tip the engine over and fish it out with a magnet
all bolted on
New gear reduction starter and spacer cut from the original toyota spacer
couldnt use the stock oil filter, had to get a skinner one so that it would clear the transmission
This radiator fluid hose coming out of the bottom of the water pump would not fit with the new motor mounts and needed to be replaced with an older version that uses a soft elbow
I can attach a soft hose onto this one with a bend so I can clear the motot mount
Here is the cover for the underside of the transmission, cut from the original toyota spacer. I wish I had the foresight to make the tdc mark on the flywheel align somewhere down here... next time I take the engine out I will be transfering it.
I have the motor mounts all fabbed up, burned on. The motor is in place, but there is a clearance issue with the steering arm and the alternator. I will be putting a u-joint into the steering arm so that it will clear. I still need to setup the radiator, intercooler, throttle cable, new injectors, re-time the injector pump, and run the fuel lines. I have just about every part I need sitting here, time to get busy so I can bring this baby to Naches.
 07-11-2011, 01:12 PM
#23
Registered User
Thread Starter
Join Date: Jun 2009
Location: spokane, wa
Posts: 124
Likes: 0
Received 0 Likes
on
0 Posts
Nah it doesnt look like I will need one, I have plenty of space under the tranny tunnel for now and everything clears inside. If I jump the thing, I might hit the oilpan with my dropout (would have to be pretty extreme) but I think thats easy to fix with a roller and welder.
07-12-2011, 08:00 PM
#25
Registered User
Thread Starter
Join Date: Jun 2009
Location: spokane, wa
Posts: 124
Likes: 0
Received 0 Likes
on
0 Posts
well my project is on hold because my welder is being a mule.. whenever I try to spark it up, it fizzes out, a flame comes out the tip, and it melts the wire onto the tip. Ive gone through 3 tips and Ive messed with the wire speed, raising it higher and lower.. too high and it pops, pushing the tip away, too low and it just sparks and then nothing.. but when it should be at just the right setting, it melts to the tip. Very frustrating, Im making some horrendous welds with it and would rather not continue my project until I figure out what Im doing wrong. Anyone ever run into this before? I have plenty of gas, Im using .035 wire, and Im welding on e-5 with a lincoln 180 hd. e-7 is too high, e-6 is better but it still pops and pushes the stinger away, and anything 5 or lower will not work. Any advice would be awesome. Thanks in advance.
09-03-2011, 10:45 PM
#27
Registered User
Join Date: Apr 2007
Location: Victoria, BC
Posts: 137
Likes: 0
Received 0 Likes
on
0 Posts
Hey man great build, just wondering where you sourced your starter from? Im looking for a clockable one and that looks like it fits the bill.
I bet you thought youd be done by now hey? I thought that too, but man these tdi's need a lot of bits and pieces to get running.
You can check out my build over on http://forums.tdiclub.com/showthread.php?t=317802
Keep up the good work!
I bet you thought youd be done by now hey?
I thought that too, but man these tdi's need a lot of bits and pieces to get running. You can check out my build over on http://forums.tdiclub.com/showthread.php?t=317802
Keep up the good work!
11-29-2011, 04:43 AM
#28
Registered User
Thread Starter
Join Date: Jun 2009
Location: spokane, wa
Posts: 124
Likes: 0
Received 0 Likes
on
0 Posts
The mounts worked pretty well, but it was difficult putting the studs of the rubber mounts into the holes- if I were to do it over, I would bolt the rubber parts onto the engine, then fashion a mounting plate that bolted onto the other side and slid into place onto the frame side mount to make it easier to come off and on. Might be a few weeks but I can put pics up. I ended up getting a custom low profile fitting for the radiator line coming out across the back of the engine, I realized that stopping the flow of coolant across the heads was probably a recipe for disaster. Now that the motor is in, I am in a situation where I need this truck asap and have zero time to finish it- single dad, full time student, with 2 part time jobs and I am driving a blazer with bald tires and no 4wd in the PNW winter. I sent the truck off to have the plumming and wiring done by a friend of mine who is also a Volkswagen mechanic, the truck should be together soon. I still have work to do as far as axles and fuel tanks go, but this should get me on the road safely for the winter. I am planning on doing the chop in the spring, I have the topper allready cut down and just need to chop the bed. I will be using the stock VW alternater for now, with no ac. The bushings I went with are the stock tracker bushings, but I decided not to use the protective cover- they just didnt fit well. One concern I have is that the alternator is sitting pretty close to the steering arm, like 3/8 inch away- might have to put a joint into it.
I got my starter from acme, you can see it on his website.
I got my starter from acme, you can see it on his website.
01-21-2012, 08:19 AM
#29
Registered User
Thread Starter
Join Date: Jun 2009
Location: spokane, wa
Posts: 124
Likes: 0
Received 0 Likes
on
0 Posts
Drove this thing home last night- Im having fuel delivery issues. It runs great at idle, but if I rev it, it will die when I drop RPM's. Sometimes I can keep it going if I feather it and gradually lower the RPM's. When I shift from 1st to second, it really bogs down due to the drop in RPM's, then eventually it will start to run strong, and I can pick up speed. When I shift to 3rd, same thing but more pronounced, so much that it just dies half the time, and if I go up a hill in 3rd it just bogs down and dies. When I got it into 3rd and went for speed, I got it up to 40 mph, but when I had to down shift to make a 90 degree turn, it bogged down and this time wasnt getting any fuel at all- ran the battery dead trying to start it. Need to bleed the lines at the injectors to get fuel back into the lines. I am hoping it just needs a feed pump installed and thats the only problem- it runs amazing while at idle, even revs great- its just when the rpm's go down when it starts acting up... could be the injector pump timing- I hope its not the injector pump itself. Ill keep you guys updated, and stand by the a full build report with pics.
02-12-2012, 06:30 PM
#31
Registered User
Thread Starter
Join Date: Jun 2009
Location: spokane, wa
Posts: 124
Likes: 0
Received 0 Likes
on
0 Posts
http://www.youtube.com/watch?v=z_Mei...c4AUAAAAAAAAAA
ill post some details if i ever get some free time hehe- schedule is insane these days
ill post some details if i ever get some free time hehe- schedule is insane these days
02-26-2012, 02:52 PM
#32
Registered User
Thread Starter
Join Date: Jun 2009
Location: spokane, wa
Posts: 124
Likes: 0
Received 0 Likes
on
0 Posts
Well the truck sprung a new diesel leak, this one is pretty bad- c clip came off the choke lever on the side of the injector pump, lost some parts or damaged the o-ring... I am sending it back to the guys who built it under warranty. I have also decided this thing doesnt smoke at all- its not getting as much fuel as it should. After talking with the rathenbacher, there are some adjustments I can mess with to change it. I nailed down the timing, so it is setup much better (or will be when I get the pump back). Still not enough power though.. it isnt running like it should, it has way more capability. I did a little research, this engine runs @ 22psi on the turbo, and I am currently running only 8, but the way its supposed to work is the computer adjusts the amount of boost and fuel delivery. With no computer, I have lost that capability. I can fix it, but it will take some work- I need to setup a custom relief valve on the turbo line set for 22 psi and let it waste into the exhaust so it isnt rediculously loud. Once I tune the fuel delivery and turn up the boost to its proper running adjustment, this truck should show a remarkable increase in power and torque. Currently, the truck makes it up the spokane / cheney hill in 4th gear @ 55-60 with no problem, but 5th gear isnt happening. I think that I will actually be able to accelerate in 5th gear heading up that hill, after I tune it properly. The truck was getting better than 30mpg by my estimation, but I wasnt able to verify it because a week into my tank of gas, heading to cheney and back plus running around town (13 gal tank) I had gone about 225 miles on half a tank, then my fuel leak dumped my tank of gas onto the ground. I suspect with the increase in fuel delivery I will get a little less depending on how hard I run it, but it will be a marginal decrease in the grand scheme of things. Also my speedo is off by about 5mph, in my disadvantage for mpg calculations. Not sure how to factor this into an equation for mpg, but I am getting a little bit better than Im able to reflect currently. These numbers are taken running on 33x12.50r15lt cooper sst tires and steel wheels.
 04-13-2012, 03:51 PM
#34
Registered User
"This particular pulley is the wrong one.. before this thread is finished ill be making a list of parts and parts numbers to reflect the correct parts."
did you get the parts list together i plan on starting mine this summer
did you get the parts list together i plan on starting mine this summer
05-27-2012, 04:14 PM
#35
Registered User
Thread Starter
Join Date: Jun 2009
Location: spokane, wa
Posts: 124
Likes: 0
Received 0 Likes
on
0 Posts
Still working through some serious issues- mainly with the m-tdi I bought from Prothe aka emiata.com. The thing is chinese with a bosch wrapper and WILL NOT WORK. I threw thousands at it and 3 different mechanics say its junk- with a little research I have found out this guy who sold it to me is nothing but a crook- Ive found 3 major issues with the pump, two of them are both mistakes that would render the pump useless and should have never left the shop set up like this, and another was a mechanical issue- most likely due to a missing clip. I am supposedly going to get my money back if I send it to him, but I have to pay a 20% restocking fee on a warranty return, and the core they will send me will be another chinese pump- they refuse to send me a genuine bosch pump back like the one I sent them for my core. Please if anyone is considering using an M-TDI pump DO NOT DEAL WITH THIS GUY or you will regret it.
That being said, I also noticed some possible gearing, power, and cooling issues so I am going to do a few things in an attempt to address them. As far as the gearing goes- when I do the match, I should be cruising at 2500 rpm going 70, which is just right. without an rpm guage, I am only guessing, but it seems like I was redlining it (had it floored) to hit 70. Im guessing 4000-4500 rpm. I cant wait to see what the RPM guage says once I get this thing running again, but rather than regearing it, I am considering running 36" tires due to the improved HP and torque I am going to have.
Just put in a full width rear axle, rebuilt from drum to drum. Rebuilt the front axle, both diffs are rebuilt v6. Got the front crossmember on, springs hung, working on the crossover but having difficulty wrestling the steering box into place- need an extra hand. Also ran in to a clearance issue with the hi-steer, need to bend some tube to make it work, or whenever I go over a bump my steering will hit the engine. Next Ill work on hooking the rear brakes back up- need longer lines because of the full width 2nd gen rear axle I put under it- then I can start putting the new cam, nozzles and inectors, ecu and wiring harness, 11mm pump, hybrid turbo, all aluminum radiator, exhaust gas temp sensor and guage, and alternator rpm guage. Once I get it running and get a baseline, Ill be sending off the ecu to get chipped at kerma tdi. With these mods, I should be running around 170-180 HP and 300-325 ftlbs and still getting >30 mpg on 33" tires.
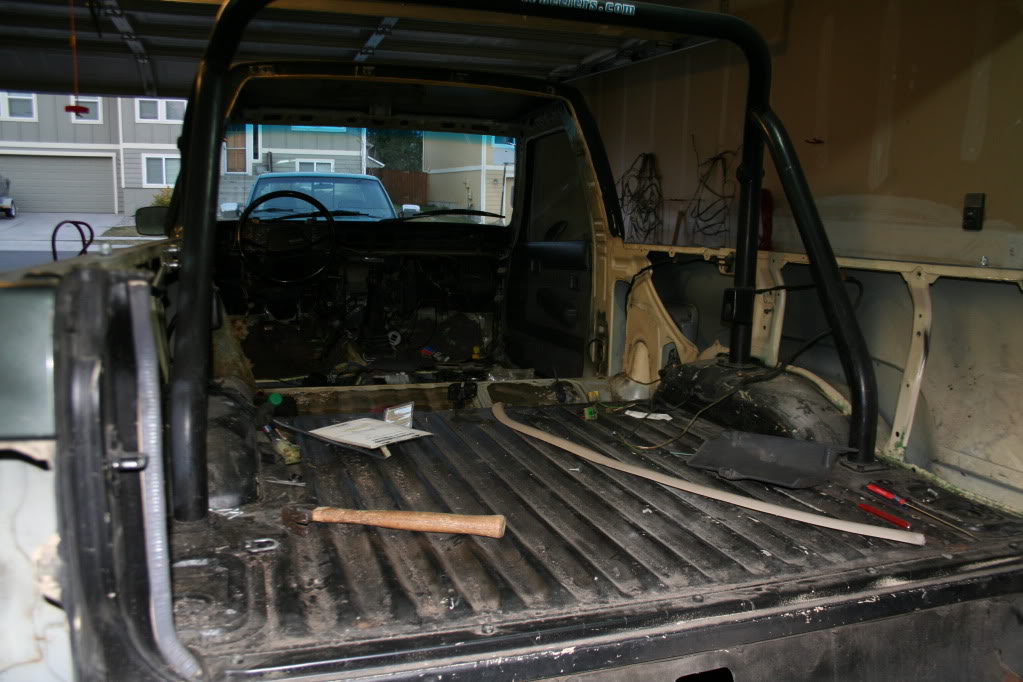
While Im waiting on the chip, I will be chopping the rear around 13ish inches, and chopping off the top of the cab- I have a new top with mint roof liner and sunroof. Once the body work is complete, I will paint the interior with my experimental sound deadening paint, install dynomat on the floorboards and firewall, rewire the cab, install new high density particle board interior trim in the rear to make in to custom speaker boxes, craft a custom metal center console, and rhino line the interior from the bottom of the glass down, including the tub.
Ill post the pics tonight.
That being said, I also noticed some possible gearing, power, and cooling issues so I am going to do a few things in an attempt to address them. As far as the gearing goes- when I do the match, I should be cruising at 2500 rpm going 70, which is just right. without an rpm guage, I am only guessing, but it seems like I was redlining it (had it floored) to hit 70. Im guessing 4000-4500 rpm. I cant wait to see what the RPM guage says once I get this thing running again, but rather than regearing it, I am considering running 36" tires due to the improved HP and torque I am going to have.
Just put in a full width rear axle, rebuilt from drum to drum. Rebuilt the front axle, both diffs are rebuilt v6. Got the front crossmember on, springs hung, working on the crossover but having difficulty wrestling the steering box into place- need an extra hand. Also ran in to a clearance issue with the hi-steer, need to bend some tube to make it work, or whenever I go over a bump my steering will hit the engine. Next Ill work on hooking the rear brakes back up- need longer lines because of the full width 2nd gen rear axle I put under it- then I can start putting the new cam, nozzles and inectors, ecu and wiring harness, 11mm pump, hybrid turbo, all aluminum radiator, exhaust gas temp sensor and guage, and alternator rpm guage. Once I get it running and get a baseline, Ill be sending off the ecu to get chipped at kerma tdi. With these mods, I should be running around 170-180 HP and 300-325 ftlbs and still getting >30 mpg on 33" tires.
While Im waiting on the chip, I will be chopping the rear around 13ish inches, and chopping off the top of the cab- I have a new top with mint roof liner and sunroof. Once the body work is complete, I will paint the interior with my experimental sound deadening paint, install dynomat on the floorboards and firewall, rewire the cab, install new high density particle board interior trim in the rear to make in to custom speaker boxes, craft a custom metal center console, and rhino line the interior from the bottom of the glass down, including the tub.
Ill post the pics tonight.
05-27-2012, 09:07 PM
#36
Registered User
Thread Starter
Join Date: Jun 2009
Location: spokane, wa
Posts: 124
Likes: 0
Received 0 Likes
on
0 Posts
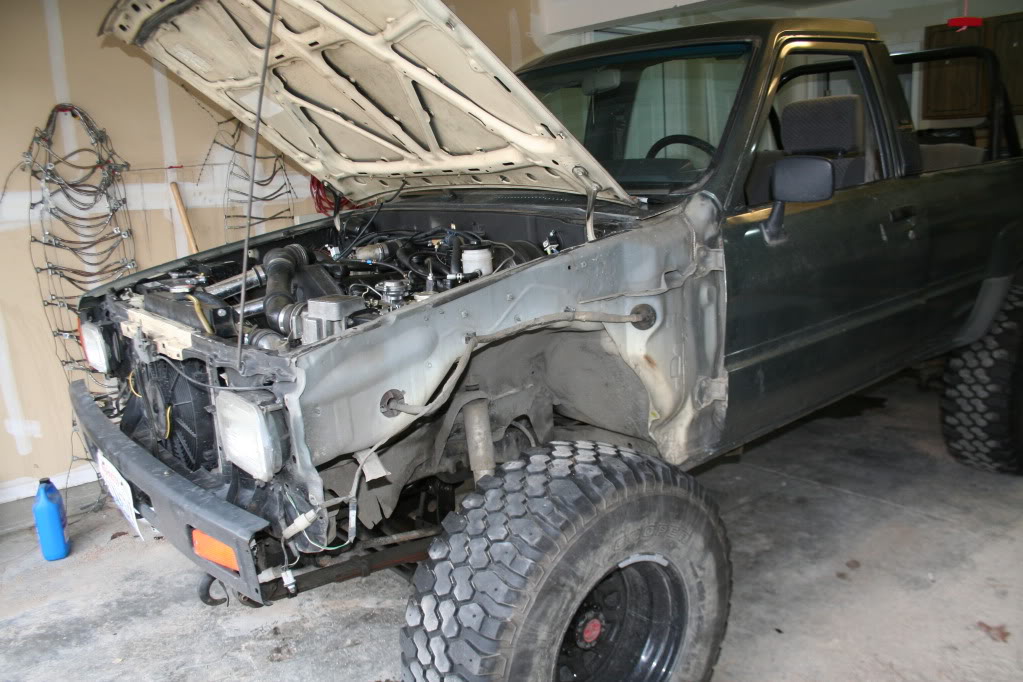
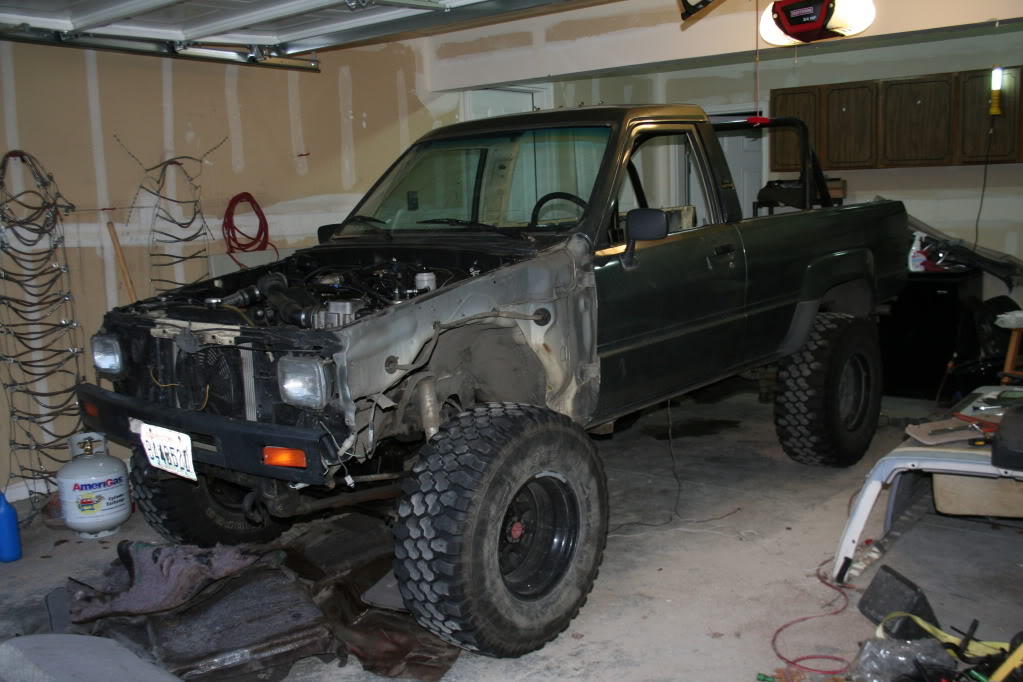
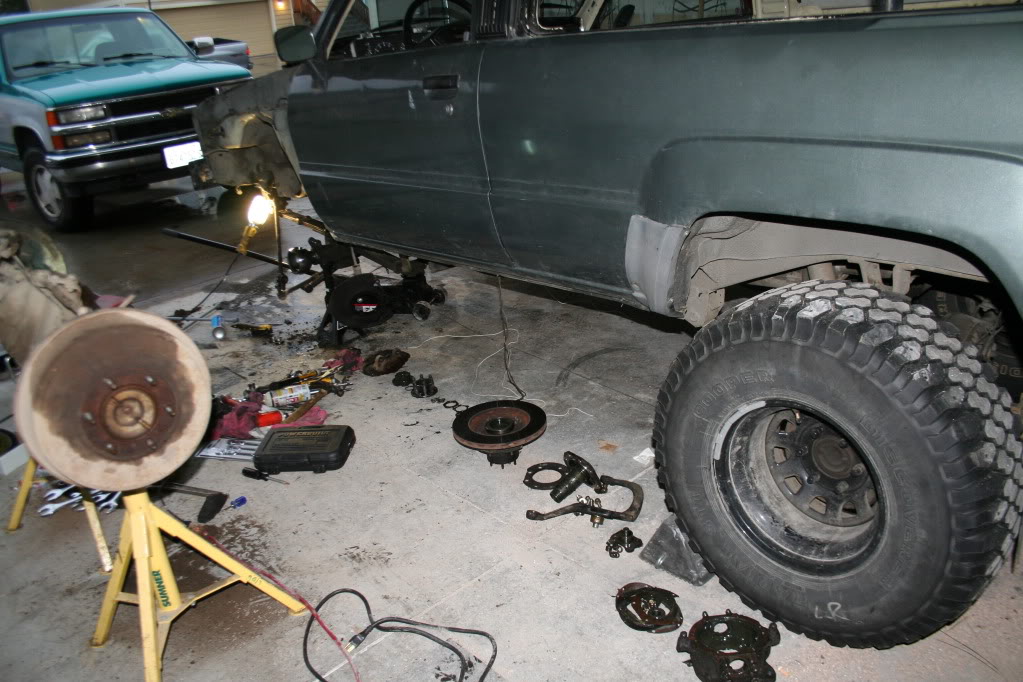
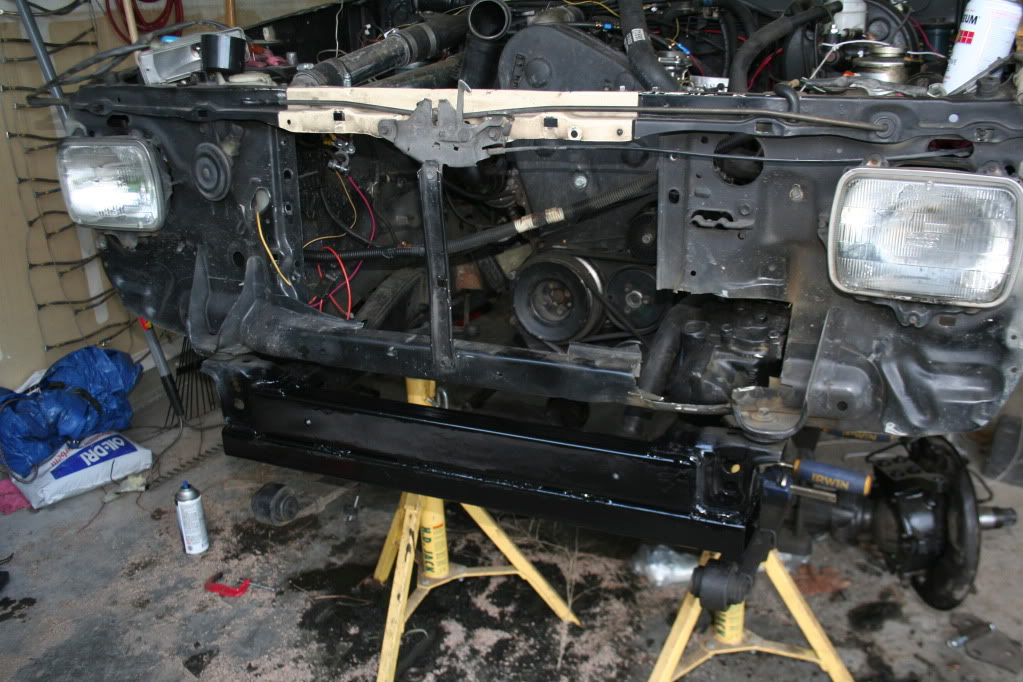
Here I am stripping the truck down for the major overhaul
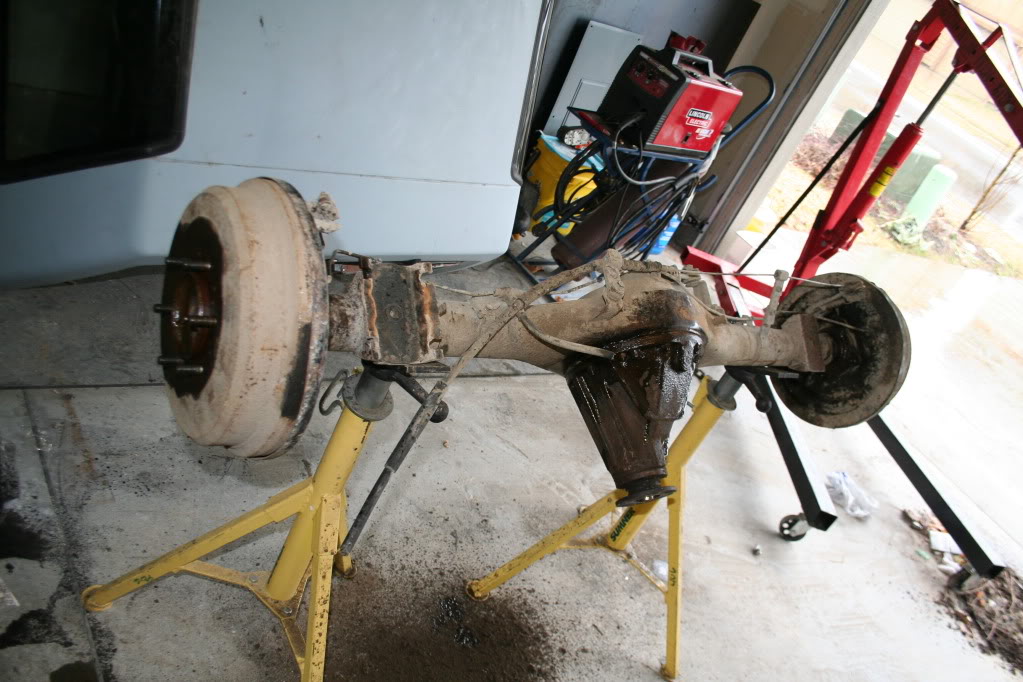
my new full width rear axle
rebuilding the front axle
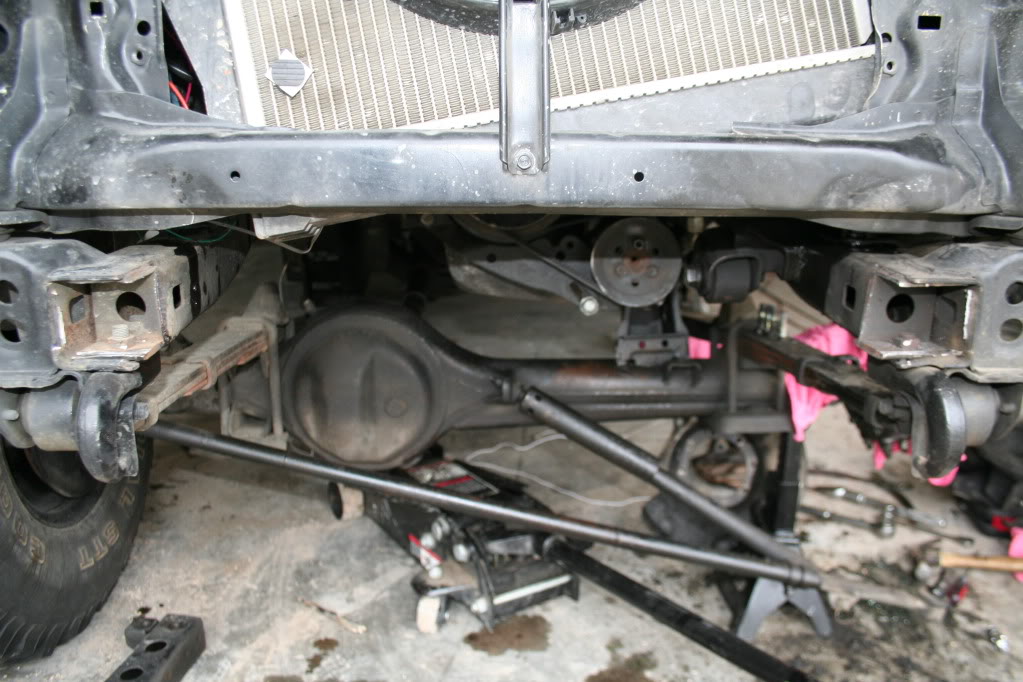
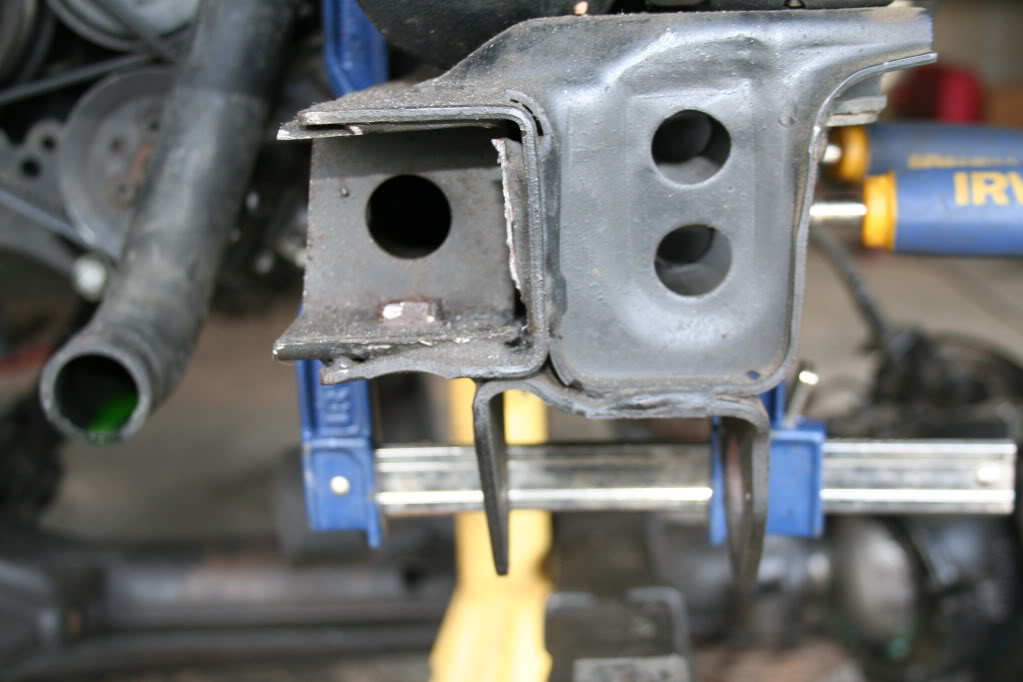
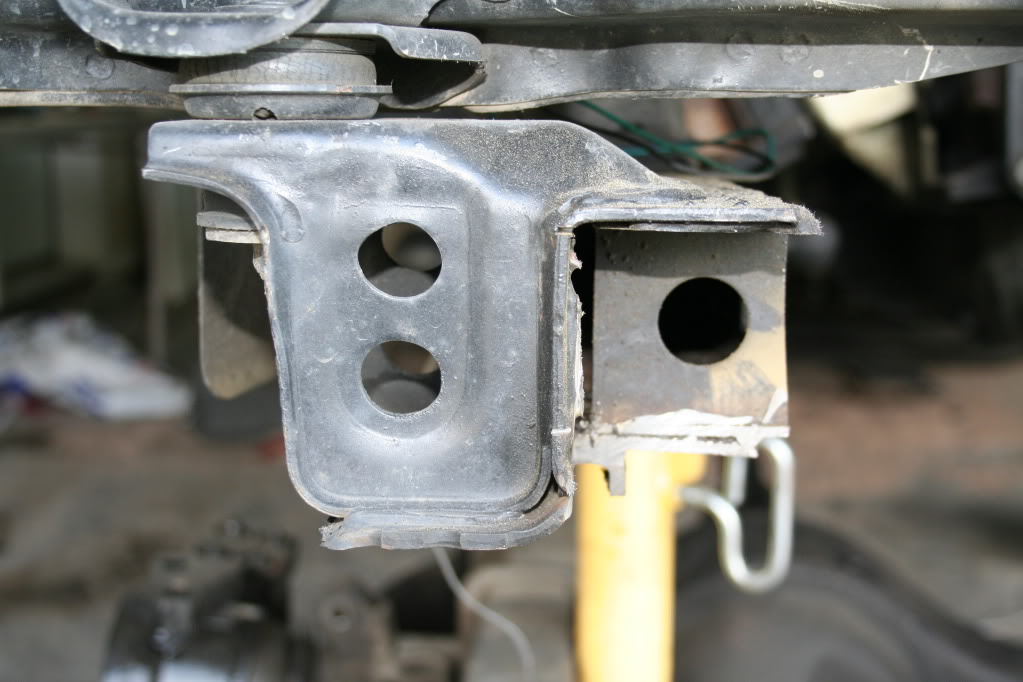
cut out the front crossmember- it was weak and bent, and I needed extra room for my new histeer
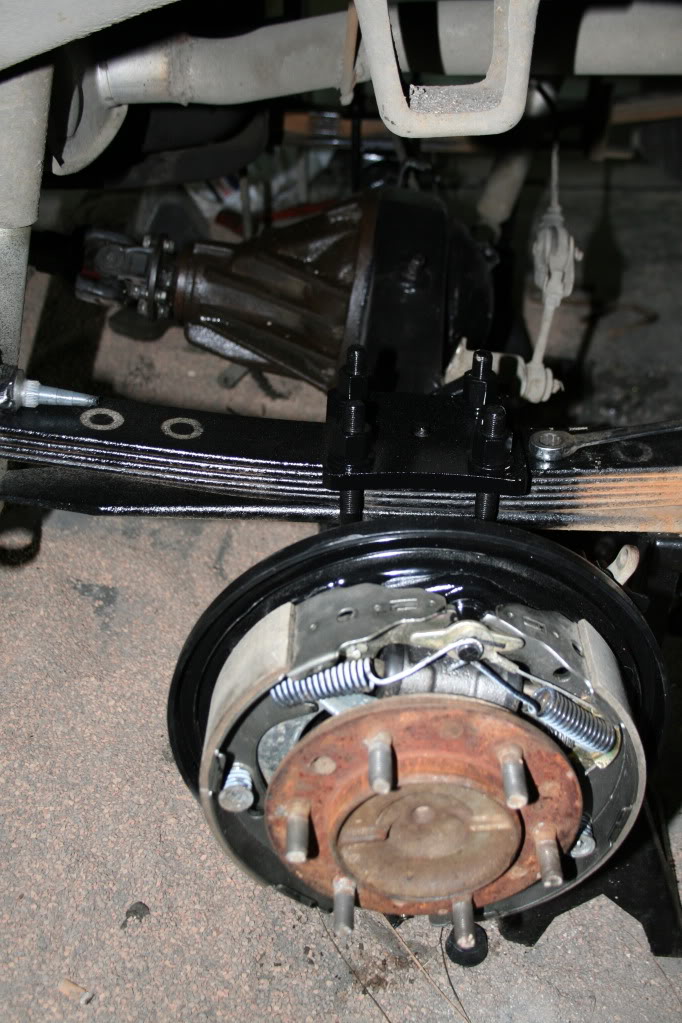
rebuilt rear axle from hub to hub, props to Jeff from Suncrest Auto Parts for finding me the goods and having the backing plate sandblasted/painted
cleaned up the frame for the new crossmember
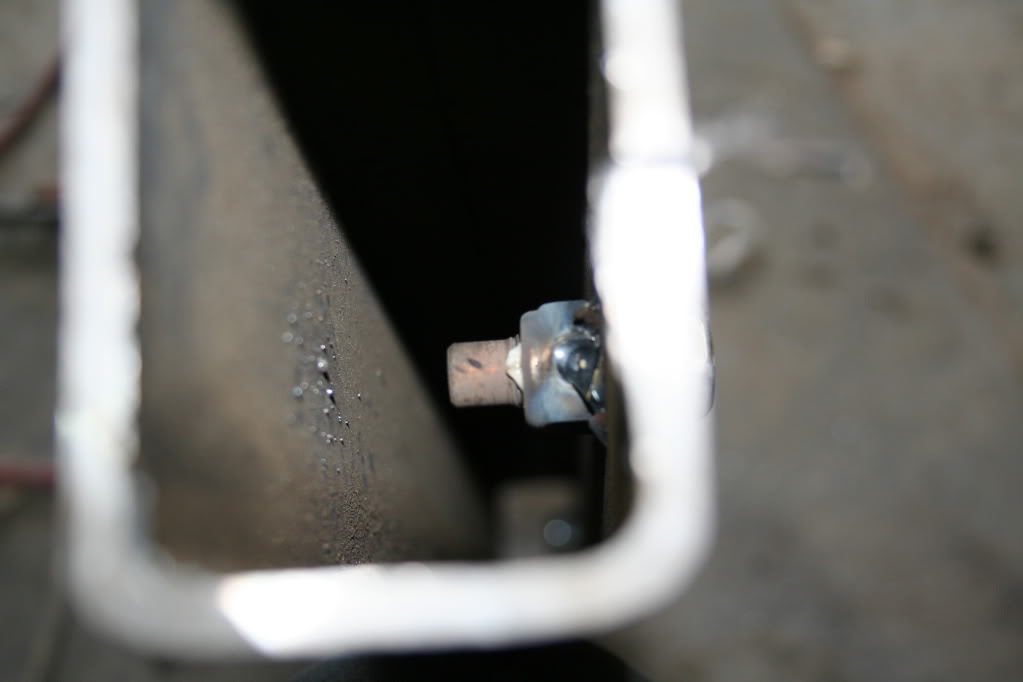
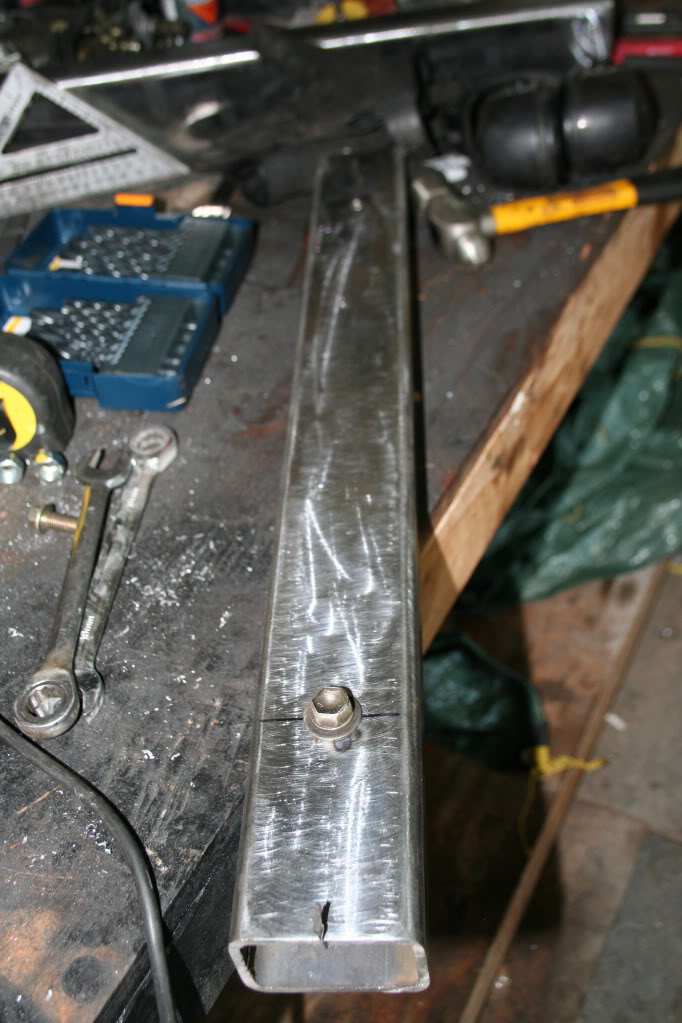
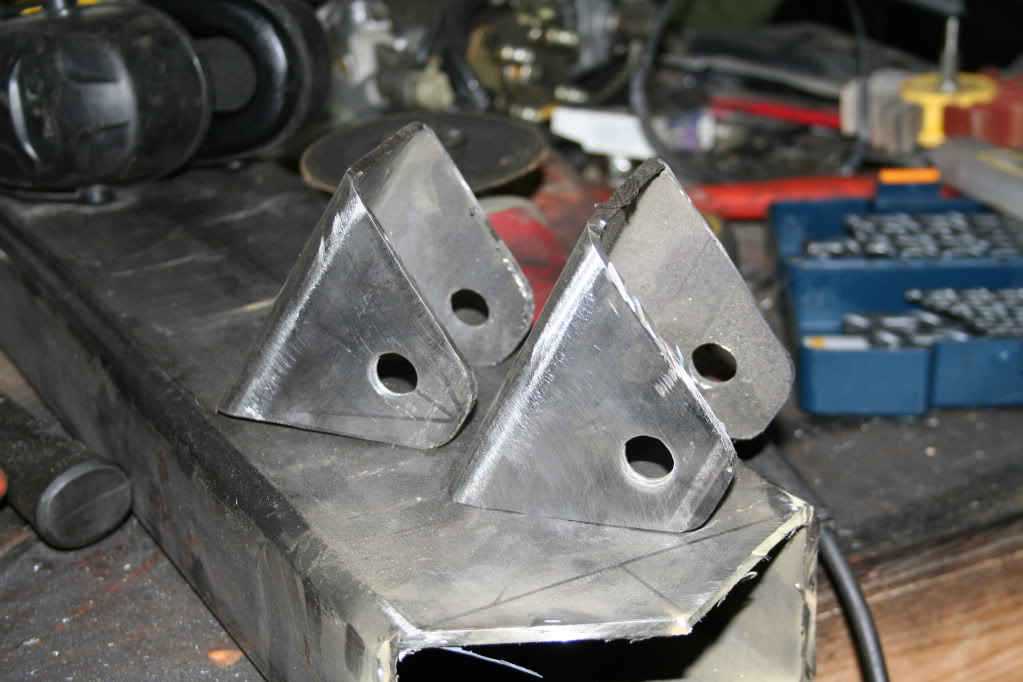
welded nuts into the crossmember so I can later mount a bumper
all welded on and painted
cutting new hangers
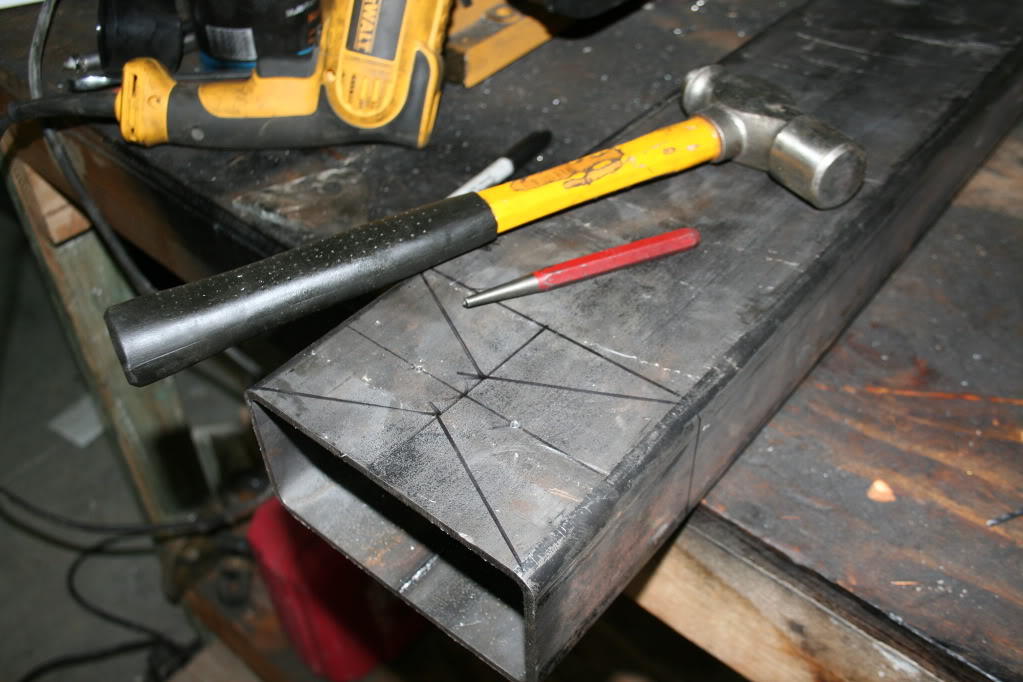
I actually have the hangers on now, with the springs attached- trying to work out the crossover steering but running into some clearance issues. Ill need to have a piece of tube bent to give more clearance between the engine during articulation. Ill post more pics soon- hoping to have this thing on its wheels, steering, and braking soon.
my new full width rear axle
rebuilding the front axle
cut out the front crossmember- it was weak and bent, and I needed extra room for my new histeer
rebuilt rear axle from hub to hub, props to Jeff from Suncrest Auto Parts for finding me the goods and having the backing plate sandblasted/painted
cleaned up the frame for the new crossmember
welded nuts into the crossmember so I can later mount a bumper
all welded on and painted
cutting new hangers
I actually have the hangers on now, with the springs attached- trying to work out the crossover steering but running into some clearance issues. Ill need to have a piece of tube bent to give more clearance between the engine during articulation. Ill post more pics soon- hoping to have this thing on its wheels, steering, and braking soon.
05-28-2012, 04:44 AM
#37
Registered User
Join Date: Jan 2011
Location: exo-reality -wave if you see me; Front Range, CO
Posts: 650
Received 93 Likes
on
73 Posts
Nice work. I -was- gonna be a smartass and note that you've listed enough to keep busy through at least the end of the month. But maybe not; you might be done by Wed. LOL
Hey, nice looking tire cables on the wall. Where'd they come from?
Hey, nice looking tire cables on the wall. Where'd they come from?
05-28-2012, 07:23 AM
#38
Registered User
Thread Starter
Join Date: Jun 2009
Location: spokane, wa
Posts: 124
Likes: 0
Received 0 Likes
on
0 Posts
I dont remember where I bought those- some parts store. Yea, I have plenty of project left haha, I just hope I finish it by winter or the ol lady is gonna be pissed she cant park in the garage for a 6th year since i bought the house. 
06-26-2012, 10:10 PM
#39
Registered User
Join Date: Apr 2007
Location: Victoria, BC
Posts: 137
Likes: 0
Received 0 Likes
on
0 Posts
Hey hardstripe. I think I found out why you blew your HG 
I found your power thread on tdiclub and was reading along and saw a link to this thread. OK.
Im looking through and I see you had some clearance issues with your coolant GP flange. If i am correct this is now blocked off?
I read in one of the TDiclub toyota swaps the guy was planning on doing the same until somebody stopped him and said NOOO no no. Apparently that takes heat directly from the head and puts it into the heater core and it is ESSENTIAL.
Hopefully you havent given up on your yota in frustration. If you havent, you owe me a HG
Swap looks great buddy, keep up the good work!


