When you click on links to various merchants on this site and make a purchase, this can result in this site earning a commission. Affiliate programs and affiliations include, but are not limited to, the eBay Partner Network.
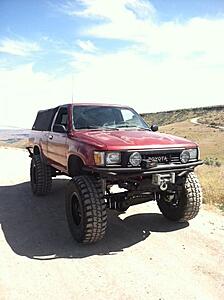
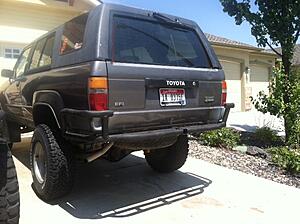
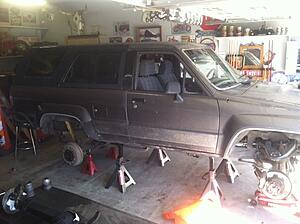
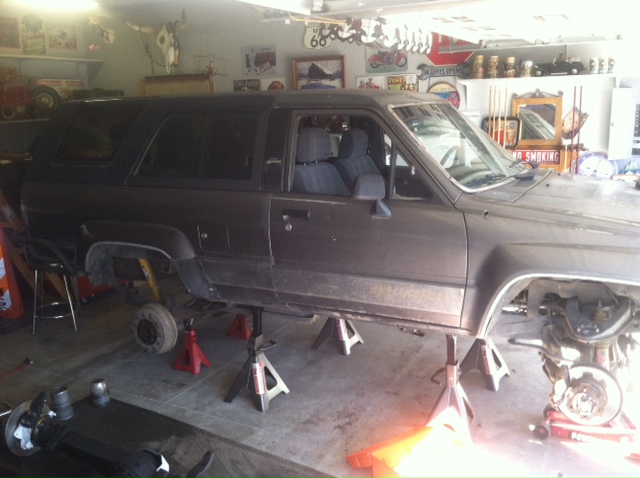
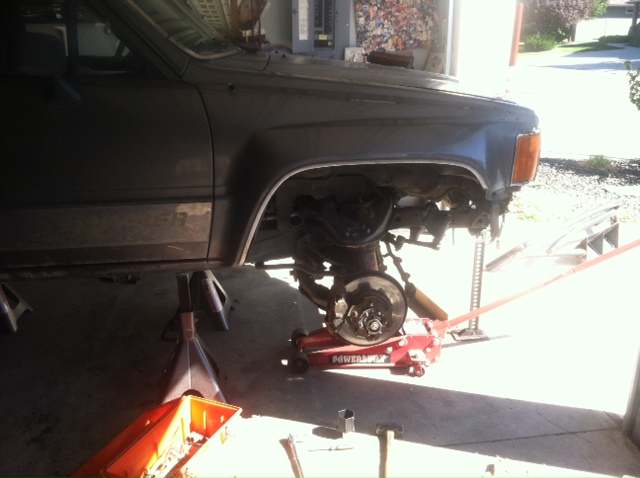
Figure I'd start a 2nd SAS thread for anyone who's interested.. It's my 87' 4Runner I picked up a while ago. Planning for a lower mild build yet keep it drive able on the roads.
Plan of attack: Has OME rear leaf springs already installed which I plan on running up front and either build my own rear pack or do a chevy swap. Gearing for 4.88's for wanting to swap a diesel in further down the road. Spool up front, ARB in the back. Rear Disc, deciding about what e brake to use.. After my first SAS I figured out all the stuff I could just fab up myself to save on costs which is nice.. Would like to get it in the garage within the next few weeks but want to build the axles before anything.
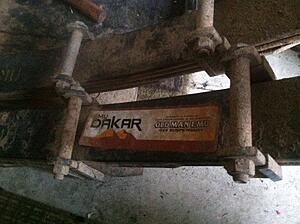
My first SAS 91' Toy
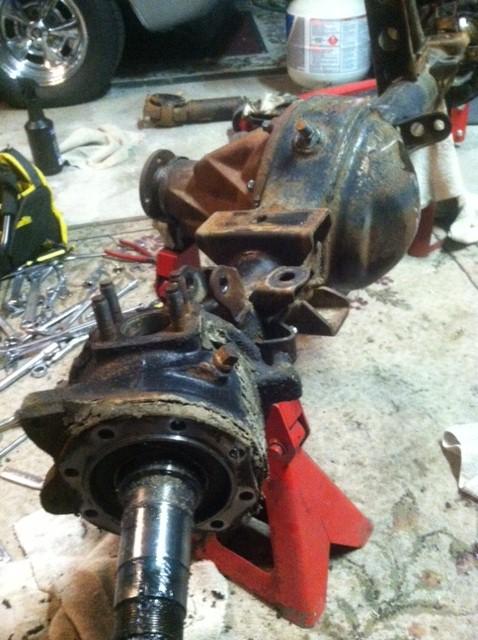
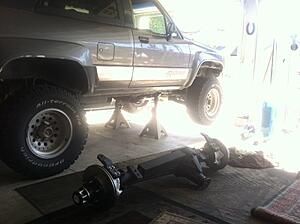
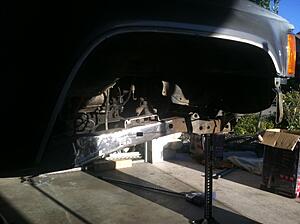
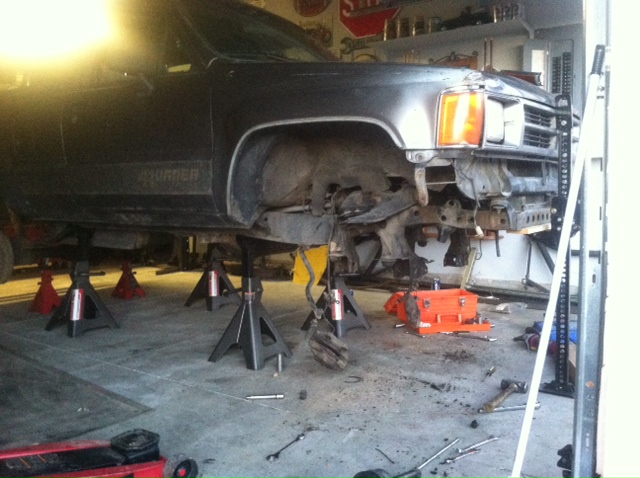
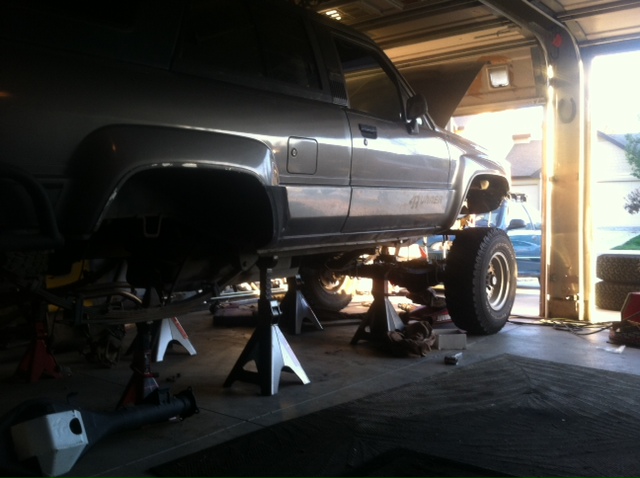
Annnnd what I'll be working with this time around..
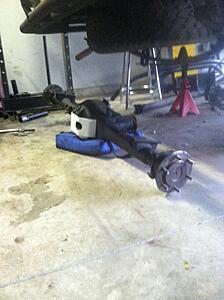
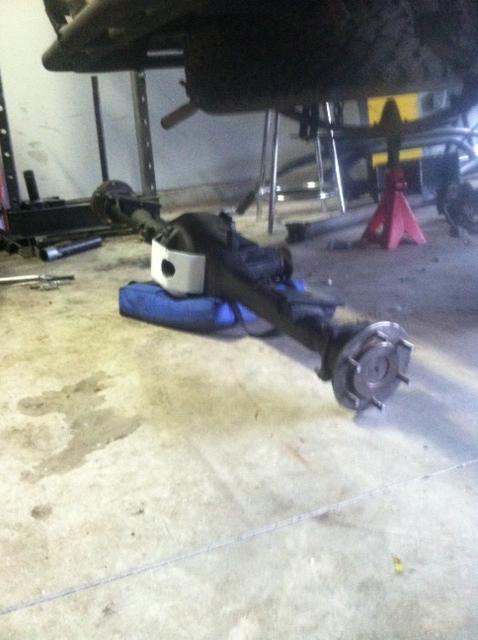
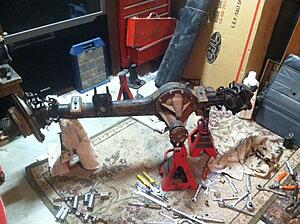
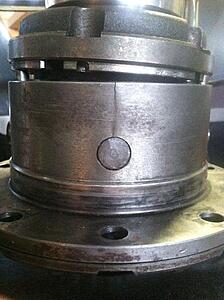
So found an 85' front axle on CL, the guy lived waaaaay out in the country and told me the axle has been sitting in the backyard for 15 years.. Which I gladly took off his hands.
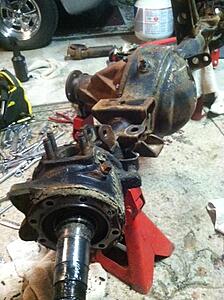
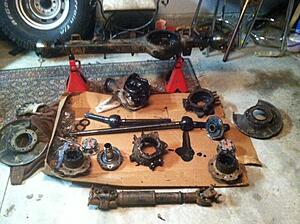
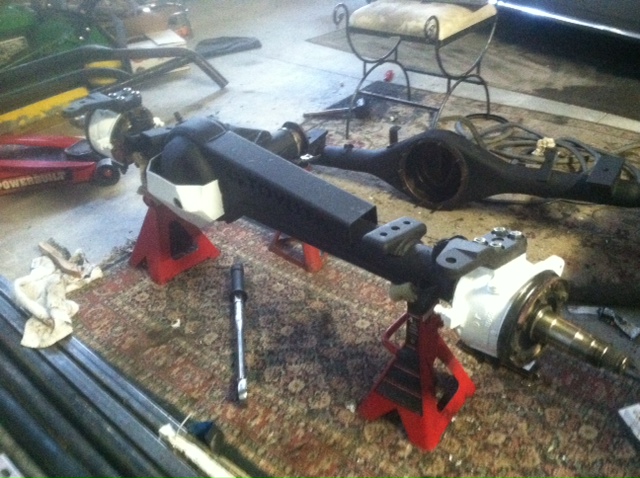
And with a little elbow grease, cutting, welding, painting and a rebuild kit! She's starting to come together. Built my own front armour place, Just need to pick up some FJ rotors and press all my new wheel studs in and get the hubs on. Painted with bed liner spray can, use it on all my bumpers and the stuff really holds up great! 4.88 w/ spool up front as well. Figure I'll just run with one hub locked for steering purposes in 4WD and if I need to; I can just lock the other for a full front lock..
And still a bit hesitant about running this in the rear but just because I got it for free and everyone I ask for advice about it says run it til it blows; I figure why not.. ARB with hairline cracks in the housing. Will order all my parts to build the rear axle probably next week.
Small update.. Went to the local pick n pull and found me a steal on some OME rear leaf springs for $40 Figure I'll run both OME springs up front and in the back! Should ride pretty nice once it's all dialed in.
I've been running a damaged ARB for years. Guy I bought it from said pinion broke and he limped it home quite aways. Even have locked it in on road intown figured if it was gonna grenade would rather be a short distance from house than someplace remote. At Least built up my confidence in set up.
Spool in front wow. Even with an Aussie up front sometime it doesn't want to unlock and turning is a pita especially on loose stuff just wants to go straight.
Wow man! That gives me a lot more confidence with mine haha. Thanks for the feedback! Yeah not too keen on a spool up front but I figure just keeping one hub locked it's essentially like an open diff and I'll just lock up both sides if I absolutely need to..
Originally Posted by muddpigg
I've been running a damaged ARB for years. Guy I bought it from said pinion broke and he limped it home quite aways. Even have locked it in on road intown figured if it was gonna grenade would rather be a short distance from house than someplace remote. At Least built up my confidence in set up. Spool in front wow. Even with an Aussie up front sometime it doesn't want to unlock and turning is a pita especially on loose stuff just wants to go straight. Gonna be a nice build.
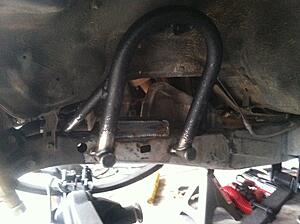
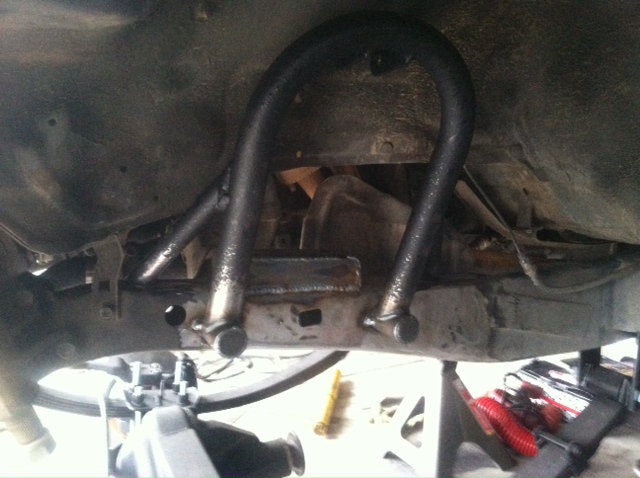
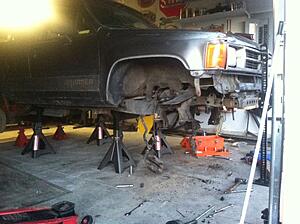
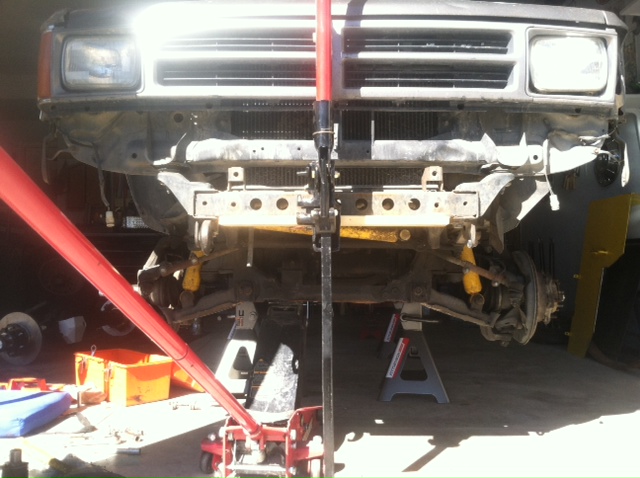
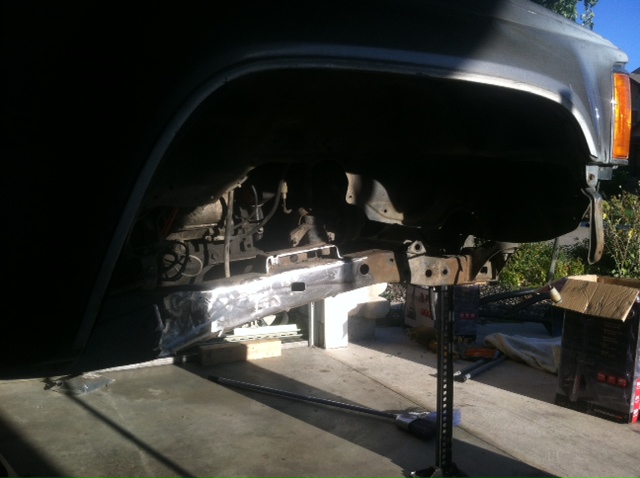
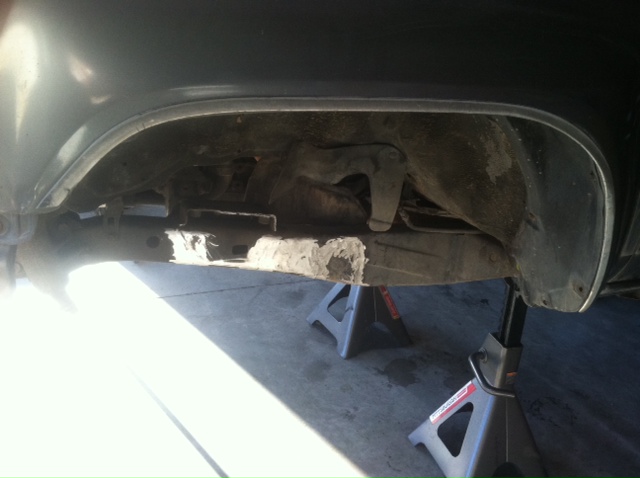
Got started the other day on getting rid of my IFS! My grinder took a crap on me so I'll have to get another tomorrow to finish up. Only have like half an hour of grinding left for everything to be all cleaned up then I can start assembling! Built my own front hanger I need to finish welding up next week then I can get the axle hung!
I've been running a damaged ARB for years. Guy I bought it from said pinion broke and he limped it home quite aways. Even have locked it in on road intown figured if it was gonna grenade would rather be a short distance from house than someplace remote. At Least built up my confidence in set up.
Spool in front wow. Even with an Aussie up front sometime it doesn't want to unlock and turning is a pita especially on loose stuff just wants to go straight.
. Even with an Aussie up front sometime it doesn't want to unlock and turning is a pita especially on loose stuff just wants to go straight.
Gonna be a nice build.
Very true about an Aussie upfront, been dealing with that for about 5 years. Hoping my 94 will get an ARB up front someday.
A2theK I had to run out to the garage and make sure my Jackstands were still there after seeing all of yours
Yep, the 3 sets are all there
Will probably pick up another set or two for my SAS too.
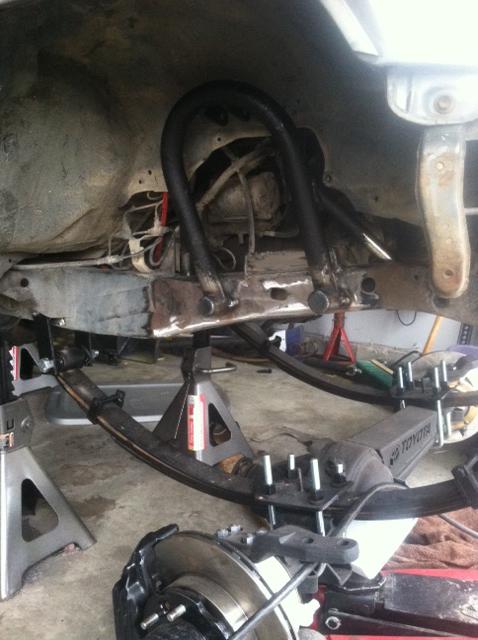
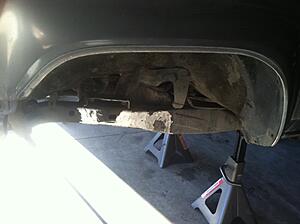
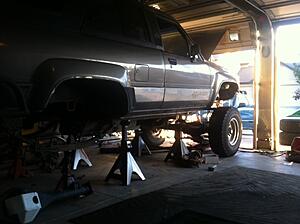
Got the axle hung today and wheels on the ground.. It sits a bit high for my taste but I'll swap over my 35's off my pickup onto it and see how those look so I can decide if I should get 35 or 37s. It's sitting on 31's just for perspective. Apparently OME rear springs are shorter than a stock RUF pack so I had to move the front hanger back a good inch and a half for a decent shackle angle.
Shackle angle with full weight on the ground. Made my own shackles and added spacers. 5" eye to eye.
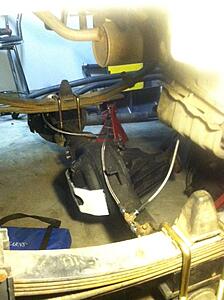
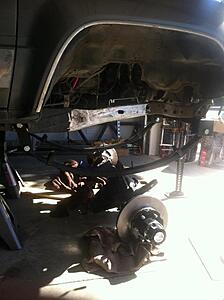
Bit of an update.. Been waiting on some backordered parts to get here so setting me back a bit but a few things that I've gotten done so far is a 15/16 master cylinder with V6 booster, larger v6 calipers up front bolted on, motor mounts welded up, shock hoops tacked in position. Also got my hands on an open 4.88 diff, decided to hold off on the cracked arb case for now and use this diff just to get it on the road already.. Rebuilt the rear axle, new seals/bearings as well as chromoly axles I got for free on CL and got everything ready for disc brakes in the rear. Waiting for those to come in the mail as well..
Haven't updated for a while.. Got everything hooked up finally. Rear disc brakes/axle hung.. Front axle/steering all finished up as well too. Brake proportioning valve and an electric line lock added in as well too! All that's left really is the bleed the brakes, put in some diff fluid and tow her to work next week to get everything fully welded and we'll be ready to roll!
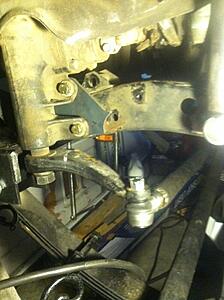
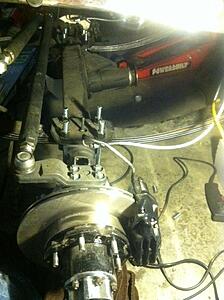
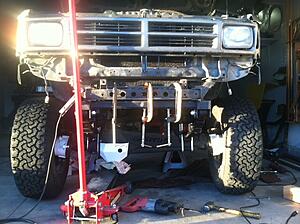
Steering box reinforcement! Used a stock FJ80 pitman arm I got at a junkyard to save on costs
Built my own tie rod and draglink as well, steering box pushed forward and vertical gives me more than enough clearance
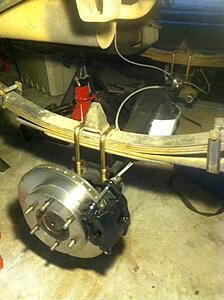
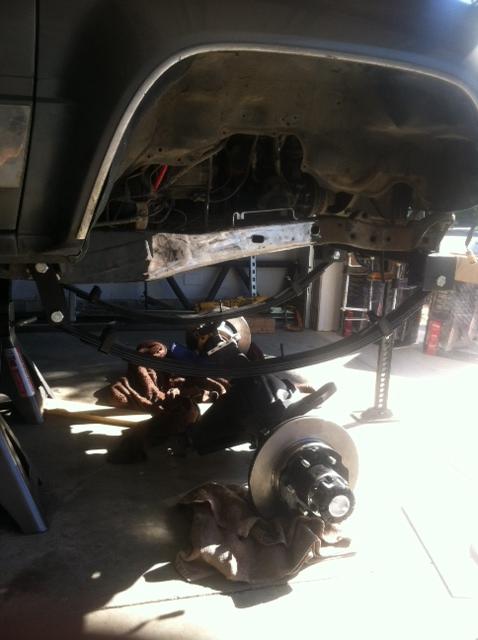
Rear disc brakes looking mighty pretty OME 2" rear springs in back. Got some blocks to really just level the front and rear out.. Will put in longer shackles a little down the road, will have to move the shackle mounts forward to keep a good angle though so figure I'll do it later..
And the electric line lock which I'll still need to wire up to a switch but heard nothing but good reviews about since I didn't feel like fabbing up anything to utilize the stock parking brake..
Haven't updated for a while.. Got everything hooked up finally. Rear disc brakes/axle hung.. Front axle/steering all finished up as well too. Brake proportioning valve and an electric line lock added in as well too! All that's left really is the bleed the brakes, put in some diff fluid and tow her to work next week to get everything fully welded and we'll be ready to roll!
Steering box reinforcement! Used a stock FJ80 pitman arm I got at a junkyard to save on costs
Built my own tie rod and draglink as well, steering box pushed forward and vertical gives me more than enough clearance
Rear disc brakes looking mighty pretty OME 2" rear springs in back. Got some blocks to really just level the front and rear out.. Will put in longer shackles a little down the road, will have to move the shackle mounts forward to keep a good angle though so figure I'll do it later..
And the electric line lock which I'll still need to wire up to a switch but heard nothing but good reviews about since I didn't feel like fabbing up anything to utilize the stock parking brake..
Great build. I have been thinking about a theft deterrent. Seems like a hidden switch for the line lock would keep anyone from moving it. If nothing else maybe two switches in series with one hidden for parking in sketchy areas. Just a thought.
Not suppose to use a linelock for long periods of use. I oopsied and forgot mine on over night without any issues and it was still holding.
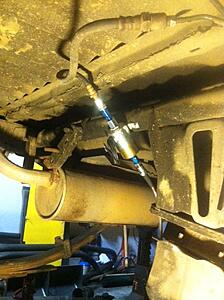
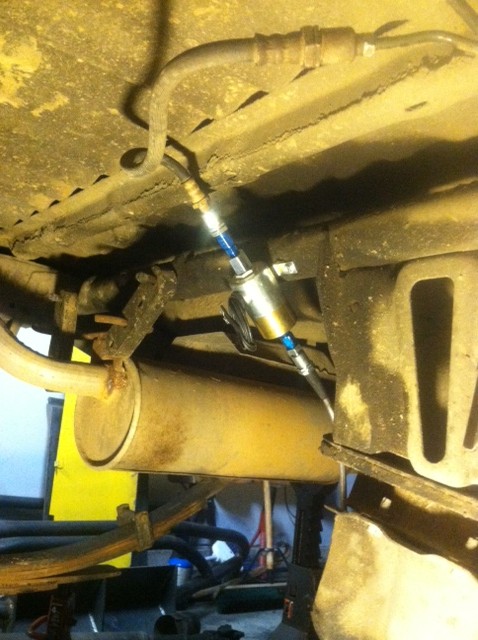
-are you mounting linelock over driveshaft? That's a bad idea..
- why are you using old rubber brake line with all the awesome braided stainless steel? nickel copper is super easy to work with is super affordable on amazon. 3/16th is line size you can get both metric and SAE line ends so you save a fortune on adaptors. Looks like you will have issues with routing of front brake lines. I you take the backing plate you can cut it so the that all that is left is part that holds brake line in place, flex line to hard line. The hard line before the rubber line looks like it is not secured. You can use the IFS frame bracket cut off and weld back in a good place to route brake line so it doesn't rub anything. Your brake system design and routing looks sketchy, might wanna rethink some of it.
- Is that 2 lift blocks stacked on each side of rear axle? That just got bad idea written all over it.
Lighten up dude! I saw one lift block on each side which is customary for leveling from what i gather. As for the other stuff...I think it was under construction at that point and he was just sharing to give a general idea. Taking a wild guess that a lot of it changed before it actually hit the trail. I have built a few street rods back in the day and a lot of the major stuff changed a few times before it was ready for the shakedown run. Helpful tips are always welcome but a little tact and benefit of the doubt goes a long way. just sayin....
Lighten up dude! I saw one lift block on each side which is customary for leveling from what i gather. As for the other stuff...I think it was under construction at that point and he was just sharing to give a general idea. Taking a wild guess that a lot of it changed before it actually hit the trail. I have built a few street rods back in the day and a lot of the major stuff changed a few times before it was ready for the shakedown run. Helpful tips are always welcome but a little tact and benefit of the doubt goes a long way. just sayin....
that was tactful,
clearly there is 2 chunks of metal on rear spring perchs. Depending on what you intend to use rig for depends on how you set it up but 2 blocks are a bad idea unless welded together. If you're intending to Offroad you should go with steel then weld front and rear to perches after mock up is complete. Extruded alimunum blocks have been know to break and blocks not welded in have been know to come out. You weld front and rear so you can grind out bead to remove/change.
it is never a good idea or common practice on any automotive project to route brake lines or fuel lines where they can potentially be damaged by anything. Suspension, tires, driveshaft... Now if you do it different on your hot rod... Well that's just a bad idea.
 08-29-2015, 06:41 PM


 and got everything ready for disc brakes in the rear. Waiting for those to come in the mail as well..