
 03-30-2016, 11:12 AM
Last edit by: IB Advertising
See related guides and technical advice from our community experts:
- Toyota Tacoma How to Replace Radiator<br>Step by step intructions for do-it-yourself repairs.

Step by step: Replacing radiator on 3rd gen p/u
07-30-2008, 01:00 AM
#1
Contributing Member
Thread Starter
Join Date: Feb 2007
Location: maple ridge, British Columbia, Canada
Posts: 9,055
Likes: 0
Received 9 Likes
on
5 Posts
Step by step: Replacing radiator on 3rd gen p/u
So your rad needs replacing, mine did too. This writeup is intended to shed light on the task of changing out a rad and how to properly flush a radiator.
*Note* My truck is equipped with a 3" performance accessories body lift kit. This kit uses brackets to drop the rad, these brackets use non-metric SAE nuts. Notes posted with a * refer to body lift equipped trucks only.
Tools/supplies needed:
-Metric sockets/open ended wrenches 10-12-14mm
* SAE sockets/open ended wrenches 1/2"-
-Flathead screwdriver
-Plyers
-Jugs to hold old coolant. (near 7 gallons once flushing is complete)
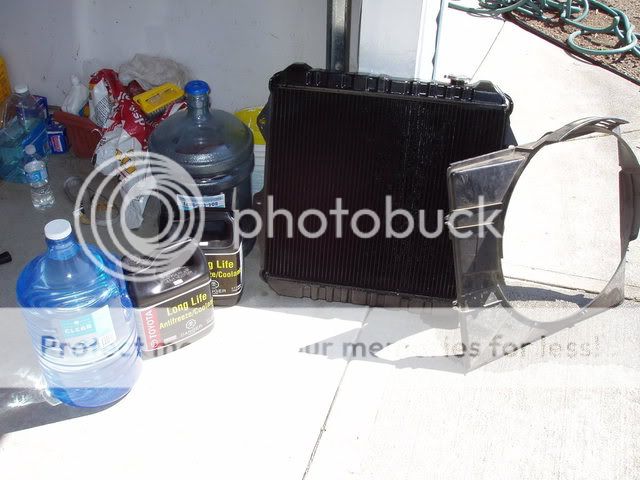
Parts needed:
- Radiator
- 2 jugs of Toyota Red coolant
- 1-2 gallons of distilled/purified water
- Oem toyota Thermostat
- Consider replacing your rad cap if your new rad didnt come with one
- Also consider replacing your rad hoses
*note* I also replaced my fan shroud at this time
Prepping for removal
- Park truck on level ground
- Open hood
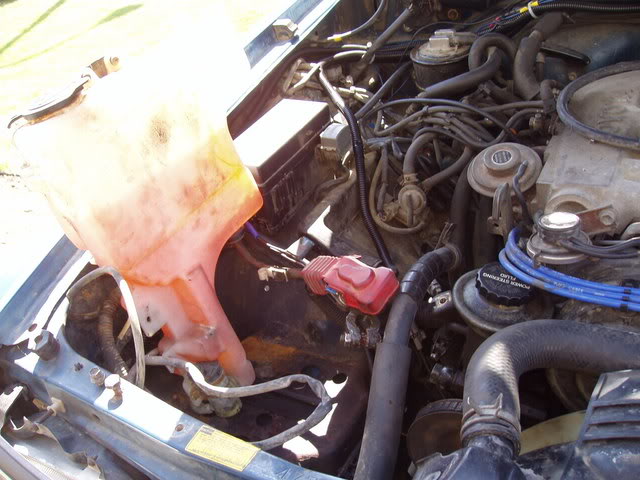
- Remove rad cap along with the overflow hose and tank (for clearance)
- Remove battery (for clearance)
- unbolt and move washer fluid tank out of the way
- Remove 4 12mm bolts on skid plate
- Locate the drain on the bottom right of the rad. If your rad is a toyota brand rad the drain will look like this.
-If aftermarket, the drain will look a little different. Should be in the same location.
- Use plyers to open the drain.
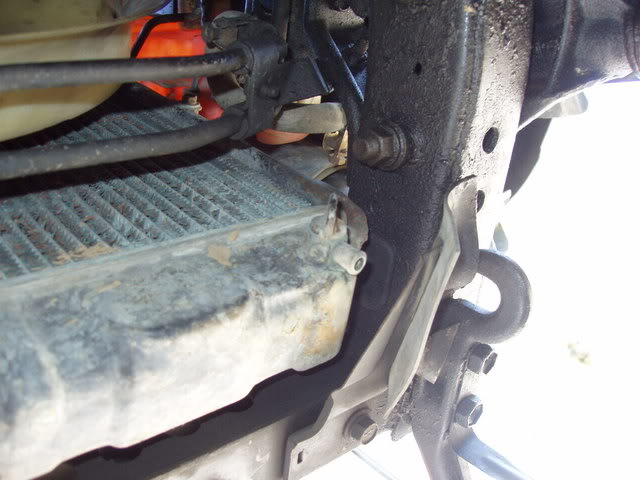
-Don't forget to undo the rad hoses. Becarefull of the bottom one, there is going to be coolant stored in it.
Try to catch it with your drain jug/pan and not your face like me
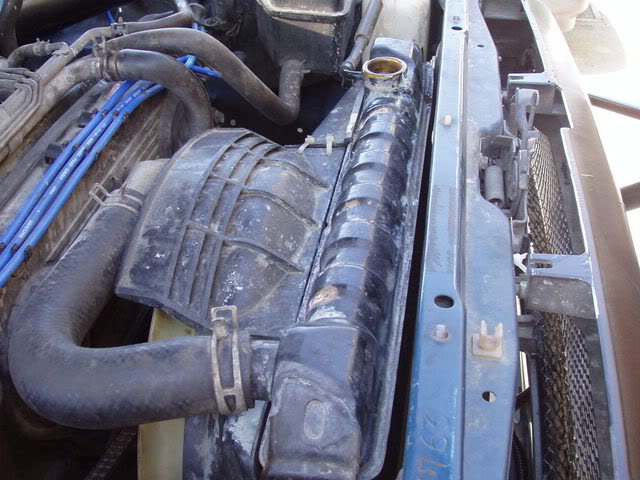
- I used the time waiting for the rad to drain as an oppertunaty to unbolt the rad.
- It is only mounted by 4 bolts on the radiator support.
*note* The drop brackets pictured on the rad mounting points are due to the body lift.
- Clearance will be tight, take your time. I used a rachet to start them off, then when the rachet wouldnt fit anymore I used an open ended wrench.
- Now that its unbolted it can come out. Be prepaired to wiggle and finess the rad out, it can be a fit fit.
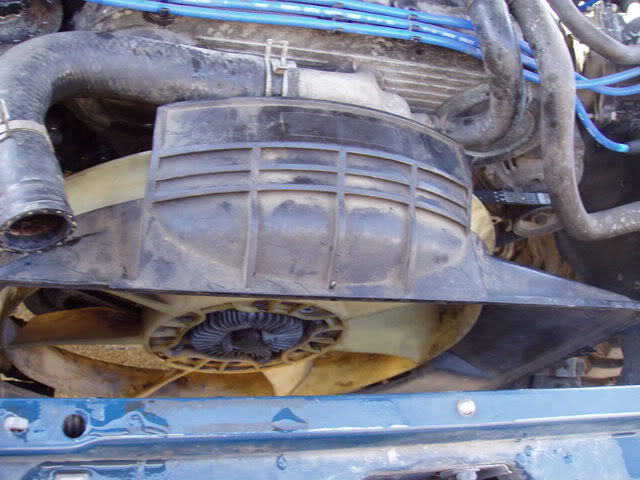
*note* My fan shroud was torn to bits prior to this, I did not have to worry about its clearance when removing. You may need to undo the 4 mounting nuts and remove it from the rad for clearance over the fan.
Removal
-Once removed, it might look a little something like mine did...
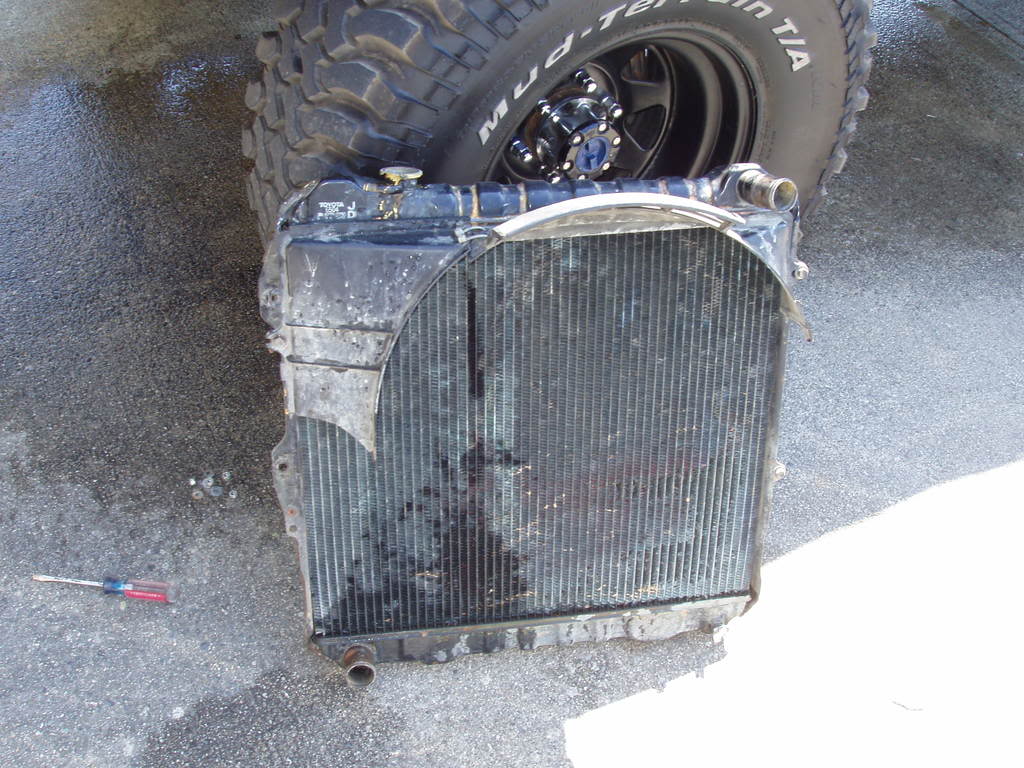
Me thinks that shroud is not very effective...
- Now is a perfect time to replace the thermostat. I opted not to as it was replaced earlier this year.
-It is also a perfect time to test your fan clutch ( if equipped). Spin with considerable force, if it rotates more then 1/2 way, it should be replaced.
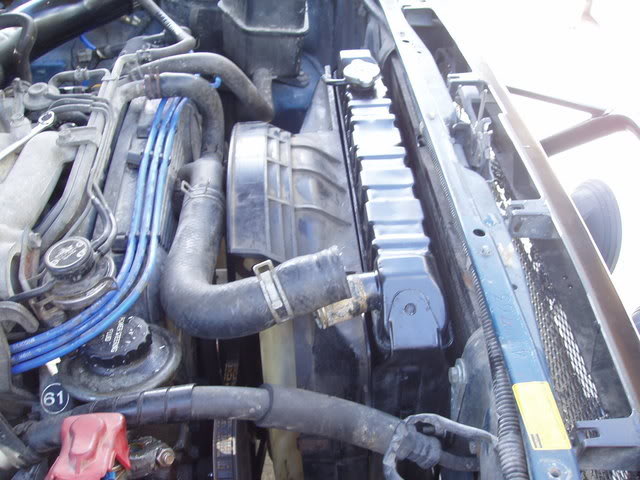
Instalation
- Place the fan shroud over the fan
- Slowly lower the rad into the engine bay
- Make sure to avoid the mounting studs, they can rip fins out without a problem
- Don't force anything!
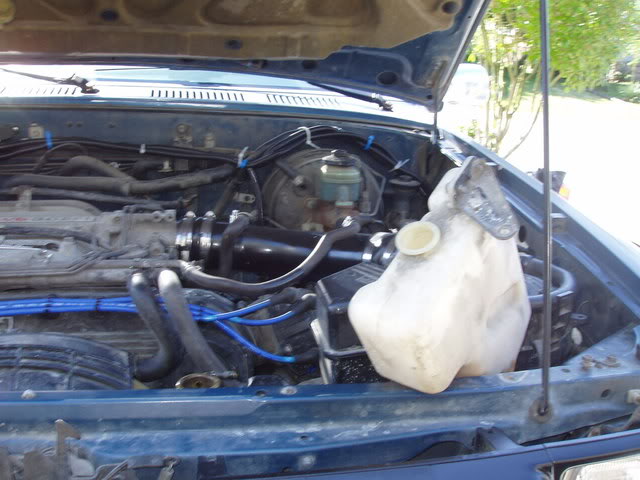
- It should look something like this once loosley in place.
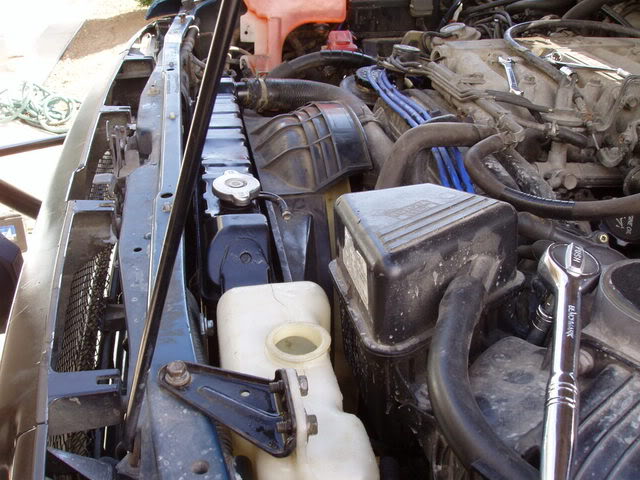
- re-install 4 rad mounting bolts
- re-install 4 rad/shroud mounting bolts (tighten by hand)
- re-install coolant hoses
- re-install Overflow tank
- bolt down washer fluid tank
- reinstall and connect battery
It should now look a little like this..
- Fill rad cold completly full with tap water. This is just to get everything flushed.
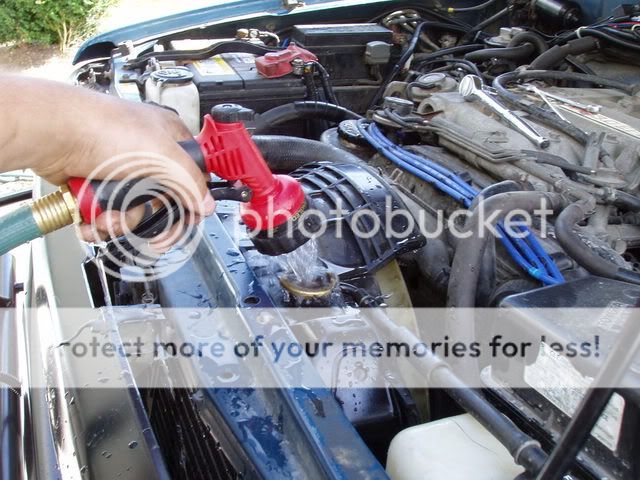
- Put on rad cap once full, and start the truck. Get everything circulating for a few minutes. I waited just till the thermostat opened then shut off the engine.
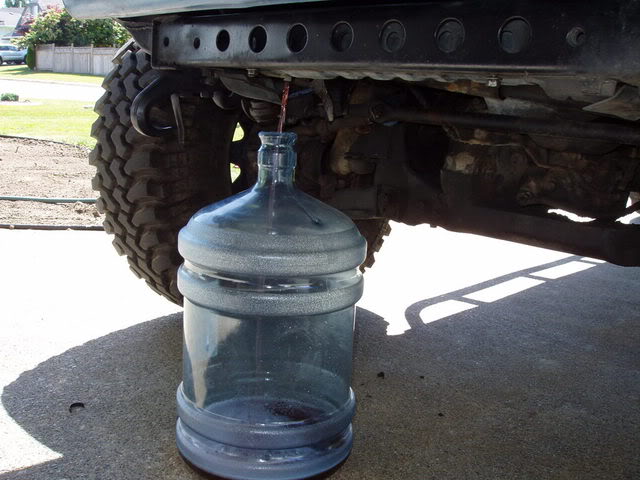
- Now open the drain and drain out all the water/coolant.
*note* Make sure you catch this stuff in a jug, there will be a good amount of coolant in it from inside the block.
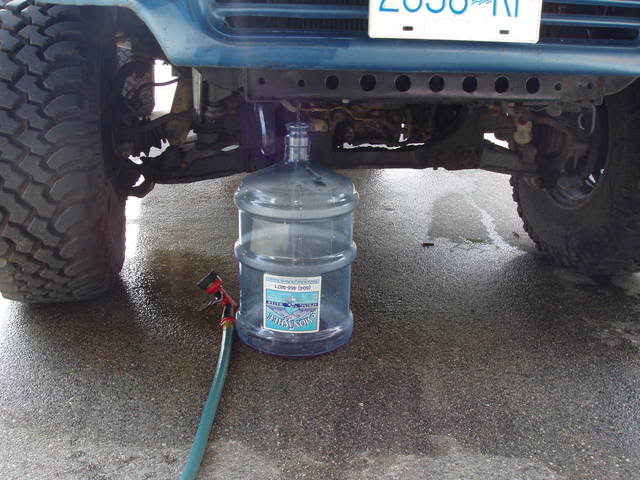
-Once flow has stopped tighten drain
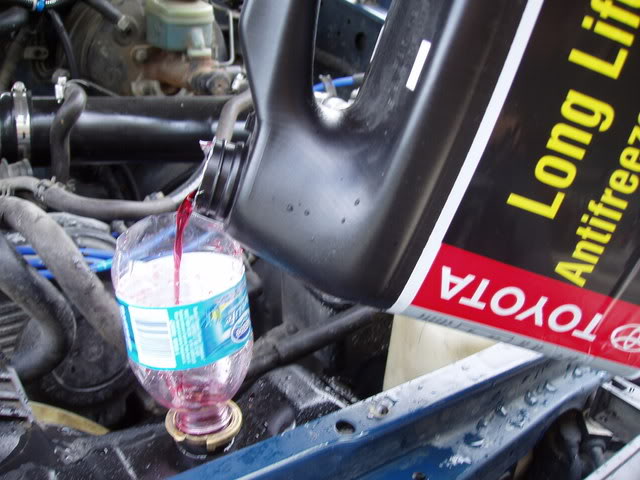
- Now its time to fill it up with the good stuff.
- Pour in one jug of toyota coolant
- Fill that now empty jug with distilled water and pour it in
- Now mix some 50/50 mix in that jug and use that to top everything up
- Now we need to burp the rad.
- Jack up the front of the truck a good foot or so. The more the better!
- Support on jackstands (dont forget to chock a rear wheel)
- Open the rad cap and Start the truck
- Make sure your heater is set to hot, this will flush the heater core
- Watch the bubbles come out of the rad and add coolant accordingly
- Squeeze the upper rad hose to get excess air out of the top
- Don't forget to fill up the overflow tank
Make sure you feel the upper and lower rad hoses periodicly to make sure the coolant is circulating properly.
- Once truck is fully warmed up, put on rad cap and shut off engine.
- Remove jack stands and lower truck
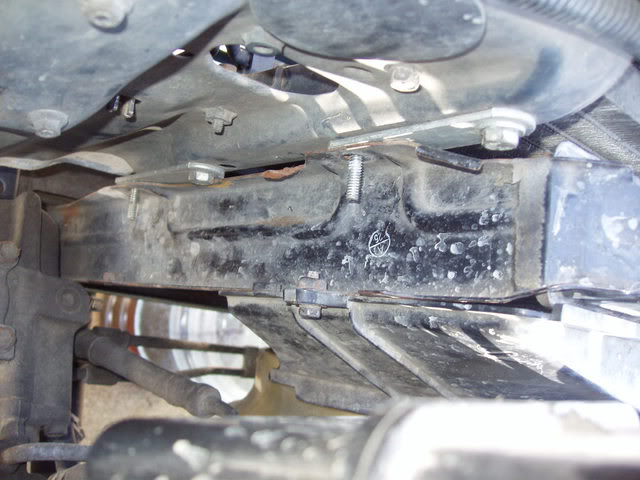
- Re-install the skid plate
Don't forget to rinse off your work area if you spilled any coolant.
Over the next few days keep an eye on your coolant level, Toyota rads are notorius for holding air. This air should purge out and the coolant level will drop. Make sure you top it up after every drive.
Congrats you are done! Grab a beer and relax.
If I have missed anything, or if you have any helpfull hints that could be helpfull for this process, feel free too PM me.
-Jay351
*Please note* You can buy kits to aid in flushing the rad, this may be needed if you cannot get everything flushed out by yourself. They go for about 30 bucks or so.
*Note* My truck is equipped with a 3" performance accessories body lift kit. This kit uses brackets to drop the rad, these brackets use non-metric SAE nuts. Notes posted with a * refer to body lift equipped trucks only.
Tools/supplies needed:
-Metric sockets/open ended wrenches 10-12-14mm
* SAE sockets/open ended wrenches 1/2"-
-Flathead screwdriver
-Plyers
-Jugs to hold old coolant. (near 7 gallons once flushing is complete)
Parts needed:
- Radiator
- 2 jugs of Toyota Red coolant
- 1-2 gallons of distilled/purified water
- Oem toyota Thermostat
- Consider replacing your rad cap if your new rad didnt come with one
- Also consider replacing your rad hoses
*note* I also replaced my fan shroud at this time
Prepping for removal
- Park truck on level ground
- Open hood
- Remove rad cap along with the overflow hose and tank (for clearance)
- Remove battery (for clearance)
- unbolt and move washer fluid tank out of the way
- Remove 4 12mm bolts on skid plate
- Locate the drain on the bottom right of the rad. If your rad is a toyota brand rad the drain will look like this.
-If aftermarket, the drain will look a little different. Should be in the same location.
- Use plyers to open the drain.
-Don't forget to undo the rad hoses. Becarefull of the bottom one, there is going to be coolant stored in it.
Try to catch it with your drain jug/pan and not your face like me
- I used the time waiting for the rad to drain as an oppertunaty to unbolt the rad.
- It is only mounted by 4 bolts on the radiator support.
*note* The drop brackets pictured on the rad mounting points are due to the body lift.
- Clearance will be tight, take your time. I used a rachet to start them off, then when the rachet wouldnt fit anymore I used an open ended wrench.
- Now that its unbolted it can come out. Be prepaired to wiggle and finess the rad out, it can be a fit fit.
*note* My fan shroud was torn to bits prior to this, I did not have to worry about its clearance when removing. You may need to undo the 4 mounting nuts and remove it from the rad for clearance over the fan.
Removal
-Once removed, it might look a little something like mine did...
Me thinks that shroud is not very effective...
- Now is a perfect time to replace the thermostat. I opted not to as it was replaced earlier this year.
-It is also a perfect time to test your fan clutch ( if equipped). Spin with considerable force, if it rotates more then 1/2 way, it should be replaced.
Instalation
- Place the fan shroud over the fan
- Slowly lower the rad into the engine bay
- Make sure to avoid the mounting studs, they can rip fins out without a problem
- Don't force anything!
- It should look something like this once loosley in place.
- re-install 4 rad mounting bolts
- re-install 4 rad/shroud mounting bolts (tighten by hand)
- re-install coolant hoses
- re-install Overflow tank
- bolt down washer fluid tank
- reinstall and connect battery
It should now look a little like this..
- Fill rad cold completly full with tap water. This is just to get everything flushed.
- Put on rad cap once full, and start the truck. Get everything circulating for a few minutes. I waited just till the thermostat opened then shut off the engine.
- Now open the drain and drain out all the water/coolant.
*note* Make sure you catch this stuff in a jug, there will be a good amount of coolant in it from inside the block.
-Once flow has stopped tighten drain
- Now its time to fill it up with the good stuff.
- Pour in one jug of toyota coolant
- Fill that now empty jug with distilled water and pour it in
- Now mix some 50/50 mix in that jug and use that to top everything up
- Now we need to burp the rad.
- Jack up the front of the truck a good foot or so. The more the better!
- Support on jackstands (dont forget to chock a rear wheel)
- Open the rad cap and Start the truck
- Make sure your heater is set to hot, this will flush the heater core
- Watch the bubbles come out of the rad and add coolant accordingly
- Squeeze the upper rad hose to get excess air out of the top
- Don't forget to fill up the overflow tank
Make sure you feel the upper and lower rad hoses periodicly to make sure the coolant is circulating properly.
- Once truck is fully warmed up, put on rad cap and shut off engine.
- Remove jack stands and lower truck
- Re-install the skid plate
Don't forget to rinse off your work area if you spilled any coolant.
Over the next few days keep an eye on your coolant level, Toyota rads are notorius for holding air. This air should purge out and the coolant level will drop. Make sure you top it up after every drive.
Congrats you are done! Grab a beer and relax.
If I have missed anything, or if you have any helpfull hints that could be helpfull for this process, feel free too PM me.
-Jay351
*Please note* You can buy kits to aid in flushing the rad, this may be needed if you cannot get everything flushed out by yourself. They go for about 30 bucks or so.
Last edited by Jay351; 07-30-2008 at 05:21 PM.


Thread
Thread Starter
Forum
Replies
Last Post
RedRunner_87
95.5-2004 Tacomas & 96-2002 4Runners (Build-Up Section)
84
06-01-2021 01:51 PM
MMA_Alex
86-95 Trucks & 4Runners (Build-Up Section)
25
04-18-2017 05:07 AM
Avenged
95.5-2004 Tacomas & 96-2002 4Runners
4
07-09-2015 07:55 AM
FS[SouthEast]: 1st Gen 4Runner Slider Window, Driver Side
coryc85
Misc Stuff (Vehicle Related)
0
07-06-2015 04:07 AM


