87-89 4Runner Interior quarter trim restoration How To
 02-21-2009, 05:18 PM
#1
*Note* This writeup will work for ANY vehicle interior. However, with the color and supplies used, it applies specifically to 87-89 4Runner interiors in the Gray color.
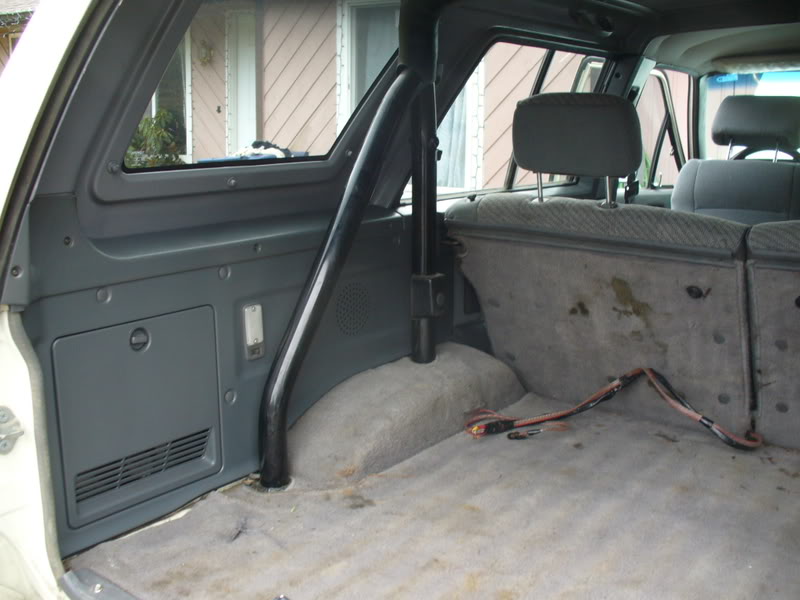
Toyota built the 4Runner very stout, and the drivetrain is one of the best. However, some of the interior components on 1st gen 4Runners leave much to be desired. One such part is the rear quarter trim.
Apparently Toyota didn't feel it necessary to make the panels colorfast, so after just a few years out in the sun and elements, they became faded and ugly. Even if you never took your top off, if the sun reached the panels, they faded. Toyota wanted well into the hundreds of dollars PER PANEL to replace these, and now, they are no longer available. This weekend, i decided to finally do something about these ugly panels. A trip to my local NAPA netted me a few starter chemicals.
First, i picked up some automotive prep clean spray:
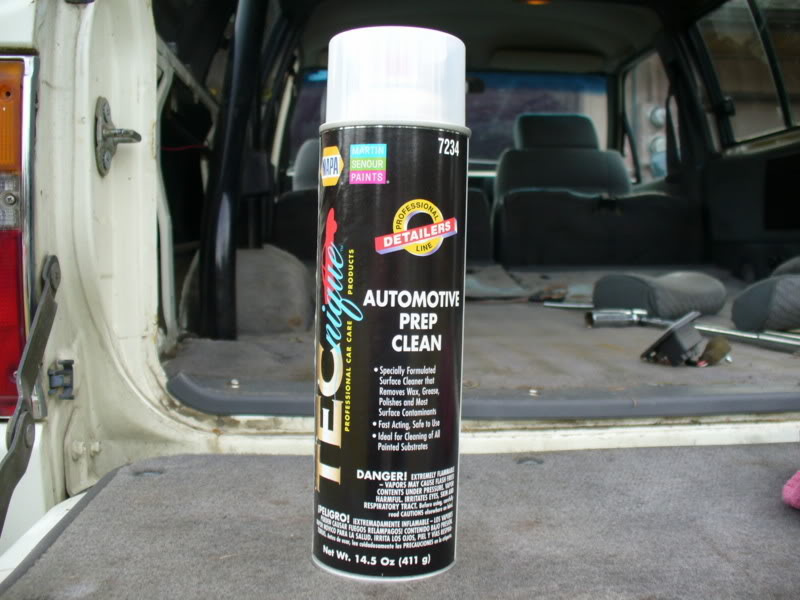
Appears to be some sort of alcohol based spray, and it works really well at removing gunk and waxy buildup.
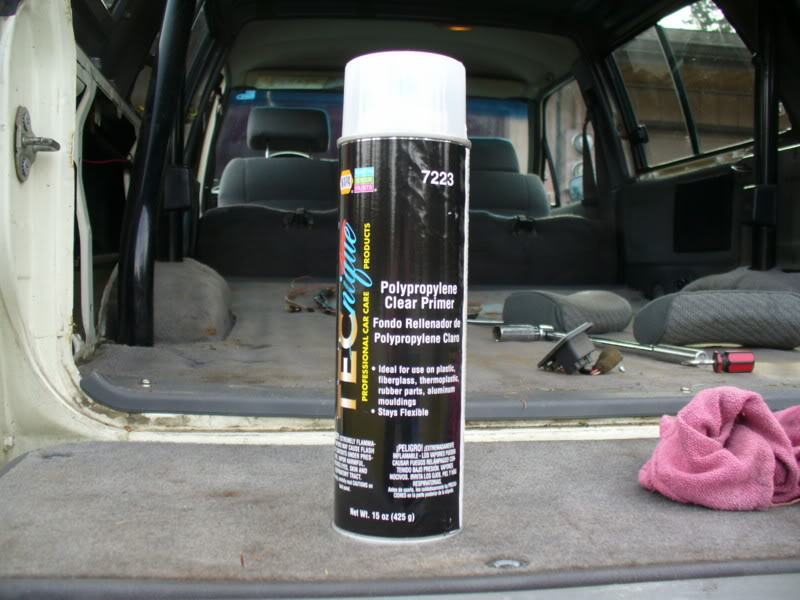
Next, I grabbed a can of Clear Polypropylene Plastic primer. Very important if you want paint to stick to plastic, and not crack like cheap spray paint.
Finally, i was able to get a can of SEM Bumper spray paint. Medium Gray, part number 39183. This matches the 87-89 Gray interiot color the best I was able to find. I did have to order it, as NAPA did not carry it in stock. I later learned WESCO Auto body supply carried it in stock.

Toyota built the 4Runner very stout, and the drivetrain is one of the best. However, some of the interior components on 1st gen 4Runners leave much to be desired. One such part is the rear quarter trim.
Apparently Toyota didn't feel it necessary to make the panels colorfast, so after just a few years out in the sun and elements, they became faded and ugly. Even if you never took your top off, if the sun reached the panels, they faded. Toyota wanted well into the hundreds of dollars PER PANEL to replace these, and now, they are no longer available. This weekend, i decided to finally do something about these ugly panels. A trip to my local NAPA netted me a few starter chemicals.
First, i picked up some automotive prep clean spray:
Appears to be some sort of alcohol based spray, and it works really well at removing gunk and waxy buildup.
Next, I grabbed a can of Clear Polypropylene Plastic primer. Very important if you want paint to stick to plastic, and not crack like cheap spray paint.
Finally, i was able to get a can of SEM Bumper spray paint. Medium Gray, part number 39183. This matches the 87-89 Gray interiot color the best I was able to find. I did have to order it, as NAPA did not carry it in stock. I later learned WESCO Auto body supply carried it in stock.

The following users liked this post:
shmony42 (07-04-2023)
02-21-2009, 05:18 PM
#2
First step in the process, is clean the surface. I didn't get any pictures of the cleaning process, but its best to use a clean lint-free rag to clean the surface.
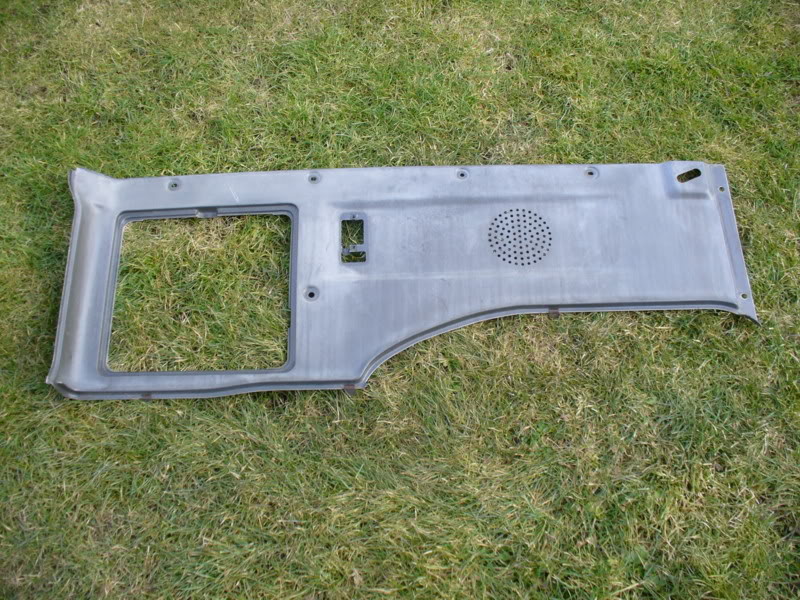
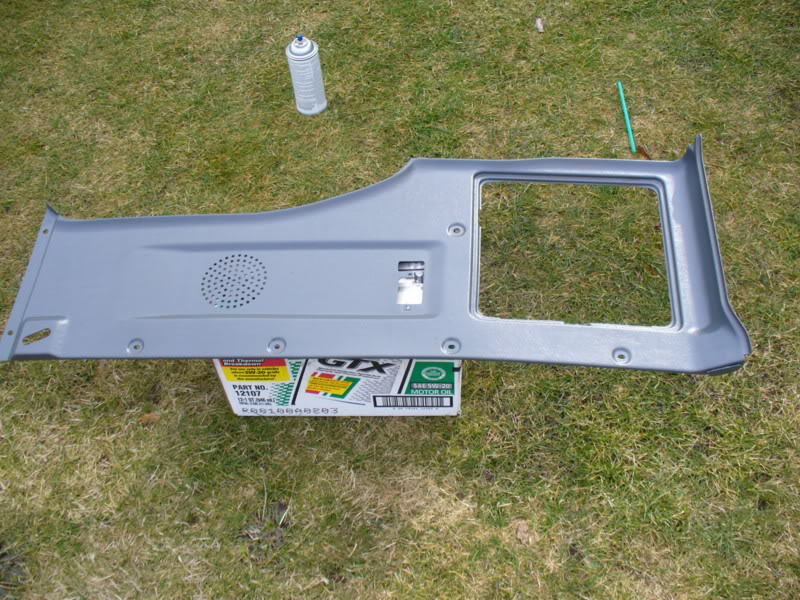
This is how they looked after cleaning. Same as before, nasty and sunfaded:
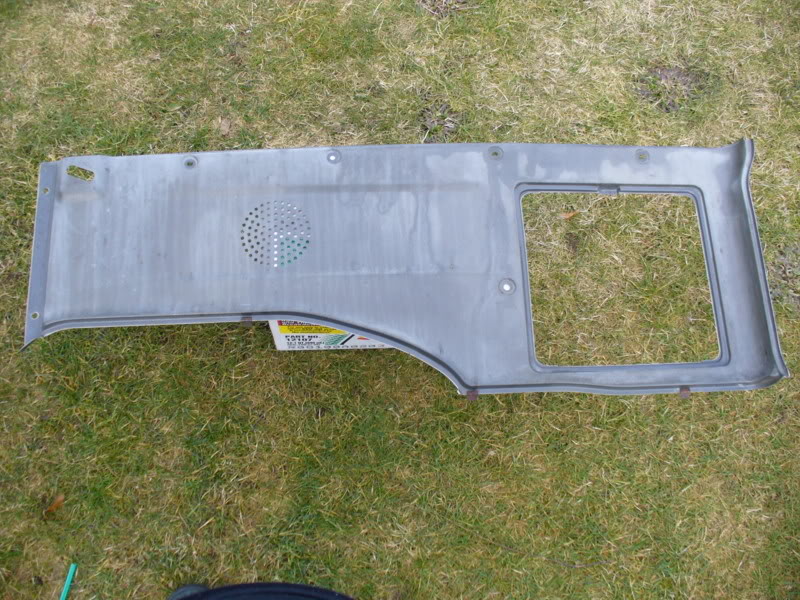
You can see the staining even better here. Notice the runs in the color. I hunted around for an appropriate elevated device, and this old oil box seemed to work well:
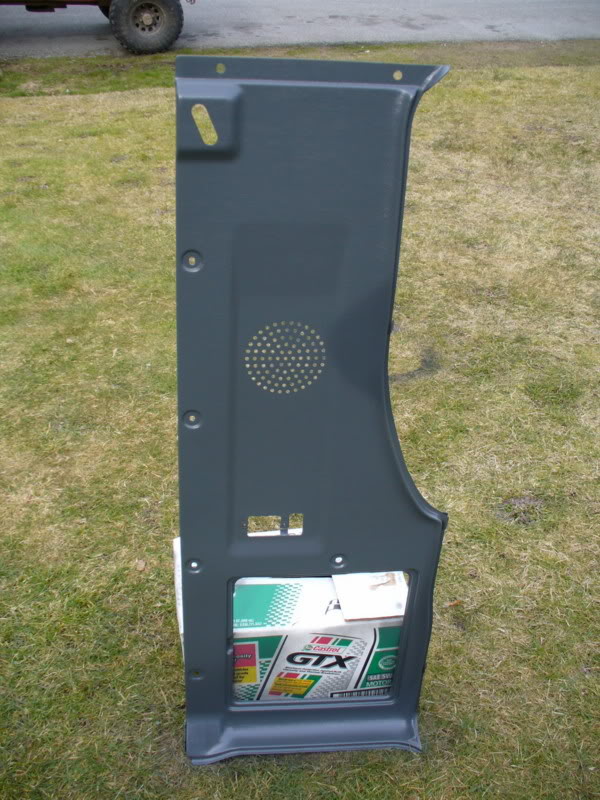
Next, each panel will need a coat of Clear Polypropylene primer. When I sprayed the panels, the staining and fading seemed to almost go away, as if they knew of the impending DOOM!
I only applied one layer of primer. Since the paint is formulated to stick directly to plastic, i didn't feel the need to over do it. I also wanted to maintain the texture of the panels, and multiple coats or primer will distort the texture. Finally, i applied two coats of paint. Both light coats, but enough to cover the panel. Again, looking to maintain panel texture here.
After the two coats, i grabbed the storage door to compare how close the colors were. Pretty close, but not quite close enough for me.
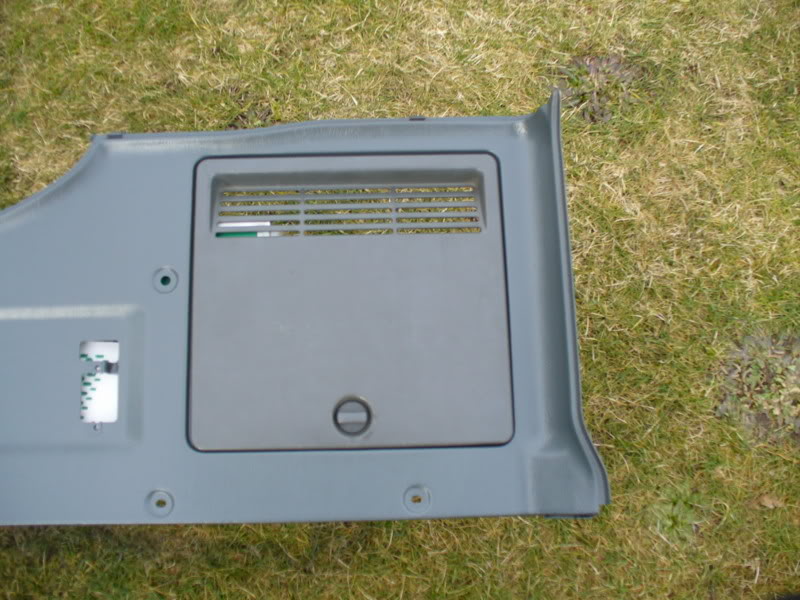
I went ahead and painted the storage doors, and while I was at it the Top trim. This way everything matched. And once installed, here is how everything looks!
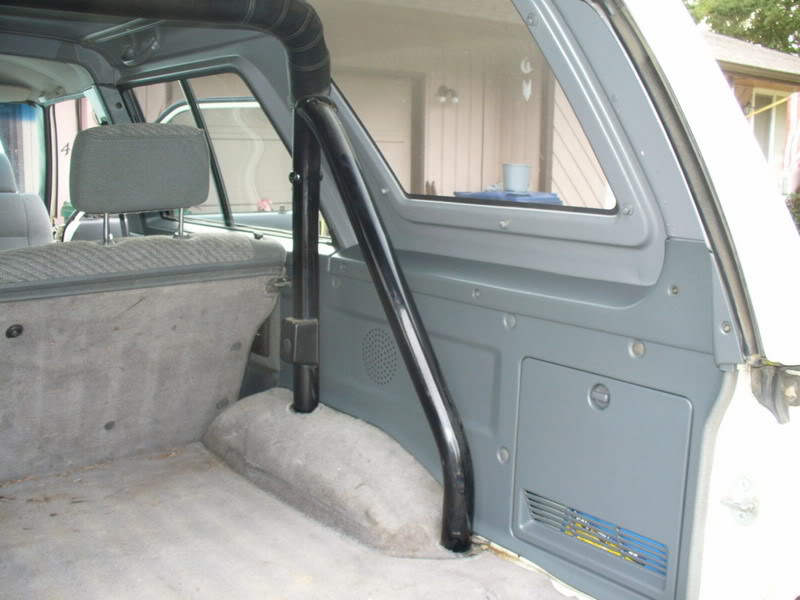
Excellent color match that should last a long time, and for a decent price to. All said and done, I paid less than $50 for materials and it looks brand new.
This is how they looked after cleaning. Same as before, nasty and sunfaded:
You can see the staining even better here. Notice the runs in the color. I hunted around for an appropriate elevated device, and this old oil box seemed to work well:
Next, each panel will need a coat of Clear Polypropylene primer. When I sprayed the panels, the staining and fading seemed to almost go away, as if they knew of the impending DOOM!
I only applied one layer of primer. Since the paint is formulated to stick directly to plastic, i didn't feel the need to over do it. I also wanted to maintain the texture of the panels, and multiple coats or primer will distort the texture. Finally, i applied two coats of paint. Both light coats, but enough to cover the panel. Again, looking to maintain panel texture here.
After the two coats, i grabbed the storage door to compare how close the colors were. Pretty close, but not quite close enough for me.
I went ahead and painted the storage doors, and while I was at it the Top trim. This way everything matched. And once installed, here is how everything looks!
Excellent color match that should last a long time, and for a decent price to. All said and done, I paid less than $50 for materials and it looks brand new.

Thread
Thread Starter
Forum
Replies
Last Post
RedRunner_87
95.5-2004 Tacomas & 96-2002 4Runners (Build-Up Section)
84
06-01-2021 01:51 PM
WTB[WestCanada]: 1989 4runner stock front bumper and other items
lledwod
Items Wanted
1
08-30-2016 01:03 PM
FS[SouthEast]: 1st Gen 4Runner Slider Window, Driver Side
coryc85
Misc Stuff (Vehicle Related)
0
07-06-2015 04:07 AM


