22re rebuild
 05-03-2016, 06:31 AM
#1

22re rebuild
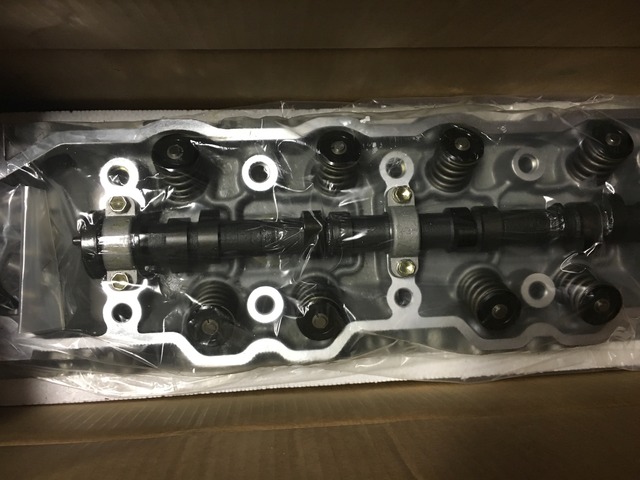
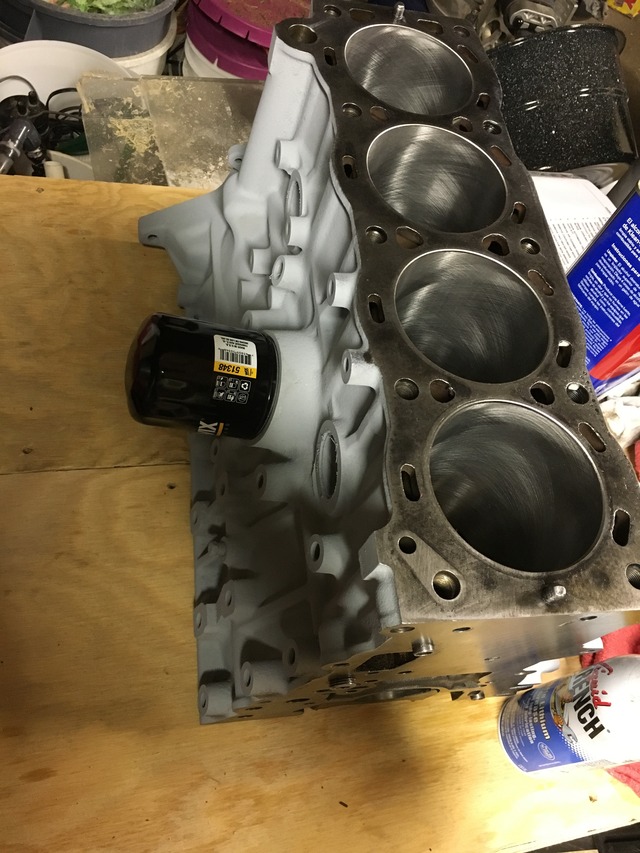
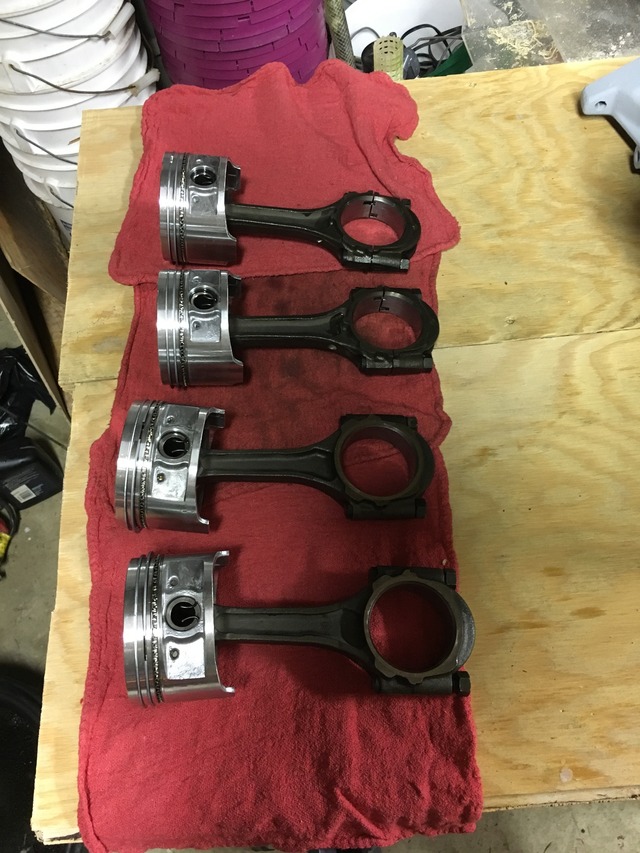
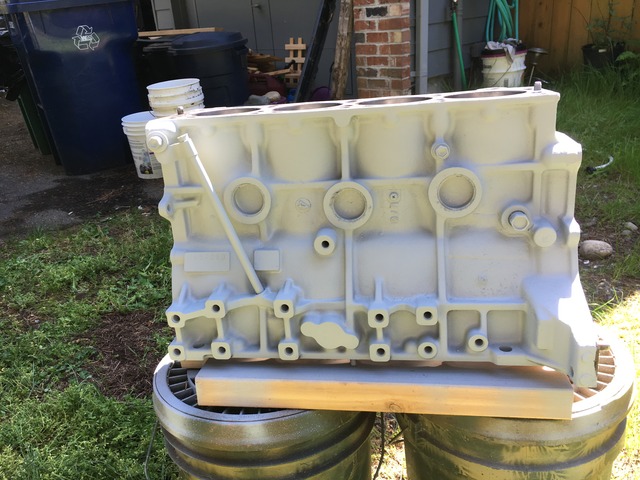
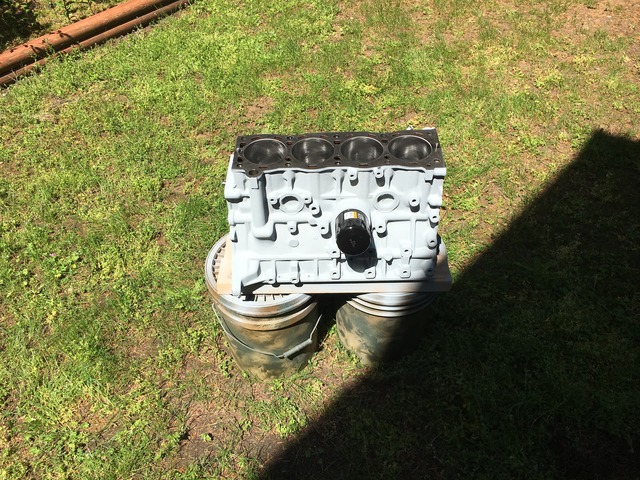
Ok so I have all my parts from engnbldr. He did all the machining and sent the crank out. This is my first bottom end in a 4 stroke but seems simple enough. I guess my main question is since it's all been machined do I use plastigauge when connecting the crank and rods. Or should I be good to go since it's essentially "new".
I know if it were not machined plastigauge is practically a must for clearances. But not sure if it's freshly machined. Now the obligatory pics so you will read the post😜😛😀🍻🍻🍻

Thanks for the help
I know if it were not machined plastigauge is practically a must for clearances. But not sure if it's freshly machined. Now the obligatory pics so you will read the post😜😛😀🍻🍻🍻


Thanks for the help
 05-04-2016, 07:35 AM
#2
Registered User
I've had a couple 22re bottom ends done by the same machinist. I didn't want to deal with it so I paid him to put it together and both times he documented bore, main and rod bearing clearance, deck height, etc... And gave me the specs on the invoice.
I spent like 30 hours doing everything I felt needed doing on my last rebuild. How bad would it feel to get it all done and it won't start or you get a few hundred miles on it and a knock develops. If you don't check it now while it's out, you may end up doing it all again later. But maybe not if that chance is worth shaving a few hours off the whole job.
I spent like 30 hours doing everything I felt needed doing on my last rebuild. How bad would it feel to get it all done and it won't start or you get a few hundred miles on it and a knock develops. If you don't check it now while it's out, you may end up doing it all again later. But maybe not if that chance is worth shaving a few hours off the whole job.
Last edited by KYLEFOO; 05-04-2016 at 07:41 AM.
05-04-2016, 12:59 PM
#3

you'd only have to check one journal of each type, right? one rod clearance check, one main bearing check, etc.
even if you checked every bearing clearance, there are things that it won't tell you, like if the rod cap was machined squarely on the rod, if an align-bore was perfectly straight, etc.
even if you checked every bearing clearance, there are things that it won't tell you, like if the rod cap was machined squarely on the rod, if an align-bore was perfectly straight, etc.
05-05-2016, 05:24 PM
#4
So I have been keeping my build thread updated but here is an update and a link to my build thread
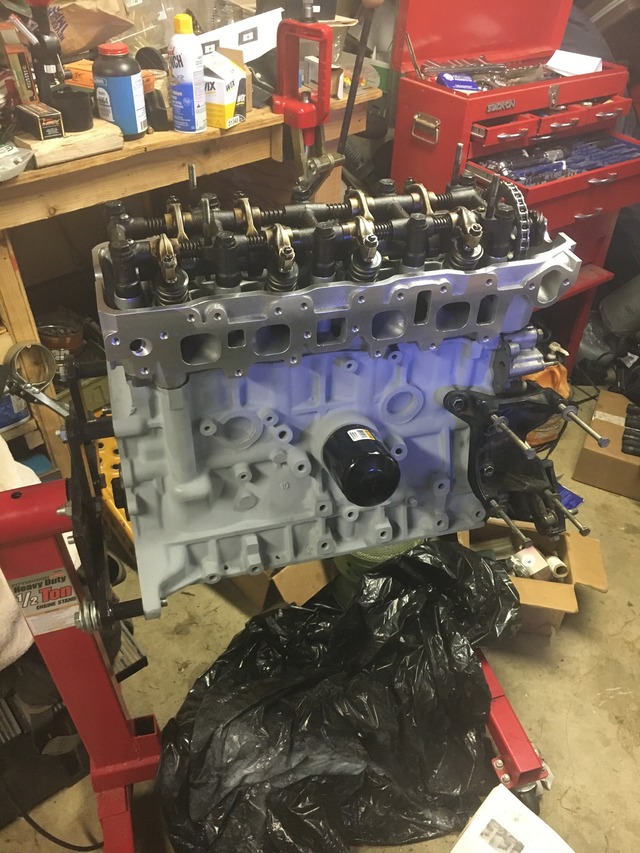
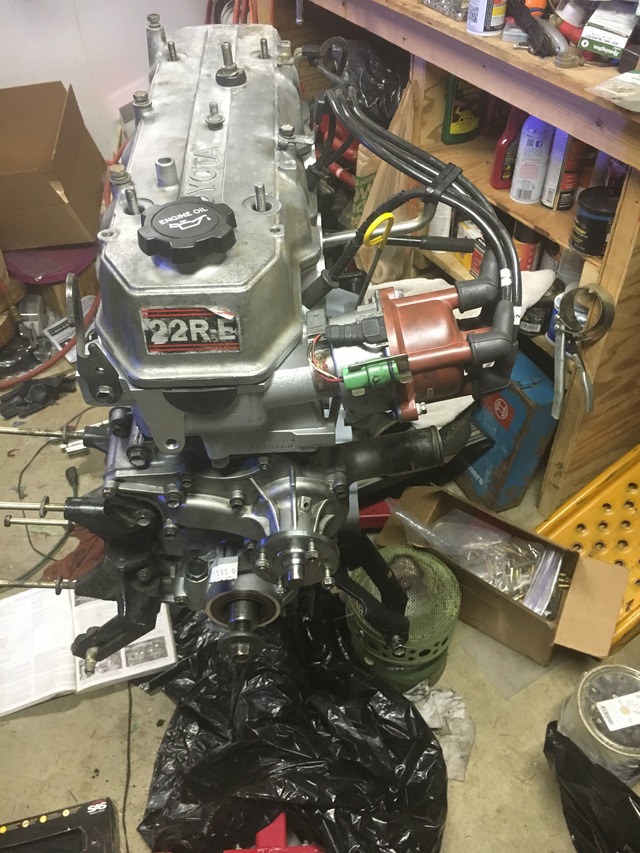
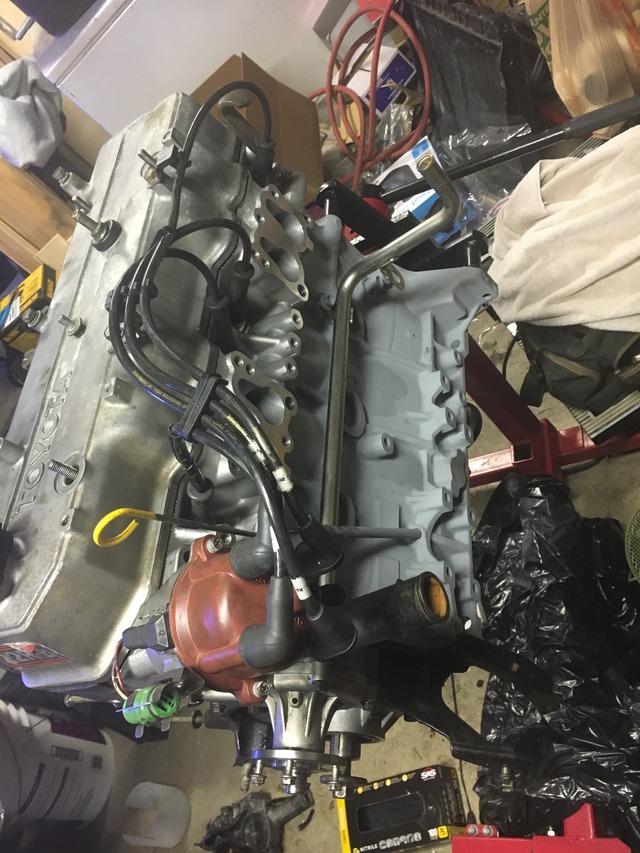
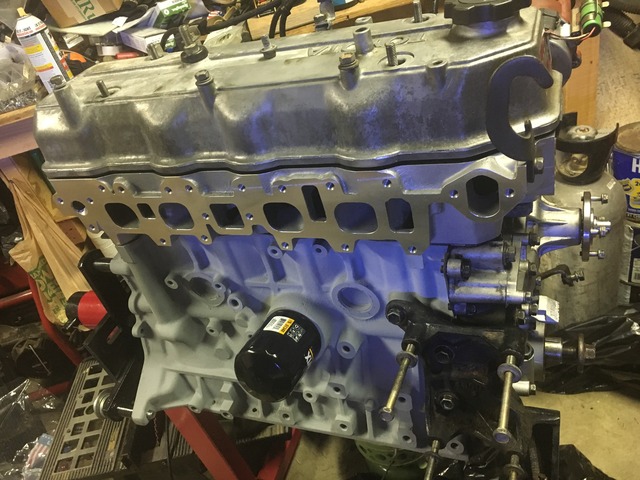
Ok so pretty much have a long block now. Timing chain, cover, oil, water pump on. Need to pull my other oil pan as its been recently cleaned. Dropped the valve cover on and mocked up the distributor for pics. I have that plat that sits on the back of the head soaking in odorless mineral spirits because it was very clogged. Probably pull it out tonight and give it a rinse. Need to go buy exhaust studs. (Can't believe I forgot about those). Then start unbolting the other motor in the 4Runner I have a spare set of motor mounts that I'm going to use.
But my question is do I paint the valve cover, intake and plenum. I have heard it traps heat in the valve cover and that's not good. But so many people do it so what do you think.
On with the pics
Link- https://www.yotatech.com/forums/f198/thefishguy77s-car-seat-crawler-289277/
Ok so pretty much have a long block now. Timing chain, cover, oil, water pump on. Need to pull my other oil pan as its been recently cleaned. Dropped the valve cover on and mocked up the distributor for pics. I have that plat that sits on the back of the head soaking in odorless mineral spirits because it was very clogged. Probably pull it out tonight and give it a rinse. Need to go buy exhaust studs. (Can't believe I forgot about those). Then start unbolting the other motor in the 4Runner I have a spare set of motor mounts that I'm going to use.
But my question is do I paint the valve cover, intake and plenum. I have heard it traps heat in the valve cover and that's not good. But so many people do it so what do you think.
On with the pics


Link- https://www.yotatech.com/forums/f198/thefishguy77s-car-seat-crawler-289277/
Ok so pretty much have a long block now. Timing chain, cover, oil, water pump on. Need to pull my other oil pan as its been recently cleaned. Dropped the valve cover on and mocked up the distributor for pics. I have that plat that sits on the back of the head soaking in odorless mineral spirits because it was very clogged. Probably pull it out tonight and give it a rinse. Need to go buy exhaust studs. (Can't believe I forgot about those). Then start unbolting the other motor in the 4Runner I have a spare set of motor mounts that I'm going to use.
But my question is do I paint the valve cover, intake and plenum. I have heard it traps heat in the valve cover and that's not good. But so many people do it so what do you think.
On with the pics
05-10-2016, 12:34 PM
#5
Intake stud question
Ok so how important is it to have the studs (in to the head) for the intake manifold. I have enough extra intake bolts that I can put it together with out the studs. But I am delayed if I have to wait for the studs.
Trending Topics
05-10-2016, 02:40 PM
#8
Got the valve cover and upper plenum painted today. Here's a preview
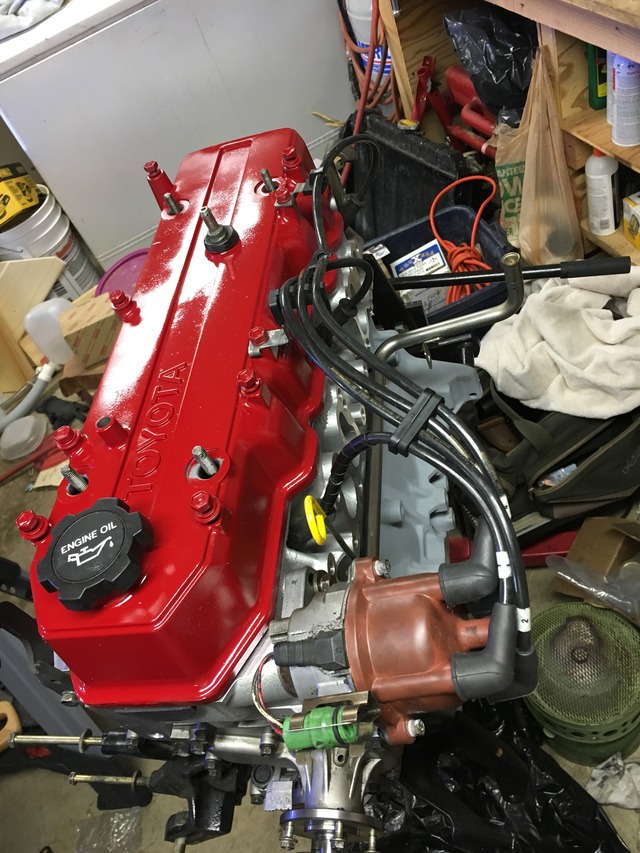
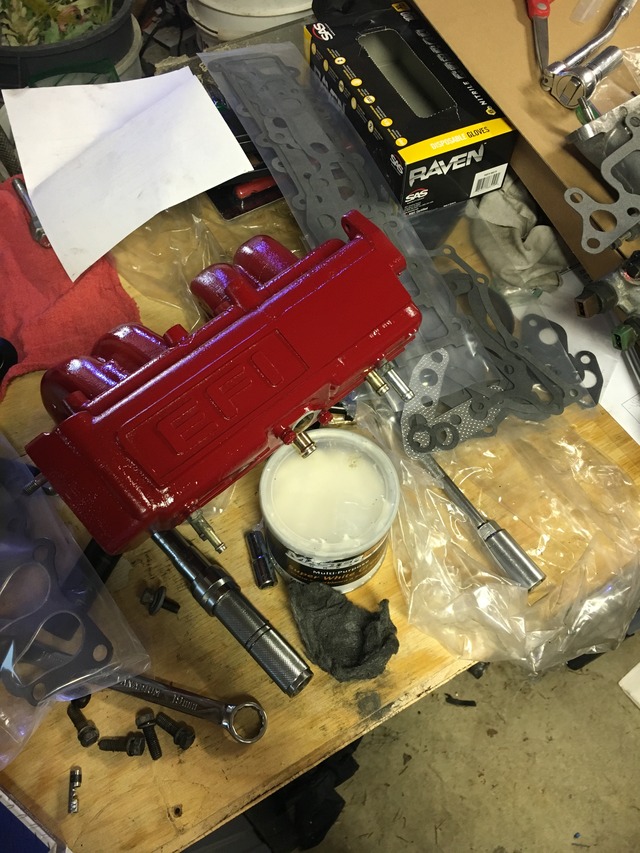
Still have to take some fine sandpaper and sand the paint off the Toyota on the valve cover and EFI on the plenum. Planning on leaving the lower intake bare I am pretty much out of carb cleaner and clean mineral spirits to clean the exterior of it. Also contrast is nice


Still have to take some fine sandpaper and sand the paint off the Toyota on the valve cover and EFI on the plenum. Planning on leaving the lower intake bare I am pretty much out of carb cleaner and clean mineral spirits to clean the exterior of it. Also contrast is nice
07-29-2016, 06:59 AM
#9
Registered User
Got it up and running yet? If so, how's it running?
I'm a few weeks into my own rebuild, still cleaning junk and gathering a few extra parts I forgot about (thinking that always happens). This is my first build so I'm looking for tips from people who've been there. I'm going for stock look and performance but is there anything you'd have done different if you could do it again?
I'm a few weeks into my own rebuild, still cleaning junk and gathering a few extra parts I forgot about (thinking that always happens). This is my first build so I'm looking for tips from people who've been there. I'm going for stock look and performance but is there anything you'd have done different if you could do it again?
07-31-2016, 06:40 AM
#10
No I haven't dropped it in yet. Finally squirreled away enough money to buy a engine hoist. The only local one for rent sucks. Should have the hoist this week. So here's hoping. I didn't think anyone was paying attention to this thread. 👍
07-31-2016, 10:17 AM
#11
Registered User
22re builds aren't as exciting as they used to be, I guess? My rebuild thread is also quiet.
Are you buying a harbor freight hoist? That's what I got for $160 with a good in-store sale + coupon. Everyone says you need a 2 ton, but my experience tells me the 1 ton probably would've worked fine. The 2 had a lot of room in front. Lifting it up and out would just require a shorter chain. The machinist lifted the bare block up like nothing, so it has to weigh less than 200lbs unless that guy was the Hulk in disguise.
Good luck, I'll check back once you got it running! 🚙
08-04-2016, 07:58 PM
#12
Registered User
Join Date: Nov 2008
Location: vancouver
Posts: 127
Likes: 0
Received 0 Likes
on
0 Posts
Exciting to me lol looking good!
I too am rebuilding my 22re only up to short block now (I'm slow) still haven't gotten around to putting the top end and timing cover on yet.
Got the same head/cam set up can't wait to get it going.
Glad I read this reminded me I need some exhaust studs too my originals are pretty rough to say the least. Would suck to do all this work and have it sound like crap due to exhaust leak right at the manifold.
Last edited by 4RunnerFreak12; 08-04-2016 at 08:20 PM. Reason: Found answer to ? Via link
08-05-2016, 09:20 AM
#13
Registered User
Exciting to me lol looking good!
I too am rebuilding my 22re only up to short block now (I'm slow) still haven't gotten around to putting the top end and timing cover on yet.
Got the same head/cam set up can't wait to get it going.
Glad I read this reminded me I need some exhaust studs too my originals are pretty rough to say the least. Would suck to do all this work and have it sound like crap due to exhaust leak right at the manifold.
I too am rebuilding my 22re only up to short block now (I'm slow) still haven't gotten around to putting the top end and timing cover on yet.
Got the same head/cam set up can't wait to get it going.
Glad I read this reminded me I need some exhaust studs too my originals are pretty rough to say the least. Would suck to do all this work and have it sound like crap due to exhaust leak right at the manifold.
Sorry for the slight thread highjack, fishguy.
08-18-2016, 06:32 PM
#14
Registered User
Progress update? At least got the hoist yet?
I had to bring my block back to the machine shop for a small mistake they made, but all's good now and they didn't charge me a dime. I should have it back together in the next few days.
I had to bring my block back to the machine shop for a small mistake they made, but all's good now and they didn't charge me a dime. I should have it back together in the next few days.
08-19-2016, 11:47 PM
#15
Update
Got the hoist. Only got the 1 ton harbor freight. Lifted the long block just fine in to the 4Runner today. Got her matted up to the tranny and motor mounts bolted down. Since I am in the process of moving my sister inlaw is helping us pack. We she may or may not have helped tidy up the garage. My bell housing bolts are now in a box with other random 22re bolts form previous motors and parts trucks 😡😡😡
The new place has an ACE hardware that has a great nut and bolt selection so since I am down there this weekend I will grab a lot of M12 1.25 bolts. 6x2.5", 6x3", 6x3.50, 6x4". This should give me enough options for the bell housing that I can get it bolted in. The the wiring harnes is next. I took pictures I think😶😶😶
09-04-2016, 07:38 AM
#16


SO got the motor all bolted in fluids full went to start it and nothing. Can't get the starter to engage. Threw another Toyota starter I had and still nothing. Guess I am going to do the big wire upgrades. I hate electrical issues.
09-04-2016, 03:13 PM
#17
Registered User

I just turned the key on my rebuild yesterday and it fired right up after I realized a stupid mistake, but now I have an irritating buzzing noise over the sound of a strong new engine.
09-24-2016, 10:36 AM
#20
Registered User
It most likely is. Last winter corrosion killed my 4runner, the subaru and the utility trailer lights. All failed the same month!
I think my engine has 5 grounds for engine-starting/running purposes. Batt neg to fender, block to fender, head to firewall, harness to intake and alternator harness to p/s bracket. This write-up is also really good and some are in different locations than mine.
https://www.yotatech.com/forums/f116/22re-ground-wire-locations-guide-194413/


