
Strykersd's first gen 4runner build
 12-25-2009, 04:31 PM
#1
Strykersd's first gen 4runner build
After just updating my "Check out my Truck" thread for the last few years I figured I'd start a build thread so that I can get input on my build. Here's my progress so far https://www.yotatech.com/forums/f77/...runner-120056/
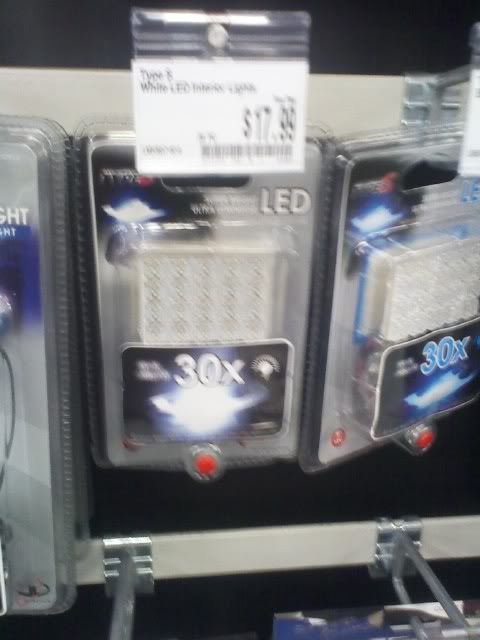
After seeing Scuba's post on Ultimateyota.com. I decided to swap out the dome light in my 4runner. I've originally replaced the stock bulb with a 6 LED bulb I still wasn't happy with the light output. The 6 LED bulb put out a good amount of light, but the stock light cover robbed it of a ton of light. I replaced the 6 LED bulb with this 30 LED bulb. I couldn't be happier, I can now see what's on the floor of my 4runner at night! Plus it 5% limo tint in the back I can also see the floor in the back of my 4runner during the day.
Here's the light I bought from Autozone
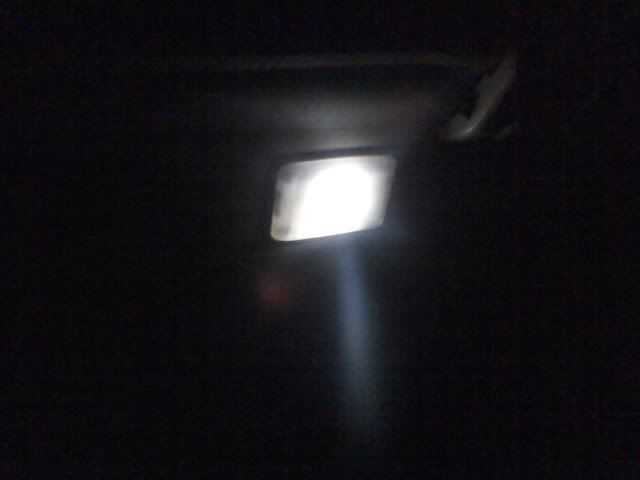
My old 6 LED bulb
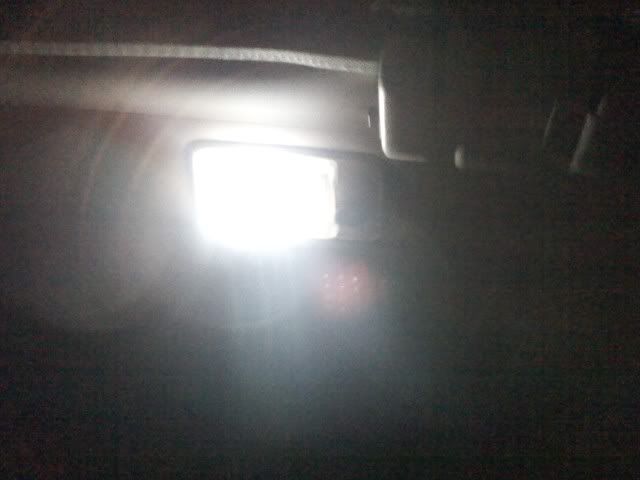
My new 30 LED bulb
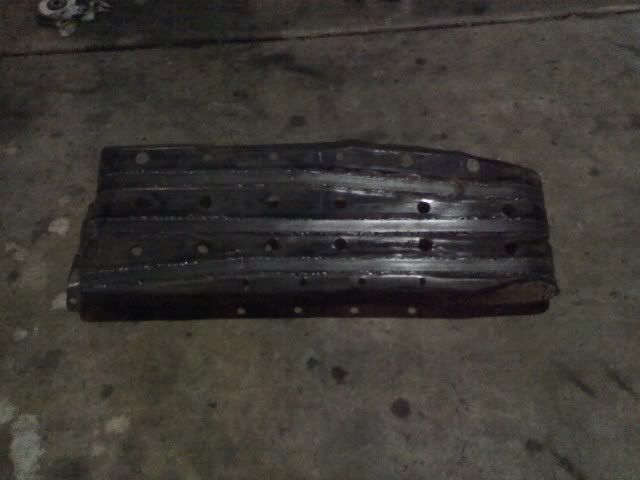
I just picked up a welder, a Hobart Handler 140 for Christmas. I wanted to get in some practice so I figured I'd hammer my gas tank skid straight and reinforce it similar to how Dirtco did ( https://www.yotatech.com/f191/dirtco...l#post51188367 ). So I just picked up some 1"X1/8" steel bar and welded strips into the grooves on my gas tank skid. Plus I reinforced the front of the skid where the stock skid was only spot welded in 5 places, one of the spot welds on my skid was already ripped off. Here's a pic of the finished product
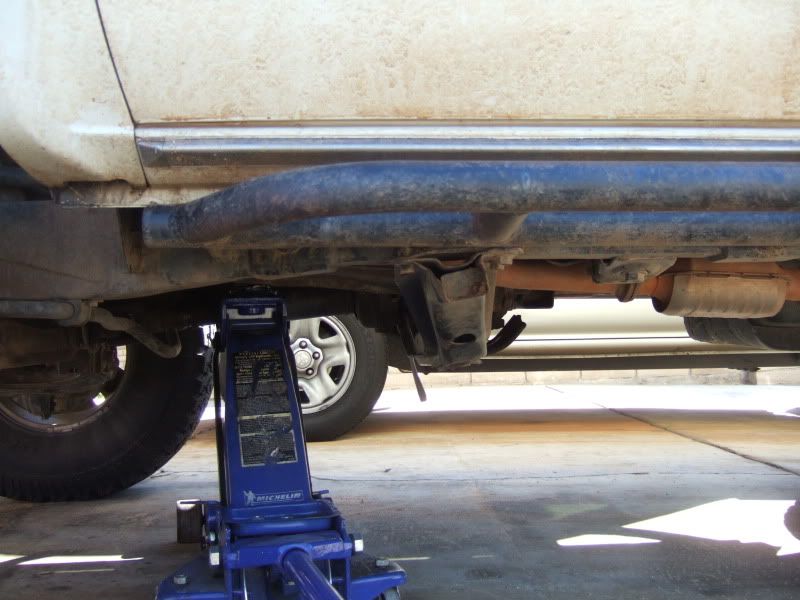
Next up I installed a Budbuilt single transfer case skid. I keep bending these stock transfer case skids backward, in turn trashing my motor mounts. Plus Budbuilt is having a Christmas sale so I decided to bite the bullet and buy myself a skid. Here's a pic of the stock bent skid which was a rock magnet
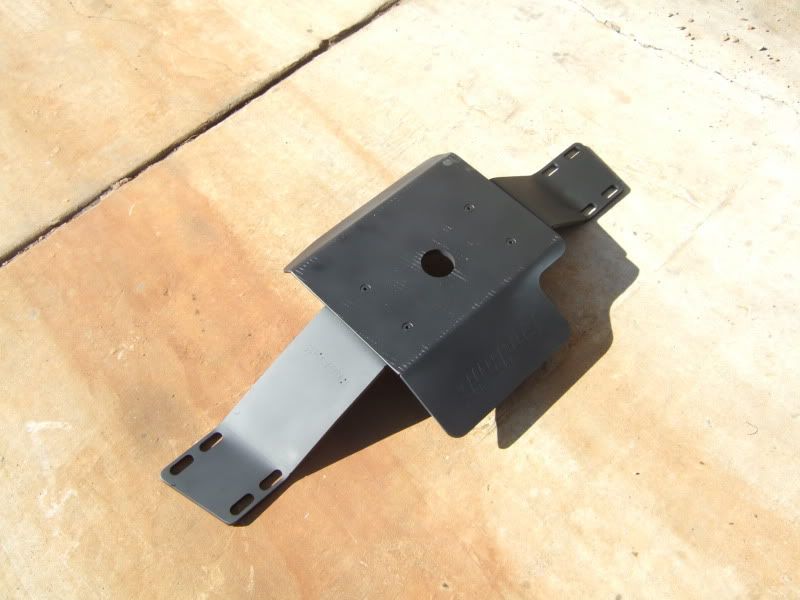
Here's a picture of Budbuilt skid primered and painted
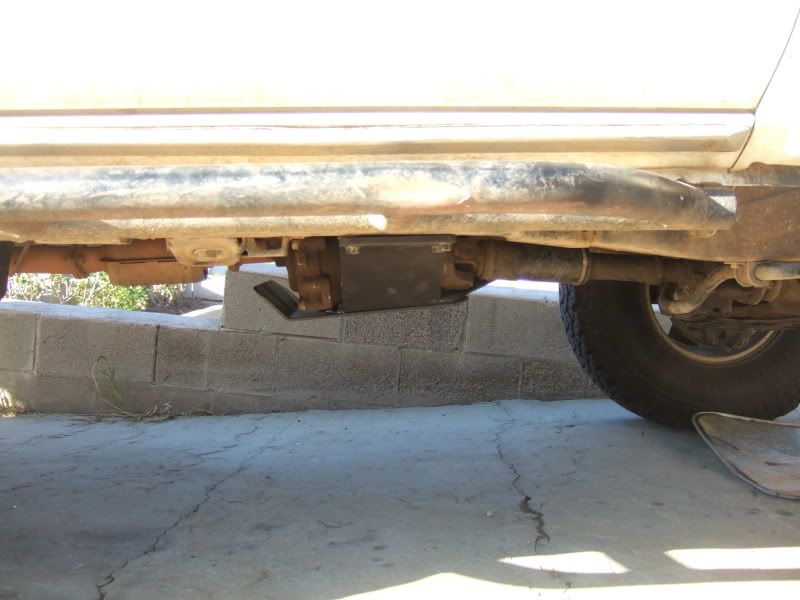
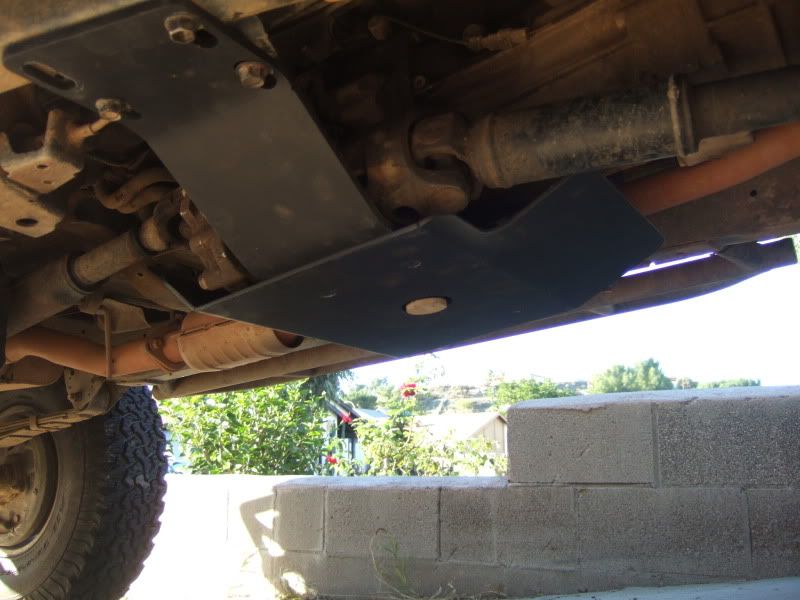
Here's the skid installed. This thing is beefy!
To install the skid I had to drain the transfer case fluid and replace the drain plug with a low profile drain plug. This is what I found when I drained the fluid.
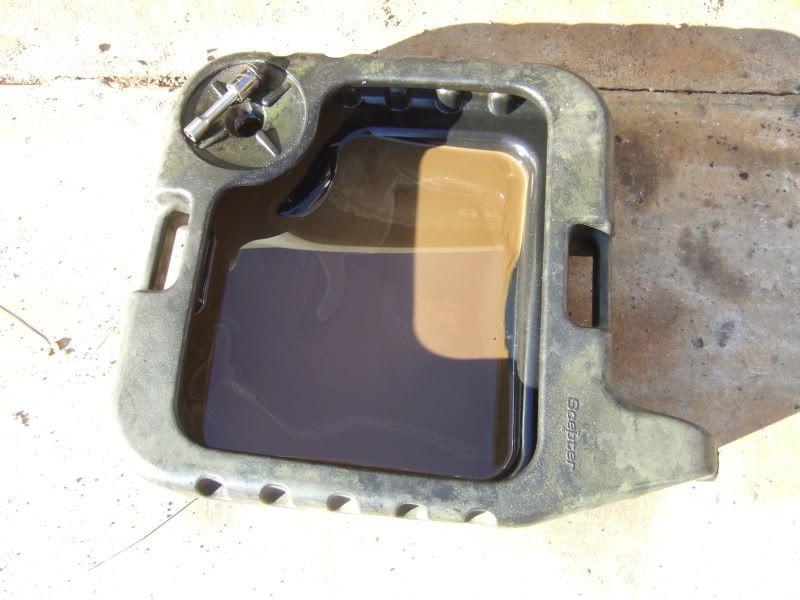
Any idea why my gear oil looks like chocolate milk? I replaced the old gear oil with synthetic gear oil about 10,000 miles and 1.5 years ago. Any idea why it's this color? Could it be the dirt getting in the oil? Maybe cleaning out out the old gear oil?
After seeing Scuba's post on Ultimateyota.com. I decided to swap out the dome light in my 4runner. I've originally replaced the stock bulb with a 6 LED bulb I still wasn't happy with the light output. The 6 LED bulb put out a good amount of light, but the stock light cover robbed it of a ton of light. I replaced the 6 LED bulb with this 30 LED bulb. I couldn't be happier, I can now see what's on the floor of my 4runner at night! Plus it 5% limo tint in the back I can also see the floor in the back of my 4runner during the day.
Here's the light I bought from Autozone
My old 6 LED bulb
My new 30 LED bulb
I just picked up a welder, a Hobart Handler 140 for Christmas. I wanted to get in some practice so I figured I'd hammer my gas tank skid straight and reinforce it similar to how Dirtco did ( https://www.yotatech.com/f191/dirtco...l#post51188367 ). So I just picked up some 1"X1/8" steel bar and welded strips into the grooves on my gas tank skid. Plus I reinforced the front of the skid where the stock skid was only spot welded in 5 places, one of the spot welds on my skid was already ripped off. Here's a pic of the finished product
Next up I installed a Budbuilt single transfer case skid. I keep bending these stock transfer case skids backward, in turn trashing my motor mounts. Plus Budbuilt is having a Christmas sale so I decided to bite the bullet and buy myself a skid. Here's a pic of the stock bent skid which was a rock magnet
Here's a picture of Budbuilt skid primered and painted
Here's the skid installed. This thing is beefy!
To install the skid I had to drain the transfer case fluid and replace the drain plug with a low profile drain plug. This is what I found when I drained the fluid.
Any idea why my gear oil looks like chocolate milk? I replaced the old gear oil with synthetic gear oil about 10,000 miles and 1.5 years ago. Any idea why it's this color? Could it be the dirt getting in the oil? Maybe cleaning out out the old gear oil?
Last edited by strykersd; 03-25-2010 at 02:03 AM.
 01-03-2010, 08:10 PM
#3
After seeing the transfer case fluid I decided to drain my transmission fluid to see if it too looked like a milkshake. Nope, it looked like normal gear oil. Looking back on the work I've done to the 4runner I remembered that I had a leaking rear seal on my transfer case a few months back when I did the water crossing at Lower Coyote Canyon in Anza Borrego. It was deep enough to get through the rear main seal, but it didn't fully submerge my t-case and transmission.
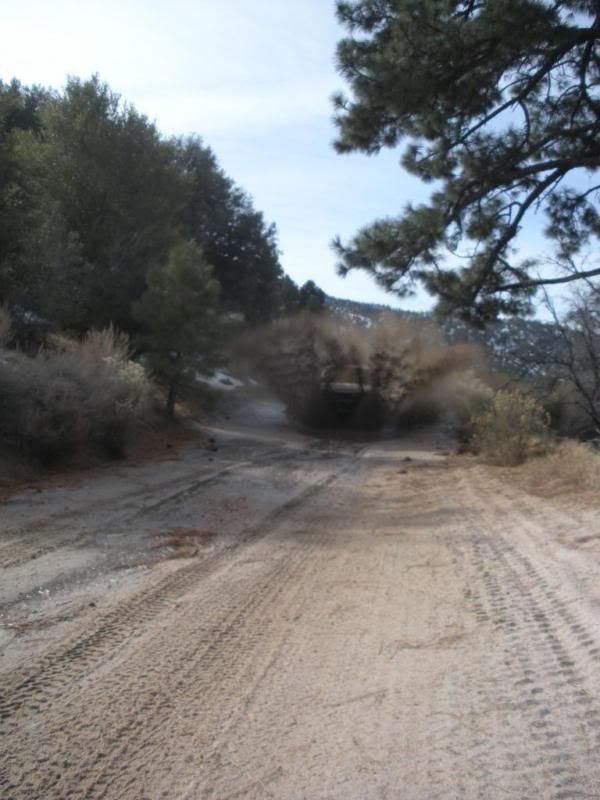
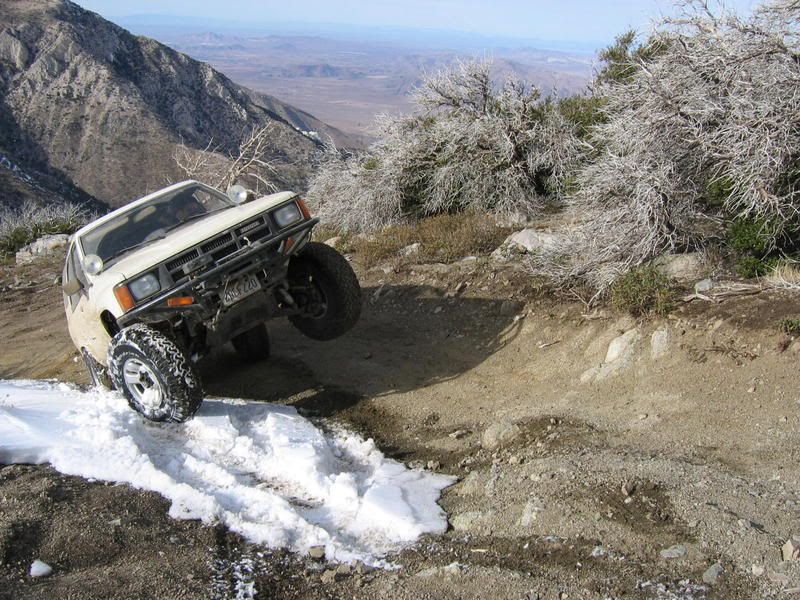
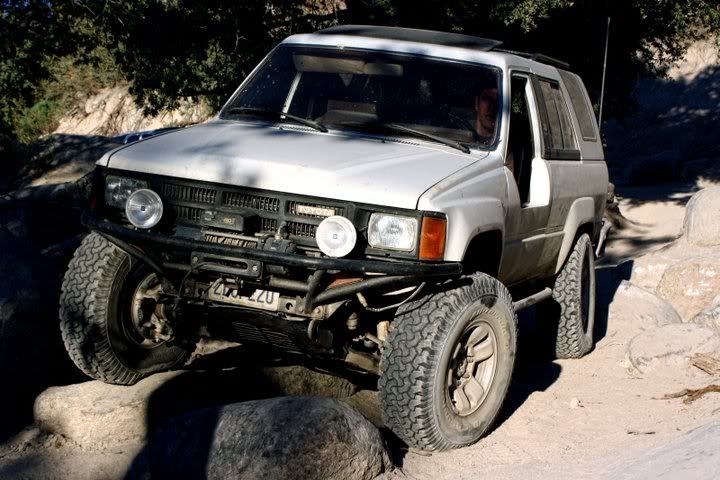
A few weeks back I joined the TTORA guys on a snow run up in Big Bear. Everything was going great until I snapped a CV. Luckily we weren't doing anything too technical, so I just finished the day in 3WD. The only problem with 3WD is that the truck kept jerking to one side on the snow/ice. Once I got back to my friend's cabin I tore the front end of the 4runner apart and swapped in my extra CV. Once again my local autozone let me swap out another snapped CV under it's lifetime warranty! I guess as long as I shop there enough they'll keep letting me trade these CVs in. Here's my two favorite pics from that day
Here's the link to the run report
http://ttora.com/forum/showthread.php?t=147485
The next day after swapping in the CVs I decided to run Gold Mountain. That went off without a hitch, then I decided to head over to John Bull and check out the changes that have been made to the gatekeeper. I never made it to the gatekeeper... my power steering gearbox stripped out on the way out there. Luckily after hours in the snow and some help from friends we were able to get another PS gearbox up to Big Bear and swapped in. We're thinking it's because my PS reservoir had a mix of PS fluid and ATF. On the bright side this newer style PS box has a tighter gear ratio then my stock one. Moral of the story, DON'T WHEEL ALONE and make sure your PS system runs ATF! This thread explains it all... http://ttora.com/forum/showthread.php?t=147522
Last edited by strykersd; 03-25-2010 at 01:15 AM.
03-25-2010, 01:13 AM
#4
The 4runner has gone through a ton of changes over the last few months...
For as long as I've owned my 4runner the power antenna hasn't worked. It goes down, but refused to go up. Turns out my antenna mast was broken, so I went to Antenna Masts R Us and picked up a new OEM mast for $40.
I replaced the input shaft seal on my V6 power steering box only to find out that the input shaft bearing was toast. Although the V6 PS box has a tighter gear ratio, I opted to go back to a 4 cylinder PS box. The V6 box was a bit longer, causing extra wear and tear on the rubber bushing on my shift linkage and it is MUCH easier changing the input shaft bearing seal on the 4 cylinder PS boxes.
Next up on my list was relocating my Hella 500s from my upper hood onto my front bumper. The lights on the upper hood caused my lights to shake off road and light to glare off my hood, which partially defeated the purpose of having auxiliary lights. The reason I mounted them up there was that I didn't have a welder, and now that I purchased a welder I wanted to move them to my front bumper, which brings me to my next project. I started test fitting my Hella 500s onto my front bumper only to realize that due to the width of my winch the Hellas would block a good amount of light from my headlights. So I removed my winch control box from off my Smittybilt XRC8 winch and relocated it above my winch cable. All it took was a little grinding and extending of some wires. In my opinion it looks much better, sort of like the competition series Smittybilt winches which also mount the control box above the winch line. Then I proceeded to mount my Hella 500s onto my front bumper. The real advantage of relocating the winch control box was that if I so choose I have enough room for 4 Hella 500s or possibly a larger light.
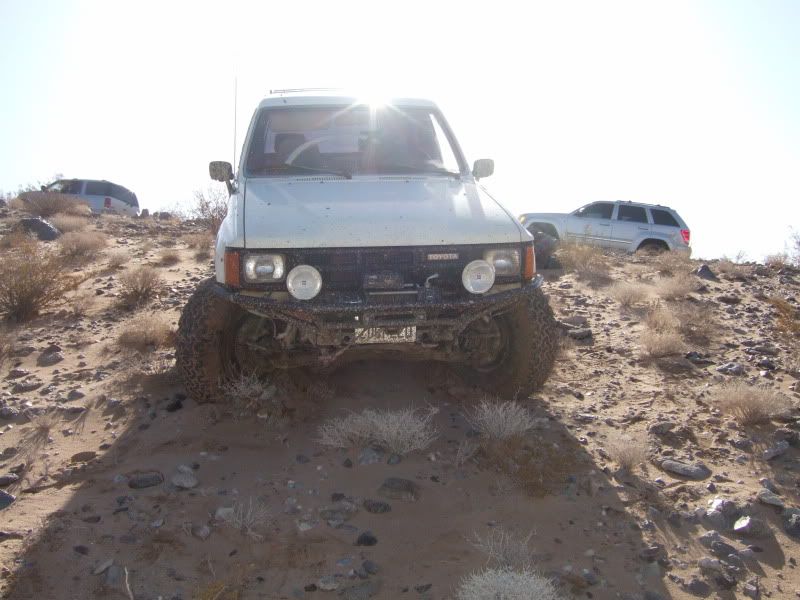
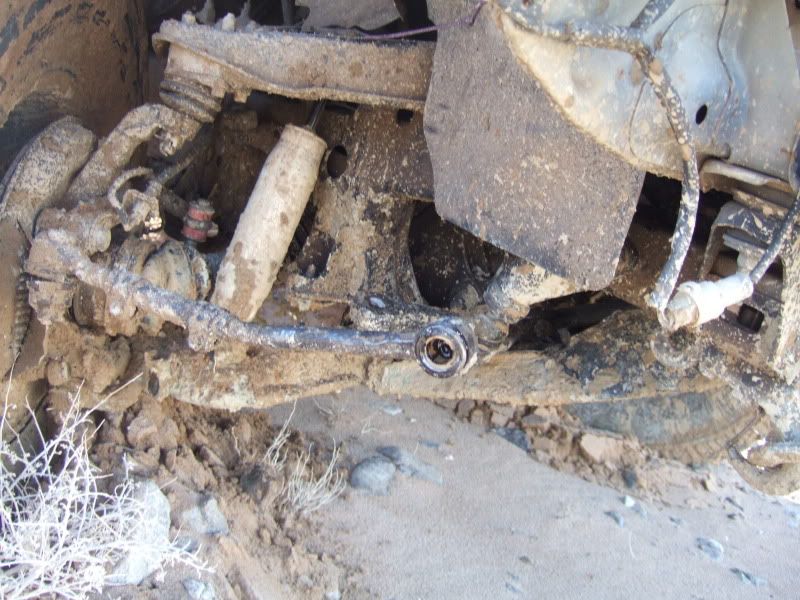
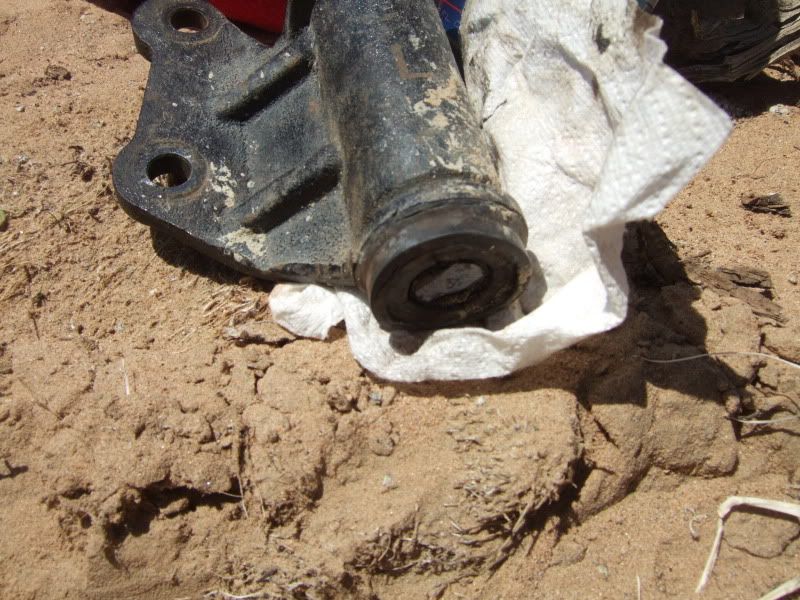
While up at The Hammers in Johnson Valley to watch King of the Hammers I somehow managed to break my passenger side inner tie rod and snap a idler arm. The ball joint on the inner tie rod popped out of it's socket. I believe the inner tie rod went first and then took out the idler arm. The part that stumped me was that I wasn't doing anything really technical when it broke. I would have understood it if one of my front tires was wedged and I tried to steer against it, but it happened while I was just prerunning in the dirt. Luckily there was a Autozone ~20 miles away that had them in stock so I was able to replace them and get back home.
When I lost steering, I hopped out of the driver seat and here's what I saw
When I got home I inspected the driver side inner tie rod and that was bent too. Here's a picture with the bent tie rods on the sides and the new straight tie rod in the center.
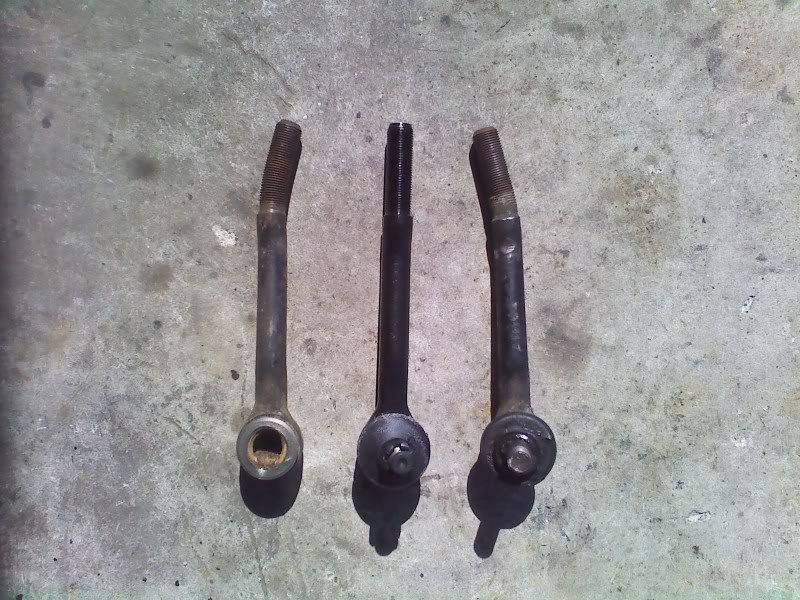
I'm wondering if this could have happened back when I ran low profile bump stops. My stock suspension isn't designed for that much up travel! Or possibly it was caused by my old bent steering center link, who knows.
Also while driving back from King of the Hammers one of my sealed beam headlights died on me. At first I contemplated just replacing it with another sealed beam unit for $10. After reading this thread I decided to upgrade to H4 housings. The pair set me back $50, but allowed me to run 55w low beam, 100w high beam bulbs. All the sealed beam lights I found were 55w low, 65w high.
Next up on my list of upgrades were my Hella 500 driving lights. For the $60 I paid for them, they weren't a bad light but I wanted more. So I ordered a H3 55w HID upgrade for them from DDM Tuning . While ordering them I discovered that DDM Tuning was also located in San Diego, a mile away from my work. So I stopped by before work one day and bought they're kit 55w H3 kit for $40 out the door! Turns out the HID bulb just barely fits into the Hella 500 housing. If the bulb was 1/4" longer it might be hitting the front lens. Here's a picture of the 55w HID bulb vs my old 100w halogen bulb. Although the HID bulb is much brighter this picture is deceiving in that the longer HID bulb gives you a wider beam of light.
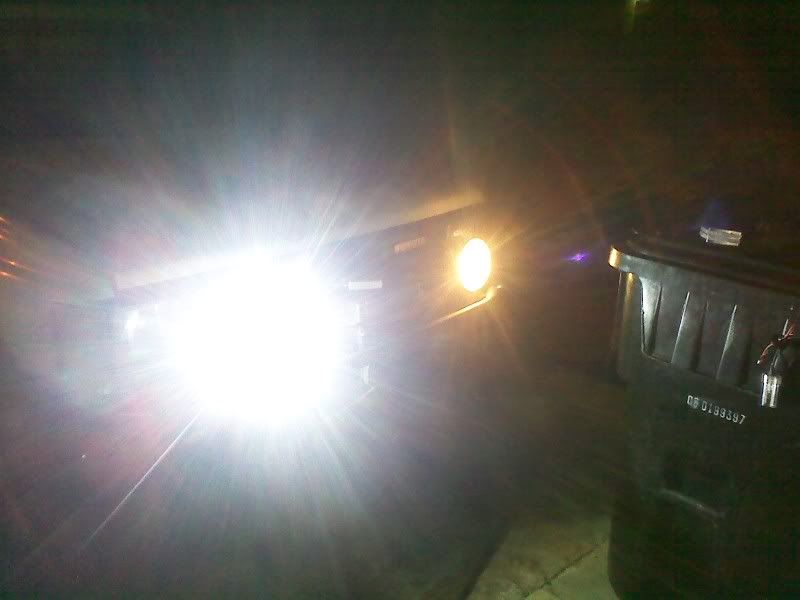
After testing all my new lights out in the desert, I discovered that I should have bought HIDs that more closely matched my headlights. The light color difference between the headlights and HIDs get a bit annoying and distracting. I purchased a 6000k (white) HID kit when I should have looked into possibly a 3000k (yellow) kit. I also had the option of getting white headlight bulbs, but in my experience that's from a blue coating on the lightbulb which also weakens the amount of light the bulb puts out.
Finally I also upgraded my brakes to V6 brakes out of a first or second generation 4runner with the 3.0L engine. This was a huge improvement over stock. I swapped over the thicker rotors, larger calipers, larger master cylinder and dual diaphragm brake booster. Luckily I was able to pick all of these parts up at my local junkyard for $120.
For as long as I've owned my 4runner the power antenna hasn't worked. It goes down, but refused to go up. Turns out my antenna mast was broken, so I went to Antenna Masts R Us and picked up a new OEM mast for $40.
I replaced the input shaft seal on my V6 power steering box only to find out that the input shaft bearing was toast. Although the V6 PS box has a tighter gear ratio, I opted to go back to a 4 cylinder PS box. The V6 box was a bit longer, causing extra wear and tear on the rubber bushing on my shift linkage and it is MUCH easier changing the input shaft bearing seal on the 4 cylinder PS boxes.
Next up on my list was relocating my Hella 500s from my upper hood onto my front bumper. The lights on the upper hood caused my lights to shake off road and light to glare off my hood, which partially defeated the purpose of having auxiliary lights. The reason I mounted them up there was that I didn't have a welder, and now that I purchased a welder I wanted to move them to my front bumper, which brings me to my next project. I started test fitting my Hella 500s onto my front bumper only to realize that due to the width of my winch the Hellas would block a good amount of light from my headlights. So I removed my winch control box from off my Smittybilt XRC8 winch and relocated it above my winch cable. All it took was a little grinding and extending of some wires. In my opinion it looks much better, sort of like the competition series Smittybilt winches which also mount the control box above the winch line. Then I proceeded to mount my Hella 500s onto my front bumper. The real advantage of relocating the winch control box was that if I so choose I have enough room for 4 Hella 500s or possibly a larger light.
While up at The Hammers in Johnson Valley to watch King of the Hammers I somehow managed to break my passenger side inner tie rod and snap a idler arm. The ball joint on the inner tie rod popped out of it's socket. I believe the inner tie rod went first and then took out the idler arm. The part that stumped me was that I wasn't doing anything really technical when it broke. I would have understood it if one of my front tires was wedged and I tried to steer against it, but it happened while I was just prerunning in the dirt. Luckily there was a Autozone ~20 miles away that had them in stock so I was able to replace them and get back home.
When I lost steering, I hopped out of the driver seat and here's what I saw
When I got home I inspected the driver side inner tie rod and that was bent too. Here's a picture with the bent tie rods on the sides and the new straight tie rod in the center.
I'm wondering if this could have happened back when I ran low profile bump stops. My stock suspension isn't designed for that much up travel! Or possibly it was caused by my old bent steering center link, who knows.
Also while driving back from King of the Hammers one of my sealed beam headlights died on me. At first I contemplated just replacing it with another sealed beam unit for $10. After reading this thread I decided to upgrade to H4 housings. The pair set me back $50, but allowed me to run 55w low beam, 100w high beam bulbs. All the sealed beam lights I found were 55w low, 65w high.
Next up on my list of upgrades were my Hella 500 driving lights. For the $60 I paid for them, they weren't a bad light but I wanted more. So I ordered a H3 55w HID upgrade for them from DDM Tuning . While ordering them I discovered that DDM Tuning was also located in San Diego, a mile away from my work. So I stopped by before work one day and bought they're kit 55w H3 kit for $40 out the door! Turns out the HID bulb just barely fits into the Hella 500 housing. If the bulb was 1/4" longer it might be hitting the front lens. Here's a picture of the 55w HID bulb vs my old 100w halogen bulb. Although the HID bulb is much brighter this picture is deceiving in that the longer HID bulb gives you a wider beam of light.
After testing all my new lights out in the desert, I discovered that I should have bought HIDs that more closely matched my headlights. The light color difference between the headlights and HIDs get a bit annoying and distracting. I purchased a 6000k (white) HID kit when I should have looked into possibly a 3000k (yellow) kit. I also had the option of getting white headlight bulbs, but in my experience that's from a blue coating on the lightbulb which also weakens the amount of light the bulb puts out.
Finally I also upgraded my brakes to V6 brakes out of a first or second generation 4runner with the 3.0L engine. This was a huge improvement over stock. I swapped over the thicker rotors, larger calipers, larger master cylinder and dual diaphragm brake booster. Luckily I was able to pick all of these parts up at my local junkyard for $120.
Last edited by strykersd; 10-11-2010 at 03:56 AM.
03-25-2010, 01:27 AM
#5
Registered User
Join Date: Mar 2008
Location: Temecula Valley, CA
Posts: 12,723
Likes: 0
Received 4 Likes
on
4 Posts
Interesting 411.
I do recommend going back to stock t-bars. Unless you have some really heavy front bumper / winch combo to carry, or are running high-speed desert type trails, there's no real need for uprated front bars. Soft bars can be compensated for, somewhat, by stiffer shocks.
I'm still digesting everything else in the thread, but you may want to look into long travel- even though it's touted primarily as high speed / desert type stuff, LT will give you a li'l bit more flex up front.
03-25-2010, 01:36 AM
#6
I'm definitely looking into long travel! I'm still between a SAS or LT, but I'm leaning towards long travel. I'm having too much fun with high speed desert trails in southern california! I just don't have the cash for a LT kit at the moment, so I'm trying to fine tune my IFS as-is right now without spending too much. By that I mean that I don't mind installing cheap stuff like bump stops, but I'm not looking to run a re-valve-able front shock with my stock IFS that'll need to be replaced when I go LT.
I'm hoping the stock t-bars with bump stops will work together as one progressive suspension but we'll see.
If I can fine tune the suspension enough, I think 8" of front travel and 12" of rear travel (with 63" chevys) should be good to hold me over until I can afford a front LT kit.
I'm hoping the stock t-bars with bump stops will work together as one progressive suspension but we'll see.
If I can fine tune the suspension enough, I think 8" of front travel and 12" of rear travel (with 63" chevys) should be good to hold me over until I can afford a front LT kit.
Last edited by strykersd; 03-25-2010 at 01:44 AM.
03-25-2010, 01:41 AM
#7
Registered User
Join Date: Mar 2008
Location: Temecula Valley, CA
Posts: 12,723
Likes: 0
Received 4 Likes
on
4 Posts
LT can be a hit. BJ spacers can accomodate some travel over stock
hint, cough, sniffle blazeland. cough, sniff.
honestly, when I get to go home, I'm going to be hitting up Blazeland for some talks about LT on my 88
hint, cough, sniffle blazeland. cough, sniff.
honestly, when I get to go home, I'm going to be hitting up Blazeland for some talks about LT on my 88
Trending Topics
03-25-2010, 01:51 AM
#8

Oh and for anyone looking for a HID kit for auxiliary lights check out DDM tuning. I just checked their site and it turns out they dropped the price of the HID kit I just bought. Now it's $25 for a 35w HID kit and $35 for a 55w HID kit.
 03-25-2010, 09:01 PM
#10
Registered User
Join Date: Jul 2008
Location: Chula Vista, Ca
Posts: 53
Likes: 0
Received 0 Likes
on
0 Posts
StrykerS, what local junk yard do you use to source parts? Let me know if you need a hand once you get your 63's, I've got the set up for mine but haven't got to installing it yet. Currently, I need an engine.
03-25-2010, 09:39 PM
#11
Dbl. E, you're the guy I met in the Lemon Grove Autozone, right? I use Ecology in Chula Vista for parts. They have a ton 2nd gen 4runners with 3.0Ls from the Cash for Clunkers program. About the Chevy's, I have yet to start collecting parts for the swap. I just got my proportioning valve today, the initial step of getting rid of my stock leaf springs. I'll let you know though.
03-25-2010, 10:24 PM
#12
Registered User
Join Date: Jul 2008
Location: Chula Vista, Ca
Posts: 53
Likes: 0
Received 0 Likes
on
0 Posts
We did meet in Lemon Grove. Thanks for the heads up on Ecology, it's not far from me but I have never stopped in. Might have to check them out to see what I need to waste some coin on. I see in your pic's you still have the front sway bar on, have you tried wheeling without it to? I yanked mine out and didn't notice much of a difference in street driving but blew my engine before I got to do anything off road.
Last edited by Dbl. E; 03-25-2010 at 10:28 PM.
03-26-2010, 12:41 AM
#13
Yeah definitely check out Ecology. The weekend of April 10-11 they are actually having a half off sale. You could do a V6 brake upgrade for $50!
I removed my swaybar back when I had stock torsion bars. While driving up 8 East to Corral Canyon the body roll in the curves scared the hell out of me. I re-installed my swaybar the next day with polyurethane bushings. It's just nice peace of mind for if I ever have to swerve to avoid something at highway speeds. Keep in mind that I still run a swaybar when the only driving my 4runner sees is to and from trails, I can't imagine daily driving it without one. Plus I enjoy prerunning in the desert so I actually enjoy the added stability.
Whenever I'm doing a technical trail I'll just pull one of the end links while airing down.
08-24-2010, 07:36 PM
#14
Alright I figured it's time I give you all an update on what I've been up to the last few months. I haven't done a ton of work to the 4runner since I've been focused on turboing my daily driver Honda Civic.
First off, I've finally done away with my load sensing proportioning valve. I decided to bite the bullet since I've been having issues with air in my brake lines and also that I've wanted to fit a larger spare tire under my 4runner and the LSPV was in the way. I used a universal brake proportioning valve from summit racing ( http://www.summitracing.com/parts/SUM-G3905/ ).

Next up, I made a set of half doors. I got sick of getting into a sticky situation and having to take my seatbelt off to stick my head out on an obstacle, only to get back in and have my seat belt locked and have to go through a obstacle without a seatbelt. Some people might ask why go through all the effort to make half doors when I can just remove my doors, but after reading about this thread I decided to never wheel without doors.
Building them wasn't too bad, just time consuming. I built them on the cheap so I used supplies from around the house. The extra metal is from an old water cooler, the cup holders are made from free scrap steel I was given from my local exhaust shop (the best exhaust shop in San Diego, Ed Hanson's Muffler Service in Spring Valley) and finally I used an old throttle cable for the door handle. Total cost, with bondo, supplies and paint was $90 for both doors
Here's a pic of the finished product
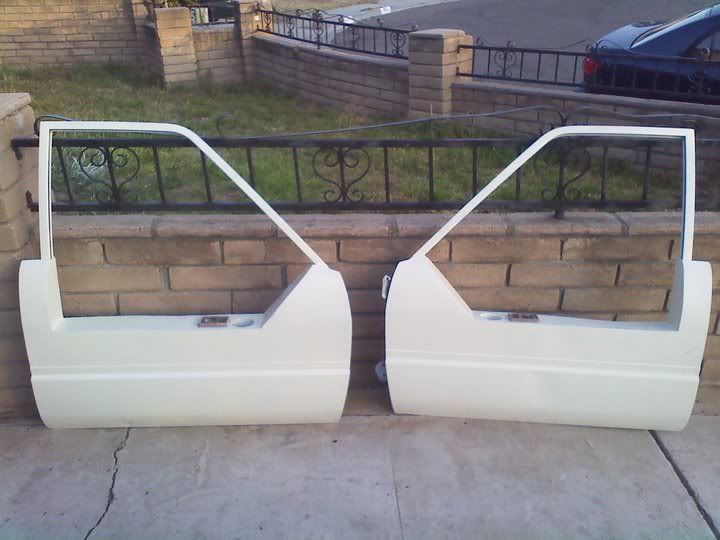
Intersting tidbit, I designed the cup holders to be the perfect size to fit a koozies
Although I've been driving around with them for a while, they still need work before I consider them done...
-either buy another set of side view mirrors or adapt the doors so I can switch my side view mirrors over from my stock doors
-make some windows! After driving back from Big Bear at 1AM in the morning, I realized how much I need them! I'm debating how to attach them. It seems like most people use snap on buttons, but I'm considering using velcro the whole way around the window to make a wind tight seal.
-buy some quick release hinges! It's a pain having to bolt them up
-get some thin particle board and carpet to cover the inside. I'm planning on adding a cargo pocket to store stuff inside the door
-possibly adding a padded armrest
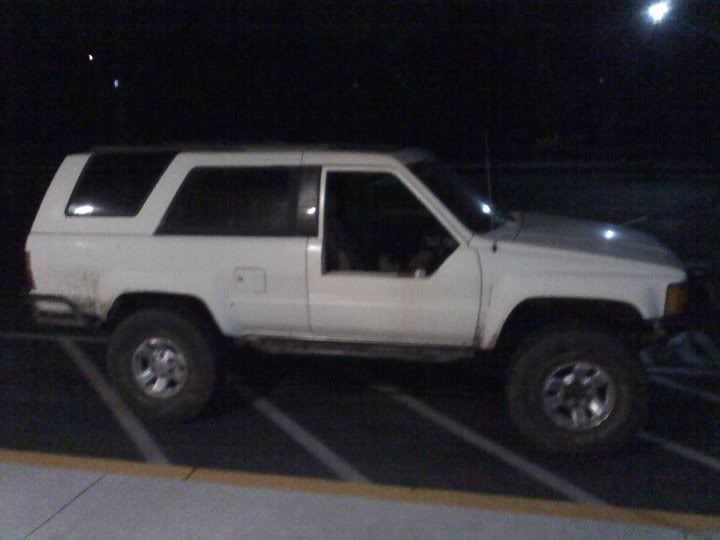
I haven't been wheeling too much the last few months but I have gotten out once or twice. Both times without a hitch. The first being an easy run out at Corral Canyon here in San Diego. The second being up in Big Bear with a group from ultimateyota.com . I ran Gold Mountain, White Mountain and Dishpan Spring (down it twice and up it once). Here's a link to the trip report http://www.ultimateyota.com/index.ph...6&topic=9180.0 . Here's my favorite pic from the trip
First off, I've finally done away with my load sensing proportioning valve. I decided to bite the bullet since I've been having issues with air in my brake lines and also that I've wanted to fit a larger spare tire under my 4runner and the LSPV was in the way. I used a universal brake proportioning valve from summit racing ( http://www.summitracing.com/parts/SUM-G3905/ ).
Next up, I made a set of half doors. I got sick of getting into a sticky situation and having to take my seatbelt off to stick my head out on an obstacle, only to get back in and have my seat belt locked and have to go through a obstacle without a seatbelt. Some people might ask why go through all the effort to make half doors when I can just remove my doors, but after reading about this thread I decided to never wheel without doors.
Building them wasn't too bad, just time consuming. I built them on the cheap so I used supplies from around the house. The extra metal is from an old water cooler, the cup holders are made from free scrap steel I was given from my local exhaust shop (the best exhaust shop in San Diego, Ed Hanson's Muffler Service in Spring Valley) and finally I used an old throttle cable for the door handle. Total cost, with bondo, supplies and paint was $90 for both doors
Here's a pic of the finished product
Intersting tidbit, I designed the cup holders to be the perfect size to fit a koozies
Although I've been driving around with them for a while, they still need work before I consider them done...
-either buy another set of side view mirrors or adapt the doors so I can switch my side view mirrors over from my stock doors
-make some windows! After driving back from Big Bear at 1AM in the morning, I realized how much I need them! I'm debating how to attach them. It seems like most people use snap on buttons, but I'm considering using velcro the whole way around the window to make a wind tight seal.
-buy some quick release hinges! It's a pain having to bolt them up
-get some thin particle board and carpet to cover the inside. I'm planning on adding a cargo pocket to store stuff inside the door
-possibly adding a padded armrest
I haven't been wheeling too much the last few months but I have gotten out once or twice. Both times without a hitch. The first being an easy run out at Corral Canyon here in San Diego. The second being up in Big Bear with a group from ultimateyota.com . I ran Gold Mountain, White Mountain and Dishpan Spring (down it twice and up it once). Here's a link to the trip report http://www.ultimateyota.com/index.ph...6&topic=9180.0 . Here's my favorite pic from the trip
Last edited by strykersd; 10-09-2010 at 03:17 AM.
08-30-2010, 08:00 PM
#15
Ok, so today I pulled my thermostat and tested it in on my stove. Turns out my thermostat has been stuck close for about a year. I guess the little hole that comes stock in the thermostat saved me for everything besides rock crawling on a hot day with the AC on and on steep grades. Gotta love the 22re, it took it like a champ without damaging anything! It was an easy one hour, $10 fix.
I also just pulled and sold my Downey 26mm torsion bars today. I'm re-installing my stock torsion bars and replacing one of the two pairs of compession bump stops up front with longer/softer bump stops ( http://www.summitracing.com/parts/ENS-9-9101G/ ). Since one pair of the stock front bump stops is ~3/8" higher then the other, I'll keep the stock bump stop that hits the A-arm last in place and just replace the lower hanging bump stop with this new one. Since these bump stops are 2.125" tall and the stock bump stops are 1.5" tall, these aftermarket bump stops will engage the arm 1/4" before my stock bump stops. Hopefully the duo of the stock sway bar and aftermarket bump stops will make bottoming out more progressive and give me a little extra flex on the trail.
I also just pulled and sold my Downey 26mm torsion bars today. I'm re-installing my stock torsion bars and replacing one of the two pairs of compession bump stops up front with longer/softer bump stops ( http://www.summitracing.com/parts/ENS-9-9101G/ ). Since one pair of the stock front bump stops is ~3/8" higher then the other, I'll keep the stock bump stop that hits the A-arm last in place and just replace the lower hanging bump stop with this new one. Since these bump stops are 2.125" tall and the stock bump stops are 1.5" tall, these aftermarket bump stops will engage the arm 1/4" before my stock bump stops. Hopefully the duo of the stock sway bar and aftermarket bump stops will make bottoming out more progressive and give me a little extra flex on the trail.
Last edited by strykersd; 10-12-2010 at 11:29 PM.
08-30-2010, 09:11 PM
#16
Registered User
Can a mod please move this to the build-up section?
The 4runner has gone through a ton of changes over the last few months...
For as long as I've owned my 4runner the power antenna hasn't worked. It goes down, but refused to go up. Turns out my antenna mast was broken, so I went to Antenna Masts R Us and picked up a new OEM mast for $40.
I replaced the input shaft seal on my V6 power steering box only to find out that the input shaft bearing was toast. Although the V6 PS box has a tighter gear ratio, I opted to go back to a 4 cylinder PS box. The V6 box was a bit longer, causing extra wear and tear on the rubber bushing on my shift linkage and it is MUCH easier changing the input shaft bearing seal on the 4 cylinder PS boxes.
Next up on my list was relocating my Hella 500s from my upper hood onto my front bumper. The lights on the upper hood caused my lights to shake off road and light to glare off my hood, which partially defeated the purpose of having auxiliary lights. The reason I mounted them up there was that I didn't have a welder, and now that I purchased a welder I wanted to move them to my front bumper, which brings me to my next project. I started test fitting my Hella 500s onto my front bumper only to realize that due to the width of my winch the Hellas would block a good amount of light from my headlights. So I removed my winch control box from off my Smittybilt XRC8 winch and relocated it above my winch cable. All it took was a little grinding and extending of some wires. In my opinion it looks much better, sort of like the competition series Smittybilt winches which also mount the control box above the winch line. Then I proceeded to mount my Hella 500s onto my front bumper. The real advantage of relocating the winch control box was that if I so choose I have enough room for 4 Hella 500s or possibly a larger light.
While up at The Hammers in Johnson Valley to watch King of the Hammers I somehow managed to break my passenger side inner tie rod and snap a idler arm. The ball joint on the inner tie rod popped out of it's socket. I believe the inner tie rod went first and then took out the idler arm. The part that stumped me was that I wasn't doing anything really technical when it broke. I would have understood it if one of my front tires was wedged and I tried to steer against it, but it happened while I was just prerunning in the dirt. Luckily there was a Autozone ~20 miles away that had them in stock so I was able to replace them and get back home.
When I lost steering, I hopped out of the driver seat and here's what I saw

Nice half doors buddy!
 09-06-2010, 12:06 AM
#18
I haven't made windows yet, I'll get around to it sooner or later. It's not a issue though because I can park my 4runner in my garage and I still have my stock doors too.


