Silla All Aluminum 3vz radiator into 22r Truck
 03-24-2012, 09:02 AM
#1
Registered User
Thread Starter
Silla All Aluminum 3vz radiator into 22r Truck
Bought online on eBay through "Radiator Classics". $94.83 shipped but it's only a 2-row rad. Might be fine though.
Bought on a Wed evening at ~5:30pm EST. Received it midday on Friday. It shipped from Maryland. Thought it was coming from Cali.

This was not listed as a Silla, but after doing some research I found out they were. As you can see it's a 7286AA Part# made in China.
Trying for Google for this part number didn't come up with much.
And most of the Sillas I have seen outside of ebay were plastic tanks.


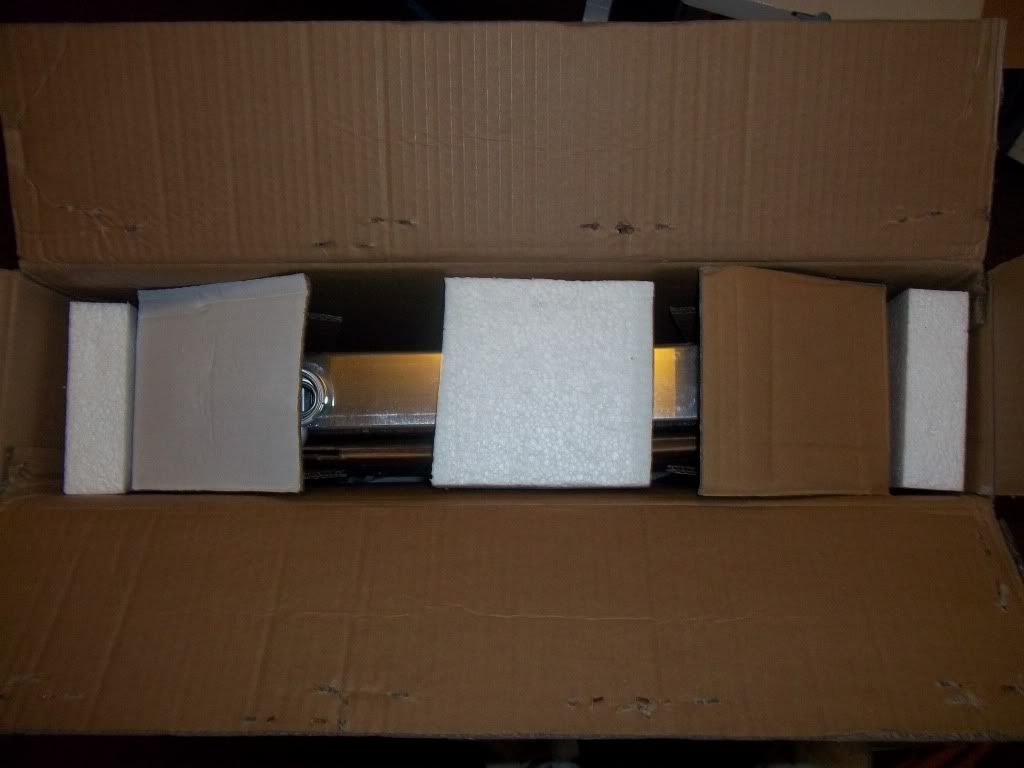
Packaged rather well. Must have been opened and inspected prior to shipping based on the newspaper that was in it.
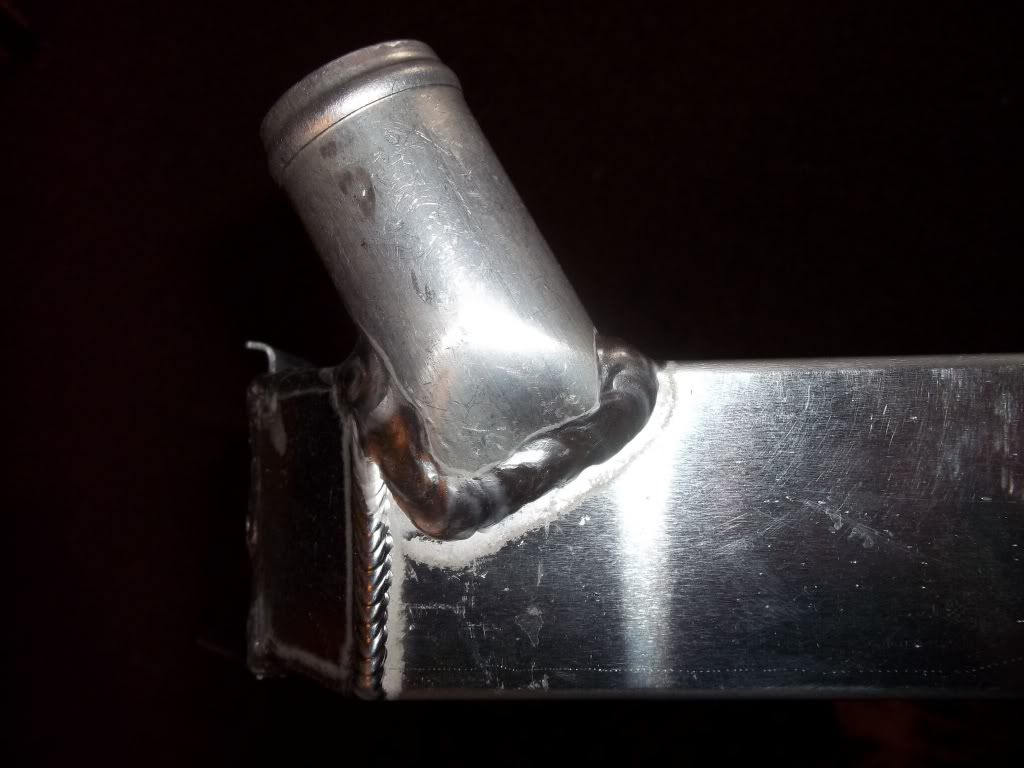
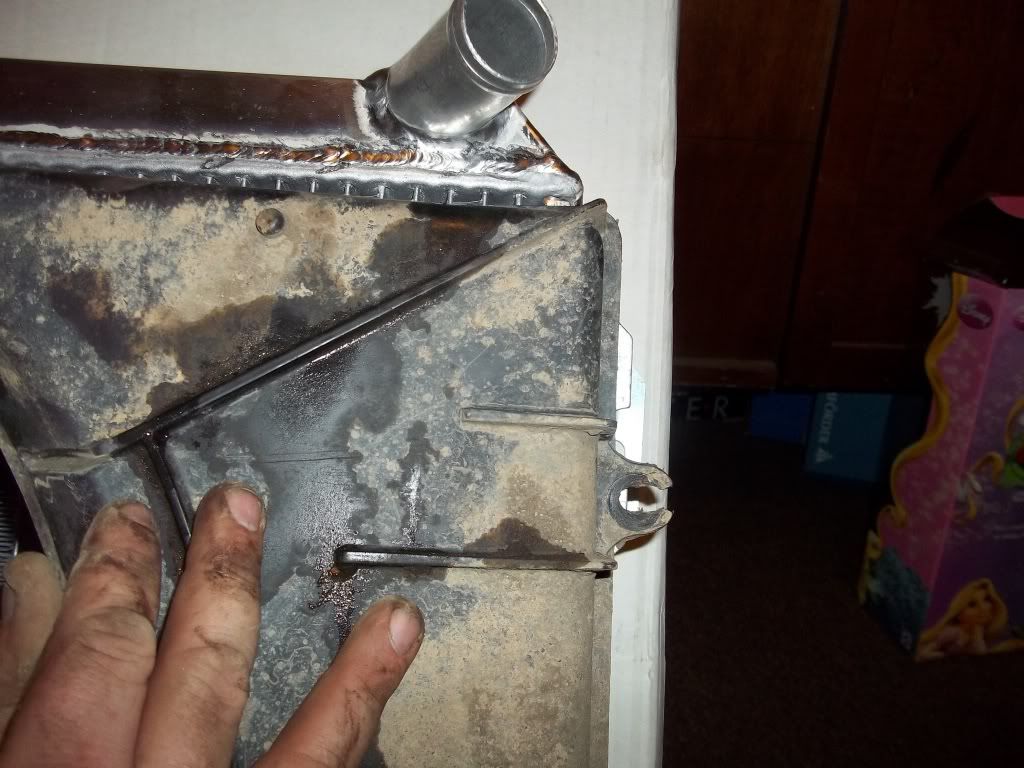
Welds to me look like they can be better, but for the price as long as it holds up, I don't care.


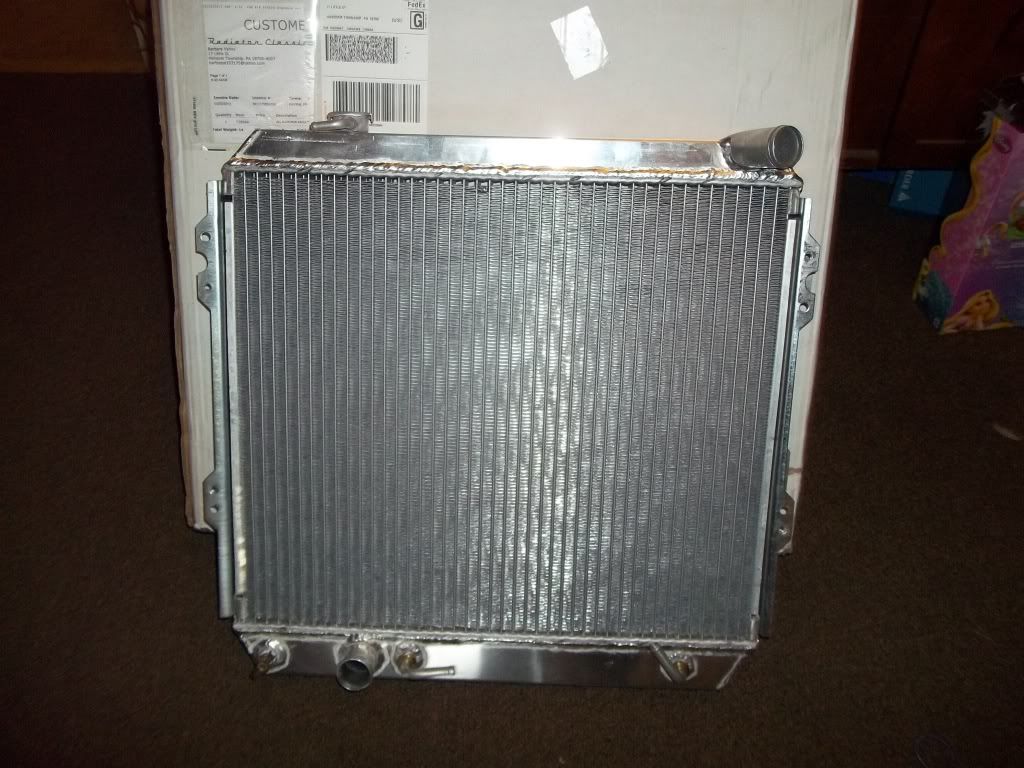
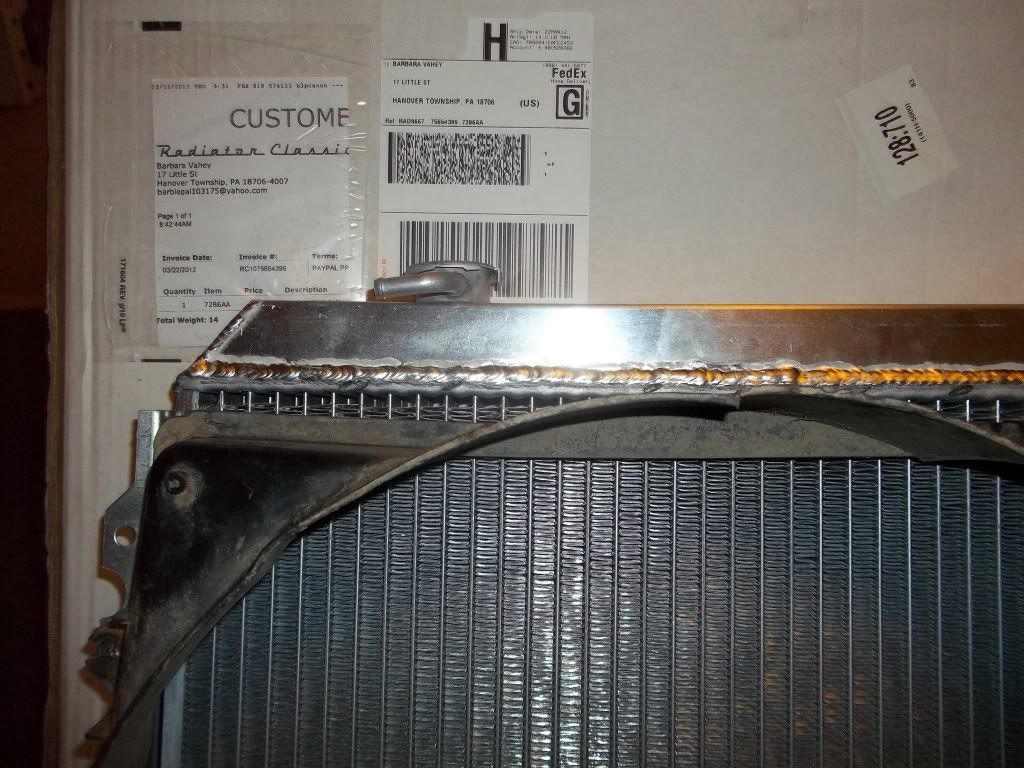
Some of the reviews on eBay reported these shipped as 1 large core and not a 2-core as advertised.
As you can clearly see, this is definitely a 2-row radiator.

Front and Back side shots.

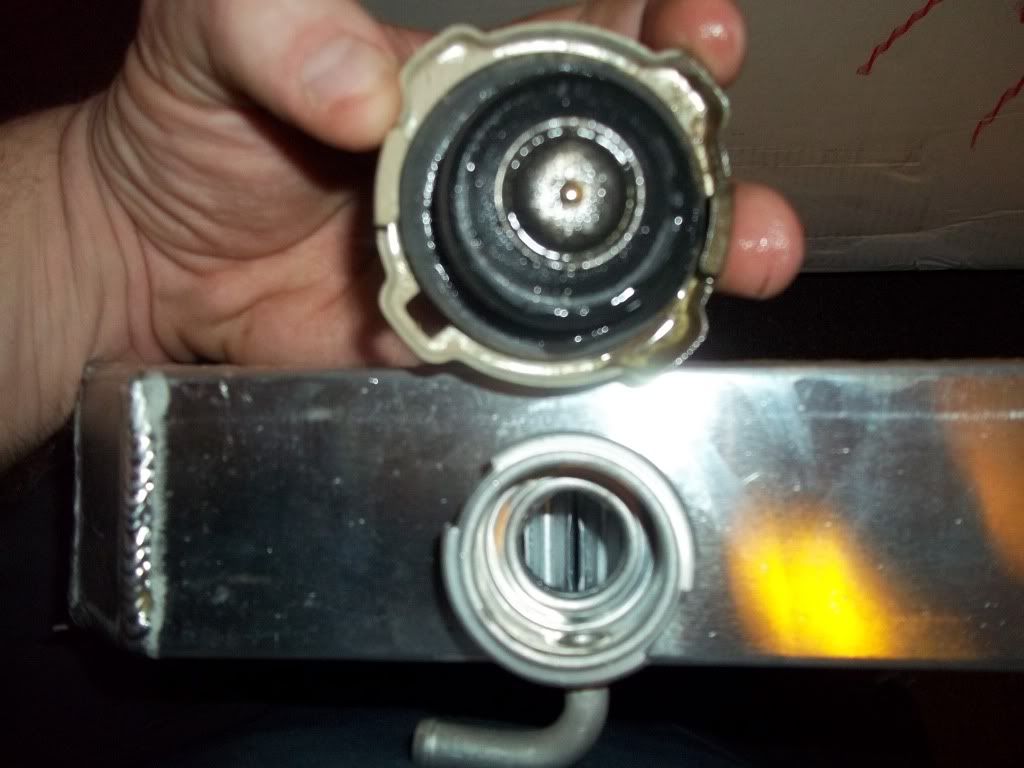
My old large cap isn't going to work with this.
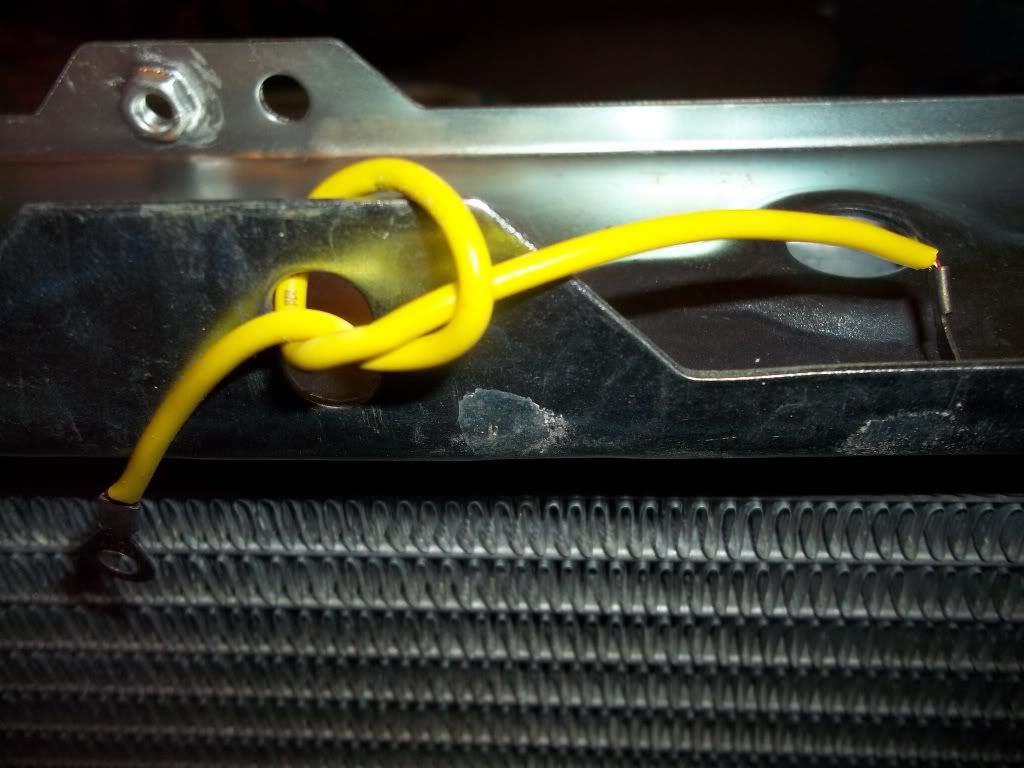
Not quite sure what the wire was for, but I didn't need it.
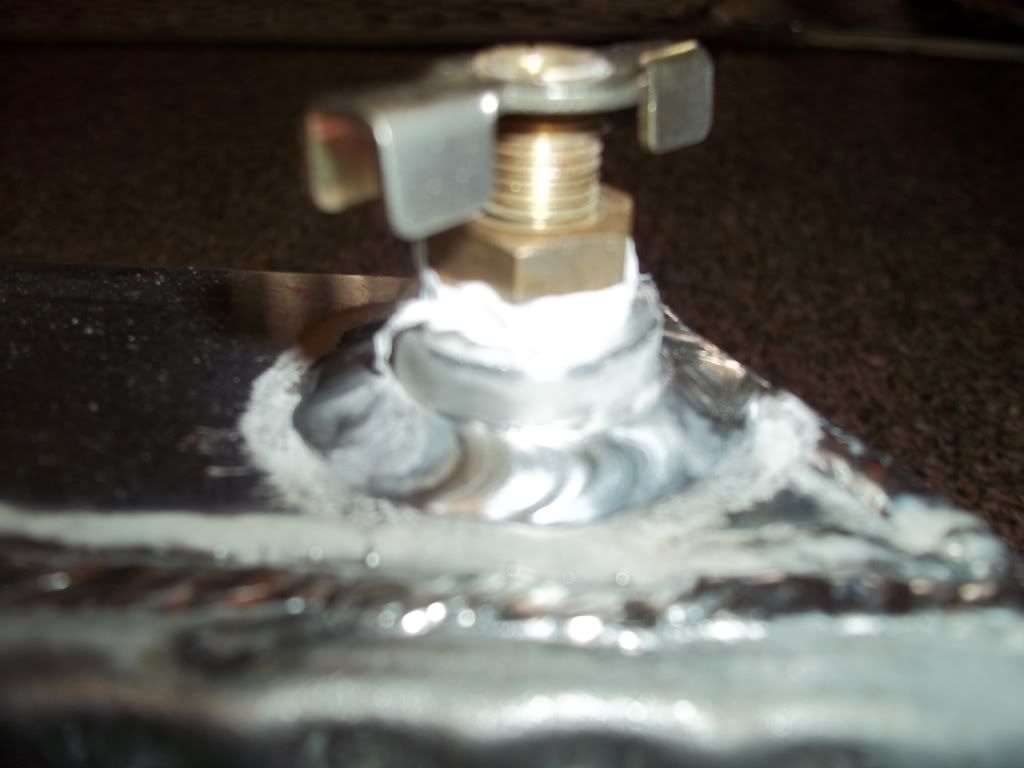
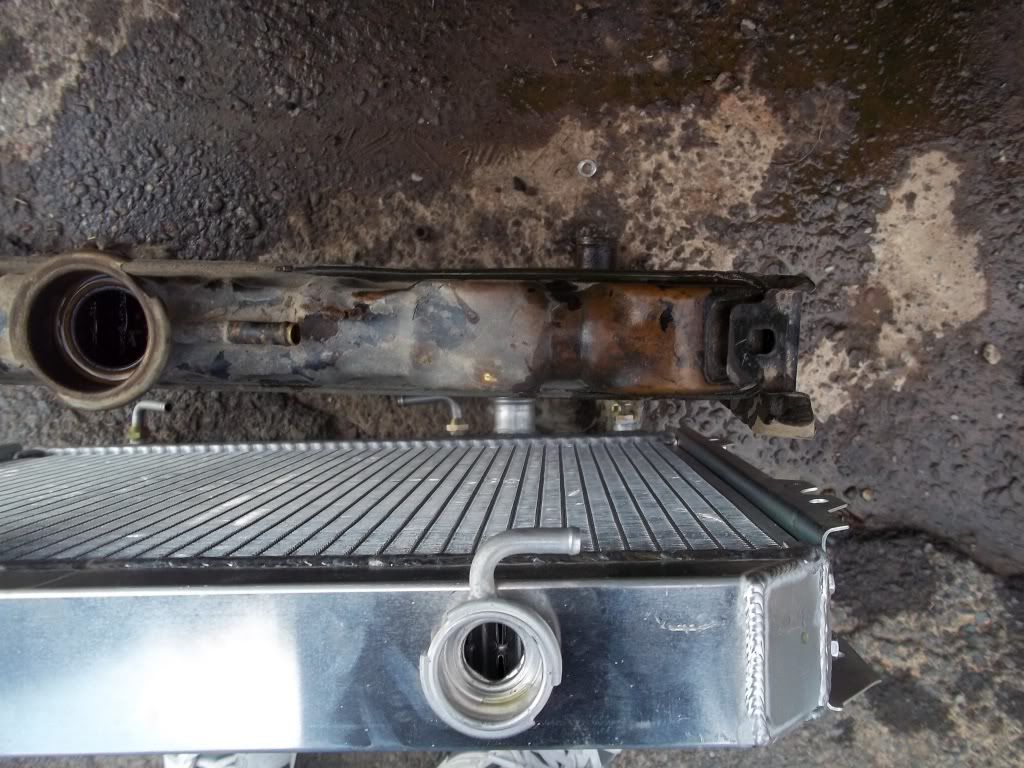
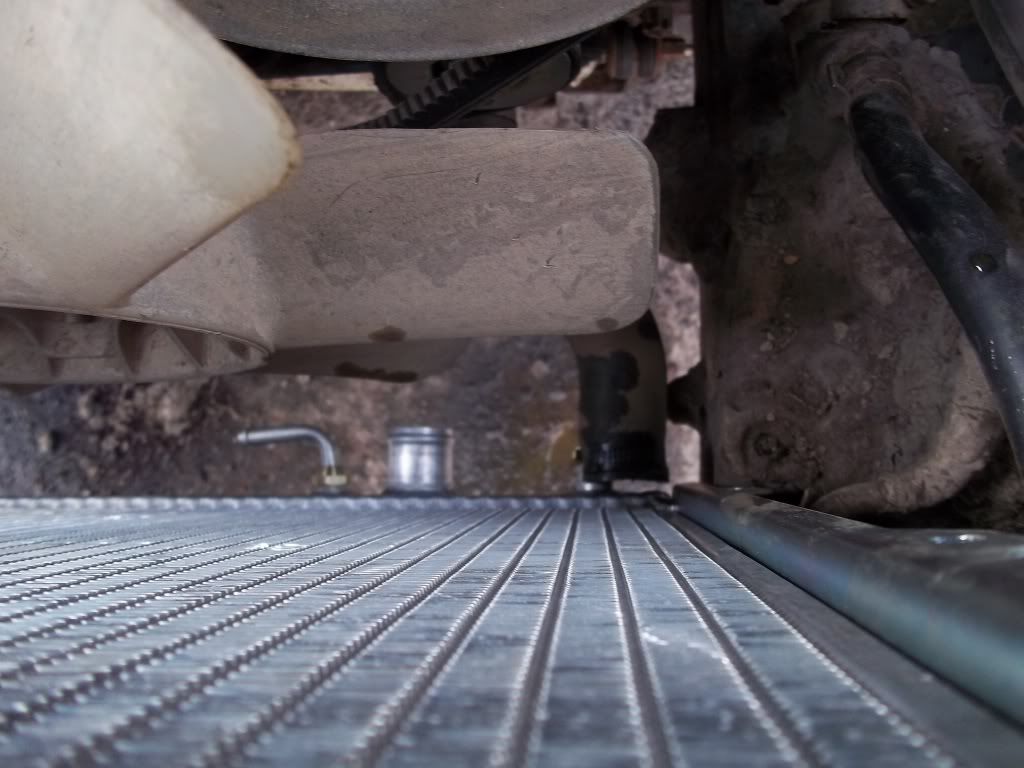
Drain valve. A little different then what I originally had and it's on the opposite side then my original radiator.
Pre-installed with teflon tape from the factory.
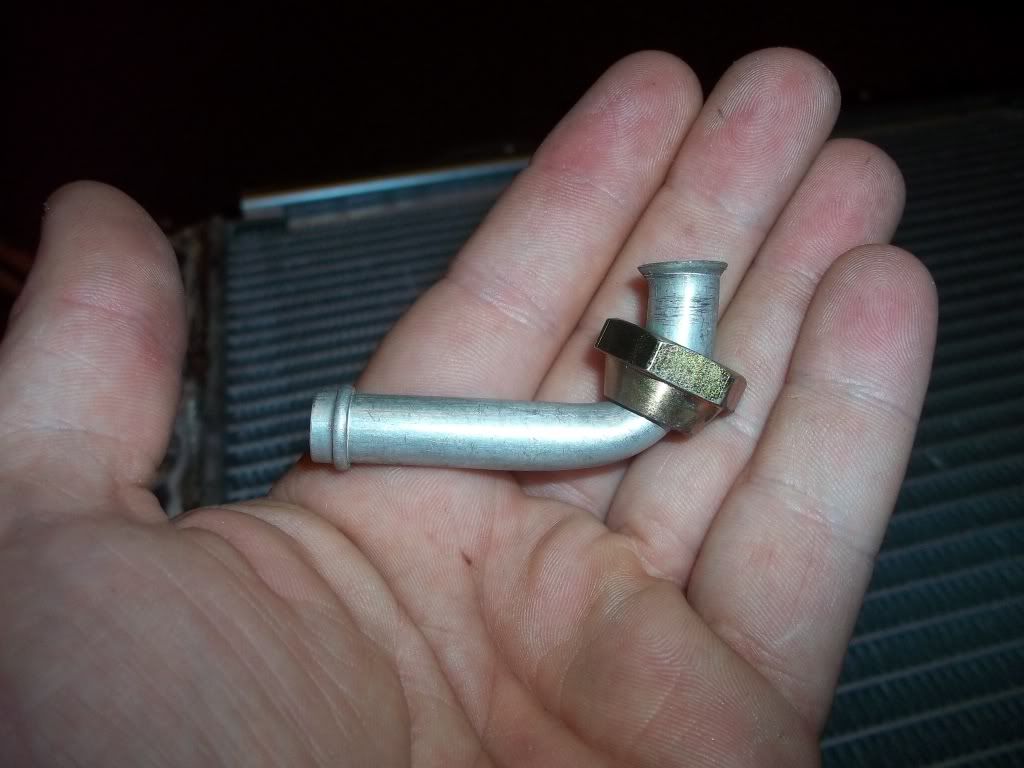
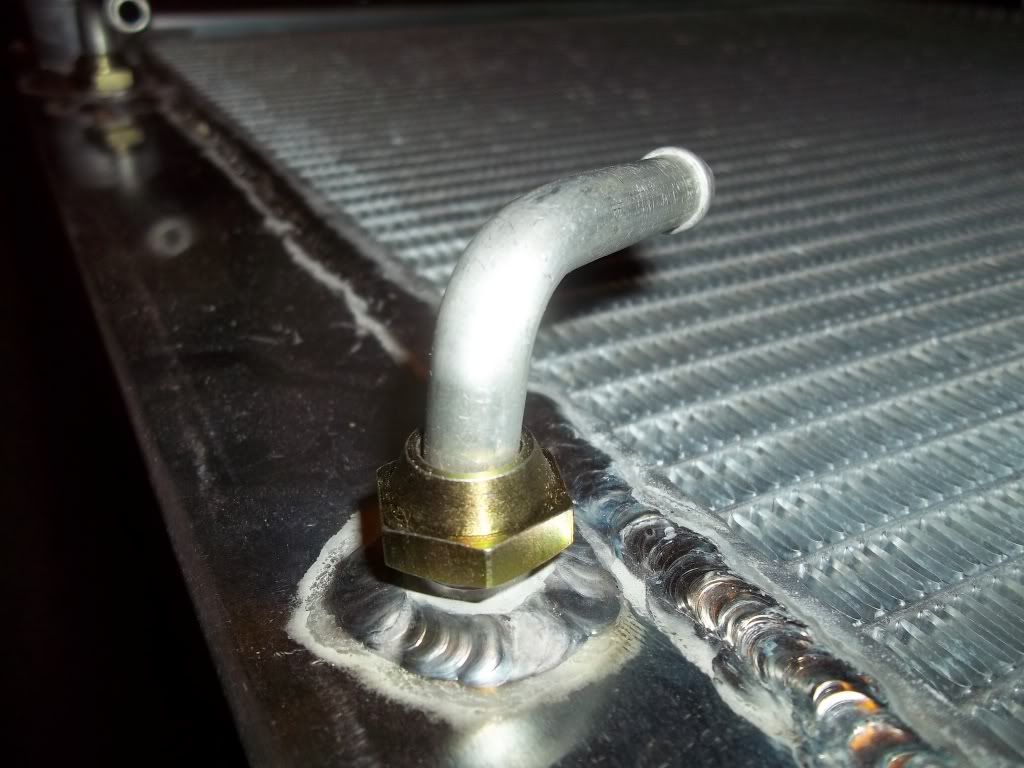
Trans lines are a little weird. I am not sure what size these are. Autozone didn't have any caps for it. It's not a 3/8 or 5/16.
I might end up using these as a power steering cooler unless someone tells me it's a bad idea. It's got to be better then the OEM one.
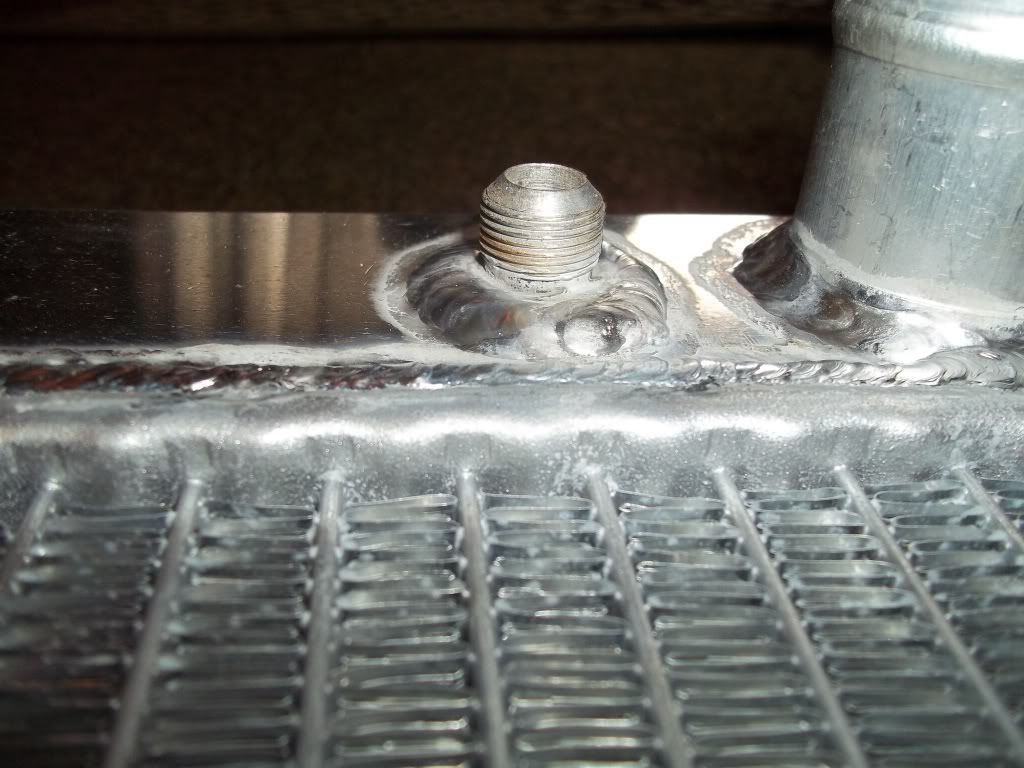
The mounting bracket on this radiator as you can see is bolted and not welded or glued one. IMO this is a major plus.

Bought on a Wed evening at ~5:30pm EST. Received it midday on Friday. It shipped from Maryland. Thought it was coming from Cali.
This was not listed as a Silla, but after doing some research I found out they were. As you can see it's a 7286AA Part# made in China.
Trying for Google for this part number didn't come up with much.
And most of the Sillas I have seen outside of ebay were plastic tanks.
Packaged rather well. Must have been opened and inspected prior to shipping based on the newspaper that was in it.
Welds to me look like they can be better, but for the price as long as it holds up, I don't care.
Some of the reviews on eBay reported these shipped as 1 large core and not a 2-core as advertised.
As you can clearly see, this is definitely a 2-row radiator.
Front and Back side shots.
My old large cap isn't going to work with this.
Not quite sure what the wire was for, but I didn't need it.
Drain valve. A little different then what I originally had and it's on the opposite side then my original radiator.
Pre-installed with teflon tape from the factory.
Trans lines are a little weird. I am not sure what size these are. Autozone didn't have any caps for it. It's not a 3/8 or 5/16.
I might end up using these as a power steering cooler unless someone tells me it's a bad idea. It's got to be better then the OEM one.
The mounting bracket on this radiator as you can see is bolted and not welded or glued one. IMO this is a major plus.
Last edited by xxxtreme22r; 03-24-2012 at 09:32 AM.
 03-24-2012, 09:32 AM
#2
Registered User
Thread Starter
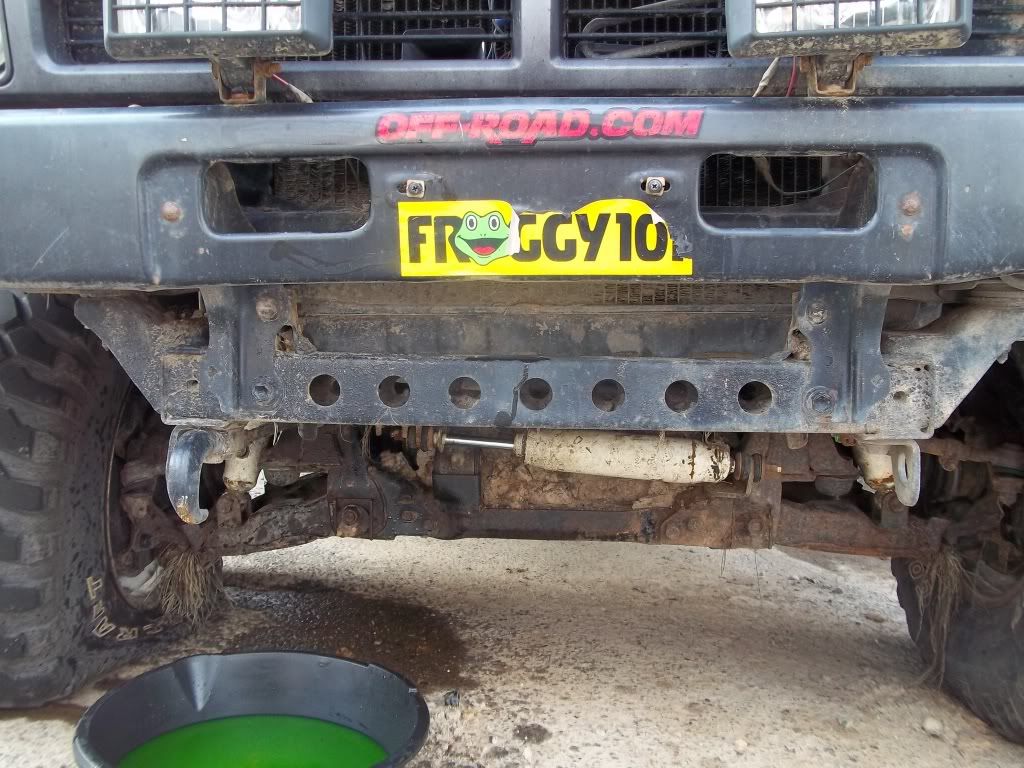
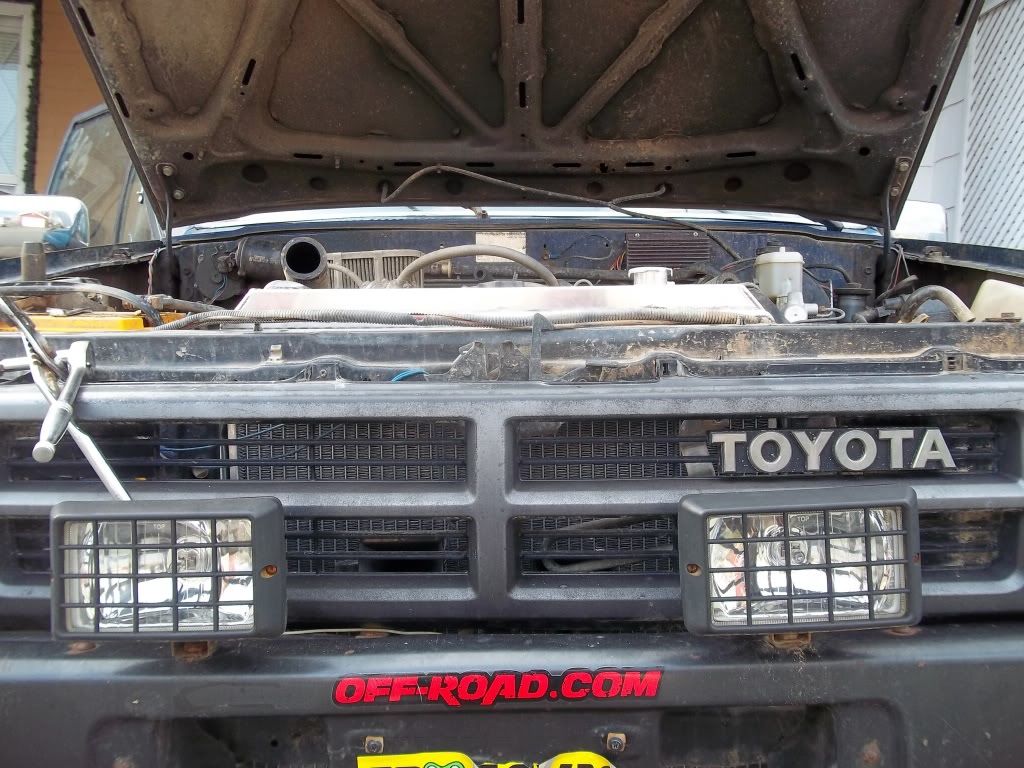
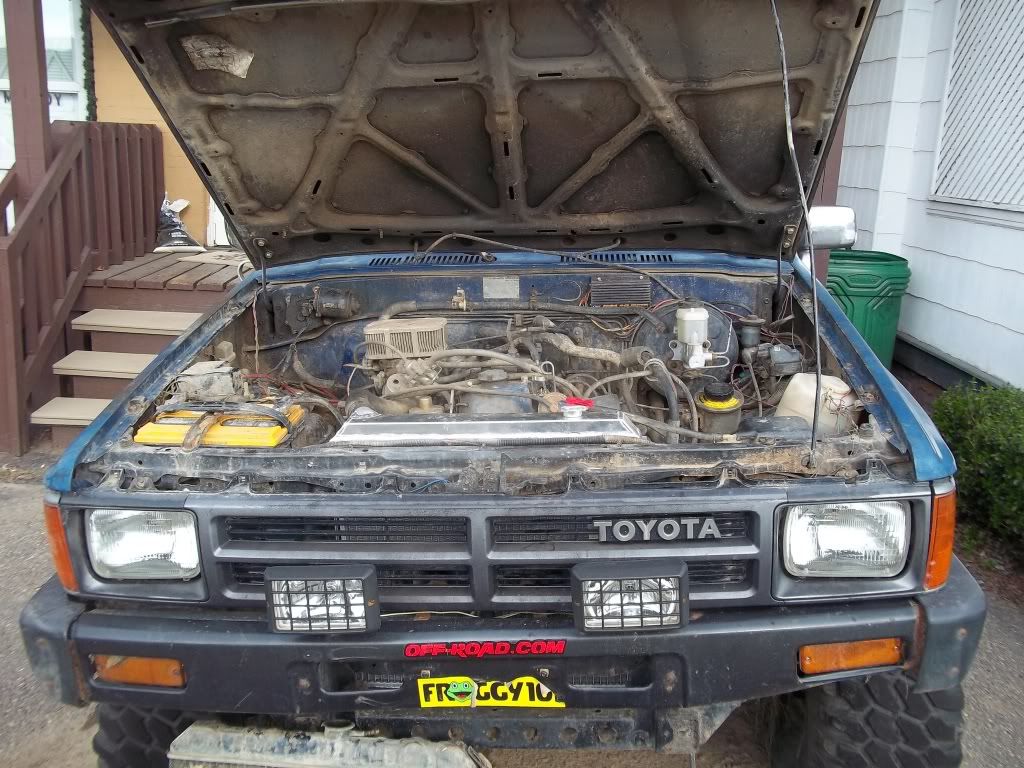
Now onto my mess of a truck. And if anyone makes a comment about my wiring and hose routing selections, I am gonna smack em. lol.
3 out of the 4 mounting bracket points were "unglued".

Just some reference shots on how high and low etc this 25 year old radiator is.

Just a pre-fitting of the fan shroud which was something I was worried about.
The two holes on one side match up perfectly. But the other side is just a tad too "wide".
It's also a little too short on the top and bottom. May or may not affect performance.


Some side by side shots old versus new. Just to show how much taller and thicker the new radiator is.

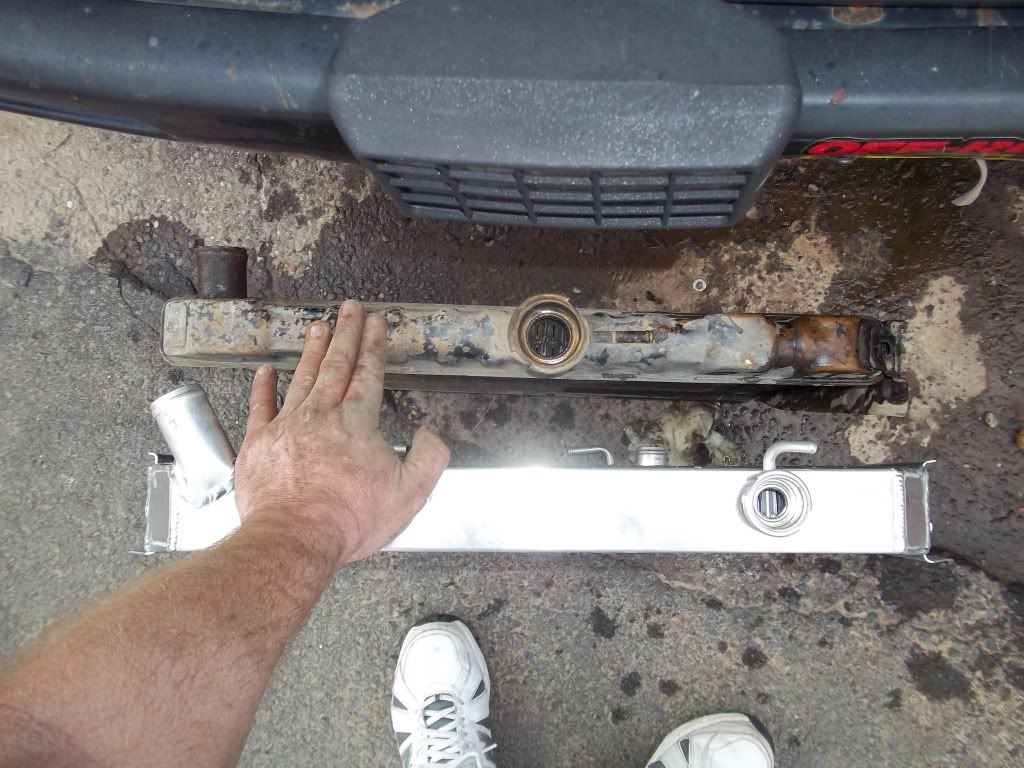
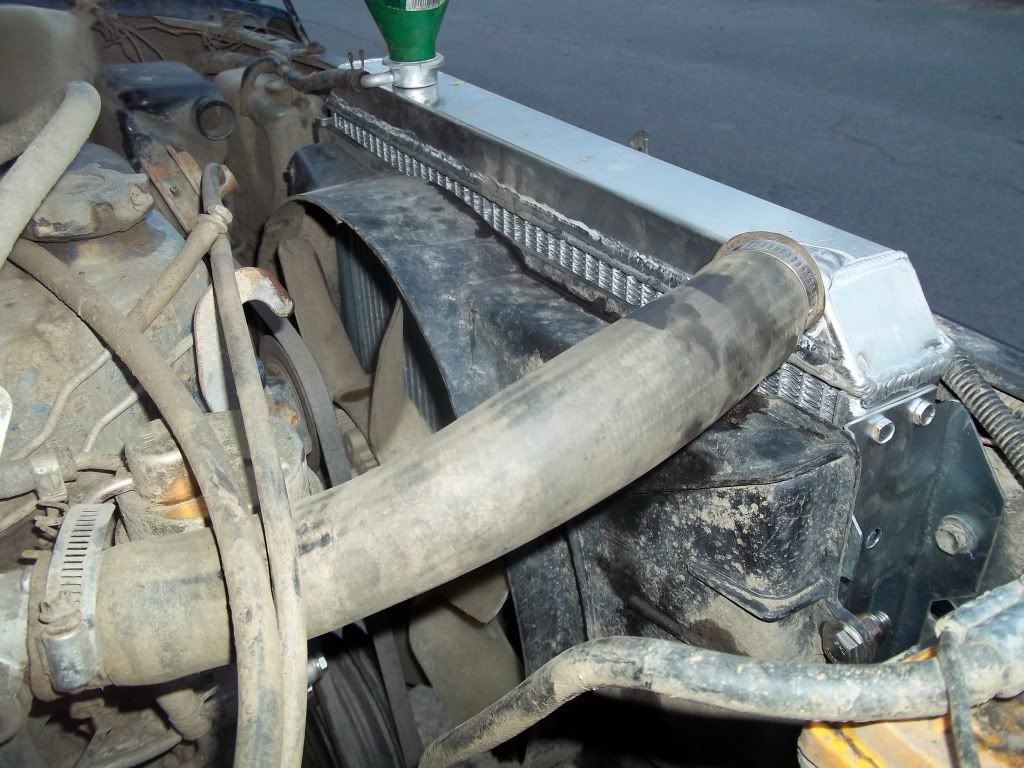
Some of the differences in the upper and lower hoses. Also take note the different location of the rad cap.

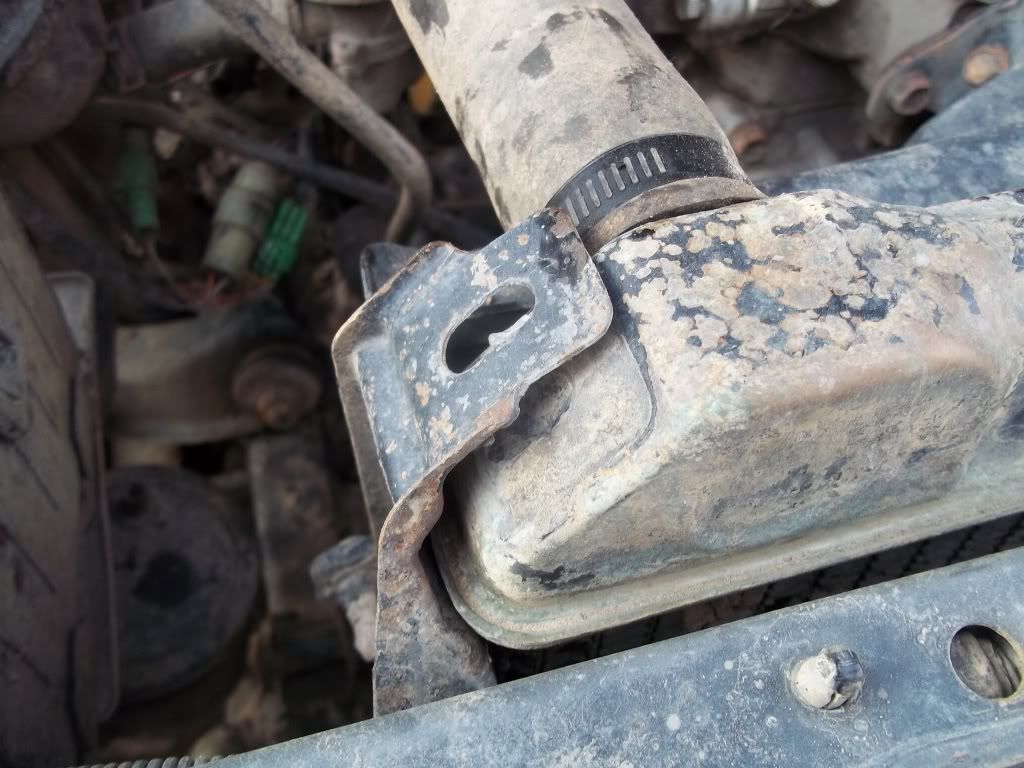
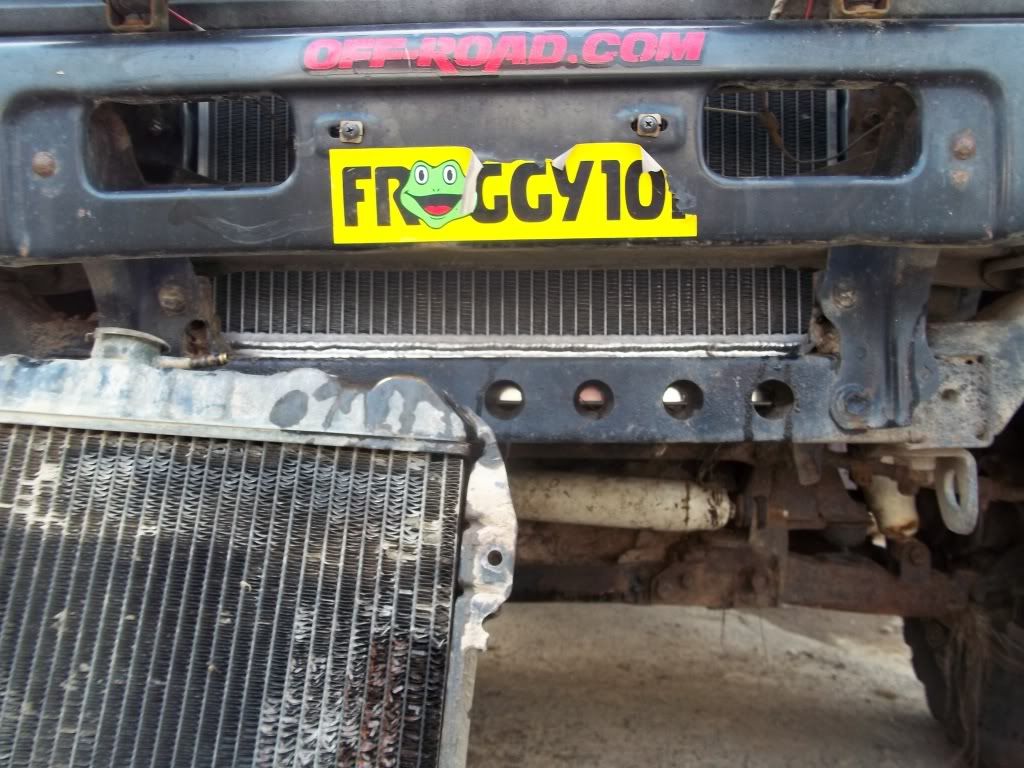
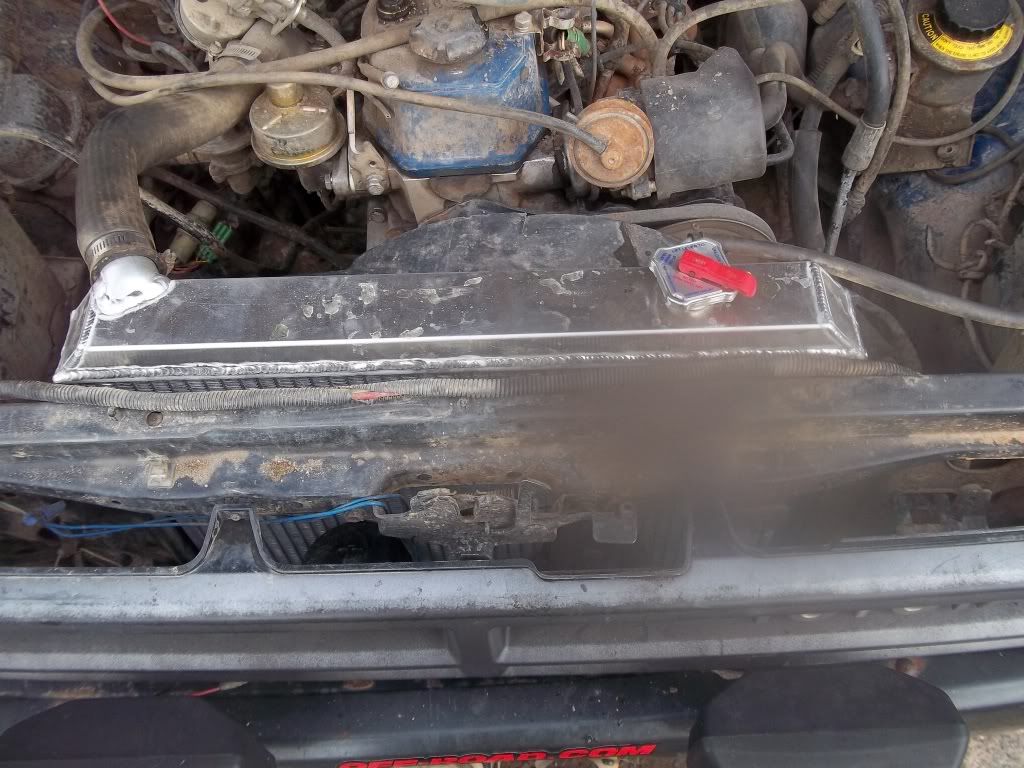
This bolted to the core support 100% the way the old one did. It's just a hair taller. And quite a bit lower.
You can see where it goes beyond the holes in the front cross member. It's almost even with it.
The onld one was just a tad above the top of that crossmember.
This is where I remember someone saying that I needed at least one different hose. I didn't.

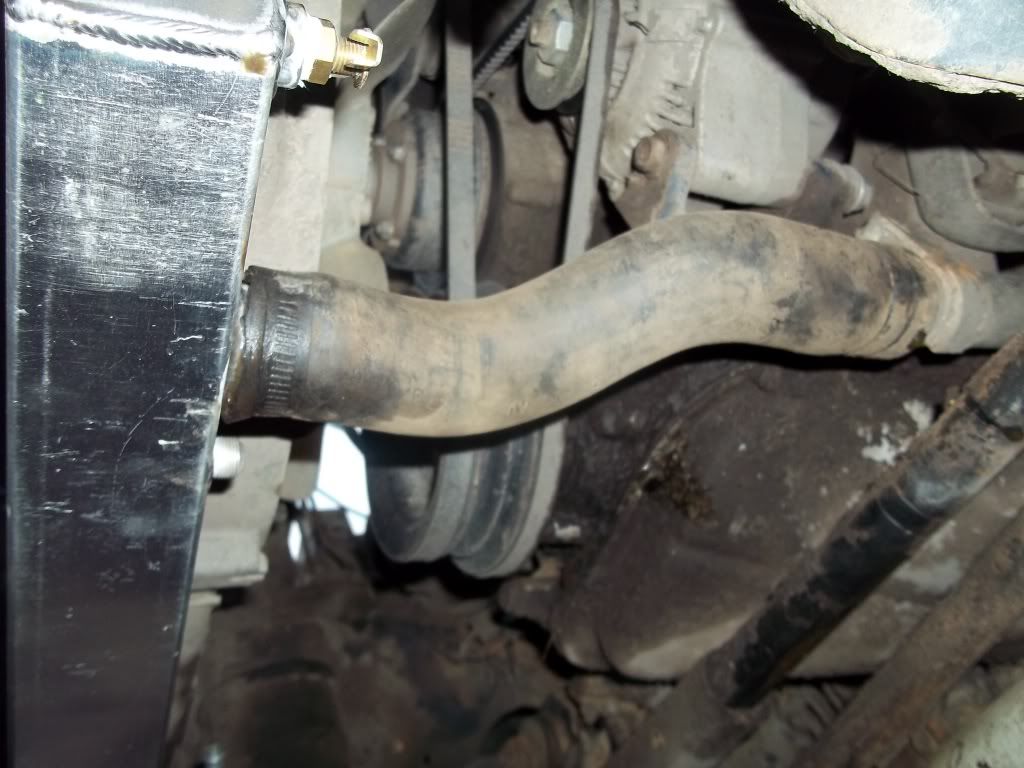
The top hose reached far enough and didn't kink enough for me to worry about.
The bottom hose I just loosened from that u-shaped pipe and twisted it 90 degrees. Worked just fine.
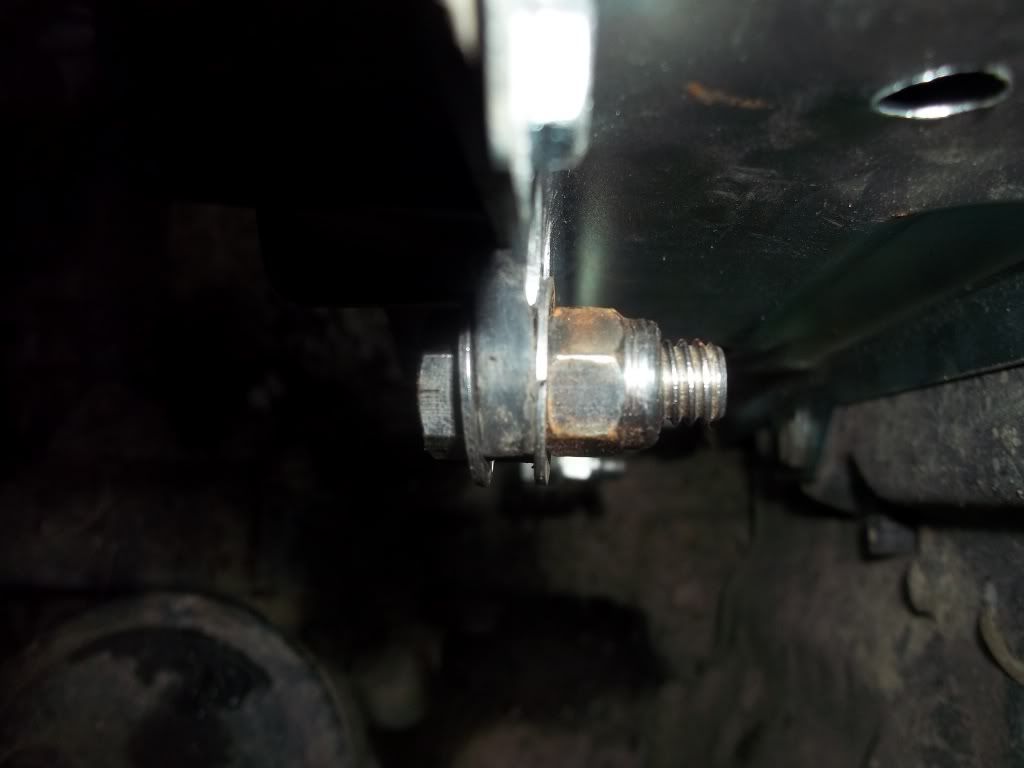
I must note, one of the mounting bolts on that pipe is undone, so I might have just a little more play.

Because of the different location of the rad cap, the overflow hose had to be shortened.
I also had to "fix" the hood for clearance issues. It hit the support bar.
A little hammer work on the support solved it.
This may or may not be an issue on a different body style or if your not using a cap with a pressure release on it.

Instead of using zip ties, bolts and washers is what I used to secure the other side of the shroud.
With the shroud bolted up you can see the areas that it doesn't cover on the top and bottom.
It does cover the entire width of this radiator.
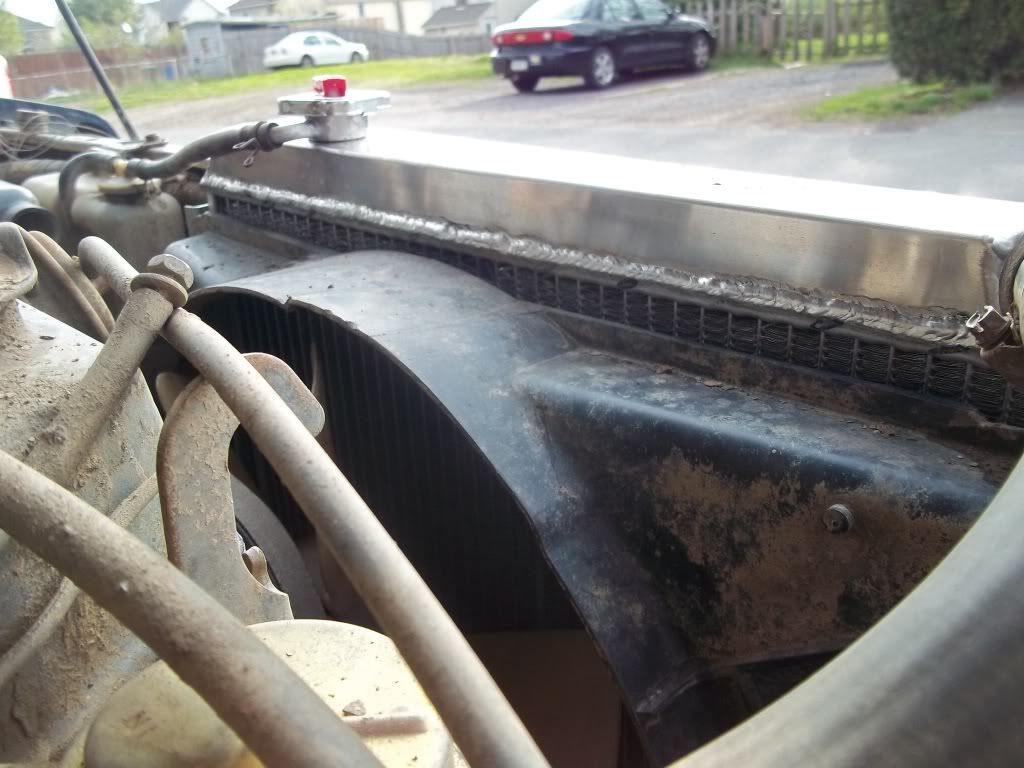

Personally I think the bracket placement on the radiator could be a little better.
It leaves a little bit of a gap between the shroud and radiator at the top and bottom like it's too far away from it.
Coupled with the wider rad this in turn pushed the rad closer to the core support.
The wire loom that went between the support and old rad now has no where to go.


The old and new bracket however is the same width.
So the shroud placement is not any closer to the engine then before. Nor does it cover any more of the fan.
Sorry for the smudge mark on the lens. It was one of the last two photos I took.

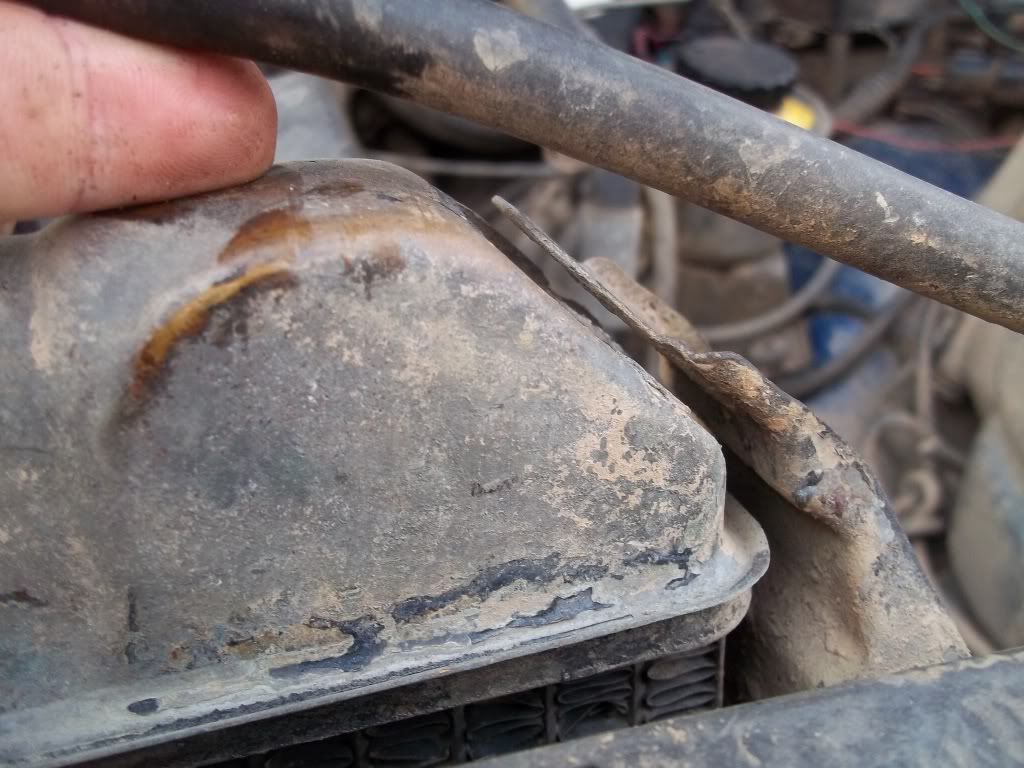
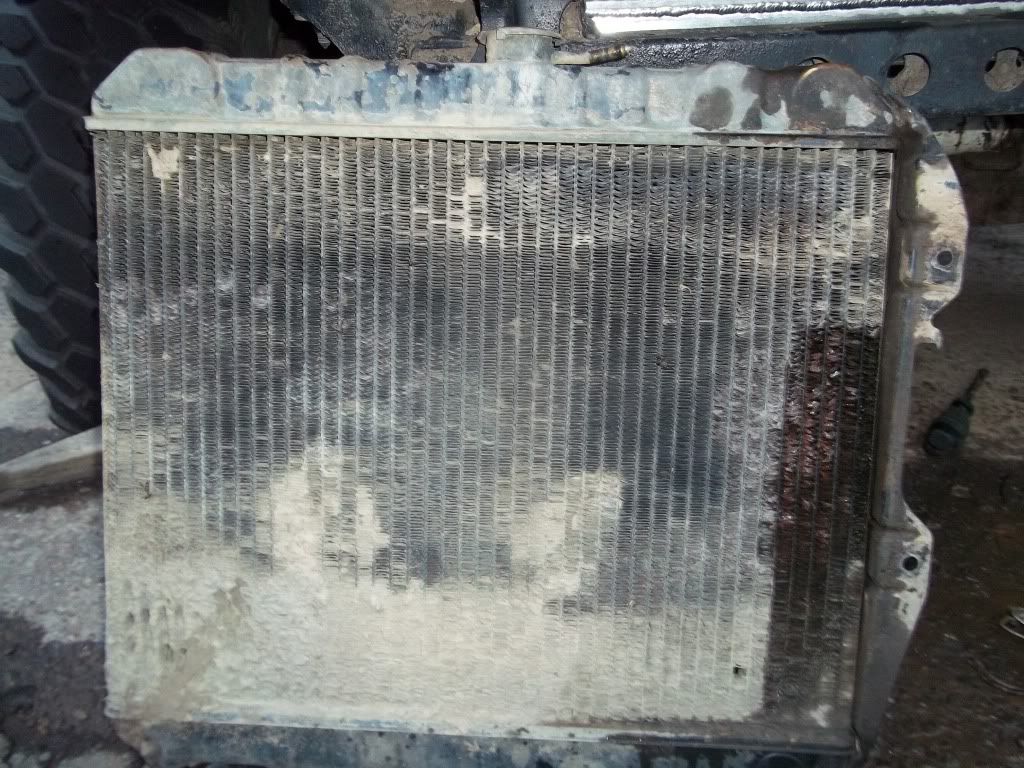
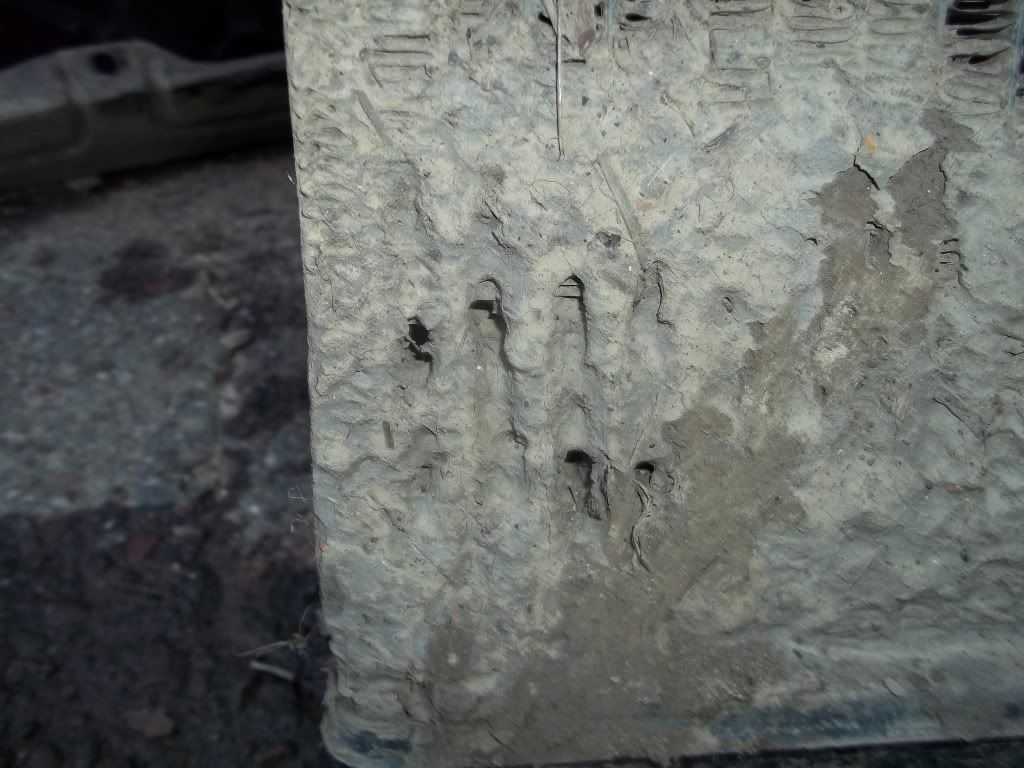
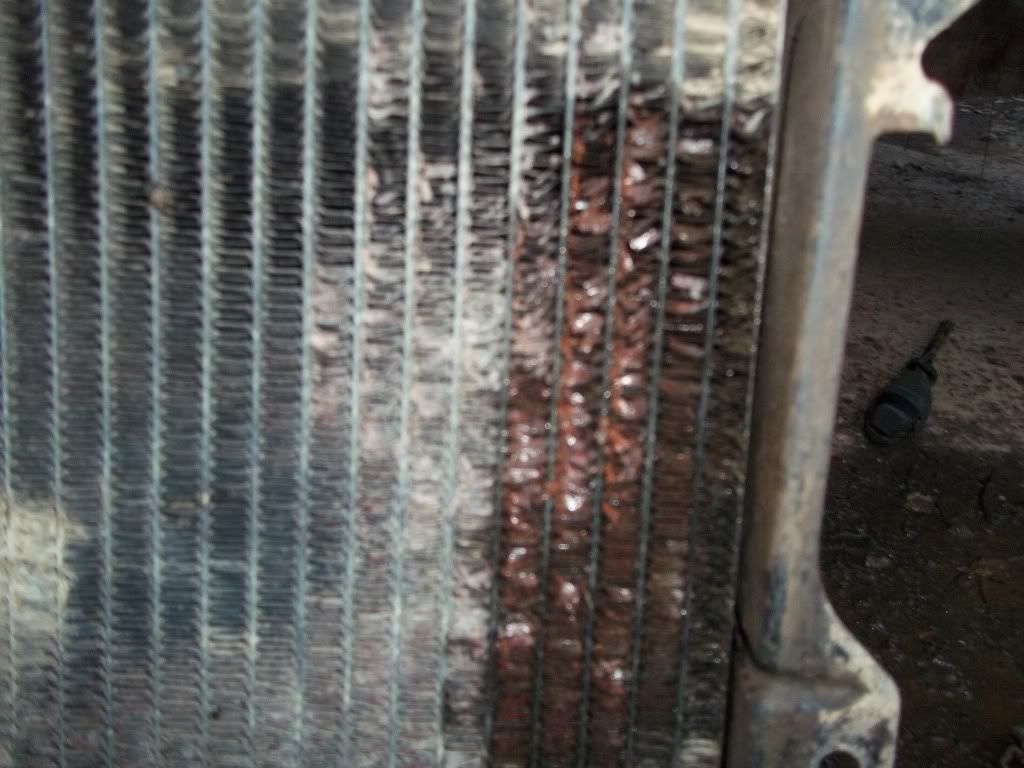
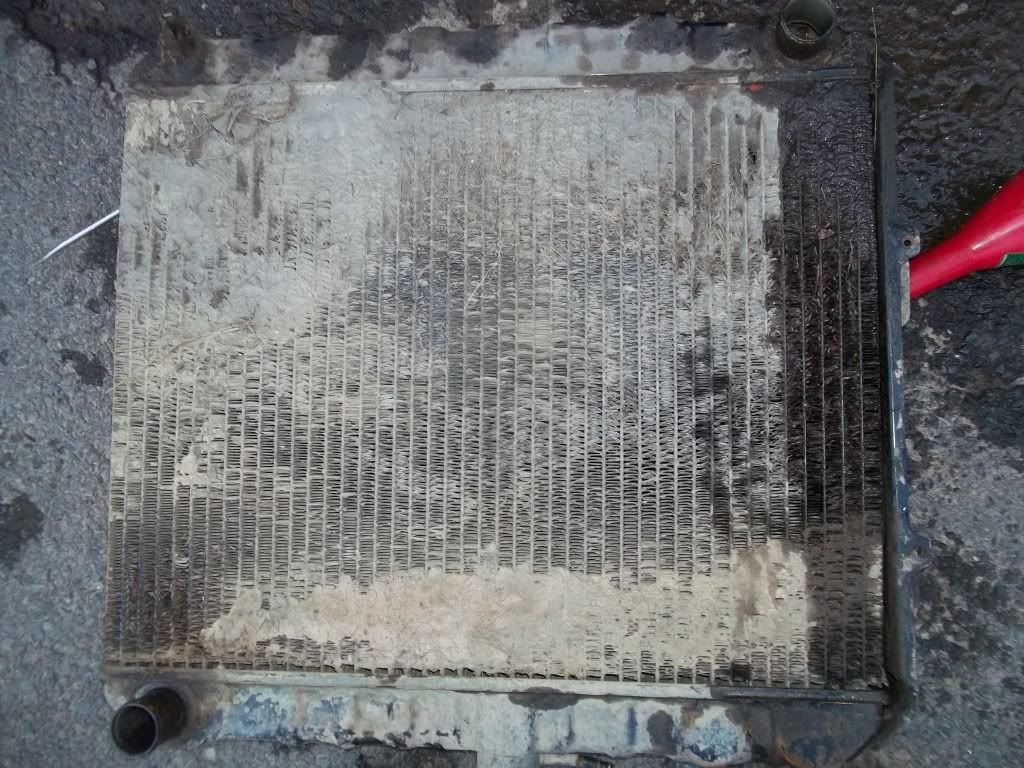
For the life of me I can't figure out why this 25 year old radiator wasn't cooling properly.
Notice how many fins and rust issues on this thing. I can't believe it survived this long.
Now to figure out a better way to keep the mud off the new one. Rust won't be an issue.
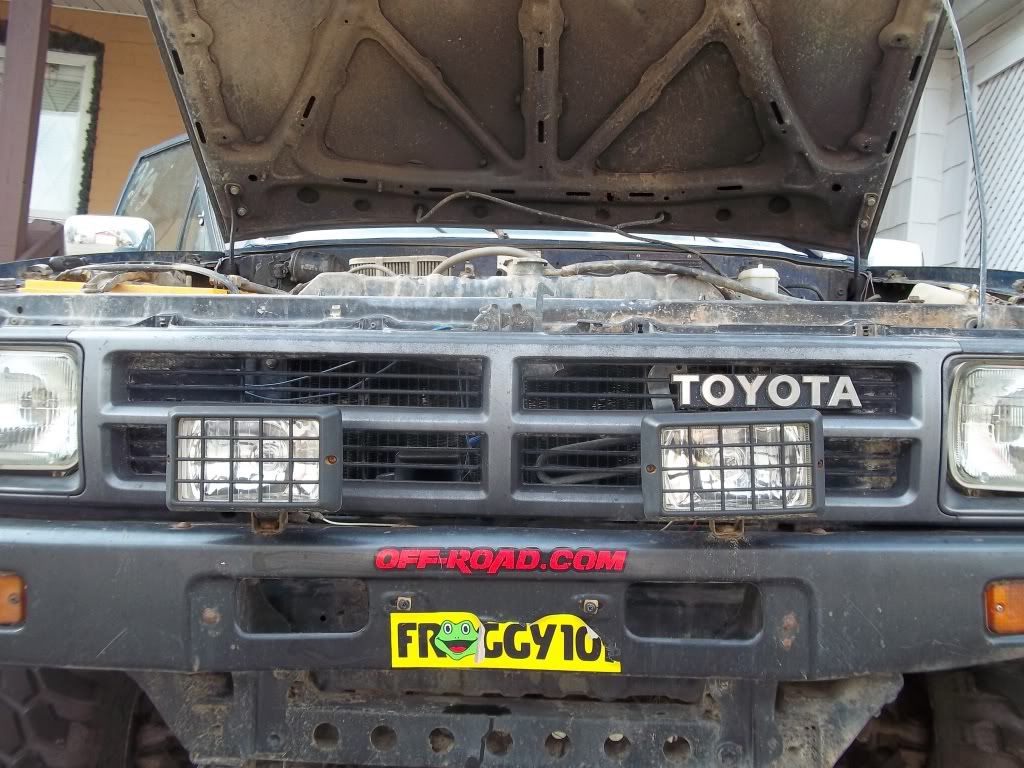
And some "done" shots. Once again, sorry for the smudge mark.

3 out of the 4 mounting bracket points were "unglued".
Just some reference shots on how high and low etc this 25 year old radiator is.
Just a pre-fitting of the fan shroud which was something I was worried about.
The two holes on one side match up perfectly. But the other side is just a tad too "wide".
It's also a little too short on the top and bottom. May or may not affect performance.
Some side by side shots old versus new. Just to show how much taller and thicker the new radiator is.
Some of the differences in the upper and lower hoses. Also take note the different location of the rad cap.
This bolted to the core support 100% the way the old one did. It's just a hair taller. And quite a bit lower.
You can see where it goes beyond the holes in the front cross member. It's almost even with it.
The onld one was just a tad above the top of that crossmember.
This is where I remember someone saying that I needed at least one different hose. I didn't.
The top hose reached far enough and didn't kink enough for me to worry about.
The bottom hose I just loosened from that u-shaped pipe and twisted it 90 degrees. Worked just fine.
I must note, one of the mounting bolts on that pipe is undone, so I might have just a little more play.
Because of the different location of the rad cap, the overflow hose had to be shortened.
I also had to "fix" the hood for clearance issues. It hit the support bar.
A little hammer work on the support solved it.
This may or may not be an issue on a different body style or if your not using a cap with a pressure release on it.
Instead of using zip ties, bolts and washers is what I used to secure the other side of the shroud.
With the shroud bolted up you can see the areas that it doesn't cover on the top and bottom.
It does cover the entire width of this radiator.
Personally I think the bracket placement on the radiator could be a little better.
It leaves a little bit of a gap between the shroud and radiator at the top and bottom like it's too far away from it.
Coupled with the wider rad this in turn pushed the rad closer to the core support.
The wire loom that went between the support and old rad now has no where to go.
The old and new bracket however is the same width.
So the shroud placement is not any closer to the engine then before. Nor does it cover any more of the fan.
Sorry for the smudge mark on the lens. It was one of the last two photos I took.
For the life of me I can't figure out why this 25 year old radiator wasn't cooling properly.
Notice how many fins and rust issues on this thing. I can't believe it survived this long.
Now to figure out a better way to keep the mud off the new one. Rust won't be an issue.
And some "done" shots. Once again, sorry for the smudge mark.
Last edited by xxxtreme22r; 03-24-2012 at 10:26 AM.
03-24-2012, 09:50 AM
#4
Registered User
Thread Starter
I know I know about the wires. They aren't too close to anything hot. Most of those are actually hoses. It's "desmogged" but not removed. Been meaning to clean those up for a year now. lol.
And I am getting to the camera lens part. Those were the last two photos I took and I wasn't about to go out there and take more. hahaha. Working my way down the photos for descriptions.
Haven't test drove it yet. And I don't have an actual read out for coolant temp, just the "sr5" gauge assembly.
And I am getting to the camera lens part. Those were the last two photos I took and I wasn't about to go out there and take more. hahaha.
Working my way down the photos for descriptions. Haven't test drove it yet. And I don't have an actual read out for coolant temp, just the "sr5" gauge assembly.
Last edited by xxxtreme22r; 03-24-2012 at 09:51 AM.
03-24-2012, 10:29 AM
#5
Registered User
Thread Starter
ok, editing is done. Descriptions are updated. This is getting driven tonight, but the weather is cooler. So I might not tell a difference till actually getting in hotter weather and in the mud pits and hill climbing in the woods.
IMO this should cool better then the 3 core brass/copper units from Radiator Barn.
Only thing that has me just slightly worried is heat cycles from hot and cooler mud/water hitting it. Should be fine though.
IMO this should cool better then the 3 core brass/copper units from Radiator Barn.
Only thing that has me just slightly worried is heat cycles from hot and cooler mud/water hitting it. Should be fine though.
03-24-2012, 11:50 AM
#6
DAYUMMMMMMMMMMNG! LOL. LOVE it when you start something like this, B! LOTS OF PICS! haha..... Great write up so far... I bet they'll sell a few(or lose a few, depending on how it works out.... HOPING FOR 'GREAT'! lol) cuz of you!
Best wishes on the rest/all the plans in the future, Brandon... I'll be watching whatever you're doin! lol.
Best wishes on the rest/all the plans in the future, Brandon... I'll be watching whatever you're doin! lol.
Trending Topics
03-24-2012, 02:05 PM
#8
Registered User
nice loookin radiator. i was gonna get a 3 core from r. c. but they never got any in stock for a v6. ended up with a 3 core all metal from dave'z offroad. will see how it works when my swap is up and running. looks like you been wheelin that yota lol... wheel on !!!
03-24-2012, 09:48 PM
#10
Registered User

Join Date: Oct 2007
Posts: 162
Likes: 0
Received 0 Likes
on
0 Posts
Trust me, I learned that the hard way.
*Let us know how the Silla works out for you. I won't ever get another one.
Last edited by KelleyC; 03-24-2012 at 09:57 PM.
03-24-2012, 09:59 PM
#11
Registered User

I know the copper/brass sillas are crap. That aluminum one looks good at least. The only problems you could ever really have with it is electolysis or the outside tube to header joints (or tube at the header joint.
03-25-2012, 04:37 AM
#12
Registered User
Thread Starter
FWIW every new rad should come w/ a cap offered, or included since they differ so much these days. As for the yellow wire, yes you do need it. It's the ground strap intended to be used with all full aluminum radiators b/c it's in the same system as a steel engine block and mounting to a steel surface. It's to stop the possibility of it corroding out from electrolysis.
Trust me, I learned that the hard way.
*Let us know how the Silla works out for you. I won't ever get another one.
Trust me, I learned that the hard way.
*Let us know how the Silla works out for you. I won't ever get another one.
So if the rad bolts to the core support and that core support is grounded to the chassis, where is this ground strap supposed to go exactly? I would think this would be more of an issue if you have a plastic tank radiator and/or a plastic mounting bracket, where the rad itself doesn't end up getting grounded to the core support.
What was wrong with your radiator? Just the electrolysis issue? What kinda of coolant did you use in your system? You can't use the regular green stuff in ours, you have to use either the Toyota Red or a "universal" coolant. But regular ethylene glycol coolant never works in a steel/aluminum configuration.
Yeah the ones with the plastic tanks are a bad idea. Never heard anything good about them, Silla brand or otherwise.
 03-25-2012, 05:24 AM
#14
Registered User
Thread Starter
Oh yeah and driving around last night, this temp needle didn't even reach halfway. Can't figure that one out since you would think it would run the same temp based on the fact it's got the same thermostat in it. But I'm not complaining.  Under hood temp though is noticeably higher when opening hood. That was expected though since aluminum radiates more heat then copper/brass does. I do have that small hole drilled in the base of the thermostat though, which might have something to do with it.
Under hood temp though is noticeably higher when opening hood. That was expected though since aluminum radiates more heat then copper/brass does. I do have that small hole drilled in the base of the thermostat though, which might have something to do with it.


 03-25-2012, 07:06 AM
#16
Registered User
Thread Starter
This same radiator other places was selling for $175. Not that far off from the radiator barn rads. (which you can actually get cheaper) And I haven't heard anything bad about these things as of yet. And at almost $500+ for an OEM rad is completely out of the question. If I were gonna pay that much coin, I woulda gotten a Griffin
Yeah, I forgot to put my boots on, was going to store and got sidetracked. lol.
No comment on my nails. lol.
Yeah, I forgot to put my boots on, was going to store and got sidetracked. lol.
No comment on my nails. lol.
Last edited by xxxtreme22r; 03-25-2012 at 07:09 AM.
03-25-2012, 10:55 AM
#17
Registered User
So if the rad bolts to the core support and that core support is grounded to the chassis, where is this ground strap supposed to go exactly? I would think this would be more of an issue if you have a plastic tank radiator and/or a plastic mounting bracket, where the rad itself doesn't end up getting grounded to the core support.
What was wrong with your radiator? Just the electrolysis issue? What kinda of coolant did you use in your system? You can't use the regular green stuff in ours, you have to use either the Toyota Red or a "universal" coolant. But regular ethylene glycol coolant never works in a steel/aluminum configuration.
Yeah the ones with the plastic tanks are a bad idea. Never heard anything good about them, Silla brand or otherwise.
03-25-2012, 12:35 PM
#18
Registered User
Is it possible to enlarge or slot the mounting brackets so you can slide the shroud closer to the radiator to eliminate gap that you were talking about in picture?
03-25-2012, 12:52 PM
#19
Registered User
Thread Starter
Thanks for the suggestion.


