Rebuilding manual hubs - what's involved?
 10-23-2007, 07:57 PM
#1
Registered User
Thread Starter

Join Date: Oct 2004
Posts: 1,230
Likes: 0
Received 0 Likes
on
0 Posts
Rebuilding manual hubs - what's involved?
When I bougth my truck, it came with WARN hubs..BUT In a box I got two AISIN hubs. They are all in peices, and I just dont know whats what. Ide like to get them rebuilt and use them, keeping the warns for spares. Does anyone have a diagram, or SOMETHING that shows all the parts of a AISIN hub and how it goes together? Also a link to a rebuild kit would be AWSOME
Last edited by Tacoma750; 10-24-2007 at 07:55 PM.
 10-23-2007, 08:05 PM
#3
Contributing Member
Join Date: Feb 2007
Location: maple ridge, British Columbia, Canada
Posts: 9,055
Likes: 0
Received 9 Likes
on
5 Posts
When I got my aisins they where in peices in the bottom of a grease/dirty filled pan. I had never even seen aisins before!
I rebuilt them and they work perfect!
Here is the best thread I found on the subject, the pictures where the best I could find. He shows you step by step with pics what to do.
http://forum.ih8mud.com/showthread.php?t=149776
I rebuilt them and they work perfect!
Here is the best thread I found on the subject, the pictures where the best I could find. He shows you step by step with pics what to do.
http://forum.ih8mud.com/showthread.php?t=149776
10-23-2007, 08:11 PM
#7
When I got my aisins they where in peices in the bottom of a grease/dirty filled pan. I had never even seen aisins before!
I rebuilt them and they work perfect!
Here is the best thread I found on the subject, the pictures where the best I could find. He shows you step by step with pics what to do.
http://forum.ih8mud.com/showthread.php?t=149776
I rebuilt them and they work perfect!
Here is the best thread I found on the subject, the pictures where the best I could find. He shows you step by step with pics what to do.
http://forum.ih8mud.com/showthread.php?t=149776
 -----> bookmarked
Trending Topics
10-23-2007, 08:37 PM
#11
Registered User
Thread Starter
Join Date: Oct 2004
Posts: 1,230
Likes: 0
Received 0 Likes
on
0 Posts
Im looking at my hubs right now at the computer desk lol
Im prettty sure Im gonna need MOST of not al of the internals. Whats the little ball everybody talks about? i deffinatley dont have that
Im prettty sure Im gonna need MOST of not al of the internals. Whats the little ball everybody talks about? i deffinatley dont have that
10-23-2007, 08:47 PM
#13
Registered User
Thread Starter
Join Date: Oct 2004
Posts: 1,230
Likes: 0
Received 0 Likes
on
0 Posts
I dont even know what im loking at here...heres a few pictures of what im looking at. The first picture is how BOTH hubs look when looking into them
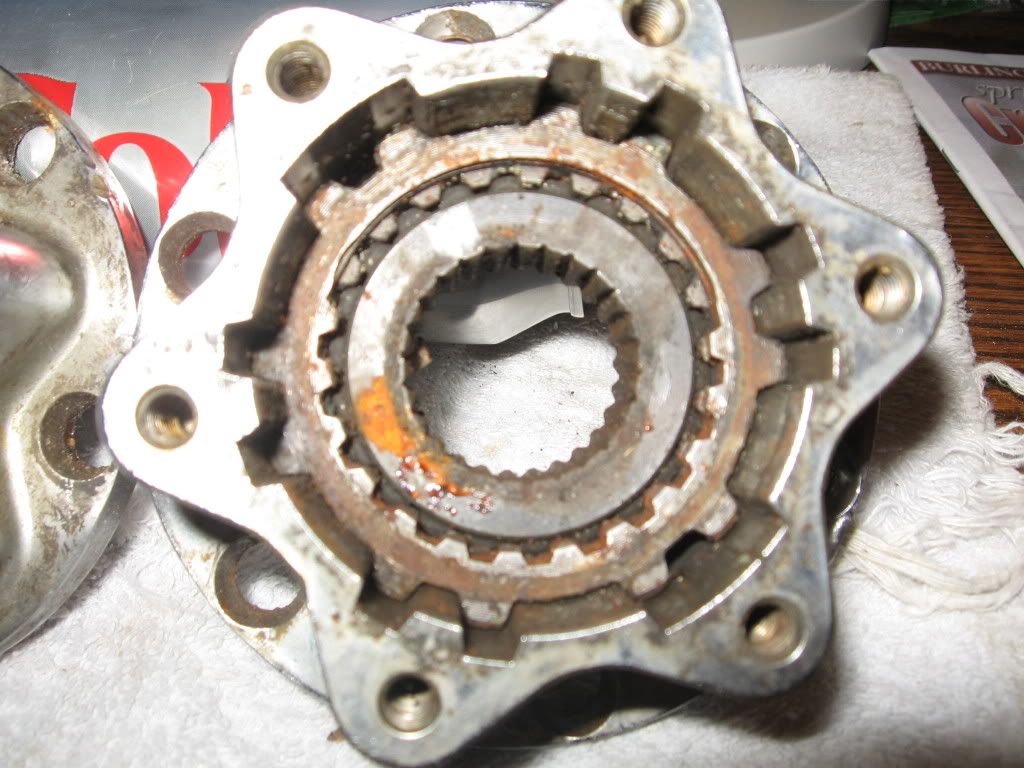
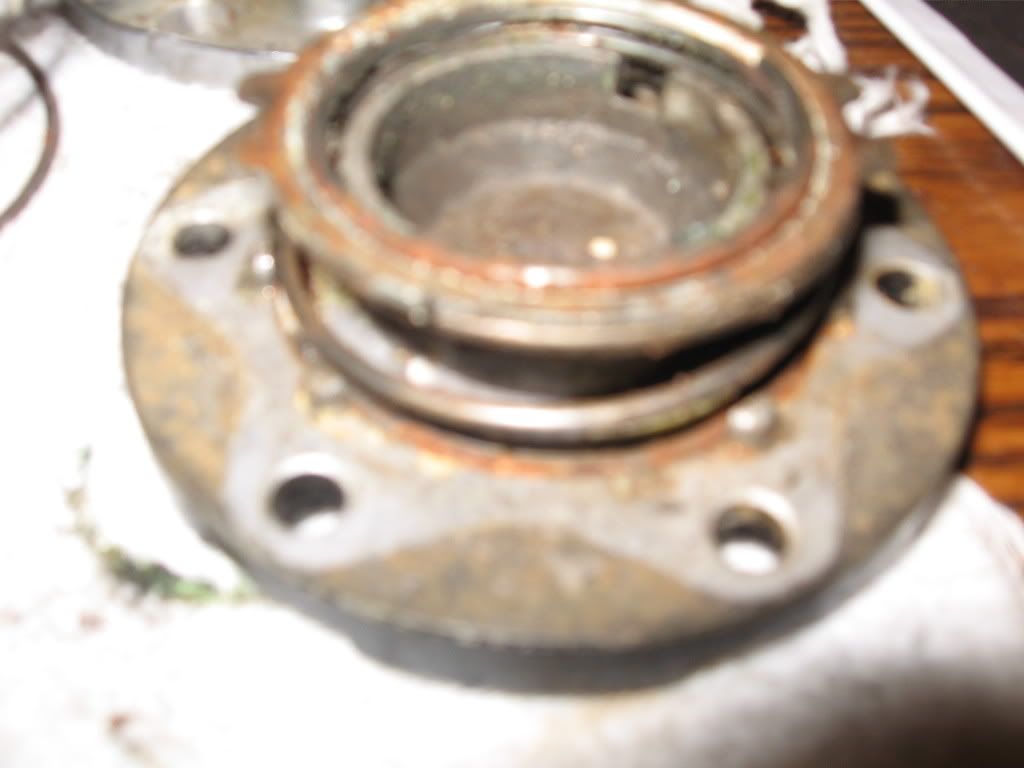
this picture is what I see looing at the outer part of the HUB
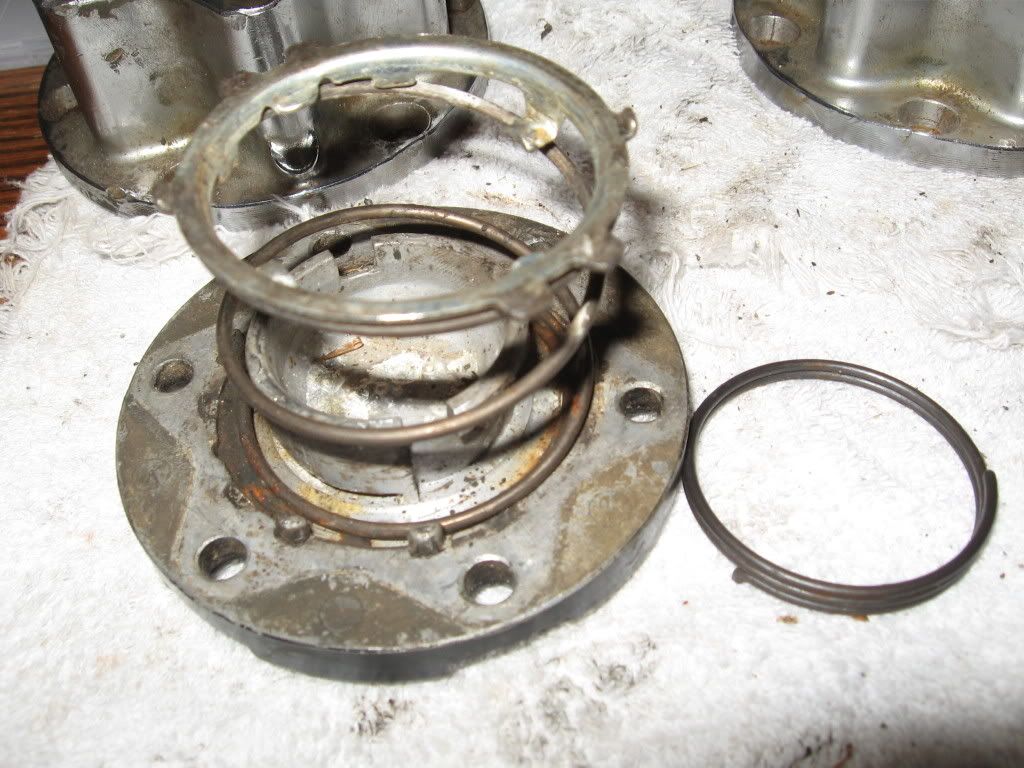
This picture is the other outer part of the hub..and some other sort of real tightly wound spring
this picture is what I see looing at the outer part of the HUB
This picture is the other outer part of the hub..and some other sort of real tightly wound spring
10-23-2007, 08:56 PM
#14
Contributing Member
Join Date: Feb 2007
Location: maple ridge, British Columbia, Canada
Posts: 9,055
Likes: 0
Received 9 Likes
on
5 Posts
Hmm It dosnt look like you are missing anything.
The "little ball" is inside the turning dial, you have to remove the snap ring on the underside of it and the red dial will sepperate from the outer ring/plate.
and dont worry about the looks of them, mine where 10x worse. Took me an hour and a half to clean them up, then another 30 mins to repaint.
*
If you tip your housing over, the top bigger gear should slide out.
the spring pictures to the right on the 3rd pic snaps into the gear, wich connects to the spring on the dial.
And the notches on the plate attached to the wound spring on the handle need to secere into the dial.
If you compress the spring you will see the notches fit into grove on the dial, the spring needs to be compressed.
Last edited by Jay351; 10-23-2007 at 08:59 PM.
10-23-2007, 08:59 PM
#16
Look at the link that jay351 sent you. Pic #3 in post #3 shows the ball. You can't see the spring cuz it's under the ball in a hole/slot in the dial. It looks like your face and dial are still assembled (held together with a snap ring) Be careful disassembling it as the spring and ball have a tendency to go flying when you seperate the parts.
10-23-2007, 09:02 PM
#18
Contributing Member
Join Date: Feb 2007
Location: maple ridge, British Columbia, Canada
Posts: 9,055
Likes: 0
Received 9 Likes
on
5 Posts
Yes If you look in that thread it will show exactly what goes where.
But that spring attaches to the end of the big spring little flat thing at the end. Then the little spring threads into the big gear making one unit.
When things are assembled you should have 2 parts. the housing and gear and the dial/springs/gear
If you have much problems, post up plently of pictures, I can guide you where to put what. And anyone else who wants to help.


