
My Cruiser Coil/BJ Spacer Lift Thread.
 01-23-2007, 07:40 PM
#1
Registered User
Thread Starter
My Cruiser Coil/BJ Spacer Lift Thread - COMPLETED
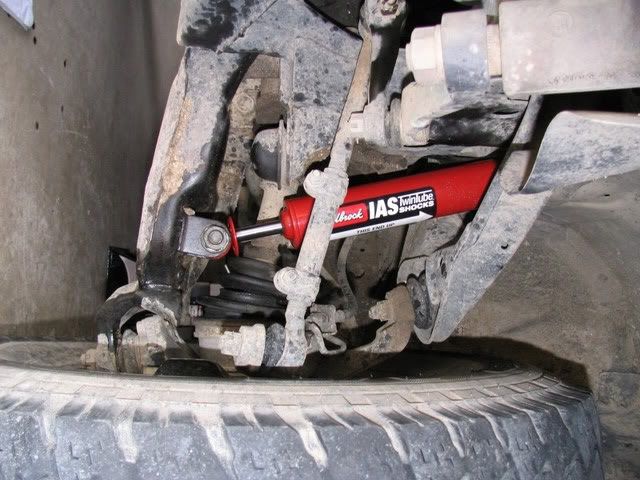
Well I finally got (mostly) everything I need for the cruiser coil/bj spacer lift, so today I decided to put on the front shocks while I'm waiting for the shock mount converter (I have an eye end where I should have a stud end). I don't have manual hubs yet either, but I'm looking around as much as I can for them. Anyways this is going to be a slow process..probably taking about a week or two because I'm going to have to wait for the rest of the parts to get here.
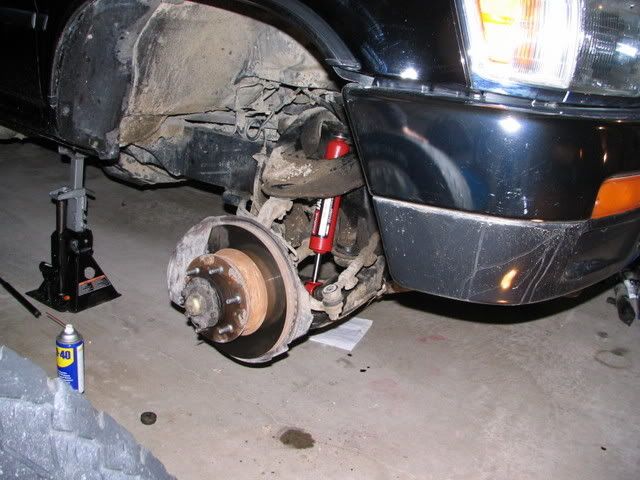
Here's some pics of the shock install.
drivers side:
passenger side:
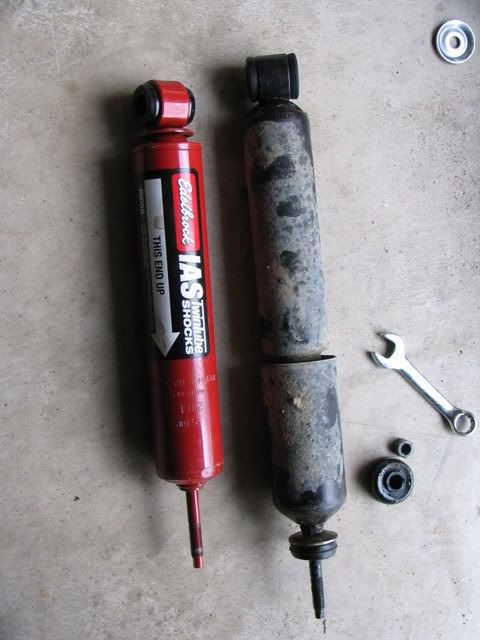
old to new:
I have some questions about replacing the coils. I sort of messed around tonight on trying to get the old ones out and all i can say is DANG. How the crap did you guys get it out because I tried a lot of the ideas i read on here and none seemed to work. Any suggestions?
Here's some pics of the shock install.
drivers side:
passenger side:
old to new:
I have some questions about replacing the coils. I sort of messed around tonight on trying to get the old ones out and all i can say is DANG. How the crap did you guys get it out because I tried a lot of the ideas i read on here and none seemed to work. Any suggestions?
Last edited by traben27; 01-29-2007 at 06:22 PM.
 01-23-2007, 07:45 PM
#2
Registered User
Join Date: Apr 2005
Location: San Antonio TX
Posts: 358
Likes: 0
Received 0 Likes
on
0 Posts
From what I remember, just loosen the fame mounts for the sway bar. I might have had a helper stand on the brake drum to push the axel down more so I could get the springs out/in.
On a side note you'll love those shocks. I run them on my 80, which for some reason costs globs more for and are no longer produced.
On a side note you'll love those shocks. I run them on my 80, which for some reason costs globs more for and are no longer produced.
Last edited by Bear80; 01-23-2007 at 07:52 PM.
01-24-2007, 04:06 AM
#3
Registered User
Thread Starter
Wow...I totally forgot about the swaybar haha. At least I wasn't making a serious attempt at getting them in, or else I'd be really mad at myself for forgetting about it. Thanks though, I'm going to try that today.
01-24-2007, 11:54 AM
#4
Registered User

Join Date: Jul 2004
Location: Alexandria, VA
Posts: 139
Likes: 0
Received 0 Likes
on
0 Posts
put the truck on jackstands and put your jack under the axle. jack the axle up until it's close to "ride height". then unbolt the swaybar links and one end of the panhard bar. lowering the axle should make the coils come out easily
01-24-2007, 04:14 PM
#7
Registered User
Thread Starter
I haven't put the BJ Spacers in yet. I only had a little over an hour so I only had time to do the shocks. I'm also waiting for my friend to help me out on that part cause I get a little nervous when it comes to cutting parts off  Edit: Shock numbers are EDL-20158 and EDL-20186. The 20186's (rears) only fit up to the 89 4runners, I'm not sure if they work on the trucks or not, because they have an eye mount at the top instead of the stud. But I've ordered the ProComp Shock Mount Conversion, hopefully it fits right. If not I'll have to fab one up.
Well I got a little more done today. I got the rear shocks off and the coils out.
I got the coils out by first unbolting the sway bar.
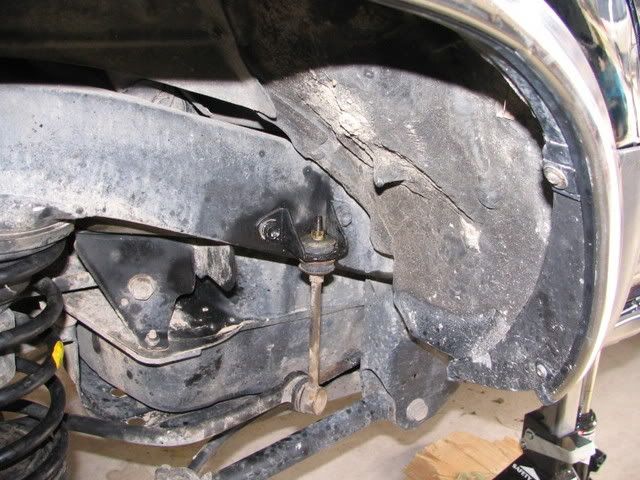
Then I took the shocks off because they weren't letting the axle drop enough. (Yeah I can't put the new ones on yet, I'm waiting for my shock conversion mounts to get here.) Once I had those off I put a jack under one end of the axle and raised it so that the other end dropped lower. The coil came out with just a few tugs after that. Then I repeated it for the other side.
There's a big difference between the LC Coils and the saggy stock ones I had on.
Thats where I'm at now. I haven't tried yet, but I've been trying to figure out how on earth to get the new coils on. What were your ideas? I also forgot if the coil with the three yellow marks goes on the passenger or driver side.
I'll keep posting on how it goes, but it's going to be pretty slow as I usually only have an hour or so a day to work on it after school and between work.
Edit: Shock numbers are EDL-20158 and EDL-20186. The 20186's (rears) only fit up to the 89 4runners, I'm not sure if they work on the trucks or not, because they have an eye mount at the top instead of the stud. But I've ordered the ProComp Shock Mount Conversion, hopefully it fits right. If not I'll have to fab one up.Well I got a little more done today. I got the rear shocks off and the coils out.
I got the coils out by first unbolting the sway bar.
Then I took the shocks off because they weren't letting the axle drop enough. (Yeah I can't put the new ones on yet, I'm waiting for my shock conversion mounts to get here.) Once I had those off I put a jack under one end of the axle and raised it so that the other end dropped lower. The coil came out with just a few tugs after that. Then I repeated it for the other side.
There's a big difference between the LC Coils and the saggy stock ones I had on.
Thats where I'm at now. I haven't tried yet, but I've been trying to figure out how on earth to get the new coils on. What were your ideas? I also forgot if the coil with the three yellow marks goes on the passenger or driver side.
I'll keep posting on how it goes, but it's going to be pretty slow as I usually only have an hour or so a day to work on it after school and between work.
Last edited by traben27; 01-24-2007 at 04:18 PM.
Trending Topics
01-24-2007, 05:09 PM
#8
Registered User

Join Date: Jan 2007
Location: Marietta GA
Posts: 309
Likes: 0
Received 0 Likes
on
0 Posts
I cant wait to see some before and after shots... do you have your torsion bars cranked at all? And why couldnt you just use the EDL-20158's with the pins on all four corners instead of ordering the EDL-20186. Different valving in them? I'm wondering because I'm planning to do about the same thing with my 91. Looks great, keep up the good work.
01-24-2007, 05:39 PM
#10
Contributing Member
I would say go to the local parts store and use there coil spring compressor just did mine that way works great but have a big air wrench there to help pull them coils down by hand it will take forever and you will know you did them the morning.
01-24-2007, 07:20 PM
#12
Registered User
Thread Starter
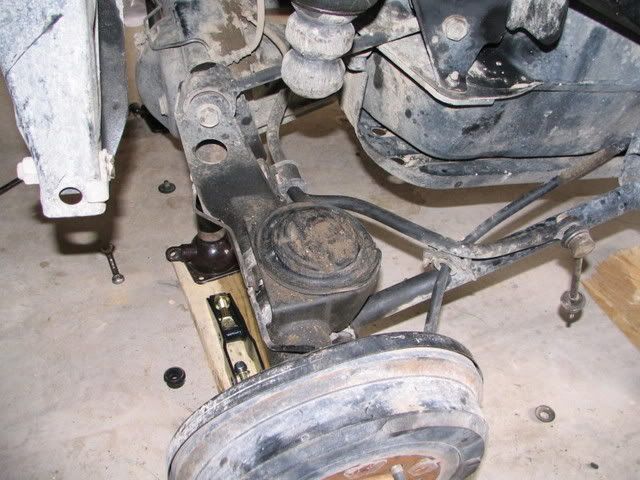
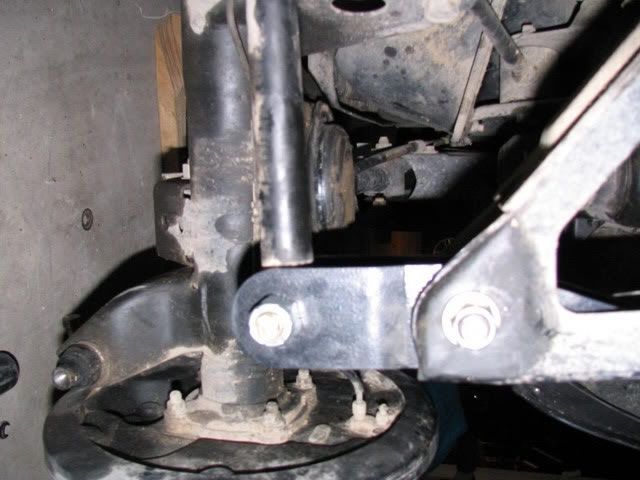
I got bored and decided to put in the panhard drop bracket (from 4crawler). Since I couldn't exactly lower the axle onto its wheels and everything, I just had to pound the bolt out with a screw driver and rubber mallet. It ended up stripping a few of the threads so I went to lowe's and got a new bolt.
Before:
After:
Now I still need to figure out how to get the other coils in, wait for my conversion brackets, wait for my lspv bracket, find some manual hubs (I'm not so worried about these yet because I don't plan on doing any offroading just yet, but no worries I'll be sure to get them as soon as I can find some), and then figure out the whole extended brake line thing. Other than that she's drivable
01-24-2007, 07:28 PM
#13
Contributing Member
Join Date: Dec 2005
Location: Bucklesberry, North Carolina
Posts: 1,167
Likes: 0
Received 2 Likes
on
2 Posts
I love this thread. Yeah there are lots of info on yotatech about all of this, but this is one of the few pictures of everything going in. Keep up the good work and pictures!!
What size tires are you gonna be running with this setup?
What size tires are you gonna be running with this setup?
01-24-2007, 07:34 PM
#14
Registered User
Thread Starter
You know...there probably wouldn't be so many pictures, except I'm using this for a school project and I have to keep track of everything I do haha. It's for my english class but we get to do an "independent study" where we can do whatever we want, this sounded good to me.
I'm planning on running 33's, I just haven't decided on the width yet.
I think I figured out how I'm going to get the coils in by the way. I found i think it was robinhoods thread on his install and he disconnected the sway bar, lspv, shocks, and upper control arm on the driver's side. <- That right there is the only thing I haven't tried so I guess I'll do that tomorrow when i get the time.
01-25-2007, 03:55 AM
#16
Registered User
Thread Starter
I know I have the wrong ones for the rear, thats why I'm buying the shock mount conversion bracket. I got mine from Summit and they ended up telling me they didn't have any that would fit the rear on mine in that price range (this was after I had ordered and received them and realized it was wrong), so I decided to just make them work.
01-25-2007, 06:19 AM
#17
Registered User
Join Date: Aug 2006
Location: Versailles, KY
Posts: 148
Likes: 0
Received 0 Likes
on
0 Posts
I wouldn't try to install the new coils by yourself, IMO, like I did. FWIW, I got my neighbor to come over and with about 2-3 different prybars/big screwdrivers, we were able to slowly "push" them into place, and don't worry if they aren't positioned correctly for seating. Once they get to the point of sliding across that rubber pad on the axle, go ahead and spray that and the top coil seat with a soapy water mixture-- this will help them slide on in, and you'll be able to "spin" the spring to get it seated correctly. I installed OME 901's, but I used the Downey Coils tech write up from here-- It was very helpful
01-25-2007, 04:53 PM
#18
Registered User
Thread Starter
So I finally got the drivers side coil on...just now actually...but when it finally got in there, it pushed out the round piece of rubber that it pushes against on the bottom, the top one stayed in. How important is this piece?
01-25-2007, 05:06 PM
#19
Registered User
Thread Starter
come on guys I need some help really fast. I'm sure it's important, I just wanna know if its something you have to have or else damage will occur...ya know one of those things...
edit: nevermind I got it back on...holy crap i am so sore from getting that crap in there (not to mention I worked today. I'll get pics up later.
edit:
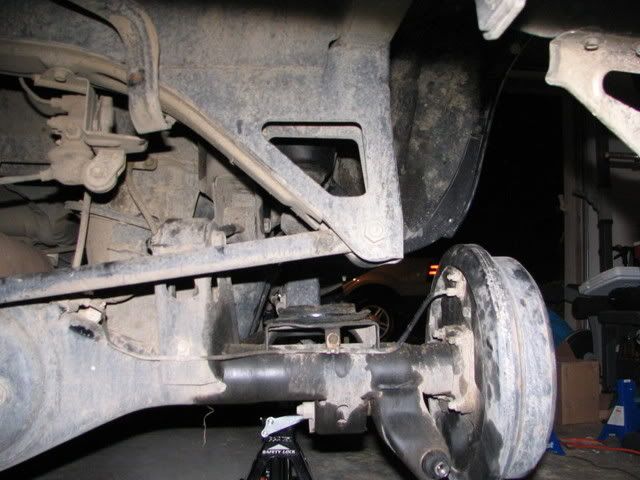
I got to work tonight and decided to make my best attempt at getting at least 1 coil in. (Everyone else seems to have such an easy time with this, but I'm hitting a serious road block). I decided to disconnect everything I possibly could that would be limiting the axle from dropping. This included upper control arms, sway bar, panhard, lspv bracket, brake line. (On these I only undid the bolts that were connecting them to the axle.
Here's some pics of a few of the things I disconnected.
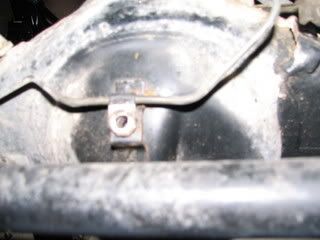
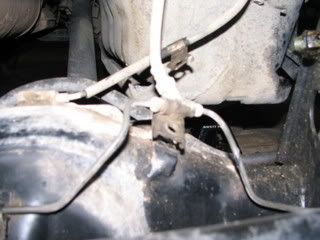
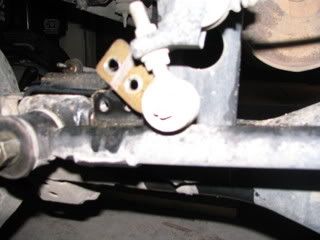
I haven't been able to get the bolt off of the control arm on the passenger side just yet, I'm waiting for a friend to help. This meant it would be easiest to get the drivers side coil in. Well, after pushing the top in and everything I had to have my mom (oh yeah she helps...cool huh) come push down on the drum while I pushed it in with all my might. A few bad cramps and difficult twists later I had that sucker in. But OH NO! Of course as soon as the bottom slid in it pushed the little round rubber thing out. (I dont know what exactly to call it but I'm pretty sure it's important.) Well I couldn't just leave it out so I pulled the spring out and pushed it in again and let me tell you it was a LOT easier to get in the second time.
Edit one last time: Well my friends just came over to see my progress haha and I got my much stronger friend to get under there and try and get the control arm off and he got it! You have no idea how excited I was. Once that was off it only took a few more minutes and the second coil's in! Now I just have to wait for the conversion bracket and I'll pretty much be done with the back. Then I gotta put the bj spacers in and I can wrap this whole thing up. 
edit: nevermind I got it back on...holy crap i am so sore from getting that crap in there (not to mention I worked today. I'll get pics up later.
edit:
I got to work tonight and decided to make my best attempt at getting at least 1 coil in. (Everyone else seems to have such an easy time with this, but I'm hitting a serious road block). I decided to disconnect everything I possibly could that would be limiting the axle from dropping. This included upper control arms, sway bar, panhard, lspv bracket, brake line. (On these I only undid the bolts that were connecting them to the axle.
Here's some pics of a few of the things I disconnected.
I haven't been able to get the bolt off of the control arm on the passenger side just yet, I'm waiting for a friend to help. This meant it would be easiest to get the drivers side coil in. Well, after pushing the top in and everything I had to have my mom (oh yeah she helps...cool huh) come push down on the drum while I pushed it in with all my might. A few bad cramps and difficult twists later I had that sucker in. But OH NO! Of course as soon as the bottom slid in it pushed the little round rubber thing out. (I dont know what exactly to call it but I'm pretty sure it's important.) Well I couldn't just leave it out so I pulled the spring out and pushed it in again and let me tell you it was a LOT easier to get in the second time.
Edit one last time: Well my friends just came over to see my progress haha and I got my much stronger friend to get under there and try and get the control arm off and he got it! You have no idea how excited I was.
Once that was off it only took a few more minutes and the second coil's in! Now I just have to wait for the conversion bracket and I'll pretty much be done with the back. Then I gotta put the bj spacers in and I can wrap this whole thing up.
Last edited by traben27; 01-25-2007 at 08:47 PM.
01-26-2007, 04:12 AM
#20
Registered User
Thread Starter
Here's a picture I got this morning with both coils on...looks good to me
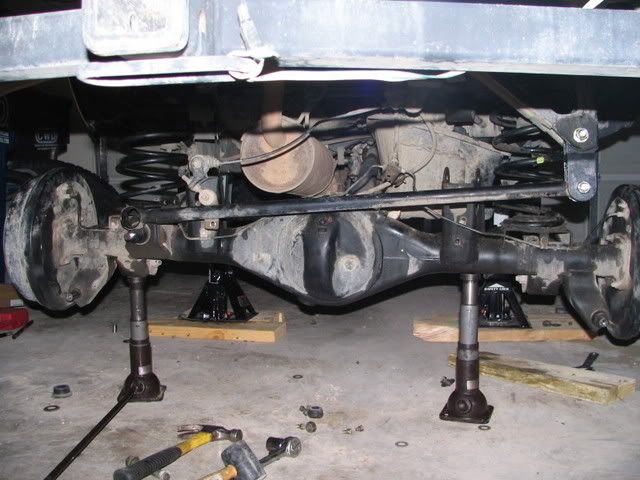
it looks a lot bigger than I thought it would be...so hopefully once it gets the weight of the body on it...it'll go down.
it looks a lot bigger than I thought it would be...so hopefully once it gets the weight of the body on it...it'll go down.
Last edited by traben27; 01-26-2007 at 04:15 AM.


