
Mountain Cop's attempt to make a soft top
 03-22-2010, 11:03 PM
#1
Registered User
Thread Starter
Join Date: Nov 2009
Location: Central Sierra Nevadas (Oakhurst)
Posts: 504
Likes: 0
Received 2 Likes
on
2 Posts
Mountain Cop's attempt to make a soft top
First and foremost- I know that there are no pics. Sorry. I left my camera at work this weekend. I will get some up as soon as I can. I am also sorry that this is such a teaser thread. I am going to document the build here, but there isn't too much to report at this point.
I will do my best to include parts sources and item numbers where applicable. Thanks to everyone else who has done this before and documented it. I am unabashedly ripping off everything here from your ideas.
So...
It has been getting warm. I know that the whole "April showers" thing hasn't hit yet, but this week was warm and sunny. Also, I was doing some work with a wheel grinder inside the truck, and it was loud, so I took the top off.
This morning, I went to Lowe's (big box hardware/lumber store for those who don't have them. Similar to Home Depot and the like), and purchased a 8' strip of 2" x 1/8" aluminum (item number 55960, $21.47), and two 1 foot long pieces of 14 gauge steel 1-1/2" x 1-1/2" angle iron which was already perforated (item number 215893, $2.97) to cut into mounting brackets, along with six sets of fasteners for the six mounting brackets to hold the aluminum to the back of the cab. I used 1/4" x 3/4" screws, 1" OD / 1/4" ID fender washers, and 1/4" lock washers and nuts for each bracket. The two side brackets I used extra fender washers on. I had a lot of the fasteners, but I can't imagine that a whole set of new ones would cost more than five or six dollars.
Total cost of "cab snap plate assembly" = $32.41 (taking into account $5.00 for fasteners).
I then went to a metal yard (Valley Iron, for those of you in the Central California area) and purchased a 24' stick of 1"x1"x.065" tubing and a 20' stick of 1"x3"x.065" tubing. They cut the sticks to length for me, so I ended up with eight 1"x1"x8' sections, two 1"x3"x6' sections, and one 1"x3"x8' section. I am not planning to use the last section for this build, but we will see.
Total cost for the tubing was $53.66. They did cut them for free, but I believe they normally only charge $2.00 / cut, so it would still be worth it to have the pieces cut for me.
Total materials cost for the frame (thus far...): $86.07. I'm still $1300 under what Canback would charge!
I'm planning on using mostly "common sense snaps" for the canvas. I'm hoping that I will be out no more than $70 for the whole setup there. I am planning on making the canvas portion out of military tarps. I haven't decided what size(s) to go with. I'm planning on one top piece which is separate from the sides. The top will be roughly 4'x6.6'. Unfortunately, mil tarp comes in 4x6, but not 5x7 sizes. a 5x7 would be almost perfect. I will probably end up going with a 8x10 tarp and cutting it down.
Updates will be posted as events warrant.
Last edited by Mountain Cop; 03-23-2010 at 05:06 PM.

 03-23-2010, 09:35 AM
#5
Registered User

Join Date: Nov 2009
Location: Currently in Colorado Springs, CO
Posts: 45
Likes: 0
Received 0 Likes
on
0 Posts
Central Cali!!! Ha You wouldn't happen to be in Fresno wouldja?
i'm also interested in seeing the outcome here. My Sis has a 1st gen runner and i'd love to make a soft top myself.
i'm also interested in seeing the outcome here. My Sis has a 1st gen runner and i'd love to make a soft top myself.
03-23-2010, 12:01 PM
#6
Registered User
Here's another YT member that is building a top.
https://www.yotatech.com/forums/f88/...der-way-92914/
You might be able to borrow some ideas from him if you run into any snags.
https://www.yotatech.com/forums/f88/...der-way-92914/
You might be able to borrow some ideas from him if you run into any snags.
Trending Topics
03-23-2010, 04:23 PM
#8
Registered User
Thread Starter
Join Date: Nov 2009
Location: Central Sierra Nevadas (Oakhurst)
Posts: 504
Likes: 0
Received 2 Likes
on
2 Posts
Volcom- Yeah, that was definitely one of my inspiration threads. You beat me to the punch in posting the link up. Thanks!
Prelude85- About 45 minutes north, but yeah, certainly the Fresno area.
WJC- patiently? Heck, I'm not even being patient!
I got the "cab snap plate assembly mounted up. It was a lot easier than I thought it would be. The angle iron ended up being the perfect size for the mounts. I had to trim about 8-10 inches off of the end of the aluminum to make it fit. There will be more finish work on the mounts and strap once everything is mounted up.
03-23-2010, 08:42 PM
#10
Contributing Member
Join Date: Mar 2003
Location: COTKU,Ontario,Canada
Posts: 11,334
Likes: 0
Received 0 Likes
on
0 Posts
Check out some Marine suppliers they can probably hook you up with some Sunbrella type canvas... also take a look at some boat canvas tops... they sometimes use some kind of heavy semi-flexible plastic strips as stiffeners to help stop sag/flap and "ponding" during rain storms...
03-23-2010, 09:09 PM
#11
Registered User
Thread Starter
Join Date: Nov 2009
Location: Central Sierra Nevadas (Oakhurst)
Posts: 504
Likes: 0
Received 2 Likes
on
2 Posts
Ok, so after pricing common sense fasteners... I'm going the cheaper route and using good old fashioned snaps. At between $1.30 and $1.60 per fastener set, and considering that I would need roughly 70 fasteners, I would end up spending more on fasteners than anything else in the project. I may get a few, and use them in some key high-stress areas on the perimeter of the canvas.
I haven't really spent that much time figuring out how I am going to mount tension straps. Any thoughts on that would be appreciated.
I haven't really spent that much time figuring out how I am going to mount tension straps. Any thoughts on that would be appreciated.
03-29-2010, 09:55 PM
#12
Registered User
Thread Starter
Join Date: Nov 2009
Location: Central Sierra Nevadas (Oakhurst)
Posts: 504
Likes: 0
Received 2 Likes
on
2 Posts
I should always start at plan "B".
I'll use the .065 tubing for something else.
We decided to make the bed rail portions out of 3/16" x 1 1/2" angle iron. We cut and drilled some tabs so that we could mount it to the existing bolt holes.
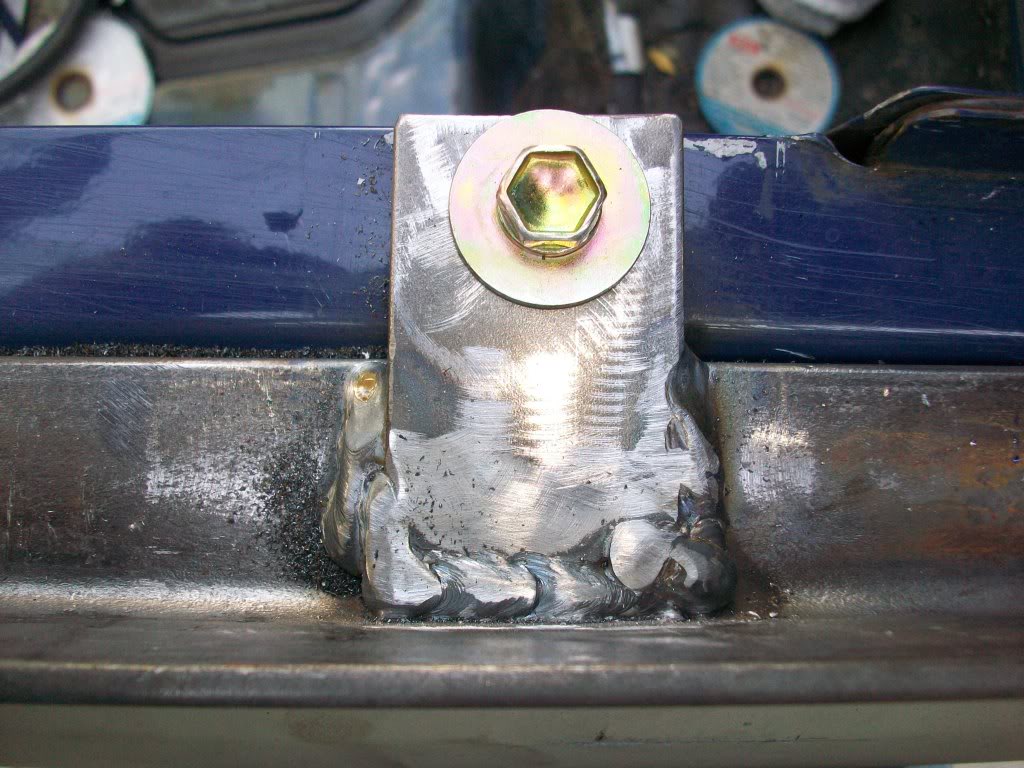
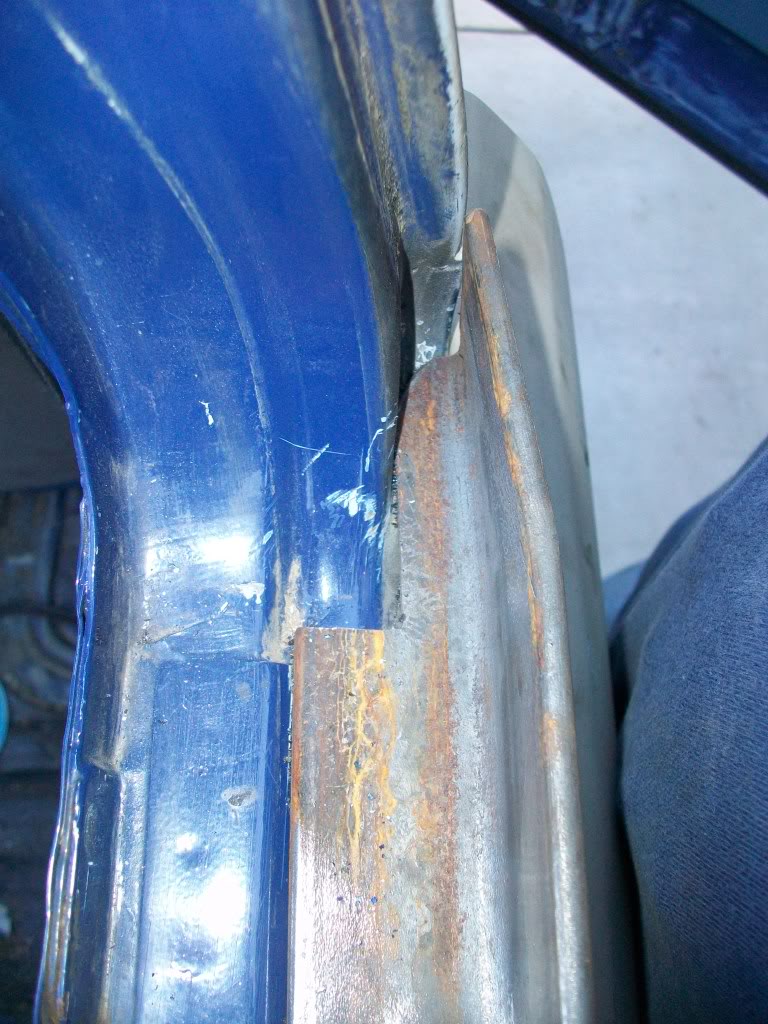
The angle iron sits just to the outside of the small ridge on top of the bed rail. We cut the it long enough that we could sort of cope in the bottom to fit around the pinch weld at the front of the bed rail. This allowed us to bend the side of the angle in a bit to match the contour of the cab. It should make it a bit more weather resistant.
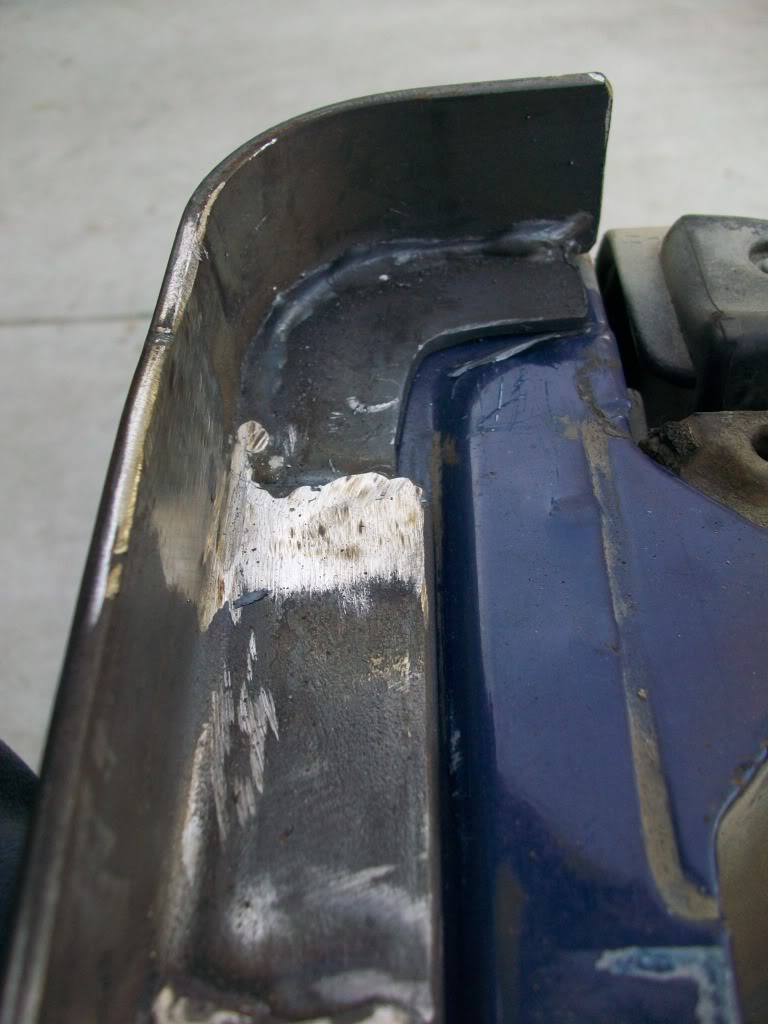
If I had been doing this myself, the tailgate ends of the angle iron would have been square or perhaps at most would have a couple of bends in them to finish the end. However, my friend who was helping me on the project had other plans (and more skill and imagination than I have). He cut the angle just short of the bend, then massaged in a piece of plate that matched the curve and a piece of flat iron that he bent to match.
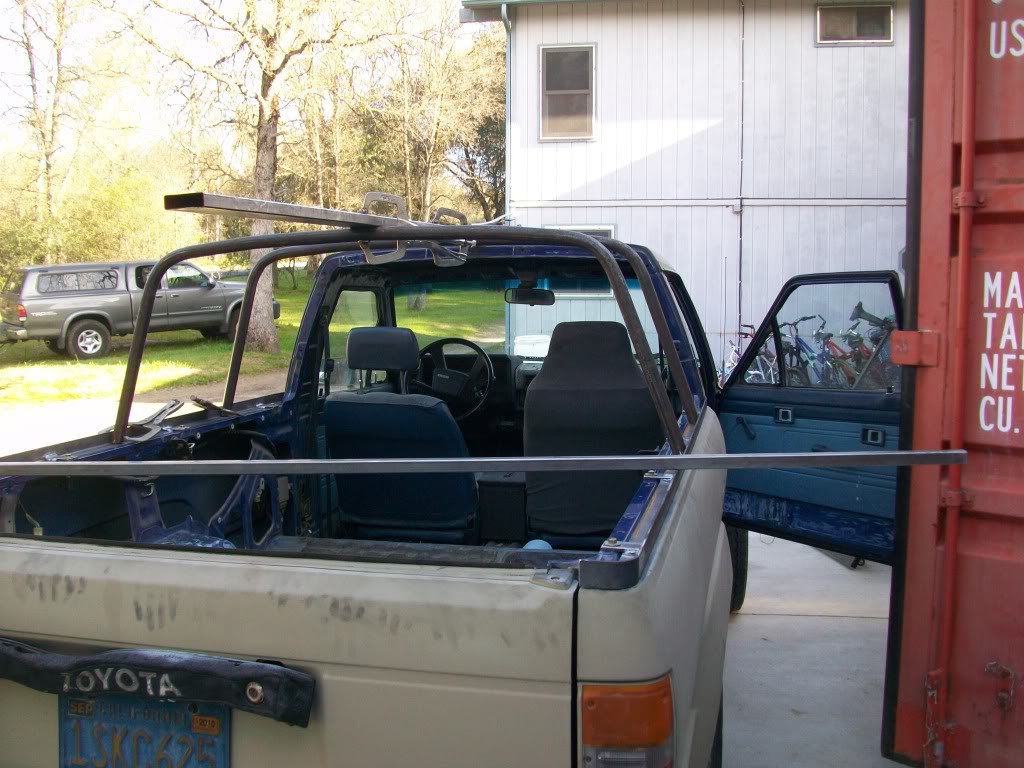
We used Schedule 80 (cut into 92" lengths) pipe for the three upright "hoops". We gave them a little bit of a bend at the mid point, then another bend one foot to either side of the mid point. We didn't measure the distance for the final corner bend, but fit the first piece up to the rear of the cab and simply marked the middle of the bend. We did end up cutting about 2" off each end of each hoop, and cut at about a 30 degree angle to get it close to flat on the inside of the angle. I ground back the outer edge of the corner to fit them in. The second hoop was a copy of the first. We designed the third hoop to lean slightly forward, and as such only ended up cutting about 1" off either end. There was a lot of grinding and test fitting and regrinding and retest fitting, but we didn't want any spring in the hoops to make it a pain to install the top later on.
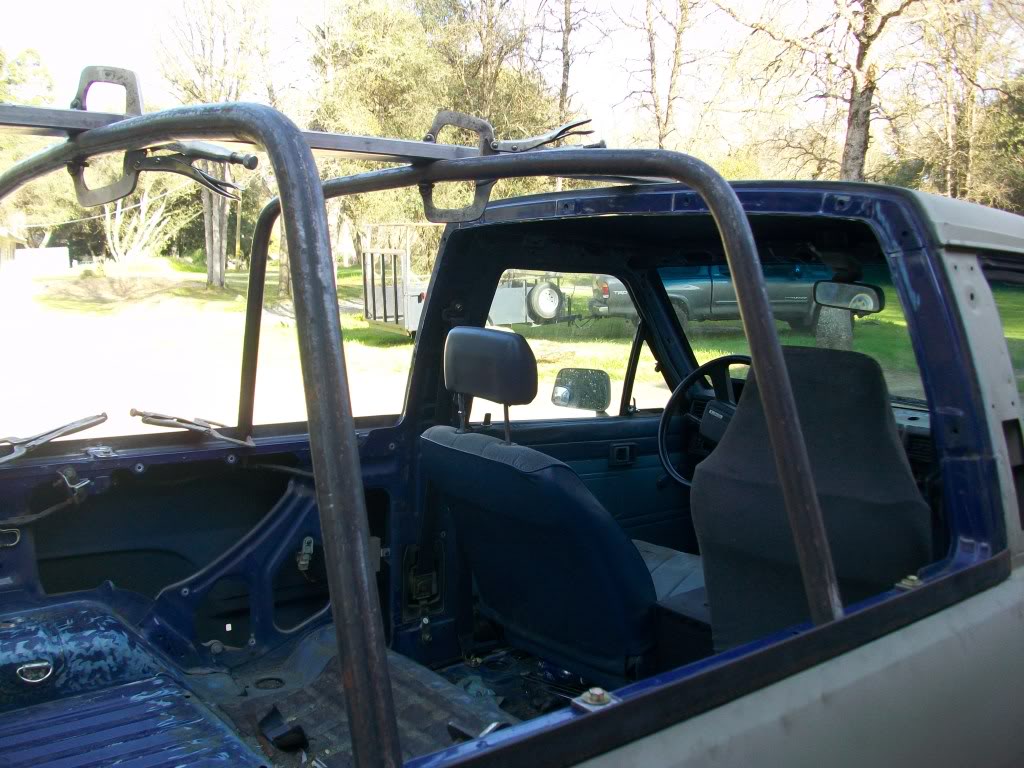
We also added a piece of 3/16" angle iron to the side of the frame, 16 3/16" up. We cut out notches for the hoops and fitted the angle up such that the vertical side is just outside the hoops, and the horizontal side angles down toward the opposite fender. This will later be drilled for use as a tie down location. The outer portion will be drilled in a few places in anticipation of a later basket or lumber rack addition such as the canback (or Marty4Runner) uses.
I have the bed rails and hoops finished, and the right side angle iron horizontal brace done. Hopefully Thursday I will be able to finish the left brace and get started on the final forward snap portion. My original plan was to have the "snap plate" be independent of the rest of the frame, so that I could remove the rear portion and not worry about removing the front if I wanted to carry something large. Instead, I will just have to undo those bolts as well. We are going to use a piece of 3/16" angle iron for the snap plate. We are planning on notching it and bending it to fit the contour of the rear of the cab, then drilling it for the existing bolt holes. It will be welded to the bed rail and the two horizontal braces, making one very strong, very rigid frame. I will use twist snaps (or "common sense snaps" if you want to pay more for the same thing...) at the corners of each canvas portion, and will make up the difference with conventional snaps. I am planning on using either six or eight straps to tension the top canvas piece (2 at the back, and the remainder along the sides) so that I can pull it taught and snap it. The sides and back will be under a bit less stress, but I will still use a few twist snaps to help in pulling things tight. The only thing I don't really have a complete plan for yet is the back panel. I'm deciding between it being extensions of the sides which will snap together in the middle (allowing me to roll up the sides rather than have to roll up the whole thing) or making it a completely separate piece. The top portion will probably measure about 4' x 6', with the sides being closer to 22" x 6.5'. A couple of 5x7 military canvas tarps should do nicely.
Its dark now, so you don't get to see any pics of it on the truck yet. Perhaps if I get home before dark tomorrow I will snap a couple and get them up.
MC
I'll use the .065 tubing for something else.
We decided to make the bed rail portions out of 3/16" x 1 1/2" angle iron. We cut and drilled some tabs so that we could mount it to the existing bolt holes.
The angle iron sits just to the outside of the small ridge on top of the bed rail. We cut the it long enough that we could sort of cope in the bottom to fit around the pinch weld at the front of the bed rail. This allowed us to bend the side of the angle in a bit to match the contour of the cab. It should make it a bit more weather resistant.
If I had been doing this myself, the tailgate ends of the angle iron would have been square or perhaps at most would have a couple of bends in them to finish the end. However, my friend who was helping me on the project had other plans (and more skill and imagination than I have). He cut the angle just short of the bend, then massaged in a piece of plate that matched the curve and a piece of flat iron that he bent to match.
We used Schedule 80 (cut into 92" lengths) pipe for the three upright "hoops". We gave them a little bit of a bend at the mid point, then another bend one foot to either side of the mid point. We didn't measure the distance for the final corner bend, but fit the first piece up to the rear of the cab and simply marked the middle of the bend. We did end up cutting about 2" off each end of each hoop, and cut at about a 30 degree angle to get it close to flat on the inside of the angle. I ground back the outer edge of the corner to fit them in. The second hoop was a copy of the first. We designed the third hoop to lean slightly forward, and as such only ended up cutting about 1" off either end. There was a lot of grinding and test fitting and regrinding and retest fitting, but we didn't want any spring in the hoops to make it a pain to install the top later on.
We also added a piece of 3/16" angle iron to the side of the frame, 16 3/16" up. We cut out notches for the hoops and fitted the angle up such that the vertical side is just outside the hoops, and the horizontal side angles down toward the opposite fender. This will later be drilled for use as a tie down location. The outer portion will be drilled in a few places in anticipation of a later basket or lumber rack addition such as the canback (or Marty4Runner) uses.
I have the bed rails and hoops finished, and the right side angle iron horizontal brace done. Hopefully Thursday I will be able to finish the left brace and get started on the final forward snap portion. My original plan was to have the "snap plate" be independent of the rest of the frame, so that I could remove the rear portion and not worry about removing the front if I wanted to carry something large. Instead, I will just have to undo those bolts as well. We are going to use a piece of 3/16" angle iron for the snap plate. We are planning on notching it and bending it to fit the contour of the rear of the cab, then drilling it for the existing bolt holes. It will be welded to the bed rail and the two horizontal braces, making one very strong, very rigid frame. I will use twist snaps (or "common sense snaps" if you want to pay more for the same thing...) at the corners of each canvas portion, and will make up the difference with conventional snaps. I am planning on using either six or eight straps to tension the top canvas piece (2 at the back, and the remainder along the sides) so that I can pull it taught and snap it. The sides and back will be under a bit less stress, but I will still use a few twist snaps to help in pulling things tight. The only thing I don't really have a complete plan for yet is the back panel. I'm deciding between it being extensions of the sides which will snap together in the middle (allowing me to roll up the sides rather than have to roll up the whole thing) or making it a completely separate piece. The top portion will probably measure about 4' x 6', with the sides being closer to 22" x 6.5'. A couple of 5x7 military canvas tarps should do nicely.
Its dark now, so you don't get to see any pics of it on the truck yet. Perhaps if I get home before dark tomorrow I will snap a couple and get them up.
MC
03-30-2010, 08:11 AM
#13
Contributing Member
Join Date: Mar 2003
Location: COTKU,Ontario,Canada
Posts: 11,334
Likes: 0
Received 0 Likes
on
0 Posts
Looks good MC... if you run some velcro along between the snaps the tarp will have less flap and be more weather/dust/bug resistant as well. between the steel and the body you could run some of that weather stripping they sell to put between the box and cap on pick-ups it is very thin so it would not interfere with the bolt mounting and would seal the area and protect the paint a bit... stick the stripping to the cover not the truck lol... that way come winter you can go back to a hard top if you want...
If you have flapping issues you could sew in some eyelet patches on the inside of the cover and weld some loops/washers to the inside top edge of the frame and use some shock cord to tie it down a bit more or use the shock cord idea and lace the cover to the hoops. You can get silicone/gortex type strip things to seal the seams.
If you have flapping issues you could sew in some eyelet patches on the inside of the cover and weld some loops/washers to the inside top edge of the frame and use some shock cord to tie it down a bit more or use the shock cord idea and lace the cover to the hoops. You can get silicone/gortex type strip things to seal the seams.
Last edited by aviator; 03-30-2010 at 08:15 AM.
03-30-2010, 05:33 PM
#16
Registered User
Thread Starter
Join Date: Nov 2009
Location: Central Sierra Nevadas (Oakhurst)
Posts: 504
Likes: 0
Received 2 Likes
on
2 Posts
Thanks guys.
Aviator- I will likely put snaps on first for a more positive connection, then add the velcro as needed to reduce noise / flapping / leakage, etc. (sounds like bad home medical advice, doesn't it?)
NwRunner- Lol, not so much the tailgate as the whole truck. My build thread explains. The link is in my sig.
04-17-2010, 07:31 PM
#18
Registered User
Thread Starter
Join Date: Nov 2009
Location: Central Sierra Nevadas (Oakhurst)
Posts: 504
Likes: 0
Received 2 Likes
on
2 Posts
I'm with ya now, Aviator. I will definitely add some velcro, especially along the front hoop and cloth-to-cloth portions.
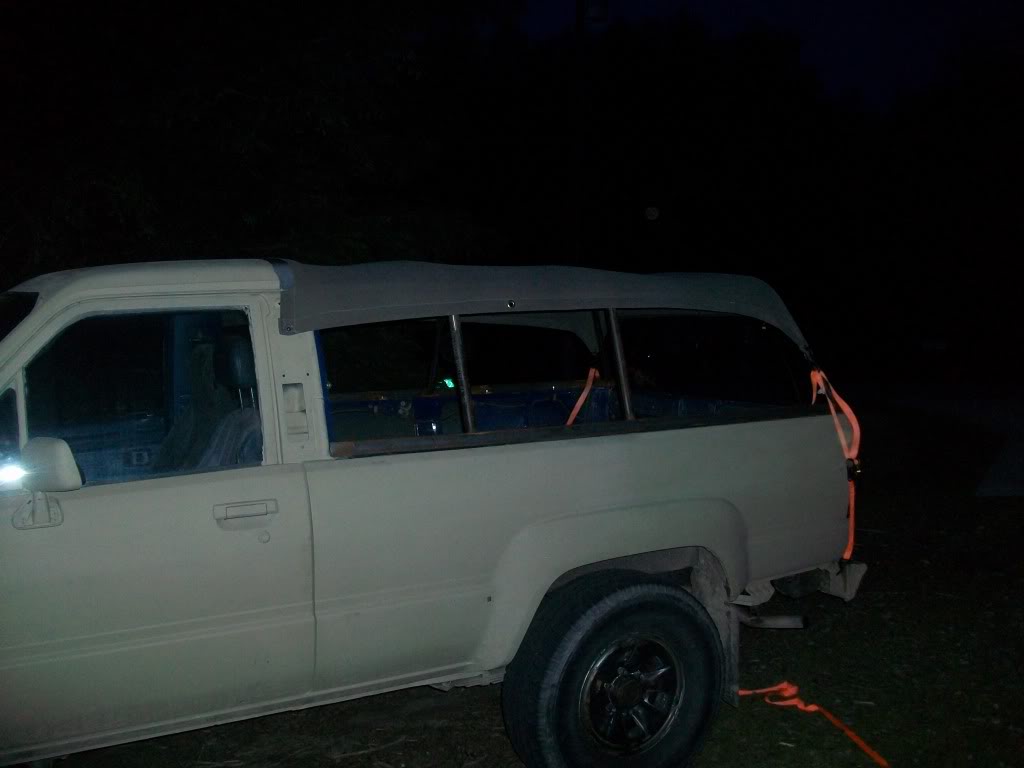
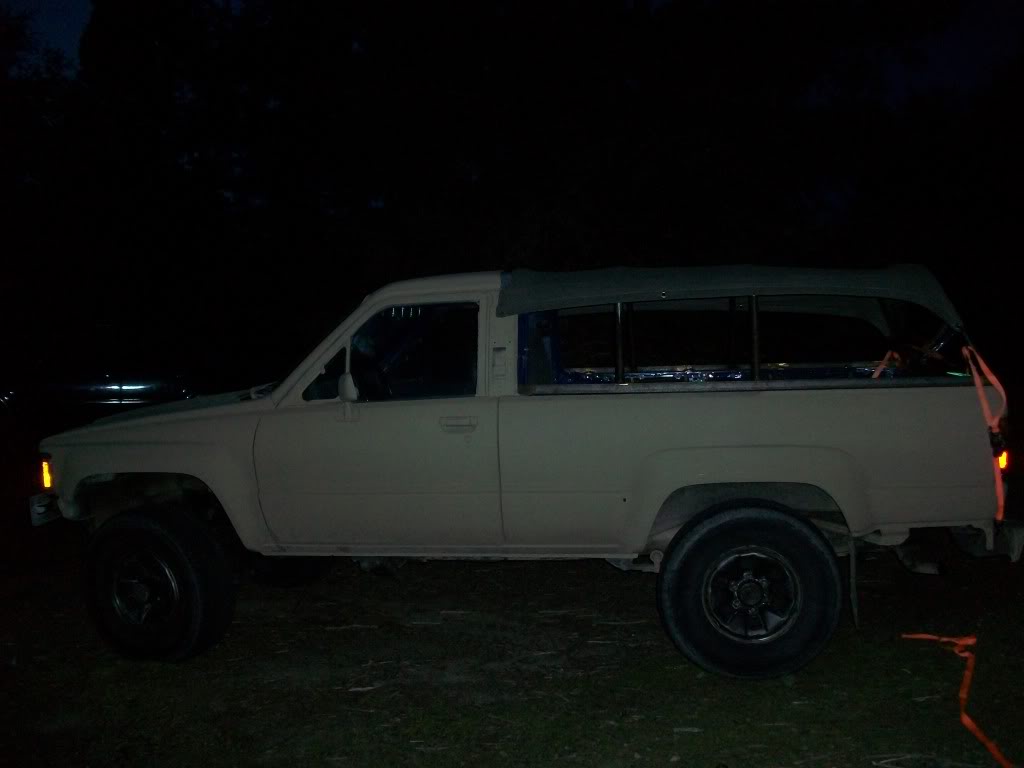
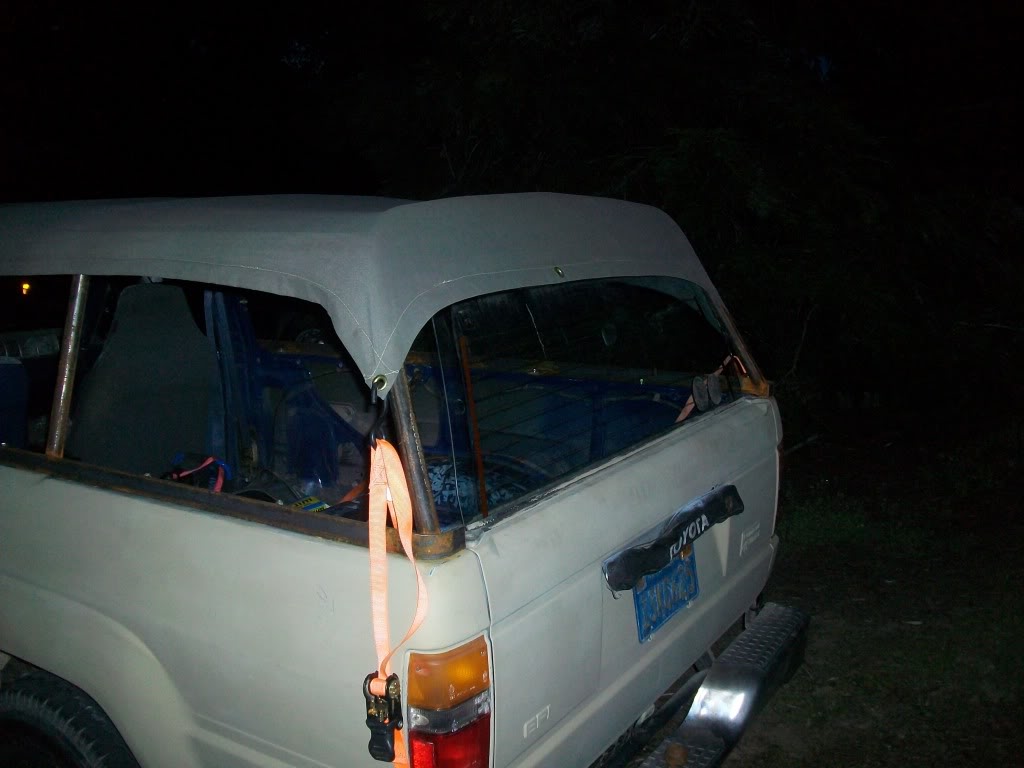
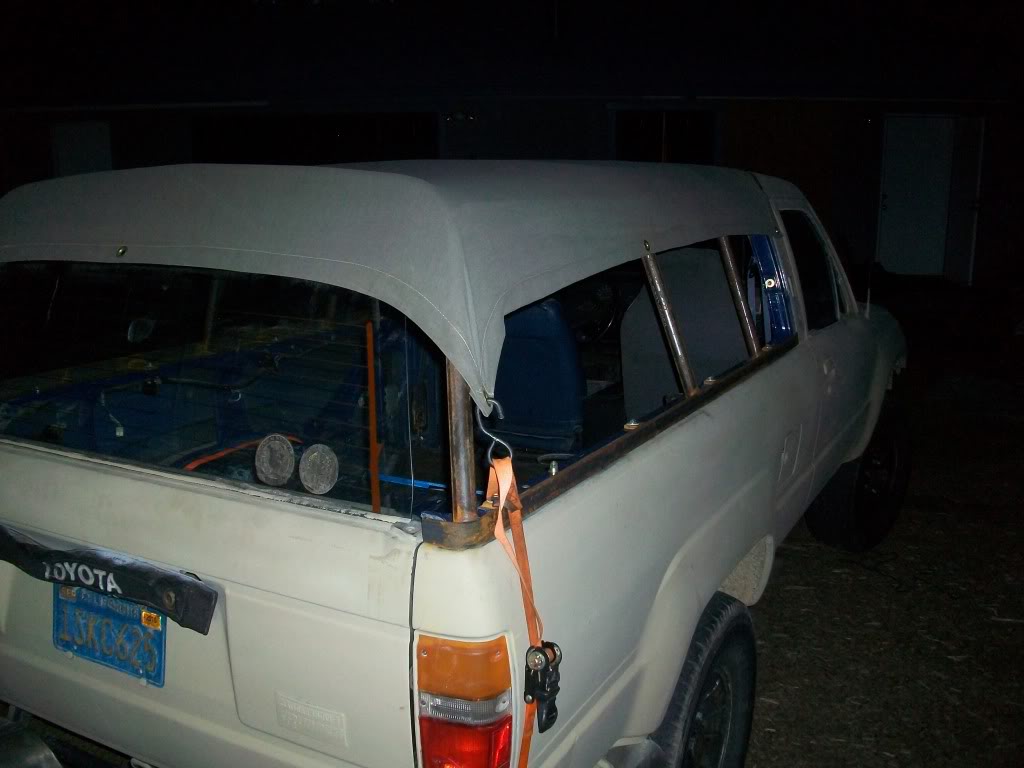
I've been putting off ordering the snaps and canvas for some time, mainly because I didn't want to get canvas that was too thick to be able to work with, and I didn't want to sacrifice strength. I finally found for $18.00 at a surplus store what was advertised as a 5'x7' 10oz water resistant tarp. Upon getting it home, I found that the 5'x7' measurement was a "cut" size, not a "finished" size. This didn't really surprise me. I figured that I needed just a bit more than 4' for width and about 6 1/2' for length for the top canvas portion. Fortuitously, this piece of canvas was almost exactly the right size. I doubt that I will have to cut it at all.
I still haven't found time to purchase the 1"x1" angle iron that I need to complete the frame. Perhaps Monday. In the meantime, I used a couple of large sheet metal screws on the front corner grommets and a couple of ratchet straps to secure the back corner grommets. It is temporary, of course, but I was able to finally get a look at something similar to the final product. Upon test driving the truck, I was surprised to find myself under machine gun attack. Once I realized that this was unlikely, I found my wits and located the source of the staccato cacophony. There was a "middle" (but not at all centered) grommet on the front edge of the tarp. The wind caught it at about 35mph and created a tattoo of sorts, with me unhappily sitting inside the drum head in question- the cab. Quick to revert to my redneck roots, I ran a strip of 100mph tape across the leading edge of the tarp. It solved the problem nicely. Hopefully, this will not be much of a problem in the final design. The tarp will not be sitting above the level of the top of the cab, but will rather be nestled just below that level, and sitting on a flat strip of rubber.
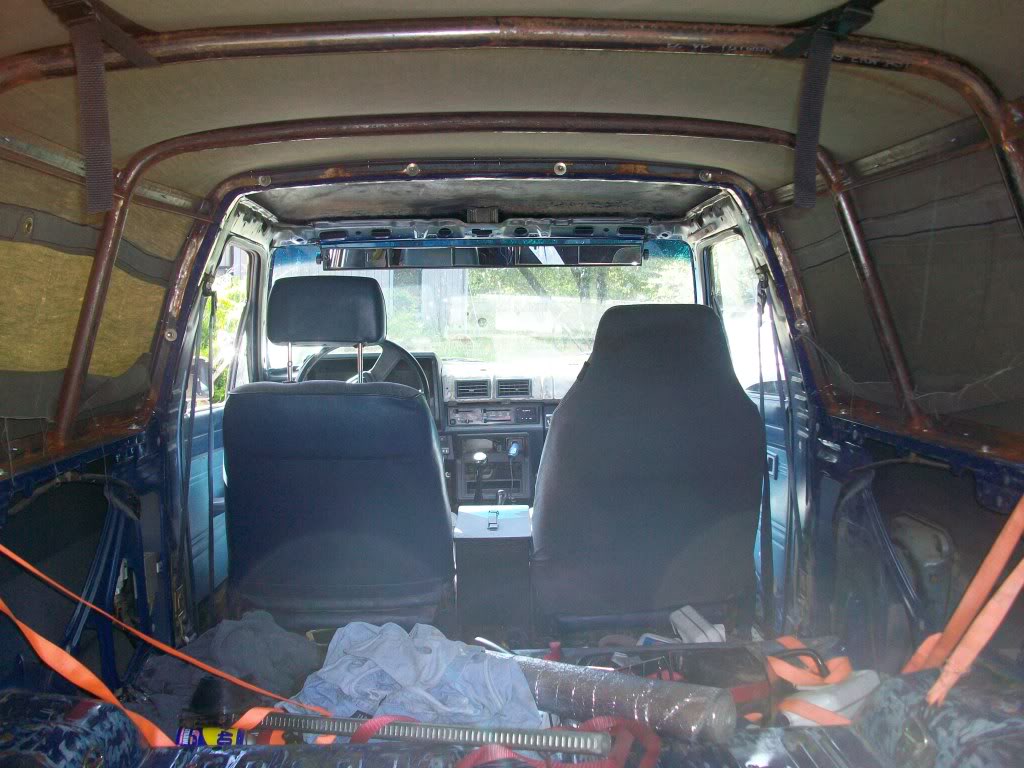
I discovered another bit of serendipity. I'm not certain that I will make use of it, but the thought is now there, tumbling about in my head. It turns out that the rear window, when rolled up, just hits the inside of the canvas. I am considering the possibility of retaining the rear window (though I had previously wanted to remove it and make a storage area in the tailgate), and figuring out a way to semi-seal around it with side portions a bit longer than I had planned.

I've been putting off ordering the snaps and canvas for some time, mainly because I didn't want to get canvas that was too thick to be able to work with, and I didn't want to sacrifice strength. I finally found for $18.00 at a surplus store what was advertised as a 5'x7' 10oz water resistant tarp. Upon getting it home, I found that the 5'x7' measurement was a "cut" size, not a "finished" size. This didn't really surprise me. I figured that I needed just a bit more than 4' for width and about 6 1/2' for length for the top canvas portion. Fortuitously, this piece of canvas was almost exactly the right size. I doubt that I will have to cut it at all.
I still haven't found time to purchase the 1"x1" angle iron that I need to complete the frame. Perhaps Monday. In the meantime, I used a couple of large sheet metal screws on the front corner grommets and a couple of ratchet straps to secure the back corner grommets. It is temporary, of course, but I was able to finally get a look at something similar to the final product. Upon test driving the truck, I was surprised to find myself under machine gun attack. Once I realized that this was unlikely, I found my wits and located the source of the staccato cacophony. There was a "middle" (but not at all centered) grommet on the front edge of the tarp. The wind caught it at about 35mph and created a tattoo of sorts, with me unhappily sitting inside the drum head in question- the cab. Quick to revert to my redneck roots, I ran a strip of 100mph tape across the leading edge of the tarp. It solved the problem nicely. Hopefully, this will not be much of a problem in the final design. The tarp will not be sitting above the level of the top of the cab, but will rather be nestled just below that level, and sitting on a flat strip of rubber.
I discovered another bit of serendipity. I'm not certain that I will make use of it, but the thought is now there, tumbling about in my head. It turns out that the rear window, when rolled up, just hits the inside of the canvas. I am considering the possibility of retaining the rear window (though I had previously wanted to remove it and make a storage area in the tailgate), and figuring out a way to semi-seal around it with side portions a bit longer than I had planned.
04-24-2010, 07:15 PM
#19
Registered User
Thread Starter
Join Date: Nov 2009
Location: Central Sierra Nevadas (Oakhurst)
Posts: 504
Likes: 0
Received 2 Likes
on
2 Posts
We got the front strap formed and attached today. As usual, pics will have to wait until daylight.
We used 1"x1"x3/16" angle iron. We started by cutting notches for the two middle cab bolts. We bolted the piece in to the middle two, then cut notches for the next two to the outside. We also cut a notch that was just the width of the blade in between the inner and outer bolts on either side. This was followed by a series of about six small notches to allow the corner to be bent. Upon bending and notching for the bottom two cab bolts, we tacked the bend notches and fit the piece with some minimal grinding. We then shaped the bed rail piece of angle iron to the bottom of the front strap and welded that in. After finish welding and grinding, we were able to fit the frame to the truck.
The next step is snaps and canvas. I think I may go heavier than the 10oz stuff I am using now. I also have to get some rubber welting to help seal the frame to the cab and bed.
Pics later.
05-24-2010, 05:17 PM
#20
Registered User
Thread Starter
Join Date: Nov 2009
Location: Central Sierra Nevadas (Oakhurst)
Posts: 504
Likes: 0
Received 2 Likes
on
2 Posts
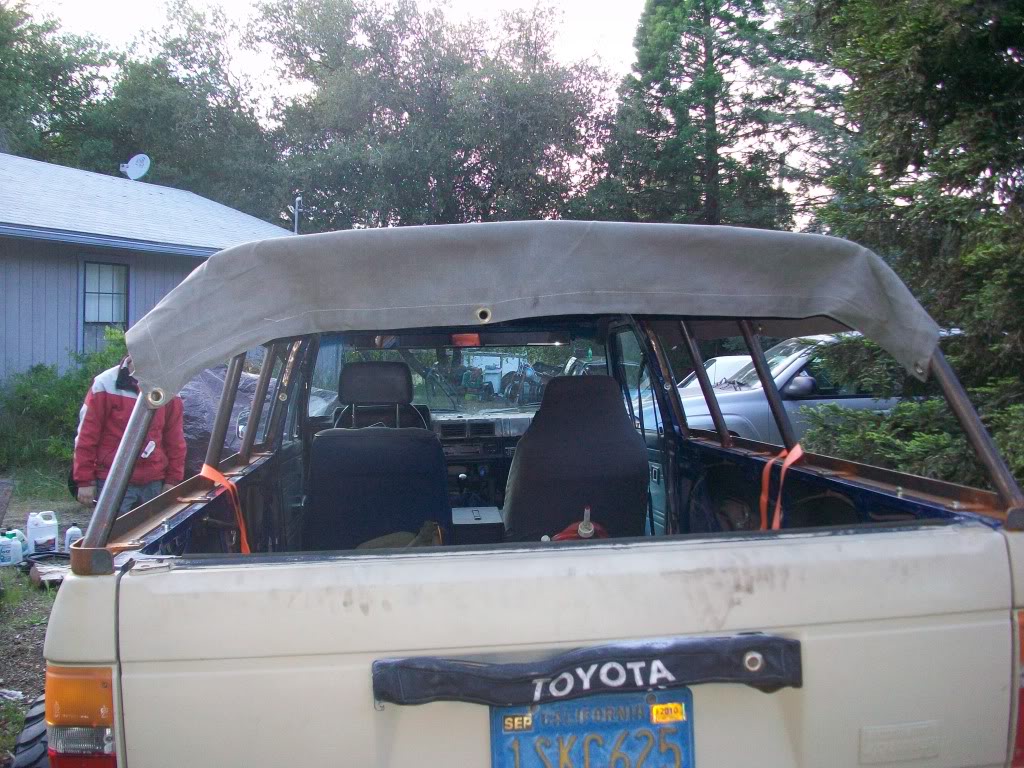
So... I've been slacking on both the 4runner and the soft top builds. This weekend, I actually got a little bit done with a lot of sewing help from my wife.
I ditched the idea of making the sides removable. If I ever decide I want to make sides with windows, they can snap inside the current solid canvas sides and the current ones can simply be rolled up.
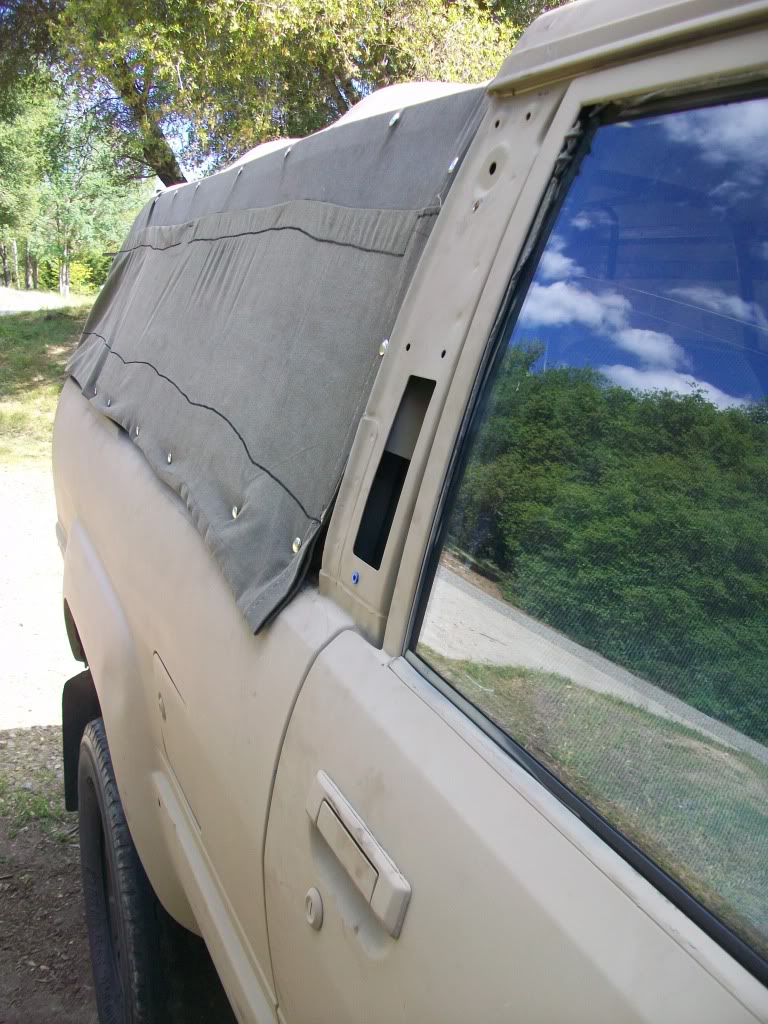
I drilled 1/8" holes in the flat pieces of steel at the front and at the top and bottom of both sides. I will end up adding a few more, but I have about 25 in it right now. I then used self-tapping 6-32 x 1/2 screws to screw the male portion of a snap assembly into the holes.
I started with the front angle iron "hoop" at the top. I measured to the center of the tarp and used a sharpie to mark the line. I then lined the center line up with the center snap, and marked where I wanted the tarp side snap. I used a leather punch to make the hole. I then used the simple, cheap snap tools that I bought with the snaps to set the center snap.
There are basically three types of snap tool. The most expensive ($200+) is a bench-mounted unit. The $20 range tool is of the plier type. I couldn't find one locally, but I did find the cheap (+/- $3.00) two part tool, which is basically a base and a long punch. You set the snap top upside down in the base, with the stud in the middle through the hole in the canvas. Drop a snap receptacle (female side) over the stud, place the punch on the stud, and tap it down with the hammer. Once you get used to the manipulation of it, it is quite easy, and works surprisingly well. I don't know that the plier style would have saved me much time at all.
I then worked my way out from the center, stretching the canvas as I went. I would use one hand to stretch the fabric, then mark a dot with my sharpie at the TOP edge of the snap base. This resulted in a reasonably taut fabric. I alternated from side to side down the top strap with the top portion of the canvas. I didn't sew the sides on until I was done with the snaps on the top.
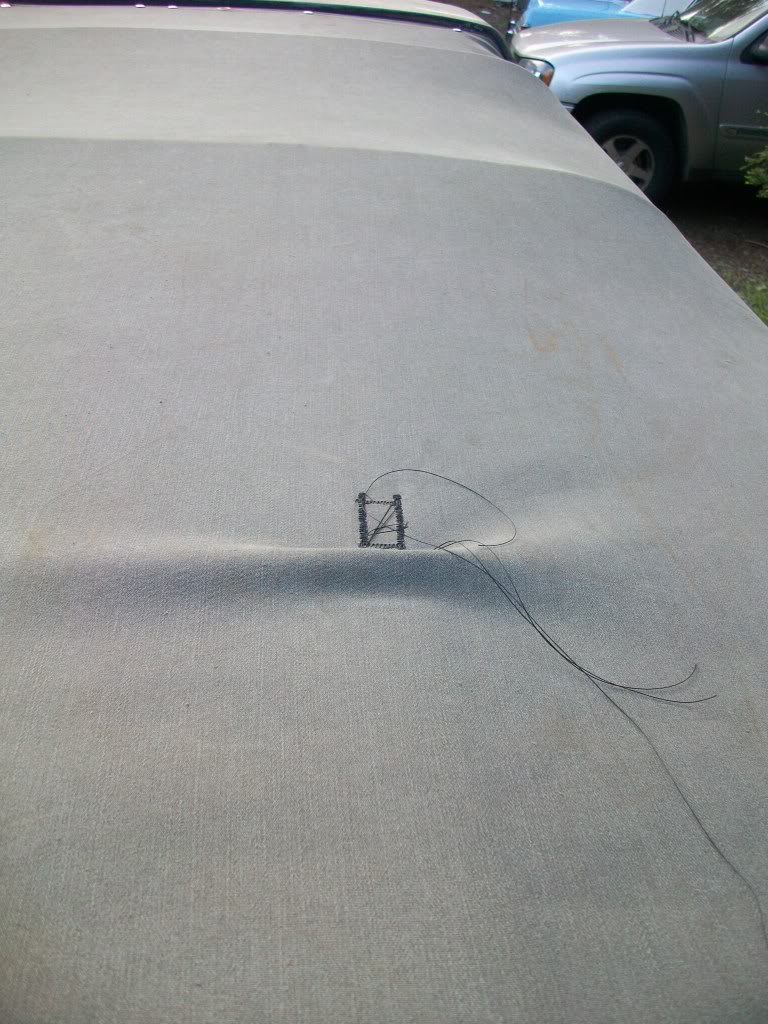
Once the front portion was done, I sewed two 1" straps at the back end of the tarp, about a foot from the edge. The straps are about 5' long. They are used to go over the back frame hoop and then forward to tension the tarp. I used a couple of cheap buckles to adjust tension and make assembly and removal simple.
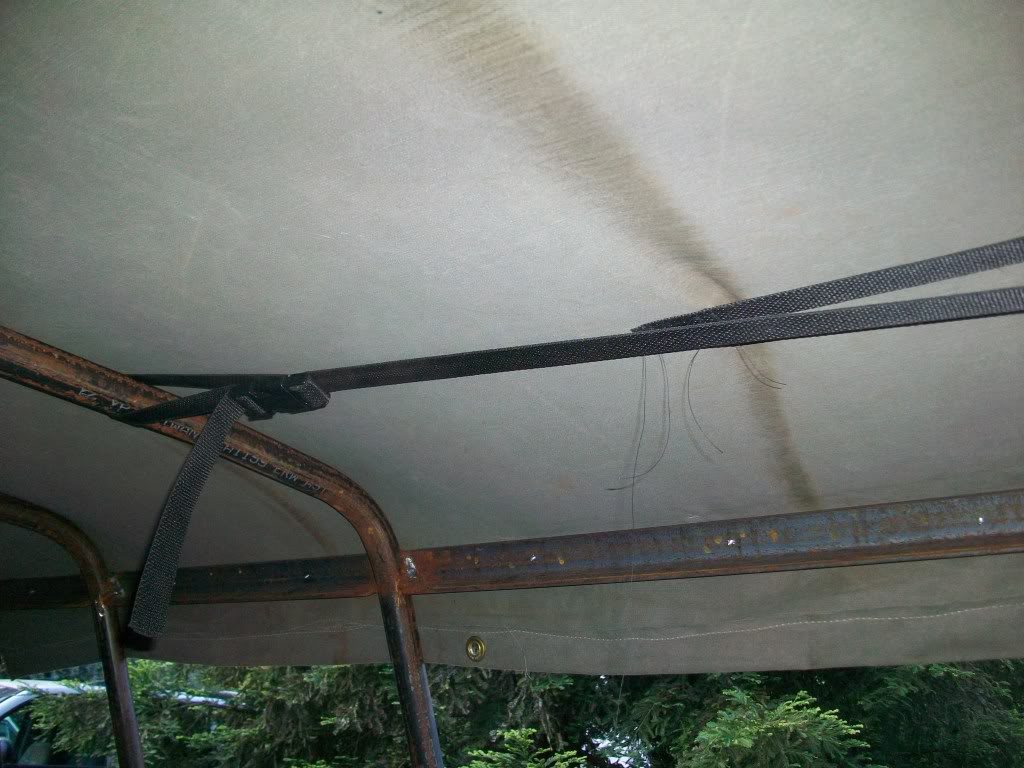

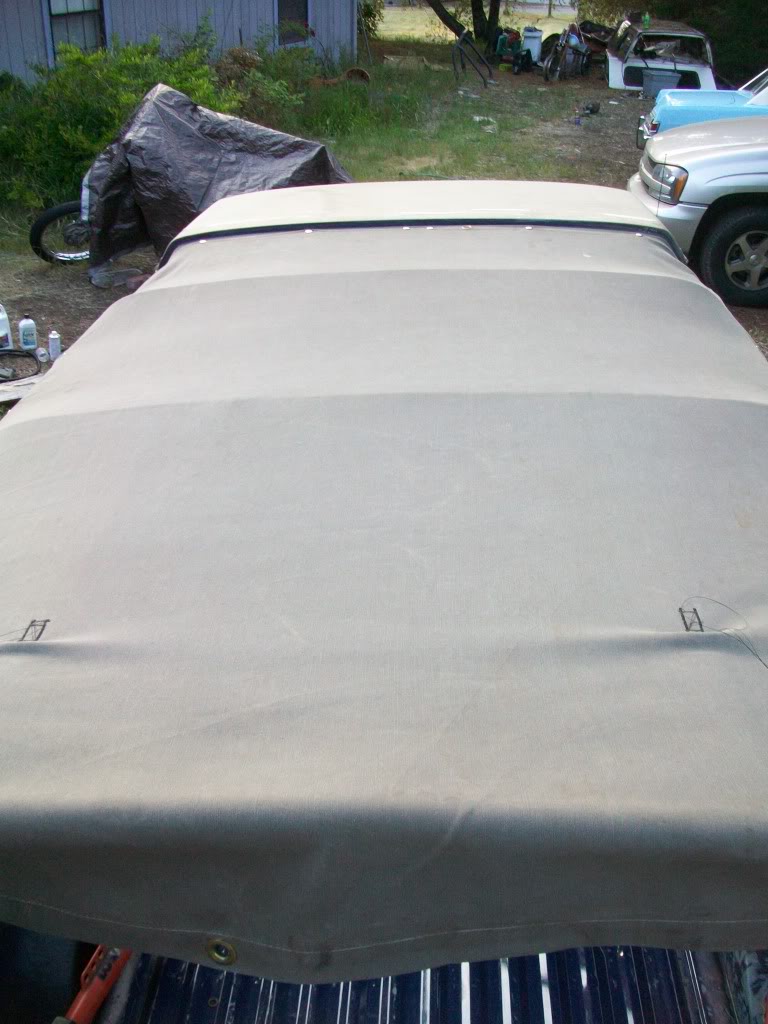
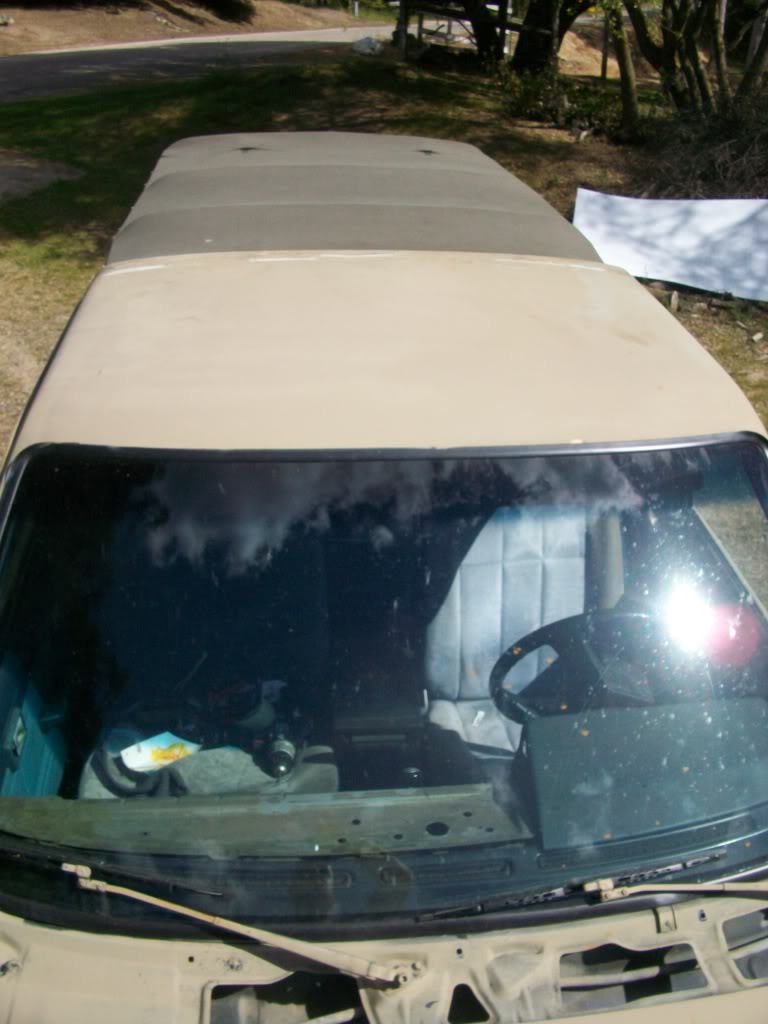
Once the tarp was tight from front to back, I began working my way from front to back along the top horizontal row of snaps. Again, I alternated from side to side and would pull the canvas tight before marking at the top edge of the base snap. This resulted in a a top that is fairly uniform in its tension, other than a couple of ripples behind the point where I sewed the straps on. I plan on resolving this by connecting the straps to the canvas all the way back to the rear hoop.
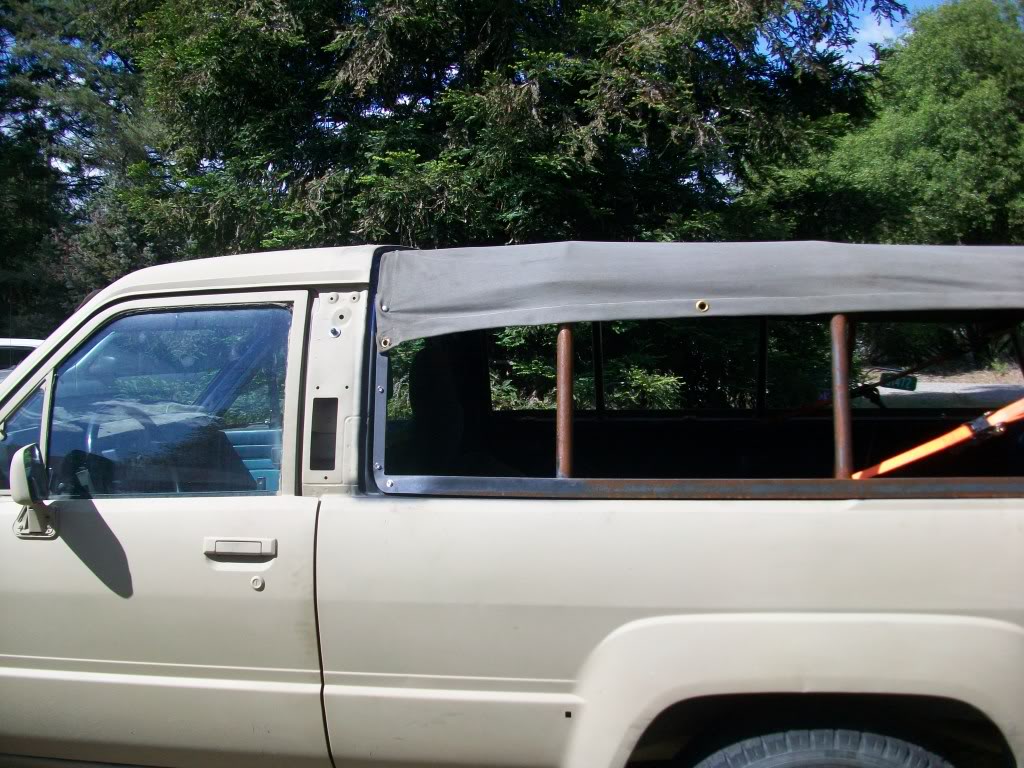
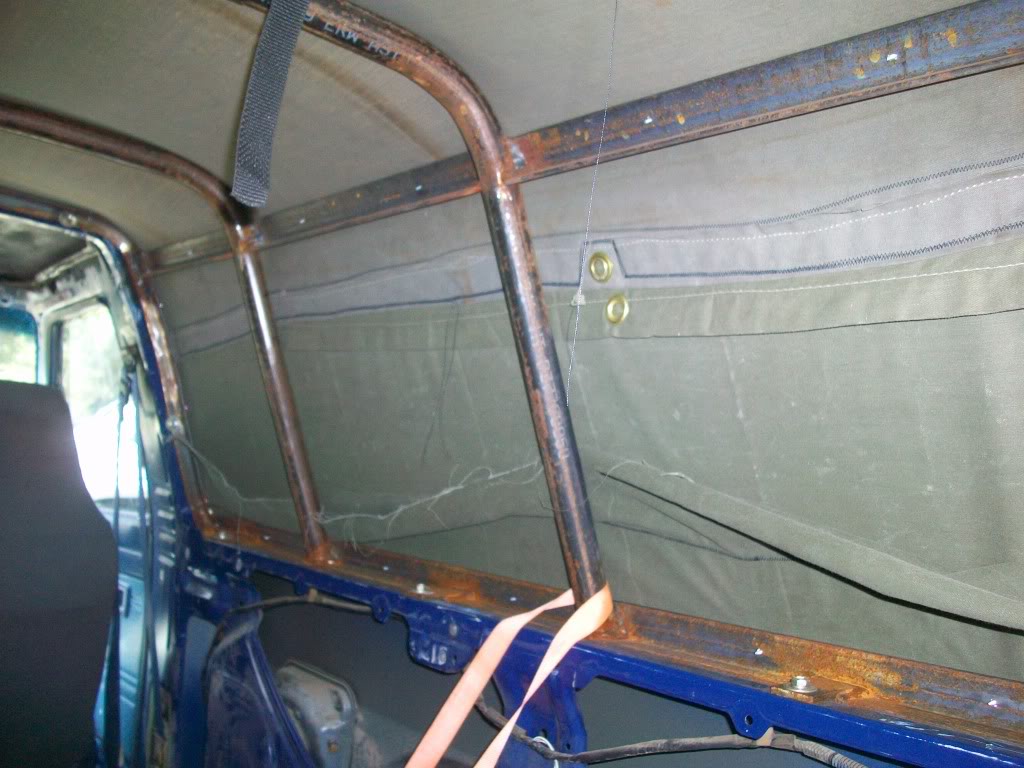
After the top was complete, we removed it and sewed the sides on.
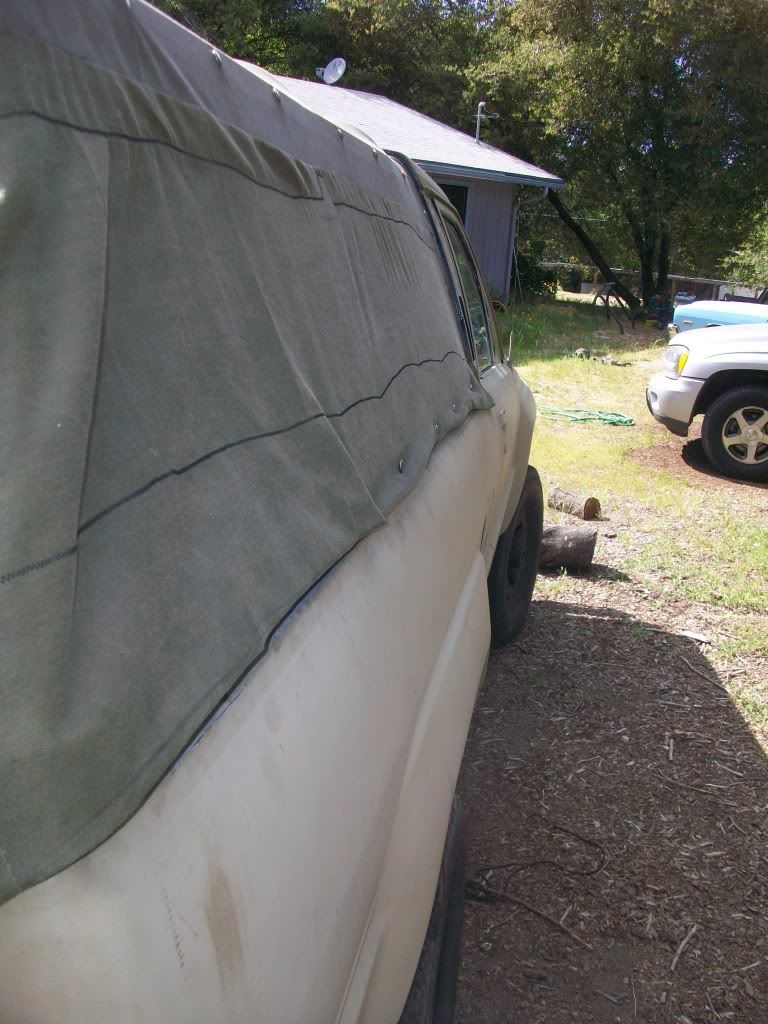
I used one 5x7 10oz tarp for the top, and cut a second one in half. The halves were sewn to either side of the top piece. This placed the seams on the sides of the truck, rather than the top. The seams are an obvious weak point for weather sealing, so I didn't want to risk any puddling over them.
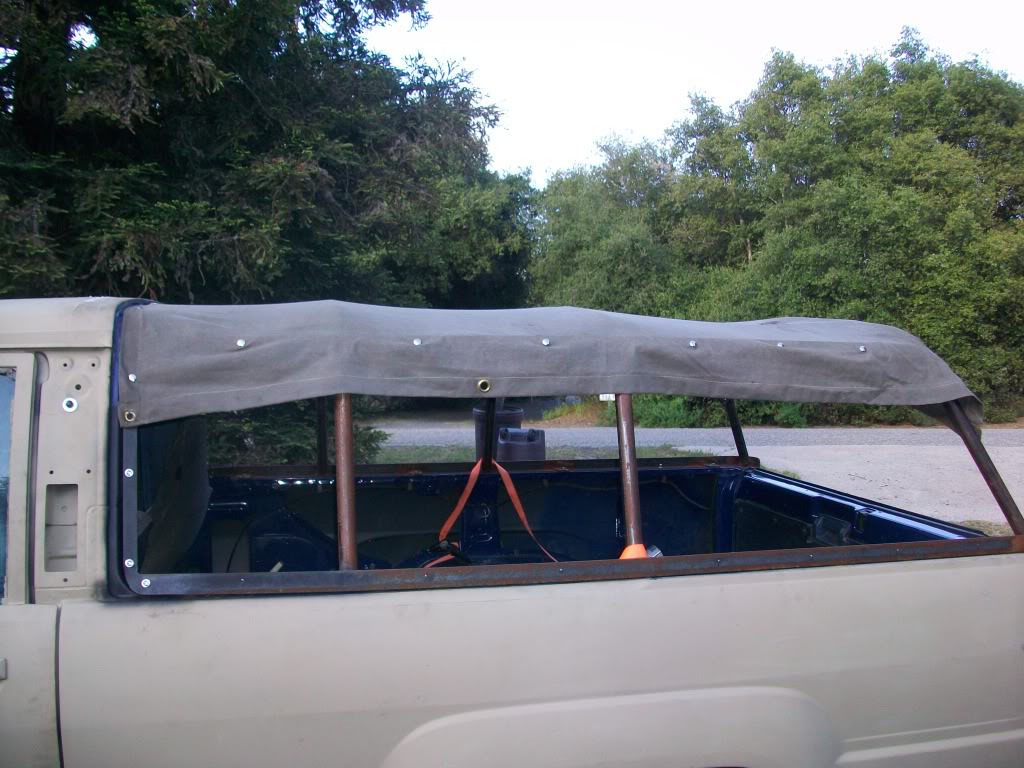
The sides hung down beyond the frame considerably. We measured them and then folded them up on the inside to fit them to the sides of the frame. We were going to cut the extra off and hem it, but then I figured out that it was in just about the right place on the inside to be turned into a row of pockets. That will be handy, especially while camping.
The bottom row of snaps went on just about the same way that the top row did. The stretching took a little more effort, but the result looks great to me. I ran out of snap bases and screws towards the end, so the last seven snaps aren't on yet. Even so, with the sides down, wind noise is no greater than with the fiberglass top and the back window down.
I haven't completely designed the back panel yet. It will be a little bit complicated, but I have a couple of ideas that should work. Does anyone know what material the pliable Jeep soft top windows are made of? I think it is some type of vinyl, but I don't know what thickness or if there is a certain type.
I still need to fine-tune my design for the straps that will hold up the sides when they are rolled up. I think it will be a small strap with a snap at one end, and proper hardware in line that I can cinch it tight. The snap will snap to the top of the canvas.


I ditched the idea of making the sides removable. If I ever decide I want to make sides with windows, they can snap inside the current solid canvas sides and the current ones can simply be rolled up.
I drilled 1/8" holes in the flat pieces of steel at the front and at the top and bottom of both sides. I will end up adding a few more, but I have about 25 in it right now. I then used self-tapping 6-32 x 1/2 screws to screw the male portion of a snap assembly into the holes.
I started with the front angle iron "hoop" at the top. I measured to the center of the tarp and used a sharpie to mark the line. I then lined the center line up with the center snap, and marked where I wanted the tarp side snap. I used a leather punch to make the hole. I then used the simple, cheap snap tools that I bought with the snaps to set the center snap.
There are basically three types of snap tool. The most expensive ($200+) is a bench-mounted unit. The $20 range tool is of the plier type. I couldn't find one locally, but I did find the cheap (+/- $3.00) two part tool, which is basically a base and a long punch. You set the snap top upside down in the base, with the stud in the middle through the hole in the canvas. Drop a snap receptacle (female side) over the stud, place the punch on the stud, and tap it down with the hammer. Once you get used to the manipulation of it, it is quite easy, and works surprisingly well. I don't know that the plier style would have saved me much time at all.
I then worked my way out from the center, stretching the canvas as I went. I would use one hand to stretch the fabric, then mark a dot with my sharpie at the TOP edge of the snap base. This resulted in a reasonably taut fabric. I alternated from side to side down the top strap with the top portion of the canvas. I didn't sew the sides on until I was done with the snaps on the top.
Once the front portion was done, I sewed two 1" straps at the back end of the tarp, about a foot from the edge. The straps are about 5' long. They are used to go over the back frame hoop and then forward to tension the tarp. I used a couple of cheap buckles to adjust tension and make assembly and removal simple.
Once the tarp was tight from front to back, I began working my way from front to back along the top horizontal row of snaps. Again, I alternated from side to side and would pull the canvas tight before marking at the top edge of the base snap. This resulted in a a top that is fairly uniform in its tension, other than a couple of ripples behind the point where I sewed the straps on. I plan on resolving this by connecting the straps to the canvas all the way back to the rear hoop.
After the top was complete, we removed it and sewed the sides on.
I used one 5x7 10oz tarp for the top, and cut a second one in half. The halves were sewn to either side of the top piece. This placed the seams on the sides of the truck, rather than the top. The seams are an obvious weak point for weather sealing, so I didn't want to risk any puddling over them.
The sides hung down beyond the frame considerably. We measured them and then folded them up on the inside to fit them to the sides of the frame. We were going to cut the extra off and hem it, but then I figured out that it was in just about the right place on the inside to be turned into a row of pockets. That will be handy, especially while camping.
The bottom row of snaps went on just about the same way that the top row did. The stretching took a little more effort, but the result looks great to me. I ran out of snap bases and screws towards the end, so the last seven snaps aren't on yet. Even so, with the sides down, wind noise is no greater than with the fiberglass top and the back window down.
I haven't completely designed the back panel yet. It will be a little bit complicated, but I have a couple of ideas that should work. Does anyone know what material the pliable Jeep soft top windows are made of? I think it is some type of vinyl, but I don't know what thickness or if there is a certain type.
I still need to fine-tune my design for the straps that will hold up the sides when they are rolled up. I think it will be a small strap with a snap at one end, and proper hardware in line that I can cinch it tight. The snap will snap to the top of the canvas.
Last edited by Mountain Cop; 05-24-2010 at 06:53 PM.


