Modified Hardtop
 05-21-2007, 05:08 AM
#1
Registered User
Thread Starter

Join Date: Feb 2006
Posts: 25
Likes: 0
Received 0 Likes
on
0 Posts
Modified Hardtop
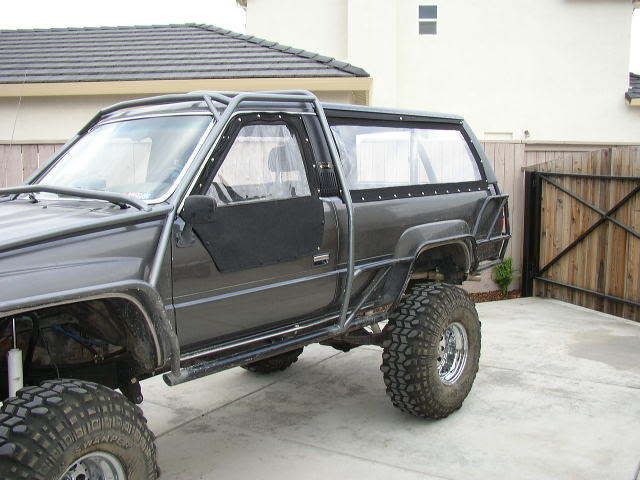
So after getting my first 1st Gen 4Runner I knew I wanted a soft top. I already knew they were expensive and I really wanted the Canback. The price was just really hard to justify. So, after thinking it over and because of an old thread on Pirate I decided to try modifying a factory hardtop. Below you will see a before and after. I have some pics of in between that I can post up. It really wasn't very hard, just time consuming. I had not worked with fiberglass or bondo a whole lot before so this was pretty new. I used an old road construction sign for the metal to fill in the rear window openings and used bondo hair and bondo to smooth it out. I left the bottom support on the bed rails on unlike the Pirate thread because I want to try and attach vinyl windows via snaps to this location on the bottom. Anyway, see what you think.
Chris


Chris
 05-21-2007, 09:48 AM
#2
Registered User
Join Date: Jan 2006
Location: Waynesboro, PA
Posts: 159
Likes: 0
Received 0 Likes
on
0 Posts
This is the exact thing I have been contemplating doing to my spare hard top. I?ll be interested to see how you cinch the vinyl down to keep it from flapping in the wind. Nice work.
05-21-2007, 11:10 AM
#3
Registered User
Thread Starter
Join Date: Feb 2006
Posts: 25
Likes: 0
Received 0 Likes
on
0 Posts
I am going to talk to someone local who works with tops and see if I can get any betters ideas. But, I was thinking something along the lines of snaps, common sense fasteners, or velcro.
 05-21-2007, 04:01 PM
#7
Registered User
Thread Starter
Join Date: Feb 2006
Posts: 25
Likes: 0
Received 0 Likes
on
0 Posts
I looked at this thread over and over again and based pretty much everything on this since I couldn't find anything else. I had in mind also trying to use some Lexan for windows, and may have come up with an idea tonight. I need to try and find some Lexan and see the different thicknesses. One thing I might do different would be to try and leave some of the angled piece that is in between the two windows. But really the whole point was to make it as open as possible, otherwise it would be just like taking the windows out only.
Trending Topics
 11-09-2007, 06:31 AM
#14
Registered User
Thread Starter
Join Date: Feb 2006
Posts: 25
Likes: 0
Received 0 Likes
on
0 Posts
Sure did. I actually just took it off this morning and was searching here for the order of bolt installation. I do have some pictures of the windows snapped on, I think they may be on my pc at work. I will look for them and get them posted. The windows turned out pretty well. It is getting cold here so I thought while it was a nice day I would go ahead an swith them out.
11-09-2007, 04:36 PM
#16
Registered User
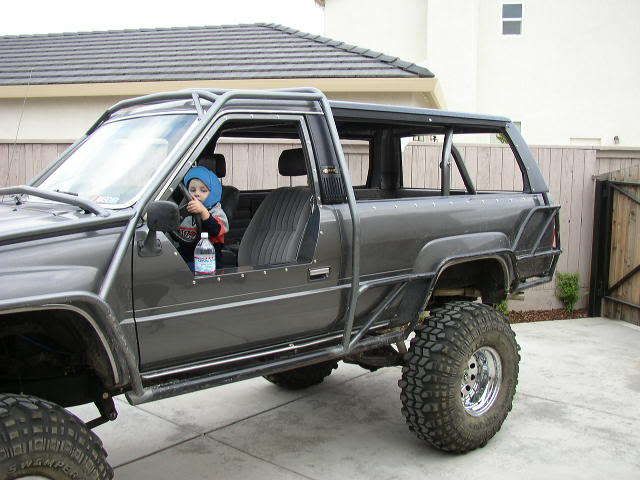
That's nice....that was a big difference going from those first pics to those more current ones...haha.
Do you have any other pics of the truck now...just curious to see it overall.
Do you have any other pics of the truck now...just curious to see it overall.
11-12-2007, 06:04 AM
#17
Registered User
Thread Starter
Join Date: Feb 2006
Posts: 25
Likes: 0
Received 0 Likes
on
0 Posts
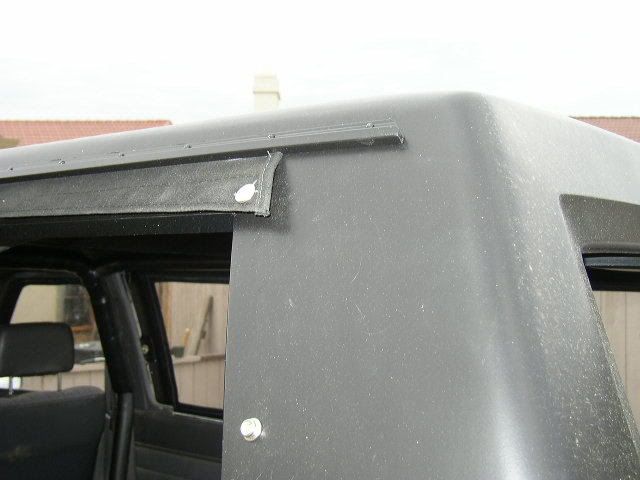
I only had this one pic at the office. I couldn't find the panel end molding the guy used on shown above so it took me a while to figure out something I could use. I ended up using lawn edging, imagine that, had many uses! I wanted the part that goes down into the ground basically. I cut the pointed arrow looking bottom off and screwed it down the sides. This way the windows tuck up inside the point and the water runs with off. You can't really tell that from this picture. The windows also came out a little short as you can see there are no snaps on the ends, but that has been fixed now. Hope this picture helps.


Thread
Thread Starter
Forum
Replies
Last Post
TheBFA
Solid Axle Swaps, All Years
8
02-15-2020 06:55 AM
justdifferentials
Just Differentials
14
09-24-2017 08:32 PM
sonorn67
84-85 Trucks & 4Runners
3
09-19-2015 05:39 PM
1st, 4runner, cabin, cutup, double, fhoto, gen, generation, hardtop, modif, modified, modifikasi, modiv, toyota, wwwtoyotahardtopmodivcom


