
heater core r&r
 10-28-2013, 05:25 PM
#1
Registered User
Thread Starter
Join Date: May 2013
Location: NW WA
Posts: 137
Likes: 0
Received 0 Likes
on
0 Posts
heater core r&r
I have an 87 runner and am wondering if anyone has quick tips for what I can do to improve my truck while I have the dash apart?
I haven't seen a thread about the heater core r&r so I think I'll post one.
I haven't seen a thread about the heater core r&r so I think I'll post one.
 10-28-2013, 06:17 PM
#2
Replace all that weatherstripping on the vents/flaps/dampers. There's also a speed control knob(potentiometer) on the blower motor. Mine was turned all the way up. So I left it that way. Not really sure what exactly it even does actually. I tried adjusting it with the blower on and it didn't seem to make a difference(or a noticeable one anyway). Lots of folks change out the bulbs in the instrument cluster. You can do a different color(s) than stock. Or brighter bulbs. Even LEDs. I also noticed on my 90 there's a place for a bulb above/inside the ashtray(not sure what the story is with that though).
Oh, almost forgot. There's a cold spec heater core you can upgrade to. Don't know the details on that though either. Maybe it's a bigger PITA than it sounds like(as in not a direct "bolt-in" swap).
Oh, almost forgot. There's a cold spec heater core you can upgrade to. Don't know the details on that though either. Maybe it's a bigger PITA than it sounds like(as in not a direct "bolt-in" swap).
Last edited by MudHippy; 10-28-2013 at 06:46 PM.
10-28-2013, 06:49 PM
#3
Registered User
Replace all that weatherstripping on the vents/flaps/dampers. There's also a speed control knob(potentiometer) on the blower motor. Mine was turned all the way up. So I left it that way. Not really sure what exactly it even does actually. I tried adjusting it with the blower on and it didn't seem to make a difference(or a noticeable one anyway). Lots of folks change out the bulbs in the instrument cluster. You can do a different color(s) than stock. Or brighter bulbs. Even LEDs. I also noticed on my 90 there's a place for a bulb above/inside the ashtray(not sure what the story is with that though).
Oh, almost forgot. There's a cold spec heater core you can upgrade to. Don't know the details on that though either. Maybe it's a bigger PITA than it sounds like(as in not a direct "bolt-in" swap).
Oh, almost forgot. There's a cold spec heater core you can upgrade to. Don't know the details on that though either. Maybe it's a bigger PITA than it sounds like(as in not a direct "bolt-in" swap).
I just replaced mine last week and didn't replace that weatherstripping, now heat always comes out even when the blower motor is not on.... No bueno. I also replaced my gauge lights with red LEDs, much easier on my eyes.
10-28-2013, 08:57 PM
#4
Registered User
Thread Starter
Join Date: May 2013
Location: NW WA
Posts: 137
Likes: 0
Received 0 Likes
on
0 Posts
I think I saw what you are referring to. Was it a little knob that said "RPM" hi and low on it?
I plan on replacing some of the burnt out bulbs. I wonder if I can find one of the SR5 clusters instead though.....
Also, do either of you have a photo of the control station for the heat - a/c?
The lever for my heater control valve is busted and id like to see how it goes back together.
10-29-2013, 12:26 AM
#5
Super Moderator
Staff
iTrader: (1)
Join Date: Aug 2008
Location: Anderson Missouri
Posts: 11,788
Likes: 0
Received 21 Likes
on
19 Posts
Check the classifieds here on YT or post a wanted item for the SR5 gauge. I seen one on ebay recently.
Since you are going to replace the heater core, I remove the entire dash assembly to repair or replace the heater controls. I then take paint or a marker and on the metal part of the dash support and other areas, I mark it so as I know where the cables go back.
While you have the dash out, I suggest removing the blower assembly and getting all of the trash out of the cowl area. Removing the windshield cowl will help get to a lot of the debris that is in there. Wash all of the ventilation pipes out as they will be dusty/muddy. They get dirty and gives a fresher smell in the truck.
With the blower assembly out of the way, is a good time to clean the trash that made its way from the blower into the condenser.
Here is a link with a little more info>>> https://www.yotatech.com/forums/f199...l#post52002149
I am currently replacing my dash pad and will update my post on this as I go. It is fairly easy once you know the steps.
1.Remove Speedometer Bezel and there is a 10 mm nut that holds the left side of the dash pad in.
2. Take out the far right vent on passenger side. Mine cracked bad as it was brittle.There is another 10mm nut that holds the right side of the dash pad in.
3.Take out the glove box. 2 screws at the bottom, holds the glove box in. There is a black strip that has a cover attached to it. Just take a flat blade screwdriver and pop out the little tabs.
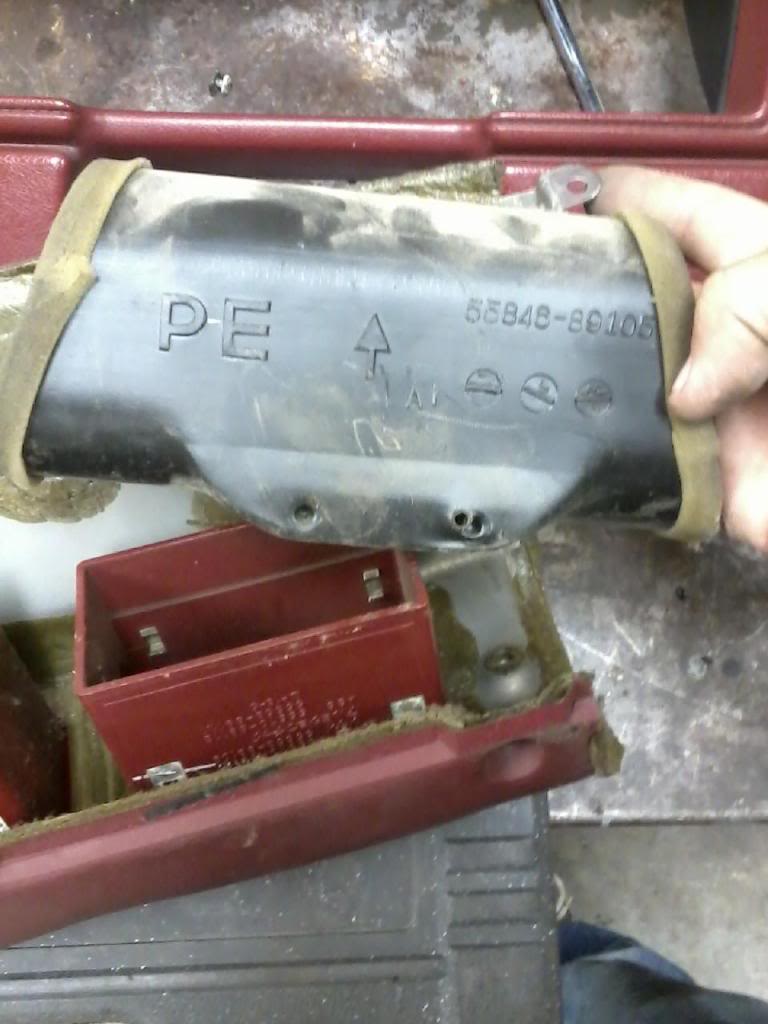
4. I will get a picture below but there is a little screw that holds part of the ventilation pipe in. Take the screw out and slide the 4-5inch vent pipe out of the way(first picture). Straight above it, there is another 10mm nut that has to be removed.
5.You have 5 screws at the bottom of the dash pad that you have to take out and it is done.
With the dash pad out of the way, it makes it easier to work on the heater control assembly. Mine is broken and it is still a pain to get to.
Notes for myself.
Black cable goes below heater core.
White/clear cable goes along top of dash to right side.
Blue cable goes to assembly under hood through firewall.
Great link to dash pad removal. https://www.yotatech.com/forums/f115...emoval-189633/
Great Thread by nvdesertrunner. https://www.yotatech.com/forums/f115...emoval-263039/
Duct that needs removed to get the center nut of dash pad. Once you remove it, straight up is the nut.
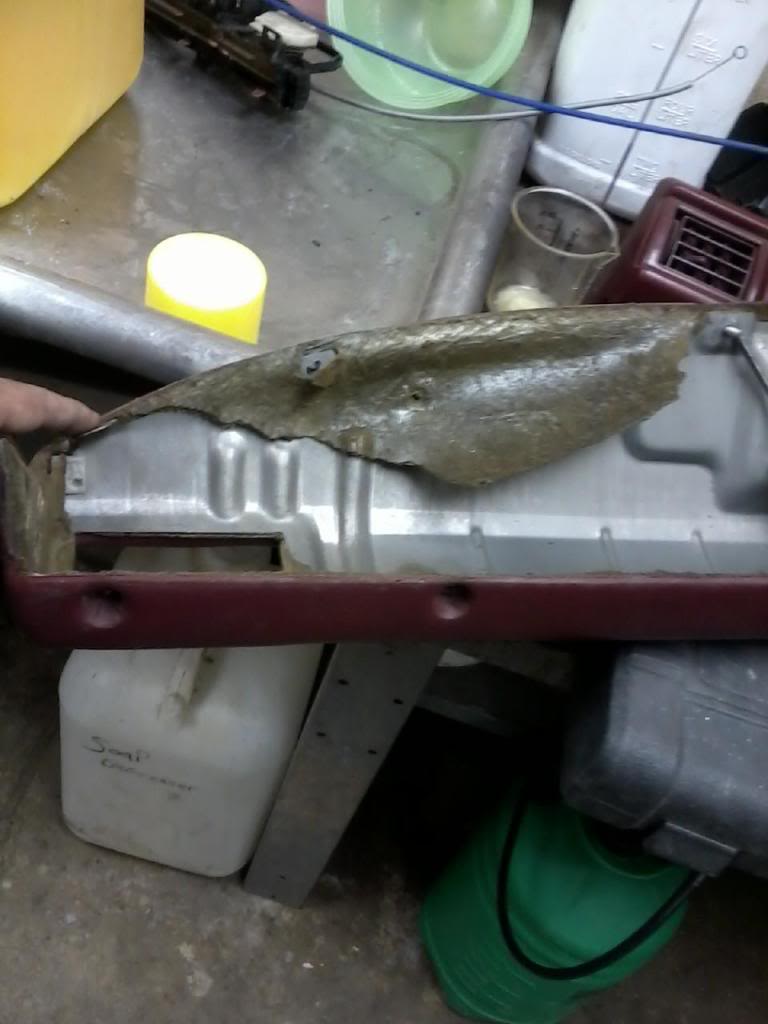
The bolt that holds the passenger side is where my finger is and the nut is for the center of the dash pad. Screwdriver tip is on the stud for where nut needs to go.
Youtube video I found that might help some.
Video I made to get the passenger vent out.
Video to get the PE pipe out and the center dash pad nut.
Since you are going to replace the heater core, I remove the entire dash assembly to repair or replace the heater controls. I then take paint or a marker and on the metal part of the dash support and other areas, I mark it so as I know where the cables go back.
While you have the dash out, I suggest removing the blower assembly and getting all of the trash out of the cowl area. Removing the windshield cowl will help get to a lot of the debris that is in there. Wash all of the ventilation pipes out as they will be dusty/muddy. They get dirty and gives a fresher smell in the truck.
With the blower assembly out of the way, is a good time to clean the trash that made its way from the blower into the condenser.
Here is a link with a little more info>>> https://www.yotatech.com/forums/f199...l#post52002149
I am currently replacing my dash pad and will update my post on this as I go. It is fairly easy once you know the steps.
1.Remove Speedometer Bezel and there is a 10 mm nut that holds the left side of the dash pad in.
2. Take out the far right vent on passenger side. Mine cracked bad as it was brittle.There is another 10mm nut that holds the right side of the dash pad in.
3.Take out the glove box. 2 screws at the bottom, holds the glove box in. There is a black strip that has a cover attached to it. Just take a flat blade screwdriver and pop out the little tabs.
4. I will get a picture below but there is a little screw that holds part of the ventilation pipe in. Take the screw out and slide the 4-5inch vent pipe out of the way(first picture). Straight above it, there is another 10mm nut that has to be removed.
5.You have 5 screws at the bottom of the dash pad that you have to take out and it is done.
With the dash pad out of the way, it makes it easier to work on the heater control assembly. Mine is broken and it is still a pain to get to.
Notes for myself.
Black cable goes below heater core.
White/clear cable goes along top of dash to right side.
Blue cable goes to assembly under hood through firewall.
Great link to dash pad removal. https://www.yotatech.com/forums/f115...emoval-189633/
Great Thread by nvdesertrunner. https://www.yotatech.com/forums/f115...emoval-263039/
Duct that needs removed to get the center nut of dash pad. Once you remove it, straight up is the nut.
The bolt that holds the passenger side is where my finger is and the nut is for the center of the dash pad. Screwdriver tip is on the stud for where nut needs to go.
Youtube video I found that might help some.
Video I made to get the passenger vent out.
Video to get the PE pipe out and the center dash pad nut.
10-29-2013, 12:49 AM
#6
Registered User
Thread Starter
Join Date: May 2013
Location: NW WA
Posts: 137
Likes: 0
Received 0 Likes
on
0 Posts
Terry that was a lot of very helpful information and I appreciate it.
I pulled off my dash pad earlier today and kept staring at the crack. I think you know the one from the usual place.. I just cant afford a replacement and EVERYONE has grey, not red.
Since you've worked on this, can you by chance get me a good photo of the underside of the temp control panel?
My hot/cold selector is in place but only the cold is intact with the metal lever and I need to find out how to attach the blend door to the lever and also need to know where the lever is actually supposed to attach.
I see a white clip that's on the mode selector but the bottom of the clip is smaller than the hole of my lever.
I'm sure none of that really made any sense..

Trending Topics
01-05-2014, 11:46 AM
#8
Super Moderator
Staff
iTrader: (1)
Join Date: Aug 2008
Location: Anderson Missouri
Posts: 11,788
Likes: 0
Received 21 Likes
on
19 Posts
YotaSnap.. I see I missed your queston and guessing you have it fixed now.
Spanky.. Here is a little more info and is a step by step on 84-88 and how I fix the heater control and getting to the heater core.>>> https://www.yotatech.com/forums/f199...l#post52150377
Spanky.. Here is a little more info and is a step by step on 84-88 and how I fix the heater control and getting to the heater core.>>> https://www.yotatech.com/forums/f199...l#post52150377
Last edited by Terrys87; 01-05-2014 at 11:55 AM.
01-05-2014, 02:36 PM
#9
Registered User


Thread
Thread Starter
Forum
Replies
Last Post
kawazx636
The Classifieds GraveYard
34
10-06-2021 03:03 PM
scott90
86-95 Trucks & 4Runners
7
10-04-2015 09:21 AM
gyroscope7
General Vehicle Related Topics (Non Year Related)
7
09-27-2015 08:39 PM


