
Complete 87 4runner SR5 interior remodel
 08-15-2010, 07:26 PM
#1
Registered User
Thread Starter
Complete 87 4runner SR5 interior remodel
The interior on my new 4runner wasn't the best. Not horrible, but I've heard of several people talking about herculiner for the whole cargo area. I've basically got my whole inside stripped right now.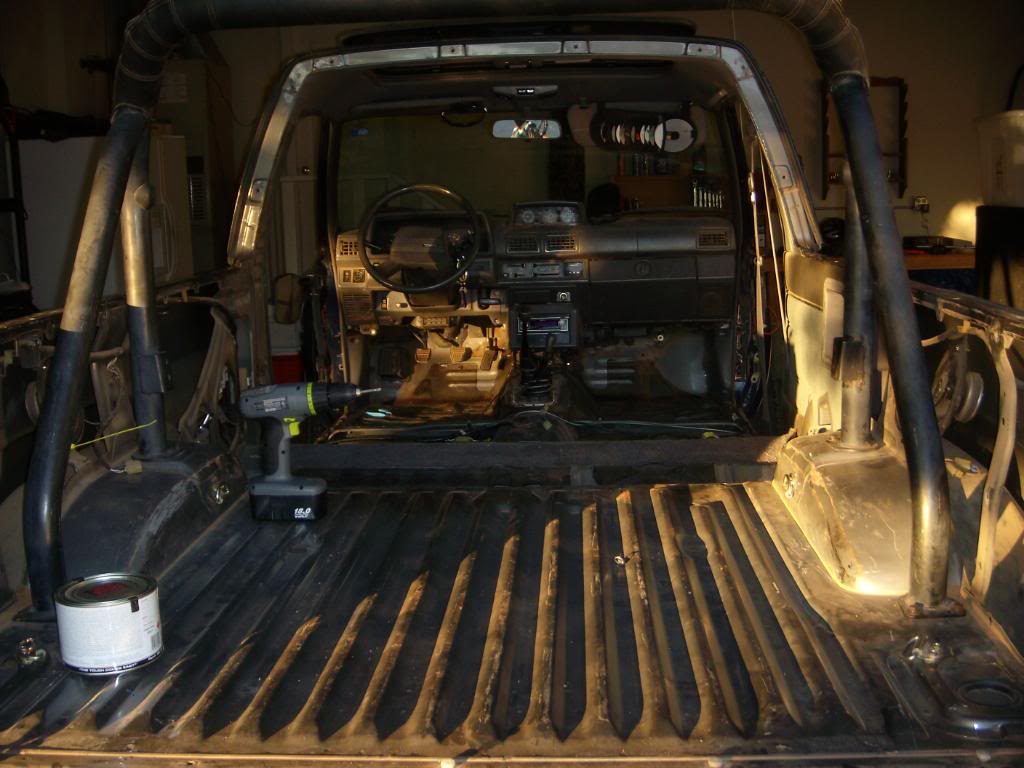
Im going to start by using the herculiner all the way up to wear the rear seats would be. The rear quarter panels I am either going to do what death cougar did https://www.yotatech.com/forums/f116...on-how-167686/ or I am going to make my own out of something more heavy duty(maybe some thin plywood I was thinking) and make my own custom panel to access the cargo area inside there. also using the liner there also
This is something I've absolutely never done before. I know a lot of you here have done something similar. Tons of info on this site and a lot of helpfull and knowledgeable people here. I love love to keep this going as I will keep uploading pics of my progress. I'm going to start with the cargo area because this is my dd and the driver's side front is going to be last(only need one seat and belt to drive round lol) The front is going to be extremely hard to line I think. I'm going to be going over those mats( i guess they're for sound dampening.) If I clean the hell out of them before coating, do you guys see any problems?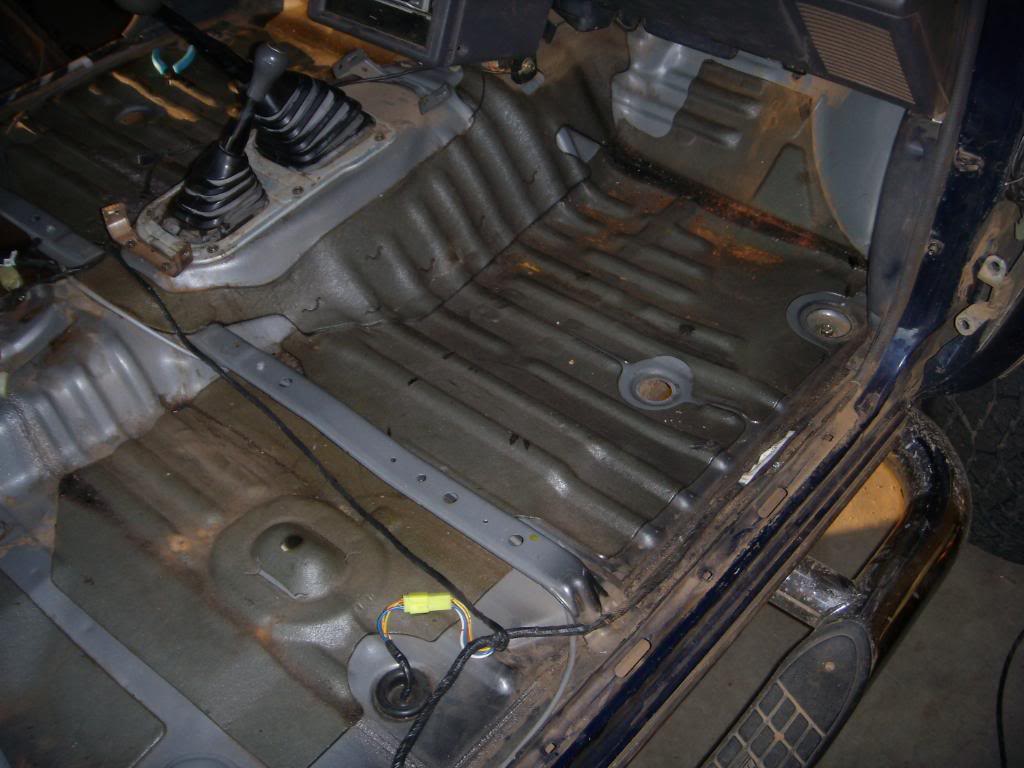
there is also the carpet stuck in the middle.
 How would you guys go about the cleaning and the prepping for the liner? I definitely don't want to mess this stuff up.
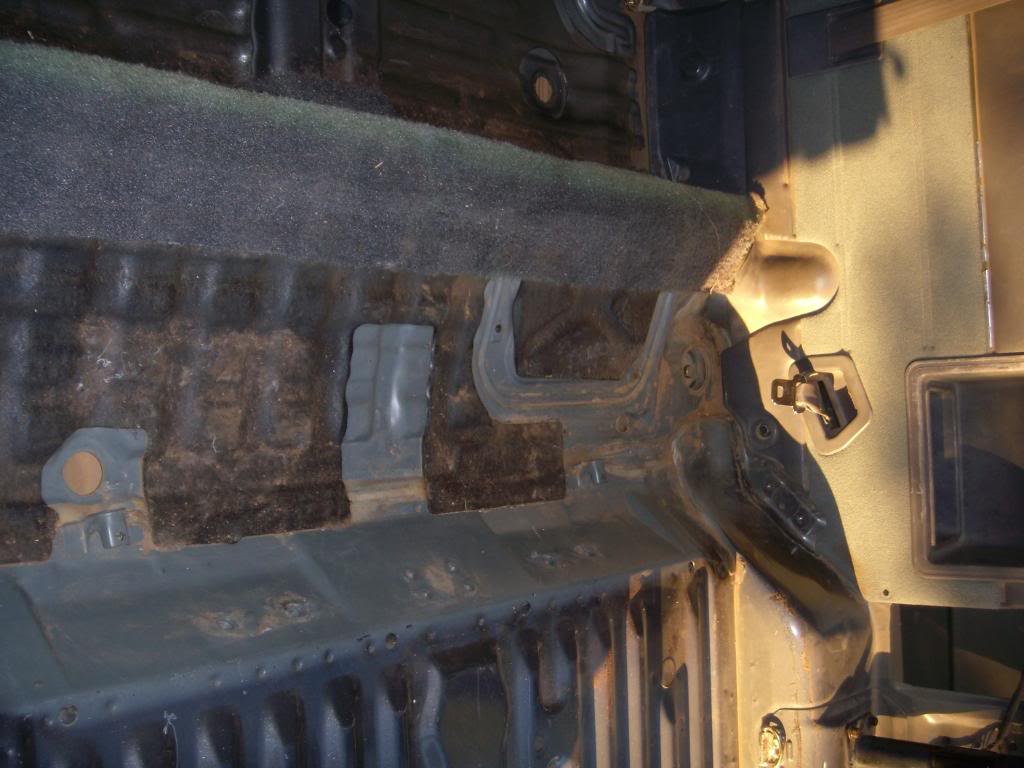
Also my last step for the cargo area is the tailgate. I always fear sitting or standing on that thing because of the window in it.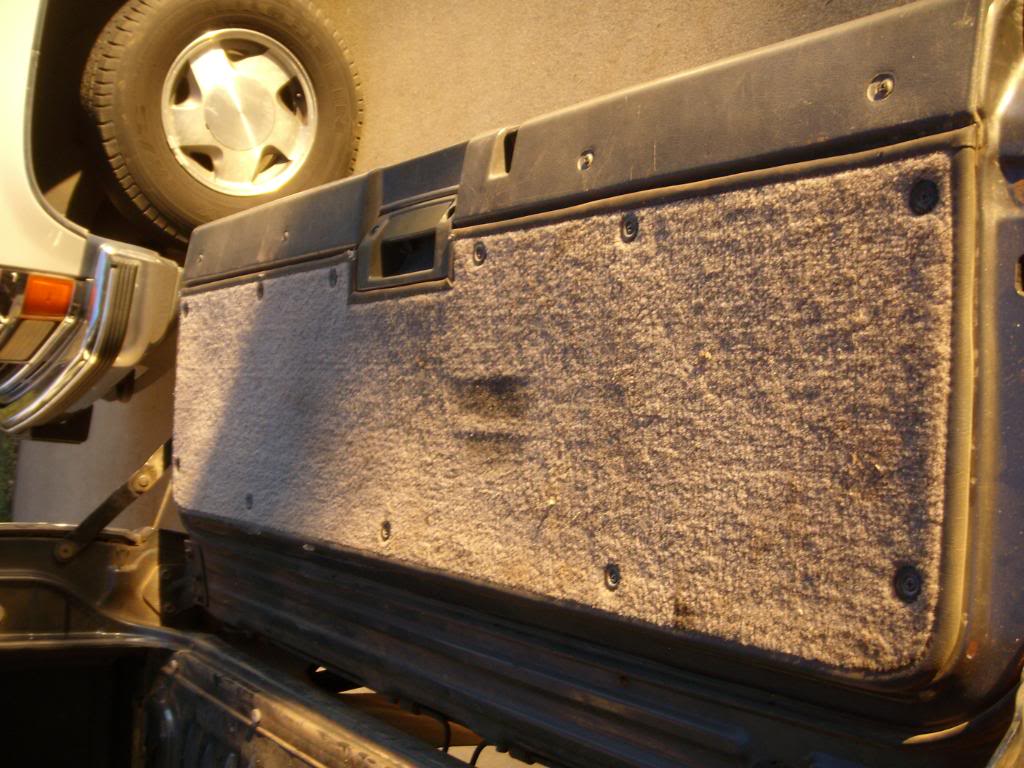
Those panels come off very easy. What do you guys think of diamond plating the whole thing or at least from the plastic handle down? Instead of the carpet and that cheap cardboard like wood the carpet is stuck to.
It would be very helpful for any tips on prepping the surfaces to be coated and for what material for making my new panels out of. I am also not sure what I'm going to be doing for the second panels.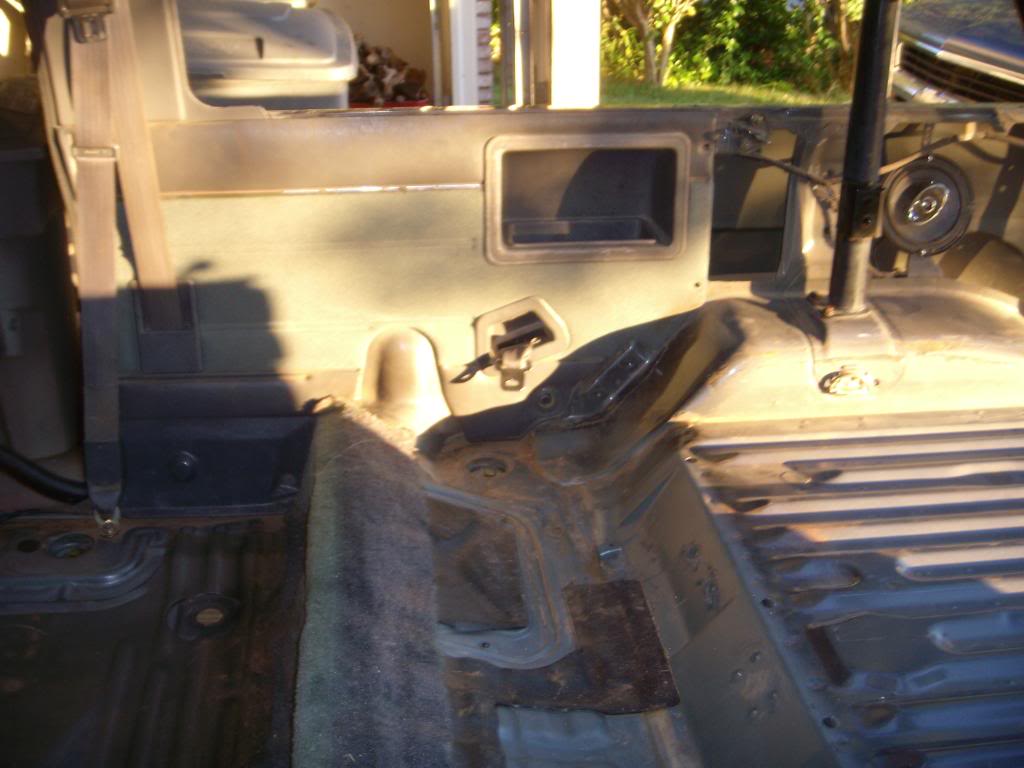
I'm not that great at fabbing and craftsmanship, and those have alot of holes to cut out and I think I would have to be precise for a good fit.
Another great thing is that if I were to use some sort of plywood for the rear panels, I think that would give a great sound for the speakers back there. Just cut a hole and mount them in the panel. This is definitely going to be a cool but stressful project and I would love to keep this thread going with updates and pics if you guys are interested. And mostly because any advice will be taken like gold on my part. Thanks
Im going to start by using the herculiner all the way up to wear the rear seats would be. The rear quarter panels I am either going to do what death cougar did https://www.yotatech.com/forums/f116...on-how-167686/ or I am going to make my own out of something more heavy duty(maybe some thin plywood I was thinking) and make my own custom panel to access the cargo area inside there. also using the liner there also
This is something I've absolutely never done before. I know a lot of you here have done something similar. Tons of info on this site and a lot of helpfull and knowledgeable people here. I love love to keep this going as I will keep uploading pics of my progress. I'm going to start with the cargo area because this is my dd and the driver's side front is going to be last(only need one seat and belt to drive round lol) The front is going to be extremely hard to line I think. I'm going to be going over those mats( i guess they're for sound dampening.) If I clean the hell out of them before coating, do you guys see any problems?
there is also the carpet stuck in the middle.
How would you guys go about the cleaning and the prepping for the liner? I definitely don't want to mess this stuff up.Also my last step for the cargo area is the tailgate. I always fear sitting or standing on that thing because of the window in it.
Those panels come off very easy. What do you guys think of diamond plating the whole thing or at least from the plastic handle down? Instead of the carpet and that cheap cardboard like wood the carpet is stuck to.
It would be very helpful for any tips on prepping the surfaces to be coated and for what material for making my new panels out of. I am also not sure what I'm going to be doing for the second panels.
I'm not that great at fabbing and craftsmanship, and those have alot of holes to cut out and I think I would have to be precise for a good fit.
Another great thing is that if I were to use some sort of plywood for the rear panels, I think that would give a great sound for the speakers back there. Just cut a hole and mount them in the panel. This is definitely going to be a cool but stressful project and I would love to keep this thread going with updates and pics if you guys are interested. And mostly because any advice will be taken like gold on my part. Thanks
 08-15-2010, 08:12 PM
#2
Registered User
I'm up for watching this thread. Post those pics. Cardboard or stiff construction paper can be used for templates, cut exactly to fit and easy to make holes in.
Good luck.
Good luck.
08-15-2010, 08:21 PM
#4
Registered User
First off, don't worry about you sitting on the tailgate. Grab a screw gun and peel back a couple layers and see what you are dealing with under there, you wont break it by setting your keister there.
I have thought about diamond plating that as well. It would look sweet. But I have to climb in to grab my gear out when I get to work, setting a kneecap on there doesn't sound like my idea of fun.
Plus, it'll be good to see what's going on when you need to dive back in to fix your rear defrost, or better yet, grease the gears and moving parts so your window keeps moving.
If you have good, usable panels....... Paint em. I painted mine, they look good, and its fairly quick and painless. The problem with fabbing your own, if you are doubting your fab skills, is taking on the rounded corners in the rear. If you feel comfortable with that, cut away.
About the speakers....... The PO cut speaker holes into the rear seat panel........
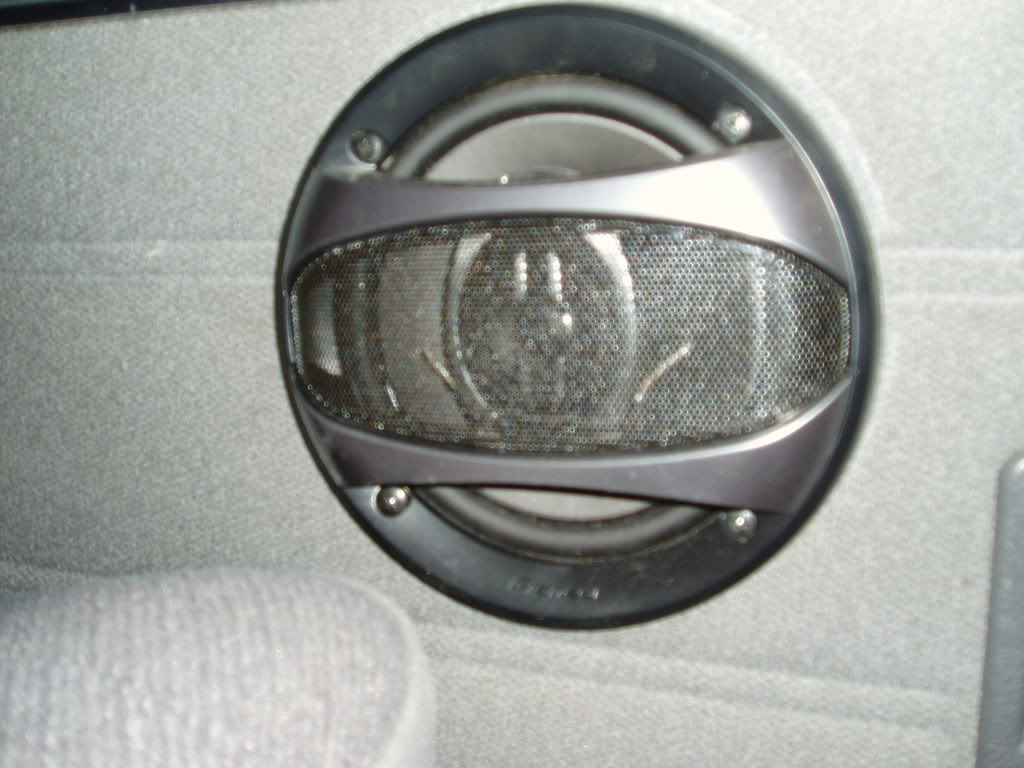
Well the edges weren't cut great, the screws are barely hanging on, and you can't hear the rear speakers when they are mounted there, and its even worse when they are mounted in the cargo area.
My plan? I am gonna track down some new panels and then try this manuever.....
The rest of his write up is here.
https://www.yotatech.com/forums/f96/...eakers-210463/
I heard them in person, they sound really good. I didn't get to listen to them with the top off, but they were already better then the stock location, and it keeps the panels from falling apart.
btw, I think the herculiner will stick fine to the tar dampening mats. as long as the mats stick, the herculiner will too. Keep us posted.
I use acetone to clean anything to paint, I don't see why it wouldn't work on any exposed metal.
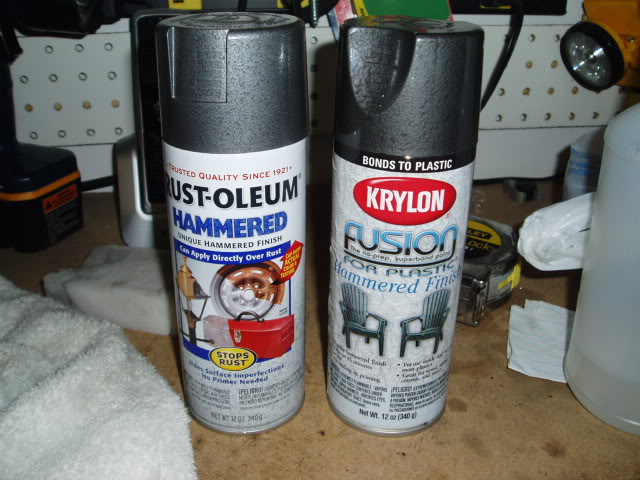
EDIT* Found these, thought I would share. Here are my faded rear panels, hit with a 440 sandpaper, wiped with acetone and sprayed with some krylon fusion for plastics.
the one on the right, the one on the left is almost a dead ringer for the charcoal colored bumpers....... just spray lightly, and you don't get the hammered effect.
I have thought about diamond plating that as well. It would look sweet. But I have to climb in to grab my gear out when I get to work, setting a kneecap on there doesn't sound like my idea of fun.
Plus, it'll be good to see what's going on when you need to dive back in to fix your rear defrost, or better yet, grease the gears and moving parts so your window keeps moving.
If you have good, usable panels....... Paint em. I painted mine, they look good, and its fairly quick and painless. The problem with fabbing your own, if you are doubting your fab skills, is taking on the rounded corners in the rear. If you feel comfortable with that, cut away.
About the speakers....... The PO cut speaker holes into the rear seat panel........
Well the edges weren't cut great, the screws are barely hanging on, and you can't hear the rear speakers when they are mounted there, and its even worse when they are mounted in the cargo area.
My plan? I am gonna track down some new panels and then try this manuever.....
The rest of his write up is here.
https://www.yotatech.com/forums/f96/...eakers-210463/
I heard them in person, they sound really good. I didn't get to listen to them with the top off, but they were already better then the stock location, and it keeps the panels from falling apart.
btw, I think the herculiner will stick fine to the tar dampening mats. as long as the mats stick, the herculiner will too. Keep us posted.
I use acetone to clean anything to paint, I don't see why it wouldn't work on any exposed metal.
EDIT* Found these, thought I would share. Here are my faded rear panels, hit with a 440 sandpaper, wiped with acetone and sprayed with some krylon fusion for plastics.
the one on the right, the one on the left is almost a dead ringer for the charcoal colored bumpers....... just spray lightly, and you don't get the hammered effect.
Last edited by kiyobrown; 08-15-2010 at 08:43 PM.
 08-15-2010, 09:09 PM
#6
Registered User
almost? 
Trending Topics
08-15-2010, 10:44 PM
#8
Registered User
Thread Starter
RIGHT ON!!!! already some great freakin advice!!! I am pretty uncomfortable with my fabbing skills. I think I might do the easy way and paint my stock panels. I pretty much have got every thing ready to go to be primed and then coated. thanks guys. I'll definitely take some pics as I progress. Just sucks I don't have more time. I bet yall can feel me on working 6 days a week?
08-15-2010, 10:57 PM
#9
Registered User
Thread Starter
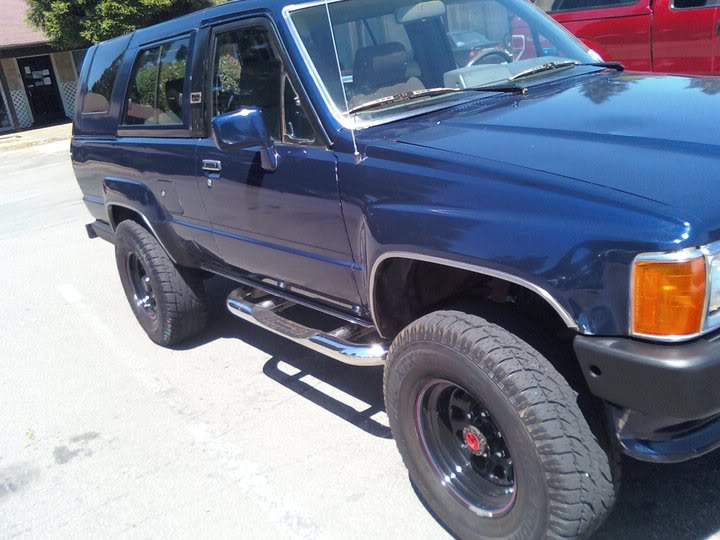
I thought I would also share this picture with every one. First day I got her. After a wash and wax. The exterior is very nice with a 3 year old paint job. That's what is motivating me to do this and make the interior decent as well. If it was not in so nice condition, I would have just had this as my beater truck, but come on, the AC still works and power everything still works(I hope it still does when I put everything together). I think I'm going to work my way from the tail gate up, because the dash and front seat areas are going to be the hardest.
08-16-2010, 12:27 AM
#10
Registered User
My comment is going to be kinda off the wall, but if you ever see power window switches or relays, or power mirrors, buy them. Buy them all. If you find them and don't want them, shoot me a pm, I will buy them from you.
Your 4Runner looks great man, have fun with it.
Your 4Runner looks great man, have fun with it.
08-16-2010, 04:31 AM
#11
Registered User
For the tailgate interior panel why not just make a custom out of plywood? That's all that thing is really, then you can paint to match the bed. This way you also don't need to worry about damaging anything.
08-16-2010, 07:50 AM
#12
Registered User
Thread Starter
well, the panel that actually comes off with the carpet on it(there is a thin, smaller metal one under that one too) is actually pretty thin. Plywood that thin might actually be weaker I think...
08-16-2010, 10:06 AM
#13
Registered User
Thread Starter
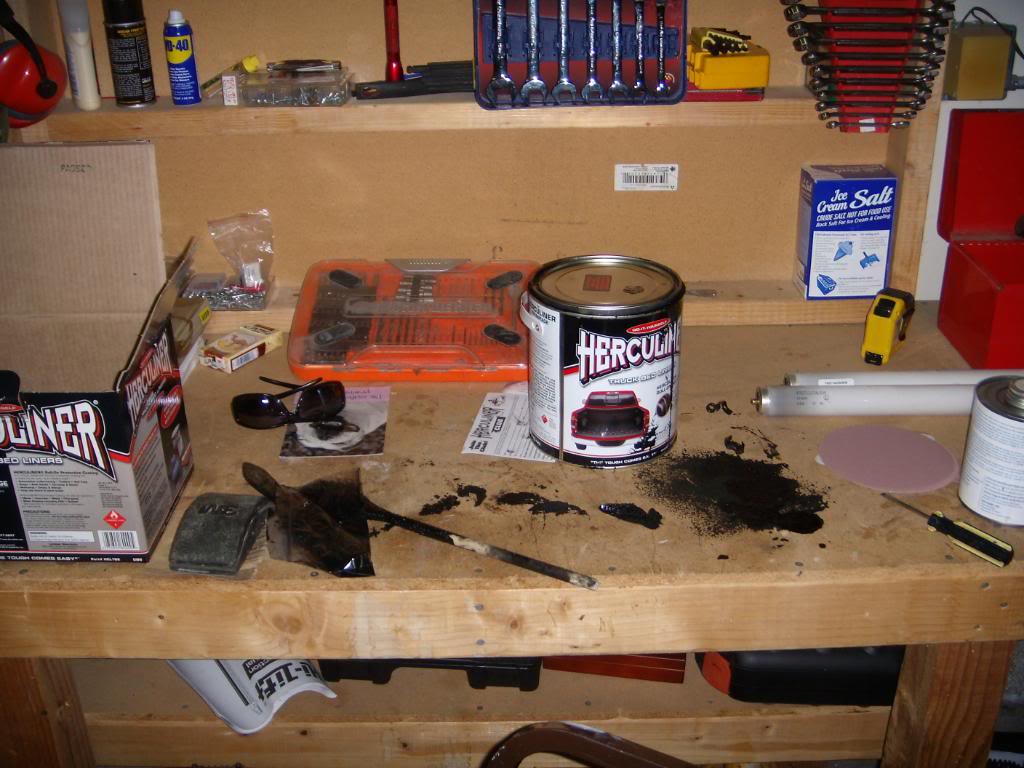
So I started prepping today. Got all the supplies I think I will need. About 15 bucks through my work.
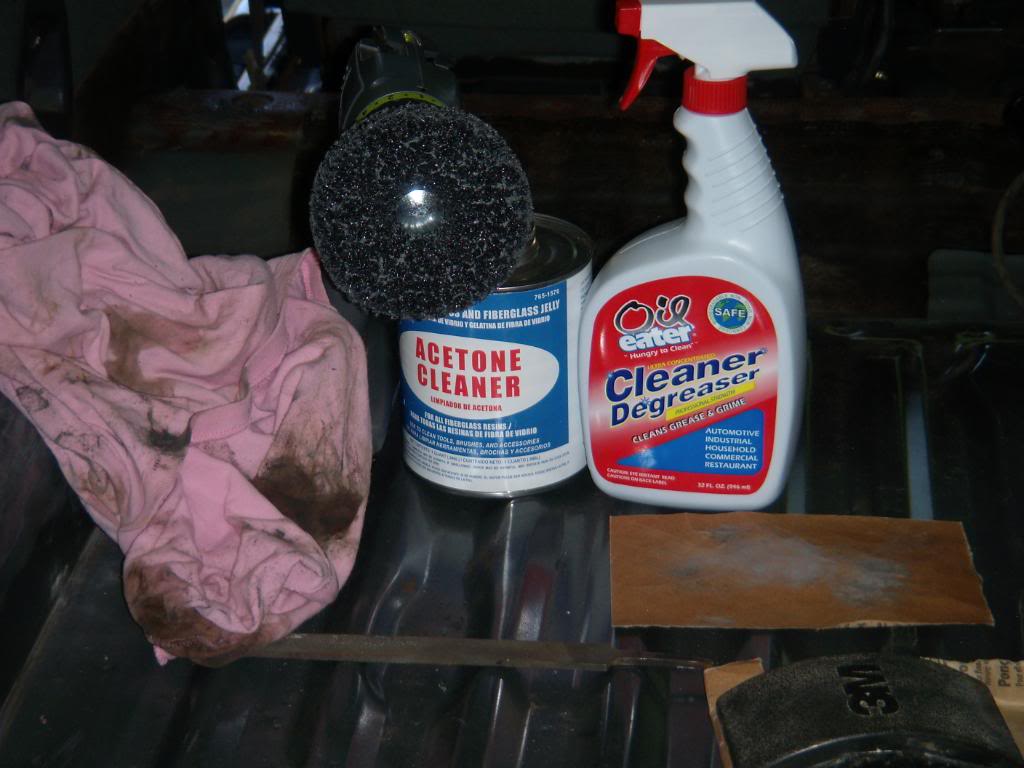
There is some sticky stuff on the wheel bump that took a while to get off.
Now im wondering what you guys think I should do in these types of area around the corner and the edges.
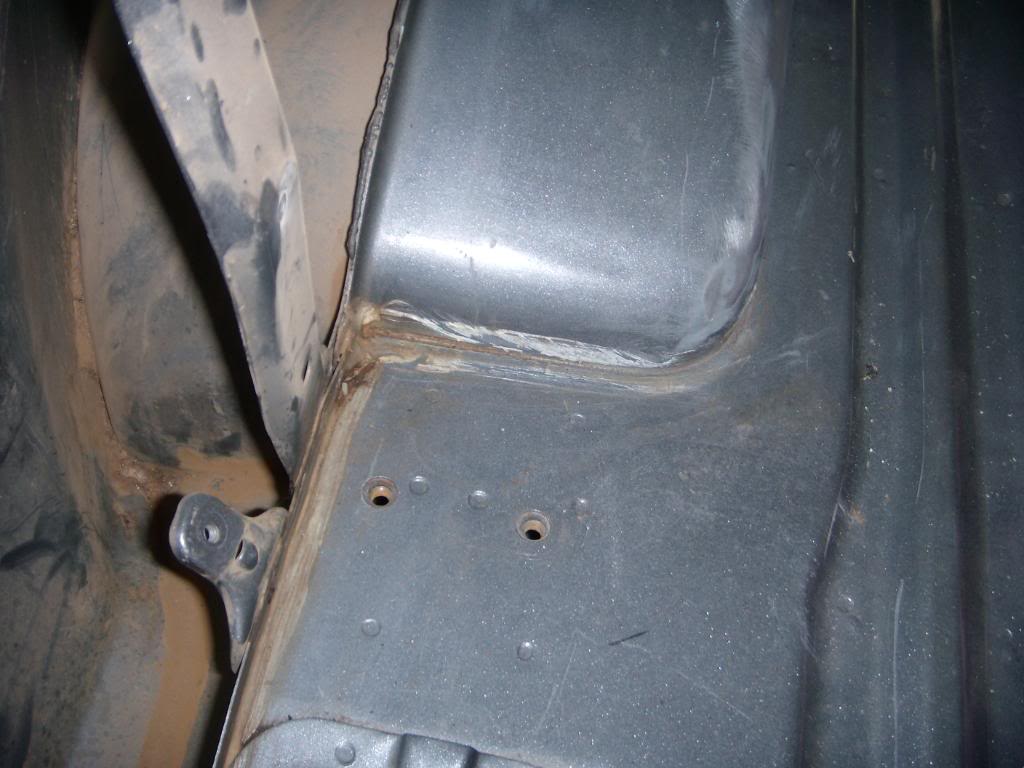
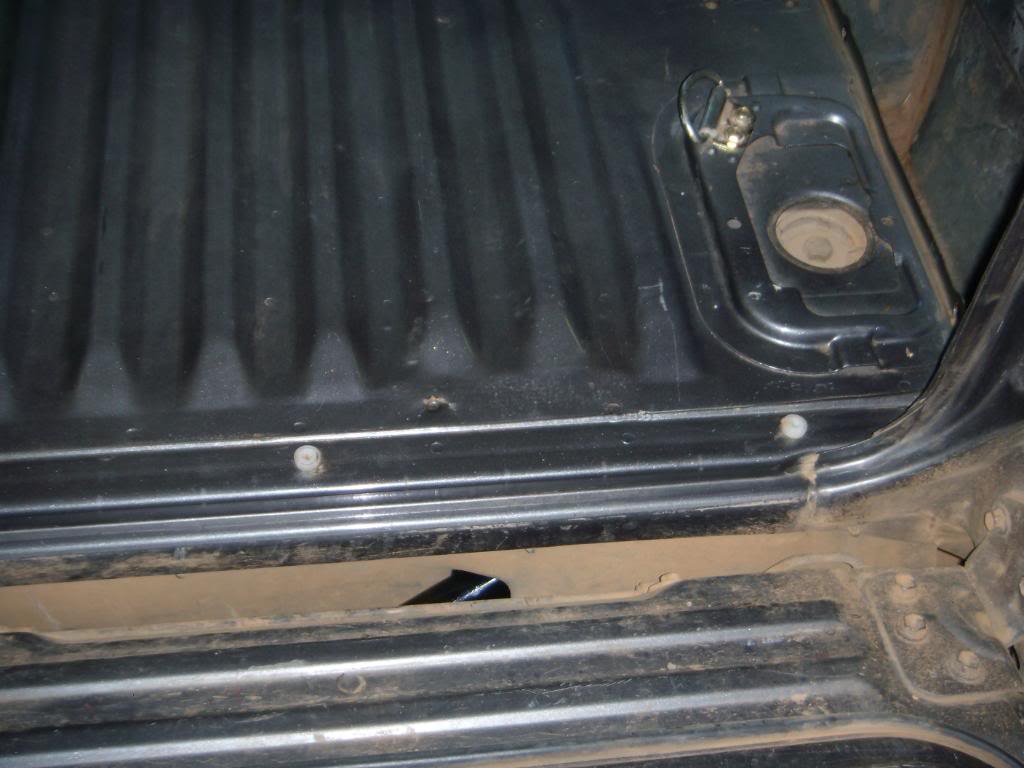
there is some modling (like caulking) around the edges and the wheel bump thing. Shouuld i get rid of it all, or just clean it a little and put the liner over it. It will be easy going on the bed itself, just a flat level surface. I'm just not sure how I should go up to the edges and other curved surfaces.
I also plan on masking off any whole and bolt holes. Also, should I go over with the liner where the roll bar bolts down, or just around some edges. Sucks because I woke up early to get this done today, but %&*holes at work called me in to work at 12 to 5. Nice and smack in the middle of my progress
There is some sticky stuff on the wheel bump that took a while to get off.
Now im wondering what you guys think I should do in these types of area around the corner and the edges.
there is some modling (like caulking) around the edges and the wheel bump thing. Shouuld i get rid of it all, or just clean it a little and put the liner over it. It will be easy going on the bed itself, just a flat level surface. I'm just not sure how I should go up to the edges and other curved surfaces.
I also plan on masking off any whole and bolt holes. Also, should I go over with the liner where the roll bar bolts down, or just around some edges. Sucks because I woke up early to get this done today, but %&*holes at work called me in to work at 12 to 5. Nice and smack in the middle of my progress
08-16-2010, 12:05 PM
#14
Registered User
iTrader: (2)
Join Date: Dec 2009
Location: Pleasanton, CA - SF Bay Area
Posts: 2,159
Likes: 0
Received 7 Likes
on
5 Posts
SUBSCRIBED!!
I plan to do this as well - at least to the back and eventually the whole thing.
I also want to replace back panels with diamondplate, as my OEM ones are ˟˟˟˟˟, and I've lost pretty much all the plastic rivets that hold them on ORERUNNER (ORRUNNER?) did diamondplate sides and it looks really good - search for the post
If I were you, I'd remove all the rubber drain hole plugs, and the bolts that hold the D rings/tie downs, and line the inside of the holes with blue painters tape to protect the threads. For the roll bar...not sure how easy it would be for you to get out with the top still on? I'd removing it, but then you don't want to cover where it mates up to the floor, as it would not make a level mounting surface...hmmmm, got me on that one!
For your wiring on the floor in the front, I'd unplug everytrhing you can, and even re route if you can, so you don't cover up the wires with the liner.
GL - keep the pics coming!
As far as fabbing the sides, couldn't you use the current plastic sides as a template and use an angle grinder to cut the contoured parts? I believe it's 24" tall, which is a common size for diamondplate?
I plan to do this as well - at least to the back and eventually the whole thing.
I also want to replace back panels with diamondplate, as my OEM ones are ˟˟˟˟˟, and I've lost pretty much all the plastic rivets that hold them on
ORERUNNER (ORRUNNER?) did diamondplate sides and it looks really good - search for the post If I were you, I'd remove all the rubber drain hole plugs, and the bolts that hold the D rings/tie downs, and line the inside of the holes with blue painters tape to protect the threads. For the roll bar...not sure how easy it would be for you to get out with the top still on? I'd removing it, but then you don't want to cover where it mates up to the floor, as it would not make a level mounting surface...hmmmm, got me on that one!
For your wiring on the floor in the front, I'd unplug everytrhing you can, and even re route if you can, so you don't cover up the wires with the liner.
GL - keep the pics coming!
As far as fabbing the sides, couldn't you use the current plastic sides as a template and use an angle grinder to cut the contoured parts? I believe it's 24" tall, which is a common size for diamondplate?
08-16-2010, 12:18 PM
#15
Registered User
Wow. Nice ride! That exterior looks really clean!
Awilson is right about the window switches, if you find some, buy a backup set.
My tailgate panel just got a coat of paint along with the rest of the carpet. I pulled it all out and used the duplicolor vinyl and fabric paint in a charcoal gray. Stinks like hell for a couple days but has held up great. How was the front carpet? I think carpet up in the passenger area and herculiner in the cargo area would be pretty sweet too.
Hope you get some time to make a little progress.
08-16-2010, 07:18 PM
#16
Registered User
Join Date: Jul 2009
Location: West of LIttle Rock near a lake, AR, USA
Posts: 23
Likes: 0
Received 0 Likes
on
0 Posts
Spend the extra time cleaning and prepping. it will pay off.
I used treated plywood for my side panels. I think the wood was still wet from the store when I added the Herculiner, now, there are small splits in the liner.
The liner sticks to the metal and the asphalt mat without any problem. I lined all the way to the firewall. I do feel more heat from the floor.
As in any worthwhile project, don't rush it and keep the work area clean.
08-16-2010, 07:23 PM
#17
Registered User
Thread Starter
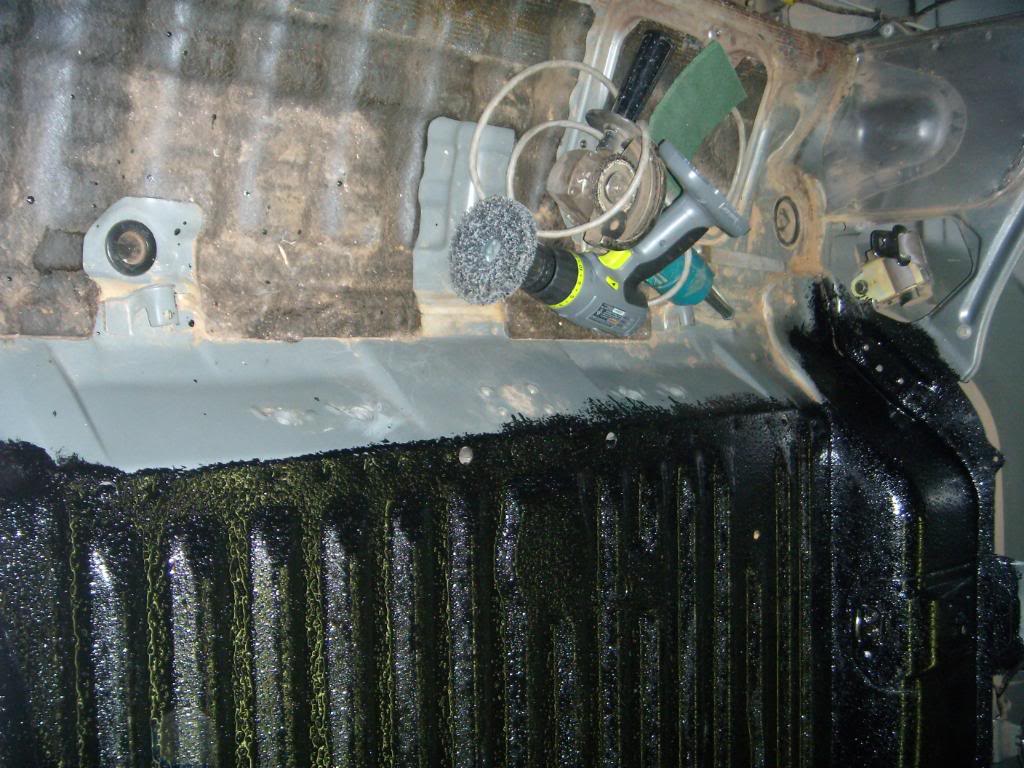
So this is how far I got in about an hour.
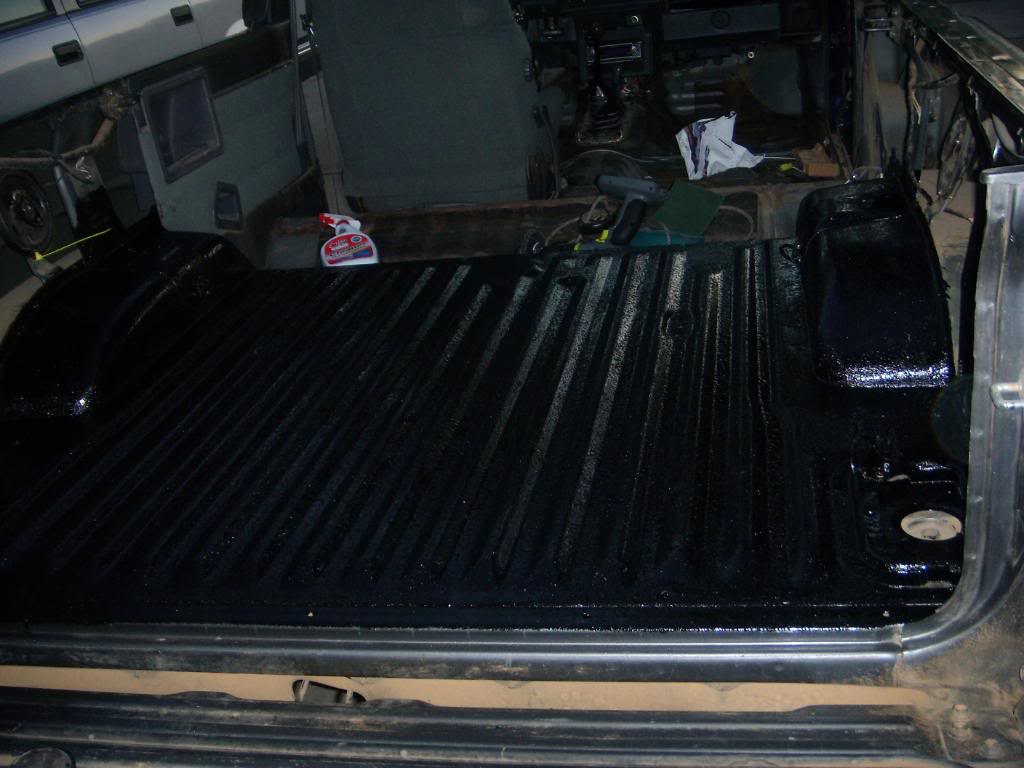

I started with the corners and edges first. Then did it in halves. I'm an idiot and didnt tape off any bolt holes. I think the only problem this will be for is the roll bar. I'll find out if that's a problem or not down the road...
Damn this stuff is messy!!!!
I stopped here.
That's where the rear seats will be. That is going to be a lot harder to clean and prep. I am trying to think of a way to fill in the bare spots where there is no sound dampening matts to make everything even. I am going to clean a small spot on one of the mats and put a thin layer of the liner on there to see if it will stay or not.
I am not sure if I am going to line the front area where I will be driving or not. I might throw the carpet back in there. Not sure at all.
Also, I guy that comes into my work a lot was showing me what he did with his quarter panels. He just had probably 1/4 inch ply wood and made his own. It looked good and he said it was easy because it was straight and he didn't follow the way the factory panels curve near the tailgate. He didn't spray paint his though, you guys think if I made my own and sanded one side and sprayed painted that side they would look good?


