Camshaft bolt removal for a timing chain install
 03-22-2012, 07:19 AM
#1
Registered User
Thread Starter
Camshaft bolt removal for a timing chain install
Morning everyone, I am busy working away on my rig for the rally from England to Mongolia this week.
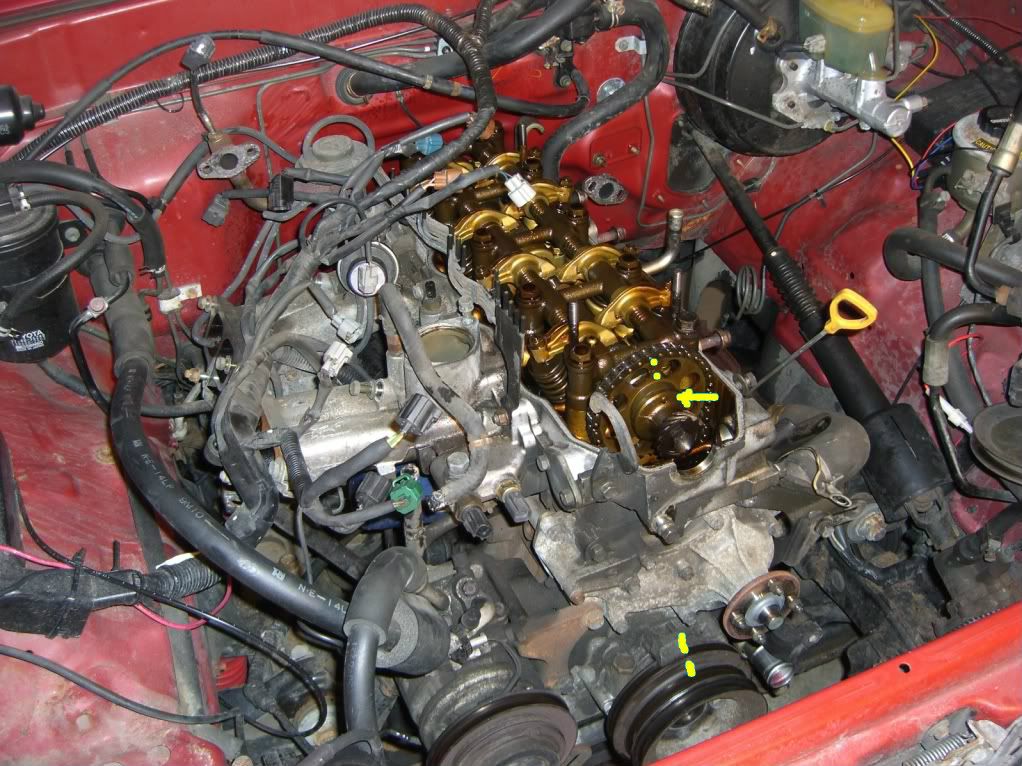
I am confused about how to ensure my engine will stay at Top Dead Center (TDC) when I am removing the camshaft bolt. After looking at page 2 of this link (https://www.yotatech.com/forums/f116...88/index2.html) I was able to see there is a groove cut into the cam gear that lines up with a pin on the camshaft.
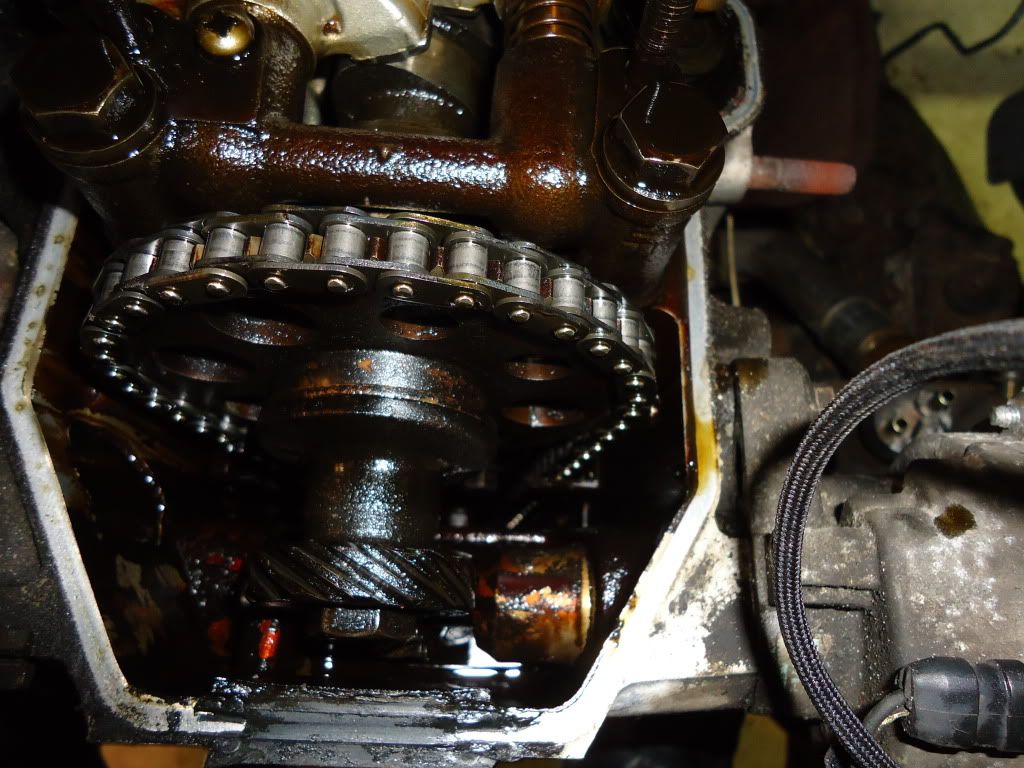
Would it be best that I use hand strength with a breaker bar or an impact gun to break this bolt loose? (Refer to Picture A)
I think the valvetrain will still be in time with the piston movement, I just need to make sure I am on the right track.
From what I can see on the timing cover and vaguely on the timing guides there don't seem to be railroad tracks (just light contact, ) and I think the truck would get me and my teammate from England to Mongolia. However, deep down, this rig will one day be donated to a tribesman in Mongolia and I'd like to know he could get another 5 to 6 years outta of the rig before some unfortunate failure came.
By the way, I think I am going to reuse this pulley, but I wanted to make sure I got some more informed opinions from guys who normally work on these rigs. Are these grooves a ending factor for the reuse of this pulley (Refer to pictures C and D). Btw, I saw in some thread somewhere, but the fellow Yotatech gentleman by the screenname of RBX said that you could use a sharpie trick to see if the new front main seal is going to be too tight on the old crankshaft pulley. Correct me if I am wrong, but you draw a black line with the sharpie marker on the crankshaft while you have the timing cover installed and you rotate the engine a few times. Then you remove the crankshaft pulley and if the black line was cut by the seal (i.e. no longer a solid line but a dotted line in some sense) then you want to use a bigger seal (i.e. a 11mm versus a 7 mm). I have a new seal, and I will try the trick RBX mentioned but I am wondering is this trick a way to save the owner the cost of a new crankshaft pulley or would it be always best to buy a new crankshaft pulley than change front main seals in and out?
If you guys need more pictures check out my build thread, I tried posting the most important stuff here to get yalls help. Thanks
Picture A- Camshaft gear bolt. I don't have the transmission on so do I break the bolt loose using an impact gun or a breaker bar? If I use a breaker bar should I put the spark plugs to use the compression of the air in-cylinder as a resistive force as I break the bolt loose?
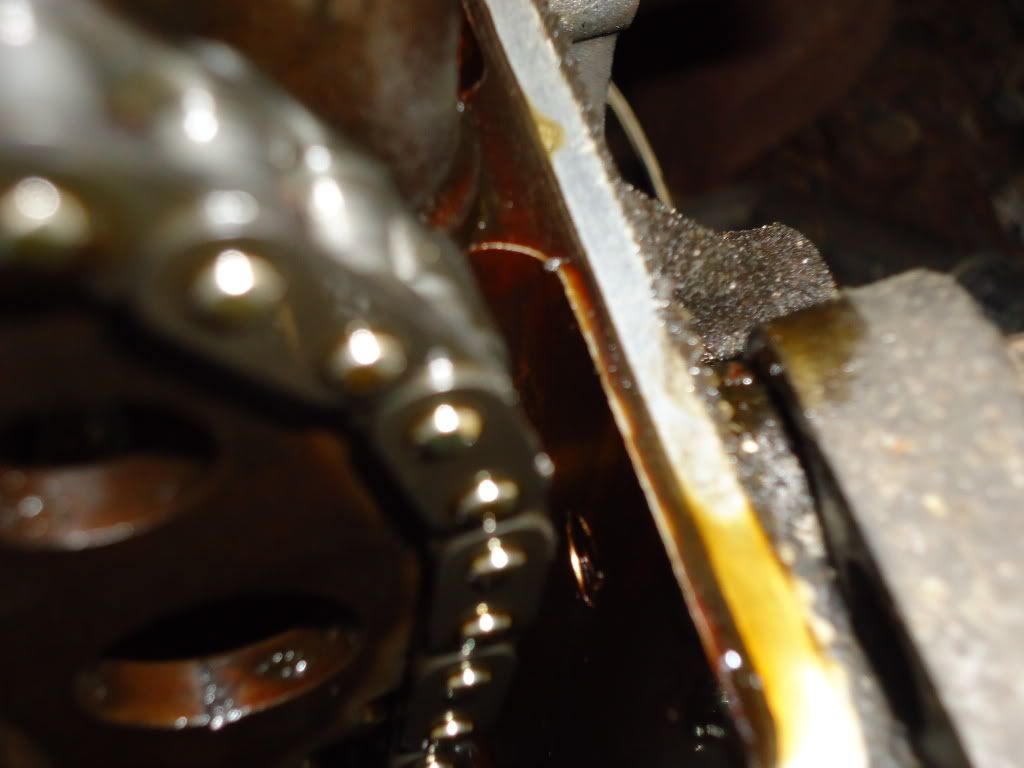
Picture B - The light contact with the timing case cover. The sight of these railroad tracks possibly becoming a future problem for the people we donate this vehicle to makes me want to fix this problem, especially since I am so close to pulling the timing cover off.
I found this video of what the timing chain looks like when halfway through the installation process.
http://www.youtube.com/watch?v=_AVmX0aGLDk
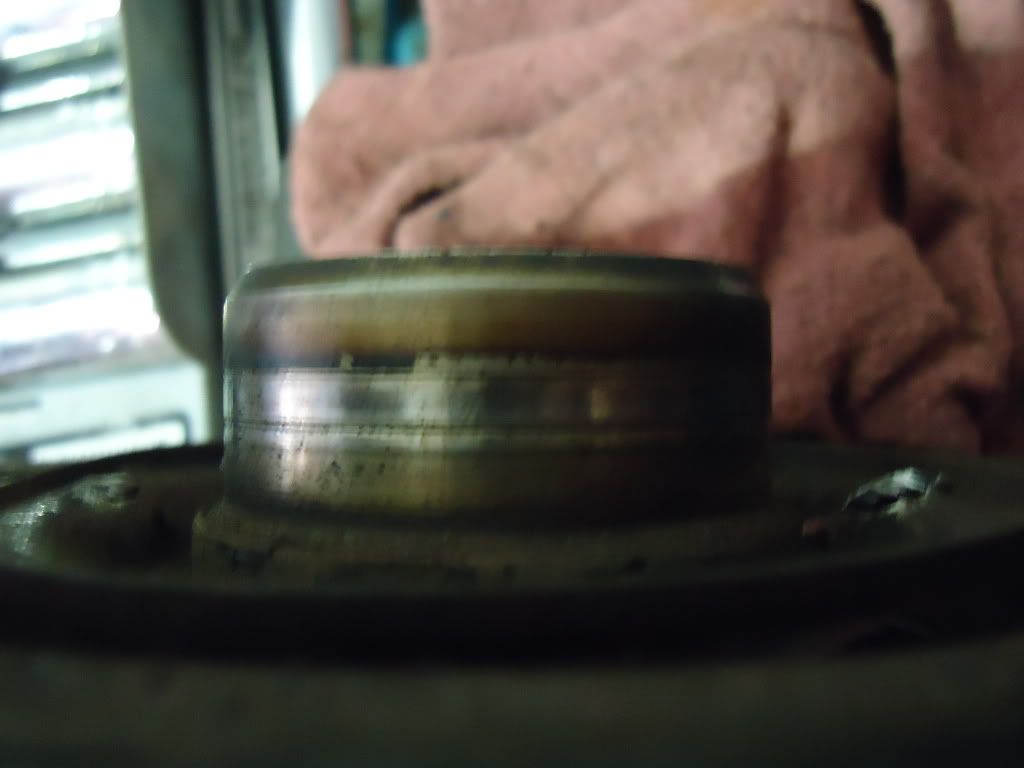
Picture C - Crankshaft pulley groove

Picture D - Another angle of the Crankshaft pulley groove

I am confused about how to ensure my engine will stay at Top Dead Center (TDC) when I am removing the camshaft bolt. After looking at page 2 of this link (https://www.yotatech.com/forums/f116...88/index2.html) I was able to see there is a groove cut into the cam gear that lines up with a pin on the camshaft.
Would it be best that I use hand strength with a breaker bar or an impact gun to break this bolt loose? (Refer to Picture A)
I think the valvetrain will still be in time with the piston movement, I just need to make sure I am on the right track.
From what I can see on the timing cover and vaguely on the timing guides there don't seem to be railroad tracks (just light contact, ) and I think the truck would get me and my teammate from England to Mongolia. However, deep down, this rig will one day be donated to a tribesman in Mongolia and I'd like to know he could get another 5 to 6 years outta of the rig before some unfortunate failure came.
By the way, I think I am going to reuse this pulley, but I wanted to make sure I got some more informed opinions from guys who normally work on these rigs. Are these grooves a ending factor for the reuse of this pulley (Refer to pictures C and D). Btw, I saw in some thread somewhere, but the fellow Yotatech gentleman by the screenname of RBX said that you could use a sharpie trick to see if the new front main seal is going to be too tight on the old crankshaft pulley. Correct me if I am wrong, but you draw a black line with the sharpie marker on the crankshaft while you have the timing cover installed and you rotate the engine a few times. Then you remove the crankshaft pulley and if the black line was cut by the seal (i.e. no longer a solid line but a dotted line in some sense) then you want to use a bigger seal (i.e. a 11mm versus a 7 mm). I have a new seal, and I will try the trick RBX mentioned but I am wondering is this trick a way to save the owner the cost of a new crankshaft pulley or would it be always best to buy a new crankshaft pulley than change front main seals in and out?
If you guys need more pictures check out my build thread, I tried posting the most important stuff here to get yalls help. Thanks
Picture A- Camshaft gear bolt. I don't have the transmission on so do I break the bolt loose using an impact gun or a breaker bar? If I use a breaker bar should I put the spark plugs to use the compression of the air in-cylinder as a resistive force as I break the bolt loose?
Picture B - The light contact with the timing case cover. The sight of these railroad tracks possibly becoming a future problem for the people we donate this vehicle to makes me want to fix this problem, especially since I am so close to pulling the timing cover off.
I found this video of what the timing chain looks like when halfway through the installation process.
http://www.youtube.com/watch?v=_AVmX0aGLDk
Picture C - Crankshaft pulley groove
Picture D - Another angle of the Crankshaft pulley groove
Last edited by 2012MongolRally; 03-22-2012 at 07:24 AM.
 03-22-2012, 07:22 AM
#2
Registered User
Thread Starter
Hey guys, here is another picture of the crankshaft pulley groove. I forgot to ask in my previous post, is there someway to measure the depth of the groove?
Picture E - Another picture of the Crankshaft pulley groove
Picture E - Another picture of the Crankshaft pulley groove
 03-22-2012, 08:48 AM
#6
Registered User
I just did this... you should be able to get the top nut off with an impact driver... the bottom nut was a little tougher for me... what i ended up doing was putting a breaker bar on it and placing the handle under the driver sd frame rail... once everything is in place you can turn the engine over and the nut should break free... make sure to no lose your woodruff key when you take the nut off.
Hope that helped... If i misunderstood your question let me know, like i said I just did this not but two weeks ago. If you need help let me know.
Hope that helped... If i misunderstood your question let me know, like i said I just did this not but two weeks ago. If you need help let me know.
Trending Topics
03-22-2012, 02:18 PM
#8
Registered User
Thread Starter
Yeah, I used an impact wrench and it zipped right off. I took of the camshaft pulley and was able to take off the timing cover. 
Now I have been able disassemble and reassemble the timing chain, camshaft gear, crankshaft gear, both guides and the tensioner......but what is the torque on those 12mm bolts. I don't see it in the Haynes listings of torques for bolts in Chapter 2 for engine repairs.
Does anyone know the torque required for those bolts?
Btw, the tensioner is self-adjusting, correct? So I don't have anything to do the tensioner except install it. Thanks for the help
03-22-2012, 02:22 PM
#9
Nope, no adjustments tot he tensioner. Just install it and pull the pin. Are you talking about the bolts for the tensioner? The torque specs are in the haynes manual usually on the first or second page of the chapter. OR you could check out the FSM.
03-22-2012, 02:26 PM
#10
Registered User
Thread Starter
I just found this link/ thread
https://www.yotatech.com/forums/f116...-specs-141980/
with the PDF http://personal.utulsa.edu/~nathan-b...11services.pdf
If you look at page 3 there are a bunch of torque specs for the timing cover stuff.
Correct if I am wrong, but I would appreciate someone verifying I picked the correct specs:
- Driver side guide to the block = Cylinder block x Chain damper = 16 ft-lb
- Passenger side guide to the block = Cylinder block x Chain damper = 16 ft-lb
- Tensioner to the block = Cylinder block x Chain tensioner = 14 ft-lb
03-22-2012, 02:29 PM
#11
Registered User
Thread Starter
The pin you mentioned on the tensioner, I didn't see one on my tensioner. Mine was already sliding back and forth when I got it. Is that normal? Seems to operate fine.
03-22-2012, 02:58 PM
#13
Registered User
Thread Starter
My fault I explained it wrong. The tensioner provides tension against the chain. Feels like the same resistance as the old tensioner. Sound correct?
03-22-2012, 03:06 PM
#14
Registered User
Thread Starter
Btw, what are your thoughts on putting thread locker on the bolts? I am thinking about doing that for the guides and the tensioner bolts, but what about the cam sprocket bolt...I am leaning towards using thread locker on the cam sprocket as well. Thanks
 03-22-2012, 03:17 PM
#16
Registered User
Thread Starter
Btw, you got any ideas about the life of my crankshaft sprocket? Do those grooves look bad? Did you just throw on the original crankshaft sprocket you had or did you buy a new one?
Thanks again
03-22-2012, 03:59 PM
#17
Registered User
Thread Starter
Guys, I have a big question....
I just rotated the timing chain assembly (i.e. I put the new chain, cam sprocket, crank sprocket, guides, and tensioner on), but......
When I rotate the assembly the driver side is tight some of the time while the passenger side is tight some of the time. When I initially installed everything I installed the chain so that the lighter chain link (silverish in color) lined up with the dots on the cam sprocket and likewise for the crank sprocket. At that time when i installed everything the driver side was tight (just as it is suppose to be) while the passenger side was the side with the slack in it that was made tight by the tensioner.....what could have happened?
Is it because there isn't a bunch of oil in the tensioner to lubricate the piston to make piston movement easy. The tensioner is brand new and functions fine.
Thanks
 03-22-2012, 04:41 PM
#19
Registered User
Thread Starter
So the little valve/ nipple on the back side of the tensioner that acts as a dowel pin into the block is where the oil is fed in, correct? And when I rotate the chain assembly without only pressure the only thing acting against the piston is air so that is why the chain doesn't stay taut, correct?
I changed out the new tensioner with the old tensioner to see if I observed the same issue, and I did. I did this to rule out the tensioner being the faulty part.
So am I good to go? I think so but some verification would be great
Thanks
03-22-2012, 05:53 PM
#20
Registered User
Thread Starter
Hey guys,
I am about to install the timing cover but the Haynes manual and the link I found earlier about the torque specs for the bolts doesn't list the torque specs for the M12 (12mm) and M14 (14mm) bolts that I have for the timing cover. Rather, it list the torque specs for 8mm and 10mm, can anyone tell me what the torque specs are for my bolts?
I find this to be strange why I have different bolts than listed. Thanks


