Beware Of Clutch Bracket Fatigue!
#81
Registered User
Join Date: Nov 2011
Location: central new york state (DeRuyter)
Posts: 181
Likes: 0
Received 0 Likes
on
0 Posts
I just found this for like 80$ - Part #55107-34030. SUPPORT SUB-ASSY, CLUTCH pedal bracket
The other firewall bracket is only like 6$. Here is the bracket that stephens1971 mentioned above: part#5513-34010
just pan down to the two above part #'s
hope it helps, I may get the 6$ part for extra support but will weld up the original clutch bracket...
The other firewall bracket is only like 6$. Here is the bracket that stephens1971 mentioned above: part#5513-34010
just pan down to the two above part #'s
hope it helps, I may get the 6$ part for extra support but will weld up the original clutch bracket...
#83
Registered User
Join Date: Jan 2012
Location: Auburn, CA
Posts: 254
Likes: 0
Received 0 Likes
on
0 Posts
Mine broke about 6 months ago. I thought it was my clutch going out at first as well. I can't remember if I had it reinforced or just replaced. Might want to check that...
#84
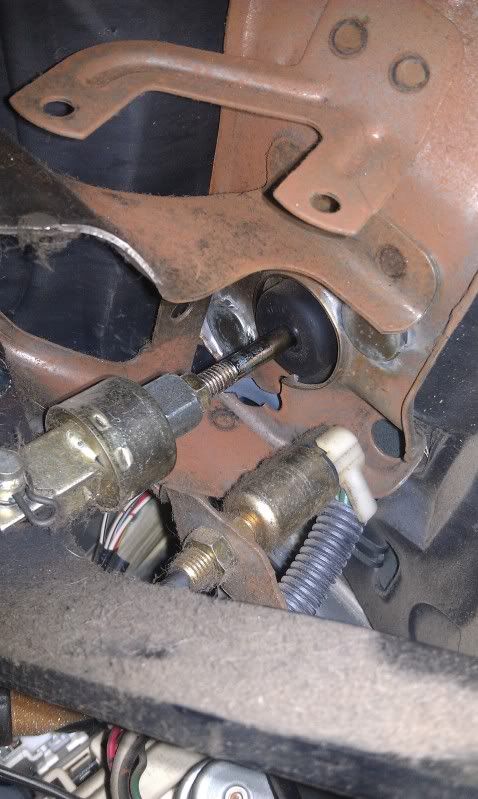
Mine broke a while ago, but didn't really get bad until this week. I heard the creaking maybe 3 months but never really felt a pop or a big change in pedal feel. I had no idea the bracket could break and never even thought to check it.
Today, I bought a slave and master from Autozone ready to replace them until I read this thread before going outside. The internet and YotaTech saved me a ton of hassle.
I'll order the parts tomorrow and replace it with new ASAP.
Today, I bought a slave and master from Autozone ready to replace them until I read this thread before going outside. The internet and YotaTech saved me a ton of hassle.
I'll order the parts tomorrow and replace it with new ASAP.

#85
Registered User
not seeing a crack there (giggity).
and maybe, just maybe paint the new one before it gets rusty like all the rest...i wonder why they never painted that part.
and maybe, just maybe paint the new one before it gets rusty like all the rest...i wonder why they never painted that part.
#86

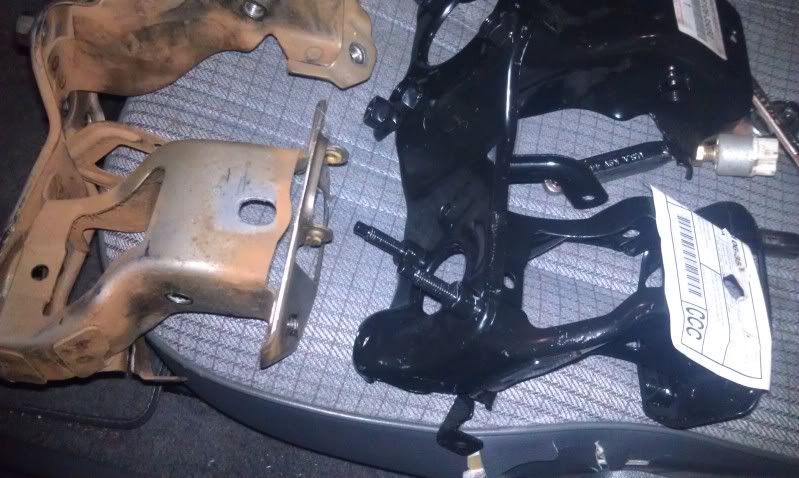
Cost $200 freaking dollars at the dealer. I know it's cheaper online, but my truck is my DD and I could barely drive it by the time I discovered the problem.(Supra is down for the winter and waaaay too cold to ride the motorcycle. My balls aren't nearly big enough to bear freezing temps for a 45 minute commute.)
All in all I'm glad it's fixed, but definitely a big pain in the ass.
#87
my bracket snapped last yr and left me stranded. don't make the same mistake i did. once that thing starts making creeking noises, replace it soon. on that note its a jigsaw puzzle down there. plus having to do it upside down didnt help. what seems like a straight forward job turned out to be alot more hellish than i had anticipated..
#88
I have bone stock 92 pu 3.0, with 72,xxx original miles. I just noticed a "creaking"sound when I push in and release the clutch. Has anyone had an issue with the clutch slipping in 4th & 5th after 3,xxx rpm as well ?

#89
I agree this should definitely be a sticky!
Ive been hearing that clutch creaking noise for a while now, didn't reallly think much of it, but a couple of days ago the bracket cracked some more causing me to be barely able to shift. After noticing all the slop in the pedal I searched YT and found this thread, which was nice for the tips on removing that bracket. Sure enough, a big crack in the bracket.
Ive been hearing that clutch creaking noise for a while now, didn't reallly think much of it, but a couple of days ago the bracket cracked some more causing me to be barely able to shift. After noticing all the slop in the pedal I searched YT and found this thread, which was nice for the tips on removing that bracket. Sure enough, a big crack in the bracket.
#91
Registered User
Join Date: Apr 2005
Location: Loveland, CO
Posts: 13
Likes: 0
Received 0 Likes
on
0 Posts
2nd gen pedal bracket - cheap & effective fix
IMPORTANT – PLEASE READ
These repair instructions are provided to the user with no warranty expressed or implied that the repair outlined herein will restore the operation of the clutch or clutch pedal. This solution is being offered in light of the alternative costs for dealer repair, which some have reported to be several hundred dollars. Test cases for this repair were on a 1990 4Runner and a 1989 4x4 Pickup. This repair technique fully restored the function of the clutch pedal in both applications in 8/05 and 9/05 respectively. These clutch repairs are still working perfectly with the original “feel” in the pedal. E-mail me and I'll send original document with photos - I couldn't insert the photos here.
Symptoms:
The clutch will not disengage when the pedal is pressed to the floor. The clutch also feels “spongy” and shifting is difficult. In the worst cases, the vehicle must be started in gear in order to begin moving. It is impossible, or nearly so to put the vehicle in first gear.
Supplies:
1 each 3/8 inch bolt or threaded rod approximately 3 inches long
2 each large flat washers approximately 2” in diameter
2 each flat washers approximately 1-1˝” in diameter
3 nuts for the 3/8 inch bolt, 4 nuts with a threaded rod
Tools:
A drill and 3/8” steel bit.
The Problem/ Root Cause:
The bracket that holds the clutch and brake pedal is cracked at the base where it attaches to the firewall. Diagnose this by using a flashlight to look under the dash where the clutch master cylinder attaches to the brake pedal. Examine the clutch pedal bracket where it attaches through the firewall with the bolts that attach the master cylinder.
The cracks will be at the left side of the bracket and may be difficult to see while the bracket is installed. The bracket at the right has been removed and shows the large crack from the top of the base towards the bottom for several inches. This comes from years of flexing because the brace bolt under the dash has broken loose. After the brace is broken, every time the clutch pedal is pushed, it torques the bracket until it finally tears it from the upper left corner (driver’s view). The torsion on the bracket also distorts the shape of the bracket making it impossible to achieve leverage with the clutch pedal to disengage the clutch to put the vehicle in gear and/ or to shift gears – especially reverse. Reverse has no synchronizer, so there is nothing to help slow the transmission, and when the clutch does not fully disengage, the engine must be shut down before it will go into reverse.
See in the photo to the right how the clutch bracket on the left and the brake bracket on the right are no longer parallel. Also note the broken bracket attached to the top of the clutch side at the bottom left of the picture. That brace was designed to anchor the back of the bracket and keep it from flexing the base (front) where it broke. The design is workable, but the solution was under-engineered and the brace will eventually break just as it did on my vehicles. Keep these instructions, because if your 2nd Generation 4Runner doesn’t need it yet, it will eventually!
The Fix:
1. Get the bracket welded. This cost me $15 when I took it into the welding shop. Unless you are an experienced welder and have the right equipment, I recommend taking it to a professional. This is pretty light material and is easy to burn it up if you don’t know exactly what you’re doing. As you can see in the pictures, this was a good weld and penetrated completely through the base of the bracket. It should also be properly aligned; the crack must be brought together when it is welded. There may still be a slight twist in the bracket indicated by the fact that the clutch and brake sides are not yet parallel. This is not a huge problem, but with your hand you can twist it back into pretty close alignment before reinstalling it.
2. Before re-install the bracket, use a flashlight to locate the broken brace under the dash. It is aligned with the back part of the clutch pedal bracket, i.e., the left side. Remember that the brace is on the top of the clutch bracket, so it is located quite a way up into the dash area. Remove the broken brace with a pair of pliers if any is left attached. Bending it back-and-forth will break it off.
3. With that out of the way you are ready to drill a hole for the new “brace”. In preparation to drill the hole and install the bolt, remove the five (5) screws and pull the body panel by the windshield wipers off to expose the area below the wipers and behind the firewall. Take the drill and put a hole in the cowling from the bottom where the original brace used to fit.
4. Take the 3” x 3/8” bolt as pictured here and install it from the top below the left wiper arm. Insert it with only a single large flat washer from the top. The second large flat washer and another nut goes on from the bottom side. When this is tightened from the bottom, this double-washer method ensures that the bolt is a rigid brace for the clutch pedal. In the photos you notice the small hole created when the brace was broken off from the under side; this is not a problem. After tightening the nut from under the dash, slip the end of a 14mm box end wrench over the bolt end to align it with the pedal bracket. Finally, install the second nut on the bolt in preparation for installing the bracket. You will place another washer on top of the pedal bracket as you put it in place. This nut will be adjusted up or down to achieve the proper final vertical alignment for the bracket when you replace it.
5. Install the pedal bracket on the firewall and attach the new “brace” with a flat washer on top of the pedal bracket and a flat washer on the bottom of the pedal bracket. Install and tighten the final nut to secure the pedal bracket. For final up and down adjustment of the back of the bracket, adjust the nut on top of the pedal bracket. Tighten the bottom nut to lock the pedal bracket in place and install the pedals as before to complete the repair.
#92
Registered User
Join Date: Aug 2012
Location: caoe cod, ma
Posts: 2
Likes: 0
Received 0 Likes
on
0 Posts
firewall!
the issue lies in the flexing in the firewall, which makes the bracket move and eventually snap. so to truly fix the problem, ya gotta re-enforce the firewall. has anyone done this?
#99
Registered User
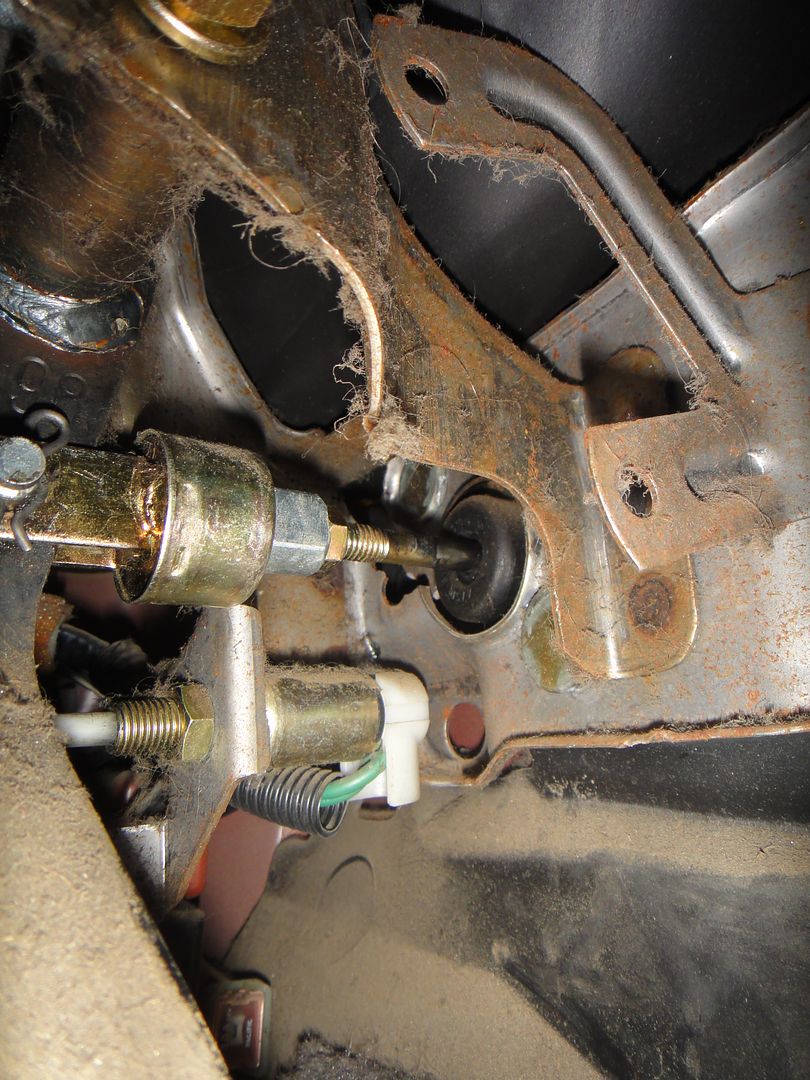
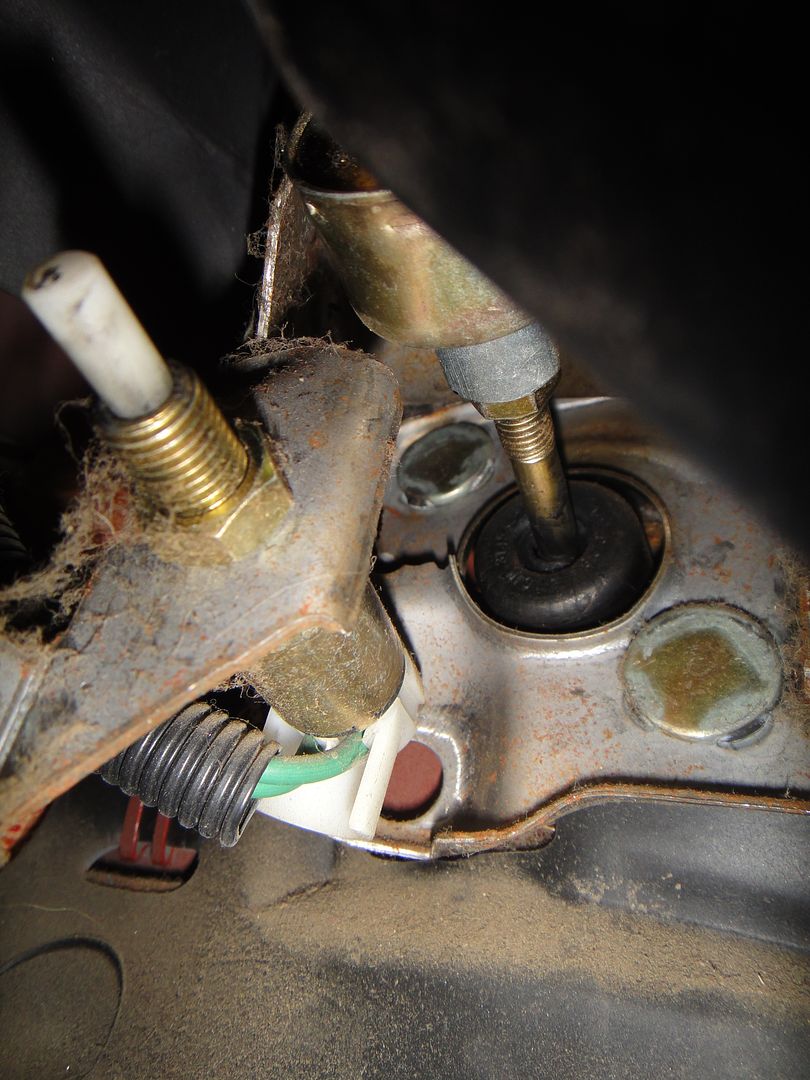
Here's another one. I'm heading to the garage shortly to get it out.
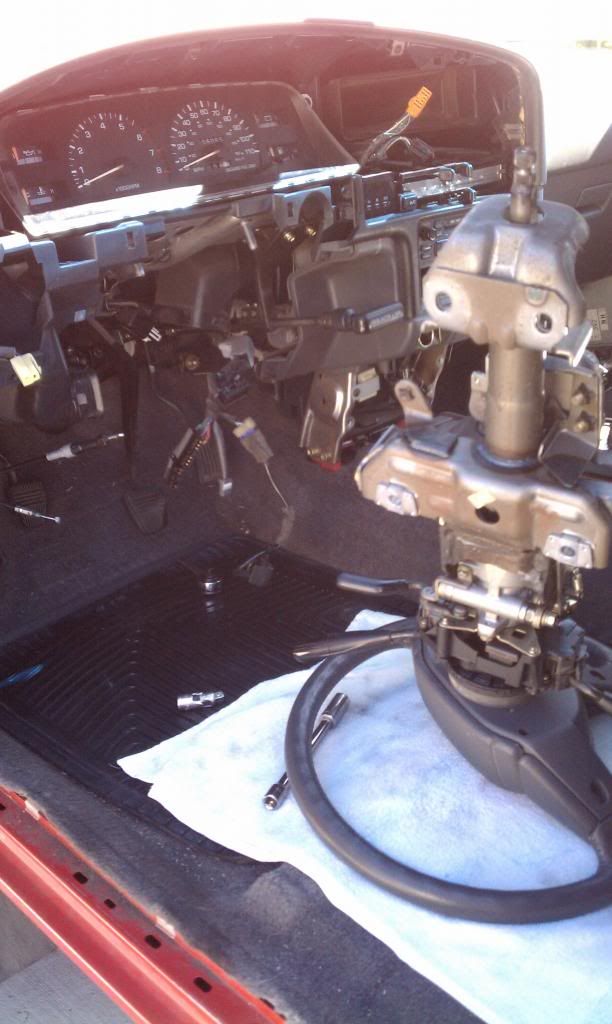
Which is the easiest version of removal? Remove pedals or the steering column?
This should definitely be a sticky.


